oregon fuels tax system – user guide use fuel user reporting tutorials/reporting... · oregon...
TRANSCRIPT
OREGON FUELS TAX SYSTEM – USER GUIDE
Use Fuel User Reporting REV 05-17
1
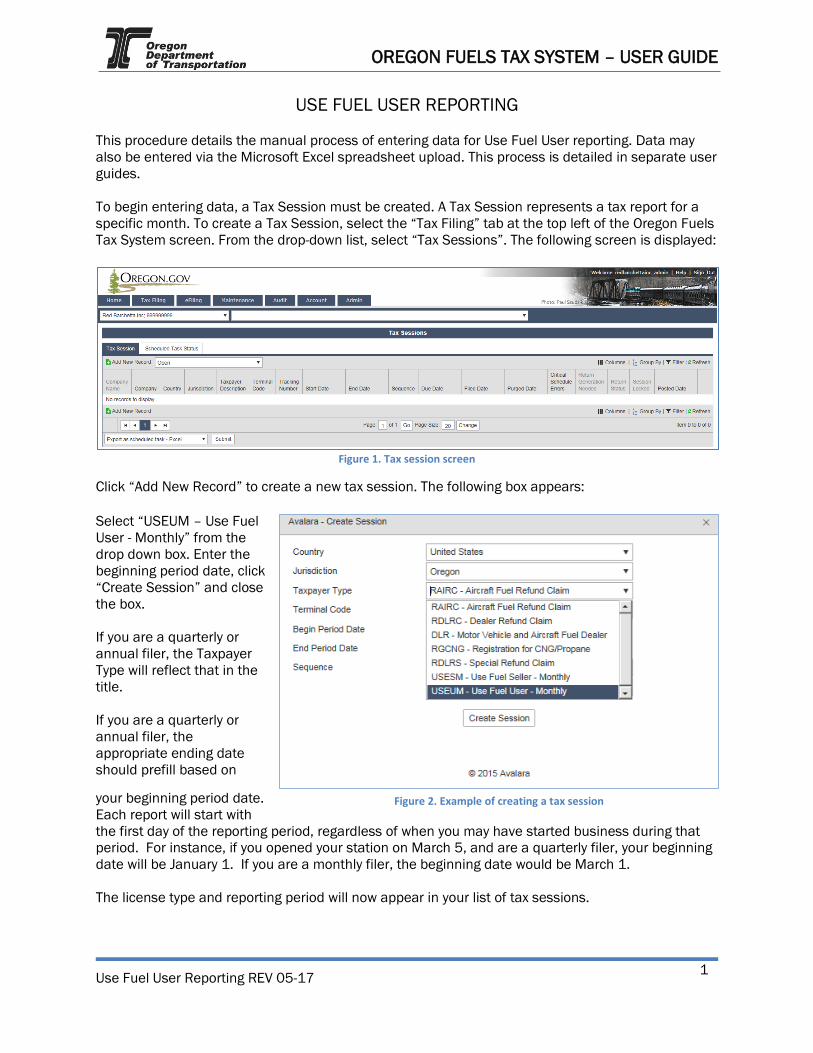
USE FUEL USER REPORTING This procedure details the manual process of entering data for Use Fuel User reporting. Data may also be entered via the Microsoft Excel spreadsheet upload. This process is detailed in separate user guides. To begin entering data, a Tax Session must be created. A Tax Session represents a tax report for a specific month. To create a Tax Session, select the “Tax Filing” tab at the top left of the Oregon Fuels Tax System screen. From the drop-down list, select “Tax Sessions”. The following screen is displayed:
Figure 1. Tax session screen
Click “Add New Record” to create a new tax session. The following box appears:
Select “USEUM – Use Fuel User - Monthly” from the drop down box. Enter the beginning period date, click “Create Session” and close the box. If you are a quarterly or annual filer, the Taxpayer Type will reflect that in the title. If you are a quarterly or annual filer, the appropriate ending date should prefill based on
your beginning period date. Each report will start with the first day of the reporting period, regardless of when you may have started business during that period. For instance, if you opened your station on March 5, and are a quarterly filer, your beginning date will be January 1. If you are a monthly filer, the beginning date would be March 1. The license type and reporting period will now appear in your list of tax sessions.
Figure 2. Example of creating a tax session

OREGON FUELS TAX SYSTEM – USER GUIDE
Use Fuel User Reporting REV 05-17
2
Click anywhere on the line containing the session you just created and select “Session Details” from the pop-up menu.
Figure 3. Select a line to bring up the menu
The following screen is displayed:
Figure 4. Session Details screen

OREGON FUELS TAX SYSTEM – USER GUIDE
Use Fuel User Reporting REV 05-17
3
Select the “Form Manual Entry” tab. The following screen is displayed:
Figure 5. Form manual entry screen
Check the “Check to Override” box in the Contact line and select the appropriate contact from the drop down menu. For each line, enter total gallons for the period. The totals will be retrieved from you r own consumption and vehicle mileage records. NOTE: If you purchase tax paid bulk fuel, contact the Fuels Tax Group for alternate reporting procedures. Click “Save and Regenerate” at the bottom of the screen when your entries are complete and you are ready to view the report. Return to “Tax Sessions”, click on the line for the report and select “View Tax Return” to view the tax report prior to submitting.
Figure 6. Viewing the tax return

OREGON FUELS TAX SYSTEM – USER GUIDE
Use Fuel User Reporting REV 05-17
4
Once you have reviewed the tax report for accuracy, return to “Tax Sessions”, click on the line for the report and select “File Tax Return” to file the tax report
Figure7. File Tax Return
You will get a screen asking you to confirm the submission of your report electronically. Check the little box at the bottom of the statement agreeing with the conditions.
Figure 8. Submittal screen
Once you accept the conditions of the electronic filing, the “Submit” box will become available to click and the process will continue with paying the amount due, if applicable.

OREGON FUELS TAX SYSTEM – USER GUIDE
Use Fuel User Reporting REV 05-17
5
When your return is submitted, you will get an acknowledgement screen with the balance to be paid. You must pay at least the current amount due when filing the return. Click “Submit” to go to the payment screen.
Figure 9. Select payment amount screen
If you have amounts due from previous tax report errors or adjustments, they will show in the “Outstanding Balance Due:” field. While you are not required to pay previous amounts due, you must pay at least the amount due for the current tax report being filed. Enter the amount being paid in the “Payment Amount” field and click the “Submit” button. The “Select Payment Date” screen is displayed.
OREGON FUELS TAX SYSTEM – USER GUIDE
Use Fuel User Reporting REV 05-17
6
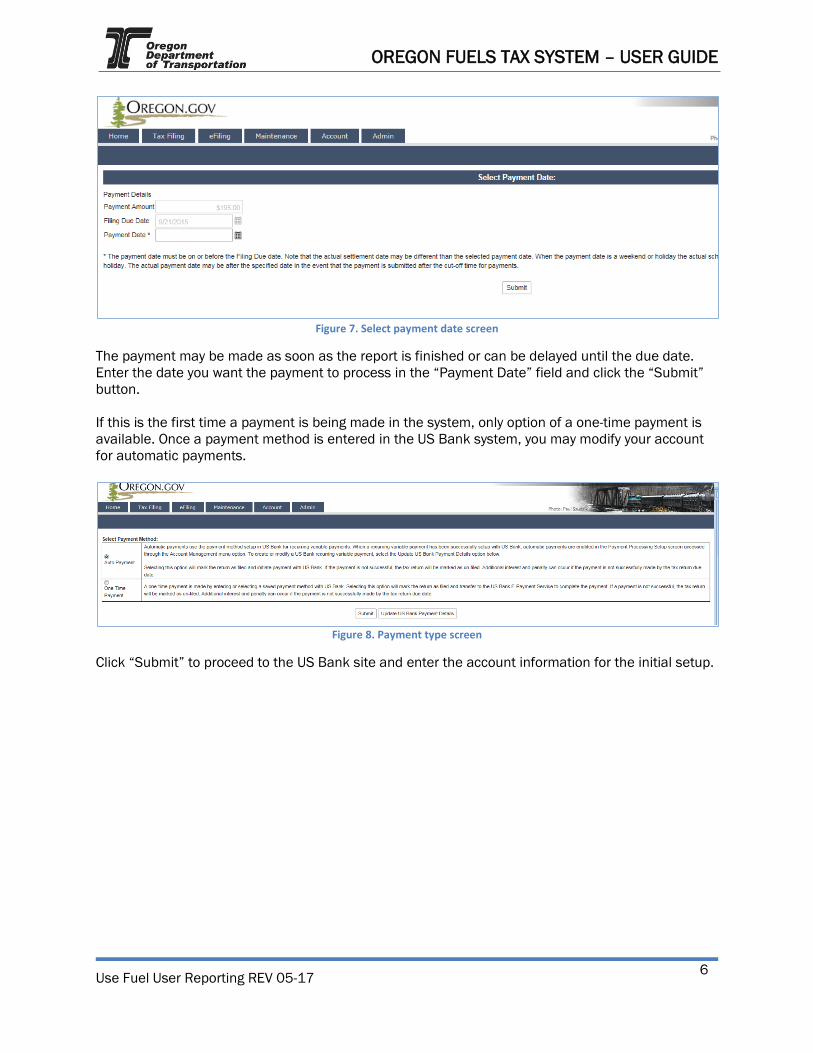
Figure 7. Select payment date screen
The payment may be made as soon as the report is finished or can be delayed until the due date. Enter the date you want the payment to process in the “Payment Date” field and click the “Submit” button. If this is the first time a payment is being made in the system, only option of a one-time payment is available. Once a payment method is entered in the US Bank system, you may modify your account for automatic payments.
Figure 8. Payment type screen
Click “Submit” to proceed to the US Bank site and enter the account information for the initial setup.

OREGON FUELS TAX SYSTEM – USER GUIDE
Use Fuel User Reporting REV 05-17
7
Figure 12. US Bank payment screen
The “Payment Information” area allows you to enter the frequency as one time or recurring payment. Selecting “Recurring Payment” will allow you to schedule automatic payments. In the lower part of the window, enter your checking account or savings account information for the payment.
Figure 13. Bank account information
Once you have entered your bank account information, click “Continue” at the bottom of the screen to go on to confirm the payment information.
OREGON FUELS TAX SYSTEM – USER GUIDE
Use Fuel User Reporting REV 05-17
8
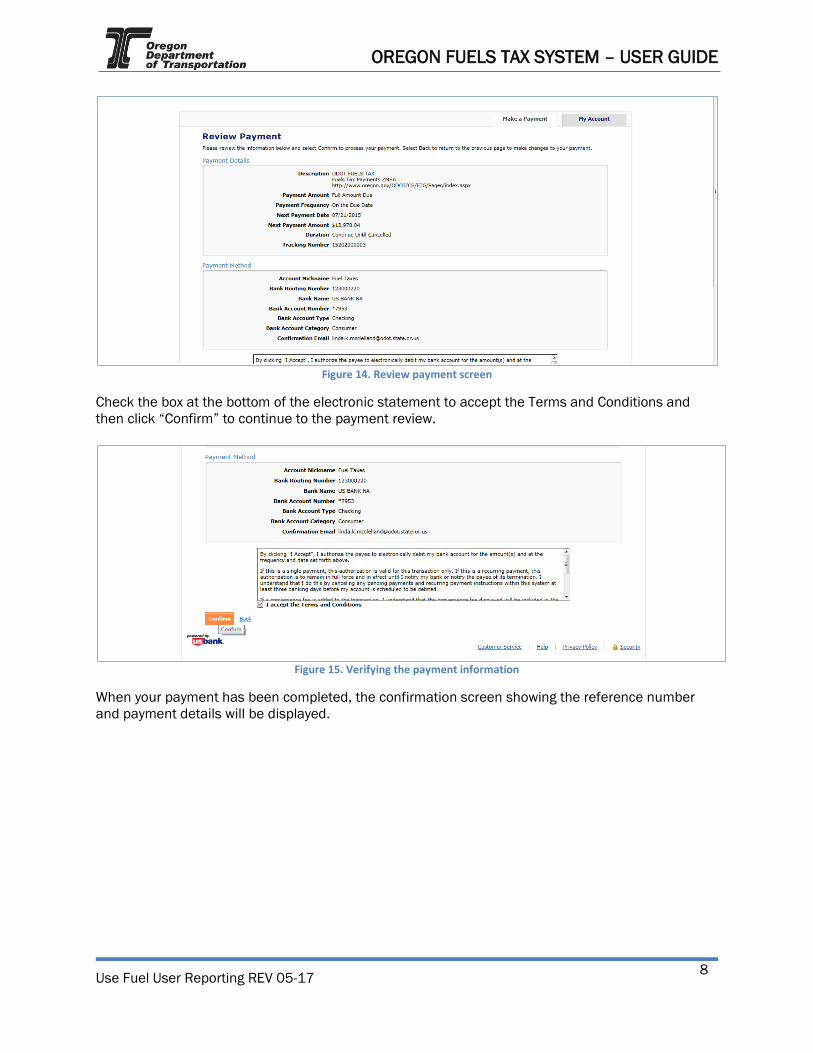
Figure 14. Review payment screen
Check the box at the bottom of the electronic statement to accept the Terms and Conditions and then click “Confirm” to continue to the payment review.
Figure 15. Verifying the payment information
When your payment has been completed, the confirmation screen showing the reference number and payment details will be displayed.
OREGON FUELS TAX SYSTEM – USER GUIDE
Use Fuel User Reporting REV 05-17
9
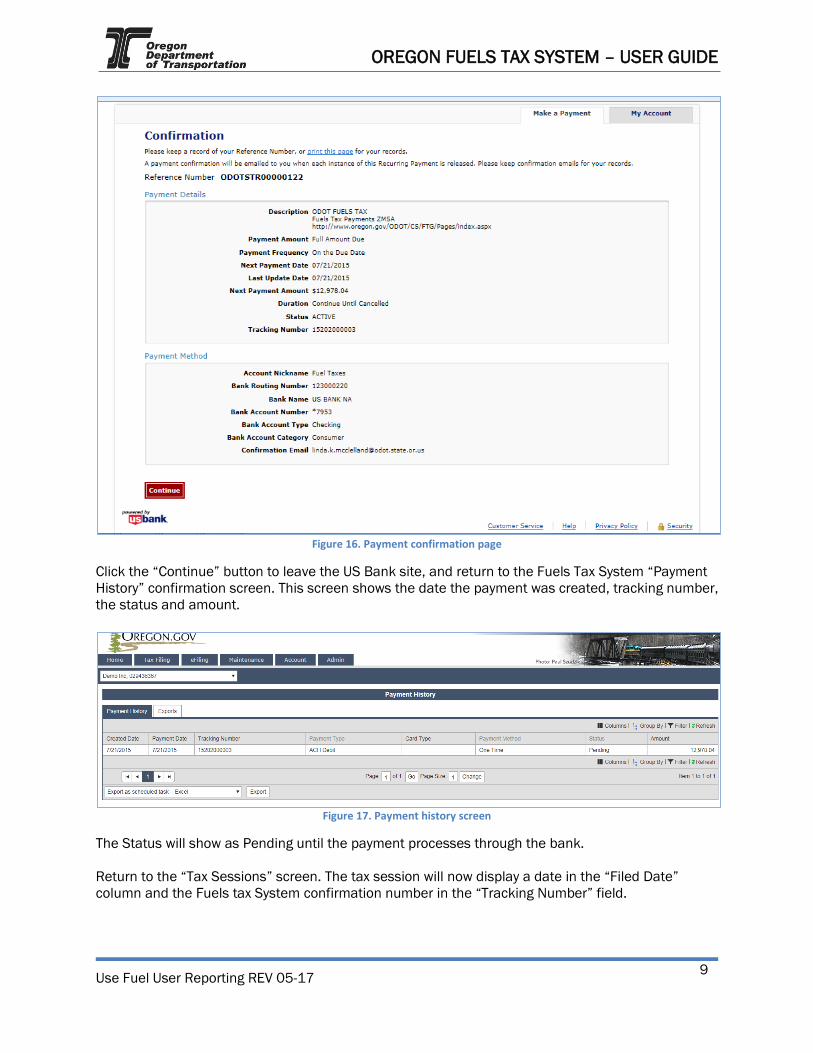
Figure 16. Payment confirmation page
Click the “Continue” button to leave the US Bank site, and return to the Fuels Tax System “Payment History” confirmation screen. This screen shows the date the payment was created, tracking number, the status and amount.
Figure 17. Payment history screen
The Status will show as Pending until the payment processes through the bank. Return to the “Tax Sessions” screen. The tax session will now display a date in the “Filed Date” column and the Fuels tax System confirmation number in the “Tracking Number” field.