osgi starter · introduction documenting languages always seemed much more fun than elucidating...
TRANSCRIPT

OSGi [email protected]

Table of ContentsTL;DR . . . . . . . . . . . . . . . . . . . . . . . . . . . . . . . . . . . . . . . . . . . . . . . . . . . . . . . . . . . . . . . . . . . . . . . . . . . . . . . . . . . . . . . . . . . . . . . 1Introduction . . . . . . . . . . . . . . . . . . . . . . . . . . . . . . . . . . . . . . . . . . . . . . . . . . . . . . . . . . . . . . . . . . . . . . . . . . . . . . . . . . . . . . . . 2Starting with OSGi. . . . . . . . . . . . . . . . . . . . . . . . . . . . . . . . . . . . . . . . . . . . . . . . . . . . . . . . . . . . . . . . . . . . . . . . . . . . . . . . . . 4
TL;DR . . . . . . . . . . . . . . . . . . . . . . . . . . . . . . . . . . . . . . . . . . . . . . . . . . . . . . . . . . . . . . . . . . . . . . . . . . . . . . . . . . . . . . . . . . . . 4Installing . . . . . . . . . . . . . . . . . . . . . . . . . . . . . . . . . . . . . . . . . . . . . . . . . . . . . . . . . . . . . . . . . . . . . . . . . . . . . . . . . . . . . . . . . 4About Java. . . . . . . . . . . . . . . . . . . . . . . . . . . . . . . . . . . . . . . . . . . . . . . . . . . . . . . . . . . . . . . . . . . . . . . . . . . . . . . . . . . . . . . . 4Filters in the Bndtools Explorer . . . . . . . . . . . . . . . . . . . . . . . . . . . . . . . . . . . . . . . . . . . . . . . . . . . . . . . . . . . . . . . . . . . 5Workspace Setup . . . . . . . . . . . . . . . . . . . . . . . . . . . . . . . . . . . . . . . . . . . . . . . . . . . . . . . . . . . . . . . . . . . . . . . . . . . . . . . . . 6New Project . . . . . . . . . . . . . . . . . . . . . . . . . . . . . . . . . . . . . . . . . . . . . . . . . . . . . . . . . . . . . . . . . . . . . . . . . . . . . . . . . . . . . . 8Running. . . . . . . . . . . . . . . . . . . . . . . . . . . . . . . . . . . . . . . . . . . . . . . . . . . . . . . . . . . . . . . . . . . . . . . . . . . . . . . . . . . . . . . . . 13Summary . . . . . . . . . . . . . . . . . . . . . . . . . . . . . . . . . . . . . . . . . . . . . . . . . . . . . . . . . . . . . . . . . . . . . . . . . . . . . . . . . . . . . . . 13
Gogo. . . . . . . . . . . . . . . . . . . . . . . . . . . . . . . . . . . . . . . . . . . . . . . . . . . . . . . . . . . . . . . . . . . . . . . . . . . . . . . . . . . . . . . . . . . . . . . 14TL;DR . . . . . . . . . . . . . . . . . . . . . . . . . . . . . . . . . . . . . . . . . . . . . . . . . . . . . . . . . . . . . . . . . . . . . . . . . . . . . . . . . . . . . . . . . . . 14Gogo & Shells . . . . . . . . . . . . . . . . . . . . . . . . . . . . . . . . . . . . . . . . . . . . . . . . . . . . . . . . . . . . . . . . . . . . . . . . . . . . . . . . . . . 14At Startup . . . . . . . . . . . . . . . . . . . . . . . . . . . . . . . . . . . . . . . . . . . . . . . . . . . . . . . . . . . . . . . . . . . . . . . . . . . . . . . . . . . . . . . 14Commands. . . . . . . . . . . . . . . . . . . . . . . . . . . . . . . . . . . . . . . . . . . . . . . . . . . . . . . . . . . . . . . . . . . . . . . . . . . . . . . . . . . . . . 14Help. . . . . . . . . . . . . . . . . . . . . . . . . . . . . . . . . . . . . . . . . . . . . . . . . . . . . . . . . . . . . . . . . . . . . . . . . . . . . . . . . . . . . . . . . . . . . 14History/Editing. . . . . . . . . . . . . . . . . . . . . . . . . . . . . . . . . . . . . . . . . . . . . . . . . . . . . . . . . . . . . . . . . . . . . . . . . . . . . . . . . . 15Cheat Sheet . . . . . . . . . . . . . . . . . . . . . . . . . . . . . . . . . . . . . . . . . . . . . . . . . . . . . . . . . . . . . . . . . . . . . . . . . . . . . . . . . . . . . 16Quoting . . . . . . . . . . . . . . . . . . . . . . . . . . . . . . . . . . . . . . . . . . . . . . . . . . . . . . . . . . . . . . . . . . . . . . . . . . . . . . . . . . . . . . . . . 16Multiple Commands . . . . . . . . . . . . . . . . . . . . . . . . . . . . . . . . . . . . . . . . . . . . . . . . . . . . . . . . . . . . . . . . . . . . . . . . . . . . 17IO Redirection. . . . . . . . . . . . . . . . . . . . . . . . . . . . . . . . . . . . . . . . . . . . . . . . . . . . . . . . . . . . . . . . . . . . . . . . . . . . . . . . . . . 17Built-in Commands . . . . . . . . . . . . . . . . . . . . . . . . . . . . . . . . . . . . . . . . . . . . . . . . . . . . . . . . . . . . . . . . . . . . . . . . . . . . . 17Errors . . . . . . . . . . . . . . . . . . . . . . . . . . . . . . . . . . . . . . . . . . . . . . . . . . . . . . . . . . . . . . . . . . . . . . . . . . . . . . . . . . . . . . . . . . . 18Variables . . . . . . . . . . . . . . . . . . . . . . . . . . . . . . . . . . . . . . . . . . . . . . . . . . . . . . . . . . . . . . . . . . . . . . . . . . . . . . . . . . . . . . . . 19Objects . . . . . . . . . . . . . . . . . . . . . . . . . . . . . . . . . . . . . . . . . . . . . . . . . . . . . . . . . . . . . . . . . . . . . . . . . . . . . . . . . . . . . . . . . . 19Target . . . . . . . . . . . . . . . . . . . . . . . . . . . . . . . . . . . . . . . . . . . . . . . . . . . . . . . . . . . . . . . . . . . . . . . . . . . . . . . . . . . . . . . . . . . 20Literals . . . . . . . . . . . . . . . . . . . . . . . . . . . . . . . . . . . . . . . . . . . . . . . . . . . . . . . . . . . . . . . . . . . . . . . . . . . . . . . . . . . . . . . . . . 20Expressions . . . . . . . . . . . . . . . . . . . . . . . . . . . . . . . . . . . . . . . . . . . . . . . . . . . . . . . . . . . . . . . . . . . . . . . . . . . . . . . . . . . . . 20Backticks. . . . . . . . . . . . . . . . . . . . . . . . . . . . . . . . . . . . . . . . . . . . . . . . . . . . . . . . . . . . . . . . . . . . . . . . . . . . . . . . . . . . . . . . 20Functions . . . . . . . . . . . . . . . . . . . . . . . . . . . . . . . . . . . . . . . . . . . . . . . . . . . . . . . . . . . . . . . . . . . . . . . . . . . . . . . . . . . . . . . 21Repeat and Conditionals . . . . . . . . . . . . . . . . . . . . . . . . . . . . . . . . . . . . . . . . . . . . . . . . . . . . . . . . . . . . . . . . . . . . . . . . 22New . . . . . . . . . . . . . . . . . . . . . . . . . . . . . . . . . . . . . . . . . . . . . . . . . . . . . . . . . . . . . . . . . . . . . . . . . . . . . . . . . . . . . . . . . . . . . 22Numeric Expressions. . . . . . . . . . . . . . . . . . . . . . . . . . . . . . . . . . . . . . . . . . . . . . . . . . . . . . . . . . . . . . . . . . . . . . . . . . . . 22Exceptions . . . . . . . . . . . . . . . . . . . . . . . . . . . . . . . . . . . . . . . . . . . . . . . . . . . . . . . . . . . . . . . . . . . . . . . . . . . . . . . . . . . . . . 23Telnet Daemon. . . . . . . . . . . . . . . . . . . . . . . . . . . . . . . . . . . . . . . . . . . . . . . . . . . . . . . . . . . . . . . . . . . . . . . . . . . . . . . . . . 23Summary . . . . . . . . . . . . . . . . . . . . . . . . . . . . . . . . . . . . . . . . . . . . . . . . . . . . . . . . . . . . . . . . . . . . . . . . . . . . . . . . . . . . . . . 24
A New Gogo Command. . . . . . . . . . . . . . . . . . . . . . . . . . . . . . . . . . . . . . . . . . . . . . . . . . . . . . . . . . . . . . . . . . . . . . . . . . . . 25TL;DR . . . . . . . . . . . . . . . . . . . . . . . . . . . . . . . . . . . . . . . . . . . . . . . . . . . . . . . . . . . . . . . . . . . . . . . . . . . . . . . . . . . . . . . . . . . 25Prerequisites . . . . . . . . . . . . . . . . . . . . . . . . . . . . . . . . . . . . . . . . . . . . . . . . . . . . . . . . . . . . . . . . . . . . . . . . . . . . . . . . . . . . 25

Creating a Project . . . . . . . . . . . . . . . . . . . . . . . . . . . . . . . . . . . . . . . . . . . . . . . . . . . . . . . . . . . . . . . . . . . . . . . . . . . . . . . 25Running the Hello World Command . . . . . . . . . . . . . . . . . . . . . . . . . . . . . . . . . . . . . . . . . . . . . . . . . . . . . . . . . . . . 28Using the Shell . . . . . . . . . . . . . . . . . . . . . . . . . . . . . . . . . . . . . . . . . . . . . . . . . . . . . . . . . . . . . . . . . . . . . . . . . . . . . . . . . . 29System.out . . . . . . . . . . . . . . . . . . . . . . . . . . . . . . . . . . . . . . . . . . . . . . . . . . . . . . . . . . . . . . . . . . . . . . . . . . . . . . . . . . . . . . 30Arguments . . . . . . . . . . . . . . . . . . . . . . . . . . . . . . . . . . . . . . . . . . . . . . . . . . . . . . . . . . . . . . . . . . . . . . . . . . . . . . . . . . . . . . 30Flags . . . . . . . . . . . . . . . . . . . . . . . . . . . . . . . . . . . . . . . . . . . . . . . . . . . . . . . . . . . . . . . . . . . . . . . . . . . . . . . . . . . . . . . . . . . . 31Optional Parameters . . . . . . . . . . . . . . . . . . . . . . . . . . . . . . . . . . . . . . . . . . . . . . . . . . . . . . . . . . . . . . . . . . . . . . . . . . . . 31Adding Help. . . . . . . . . . . . . . . . . . . . . . . . . . . . . . . . . . . . . . . . . . . . . . . . . . . . . . . . . . . . . . . . . . . . . . . . . . . . . . . . . . . . . 32Property Annotation . . . . . . . . . . . . . . . . . . . . . . . . . . . . . . . . . . . . . . . . . . . . . . . . . . . . . . . . . . . . . . . . . . . . . . . . . . . . 33Summary . . . . . . . . . . . . . . . . . . . . . . . . . . . . . . . . . . . . . . . . . . . . . . . . . . . . . . . . . . . . . . . . . . . . . . . . . . . . . . . . . . . . . . . 33
API Bundle . . . . . . . . . . . . . . . . . . . . . . . . . . . . . . . . . . . . . . . . . . . . . . . . . . . . . . . . . . . . . . . . . . . . . . . . . . . . . . . . . . . . . . . . 34TL;DR . . . . . . . . . . . . . . . . . . . . . . . . . . . . . . . . . . . . . . . . . . . . . . . . . . . . . . . . . . . . . . . . . . . . . . . . . . . . . . . . . . . . . . . . . . . 34Creating an API Project. . . . . . . . . . . . . . . . . . . . . . . . . . . . . . . . . . . . . . . . . . . . . . . . . . . . . . . . . . . . . . . . . . . . . . . . . . 34Naming . . . . . . . . . . . . . . . . . . . . . . . . . . . . . . . . . . . . . . . . . . . . . . . . . . . . . . . . . . . . . . . . . . . . . . . . . . . . . . . . . . . . . . . . . 34Building. . . . . . . . . . . . . . . . . . . . . . . . . . . . . . . . . . . . . . . . . . . . . . . . . . . . . . . . . . . . . . . . . . . . . . . . . . . . . . . . . . . . . . . . . 35Service API Package . . . . . . . . . . . . . . . . . . . . . . . . . . . . . . . . . . . . . . . . . . . . . . . . . . . . . . . . . . . . . . . . . . . . . . . . . . . . . 35Exporting . . . . . . . . . . . . . . . . . . . . . . . . . . . . . . . . . . . . . . . . . . . . . . . . . . . . . . . . . . . . . . . . . . . . . . . . . . . . . . . . . . . . . . . 36Versioning . . . . . . . . . . . . . . . . . . . . . . . . . . . . . . . . . . . . . . . . . . . . . . . . . . . . . . . . . . . . . . . . . . . . . . . . . . . . . . . . . . . . . . 36Provider Type . . . . . . . . . . . . . . . . . . . . . . . . . . . . . . . . . . . . . . . . . . . . . . . . . . . . . . . . . . . . . . . . . . . . . . . . . . . . . . . . . . . 37Summary . . . . . . . . . . . . . . . . . . . . . . . . . . . . . . . . . . . . . . . . . . . . . . . . . . . . . . . . . . . . . . . . . . . . . . . . . . . . . . . . . . . . . . . 37
Provider Bundle . . . . . . . . . . . . . . . . . . . . . . . . . . . . . . . . . . . . . . . . . . . . . . . . . . . . . . . . . . . . . . . . . . . . . . . . . . . . . . . . . . . 38TL;DR . . . . . . . . . . . . . . . . . . . . . . . . . . . . . . . . . . . . . . . . . . . . . . . . . . . . . . . . . . . . . . . . . . . . . . . . . . . . . . . . . . . . . . . . . . . 38Providing an API . . . . . . . . . . . . . . . . . . . . . . . . . . . . . . . . . . . . . . . . . . . . . . . . . . . . . . . . . . . . . . . . . . . . . . . . . . . . . . . . 38Create a Provider Project . . . . . . . . . . . . . . . . . . . . . . . . . . . . . . . . . . . . . . . . . . . . . . . . . . . . . . . . . . . . . . . . . . . . . . . . 38Create a Component . . . . . . . . . . . . . . . . . . . . . . . . . . . . . . . . . . . . . . . . . . . . . . . . . . . . . . . . . . . . . . . . . . . . . . . . . . . . 38Dependencies . . . . . . . . . . . . . . . . . . . . . . . . . . . . . . . . . . . . . . . . . . . . . . . . . . . . . . . . . . . . . . . . . . . . . . . . . . . . . . . . . . . 38Repositories . . . . . . . . . . . . . . . . . . . . . . . . . . . . . . . . . . . . . . . . . . . . . . . . . . . . . . . . . . . . . . . . . . . . . . . . . . . . . . . . . . . . . 38Build Path . . . . . . . . . . . . . . . . . . . . . . . . . . . . . . . . . . . . . . . . . . . . . . . . . . . . . . . . . . . . . . . . . . . . . . . . . . . . . . . . . . . . . . . 39Implementing Eval. . . . . . . . . . . . . . . . . . . . . . . . . . . . . . . . . . . . . . . . . . . . . . . . . . . . . . . . . . . . . . . . . . . . . . . . . . . . . . 41Imports . . . . . . . . . . . . . . . . . . . . . . . . . . . . . . . . . . . . . . . . . . . . . . . . . . . . . . . . . . . . . . . . . . . . . . . . . . . . . . . . . . . . . . . . . 42Gogo Command. . . . . . . . . . . . . . . . . . . . . . . . . . . . . . . . . . . . . . . . . . . . . . . . . . . . . . . . . . . . . . . . . . . . . . . . . . . . . . . . . 42Running in the Playground. . . . . . . . . . . . . . . . . . . . . . . . . . . . . . . . . . . . . . . . . . . . . . . . . . . . . . . . . . . . . . . . . . . . . . 43Summary . . . . . . . . . . . . . . . . . . . . . . . . . . . . . . . . . . . . . . . . . . . . . . . . . . . . . . . . . . . . . . . . . . . . . . . . . . . . . . . . . . . . . . . 44
JUnit Testing. . . . . . . . . . . . . . . . . . . . . . . . . . . . . . . . . . . . . . . . . . . . . . . . . . . . . . . . . . . . . . . . . . . . . . . . . . . . . . . . . . . . . . . 45TL;DR . . . . . . . . . . . . . . . . . . . . . . . . . . . . . . . . . . . . . . . . . . . . . . . . . . . . . . . . . . . . . . . . . . . . . . . . . . . . . . . . . . . . . . . . . . . 45JUnit . . . . . . . . . . . . . . . . . . . . . . . . . . . . . . . . . . . . . . . . . . . . . . . . . . . . . . . . . . . . . . . . . . . . . . . . . . . . . . . . . . . . . . . . . . . . 45Debugging . . . . . . . . . . . . . . . . . . . . . . . . . . . . . . . . . . . . . . . . . . . . . . . . . . . . . . . . . . . . . . . . . . . . . . . . . . . . . . . . . . . . . . 47Launchpad . . . . . . . . . . . . . . . . . . . . . . . . . . . . . . . . . . . . . . . . . . . . . . . . . . . . . . . . . . . . . . . . . . . . . . . . . . . . . . . . . . . . . . 47Making Bundles . . . . . . . . . . . . . . . . . . . . . . . . . . . . . . . . . . . . . . . . . . . . . . . . . . . . . . . . . . . . . . . . . . . . . . . . . . . . . . . . . 48Interaction with Services. . . . . . . . . . . . . . . . . . . . . . . . . . . . . . . . . . . . . . . . . . . . . . . . . . . . . . . . . . . . . . . . . . . . . . . . 49Injection . . . . . . . . . . . . . . . . . . . . . . . . . . . . . . . . . . . . . . . . . . . . . . . . . . . . . . . . . . . . . . . . . . . . . . . . . . . . . . . . . . . . . . . . 49Hello World . . . . . . . . . . . . . . . . . . . . . . . . . . . . . . . . . . . . . . . . . . . . . . . . . . . . . . . . . . . . . . . . . . . . . . . . . . . . . . . . . . . . . 50Tidbits . . . . . . . . . . . . . . . . . . . . . . . . . . . . . . . . . . . . . . . . . . . . . . . . . . . . . . . . . . . . . . . . . . . . . . . . . . . . . . . . . . . . . . . . . . 51

External Dependencies . . . . . . . . . . . . . . . . . . . . . . . . . . . . . . . . . . . . . . . . . . . . . . . . . . . . . . . . . . . . . . . . . . . . . . . . . . . . 52TL;DR . . . . . . . . . . . . . . . . . . . . . . . . . . . . . . . . . . . . . . . . . . . . . . . . . . . . . . . . . . . . . . . . . . . . . . . . . . . . . . . . . . . . . . . . . . . 52Rhino . . . . . . . . . . . . . . . . . . . . . . . . . . . . . . . . . . . . . . . . . . . . . . . . . . . . . . . . . . . . . . . . . . . . . . . . . . . . . . . . . . . . . . . . . . . 52Create a Rhino Provider Project . . . . . . . . . . . . . . . . . . . . . . . . . . . . . . . . . . . . . . . . . . . . . . . . . . . . . . . . . . . . . . . . . 52Create a Component . . . . . . . . . . . . . . . . . . . . . . . . . . . . . . . . . . . . . . . . . . . . . . . . . . . . . . . . . . . . . . . . . . . . . . . . . . . . 52External Dependencies . . . . . . . . . . . . . . . . . . . . . . . . . . . . . . . . . . . . . . . . . . . . . . . . . . . . . . . . . . . . . . . . . . . . . . . . . . 53Maven Bnd Repository . . . . . . . . . . . . . . . . . . . . . . . . . . . . . . . . . . . . . . . . . . . . . . . . . . . . . . . . . . . . . . . . . . . . . . . . . . 54Gogo Command. . . . . . . . . . . . . . . . . . . . . . . . . . . . . . . . . . . . . . . . . . . . . . . . . . . . . . . . . . . . . . . . . . . . . . . . . . . . . . . . . 55Running in the Playground. . . . . . . . . . . . . . . . . . . . . . . . . . . . . . . . . . . . . . . . . . . . . . . . . . . . . . . . . . . . . . . . . . . . . . 55Summary . . . . . . . . . . . . . . . . . . . . . . . . . . . . . . . . . . . . . . . . . . . . . . . . . . . . . . . . . . . . . . . . . . . . . . . . . . . . . . . . . . . . . . . 56
Application . . . . . . . . . . . . . . . . . . . . . . . . . . . . . . . . . . . . . . . . . . . . . . . . . . . . . . . . . . . . . . . . . . . . . . . . . . . . . . . . . . . . . . . . 57TL;DR . . . . . . . . . . . . . . . . . . . . . . . . . . . . . . . . . . . . . . . . . . . . . . . . . . . . . . . . . . . . . . . . . . . . . . . . . . . . . . . . . . . . . . . . . . . 57Application Bundle . . . . . . . . . . . . . . . . . . . . . . . . . . . . . . . . . . . . . . . . . . . . . . . . . . . . . . . . . . . . . . . . . . . . . . . . . . . . . 57Define an Application Project . . . . . . . . . . . . . . . . . . . . . . . . . . . . . . . . . . . . . . . . . . . . . . . . . . . . . . . . . . . . . . . . . . . 57Executable JAR . . . . . . . . . . . . . . . . . . . . . . . . . . . . . . . . . . . . . . . . . . . . . . . . . . . . . . . . . . . . . . . . . . . . . . . . . . . . . . . . . . 58Docker Image . . . . . . . . . . . . . . . . . . . . . . . . . . . . . . . . . . . . . . . . . . . . . . . . . . . . . . . . . . . . . . . . . . . . . . . . . . . . . . . . . . . 58Summary . . . . . . . . . . . . . . . . . . . . . . . . . . . . . . . . . . . . . . . . . . . . . . . . . . . . . . . . . . . . . . . . . . . . . . . . . . . . . . . . . . . . . . . 59
Gradle . . . . . . . . . . . . . . . . . . . . . . . . . . . . . . . . . . . . . . . . . . . . . . . . . . . . . . . . . . . . . . . . . . . . . . . . . . . . . . . . . . . . . . . . . . . . . 60TL;DR . . . . . . . . . . . . . . . . . . . . . . . . . . . . . . . . . . . . . . . . . . . . . . . . . . . . . . . . . . . . . . . . . . . . . . . . . . . . . . . . . . . . . . . . . . . 60Gradle Setup . . . . . . . . . . . . . . . . . . . . . . . . . . . . . . . . . . . . . . . . . . . . . . . . . . . . . . . . . . . . . . . . . . . . . . . . . . . . . . . . . . . . 60Building. . . . . . . . . . . . . . . . . . . . . . . . . . . . . . . . . . . . . . . . . . . . . . . . . . . . . . . . . . . . . . . . . . . . . . . . . . . . . . . . . . . . . . . . . 60Gradle Tidbits . . . . . . . . . . . . . . . . . . . . . . . . . . . . . . . . . . . . . . . . . . . . . . . . . . . . . . . . . . . . . . . . . . . . . . . . . . . . . . . . . . . 61Using Gradle . . . . . . . . . . . . . . . . . . . . . . . . . . . . . . . . . . . . . . . . . . . . . . . . . . . . . . . . . . . . . . . . . . . . . . . . . . . . . . . . . . . . 61When to Use . . . . . . . . . . . . . . . . . . . . . . . . . . . . . . . . . . . . . . . . . . . . . . . . . . . . . . . . . . . . . . . . . . . . . . . . . . . . . . . . . . . . 61
Git . . . . . . . . . . . . . . . . . . . . . . . . . . . . . . . . . . . . . . . . . . . . . . . . . . . . . . . . . . . . . . . . . . . . . . . . . . . . . . . . . . . . . . . . . . . . . . . . . 62TL;DR . . . . . . . . . . . . . . . . . . . . . . . . . . . . . . . . . . . . . . . . . . . . . . . . . . . . . . . . . . . . . . . . . . . . . . . . . . . . . . . . . . . . . . . . . . . 62Fixups. . . . . . . . . . . . . . . . . . . . . . . . . . . . . . . . . . . . . . . . . . . . . . . . . . . . . . . . . . . . . . . . . . . . . . . . . . . . . . . . . . . . . . . . . . . 62Init . . . . . . . . . . . . . . . . . . . . . . . . . . . . . . . . . . . . . . . . . . . . . . . . . . . . . . . . . . . . . . . . . . . . . . . . . . . . . . . . . . . . . . . . . . . . . . 62Store on Github . . . . . . . . . . . . . . . . . . . . . . . . . . . . . . . . . . . . . . . . . . . . . . . . . . . . . . . . . . . . . . . . . . . . . . . . . . . . . . . . . 62Github Workflow Actions. . . . . . . . . . . . . . . . . . . . . . . . . . . . . . . . . . . . . . . . . . . . . . . . . . . . . . . . . . . . . . . . . . . . . . . 64
Release to Remote Repository . . . . . . . . . . . . . . . . . . . . . . . . . . . . . . . . . . . . . . . . . . . . . . . . . . . . . . . . . . . . . . . . . . . . . . 67TL;DR . . . . . . . . . . . . . . . . . . . . . . . . . . . . . . . . . . . . . . . . . . . . . . . . . . . . . . . . . . . . . . . . . . . . . . . . . . . . . . . . . . . . . . . . . . . 67Maven Repositories . . . . . . . . . . . . . . . . . . . . . . . . . . . . . . . . . . . . . . . . . . . . . . . . . . . . . . . . . . . . . . . . . . . . . . . . . . . . . 67Release Repository . . . . . . . . . . . . . . . . . . . . . . . . . . . . . . . . . . . . . . . . . . . . . . . . . . . . . . . . . . . . . . . . . . . . . . . . . . . . . . 67Authentication. . . . . . . . . . . . . . . . . . . . . . . . . . . . . . . . . . . . . . . . . . . . . . . . . . . . . . . . . . . . . . . . . . . . . . . . . . . . . . . . . . 68Connection Settings. . . . . . . . . . . . . . . . . . . . . . . . . . . . . . . . . . . . . . . . . . . . . . . . . . . . . . . . . . . . . . . . . . . . . . . . . . . . . 68Local Test Snapshots . . . . . . . . . . . . . . . . . . . . . . . . . . . . . . . . . . . . . . . . . . . . . . . . . . . . . . . . . . . . . . . . . . . . . . . . . . . . 69Github Actions. . . . . . . . . . . . . . . . . . . . . . . . . . . . . . . . . . . . . . . . . . . . . . . . . . . . . . . . . . . . . . . . . . . . . . . . . . . . . . . . . . 69Github Secrets . . . . . . . . . . . . . . . . . . . . . . . . . . . . . . . . . . . . . . . . . . . . . . . . . . . . . . . . . . . . . . . . . . . . . . . . . . . . . . . . . . 70Release Workflow . . . . . . . . . . . . . . . . . . . . . . . . . . . . . . . . . . . . . . . . . . . . . . . . . . . . . . . . . . . . . . . . . . . . . . . . . . . . . . . 71POM Generation . . . . . . . . . . . . . . . . . . . . . . . . . . . . . . . . . . . . . . . . . . . . . . . . . . . . . . . . . . . . . . . . . . . . . . . . . . . . . . . . 72Releasing . . . . . . . . . . . . . . . . . . . . . . . . . . . . . . . . . . . . . . . . . . . . . . . . . . . . . . . . . . . . . . . . . . . . . . . . . . . . . . . . . . . . . . . . 73Signing. . . . . . . . . . . . . . . . . . . . . . . . . . . . . . . . . . . . . . . . . . . . . . . . . . . . . . . . . . . . . . . . . . . . . . . . . . . . . . . . . . . . . . . . . . 74

Closing the Staging Repository . . . . . . . . . . . . . . . . . . . . . . . . . . . . . . . . . . . . . . . . . . . . . . . . . . . . . . . . . . . . . . . . . . 74Summary . . . . . . . . . . . . . . . . . . . . . . . . . . . . . . . . . . . . . . . . . . . . . . . . . . . . . . . . . . . . . . . . . . . . . . . . . . . . . . . . . . . . . . . 75
The End . . . . . . . . . . . . . . . . . . . . . . . . . . . . . . . . . . . . . . . . . . . . . . . . . . . . . . . . . . . . . . . . . . . . . . . . . . . . . . . . . . . . . . . . . . . 76

TL;DRFirst, OSGi is about complex systems. It is not some secret sauce library you can sprinkle over yourapplication and hope it will be improved. It is a pretty fundamental choice. Therefore, if you findthis document too long, you likely are not in the market for OSGi. OSGi shines for complex systemsand not for a hello world example.
However, if you’re too hurried to do a nice cozy read of this book then I suggest you first follow theBndtool videos. (And even those start with a TL;DR!). This document follows the same structure. Ifyou then want to explore things in more detail you’re welcome back!
You can skip the introduction since it is a bit of smalltalk.
OSGi Starter 1

IntroductionDocumenting languages always seemed much more fun than elucidating OSGi. First, mostdevelopers can relate quickly to another language using examples like Hello World because theunderlying concepts are so similar for most languages. However, some of the truly innovative thingsin OSGi are too unfamiliar to use such simplistic examples; they do require some effort from thestudent.
I generally addressed this large conceptual distance by making lots of pictures and diagrams,preferably with lots of animations. However, I often felt the audience drifting to thinking aboutwhat they should eat that evening instead of grasping these concepts.
I do not think I was alone in this because there are a large number of OSGi Hello World tutorials onthe web where the accompanying text shows a certain disdain to OSGi developers. Why had we notexplained OSGi better to them? Why were there no good tutorials explaining this simple andfantastic technology? It isn’t so hard? And with that, they made another "Hello World" tutorial thatwas as incomprehensible to a newcomer as the one they were rejecting.
I do take some comfort in that there were many of those tutorials, implying that these authors didnot really learn that much from each other as the authors thought. Once you get OSGi, it is actuallyquite simple and immensely powerful. However, to get it, you actually need to understand it. Andthat was the rub. OSGi often feels to newcomers like a tangled mess until just before the light goeson.
One day, while preparing a course, I realized that OSGi actually has a hidden gem called Gogo.Around 2008 I’d developed a Proof of Concept (PoC) of a Command Line Interface to launch andconfigure an OSGi framework. It combined the idea of an object-oriented language with the ease ofuse of a command-line shell like bash. It can basically do anything you can do in plain Java and it istrivial to add new commands from OSGi. It even supported piping commands.
The shell never became standardized by the OSGi Alliance since we felt that there was no real needto have a standardized shell. As long as the Framework was standardized, companies could pick anyshell and still have portability. However, TSH was actually quite cool and I therefore donated it toApache Felix, where it became Gogo. Several companies picked it up and the proof of concept wastransformed into a serious piece of software, becoming quite successful over time. In particular thework to adapt it to Apache Karaf improved Gogo significantly. Even Equinox, the Eclipse framework,switched to Gogo as its primary shell.
Clearly, Gogo could be used in a minimal framework without any IDE. Though I am generally in thecamp of learning from first principles, I felt that just having a framework with Gogo would notsuffice. After all, OSGi is not about building small programs, OSGi is about beating complexity.When the environment cannot handle complexity it is really hard to show the benefits of OSGi.
Therefore, I decided to run Gogo inside Bndtools to show the cool features of OSGi.
The bnd tool started around 2000 while I was working for Ericsson because I am lazy and distinctlydisliked writing the required OSGi metadata in the manifest. Through Neil Bartlett, bnd turned intoa very elegant Eclipse plugin called Bndtools. Over the past years, a large number of companies haveadopted Bndtools and its sidekick Gradle.
A mature environment like Bndtools hides a lot of complexity that easily obscures importantconcepts. This makes it harder to see how things actually work under the hood. If it looks like magicit is hard to understand what is happening on the lower layers.
However, the advantage with Bndtools is that, out of the box, it creates correct bundles with nospecial setup. Since Bndtools can run OSGi frameworks in many different setups, it is easy to showall the aspects of OSGi. Most importantly, since Bndtools keeps a live framework updated of anychanges in the IDE, OSGi feels like an interactive environment, i.e. similar to a Repeat-Eval-Print-Loop
2 OSGi Starter

(REPL) that makes so many languages a joy to learn. You change some Java code and it is availableinside OSGi, using the dynamic nature of OSGi to do the updates. This dynamic nature makes itworth learning OSGi & bnd in Bndtools even if you use Maven as your build system. (bnd is presentin Maven plugins.)
Therefore, this book uses a combination of the Gogo shell and Bndtools to explore OSGi. It starts byinstalling Bndtools and a bnd workspace. A playground project is then created to run a frameworkwith the Gogo shell. From there, we first will explore the shell itself to learn the features. Afterfeeling comfortable with the existing commands, we add a custom 'Hello World' command usingthe OSGi Declarative Services.
We go very lightly on the basic concepts in this book. We skip all the background and instead focuson building a trivial application that has the correct scalable architecture.
The next phase is, therefore, to create an absolutely minimal workspace with an API project and aprovider of this API, the architectural keystone of OSGi applications. We will explore how to test thecode with plain JUnit both inside and outside an OSGi framework.
The core concept of OSGi is to build applications of reusable components. The previous sectionscreated a reusable component so next comes the application. The application is the code that isnever reusable, it only works for a specific environment and configuration.
The preferred delivery format in bnd is the executable jar. This is a JAR file that contains a launcher, aframework, and all necessary dependencies. We show how to define an application project andexport it automatically to an executable JAR. Such an executable JAR can then be deployed to thetarget environment.
If you are a user of a bnd workspace and there is build master that maintains the low level detailsthen you don’t need to continue with this document. It is then highly recommended to subscribe tothe Bndtools mailing list.
The remainder of the document discusses how to:
• Build the workspace with Gradle
• Use Github Actions to build your workspace on a remote server
• Release snapshots and releases to Sonatype Nexus repository
Enjoy! And do not forget to provide feedback to improve this document.
Peter Kriens
OSGi Starter 3

Starting with OSGiTL;DR
This section will start with a hands-on deep dive into OSGi. We will install Bndtools and then createa playground project so we can explore OSGi and Bndtools in detail interactively. This kind of acrucial, and short, section to get started with Bndtools. It creates a running framework with a Gogoshell. This is very much the start level of all other chapters. So skip at your peril.
You can find a workspace with the work done in this book at https://github.com/aQute-os/com.example. Please have a Java 8 VM installed.
You can follow a short video at bndtools.org.
Installing
Install Eclipse & Bndtools. The following link can be used to find out how to install these tools.
• https://bndtools.org/installation.html
The following sections assume that you have an empty Eclipse workspace up and running in adirectory called com.example. This Eclipse workspace directory will also be used for bnd and laterGit.
About Java
Once upon a time, Java was stable for years but this changed after Java 9. Nowadays, there arefrequent releases. This would not be a problem if Java were kept perfectly backward compatible.However, the introduction of a module system and some tiny details make this not so. Also, toolslike Eclipse and Bndtools sometimes have information that can lack the information about thelatest version. Last, in the embedded world there is always a lag. For this last reason, the book iswritten against Java 8.
It should be possible to run everything on later Java versions but your mileage may vary. It is highlyrecommended to install at least one Java 8 JDK.
For the exercises to work, you should select a Java 1.8 JRE, which is the default in Eclipse. See Eclipse› Preferences→Java→Installed JREs
4 OSGi Starter

WARNING At the time of writing this document, Eclipse did not support Java 13 and 14yet.
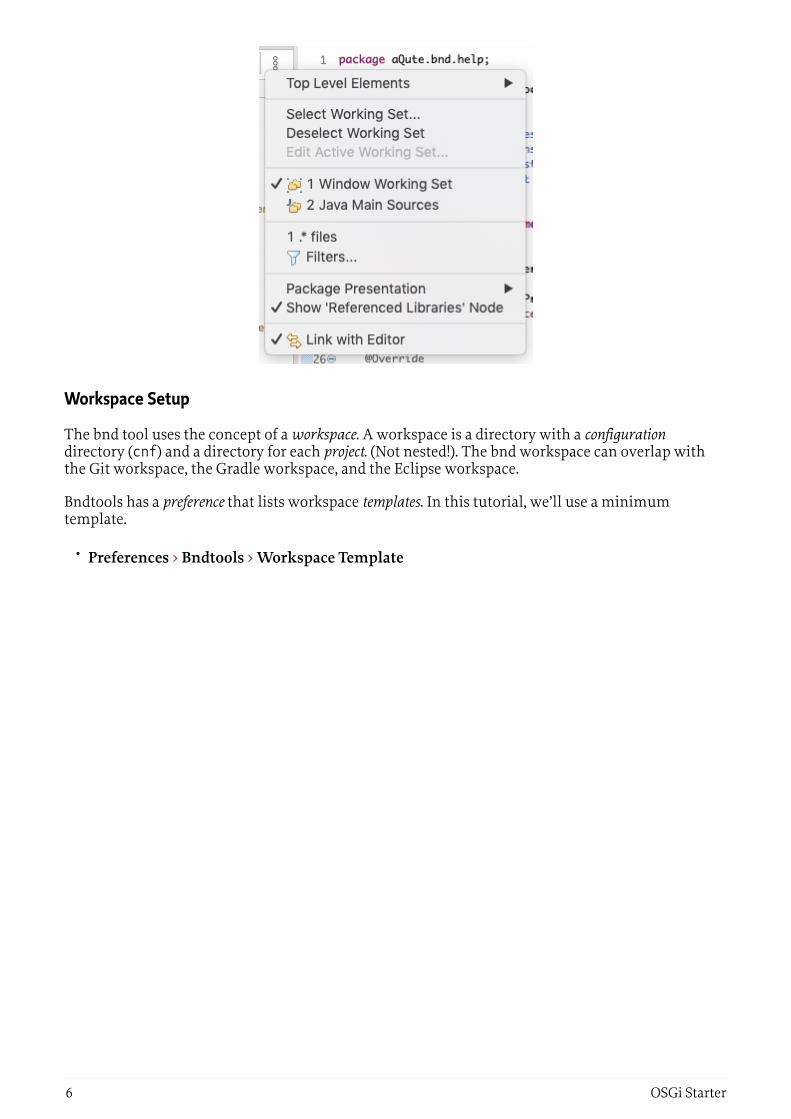
Filters in the Bndtools Explorer
By default, Eclipse filters files that start with a dot (.). Since the dotfiles are often quite interesting tolook at, it is best to disable this filtering. In the Bndtools Explorer, select the little triangle or 3 dots inthe top right of the view to open the menu. Then select Filters. Just enable/disable the filters youwant.
OSGi Starter 5
Workspace Setup
The bnd tool uses the concept of a workspace. A workspace is a directory with a configurationdirectory (cnf) and a directory for each project. (Not nested!). The bnd workspace can overlap withthe Git workspace, the Gradle workspace, and the Eclipse workspace.
Bndtools has a preference that lists workspace templates. In this tutorial, we’ll use a minimumtemplate.
• Preferences › Bndtools › Workspace Template
6 OSGi Starter
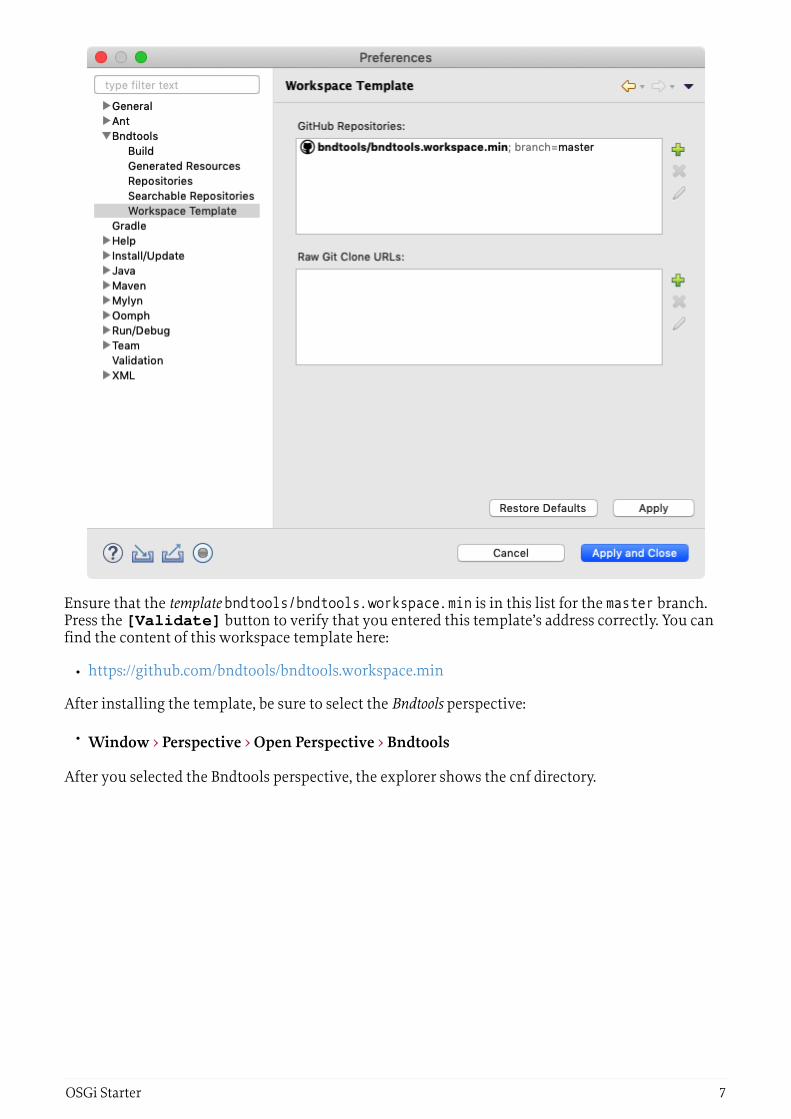
Ensure that the template bndtools/bndtools.workspace.min is in this list for the master branch.Press the [Validate] button to verify that you entered this template’s address correctly. You canfind the content of this workspace template here:
• https://github.com/bndtools/bndtools.workspace.min
After installing the template, be sure to select the Bndtools perspective:
• Window › Perspective › Open Perspective › Bndtools
After you selected the Bndtools perspective, the explorer shows the cnf directory.
OSGi Starter 7

• .settings – Eclipse settings like the compiler to be used, formatting rules, etc.
• cache – Used by bnd to cache files, must be ignored by Git
• ext – Extensions. Any properties file having an extension .bnd will be visible to all projects.
• .project – Project setup for Eclipse, do not touch
• build.bnd – A property file that contains the setup for this workspace. Anything defined in thisfile (or in a bnd file in the ext directory will be available to all projects.)
New Project
Create a new project to verify the setup.
• File › New › Bndtools OSGi Project
8 OSGi Starter

Projects can be created from templates. We are using the [empty] template that is part of Bndtools.
OSGi Starter 9

Enter the name of the project. Note that the name of the project is also the name of the bundle (a.k.a.the Bundle symbolic name). It is recommended, for this book, to use fully qualified names likecom.example.playground.
Make sure the JavaSE-1.8 execution environment is selected in the popup, then click [Next].
10 OSGi Starter
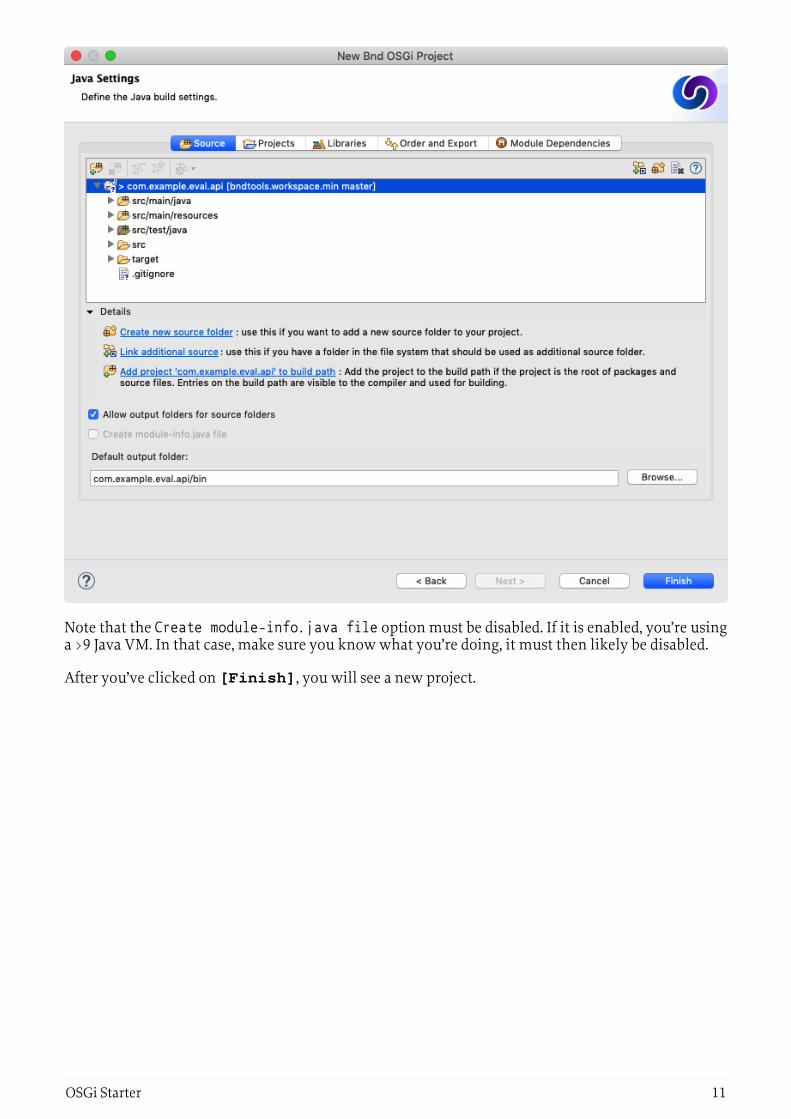
Note that the Create module-info.java file option must be disabled. If it is enabled, you’re usinga >9 Java VM. In that case, make sure you know what you’re doing, it must then likely be disabled.
After you’ve clicked on [Finish], you will see a new project.
OSGi Starter 11

After the project is created, you can find the following files in it:
• JRE System Library – Links Eclipse with the correct JDK
• src/main/java – The source directory of the project. This is where the Java code goes
• src/main/resources – The resource directory of the project. This is for bundle resources likeimages and other files
• Bnd Bundle Path – Links Elipse to the bnd buildpath defined in the bnd file. These are the sourceand test dependencies for this project
• .settings – Eclipse settings like the compiler, formatting rules, etc.
• src – Top-level src directory
• target – Contains all generated files. This directory is not stored on Github
• .classpath – Project setup for Eclipse. Do not touch
• .project – Project setup for Eclipse. Do not touch
• bnd.bnd – A property file that contains the setup for this project. It inherits from cnf/build.bnd
• …
12 OSGi Starter

Running
To verify that the project is correctly set up, we’ll run the Gogo shell in an OSGi framework. To keepit simple, we’ll be running an OSGi framework with the Gogo shell as the only bundles.
• Double click on the bnd.bnd file. This opens the bnd editor.
• Select the [Run] tab
• Enter gogo in the [Enter Search string] widget, this selects all bundles with gogo intheir name
• Drag the com.example.playground, org.apache.felix.gogo.command, andorg.apache.felix.gogo.shell to the [Run Requirements] list
• Press [Resolve]
• Press [Update]
• Save
• Press [Debug OSGi]
This opens the shell in the Eclipse console. You can enter lb -s to see the bundles that are runningin the framework.
Summary
We’ve installed Eclipse and then created an Eclipse workspace. The Eclipse workspace was thenturned into a bnd workspace from a Github template.
We then created a project as a playground for Gogo.
OSGi Starter 13
GogoTL;DR
This section explains how to use Gogo so that the remaining chapters can use Gogo to explore theexamples, making much of the book very interactive.
Gogo is much more powerful than most people think. As a minimum, you should try to run theGogo shell in the playground project and try to understand commands like help, echo, (bundle 0)headers, and s=bundle 1.
Gogo & Shells
The Gogo shell feels like a bash shell that closely interacts with the OSGi framework. Gogo wasdesigned to allow human users as well as programs to interact with an OSGi based system through acommand-line based interface, also called a shell. This shell should allow interactive and string-basedprogrammatic access to the core features of the framework as well as providing access tofunctionality that resides in bundles. However, I also wanted it to be a scripting language that wouldwork with real Java objects.
Shells can be used from many different sources, for example, the built-in Eclipse console butsometimes also from an SSH client. It is, therefore, necessary to have a flexible scheme that allowsbundles to provide shell fronts based on telnet, ssh, the Java Console class, plain Java console, serialports, files, etc. Supporting commands from bundles was made to be very lightweight to promotesupporting the shell from any bundle.
In this section, we explore the usage aspect of the Gogo shell.
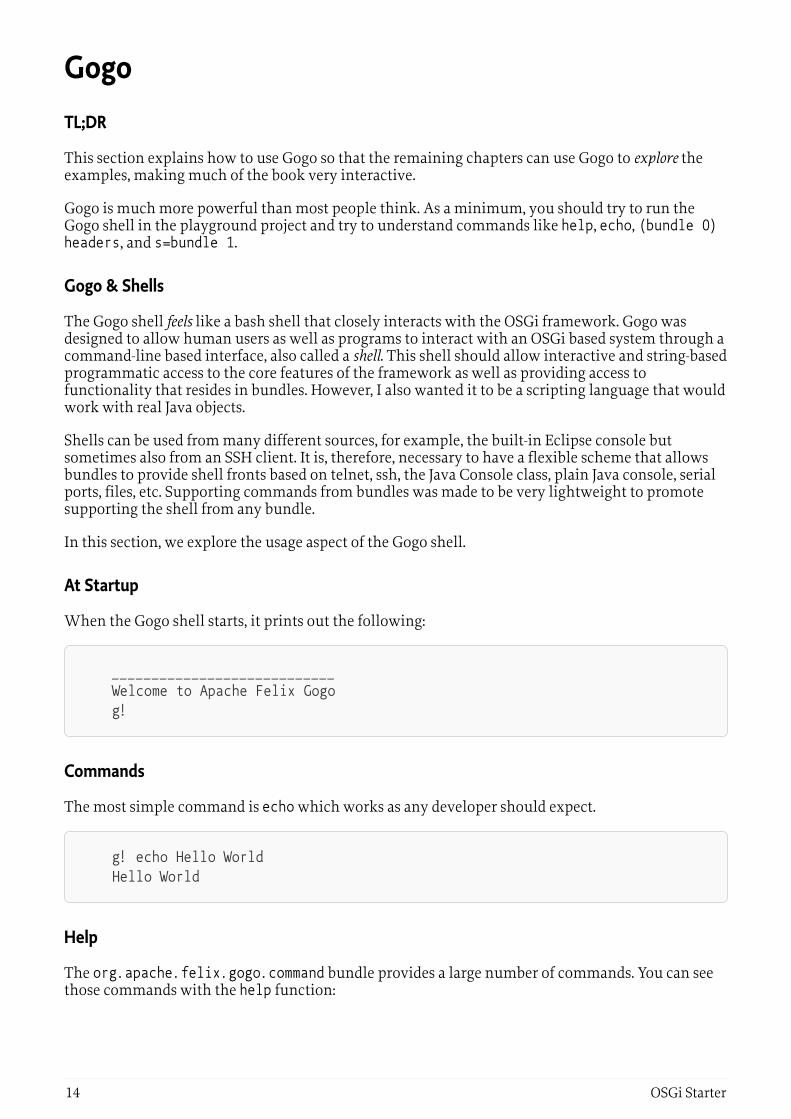
At Startup
When the Gogo shell starts, it prints out the following:
____________________________ Welcome to Apache Felix Gogo g!
Commands
The most simple command is echo which works as any developer should expect.
g! echo Hello World Hello World
Help
The org.apache.felix.gogo.command bundle provides a large number of commands. You can seethose commands with the help function:
14 OSGi Starter

g! help gogo:cat gogo:each gogo:echo gogo:format gogo:getopt gogo:gosh gogo:grep gogo:history gogo:not gogo:set gogo:sh gogo:source gogo:tac gogo:telnetd gogo:type gogo:until ...
The list shows the scope (e.g. gogo) and the function name (e.g. grep).
The actual list is likely longer because many bundles provide additional commands.
You can get more information about a command with the help command by providing the name ofthe command:
g! help echo echo scope: gogo parameters: Object[]
History/Editing
In the Eclipse console, you can unfortunately not edit the commands. However, you can access thehistory.
g! history 1 echo Hello World 2 help 3 help echo
You can repeat a command using the bang ('!'):
OSGi Starter 15

g! !1 Hello World g! !ech Hello World
In standard terminals, you can use the cursor keys to move back and forth. Unfortunately, this notyet supported by Eclipse.
Cheat Sheet
The following is a cheat sheet of the Gogo shell. You can ignore it for now but it might be a nicereference in the future.
program ::= executable ( '|' statements )* statements ::= statement ( ';' statement )* statement ::= assignment | expression assignment ::= token '=' expression expression ::= list | map | range | closure | command | variable | ne | '(' expression ')' command ::= target | function target ::= expression token ( ' ' expression)* function ::= token ( ' ' expression)* list ::= '[' expression ( ' ' expression )* ']' range ::= '[' expression '..' expression ( '..' expression )? ']' map ::= '[' assignment ( ' ' assignment )* ']' closure ::= '{' program '}' ne ::= '%(' <numeric expression> ')' variable ::= '$' token token ::= <complicated>
Special characters can be escaped by quoting them (double or single quotes) or prefixing them witha backslash ('\'). Numeric expressions support common Math functions.
Tokens are parsed more or less as a sequence of characters without whitespace or any of the specialcharacters in [](){};|&>. A special rule applies to the curly brace token ({). If it is followed bywhitespace it is a separate token, otherwise it is concatenated with the rest. (Don’t ask me why, Iprobably suffered from some obscure use case in my mind.)
Quoting
Quoting (double or single) is optional if the word does not contain spaces or some special characterslike '|', ';', and some others. So in this case two tokens are passed to echo. Notice that we can quote thetwo words turning it into a single token:
g! echo Hello World Hello World g! echo 'Hello World' Hello World
16 OSGi Starter

Multiple Commands
You can execute multiple commands on a line by separating the commands with a semicolon (';').
g! echo Hello; echo World Hello World
Multiple commands can also be separated by a pipe character ('|'). In that case, the output is theinput of the next command. Gogo has a built-in grep command so we can use echo to create outputand grep to check the output.
g! echo Hello | grep Hello Hello true g! echo Hello | grep World Hello false
IO Redirection
Two built-in commands cat and tac ( tac = reversed cat because it writes instead of reads) areavailable to provide file data and store file data. Together with the pipe operator, they replace theinput and output redirection of the bash shell.
g! echo Hello | tac temp.txt Hello g! echo World | tac -a temp.txt World g! cat temp.txt Hello World
Built-in Commands
Gogo’s commands are methods on objects. By default, Gogo adds all public methods of thejava.lang.System class and the public methods on the session’s BundleContext as commands.Instead of directly using the method names, Gogo uses the bean naming standard. That is,getHeaders() becomes headers.
This gives us access to some interesting System functions:
OSGi Starter 17
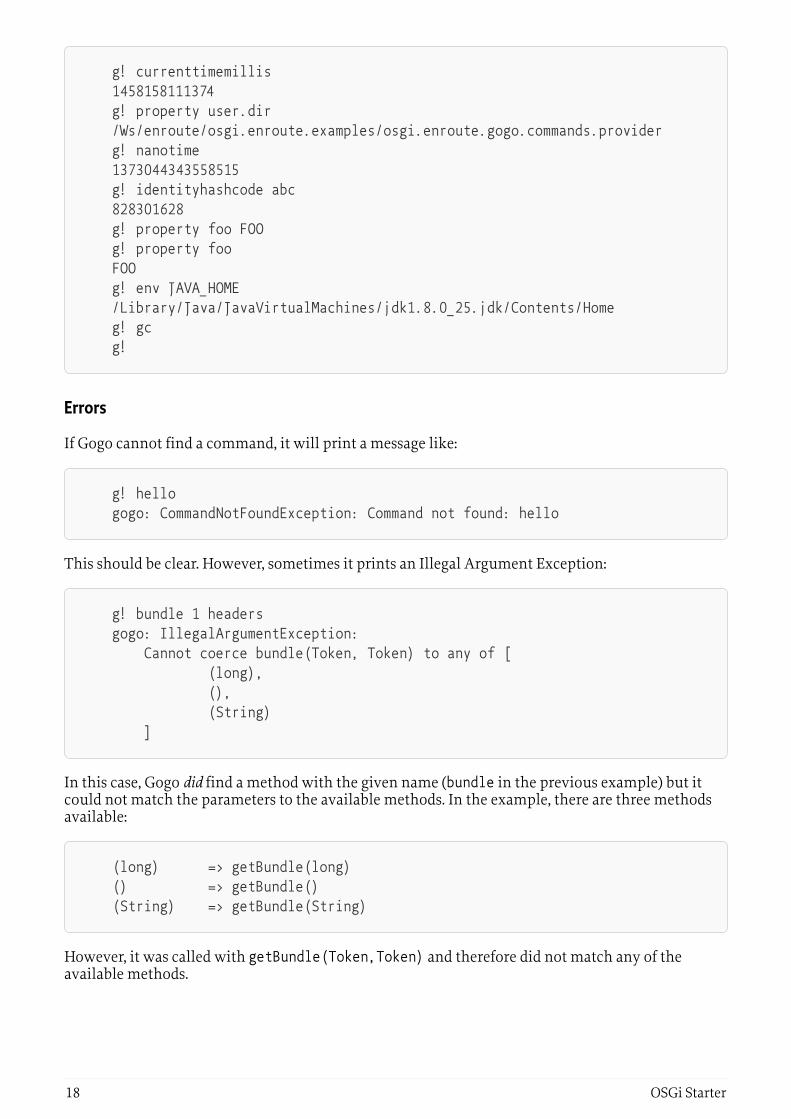
g! currenttimemillis 1458158111374 g! property user.dir /Ws/enroute/osgi.enroute.examples/osgi.enroute.gogo.commands.provider g! nanotime 1373044343558515 g! identityhashcode abc 828301628 g! property foo FOO g! property foo FOO g! env JAVA_HOME /Library/Java/JavaVirtualMachines/jdk1.8.0_25.jdk/Contents/Home g! gc g!
Errors
If Gogo cannot find a command, it will print a message like:
g! hello gogo: CommandNotFoundException: Command not found: hello
This should be clear. However, sometimes it prints an Illegal Argument Exception:
g! bundle 1 headers gogo: IllegalArgumentException: Cannot coerce bundle(Token, Token) to any of [ (long), (), (String) ]
In this case, Gogo did find a method with the given name (bundle in the previous example) but itcould not match the parameters to the available methods. In the example, there are three methodsavailable:
(long) => getBundle(long) () => getBundle() (String) => getBundle(String)
However, it was called with getBundle(Token,Token) and therefore did not match any of theavailable methods.
18 OSGi Starter

Variables
Variables can have any name. They are set with <name>=<expr>. They are referred to by $<name>.Gogo uses variables also itself. For example, the prompt can be changed by setting a new promptvariable.
g! prompt= '$ ' $
The following variables are in use by the shell:
• e – A function to print the last exception’s stack trace
• exception – The last exception
• prompt – The shell prompt
You can also use the ${…} pattern in a token to access variables:
g! name=World g! "Hello ${name}" Hello World
You can remove a variable by not providing a value:
g! foo=1 1 g! $foo 1 g! foo= 1 g! $foo g!
Objects
Notice that none of the System commands required anything special, they are just the methodsdefined on the System class. That implies that the implementation has no clue about Gogo. All thesecommands return domain, plain, unadorned objects. We can test this because Gogo has variablesthat store these plain objects. We can then use those objects in the shell as commands.
g! nr = new java.lang.Integer 10 10 g! $nr doubleValue 10.0 g!
OSGi Starter 19
Target
The syntax feels very natural but there is something a bit tricky going on. A command is executedon a target. A target is a Java object. However, Gogo searches for a match of the command name inseveral places.
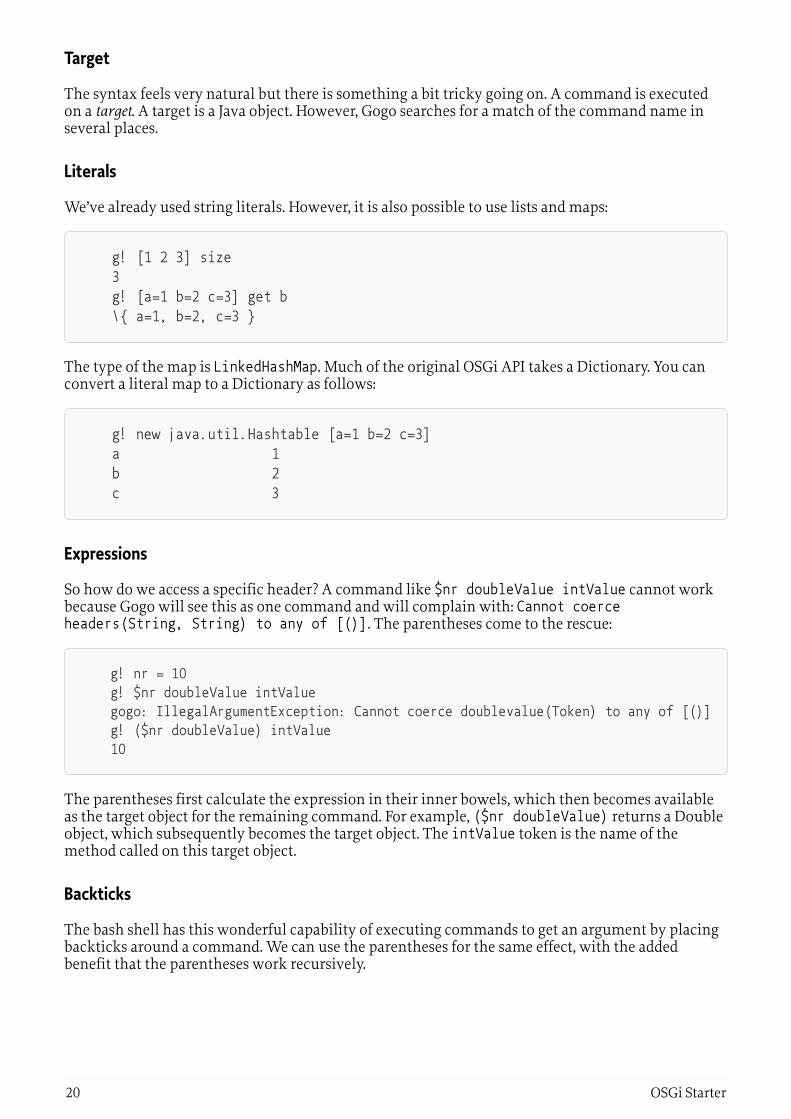
Literals
We’ve already used string literals. However, it is also possible to use lists and maps:
g! [1 2 3] size 3 g! [a=1 b=2 c=3] get b \{ a=1, b=2, c=3 }
The type of the map is LinkedHashMap. Much of the original OSGi API takes a Dictionary. You canconvert a literal map to a Dictionary as follows:
g! new java.util.Hashtable [a=1 b=2 c=3] a 1 b 2 c 3
Expressions
So how do we access a specific header? A command like $nr doubleValue intValue cannot workbecause Gogo will see this as one command and will complain with: Cannot coerceheaders(String, String) to any of [()]. The parentheses come to the rescue:
g! nr = 10 g! $nr doubleValue intValue gogo: IllegalArgumentException: Cannot coerce doublevalue(Token) to any of [()] g! ($nr doubleValue) intValue 10
The parentheses first calculate the expression in their inner bowels, which then becomes availableas the target object for the remaining command. For example, ($nr doubleValue) returns a Doubleobject, which subsequently becomes the target object. The intValue token is the name of themethod called on this target object.
Backticks
The bash shell has this wonderful capability of executing commands to get an argument by placingbackticks around a command. We can use the parentheses for the same effect, with the addedbenefit that the parentheses work recursively.
20 OSGi Starter

g! bundle = bundle 4 g! echo Bundle ($bundle bundleid) has name ((bundle ($bundle bundleid)) symbolicname) Bundle 4 has name org.apache.felix.scr
Functions
The Gogo shell can store commands for later execution. The { and } delimiters are reserved for thatpurpose. We can store these functions in objects or pass them as parameters. To execute a functionas a command, you should use the name of the variable without the dollar ('$') sign.
The { and } characters are not on the same parsing level as for example the [ and ]. You mustseparate them by spaces, otherwise, they are part of a larger token.
g! f = \{ echo Hello } echo Hello g! f Hello
You can pass arguments to the function. They are named $1..$9. $0 is the command name ifavailable. The $it macro refers to $1.
g! f = \{ echo $it } echo $1 g! f Hello World Hello g! f = \{ echo $1 } g! f Hello World Hello
Obviously, it is not very nice that we miss the World because we only used $1. There is a magicvariable called $args. This variable is list that gets expanded into separate arguments. So we canchange our function to use all the arguments when the function is invoked:
g! f = \{ echo $args } echo $args g! f Hello World Hello World
The $args list of arguments cannot be manipulated as a normal object as it gets expanded into itsmembers wherever you use it.
g! prompt={ }
You can store several functions together in a file and source them:
OSGi Starter 21

g! source utils.gogo ...
Repeat and Conditionals
Gogo provides some built-in commands that use the functions to provide conditional and repeatedexecution. For example, the each command takes a collection and a function. It then iterates overthe collection and calls the function with the element of the iteration.
g! each [1 2 3] \{ echo -- $it -- } -- 1 -- -- 2 -- -- 3 -- null null null
We can now also use the if command:
g! l = [] g! if \{ $l isempty } \{ echo empty } \{ echo not empty } empty g! $l add foo g! if \{ $l isempty } \{ echo empty } \{ echo not empty } not empty
You can negate with the not command, which takes a function:
g! if { not {$l isempty}} { echo not empty } { echo empty } not empty
New
You can use the new command to create new objects. The new command takes the name of a classand then the parameters for the constructor.
g! object = new java.lang.Object
Numeric Expressions
The Gogo shell has a convenient calculator for simple expressions built-in. The calculator is invokedfor an expression that is enclosed by a %( and ). For example:
22 OSGi Starter

g! echo %(21*2) 42
Numeric expressions allow you to evaluate simple mathematical and boolean expressions. It is as faras I know completely undocumented, the parsing is flaky, and it is completely unconnected to theGogo shell. That is, you cannot even use the variables in the Gogo shell inside an expressionHowever, sometimes it can be a lifesaver.
Exceptions
You (and any code you call) can throw exceptions. The last exception is stored in the $exceptionvariable and there is a built-in function e that shows the stack trace.
g! throw (new java.lang.Exception Foo) ... g! $exception message Foo g! e java.lang.Exception: Foo at org.apache.felix.gogo.shell.Procedural._throw(Procedural.java:83) ...
You can also catch the exceptions with a try command.
g! exception = null g! try { throw (new java.lang.Exception Foo) } g! $exception g!
Of course we now silently ignore the exception, which is not a good idea. So we can provide a catchfunction that receives the exception as the \$it variable.
g! try { throw (new java.lang.Exception Foo) } { echo ouch } ouch g!
Telnet Daemon
The Eclipse console is not very user-friendly for editing the command line. You can start a telnetdaemon.
OSGi Starter 23

g! telnetd telnetd - start simple telnet server Usage: telnetd [-i ip] [-p port] start | stop | status -i --ip=INTERFACE listen interface (default=127.0.0.1) -p --port=PORT listen port (default=2019) -? --help show help
Summary
In this chapter, you’ve learned the basics of the Gogo shell. You may wonder why so much effort isspent on learning a simple shell? Well, Gogo should be seen as the fabric of your application. Wewill see later that it is incredibly easy to provide first-class, well-documented commands in Gogo forevery service. Having this fabric is very useful in learning and testing services.
And it is fun …
24 OSGi Starter
A New Gogo CommandTL;DR
Adding a new Gogo command is very easy and provides a very gentle introduction to programmingin OSGi. In this chapter, we will create a component that registers a Gogo command that prints 'HelloWorld'. This component is then further enhanced to use parameters and provide helpfulinformation.
You can follow a short video at bndtools.org.
Prerequisites
This chapter assumes you have the com.example.playground project in your workspace and it isrunning the playground with the Gogo shell as was explained in the Starting with OSGi.
In Bndtools, everything is built and deployed all the time, after every save. Sometimes you save andthis creates errors in the running framework. In this case, you can just correct the error andcontinue. In general, this will correct the error.
Only when you’re lost, you should restart the framework.
Creating a Project
You can create a new project with File › Bnd OSGi Project. The project will be calledcom.example.playground here, but you can pick your own name.
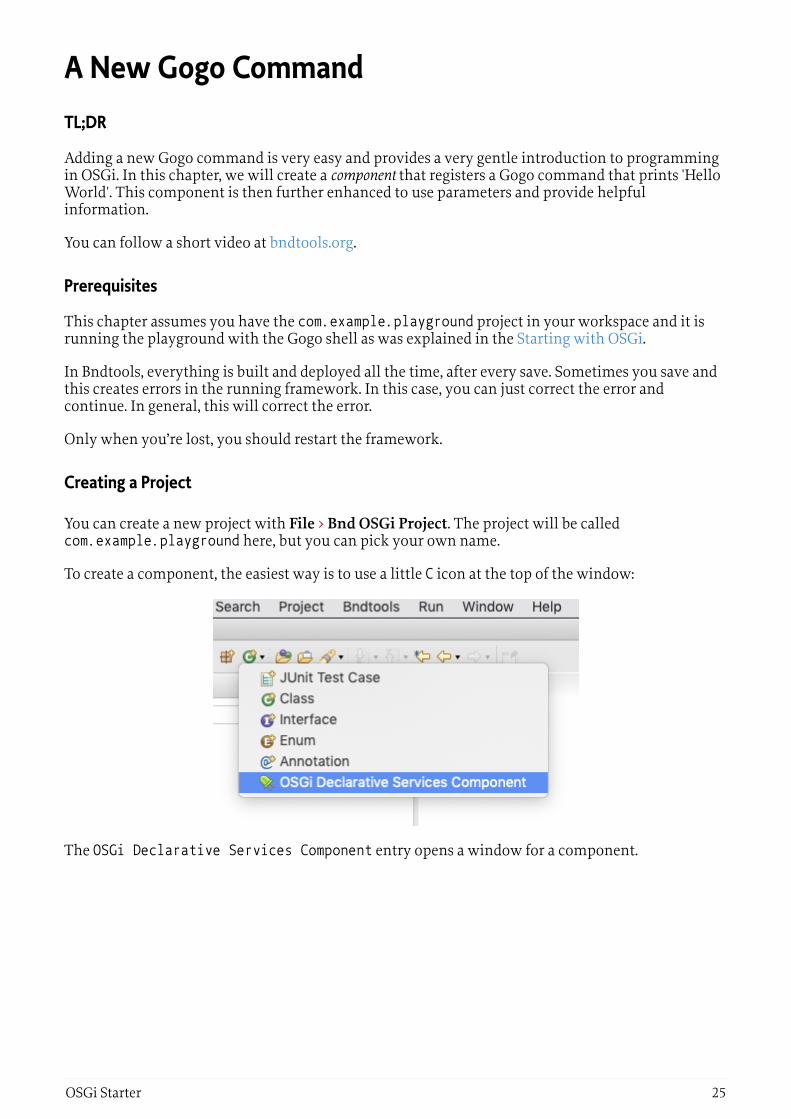
To create a component, the easiest way is to use a little C icon at the top of the window:
The OSGi Declarative Services Component entry opens a window for a component.
OSGi Starter 25

Make sure to fill in the Package and Name fields.
The source contains errors because we have not yet added any dependencies. Since the source usesthe OSGi component annotations, the compiler cannot compile the source code. You can use thequick fix (The little yellow light bulb with the red cross) to add the OSGi annotations as adependency.
26 OSGi Starter

The source now compiles and looks like:
package com.example.playground.gogo; import org.osgi.service.component.annotations.Component;
@Component public class HelloWorld {}
Bundles add commands to the shell by registering a service with the osgi.command.scope andosgi.command.function service properties. The Gogo shell detects these service properties and willregister any method whose name is listed in the osgi.command.function service property. Sinceservices could choose the same command name, the osgi.command.scope service property can beused to disambiguate the command on the command-line. Just prefix a command with the scopeand a ':' before the function name (no spaces).
g! scope:name ...
If a component does not implement an interface then it will not be registered as a service. Since Gogois looking for services with the previously defined properties to register commands, it would not beable to find this "Hello World" command. Since this "Hello World" component does not implementanything, we need to make the service explicit. We use Hello class as the service type in theservice() annotation method on the @Component annotation.
OSGi Starter 27
@Component( property = { "osgi.command.scope=hello", "osgi.command.function=hello" }, service=Hello.class ) public class Hello { public void hello() { System.out.println("Hello World"); } }
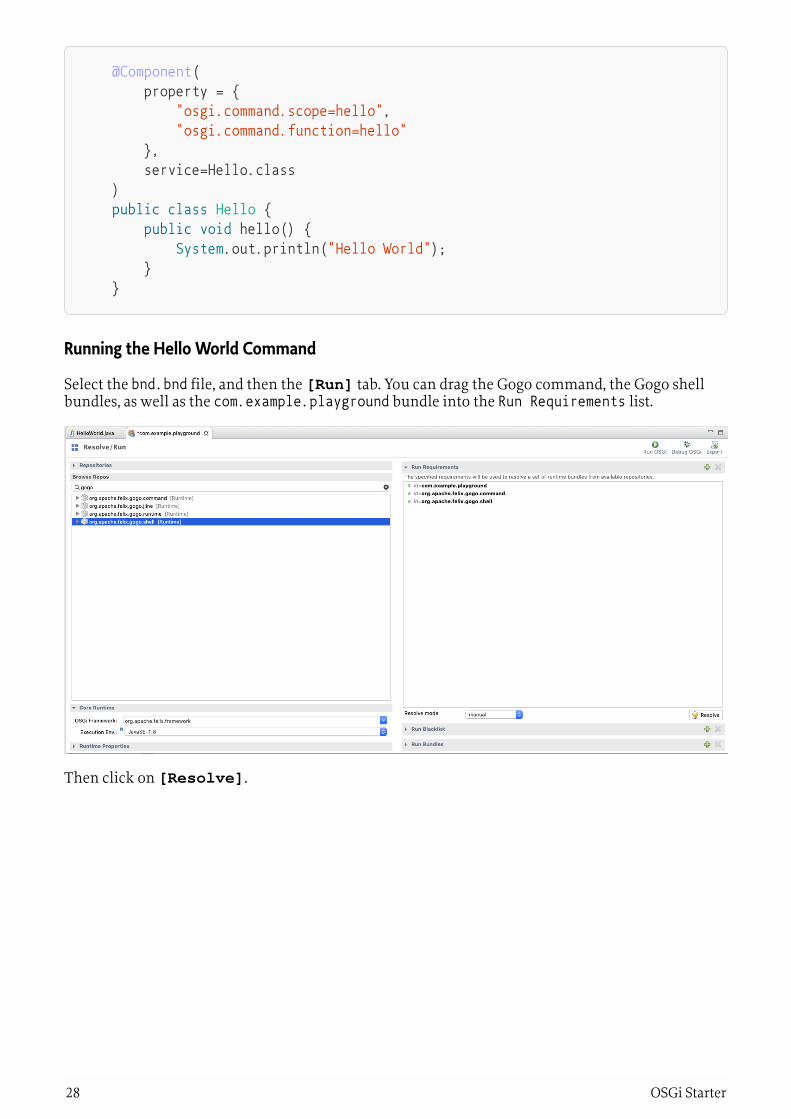
Running the Hello World Command
Select the bnd.bnd file, and then the [Run] tab. You can drag the Gogo command, the Gogo shellbundles, as well as the com.example.playground bundle into the Run Requirements list.
Then click on [Resolve].
28 OSGi Starter

After you successfully resolved this, click the [Update] button. Last, save the file and click on[Debug OSGi]. This should start the Gogo shell in the Console view.
Using the Shell
In the shell, we can now call the function:
g! hello World Hello World
In actual systems, the number of Gogo commands tend to get very large. The number of commandsmakes it hard to ensure each command has a unique name. This is the reason we had to specify theosgi.command.scope service property so commands could be disambiguated on the command line.We can now uniquely identify a command if the combination of the scope and the function name isunique.
g! hello:hello World Hello World
OSGi Starter 29

System.out
In the example, we use System.out. This is ok, even if the shell is accessed via SSH or telnet. TheGogo shell redirects System.out for the duration of a command. However, using System.out makesthe command only useful in a shell and the function can not really be called from other services.One of the primary goals of Gogo is to make commands very lightweight. The idea is that normalservice implementations can provide commands reusing existing functions. Therefore, we can alsojust return the String, Gogo will then print the text.
public String hello() { return "Hello World"; }
After you’ve made this change and saved the source, we can try it in the shell immediately; there isno need to restart the framework. Bndtools will automatically update any changed bundles. (Notrestarting the framework is sometimes hard to unlearn.)
g! hello Hello World
Arguments
Commands can also take parameters by declaring them in the prototype. For example, we canprovide a name that is welcomed.
public String hello(String name) { return "Hello " + name; }
g! hello peter Hello peter
Parameters can use any type they want. Gogo will attempt to coerce the given command to theproper types. For example, we could add a boolean argument to upper case the result:
public int hello(boolean uppercase, String name) { String msg = "Hello " + name; return uppercase ? msg.toUpperCase() : msg; }
g! hello true peter HELLO PETER
30 OSGi Starter
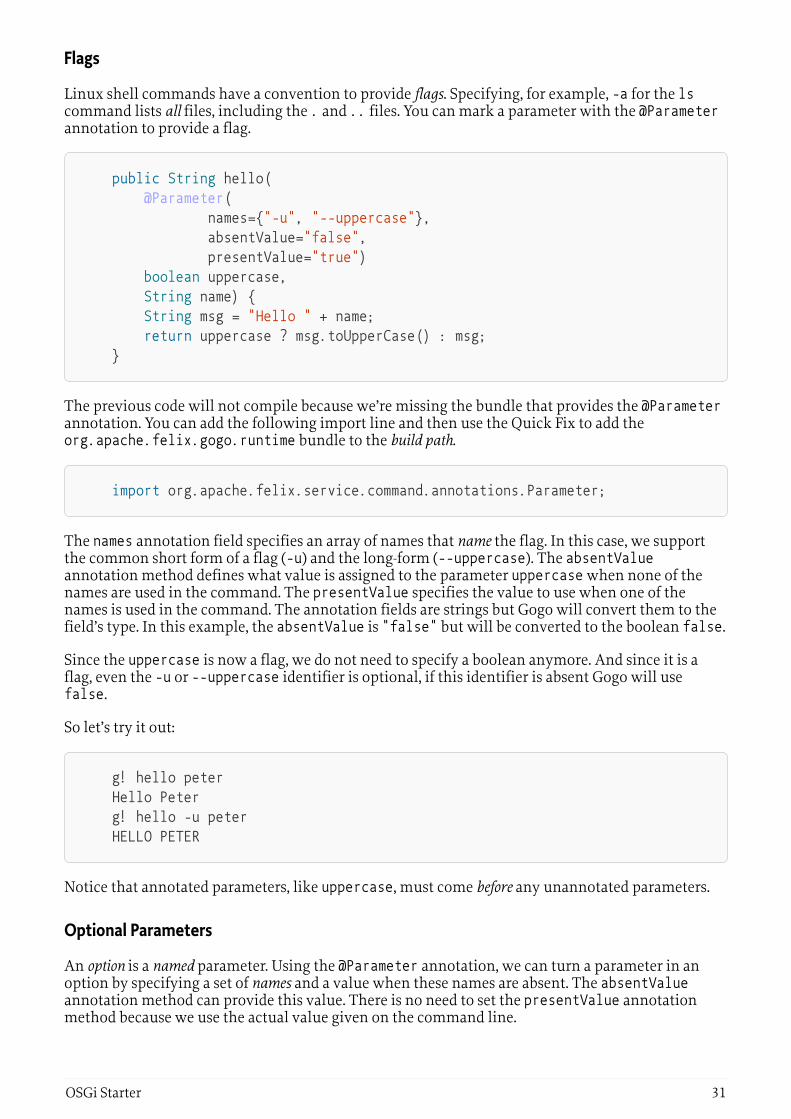
Flags
Linux shell commands have a convention to provide flags. Specifying, for example, -a for the lscommand lists all files, including the . and .. files. You can mark a parameter with the @Parameterannotation to provide a flag.
public String hello( @Parameter( names={"-u", "--uppercase"}, absentValue="false", presentValue="true") boolean uppercase, String name) { String msg = "Hello " + name; return uppercase ? msg.toUpperCase() : msg; }
The previous code will not compile because we’re missing the bundle that provides the @Parameterannotation. You can add the following import line and then use the Quick Fix to add theorg.apache.felix.gogo.runtime bundle to the build path.
import org.apache.felix.service.command.annotations.Parameter;
The names annotation field specifies an array of names that name the flag. In this case, we supportthe common short form of a flag (-u) and the long-form (--uppercase). The absentValueannotation method defines what value is assigned to the parameter uppercase when none of thenames are used in the command. The presentValue specifies the value to use when one of thenames is used in the command. The annotation fields are strings but Gogo will convert them to thefield’s type. In this example, the absentValue is "false" but will be converted to the boolean false.
Since the uppercase is now a flag, we do not need to specify a boolean anymore. And since it is aflag, even the -u or --uppercase identifier is optional, if this identifier is absent Gogo will usefalse.
So let’s try it out:
g! hello peter Hello Peter g! hello -u peter HELLO PETER
Notice that annotated parameters, like uppercase, must come before any unannotated parameters.
Optional Parameters
An option is a named parameter. Using the @Parameter annotation, we can turn a parameter in anoption by specifying a set of names and a value when these names are absent. The absentValueannotation method can provide this value. There is no need to set the presentValue annotationmethod because we use the actual value given on the command line.
OSGi Starter 31

public String hello( @Parameter( absentValue="World", names={"-n","--name"}) String name ) { return "Hello " + name; }
Since we have an absentValue, we do not need the value to be specified on the command line. So wecan call the command with and without a parameter.
g! hello Hello World g! hello -n OSGi Hello OSGi g! hello --name OSGi Hello OSGi
Adding Help
Gogo provides a help command that works out of the box:
g! help gogo:type gogo:until hello:hello scr:config ... scr:disable g! help hello hello scope: hello
We can add a @Descriptor annotations to the component to assist the help function. If you import:
import org.apache.felix.service.command.Descriptor;
And add the annotation to the method:
@Descriptor("Friendly welcome") public String hello() { return "Hello World"; }
32 OSGi Starter

Then the output of the help command has changed:
g! help hello hello - Friendly welcome scope: hello
You can also apply the @Descriptor annotation on the parameters.
@Descriptor("Friendly welcome command") public String hello( @Parameter( absentValue="World", names={"-n","--name"}) @Descriptor("Name to welcome") String name ) { return "Hello " + name; }
g! help hello hello - Friendly welcome command scope: hello options: -n, --name Name to welcome [optional]
Property Annotation
The component properties osgi.command.scope and osgi.command.function are constructedfrom strings. This is an error-prone programming pattern. We used this error-prone patter to makemore clear what was going on beneath the covers; it also allowed us to get started without importingthe Gogo runtime bundle. However, the org.apache.felix.runtime bundle, that we use for the@Descriptor and @Parameter annotations, also contains an annotation to add service properties:@GogoCommand. This annotation cleans up the component by defining the Gogo service propertiesvia a simple annotation.
@GogoCommand(scope="hello", function="hello") @Component(service=Object.class) public class HelloWorld { ... }
Summary
In this chapter, we created a Gogo command with the OSGi Declarative Services standard. We usedthe playground project to interactively change the initial simple command into a fully documentedcommand with a flag and parameters.
OSGi Starter 33

API BundleTL;DR
OSGi’s primary innovation is the service registry. Services are used to decouple components/modulesfrom each other. In OSGi, modules depend on service contracts/APIs, not on other modules as is thecustom in classical module systems. Services require a contract or API. An OSGi API is a bit like ascreenplay for a movie, it describes how the different actors (the service implementations) must playtheir role (the service interfaces). A contract is represented by an exported package in OSGi that holdsthe classes, interfaces, and documentation.
In this section, we are going to create an API for a simple expression evaluator. It will teach you howto create an API project, how to name a project, and how to navigate around inside the project. Wewill also explain how to export and version the API package.
You can follow a short video at API & Provider Project.
Creating an API Project
Assume, we noticed that in several projects developers evaluated expressions from a string like 5*2.They used different libraries, had different syntaxes, and they had different ways of adding customfunctions. To address these issues, we created a story that there should be a service that couldevaluate these types of expressions.
So let’s create an API project.
• Create a project with File › New › Bnd OSGi Project. Name the project:
com.example.eval.api
• Use the API template.
• This template will ask for the name of the service interface. Use Eval for this exercise.
• Uncheck the 'Create module-info.java file' option if it is enabled. (This happens on Java 9 andlater; it is recommended to use Java 8.)
• [Finish]
• Update the given Eval interface in the package com.example.eval.api to:
package com.example.eval.api; public interface Eval { double eval(String expression) throws Exception; }
Naming
The name of this API project was not chosen at random. Over the years, a common pattern wasestablished as a best practice to name projects.
34 OSGi Starter

<domain>.<workspace>.<api>[.<provider>].<ext>
Part Example Description
domain com.example The organization’s domainname as is common in Java
workspace prime A unique name in theorganization for theworkspace/system
api eval The API name
provider simple A short name of the typicalimplementation aspect of theAPI
ext api One of the common extensionslike api, provider, etc.
The advantage of this naming scheme is that it sorts rather well. In a sorted list it puts relatedprojects close together.
Building
Bndtools will immediately build the bundle directly after any change is saved, hence there is never aneed to worry if projects have already been built. Any dependencies are also always rebuiltautomatically.
Therefore, in the target directory of the com.example.eval.api project you can now find thebundle for this project. You can double click on this JAR file which will open a window with itscontents. This window selects the manifest of the bundle. The manifest contains metadata for OSGi:
Manifest-Version: 1.0 Bnd-LastModified: 1578407040731 Bundle-ManifestVersion: 2 Bundle-Name: com.example.eval.api Bundle-SymbolicName: com.example.eval.api Bundle-Version: 1.0.0.202001071424 Created-By: 1.8.0_144 (Oracle Corporation) Export-Package: com.example.eval.api;version="1.0.0" Require-Capability: osgi.ee;filter:="(&(osgi.ee=JavaSE)(version=1.8))" Tool: Bnd-5.0.0.201912100922-SNAPSHOT
Service API Package
Although a service is registered with a single interface, we should define a service in a separatepackage. The reason is that in anything but the most trivial services you will need support objectsand multiple collaborating service interfaces. A service API is like the scenario for a role play, youhave different actors (interfaces) and stage props (objects).
Therefore when we talk about a service API, we always refer to a package, although every singleservice is implemented in a single interface.
OSGi Starter 35

Exporting
The com.example.eval.api package is exported in the manifest, looking at the Export-Packageheader. An exported package can be used by other bundles that import it. This project was createdfrom the API template. It automatically exports the package with the API.
You can export a package by adding an annotation to the package-info.java file in that package.This is already prepared for you by the template project.
@org.osgi.annotation.versioning.Version("1.0.0") @org.osgi.annotation.bundle.Export package com.example.eval.api;
You can also see that a package is exported in the Eclipse Explorer. An exported package in theexplorer is exported when it is decorated with a little green + icon in the left top.
Versioning
In OSGi, a service package must be exported so that other bundles can rely on being linked to acompatible service. The purpose of versioning is to ensure that bundles that are compiled against anAPI are compatible with the providers of that API. Semantic versions provide the information forOSGi (and bnd) to ensure the validity of the system.
For this reason, an OSGi version has 3 parts:
major.minor.micro.qualifier
• major – A change in this part signals full incompatibility,
• minor – A change in this part indicates that consumers are ok but providers are incompatible,
• micro – A compatible change.
Here, the API package is versioned with a version of 1.0.0 with [email protected]("1.0.0") annotation.
36 OSGi Starter

Showing Off!
If you change the @org.osgi.annotation.versioning.Version("1.0.0") in the package-info.java file to version 1.2.3 and then look at the manifest by clicking on thetarget/com.example.eval.api.jar file. You will see that the Export-Package header isimmediately updated.
If you remove the @org.osgi.annotation.bundle.Export in package-info.java then the + iconis removed from the package and the manifest will show:
Private-Package: com.example.eval.api;version="1.2.3"
Having an @Version annotation on a non-exported package is of course not recommended. Privatepackages should not have versions.
Provider Type
The Eval source also shows a @ProviderType annotation. When your dependency model is based oncontracts it turns out that you have two different kinds of dependencies on contracts. The provideris the bundle that is primarily responsible for the contract and the consumer is the one depends onthe contract to provide it some utility. The annotations @ProviderType and @ConsumerType mark aninterface’s expected implementor: either the provider or the consumer. The words consumer andprovider are used because both a provider as well as a consumer can be an implementer or a user of aservice interface.
Confused? Experience shows this is a difficult topic. In general, bnd will do the right thing.
Summary
We’ve now created an API project that exports a package with one interface. The project has nodependencies.
In the next chapter, we’ll create a simple provider of the com.example.eval.api API. :experimental:true :icons: font
OSGi Starter 37

Provider BundleTL;DR
In this section, we create a provider for the Eval API. We will show how to add dependencies to aproject and explain the -buildpath.
You can follow a short video at Provider Project. You may also check out External Dependencies.
Providing an API
In the previous section, we created an API project for a simple expression evaluator. In this chapter, wecreate another project that provides an implementation for the Eval API. A bundle that has as its solereason to provide an API is called to be a provider bundle. Any service contract can have manydifferent providers although in general only one is selected for the runtime. For example, there areproviders for the OSGi org.osgi.service.event API from Eclipse, Apache Felix, and Knopflerfish.You can compile against the OSGi API and then select one of the providers in your runtime.
Create a Provider Project
Create a project called com.example.eval.simple.provider. The simple part of the name allowsus the freedom to have alternative providers of the com.example.eval.api service API. Forexample, we will later add a provider that uses a popular expression library from Maven Central.
Using the Provider Bundle template, you will be asked for the name for a component. UseEvalImpl for this name.
Create a Component
The template has already provided a component for you. The EvalImpl class should give thefollowing source code:
package com.example.eval.provider; import org.osgi.service.component.annotations.Component;
@Component public class EvalImpl { }
Dependencies
The next step is to implement the Eval interface from our API project. It is time anyway to divedeeper into how bnd handles the build path.
To compile the code, the compiler needs to have a build path, a set of bundles that provide the APIs tocompile against. This build path is defined in the bnd.bnd file in every project.
If you open this bnd.bnd file and select the [Source] tab you see it is currently empty.
Repositories
The workspace has several repositories, repositories are a collection of bundles. If you look at the
38 OSGi Starter

bottom-left of the screen (in the Bndtools perspective) you can see the current repositories of theworkspace.
In the current workspace there are three repositories configured:
• Workspace – Contains all the bundles from the projects
• Build – Bundles intended to be used in the build only. E.g. API, test, etc.
• Runtime – Bundles for the runtime
The repositories are defined in the cnf project, look in the ext directory for their definition files. Wewill not discuss the details here. However, bnd has an extremely flexible repository model andsupports out of the box Maven repositories, P2 repositories /target platforms, and OSGi XMLrepositories.
Build Path
The build path dependencies of a bnd project are defined in the bnd.bnd file. We can, therefore,control the build path through the build path editor. Double click on the bnd.bnd file and select the[Build] tab.
OSGi Starter 39

As you can see, the org.osgi.component.annotations bundle is already listed. To add anotherdependency, click on the [+] and then swipe the com.example.eval.api bundle from the left to theright (or click the [Add] if you’re not into swiping). If you’re looking for a specific bundle then youcan filter them by symbolic name. Type the name in the filter text box to limit the entries thatmatch.
Press [Finish] and save the bnd.bnd file because otherwise there is no effect.
40 OSGi Starter
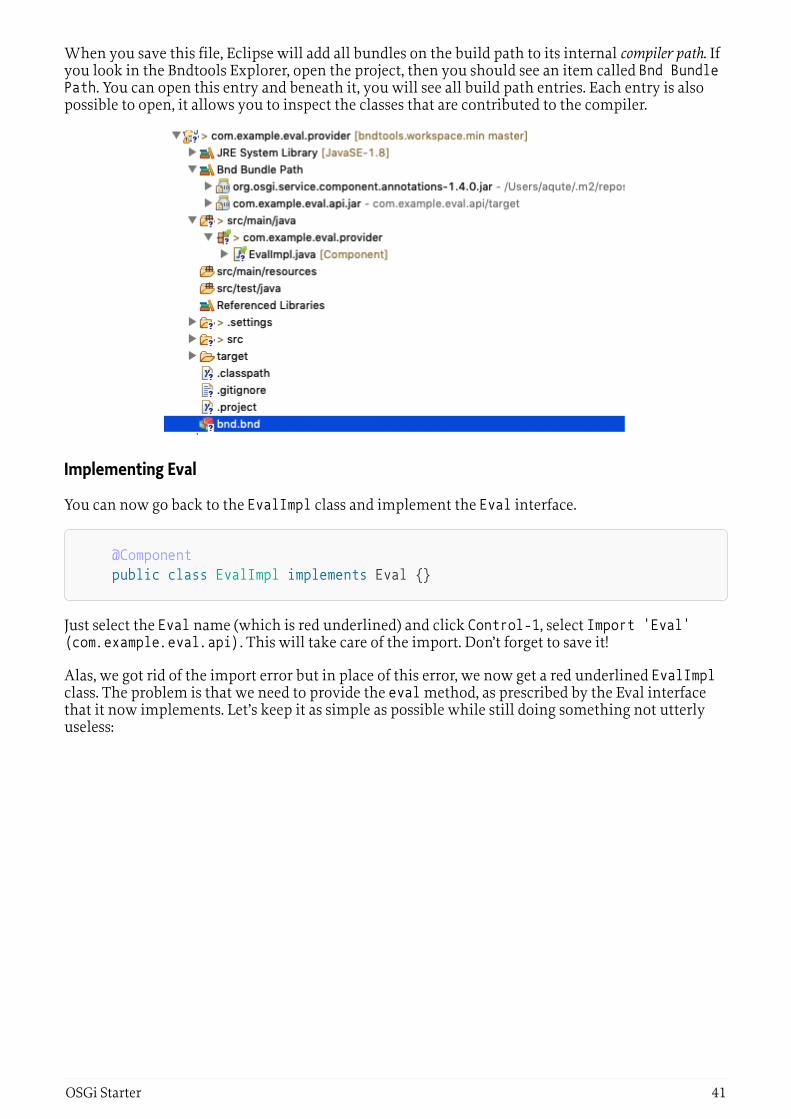
When you save this file, Eclipse will add all bundles on the build path to its internal compiler path. Ifyou look in the Bndtools Explorer, open the project, then you should see an item called Bnd BundlePath. You can open this entry and beneath it, you will see all build path entries. Each entry is alsopossible to open, it allows you to inspect the classes that are contributed to the compiler.
Implementing Eval
You can now go back to the EvalImpl class and implement the Eval interface.
@Component public class EvalImpl implements Eval {}
Just select the Eval name (which is red underlined) and click Control-1, select Import 'Eval'(com.example.eval.api). This will take care of the import. Don’t forget to save it!
Alas, we got rid of the import error but in place of this error, we now get a red underlined EvalImplclass. The problem is that we need to provide the eval method, as prescribed by the Eval interfacethat it now implements. Let’s keep it as simple as possible while still doing something not utterlyuseless:
OSGi Starter 41

@Component public class EvalImpl implements Eval { Pattern EXPR = Pattern.compile( "\\s*(?<left>\\d+)\\s*(?<op>\\+|-)\\s*(?<right>\\d+)\\s*"); @Override public double eval(String expression) throws Exception { Matcher m = EXPR.matcher(expression); if ( !m.matches()) return Double.NaN; double left = Double.valueOf( m.group("left")); double right = Double.valueOf( m.group("right")); switch( m.group("op")) { case "+": return left + right; case "-": return left - right; } return Double.NaN; } }
Ok, ok, calling it simple might still give it too much credit but we’re not here to learn parsing. Atleast it has (some) error handling! Notice that we can only handle trivial additions and subtractionsof constants.
Imports
It is about time now to take a look at what our bundle really looks like. Double click on thetarget/com.example.eval.simple.provider.jar file. This opens the JAR Editor. Select the[Print] tab, look at the IMPEXP section.
[IMPEXP] Import-Package com.example.eval.api {version=[1.0,1.1)}
The reason we import the minor range ([1.0,1.1)) is that the Eval interface was annotated withthe @ProviderType and we do implement this interface. Because we implement a provider interface,bnd assumes this bundle is a provider of the com.example.eval.api API and therefore must importthe package with a minor range. If the contract changes in any way, we need to make a new versionof this provider bundle.
NOTE The concepts of provider and consumer of APIs seem hard to understand.Fortunately, bnd handles it all quite well. Trust us. :-)
Gogo Command
Making a service a Gogo command is a good way to play with the services that are being developed.
Add org.apache.felix.gogo.runtime to the -buildpath in the bnd.bnd file.
42 OSGi Starter

-buildpath: \ osgi.annotation,\ org.osgi.service.component.annotations,\ com.example.eval.api;version=latest,\ org.apache.felix.gogo.runtime
-testpath: \ osgi.enroute.junit.wrapper, \ osgi.enroute.hamcrest.wrapper
Then add the @GogoCommand annotation to the EvalImpl class.
@GogoCommand(scope="simple", function={"eval"}) @Component public class EvalImpl implements Eval {...}
Running in the Playground
Open the bnd.bnd file of the com.example.playground project we created in the starting section.Select the [Run] tab. In this tab you can add the com.example.eval.simple.provider bundle tothe initial requirements. You should then [Resolve]. The calculated list of bundles should looksomething like:
org.apache.felix.gogo.command org.apache.felix.gogo.runtime org.apache.felix.gogo.shell com.example.playground org.apache.felix.scr org.osgi.util.function org.osgi.util.promise com.example.eval.api com.example.eval.simple.provider
The resolver that we used is the secret weapon of OSGi. It searches the repositories, including ourown code, for bundles that can work together. Each bundle contains metadata that describes whatrequirements it has to the outside world and what capabilities it can provide. In the end, the resolvercreates a set of bundles where all their requirements are satisfied. Or it gives up …
Notice how the resolver automatically added the com.example.eval.api bundle. It noticed that thiswas required by the com.example.eval.simple.provider bundle.
You should [Finish] the resolver and save the bnd.bnd file.
If the framework was still running, the new bundles will automatically be added. We should thenimmediately be able to run the command:
OSGi Starter 43

g! eval 1+2 3.0
Summary
In this section, we created a provider for the com.example.eval.api API. We used the Providertemplate to create an EvalImpl component. We extended the build path to contain the API projectand wrote a simplistic implementation.
We then tested the implementation with a Gogo command in the playground.
44 OSGi Starter
JUnit TestingTL;DR
In this section, we will create a whitebox JUnit test for our provider implementation. This test willnot depend on OSGi. It is a goal in OSGi projects to make the components testable without theoverhead of an OSGi framework. These JUnit tests are very cheap; using them extensively saves atremendous amount of time in later phases of the development process. JUnit tests are always runbefore code is released and when they fail, they prohibit the release of the project.
JUnit tests can also contain launchpad, a bnd library to test with an OSGi framework present.
Testing is one of those chores a developer has to do, not as much fun as some deep algorithmic code.However, it is likely one of the most effective ways to spend your time.
This section is not needed if you’re familiar with JUnit and launchpad.
JUnit
A provider should always have unit tests. Unit tests are white box tests. The test knows about theimplementation details and it can even see aspects of the components that are not part of the publicAPI.
The Provider Bundle template provided us with a template for the test class: EvalImplTest in thetest folder. This class is set up to run a JUnit 4 test:
package com.example.eval.simple.provider;
import static org.junit.Assert.assertNotNull; import org.junit.Test; import com.example.eval.simple.provider.EvalImpl;
public class EvalImplTest { @Test public void simple() { EvalImpl impl = new EvalImpl(); assertNotNull(impl); } }
The test folder is special. No code from the test folder should not end up in our bundle, nor shouldany of its dependencies be counted as imports. For this reason, the test folder is compiled with the-buildpath and the, -testpath. bnd guarantees that no test code, nor any of its dependencies in the-testpath, can accidentally end up in the bundle.
The template has already set up the -testpath with the JUnit dependencies. You can click on thebnd.bnd in the com.example.eval.simple.provider project, select the [Source] tab:
OSGi Starter 45

# # com.example.eval.simple.provider PROVIDER BUNDLE #
-buildpath: \ osgi.annotation,\ org.osgi.service.component.annotations,\ com.example.eval.api;version=latest
-testpath: \ osgi.enroute.junit.wrapper, \ osgi.enroute.hamcrest.wrapper
So let’s evaluate a simple expression:
package com.acme.prime.eval.provider; import static org.junit.Assert.assertEquals;
public class EvalImplTest { @Test public void testSimple() throws Exception { EvalImpl t = new EvalImpl(); assertEquals( 3.0, t.eval("1 + 2"), 0.0001D); } }
You can run the test by selecting the class name (EvalImplTest) or the method name (testSimple),call up the context menu, and select RunAs › JUnit Test. Do not select RunAs › Bnd OSGi TestLauncher (JUnit)
46 OSGi Starter

To run JUnit tests you can select the project in the explorer, the test folder, a package, a class, or amethod and call up the context menu and then RunAs › JUnit Test. It will then run all tests selectedbeneath that level.
Debugging
Since most code does not run the first time, we need to debug as well. You can set a breakpoint bydouble-clicking in the margin where you want the breakpoint to happen. A blue dot then appears.Just select the test method you want to run and do Debug As › JUnit Test.
The JUnit pane has many buttons that allow you to rerun tests, an incredibly powerful tool.
Launchpad
Launchpad is bnd library that makes it easy to test OSGi code in a normal plain JUnit environment.To use Launchpad, make sure to add the following entries to your -testpath in the bnd.bnd file:
OSGi Starter 47
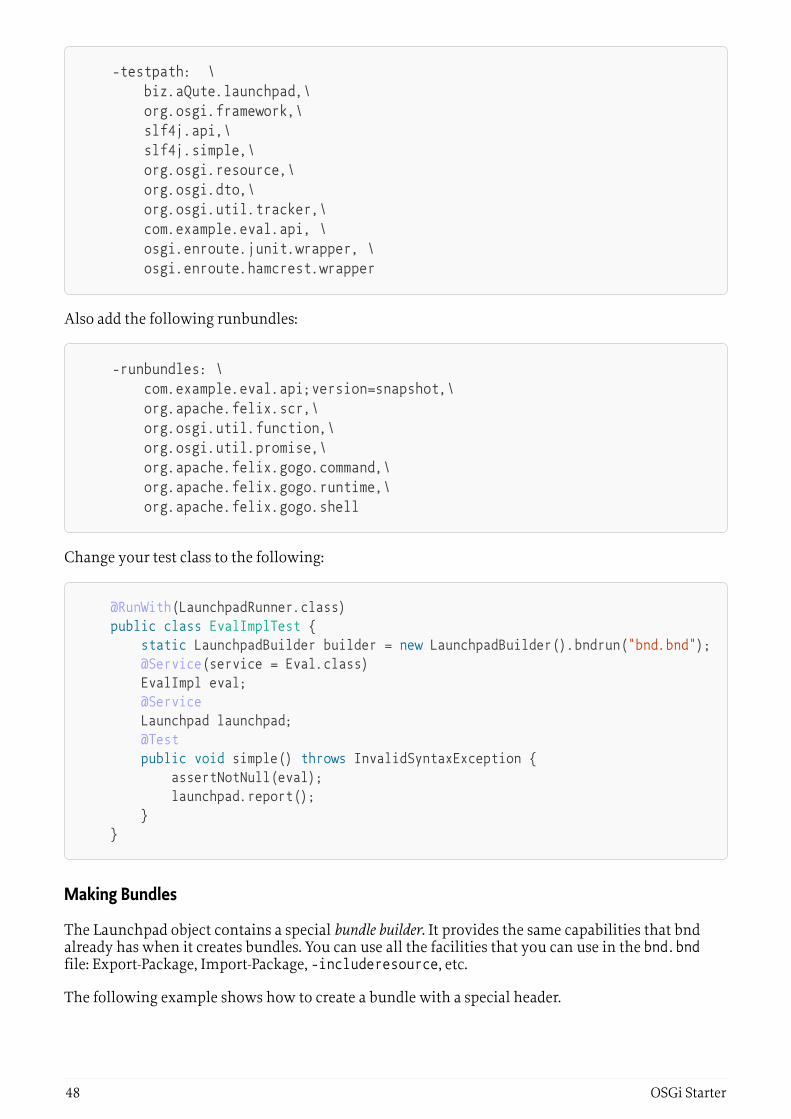
-testpath: \ biz.aQute.launchpad,\ org.osgi.framework,\ slf4j.api,\ slf4j.simple,\ org.osgi.resource,\ org.osgi.dto,\ org.osgi.util.tracker,\ com.example.eval.api, \ osgi.enroute.junit.wrapper, \ osgi.enroute.hamcrest.wrapper
Also add the following runbundles:
-runbundles: \ com.example.eval.api;version=snapshot,\ org.apache.felix.scr,\ org.osgi.util.function,\ org.osgi.util.promise,\ org.apache.felix.gogo.command,\ org.apache.felix.gogo.runtime,\ org.apache.felix.gogo.shell
Change your test class to the following:
@RunWith(LaunchpadRunner.class) public class EvalImplTest { static LaunchpadBuilder builder = new LaunchpadBuilder().bndrun("bnd.bnd"); @Service(service = Eval.class) EvalImpl eval; @Service Launchpad launchpad; @Test public void simple() throws InvalidSyntaxException { assertNotNull(eval); launchpad.report(); } }
Making Bundles
The Launchpad object contains a special bundle builder. It provides the same capabilities that bndalready has when it creates bundles. You can use all the facilities that you can use in the bnd.bndfile: Export-Package, Import-Package, -includeresource, etc.
The following example shows how to create a bundle with a special header.
48 OSGi Starter

@Test public void bundles() throws Exception { Bundle b = launchpad.bundle() .header("FooBar", "1") .install(); String string = b.getHeaders() .get("FooBar"); assertTrue(string.equals("1")); }
Interaction with Services
Clearly, the best part of Launchpad is that you can actually use real services and do not have to mockthem up. Many a test seems to mostly test their mocks.
With Launchpad, a real framework is running. You can inject services or register services.
In the following example, we register a service Foo and then verify if we can get it. We thenunregister the service and see that it no longer exists.
interface Foo {} @Test public void services() throws Exception { ServiceRegistration<Foo> register = launchpad.register(Foo.class, new Foo() { }); Optional<Foo> s = launchpad.waitForService(Foo.class, 100); assertTrue(s.isPresent()); register.unregister(); s = launchpad.waitForService(Foo.class, 100); assertFalse(s.isPresent()); }
The waitForService methods take a timeout in milliseconds. Their purpose is to provide someleeway during startup for the system to settle. If a service is expected to be registered then thegetService() methods can be used.
Injection
You can declare fields with the @Service annotation and they are injected. However, not all tests usethe same types so you can also injection manually. The injection can also happen as often as youwant.
OSGi Starter 49

@Test public void inject() throws Exception { ServiceRegistration<Foo> register = launchpad.register(Foo.class, new Foo() { }); class I { @Service Foo foo; @Service Bundle bundles[]; @Service BundleContext context; } I inject = new I(); launchpad.inject(inject); assertTrue(inject.bundles.length != 0); register.unregister(); }
Hello World
Although the of a Bundle-Activator is not recommended, they are singletons, a Bundle-Activator canbe very useful in test cases. With Launchpad it is not necessary to make a separate bundle, we canmake a bundle with an inner class as an activator.
We first define the Bundle Activator as a static public inner class of the test class:
public static class Activator implements BundleActivator { @Override public void start(BundleContext context) throws Exception { System.out.println("Hello World"); } @Override public void stop(BundleContext context) throws Exception { System.out.println("Goodbye World"); } }
The Launchpad class contains a special Bundle builder. This bundle builder is based on bnd and cando everything that bnd can do in a bnd.bnd file. In this case, we add the Bundle Activator and start it.
@Test public void activator() throws Exception { Bundle start = launchpad.bundle() .bundleActivator(Activator.class) .start(); }
When the test is run the output is:
50 OSGi Starter

Hello World Goodbye World
Tidbits
Launchpad is incredibly powerful but the class loading model used is quite tricky. The manual ofLaunchpad goes into some of these details. If you want to use Launchpad in anger, make sure youhave read this section.
OSGi Starter 51

External DependenciesTL;DR
In this section, we create another provider for the Eval API using Javascript via the Mozilla Rhinointerpreter. We will show how to add a dependency from Maven Central to your build and use it in aproject.
You can follow a short video about External Dependencies
Rhino
Rhino is a Javascript interpreter that we can use to evaluate the expressions a bit more professionalthan the regular expression hack we used in the com.example.eval.simple.provider. Looking atthe Rhino documentation, we can evaluate an expression with the following method:
@Override public double eval(String expression) throws Exception { Context cx = Context.enter(); try { Scriptable scope = cx.initStandardObjects(); Object result = cx.evaluateString(scope, expression, "?", 1, null); if (result instanceof Number) return ((Number) result).doubleValue(); return Double.NaN; } finally { Context.exit(); } }
Create a Rhino Provider Project
Create a project called com.example.eval.rhino.provider. It should be clear now why we chosethe naming pattern. All projects related to the Eval API are now close together in theBndtools/Package explorer.
Using the Provider Bundle template, you will be asked for the name for a component. UseRhinoEvalImpl for this name.
Create a Component
The template has already provided a component for you. The RhinoEvalImpl class should give thefollowing source code:
package com.example.eval.provider; import org.osgi.service.component.annotations.Component; @Component public class RhinoEvalImpl { }
52 OSGi Starter

You can modify it to:
package com.example.eval.rhino.provider;
import org.mozilla.javascript.Context; import org.mozilla.javascript.Scriptable; import org.osgi.service.component.annotations.Component;
import com.example.eval.api.Eval;
@Component public class RhinoEvalImpl implements Eval {
@Override public double eval(String expression) throws Exception { Context cx = Context.enter(); try { Scriptable scope = cx.initStandardObjects(); Object result = cx.evaluateString(scope, expression, "?", 1, null); if (result instanceof Number) return ((Number) result).doubleValue(); return Double.NaN; } finally { Context.exit(); } }
}
External Dependencies
This code will have errors. You should now be able to add the missing Eval interface by adding thecom.example.eval.api project to your -buildpath in the bnd.bnd file via the [Build] tab.
The com.example.eval.api was in the Workspace repository, so we could find it, but the Rhinodependencies cannot be found in the repositories. This mechanism, therefore, does not work here.
However, we can find this dependency on Maven Central:
OSGi Starter 53
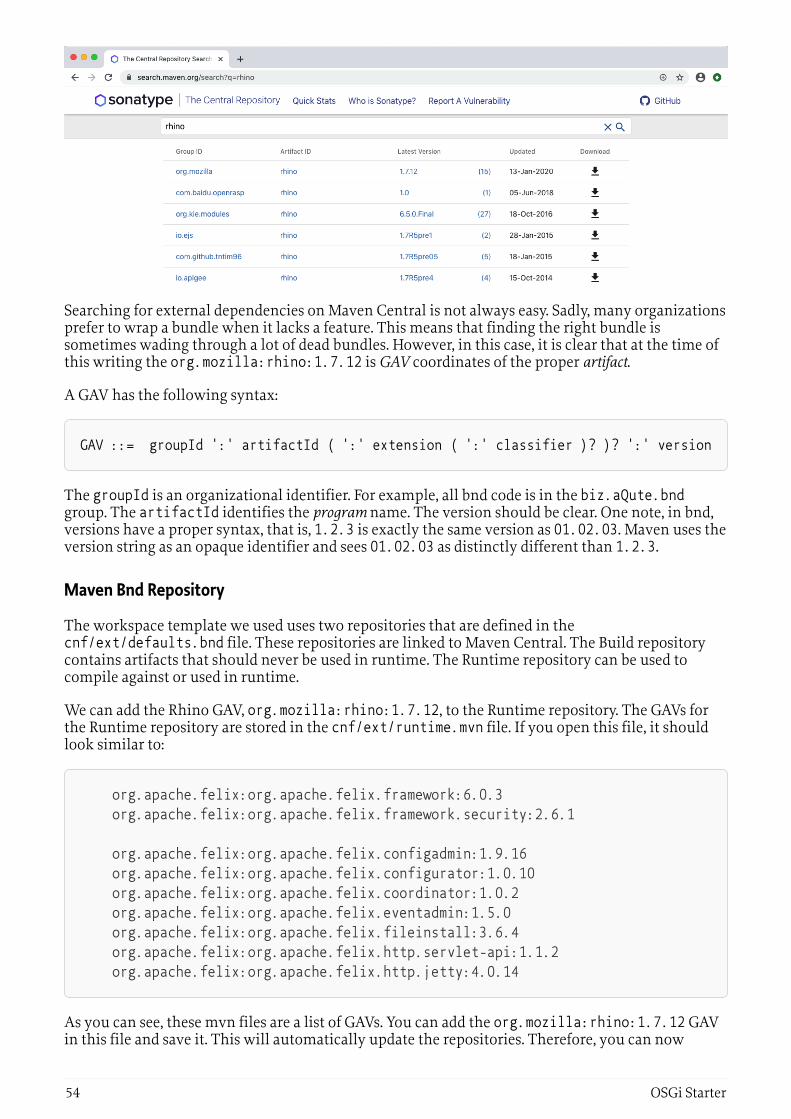
Searching for external dependencies on Maven Central is not always easy. Sadly, many organizationsprefer to wrap a bundle when it lacks a feature. This means that finding the right bundle issometimes wading through a lot of dead bundles. However, in this case, it is clear that at the time ofthis writing the org.mozilla:rhino:1.7.12 is GAV coordinates of the proper artifact.
A GAV has the following syntax:
GAV ::= groupId ':' artifactId ( ':' extension ( ':' classifier )? )? ':' version
The groupId is an organizational identifier. For example, all bnd code is in the biz.aQute.bndgroup. The artifactId identifies the program name. The version should be clear. One note, in bnd,versions have a proper syntax, that is, 1.2.3 is exactly the same version as 01.02.03. Maven uses theversion string as an opaque identifier and sees 01.02.03 as distinctly different than 1.2.3.
Maven Bnd Repository
The workspace template we used uses two repositories that are defined in thecnf/ext/defaults.bnd file. These repositories are linked to Maven Central. The Build repositorycontains artifacts that should never be used in runtime. The Runtime repository can be used tocompile against or used in runtime.
We can add the Rhino GAV, org.mozilla:rhino:1.7.12, to the Runtime repository. The GAVs forthe Runtime repository are stored in the cnf/ext/runtime.mvn file. If you open this file, it shouldlook similar to:
org.apache.felix:org.apache.felix.framework:6.0.3 org.apache.felix:org.apache.felix.framework.security:2.6.1
org.apache.felix:org.apache.felix.configadmin:1.9.16 org.apache.felix:org.apache.felix.configurator:1.0.10 org.apache.felix:org.apache.felix.coordinator:1.0.2 org.apache.felix:org.apache.felix.eventadmin:1.5.0 org.apache.felix:org.apache.felix.fileinstall:3.6.4 org.apache.felix:org.apache.felix.http.servlet-api:1.1.2 org.apache.felix:org.apache.felix.http.jetty:4.0.14
As you can see, these mvn files are a list of GAVs. You can add the org.mozilla:rhino:1.7.12 GAVin this file and save it. This will automatically update the repositories. Therefore, you can now
54 OSGi Starter

search in the repositories view.
We can now go to the bnd.bnd file and select the [Build] and add the org.mozilla.rhinodependency on the -buildpath. This will add it to the Bnd Bundle Path in the Bndtools Explorer.
In the RhinoEvalImpl.java source code we can now do the imports and make it compile correctly.
Gogo Command
To exercise this provider, we want to make it a Gogo command. We therefore need to addorg.apache.felix.gogo.runtime to the -buildpath in the bnd.bnd file. The source of the bnd.bndfile should look like:
-buildpath: \ osgi.annotation,\ org.osgi.service.component.annotations,\ com.example.eval.api;version=latest,\ org.apache.felix.gogo.runtime
-testpath: \ osgi.enroute.junit.wrapper, \ osgi.enroute.hamcrest.wrapper
Then add the @GogoCommand annotation to the EvalImpl class.
@GogoCommand(scope="rhino", function={"eval"}) @Component public class RhinoEvalImpl implements Eval {...}
Running in the Playground
Open the bnd.bnd file of the com.example.playground project that we created in the startingsection. Then select the [Run] tab. In this tab you can add the com.example.eval.rhino.providerbundle to the initial requirements.
Select auto in the popup menu on the left side of the [Resolve] button. The resolve will thenautomatically happen on saving the file.
Save the file.
OSGi Starter 55

If the framework was still running, the new bundles will automatically be added. We should thenimmediately be able to run the command:
g! rhino:eval 1+2 3.0
Summary
In this chapter we created a second provider to the Eval interface. For this provider, we had to find anexternal dependency on Maven Central. We found the Mozilla Rhino Javascript interpreter. Thisdependency was added to the runtime.mvn file. After saving this file, it became available to add it tothe -buildpath.
Last, a @GogoCommand annotation was added to the component to be able to test it in Gogo.
56 OSGi Starter

ApplicationTL;DR
Bndtools supports executable jars. These are JARs that contain all dependencies and can directly beexecuted by the Java VM. This section outlines the role of the application project and shows howyou can create such an executable JAR.
You may also want to take a look at Executable JARs.
Application Bundle
In OSGi, an application is a bundle that acts as the root of a runtime assembly. The application is abundle that is specific for some complete end-user functionality. A very important aspect of anapplication is that it is a leaf node in a dependency graph, it must never required by any otherbundle. In a perfect system, this is the only part that is not reusable.
For non-application bundles, it is recommended to minimize dependencies because everydependency makes it harder to use that bundle in different applications. However, the applicationbundle is free from these constraints. An application can be a web application but also for a specificdevice configuration. It is the thing that you deploy for your customers.
Applications should only require other code and rarely include any code since that code can never bereused. We, therefore, create a new project that is dedicated to only being an application, it does notcontain code.
Define an Application Project
Create a new project from the [empty] template:
com.example.application
In this project, create a file called application.bndrun. Open it, and go to the [Run] tab.
We now have to establish what needs to be a part of the application. For this example, we drag thefollowing bundles to the Initial Requirements list.
org.apache.felix.gogo.command org.apache.felix.gogo.shell com.example.eval.simple.provider
Select a Resolve mode of auto and then click the [Debug OSGi] to see if the application works.
____________________________ Welcome to Apache Felix Gogo g! eval 3+5 8.0 g!
OSGi Starter 57

Executable JAR
To deploy the application we need a file in a deployable format. One of the formats supported bybndrun files is the executable JAR. This format packs a framework and all necessary bundles in asingle JAR file. You can export this by adding the following in the bnd.bnd file in thecom.example.application project.
-dependson * -fixupmessages The JAR is empty -export application.bndrun
This will tell bnd to create an executable JAR whenever something changes. (The -dependson *makes sure that this is the last project built so that the dependencies are ready when we export themto the executable JAR.)
If you open the target directory in a shell, you now see a file application.bndrun.jar. This filecan directly be run from the command line.
$ cd com.example/com.application.playground $ java -jar target/application.bndrun.jar g! simple:eval 3+7 10 g!
Docker Image
Executable JARs are perfect for a Docker image.
FROM java:8-jdk-alpine ADD target/application.bndrun.jar / WORKDIR /data ENTRYPOINT ["java", "-jar", "/application.bndrun.jar"]
You can now build the docker image and run it.
58 OSGi Starter

$ docker build . Sending build context to Docker daemon 6.456MB Step 1/4 : FROM ggtools/java8 ---> f8f0aa8056f4 Step 2/4 : MAINTAINER [email protected] ---> Using cache ---> 0e918347c1f3 Step 3/4 : CMD java -jar application.bndrun.jar ---> Using cache ---> 9f16d98f80ca Step 4/4 : ADD target/application.bndrun.jar application.bndrun.jar ---> b1559881a6eb Successfully built b1559881a6eb $ docker run -i b1559881a6eb ____________________________ Welcome to Apache Felix Gogo g! rhino:eval 41+1 42.0 g!
Summary
In this chapter we learned about the concept of executable JARs: JARs that contain the OSGiframework and all necessary bundles. We then looked at how to build such a JAR and used it tocreate a Docker image.
OSGi Starter 59

GradleTL;DR
If you are a user of a bnd workspace and there is build master that maintains the low level detailsthen you can skip this section. This is only for build masters.
Bndtools uses Gradle as the continuous integration build tool. Every bnd workspace can automaticallybe built by Gradle using straight generic templates. The output of this build is identical to theartifacts built in Eclipse or Intellij.
The templates use gradlew, which is a small script that fetches the correct version of Gradle. Youcan start a build typing ./gradlew clean build, getting a list of the tasks is ./gradlew tasks.
You may also want to look at Gradle Integration
Gradle Setup
The workspace template that was used in an earlier session provided a bnd workspace to Bndtools.However, it also included setup for Gradle. Gradle is one of the primary build tools, nowadayscompeting with maven for primacy. The main difference is that Maven is very declarative whileGradle allows fine-grained control using the Groovy or Kotlin language.
This makes it possible to build all the bundles in the workspace, and the application, via thecommand-line. The primary purpose of this is to build the artifacts on a different system than thedeveloper’s. Before continuous integration on external servers was the norm, many projects foundthat the application worked on one developer’s machine but not necessarily on another due to adifference in configuration.
Building
The workspace is set up to build all projects in the workspace directory using the Gradle bnd plugin.This plugin takes the bnd files and tells Gradle how to compile and build the artifacts.
Therefore, to build the workspace, you can do the following:
$ cd com.example $ ./gradlew clean build ..... BUILD SUCCESSFUL in 4s 13 actionable tasks: 13 executed
The bnd Gradle plugin will build exactly the same artifacts as the Eclipse IDE.
Lets try out how the application runs.
60 OSGi Starter

$ java -jar com.example.application/target/application.bndrun.jar ____________________________ Welcome to Apache Felix Gogo g! eval 41+1 42.0
Gradle Tidbits
• There is no need to install Gradle. The workspace template contains two script (gradlew forMacOS & Linux, and gradlew.bat for Windows) that will download an appropriate Gradleexecutable.
• You can find out the tasks you can run with ./gradlew tasks
• By default, Gradle compiles in the same directory as Eclipse/Intellij. This means that they cansometimes override each other’s files. This is only a problem if you build locally with Gradle,which is generally not necessary. If Eclipse is confused, it is likely a Gradle build that destroyedits files.
Using Gradle
The default workspace build with Gradle is driven by the bnd configuration files. Since bnd alsoruns inside Eclipse and Intellij, there is no need for special Gradle configuration. However, there aresituations where you need to generate sources or run some special Gradle plugin. For this reason,each project directory can have a build.gradle file that extends the Gradle setup. This can be alifesaver. However, these gradle files are not run inside the IDE. It is therefore recommended to limitthe use of this facility to cases when there is no bnd solution.
When to Use
The primary purpose of Gradle is to do the CI build on a remote server. However, I’ve noticed that alot of developers do local builds with Gradle, often from the distrust that the CI build might not bethe same. The bnd team sees any discrepancy between the Eclipse IDE and the Gradle build as a highpriority error and thus they are rare. Trust Eclipse …
OSGi Starter 61
GitTL;DR
If you have a build master that sets up the workspace for you then this section unnecessary for you.The following sections are only intended for people that need to maintain workspaces.
Currently the workspace is local on our laptop. Today, by far the most widespread solution for aSource Control Management System (SCMS) is Git. In this section we’ll connect the com.exampleworkspace to Github and use the Github continuous integration servers (Github Actions) to build it.
You may also want to look at Github & Actions.
Fixups
Git does not store empty folders. This is a nuisance for Eclipse since Eclipse will not build a project ifa source folder is missing because it was empty. Since on your local system the folder is alreadycreated, there is no warning or error. However, when someone else pulls your repository, it will bemissing and the workspace won’t build. So you should check that all source folders are not empty.An easy fix is to add an empty .gitignore file. For example:
$ touch src/test/java/.gitignore
Init
The following command initializes git for the repository.
$ git init; \ git add .; \ git commit -m "first commit"
The workspace directory is now a git workspace.
Store on Github
To safeguard our work, we want to store it in a remote repository. Github is free. If you do not havean account already, create one. Then create a new repository with the name com.example. Youshould not initialize the repository with a `.gitignore file. The readme file is optional.
After you’ve created the repository, you get a window that looks more or less like:
62 OSGi Starter

We have an existing repository so you should copy the lines after …or push an existing repositoryfrom the command line.
This should be similar to the following but instead of pkriens you should use your Github username.
$ git remote add origin [email protected]:pkriens/com.example.git; \ git push -u origin master 54 files changed, 2150 insertions(+) create mode 100644 .gitattributes create mode 100644 .github/workflows/cibuild.yml create mode 100644 .gitignore create mode 100644 .gradle-wrapper/gradle-wrapper.jar create mode 100644 .gradle-wrapper/gradle-wrapper.properties create mode 100644 .travis.yml create mode 100644 LICENSE create mode 100644 cnf/.classpath ........ create mode 100755 gradlew create mode 100644 gradlew.bat create mode 100644 settings.gradle $
If you can now go to the Github repository at https://github.com/pkriens/com.example (don’t) forgetto change to your user name).
OSGi Starter 63

Github Workflow Actions
Reliable software must always be built on a server. Github has support for Continuous Integration(CI) with their Actions feature. By adding a workflow configuration to your workspace, your codecan automatically be built. Our template already contained such a workflow.
The .github/workflow directory contains a file called build.yml:
64 OSGi Starter
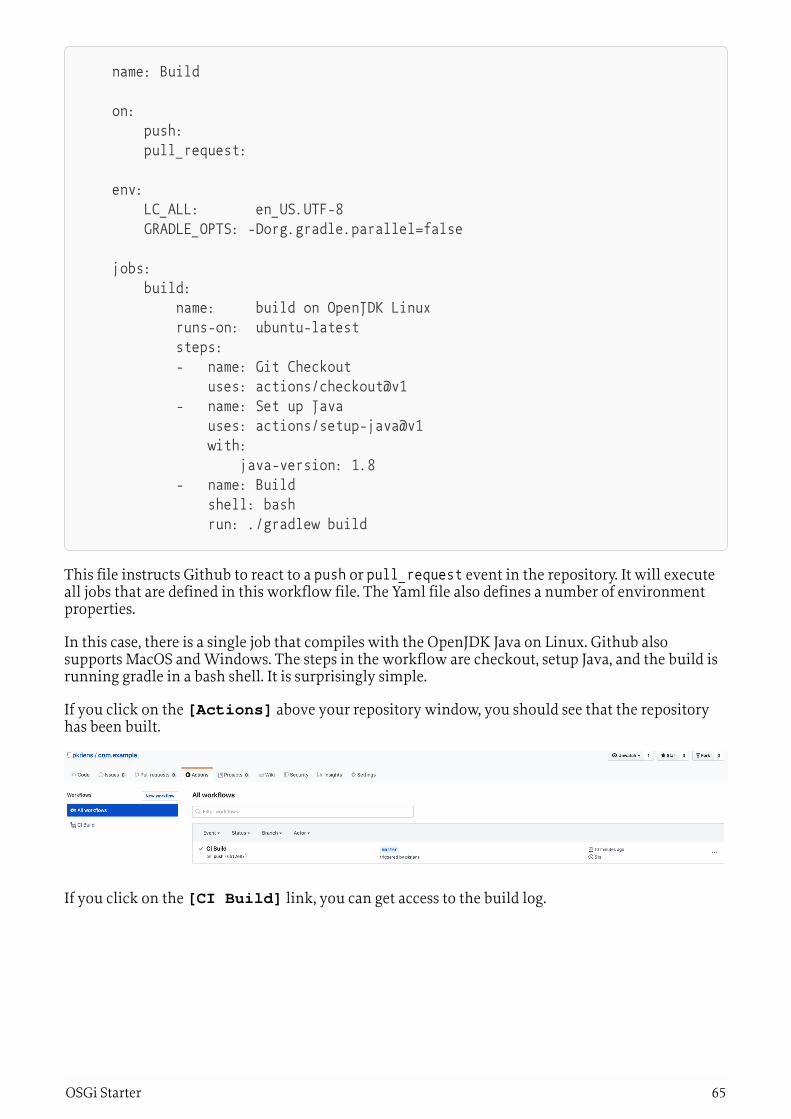
name: Build
on: push: pull_request:
env: LC_ALL: en_US.UTF-8 GRADLE_OPTS: -Dorg.gradle.parallel=false
jobs: build: name: build on OpenJDK Linux runs-on: ubuntu-latest steps: - name: Git Checkout uses: actions/checkout@v1 - name: Set up Java uses: actions/setup-java@v1 with: java-version: 1.8 - name: Build shell: bash run: ./gradlew build
This file instructs Github to react to a push or pull_request event in the repository. It will executeall jobs that are defined in this workflow file. The Yaml file also defines a number of environmentproperties.
In this case, there is a single job that compiles with the OpenJDK Java on Linux. Github alsosupports MacOS and Windows. The steps in the workflow are checkout, setup Java, and the build isrunning gradle in a bash shell. It is surprisingly simple.
If you click on the [Actions] above your repository window, you should see that the repositoryhas been built.
If you click on the [CI Build] link, you can get access to the build log.
OSGi Starter 65

66 OSGi Starter

Release to Remote RepositoryTL;DR
If you are a user of a bnd workspace and there is build master that maintains the low level detailsthen you can skip this section. This is only for build masters.
To be able to share bundles, it is necessary to release a workspace to a remote repository. This chaptershows how the bundles in a workspace can be released to Sonatype’s Open Source repository. Youwill be shown how to do snapshot releases and releasing a final release to Maven Central usingstaging.
Maven Repositories
Maven repositories have become the de-facto standard in our industry. Maven Central is the largestopen source repository for Java. Therefore, bnd has extensive support for releasing to Maven Nexusand Artifactory repositories.
Maven has the concept of snapshots. These are revisions that are not released yet. Whether an artifactin a build is a snapshot or a release is defined by the version. If the version ends with SNAPSHOT, bndwill assume it must be released as a snapshot version, otherwise it will released it as a final release.
The normal process is then to release a snapshot version. Therefore, in cnf/build.bnd, change theBundle-Version into a snapshot version.
Bundle-Version 1.0.0.SNAPSHOT
We also want to make sure the version for Maven is consistently formatted. In OSGi, versions can bewritten differently but are treated as the same version whereas in Maven a version is an opaqueidentifier.
-pom: version=${versionmask;===s;${@version}}
The ${@version} is set by the pom generator when this macro is expanded. It is the versioncalculated for the bundle itself. This allows us to slightly tweak the version. We are using the major,minor, and micro part but then only add the snapshot part if present. We ignore the qualifier. This isa timestamp and does not work well with Maven.
A release to Maven Central will require staging. With staging, a temporary repository is created withall the artifacts. The files are then signed in that repository. Before you can release to Maven Central,a verification process will validate each artifact. If the verification process accepts the temporaryrepository, it can be promoted to Maven Central.
Releasing should not be done from a local developer’s machine so as to avoid depending on a localset up. The best place to release is from a remote service. In this example, we will use Github Actionsto release to the https://oss.sonatype.org server.
Release Repository
To release, we need a release repository. This is a Maven Bnd Repository that is listed in the-releaserepo instructions. Enter the following information in the cnf/build.bnd file.
OSGi Starter 67
-plugin.8.nexus: \ aQute.bnd.repository.maven.provider.MavenBndRepository; \ snapshotUrl = 'https://oss.sonatype.org/content/repositories/snapshots/'; \ releaseUrl = 'https://oss.sonatype.org/service/local/staging/deploy/maven2/'; \ noupdateOnRelease=true; \ name="Sonatype"
-releaserepo Sonatype
Authentication
Sonatype recommends rather strongly to create an authentication token. To create such a token, youneed to login to Sonatype Nexus. This requires an account that you can register on their website.
Group Id
To get a username and a password, you need to claim a groupid. The group id is a unique name foryour part of the repository. In this example, we’ll use biz.aQute.example since I own thebiz.aQute group prefix. However, you will need your own group id.
We need to register the group id with bnd in the cnf/build.bnd file.
-groupid biz.aQute.example
Username & Password
Once you are logged in, click on your user name in the right top, and select [Profile]. Thenselect the pop menu in the left [User Token]. There you can create a user token. This consists oftwo parts, a user name and a password. In the rest of the text, these parts are calledSONATYPE_USERNAME and SONATYPE_PASSWORD.
Connection Settings
Since we will be releasing from a continuous integration server, we cannot use the localauthentication provided by the bnd connection settings. These settings only works locally on yourown computer. However, we can also define the connection settings also in the bnd file. Sincepasswords cannot be stored in the source code for obvious reason, we are going to assume that thesesecrets are available as environment variables. Environment variables allow us to test the releaseprocess locally but they can also be used by Github Actions, Travis, and other continuousintegration services.
To pass the environment variables to bnd, we need the -connection-settings instruction incnf/build.bnd.
68 OSGi Starter

-connection-settings: \ server; \ id=https://oss.sonatype.org; \ username=${env;SONATYPE_USERNAME;}; \ password=${env;SONATYPE_PASSWORD;}, \ bnd
Local Test Snapshots
Everything is now set up to release a snapshot to the Sonatype snapshot repository. To test this, wecan go to the shell and use gradlew to release.
$ cd com.example $ export SONATYPE_USERNAME=... $ export SONATYPE_PASSWORD=... $ ./gradlew clear release
This will release the whole workspace to the snapshot repository.
Looking at the output, we see that the com.example.playground project was also built. We candisable releasing this project by overriding the -releaserepo in the bnd.bnd file of thecom.example.playground project.
-releaserepo:
Github Actions
Github automatically builds both PRs and all commits to the master branch. For PR’s we want totrigger a build so we can run the tests and validate the PR. However, if we commit to master, wewant to run the release process. The template gave us the following workflow document in.github/workflows/build.yml in the root of our workspace:
OSGi Starter 69

name: CI Build
on: push: pull_request:
env: LC_ALL: en_US.UTF-8 GRADLE_OPTS: -Dorg.gradle.parallel=false
jobs: build: name: build on OpenJDK Linux runs-on: ubuntu-latest steps: - name: Git Checkout uses: actions/checkout@v1 - name: Set up Java uses: actions/setup-java@v1 with: java-version: 1.8 - name: Build shell: bash run: ./gradlew build
We can modify this to only run on a non-master commit. We can then add a second workflow filefor commits on the master branch.
For the original file, we only need to change the event section that is listed under the on: attribute:
on: push: branches-ignore: ['master'] pull_request:
Github Secrets
We now need to register our SONATYPE_USERNAME and SONATYPE_PASSWORD with Github.You can add these secrets via the Settings of the repository. If you select the repository Settingspage and then select the Secrets entry.
In the Secrets section you can add the SONATYPE_USERNAME and SONATYPE_PASSWORDsecrets.
70 OSGi Starter

We will now have to add the environment variables to the .github/workflows/build.yml file.
env: LC_ALL: en_US.UTF-8 GRADLE_OPTS: -Dorg.gradle.parallel=false SONATYPE_USERNAME: {{ secrets.SONATYPE_USERNAME }} SONATYPE_PASSWORD: {{ secrets.SONATYPE_PASSWORD }}
Release Workflow
From now on, this will not run when we commit on the master branch. For this, we add a secondworkflow file that is called .github/workflows/release.yml. This is a copy of the.github/workflows/build.yml with only the on, env, and run section slightly changed.
OSGi Starter 71
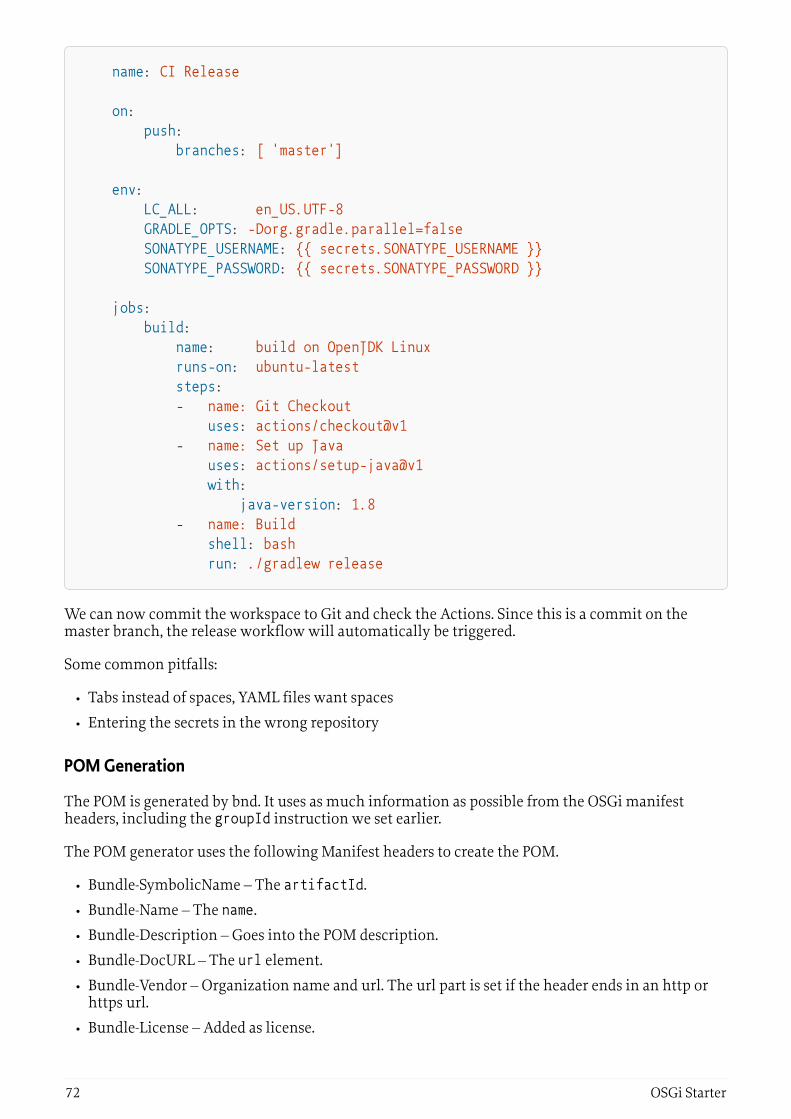
name: CI Release
on: push: branches: [ 'master']
env: LC_ALL: en_US.UTF-8 GRADLE_OPTS: -Dorg.gradle.parallel=false SONATYPE_USERNAME: {{ secrets.SONATYPE_USERNAME }} SONATYPE_PASSWORD: {{ secrets.SONATYPE_PASSWORD }}
jobs: build: name: build on OpenJDK Linux runs-on: ubuntu-latest steps: - name: Git Checkout uses: actions/checkout@v1 - name: Set up Java uses: actions/setup-java@v1 with: java-version: 1.8 - name: Build shell: bash run: ./gradlew release
We can now commit the workspace to Git and check the Actions. Since this is a commit on themaster branch, the release workflow will automatically be triggered.
Some common pitfalls:
• Tabs instead of spaces, YAML files want spaces
• Entering the secrets in the wrong repository
POM Generation
The POM is generated by bnd. It uses as much information as possible from the OSGi manifestheaders, including the groupId instruction we set earlier.
The POM generator uses the following Manifest headers to create the POM.
• Bundle-SymbolicName – The artifactId.
• Bundle-Name – The name.
• Bundle-Description – Goes into the POM description.
• Bundle-DocURL – The url element.
• Bundle-Vendor – Organization name and url. The url part is set if the header ends in an http orhttps url.
• Bundle-License – Added as license.
72 OSGi Starter
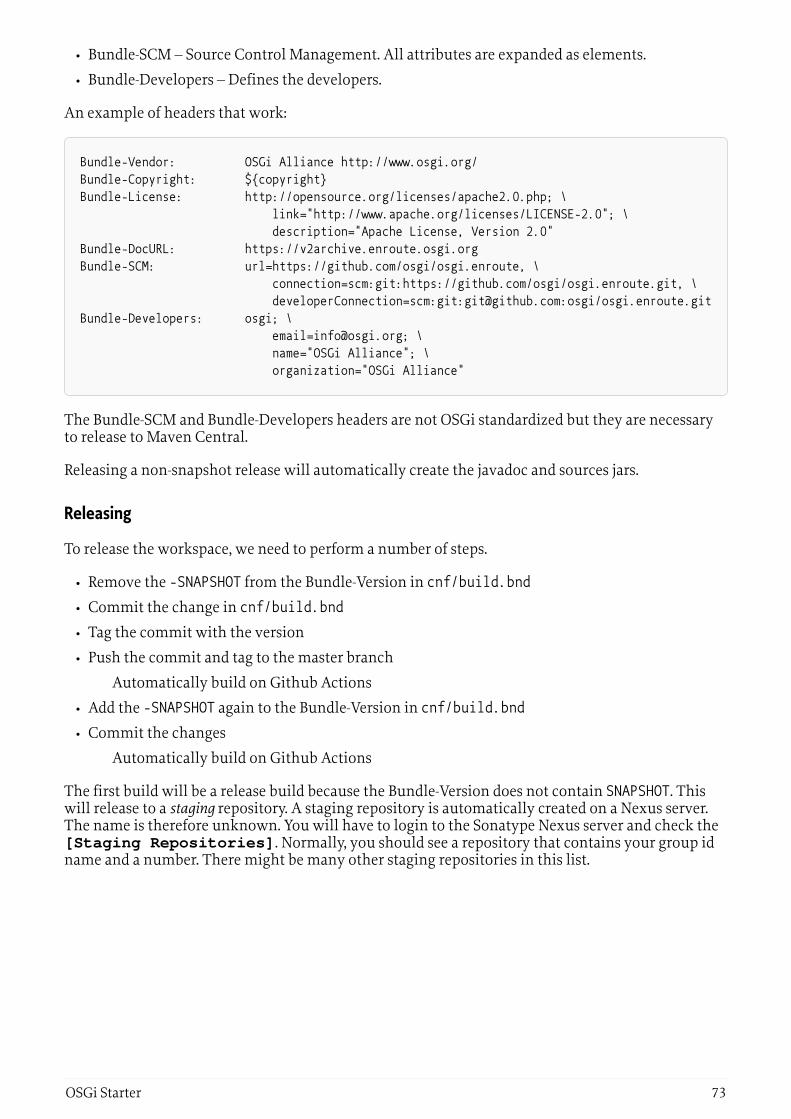
• Bundle-SCM – Source Control Management. All attributes are expanded as elements.
• Bundle-Developers – Defines the developers.
An example of headers that work:
Bundle-Vendor: OSGi Alliance http://www.osgi.org/Bundle-Copyright: ${copyright}Bundle-License: http://opensource.org/licenses/apache2.0.php; \ link="http://www.apache.org/licenses/LICENSE-2.0"; \ description="Apache License, Version 2.0"Bundle-DocURL: https://v2archive.enroute.osgi.orgBundle-SCM: url=https://github.com/osgi/osgi.enroute, \ connection=scm:git:https://github.com/osgi/osgi.enroute.git, \ developerConnection=scm:git:[email protected]:osgi/osgi.enroute.gitBundle-Developers: osgi; \ [email protected]; \ name="OSGi Alliance"; \ organization="OSGi Alliance"
The Bundle-SCM and Bundle-Developers headers are not OSGi standardized but they are necessaryto release to Maven Central.
Releasing a non-snapshot release will automatically create the javadoc and sources jars.
Releasing
To release the workspace, we need to perform a number of steps.
• Remove the -SNAPSHOT from the Bundle-Version in cnf/build.bnd
• Commit the change in cnf/build.bnd
• Tag the commit with the version
• Push the commit and tag to the master branch
◦ Automatically build on Github Actions
• Add the -SNAPSHOT again to the Bundle-Version in cnf/build.bnd
• Commit the changes
◦ Automatically build on Github Actions
The first build will be a release build because the Bundle-Version does not contain SNAPSHOT. Thiswill release to a staging repository. A staging repository is automatically created on a Nexus server.The name is therefore unknown. You will have to login to the Sonatype Nexus server and check the[Staging Repositories]. Normally, you should see a repository that contains your group idname and a number. There might be many other staging repositories in this list.
OSGi Starter 73

Signing
To release to Maven Central it is necessary to sign the files in the staging repository. The easiest wayto do this is with the bnd command line tool. The bnd nexus command can retrieve the files from therepositories, calculate the signature, and then upload the signatures.
The command uses the URL to the staging repository. This is generally a name with your mangledgroup id prefix and a number to make it unique. You can find this name on the Sonatype OSS Nexusunder the Staging Repositories as discussed earlier. For example, bizaqute-1387. This is url is for the-u option.
You will need a GPG and a key for signing the artifacts.
$ bnd nexus -u https://oss.sonatype.org/service/local/repositories/bizaqute-1387 sign Passsword for pgp: ************
The sign command will download all files and sign them locally. It then uploads the asc file tonexus. This keeps your GPG key local.
Closing the Staging Repository
On the Sonatype Nexus you can now close the repository. This will trigger a validation. If thissucceeds you can release the staging repository. This will copy your files to Maven Central.
The validation process can be picky.
74 OSGi Starter
Summary
In this chapter we created a Github Actions set up that released snapshots to the Sonatype OSSrepository for every commit on the master branch. We then showed how to create a release versionin a Sonatype staging repository.
OSGi Starter 75
The EndYou’ve reached the end of this tour. If you’ve tried out all the examples then you should be able toget started with your own workspace and take advantage of OSGi.
If you’ve a relatively small workspace with straightforward repositories then this book shouldprobably suffice. The bnd manual has always been bnd’s weak point but it is definitely improving.There are an extensive instruction index and macro index that are actually becoming quite useful.
A tremendously valuable resource is the bnd workspace itself. This is a complex workspace that usesa large number of state of the art bnd features itself. The Bndtools mailing list can be used to askquestions. Some simpler workspaces are for example aQute util and Bndtools Support for RemoteServices Development. If you’re an OSGi member, look at the OSGi build, it is also based onBndtools.
If you’re evaluating Bndtools to be used as replacement for a non-trivial system then you mightwant to contact me. Converting a large build always contains many pitfalls and we might be able tosave you a lot of work. Especially when you’re using PDE and want to enjoy OSGi, we could help alot since we developed some software to automate the conversion.
Last but not least, I am working on a book that dives much deeper into the OSGi aspects.Unfortunately, most of the OSGi books in the market are old and do not leverage DeclarativeServices. If you follow me on Twitter at @pkriens then I’ll keep you posted.
Peter Kriens
76 OSGi Starter