owner’s manualstatic.garmin.com/pumac/gps_12h_om_en.pdf · the compass uses gps (course over...
TRANSCRIPT

GPS 12H
Owner’s Manual
September 2015 Printed in Taiwan 190-01956-00_0A

All rights reserved. Under the copyright laws, this manual may not be copied, in whole or in part, without the written consent of Garmin. Garmin reserves the right to change or improve its products and to make changes in the content of this manual without obligation to notify any person or organization of such changes or improvements. Go to www.garmin.com for current updates and supplemental information concerning the use of this product.Garmin® and the Garmin logo are trademarks of Garmin Ltd. or its subsidiaries, registered in the USA and other countries. Garmin Connect™, Garmin Express™, and HomePort™ are trademarks of Garmin Ltd. or its subsidiaries. These trademarks may not be used without the express permission of Garmin.NMEA® is a registered trademark of the National Marine Electronics Association. Mac® is a trademark of Apple Inc., registered in the U.S. and other countries. Windows® and Windows NT® are registered trademarks of Microsoft Corporation in the United States and other countries.
Table of ContentsGetting Started............................................................... 1Device Overview......................................................................... 1Keys............................................................................................ 1Battery Information..................................................................... 1
Installing AA Batteries ............................................................ 1Turning On the Device................................................................ 1Waypoints, Routes, and Tracks.................................... 1Waypoints ................................................................................... 1
Creating a Waypoint .............................................................. 1Navigating to a Waypoint ....................................................... 1Editing a Waypoint ................................................................. 1Sorting and Finding Waypoints in a List ................................ 1Deleting a Waypoint ............................................................... 1
Routes........................................................................................ 2Creating a Route.................................................................... 2Editing the Name of a Route.................................................. 2Editing a Route...................................................................... 2Viewing a Route on the Map.................................................. 2Deleting a Route.................................................................... 2Reversing a Route................................................................. 2
Tracks......................................................................................... 2Tracks Settings...................................................................... 2Viewing the Current Track..................................................... 2Saving the Current Track....................................................... 2Clearing the Current Track.....................................................2Deleting a Track..................................................................... 2
Using the Main Pages.................................................... 2Navigating with the Map............................................................. 2
Changing the Map Orientation............................................... 2Measuring Distance on the Map............................................ 2Map Settings.......................................................................... 2
Compass.....................................................................................3Navigating with the Compass................................................ 3Highway Mode....................................................................... 3Data Fields............................................................................. 3
Satellite Page..............................................................................3Adjusting the Contrast on the Satellite Page......................... 3
Trip Computer ............................................................................. 3Customizing the Instrument Page Data Fields ...................... 3
Additional Main Menu Tools ....................................................... 3Customizing Your Device.............................................. 3System Settings.......................................................................... 3
Serial Interface Settings......................................................... 3Display Settings.......................................................................... 3Setting the Device Tones............................................................3Setting Up Marine Alarms........................................................... 3
Marine Settings...................................................................... 3Resetting Data............................................................................ 3Changing the Units of Measure.................................................. 3Time Settings.............................................................................. 4Position Format Settings.............................................................4Routing Settings......................................................................... 4Device Information......................................................... 4Specifications..............................................................................4Appendix......................................................................... 4Registering Your Device............................................................. 4Support and Updates.................................................................. 4
Setting Up Garmin Express................................................... 4Viewing Device Information........................................................ 4Contacting Garmin Product Support ........................................... 4Maximizing Battery Life ...............................................................4
Long-Term Storage................................................................ 4
Turning off GLONASS........................................................... 4Adjusting the Backlight ...........................................................4Adjusting the Backlight Timeout .............................................4
Data Management ...................................................................... 4File Types.............................................................................. 4Connecting the Device to Your Computer ............................. 4Transferring Files to Your Device.......................................... 5Deleting Files ......................................................................... 5Disconnecting the USB Cable ................................................5
Attaching the Wrist Strap............................................................ 5Device Care................................................................................ 5
Cleaning the Device............................................................... 5Troubleshooting.......................................................................... 5
Resetting the Device.............................................................. 5Restoring All Default Settings................................................ 5
Index................................................................................ 6
Table of Contents i

Getting Started WARNING
See the Important Safety and Product Information guide in the product box for product warnings and other important information.
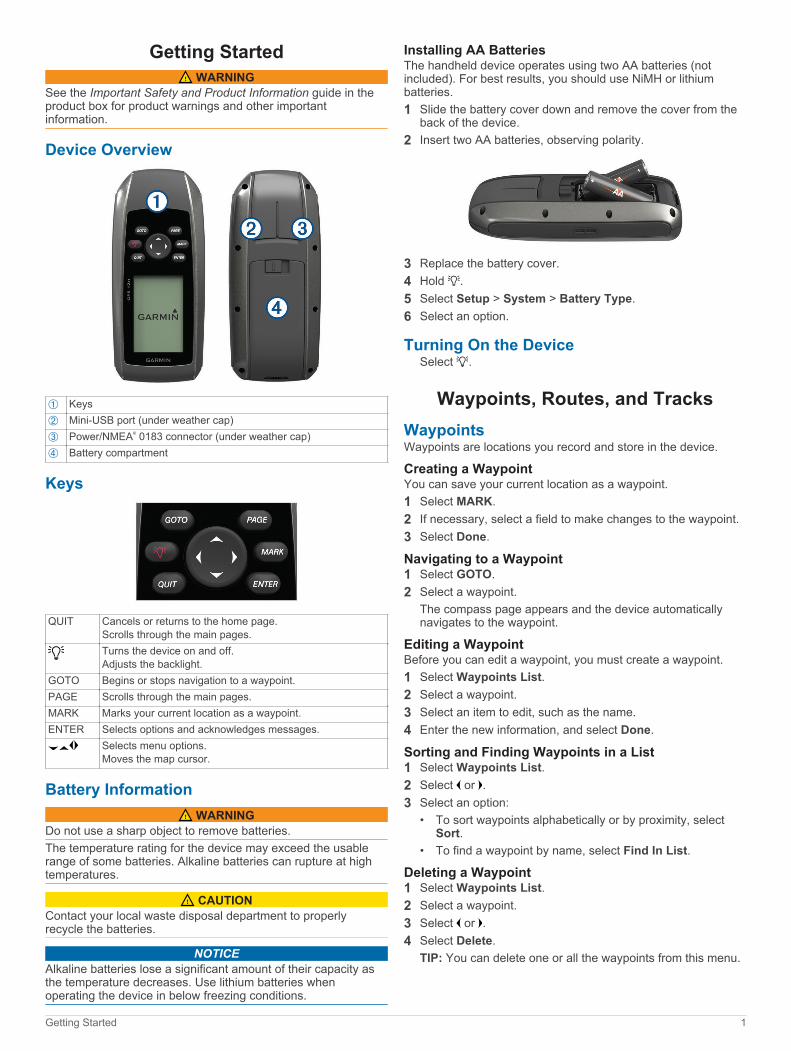
Device Overview
À
KeysÁ
Mini-USB port (under weather cap)Â
Power/NMEA® 0183 connector (under weather cap)Ã
Battery compartment
Keys
QUIT Cancels or returns to the home page.Scrolls through the main pages.Turns the device on and off.Adjusts the backlight.
GOTO Begins or stops navigation to a waypoint.PAGE Scrolls through the main pages.MARK Marks your current location as a waypoint.ENTER Selects options and acknowledges messages.
Selects menu options.Moves the map cursor.
Battery Information WARNING
Do not use a sharp object to remove batteries.The temperature rating for the device may exceed the usable range of some batteries. Alkaline batteries can rupture at high temperatures.
CAUTIONContact your local waste disposal department to properly recycle the batteries.
NOTICEAlkaline batteries lose a significant amount of their capacity as the temperature decreases. Use lithium batteries when operating the device in below freezing conditions.
Installing AA BatteriesThe handheld device operates using two AA batteries (not included). For best results, you should use NiMH or lithium batteries.1 Slide the battery cover down and remove the cover from the
back of the device.2 Insert two AA batteries, observing polarity.
3 Replace the battery cover.4 Hold .5 Select Setup > System > Battery Type.6 Select an option.
Turning On the DeviceSelect .
Waypoints, Routes, and TracksWaypointsWaypoints are locations you record and store in the device.
Creating a WaypointYou can save your current location as a waypoint.1 Select MARK.2 If necessary, select a field to make changes to the waypoint.3 Select Done.
Navigating to a Waypoint1 Select GOTO.2 Select a waypoint.
The compass page appears and the device automatically navigates to the waypoint.
Editing a WaypointBefore you can edit a waypoint, you must create a waypoint.1 Select Waypoints List.2 Select a waypoint.3 Select an item to edit, such as the name.4 Enter the new information, and select Done.
Sorting and Finding Waypoints in a List1 Select Waypoints List.2 Select or .3 Select an option:
• To sort waypoints alphabetically or by proximity, select Sort.
• To find a waypoint by name, select Find In List.
Deleting a Waypoint1 Select Waypoints List.2 Select a waypoint.3 Select or .4 Select Delete.
TIP: You can delete one or all the waypoints from this menu.
Getting Started 1

RoutesA route is a sequence of waypoints or locations that leads you to your final destination.
Creating a Route1 Select Routes > Create Route > Select First Point.2 Select a category.3 Select the first point in the route.4 Select Use.5 Select Select Next Point to add additional points to the
route.6 Select QUIT to save the route.
Editing the Name of a Route1 Select Routes.2 Select a route.3 Select Change Name.4 Enter the new name.
Editing a Route1 Select Routes.2 Select a route.3 Select Edit Route.4 Select a point.5 Select an option:
• To view the point on the map, select Review.• To change the order of the points on the route, select
Move Up or Move Down.• To insert an additional point on the route, select Insert.
The additional point is inserted before the point you are editing.
• To remove the point from the route, select Remove.6 Select QUIT to save the route.
Viewing a Route on the Map1 Select Routes.2 Select a route.3 Select View Map.
Deleting a Route1 Select Routes.2 Select a route.3 Select Delete Route.
Reversing a RouteYou can switch the start and end points of your route to navigate the route in reverse.1 Select Routes.2 Select a route.3 Select Reverse Route.
TracksA track is a recording of your path. The track log contains information about points along the recorded path, including time, location, and elevation for each point.
Tracks SettingsSelect Setup > Tracks.Record: Sets a type of track log recording. The Wrap option
records new track log information over old track log information when the active track log is full. The Fill option stops recording when the track log is full.
Record Method: Sets a track recording method. The Auto option records the tracks at a variable rate to create an optimum representation of your tracks.
Recording Interval: Sets a track log recording rate. Recording points more frequently creates a more-detailed track, but fills the track log faster.
Viewing the Current TrackSelect Track Manager > Current Track > View Map.
Saving the Current Track1 Select Track Manager > Current Track.2 Select an option.
• Select Save Track to save the current track.• Select Save Portion to save a segment of the current
track.3 Enter a track name.4 Select OK.
Clearing the Current TrackSelect Track Manager > Current Track > Clear Current Track.
Deleting a Track1 Select Track Manager.2 Select a track.3 Select Delete.
Using the Main PagesThe information needed to operate this device is found on the main menu, map, compass, and trip computer pages.1 Select PAGE.2 Select the active main page.
Navigating with the Map1 From the map, select Pan.
A triangle represents your location on the map. As you travel, the triangle moves and leaves a track log (trail).
2 Use the arrow keys to move the pointer.
Changing the Map Orientation1 Select Opt. > Setup Map > Orientation.2 Select an option:
• To show north at the top of the page, select North Up.• To show your current direction of travel at the top of the
page, select Track Up.
Measuring Distance on the MapYou can measure the distance between two locations.1 From the map, select a location.2 Select Opt. > Measure Distance.3 Move the pin to another location on the map.
The distance appears at the bottom of the screen and on the measure line.
Map SettingsFrom the map, select MARK > Setup Map.Orientation: Adjusts how the map is shown on the page. The
North Up option shows north at the top of the page. The Track Up option shows a top-down view with your current direction of travel toward the top of the page.
Advanced Map SettingsFrom the map, select MENU > Setup Map > Advanced Map Setup.
2 Using the Main Pages

Auto Zoom: Enables the device to automatically select the zoom level for optimal use of your map. When the Off option is selected, you must zoom in or out manually.
Select User Waypoint Zoom Level: Sets the zoom level at which waypoints appear on the map. Waypoints do not appear when the map zoom level is higher than the selected level.
Select User Waypoint Text Size: Sets the text size for waypoints on the map.
CompassThe compass uses GPS (course over ground) to guide you to your destination, and does not account for other factors that can affect your destination, such as currents and tides. You can use a bearing pointer or a course pointer to navigate to your destination.
Navigating with the CompassWhen navigating to a destination, points to your destination, regardless of the direction you are moving.1 Begin navigating to a destination.2 Select PAGE > Compass.3 Turn until points toward the top of the compass, and
continue moving in that direction to the destination.
Highway ModeYou can use the device to navigate on land in highway mode.
Select Highway.
Data FieldsFrom the compass, select > ENTER.ETE: Displays the estimated time to your destination.ETA at Dest: Displays the estimated time of your arrival at your
destination.To Course: Displays the recommended direction to steer in
order to stay on course.Off Course: Displays the distance you are off course.Vel Made Good: Displays the speed at which you are moving
toward your destination.Turn: Displays the recommended degree of your next turn to
stay on course.
Satellite PageThe satellite page shows your current location, GPS accuracy, satellite locations, and signal strength.
Adjusting the Contrast on the Satellite PageFrom the satellite page, select or .
Trip ComputerThe trip computer displays your current speed, current track, position, time of day, and other helpful statistics. You can customize the center data fields of the trip computer.
Customizing the Instrument Page Data Fields1 From the instrument page, select .2 Select a data field.3 Select ENTER.4 Select a data field.
Additional Main Menu ToolsSun and Moon: Displays sunrise and sunset times, along with
the moon phase, based on your GPS position.
Customizing Your DeviceSystem SettingsSelect Setup > System > GPS Setting.Speed Filter: Allows you to select the preferred source for GPS
data.Satellite System: Turns on or off use of GLONASS Russian
satellite system data. When the system is used in situations with poor sky visibility, GLONASS data can be used with GPS data to provide more accurate position information.
WAAS/EGNOS: Turns on or off use of WAAS (in North America) or EGNOS (in Europe) satellite system data, which can provide more-accurate GPS position information. When using WAAS or EGNOS, the device may take longer to acquire satellites.
Serial Interface SettingsSelect Setup > System > Interface.Garmin Serial: Enables the device to use a Garmin® proprietary
format to exchange waypoint, route, and track data with a computer.
NMEA In/Out: Enables the device to use standard NMEA 0183 output and input.
Display SettingsSelect Setup > Display.Backlight Timeout: Adjusts the length of time before the
backlight turns off.Adjust Contrast: Adjusts the contrast level.Main, Setup, Find Style: Sets the appearance of the main
menu.
Setting the Device TonesYou can customize tones for messages, keys, warnings, and alarms.1 Select Setup > Tones.2 Select a tone for each audible type.
Setting Up Marine Alarms1 Select Setup > Marine Alarm.2 Select an alarm type.3 Enter the setting.4 Select Done.
Marine SettingsSelect Setup > Marine Alarm.Anchor Drag: Sets an alarm to sound when you exceed a
specified drift distance while anchored.Off Course Alarm: Sets an alarm to sound when you are off
course by a specified distance.
Resetting DataYou can reset trip data, delete all waypoints, clear the current track, or restore default values.1 Select Setup > Reset.2 Select an item to reset.
Changing the Units of MeasureYou can customize units of measure for distance and speed, elevation, depth, temperature, pressure, and vertical speed.1 Select Setup > Units.2 Select a measurement type.3 Select a unit of measure.
Customizing Your Device 3
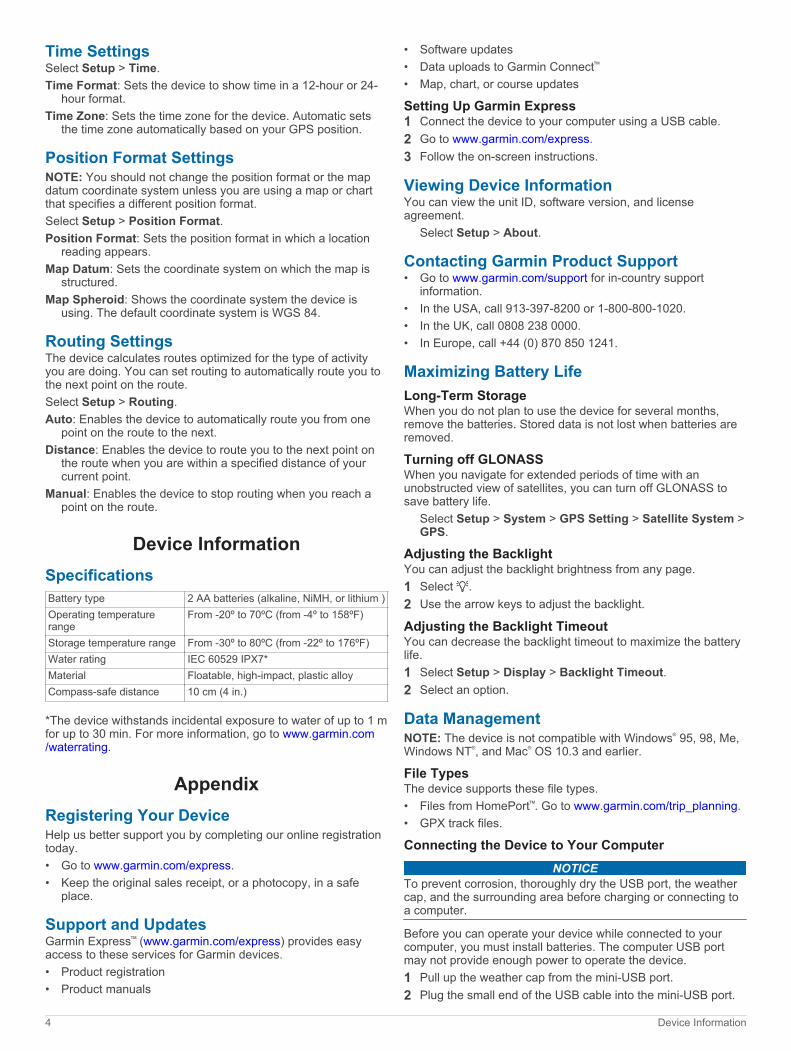
Time SettingsSelect Setup > Time.Time Format: Sets the device to show time in a 12-hour or 24-
hour format.Time Zone: Sets the time zone for the device. Automatic sets
the time zone automatically based on your GPS position.
Position Format SettingsNOTE: You should not change the position format or the map datum coordinate system unless you are using a map or chart that specifies a different position format.Select Setup > Position Format.Position Format: Sets the position format in which a location
reading appears.Map Datum: Sets the coordinate system on which the map is
structured.Map Spheroid: Shows the coordinate system the device is
using. The default coordinate system is WGS 84.
Routing SettingsThe device calculates routes optimized for the type of activity you are doing. You can set routing to automatically route you to the next point on the route.Select Setup > Routing.Auto: Enables the device to automatically route you from one
point on the route to the next.Distance: Enables the device to route you to the next point on
the route when you are within a specified distance of your current point.
Manual: Enables the device to stop routing when you reach a point on the route.
Device InformationSpecificationsBattery type 2 AA batteries (alkaline, NiMH, or lithium )Operating temperature range
From -20º to 70ºC (from -4º to 158ºF)
Storage temperature range From -30º to 80ºC (from -22º to 176ºF)Water rating IEC 60529 IPX7*Material Floatable, high-impact, plastic alloyCompass-safe distance 10 cm (4 in.)
*The device withstands incidental exposure to water of up to 1 m for up to 30 min. For more information, go to www.garmin.com/waterrating.
AppendixRegistering Your DeviceHelp us better support you by completing our online registration today.• Go to www.garmin.com/express.• Keep the original sales receipt, or a photocopy, in a safe
place.
Support and UpdatesGarmin Express™ (www.garmin.com/express) provides easy access to these services for Garmin devices.• Product registration• Product manuals
• Software updates• Data uploads to Garmin Connect™
• Map, chart, or course updates
Setting Up Garmin Express1 Connect the device to your computer using a USB cable.2 Go to www.garmin.com/express.3 Follow the on-screen instructions.
Viewing Device InformationYou can view the unit ID, software version, and license agreement.
Select Setup > About.
Contacting Garmin Product Support• Go to www.garmin.com/support for in-country support
information.• In the USA, call 913-397-8200 or 1-800-800-1020.• In the UK, call 0808 238 0000.• In Europe, call +44 (0) 870 850 1241.
Maximizing Battery LifeLong-Term StorageWhen you do not plan to use the device for several months, remove the batteries. Stored data is not lost when batteries are removed.
Turning off GLONASSWhen you navigate for extended periods of time with an unobstructed view of satellites, you can turn off GLONASS to save battery life.
Select Setup > System > GPS Setting > Satellite System > GPS.
Adjusting the BacklightYou can adjust the backlight brightness from any page.1 Select .2 Use the arrow keys to adjust the backlight.
Adjusting the Backlight TimeoutYou can decrease the backlight timeout to maximize the battery life.1 Select Setup > Display > Backlight Timeout.2 Select an option.
Data ManagementNOTE: The device is not compatible with Windows® 95, 98, Me, Windows NT®, and Mac® OS 10.3 and earlier.
File TypesThe device supports these file types.• Files from HomePort™. Go to www.garmin.com/trip_planning.• GPX track files.
Connecting the Device to Your ComputerNOTICE
To prevent corrosion, thoroughly dry the USB port, the weather cap, and the surrounding area before charging or connecting to a computer.
Before you can operate your device while connected to your computer, you must install batteries. The computer USB port may not provide enough power to operate the device.1 Pull up the weather cap from the mini-USB port.2 Plug the small end of the USB cable into the mini-USB port.
4 Device Information

3 Plug the large end of the USB cable into a computer USB port.On Windows computers, the device appears as a removable drive or a portable device, and the memory card may appear as a second removable drive. On Mac computers, the device and memory card appear as mounted volumes.
Transferring Files to Your Device1 Connect the device to your computer.
On Windows computers, the device appears as a removable drive or a portable device, and the memory card may appear as a second removable drive. On Mac computers, the device and memory card appear as mounted volumes.NOTE: Some computers with multiple network drives may not display device drives properly. See your operating system documentation to learn how to map the drive.
2 On your computer, open the file browser.3 Select a file.4 Select Edit > Copy.5 Open the portable device, drive, or volume for the device or
memory card.6 Browse to a folder.7 Select Edit > Paste.
The file appears in the list of files in the device memory or on the memory card.
Deleting FilesNOTICE
If you do not know the purpose of a file, do not delete it. Your device memory contains important system files that should not be deleted.
1 Open the Garmin drive or volume.2 If necessary, open a folder or volume.3 Select a file.4 Press the Delete key on your keyboard.
Disconnecting the USB CableIf your device is connected to your computer as a removable drive or volume, you must safely disconnect your device from your computer to avoid data loss. If your device is connected to your Windows computer as a portable device, it is not necessary to safely disconnect.1 Complete an action:
• For Windows computers, select the Safely Remove Hardware icon in the system tray, and select your device.
• For Mac computers, drag the volume icon to the trash.2 Disconnect the cable from your computer.
Attaching the Wrist Strap1 Insert the loop of the wrist strap through the slot in the
device.
2 Thread the other end of the strap through the loop, and pull it tight.
Device CareNOTICE
Avoid chemical cleaners, solvents, and insect repellents that can damage plastic components and finishes.Do not store the device where prolonged exposure to extreme temperatures can occur, because it can cause permanent damage.The device is water resistant to IEC Standard 60529 IPX7. It can withstand accidental immersion in 1 meter of water for 30 minutes. Prolonged submersion can cause damage to the device. After submersion, be certain to wipe dry and air dry the device before using or charging.
Cleaning the DeviceNOTICE
Even small amounts of sweat or moisture can cause corrosion of the electrical contacts when connected to a charger. Corrosion can prevent charging and data transfer.
1 Wipe the device using a cloth dampened with a mild detergent solution.
2 Wipe it dry.After cleaning, allow the device to dry completely.
TroubleshootingResetting the DeviceIf the device stops responding, you may need to reset it. This does not erase any of your data or settings.1 Remove the batteries.2 Reinstall the batteries.
Restoring All Default SettingsYou can reset all settings back to the factory default settings.
Select Setup > Reset > Reset All Settings > Yes.
Appendix 5
IndexAalarms
anchor drag 3arrival 3clock 3deep water 3off course 3shallow water 3tones 3
Bbacklight 3, 4battery 1, 4, 5
installing 1life 4maximizing 4storage 4
Ccleaning the device 5compass 2, 3computer, connecting 4contrast 3
Ddata, transferring 4deleting, all user data 5device
registration 4resetting 5
display settings 3
EEGNOS 3
Ffiles
supported types 4transferring 4, 5
GGarmin Express 4
registering the device 4updating software 4
gauges, trip 2, 3GLONASS 3, 4GPS 3
EGNOS 3WAAS 3
Kkeys 1
power 1
Llocations
editing 1saving 1
Mmain menu 3map 2maps 2
updating 4measuring distance 2
Nnavigating 2, 3NMEA 0183 3
Pposition format 4power key 1product registration 4
Rregistering the device 4resetting the device 3, 5restoring, settings 5
routes 2creating 2deleting 2editing 2viewing on the map 2
Ssatellite signals 3settings 2–5software, updating 4specifications 4storing data 4
Ttemperature 4time settings 4time zones 4tones 3tracks 2
saving 2transferring, files 4trip gauges 2, 3trip planner. See routestroubleshooting 3, 5
Uunit ID 4units of measure 3USB
connector 1disconnecting 5transferring files 4
user data, deleting 5
WWAAS 3water rating 4waypoints 1
deleting 1editing 1navigating 1saving 1viewing list of 1
wrist strap 5
6 Index


www.garmin.com/support+43 (0) 820 220230 + 32 2 672 52 54
0800 770 4960 1-866-429-9296
+385 1 5508 272+385 1 5508 271
+420 221 985466+420 221 985465
+ 45 4810 5050 + 358 9 6937 9758
+ 331 55 69 33 99 + 39 02 36 699699
(+52) 001-855-792-7671 0800 0233937
+47 815 69 555 00800 4412 454+44 2380 662 915
(+35) 1214 447 460 +386 4 27 92 500
0861 GARMIN (427 646)+27 (0)11 251 9999 +34 93 275 44 97
+ 46 7744 52020 +886 2 2642-9199 ext 2
0808 238 0000+44 (0) 870 8501242
+49 (0) 89 858364880zum Ortstarif - Mobilfunk kann abweichen
913-397-82001-800-800-1020
© 2015 Garmin Ltd. or its subsidiaries