page 1 web intelligence - the basics · page 1 – web intelligence - the basics. the following...
TRANSCRIPT

Page 1 – Web Intelligence - The Basics
The following lesson contains screenshots of the actual BusinessObjects 4.1 application, with text and narration explaining how to use BusinessObjects to perform certain functions.
Please ensure that you are currently sitting at a computer that has soundplaying capabilities and that the speakers are turned up to an acceptablevolume.
When the narration has finished on a page, please press the [spacebar] tocontinue. If you would like to review a page, press the [backspace] key.
1

Page 2 – Create an Ad Hoc Report
To create an ad hoc report in Web Intelligence, you must first select a data source and make a query.
In this tutorial, you will create an ad hoc report using a universe data source.
2

Page 3 – Launch Web Intelligence
After you’ve logged into BusinessObjects, select the Applications menu and launch Web Intelligence.
Open the Applications menu.
Select Web Intelligence.
3

Page 4 – Create a New Document
In Web Intelligence we can create an ad hoc report using a wide range of data sources. We can open an existing document or create a new one.
Select to create a new document.
4

Page 5 – Select a Universe
Select Universe.
5

Page 6 – Select a Universe (continued)
In this example, we’ll create a new report based on the eFashion universe.
Select eFashion.
Click OK.
6

Page 7 – The Query Panel
After we have selected a data source, the query panel opens. The Universe outline panel, on the left side of the query panel, displays a list of all the objects available in the data source. We can select the objects from here and move them into the Result Objects text box to build a query.
In this example, we’ll build the query for a report that displays store name, year, quarter and sales revenue.
Select Store name and move it into the Result Objects panel using the insert button, or by dragging and dropping.
7

Page 8 – Define Query Result Objects
Select Year and move it into the Result Objects panel using the insert button, or by dragging and dropping.
8

Page 9 – Define Query Result Objects (continued)
Select Quarter and move it into the Result Objects panel using the insert button, or by dragging and dropping.
Scroll down to see more options.
9

Page 10 – Define Query Result Objects (continued)
Select and expand the Measures folder.
10

Page 11 – Define Query Result Objects (continued)
Select Sales revenue and move it into the Result Objects panel using the insert button, or by dragging and dropping.
11

Page 12 – Filter the Query
Now let’s do a Query Filter on Year to make our query more specific.
Select and move Year into the Query Filters panel.
12

Page 13 – Define the Filter
To define what type of filter to use, we’ll select and open the Year filter menu.
Select menu to see filter choices.
13
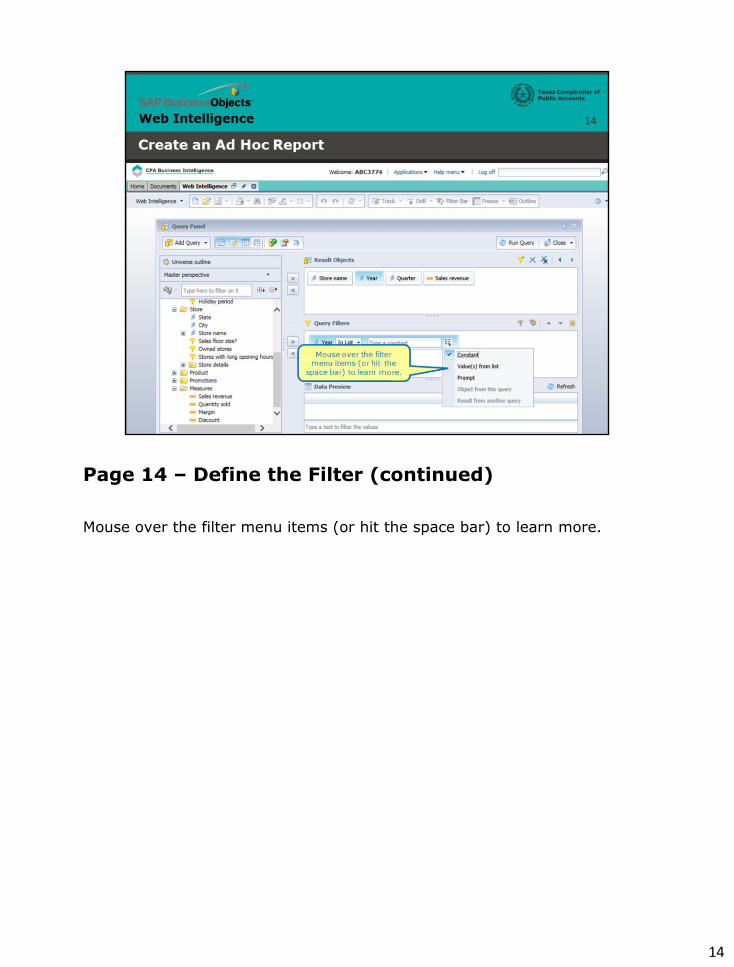
Page 14 – Define the Filter (continued)
Mouse over the filter menu items (or hit the space bar) to learn more.
14

Page 15 – Filter Definitions
Constant: Allows typing in a specific value (or values, separated by a semicolon)
15

Page 16 – Filter Definitions (continued)
Value(s) from list: Allows selection of one or more items from a list of values
16

Page 17 – Filter Definitions (continued)
Prompt: Prompts the user to select or enter a value when the document is generated
17
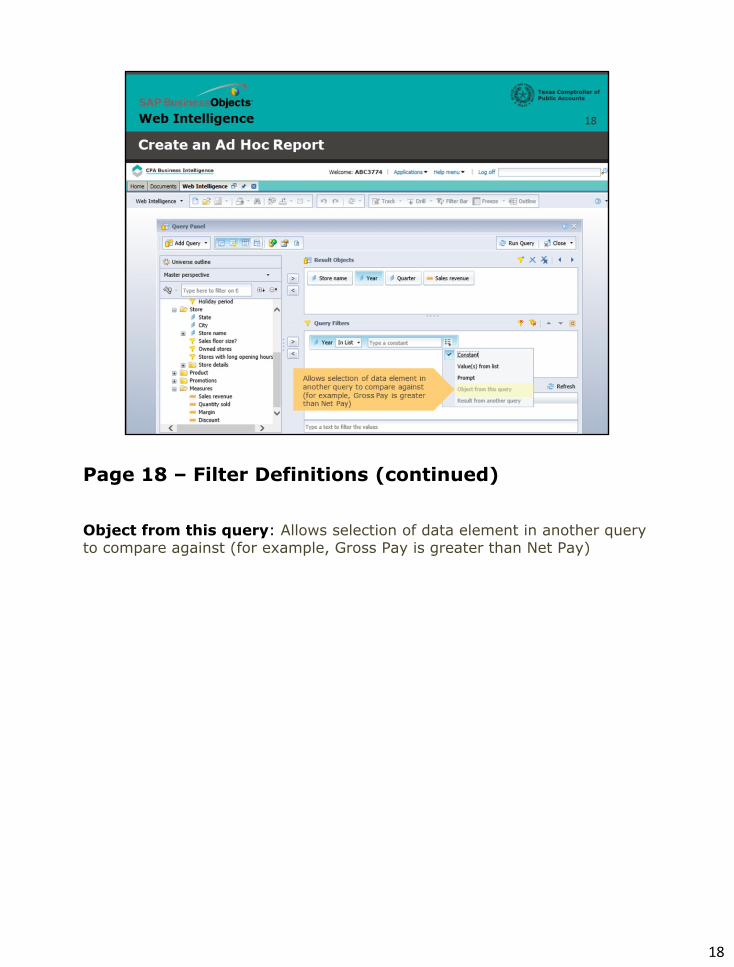
Page 18 – Filter Definitions (continued)
Object from this query: Allows selection of data element in another query to compare against (for example, Gross Pay is greater than Net Pay)
18

Page 19 – Filter Definitions (continued)
Result from another query: Allows selection of data element in this query to compare against (for example, Gross Pay is greater than Net Pay)
19

Page 20 – The Constant Filter
Now let’s select three of the filters and note the results. Select
Run Query to generate a report.
Constant is the default selection. Type in the value 2006.
20

Page 21 – The Constant Filter: Report Results
21

Page 22 – The Value(s) from List Filter
Choose Value(s) from list.
22

Page 23 – Choose from the Year List
Select 2006 from list to add it to the box at right using the insert button or by dragging and dropping.
Click OK.
23

Page 24 – Run the Query
Select to run the query.
24

Page 25 – The Value(s) from List Filter: Report Results
25
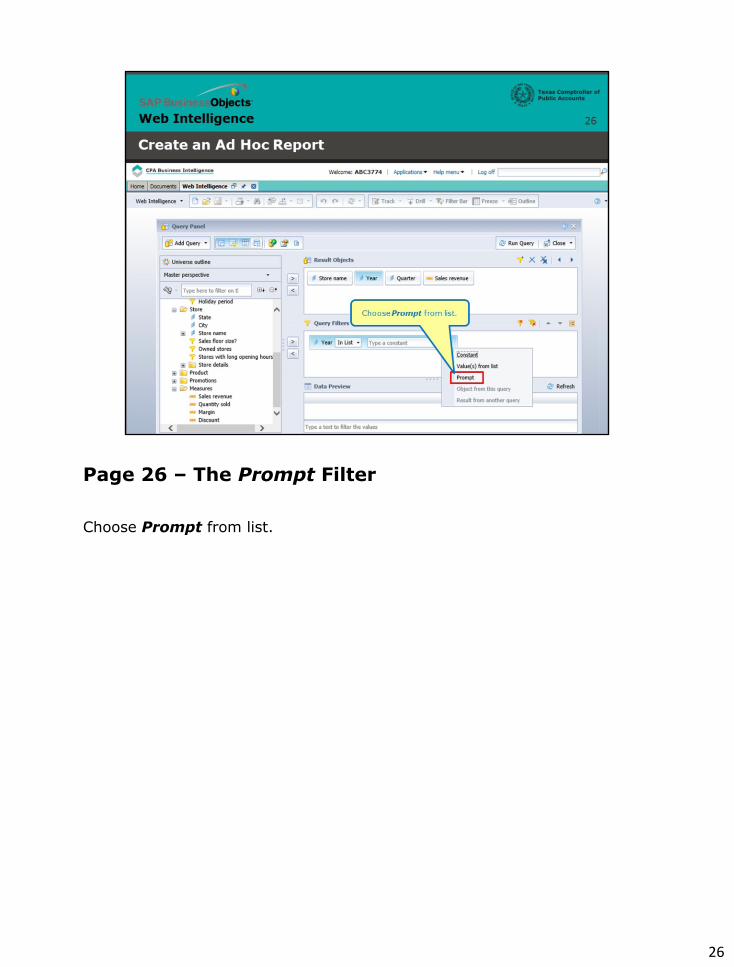
Page 26 – The Prompt Filter
Choose Prompt from list.
26

Page 27 – Run the Query
Select to run the query.
27

Page 28 – Choose from the Year List
Select 2006 from list to add it to the box at right using the insert button or by dragging and dropping.
Click OK to run the report.
28

Page 29 – The Prompt Filter: Report Results
29

Page 30 - Conclusion
This concludes this lesson.
For more BusinessObjects 4.1 tutorials, select the link below.
30