painting walls ... 106 key things to remember protect exterior concrete surfaces and the garage...
TRANSCRIPT

PAINT
PAINTING WALLS…………….…………..……………..…….…107 -Interior Walls -Exterior Walls PAINTING DOORS…………….…………..………………………109 CLEAN UP…………...…………..………………..…………………110
104

SAFETY TALK
P
AIN
TIN
G:
Safe
ty T
alk
105
Basic Construction Safety
Ladders
Lifting and Carrying
· #1: Drink plenty of water and watch for dehydration! · When you are tired - Rest! · Know where the First Aid Kit is - if you are hurt see your House Leader or Site Host
immediately. Our Accident Procedure is in the Site Host book, please follow it. · Fill out an Incident Report any time the First Aid Kit is opened. · Keep a name tag on at all times. · Use Common Sense! Keep an eye on your own safety and the safety of others. · Concentrate -- especially if you are on a ladder or roof. · Watch for trip hazards wherever you are going. · Help keep the site safe by picking up and moving things that are in the way. · If you see something unsafe tell your House Leader or a Staff Member.
· Bend your knees and lift with your legs not your back. · If something is too heavy, get help - don’t hesitate to ask! · Make sure you can see over what you are carrying. · When carrying something longer than 8 feet have a person on each end.
· At the beginning of each day inspect all ladders for any structural defects that would make them unsafe. If any defects are found, mark the ladder(s) and set it aside for the Site Supervisor’s disposition.
· Use the right size ladder and place it on a solid footing · Never lean an A-frame ladder against anything, always use it fully opened. · Never stand on the top step or back side of a ladder. · Don’t stretch out too far – take the time to move the ladder with your work! · Get someone to steady your ladder if needed. · Only one person on a ladder at a time. · The 4 to 1 rule
For every 4 feet of height, move extension ladders one foot away from the wall.
Painting
· Paint can splatter when rolling overheard – Use Eye protection. · Painting involves a lot of work on ladders - remember ladder safety! · Use dust mask when scraping floors.

PA
IN
TIN
G:
Overv
iew
106
Key things to remember Protect exterior concrete surfaces and the garage floor from paint. · Clean spills immediately
Doors: · Paint the exterior doors with a foam roller and touch-up brush. · Paint interior doors with a foam roller and touch up brush. · Doors may be sprayed if desired if the equipment is available. · If desired and the equipment is available, doors may be spray painted. · Strain paint before painting doors and trim. · Doors require three thin applications of paint. Two applications of paint to all surfaces. · Allow time for the first application to dry before applying the second. · Paperless sheetrock usually requires at least three coats.
Brushes and roller covers MUST be cleaned immediately following use. · Remove roller covers from rollers. Store brushes horizontally.

PA
IN
TIN
G:
Inte
rior
Pain
ting
107
INTERIOR PAINTING
We all must pay more attention to providing a high quality paint job. Painting is the MOST IM-PORTANT aspect of the house’s appearance. A poor paint job will make even the best-built house look bad. It will also cause the most time-consuming redo work of the entire build. You CAN NOT overstress the importance of a quality paint job. At the BEGINNING of the day cover the importance of clean up AND that the volunteers are re-sponsible for their own cleanup. GENERAL PAINTING PROCEDURES:
All paint spills are to be cleaned up immediately. Once a spill dries, clean up is much more difficult. White vinegar is a very effective non-damaging way to remove dried latex paint from other surfaces..
Stir ALL paint thoroughly before every use. Color settles to the bottom, even in white paints.
Take care not to mix up interior and exterior paints. Clearly mark all paint buckets on the side. Lids get removed so labeling them doesn’t help.
All surfaces will need a minimum of two coats of paint. Allow time for the first application to dry before applying the second.
Cover paint containers not in use at all times.
Have separate crews for painting interior and exterior , if both are being done at the same time.
Distinguish between the different types of rollers. The long nap rollers absorb lots of paint and work well on the stucco. However they are quite sloppy inside! Short nap rollers do a nice smooth job on the interior, but are lousy on stucco.
Slightly dampen rollers and brushes before painting. This keeps paint from wicking directly to the center and will make them much easier to clean.
Rinse brushes out in water every hour (latex paint dries very fast and clogs bristles).
Every time someone takes even a short break, brushes should be put in water to prevent harden-ing. Keep a couple buckets of water handy. Shake off excess water before reusing. They don’t need to be completely cleaned before reusing.
Rollers should be wrapped in plastic on breaks to prevent hardening.
Do not roll with a dry roller. It will only remove paint.
Fill paint pans and buckets over a dirt area away from the house.
Use wire screens inside the paint buckets to cut down on the use and cleaning of paint pans. Doing this is better because it is easier to move the paint around, easier to load the roller cover, you are less likely to spill or step in the paint, and if you need to take a break, it is much easier to cover the bucket with a damp rag to prevent the paint from skinning over.
PAINTING
Check all drywall and corner bead for remaining texture globs. Scrape them smooth with a putty knife.
Use a wet rag around a plastic putty knife or wood shim to remove all extraneous drywall mud from the window frames and tub surrounds.
Sweep all floor surfaces and window sills spotless to prevent dirt from mixing with the paint. Use a shop vac as needed.
Cover thresholds with masking tape.

PA
IN
TIN
G:
Tri
m
108
Roll back over the entire area that you have covered to further smooth and blend the paint. Do not reload the roller with paint for this step, and use very light pressure on the roller. Overlap about 1/4 of the previ-ous stroke with each successive stroke. Be extremely careful to avoid paint runs on all trim. Interior Trim Painting:
Strain an entire bucket of paint into another CLEAN bucket before painting any wood surfaces.
Always paint shelving prior to instal-lation. Be extremely careful to avoid paint runs on all trim.
Painting shelving and any non-installed trim is best done with a roller, fol-lowed immediately as needed with brush touch up. Previously installed baseboard and casing must be brush painted.
Have a Cut-in Crew use brushes to paint all baseboard, casing, drywall corners and around win-dows. They should paint about 3” out from the cor-ner or trim with the brush.
Make sure each member of the Cut-in Crew has a damp rag. It is easier to clean paint off window frames immediately, before it dries.
DO NOT tape window frames.
Have everyone else use rollers to paint the ceilings and walls.
When rolling a ceiling or wall, try to finish the entire surface before taking a break. Doing so should eliminate overlap marks in the finished sur-face.
Paint one direction on the first coat.
Paint in a perpendicular direction on the sec-ond coat.
Paint each surface with a sweeping stroke, be-ginning about 6” from the edge. Now roll back and forth towards the edge to quickly spread the paint. Get as close to the edge as you can (within 1”), working with the open end of the roller facing the edge. This is important because the cutting in pro-cess will leave noticeable brush marks if it is not rolled as far over as possible. Do not worry about a perfect job yet. Do not roll with a dry roller. It will only remove paint.
Reload the roller and repeat the process in the adjacent space, working back towards the area you just painted. Always keep a wet edge to work back to, to eliminate overlap marks in the finished sur-face. The idea is to plan your sequence of painting and to work quickly enough that you are always ap-plying the new paint to an edge that is still wet.
Never paint pre–hung doors or door casings before they are installed. Strain the entire bucket of paint into another CLEAN bucket before painting any wood sur-faces, doors or door frames. Unless otherwise instructed by staff, NEVER PAINT GARAGE DOORS.
When painting raised panel doors the following painting order is recommended: 1. Paint all edges. 2. Paint the panels and beveled areas. 3. Paint the rails and stiles. Avoid getting paint on the rails and stiles dur-ing the preceding steps. All doors may be spray paint if desired, and the equipment is available. Exterior Doors:
Carefully remove the weather strip-
PA
IN
TIN
G:
Pain
ting D
oors
109
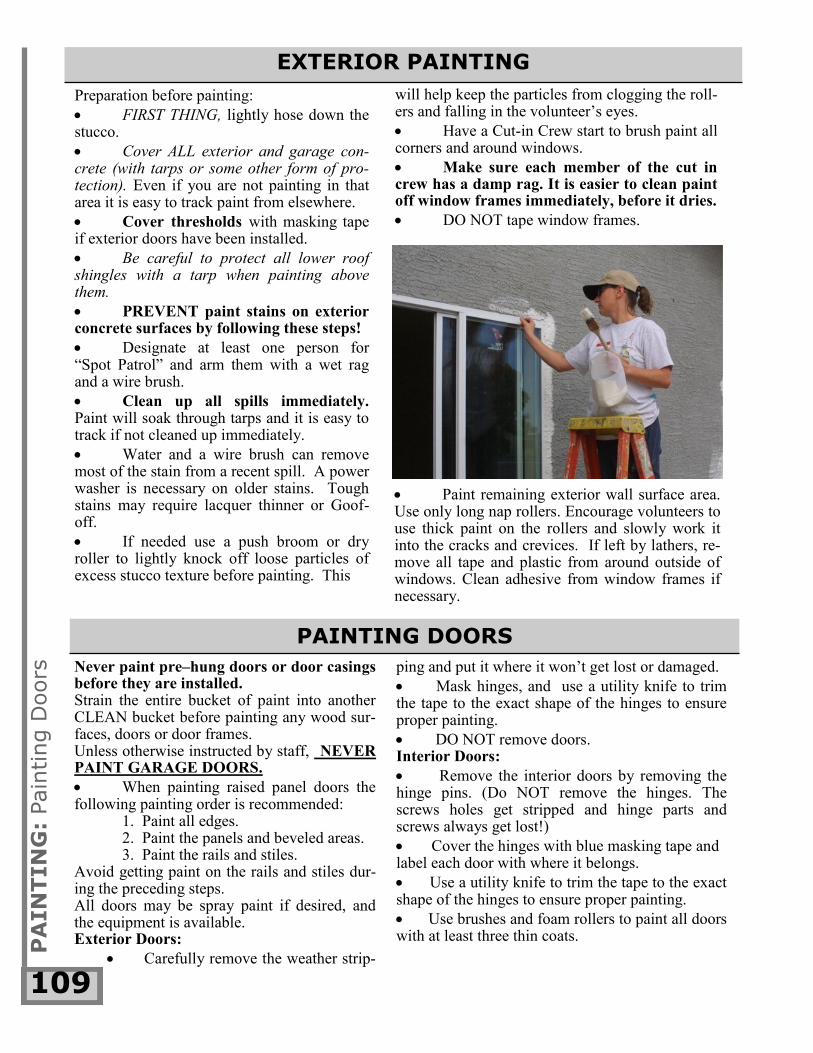
Paint remaining exterior wall surface area. Use only long nap rollers. Encourage volunteers to use thick paint on the rollers and slowly work it into the cracks and crevices. If left by lathers, re-move all tape and plastic from around outside of windows. Clean adhesive from window frames if necessary.
Preparation before painting:
FIRST THING, lightly hose down the stucco.
Cover ALL exterior and garage con-crete (with tarps or some other form of pro-tection). Even if you are not painting in that area it is easy to track paint from elsewhere.
Cover thresholds with masking tape if exterior doors have been installed.
Be careful to protect all lower roof shingles with a tarp when painting above them.
PREVENT paint stains on exterior concrete surfaces by following these steps!
Designate at least one person for “Spot Patrol” and arm them with a wet rag and a wire brush.
Clean up all spills immediately. Paint will soak through tarps and it is easy to track if not cleaned up immediately.
Water and a wire brush can remove most of the stain from a recent spill. A power washer is necessary on older stains. Tough stains may require lacquer thinner or Goof-off.
If needed use a push broom or dry roller to lightly knock off loose particles of excess stucco texture before painting. This
ping and put it where it won’t get lost or damaged.
Mask hinges, and use a utility knife to trim the tape to the exact shape of the hinges to ensure proper painting.
DO NOT remove doors. Interior Doors:
Remove the interior doors by removing the hinge pins. (Do NOT remove the hinges. The screws holes get stripped and hinge parts and screws always get lost!)
Cover the hinges with blue masking tape and label each door with where it belongs.
Use a utility knife to trim the tape to the exact shape of the hinges to ensure proper painting.
Use brushes and foam rollers to paint all doors with at least three thin coats.
PAINTING DOORS
EXTERIOR PAINTING
will help keep the particles from clogging the roll-ers and falling in the volunteer’s eyes.
Have a Cut-in Crew start to brush paint all corners and around windows.
Make sure each member of the cut in crew has a damp rag. It is easier to clean paint off window frames immediately, before it dries.
DO NOT tape window frames.

PA
IN
TIN
G:
Cle
an U
p
110
Now spray/rinse the cover until the water running off is clear.
Put the clean roller covers part way onto the rollers and hang them vertically to dry, keeping the bottoms in the air.
Please remove any dried and crunchy roller covers from the handles and SAVE THE HANDLES. No matter how crunchy the roller is, we need the handle. Cut it, saw it, please do whatever you can to remove the cover and save the handle.
Dispose of painting equipment that is broken or worn.
BRUSHES Before washing brushes be sure to wipe off all possible paint on the edge of the paint bucket.
Scrub the bristles with your fingers, as if you were washing you hair. If needed, use a brush comb or a wire brush to loosen dried paint bits.
Rinse the brush until the water runs clear.
Hang brushes vertically to dry. Store brushes horizontally. Never leave a brush standing on it’s bristles in paint or water.
CLEAN UP
Door Frames:
Caulk all seams (EXCEPT THE SLOT FOR WEATHERSTRIPPING ), and putty all nail holes before painting.
Always use the cleanest brushes with smooth bristles on wood. Rinse brushes out in water eve-ry hour (latex paint dries very fast and clogs bristles).
Even if the door trim is painted, check the outside vertical edges. This area is frequently missed.
OUR PAINTING SUPPLIES ARE NOT DISPOSABLE!
Using a hose and nozzle it takes less than 3 minutes to properly clean a brush or roller. Make sure the volunteers clean brushes and rollers before they leave, otherwise YOU will be stuck doing all of it.
Set up the paint cleaning area in the retention area of the backyard and be sure the water from clean up does not overflow on to any of the concrete, as it will leave a stain.
Designate one leader to supervise the cleanup of all rollers, brushes, roller handles, paint pans and paint screens to be sure it is done thoroughly. If all paint is not removed, the brushes and rollers will dry stiff and be virtually useless.
ROLLERS Before washing a roller cover, use a putty knife to scrape excess paint out of the roller cover. A painter’s “5 in 1 tool” (with it’s semi-circular cut out in the blade) is perfect for this task.
Remove all roller covers from roller handles and wash them inside and out. When the roller co-vers dry on the handle and cannot be removed, the whole thing ends up being trashed.
Scrub the nap with your fingers, as if you were washing you hair. If needed, use a wire brush to loosen dried paint bits.