paper snowflake - amazon web...
TRANSCRIPT
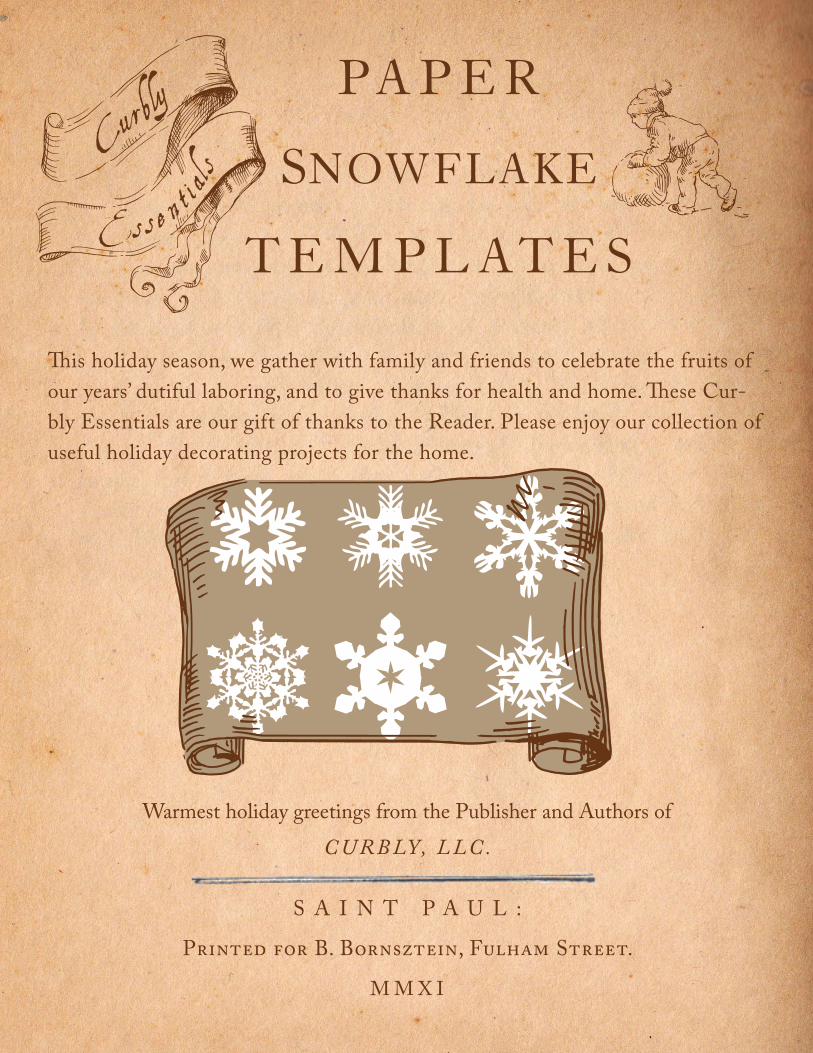
This holiday season, we gather with family and friends to celebrate the fruits of our years’ dutiful laboring, and to give thanks for health and home. These Cur-bly Essentials are our gift of thanks to the Reader. Please enjoy our collection of useful holiday decorating projects for the home.
Warmest holiday greetings from the Publisher and Authors of C U R B LY, L LC .
S A I N T P A U L :
Printed for B. Bornsztein, Fulham Street.
M M X I
PA P E R
SNOWFLAKE
T E M P L AT E S

PAPER SNOWFLAKE TEMPLATES
The paper snowflake is nearly everyone’s favorite holiday craft, and its elegant aesthetic keeps folks creating ‘em, year after year. But our elementary-school snowflakes never really cap-tured nature’s precise geometry and symmetry. As it turns out, the magic doesn’t lie in obsessive, intricate scissorwork...but rather in starting in the right place: folding technique.
Directions
1. Print out the snowflake templates (included on following pages) on paper of your choice (cardstock, colored paper, or regular printer paper).
2. Follow the folding directions and cut your snowflakes out!
3. Flatten your flakes by pressing them under heavy book or ironing gently.
4. String ‘em up! Hang ‘em up!
A E
E2
D2
D
C
C2
A2
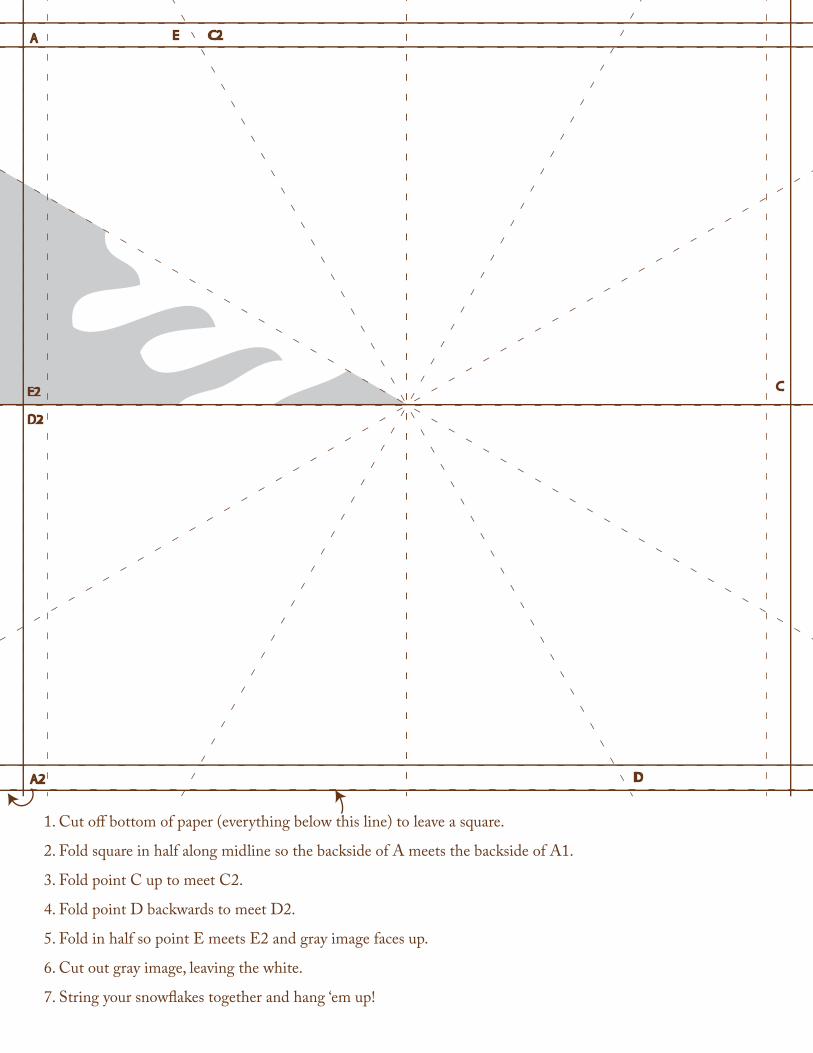
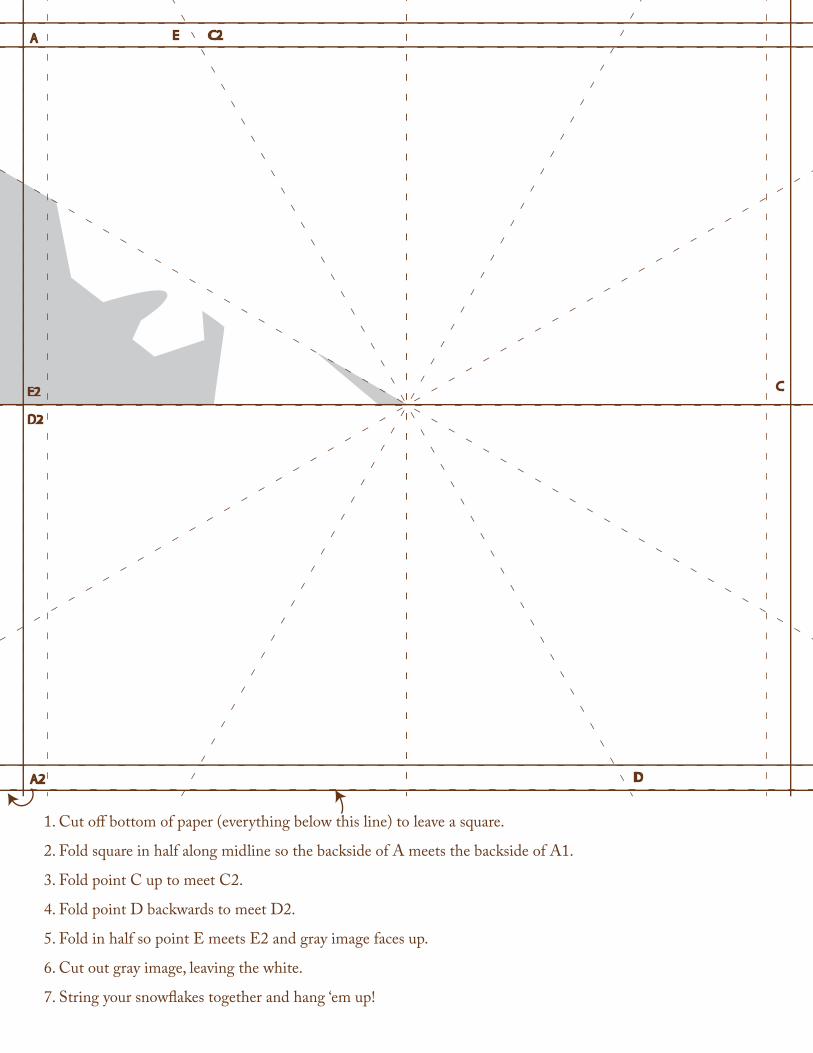
1. Cut o� bottom of paper (everything below this line) to leave a square.
2. Fold square in half along midline so the backside of A meets the backside of A1.
3. Fold point C up to meet C2.
4. Fold point D backwards to meet D2.
5. Fold in half so point E meets E2 and gray image faces up.
6. Cut out gray image, leaving the white.
7. String your snow�akes together and hang ‘em up!
A E
E2
D2
D
C
C2
A2
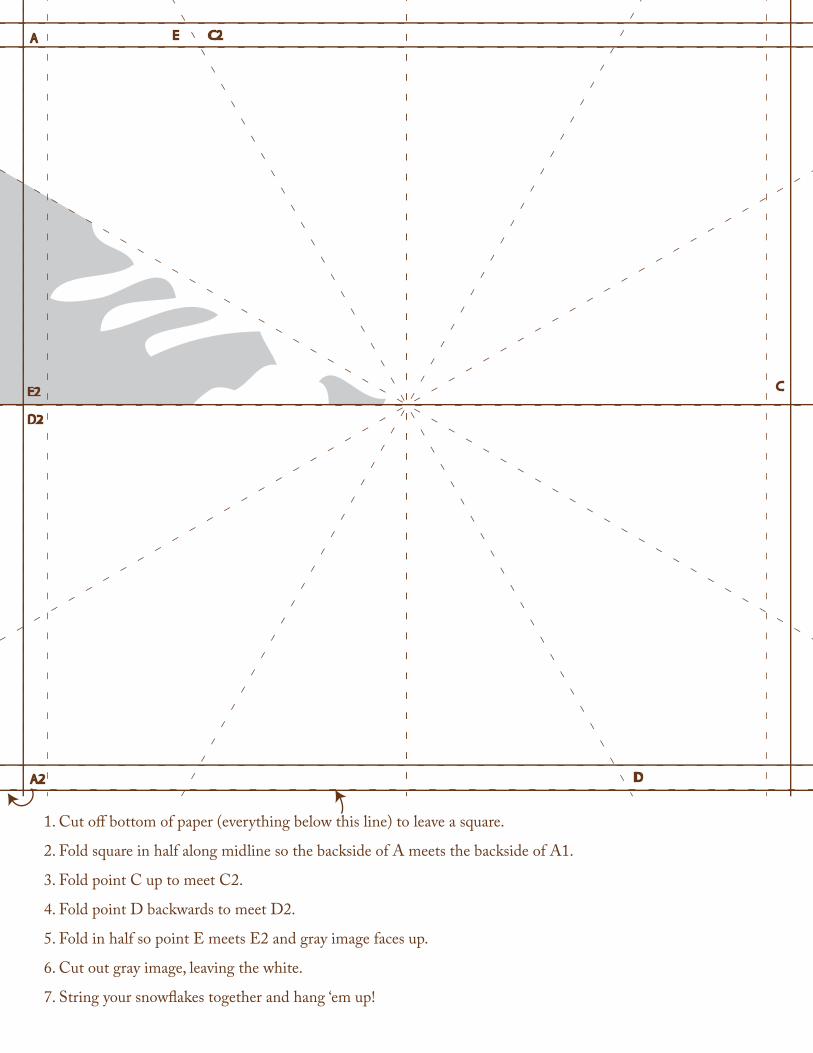
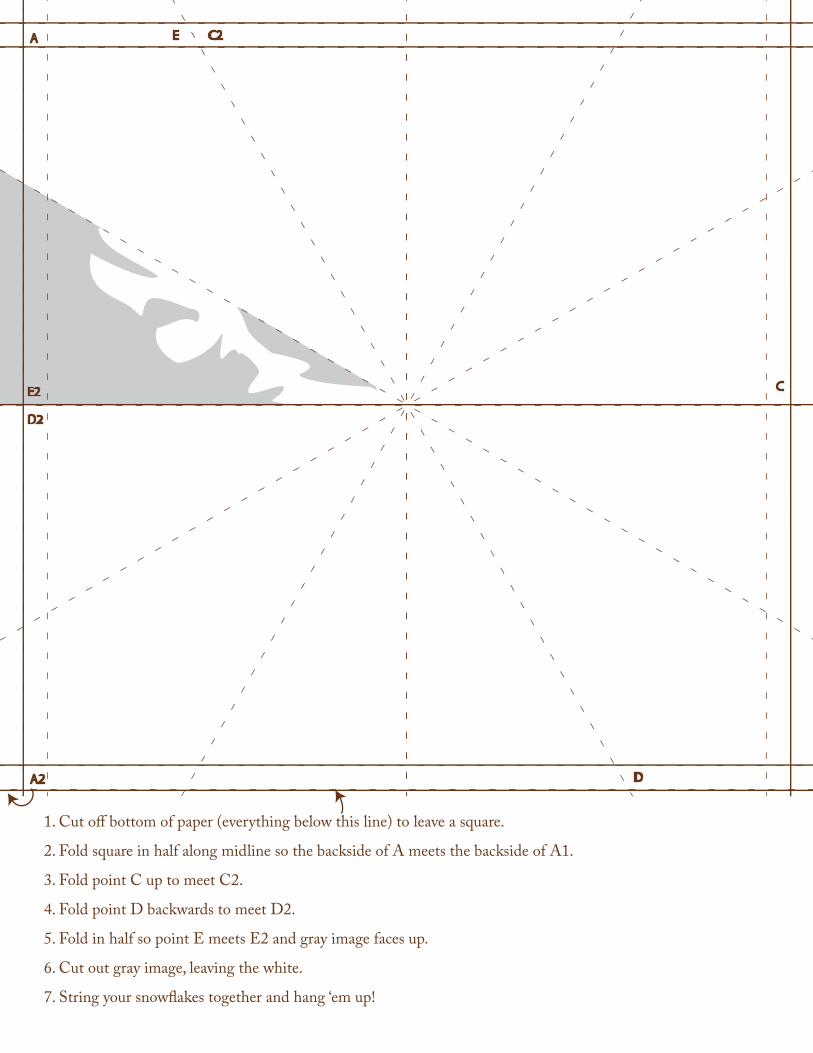
1. Cut o� bottom of paper (everything below this line) to leave a square.
2. Fold square in half along midline so the backside of A meets the backside of A1.
3. Fold point C up to meet C2.
4. Fold point D backwards to meet D2.
5. Fold in half so point E meets E2 and gray image faces up.
6. Cut out gray image, leaving the white.
7. String your snow�akes together and hang ‘em up!

A E
E2
D2
D
C
C2
A2
1. Cut o� bottom of paper (everything below this line) to leave a square.
2. Fold square in half along midline so the backside of A meets the backside of A1.
3. Fold point C up to meet C2.
4. Fold point D backwards to meet D2.
5. Fold in half so point E meets E2 and gray image faces up.
6. Cut out gray image, leaving the white.
7. String your snow�akes together and hang ‘em up!