paralleling technique. head position head position for the paralleling technique is not critical,...
TRANSCRIPT

Paralleling Technique
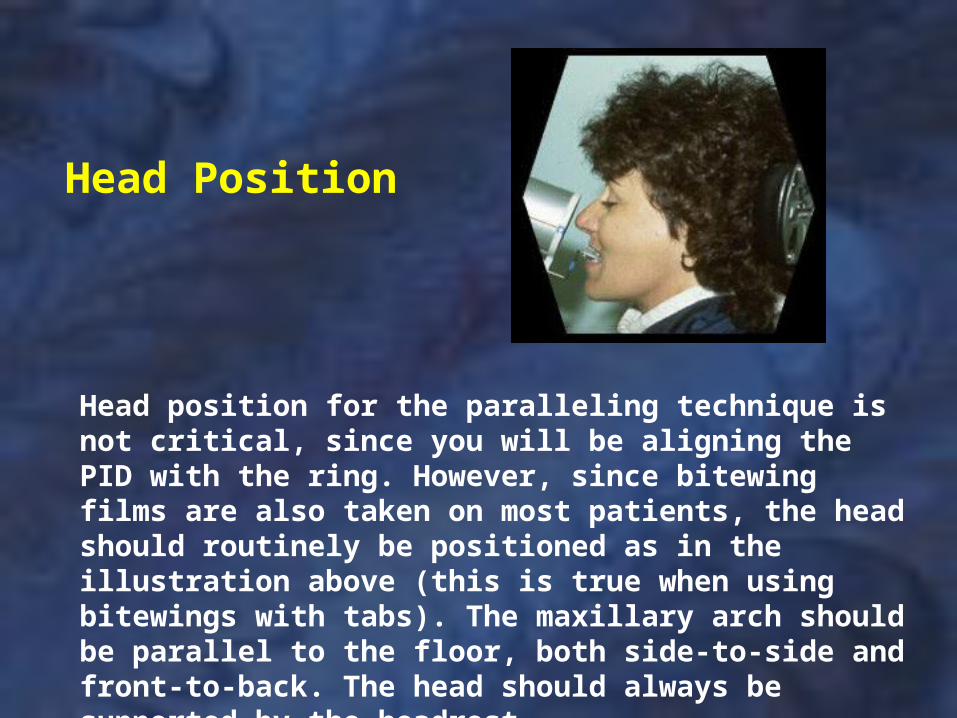
Head Position
Head position for the paralleling technique is not critical, since you will be aligning the PID with the ring. However, since bitewing films are also taken on most patients, the head should routinely be positioned as in the illustration above (this is true when using bitewings with tabs). The maxillary arch should be parallel to the floor, both side-to-side and front-to-back. The head should always be supported by the headrest.
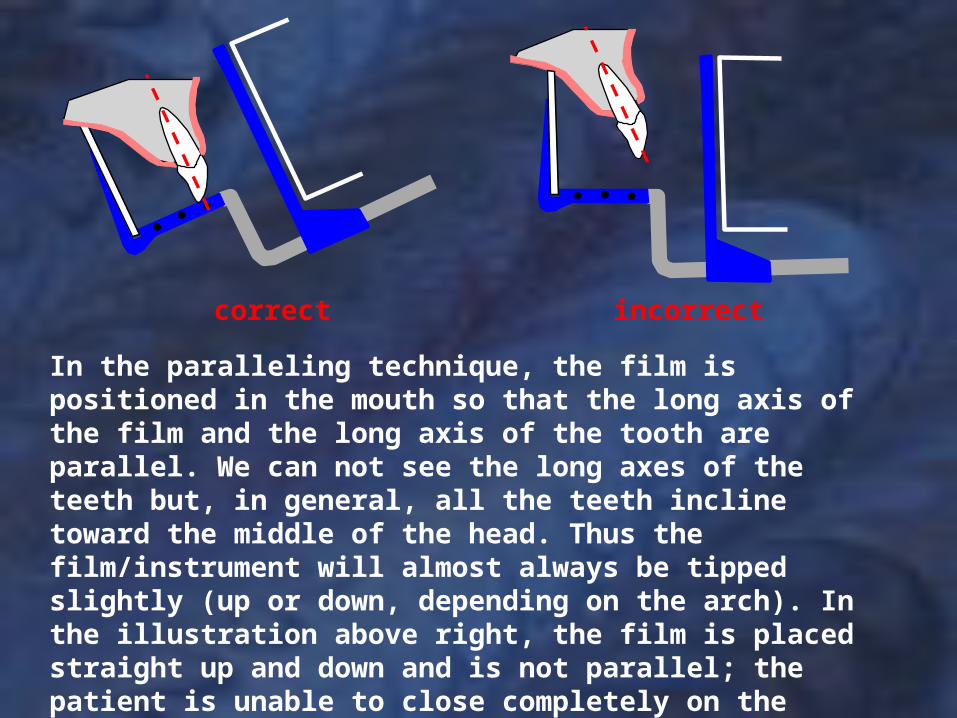
In the paralleling technique, the film is positioned in the mouth so that the long axis of the film and the long axis of the tooth are parallel. We can not see the long axes of the teeth but, in general, all the teeth incline toward the middle of the head. Thus the film/instrument will almost always be tipped slightly (up or down, depending on the arch). In the illustration above right, the film is placed straight up and down and is not parallel; the patient is unable to close completely on the biteblock and the apices of the teeth would not appear on the film.
correct incorrect

ANTERIOR POSTERIOR
Rinn XCP Paralleling Instruments
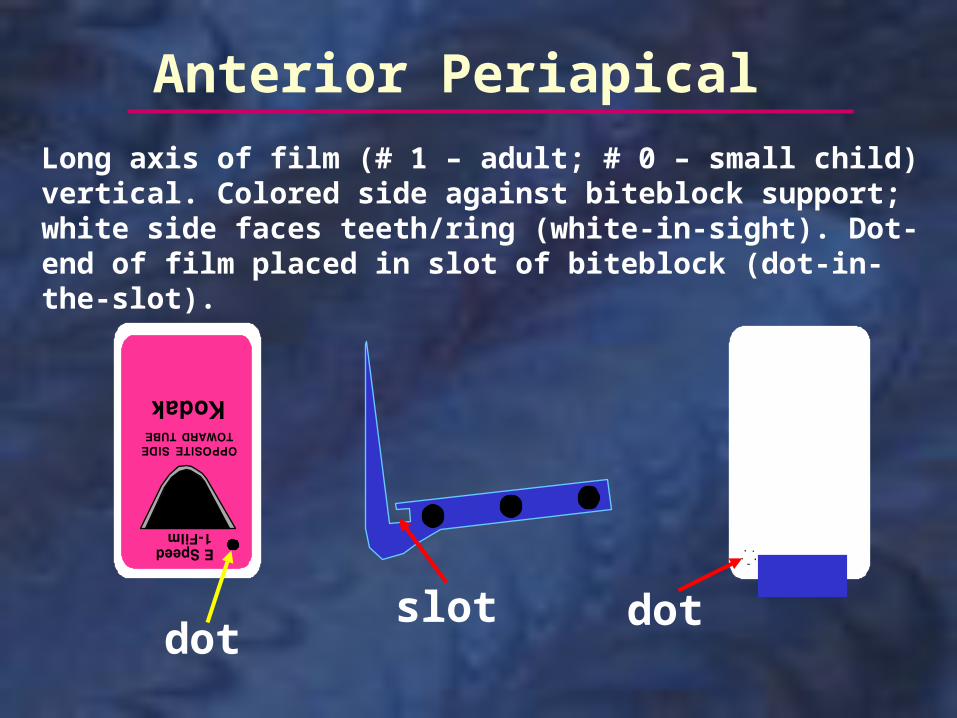
Anterior Periapical
Long axis of film (# 1 – adult; # 0 – small child) vertical. Colored side against biteblock support; white side faces teeth/ring (white-in-sight). Dot-end of film placed in slot of biteblock (dot-in-the-slot).
dotdotslot
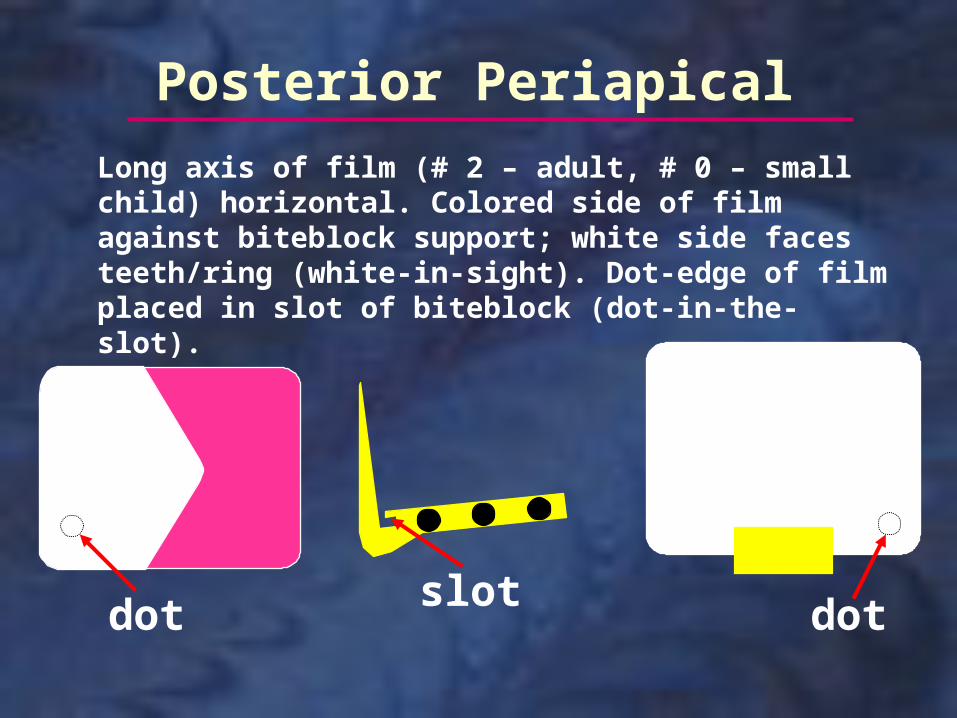
Posterior Periapical
Long axis of film (# 2 – adult, # 0 – small child) horizontal. Colored side of film against biteblock support; white side faces teeth/ring (white-in-sight). Dot-edge of film placed in slot of biteblock (dot-in-the-slot).
dotdotslot
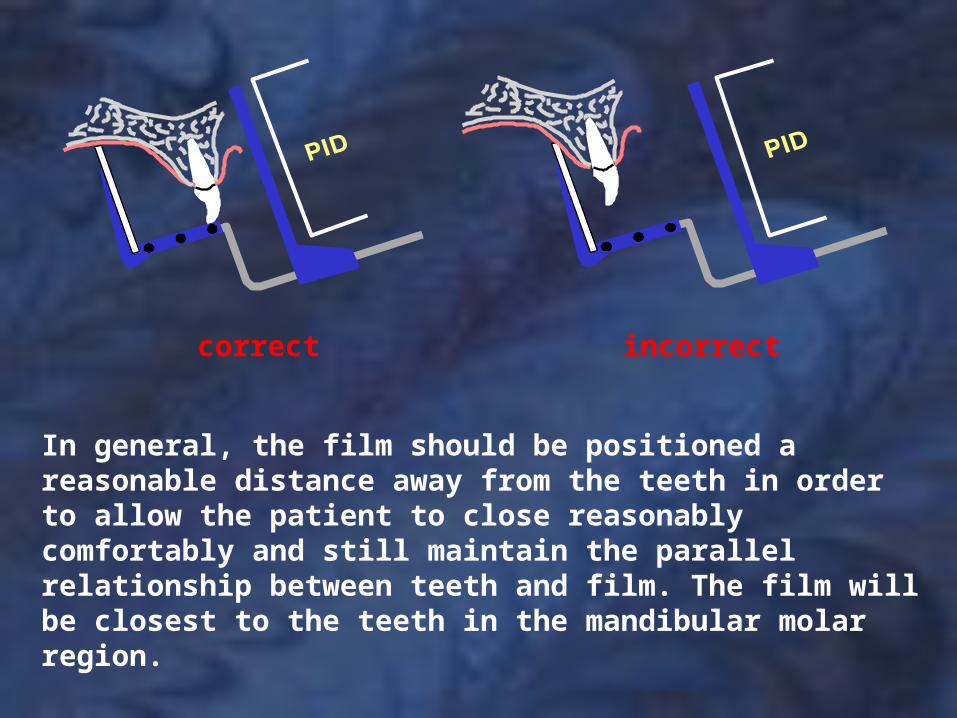
In general, the film should be positioned a reasonable distance away from the teeth in order to allow the patient to close reasonably comfortably and still maintain the parallel relationship between teeth and film. The film will be closest to the teeth in the mandibular molar region.
correct incorrect
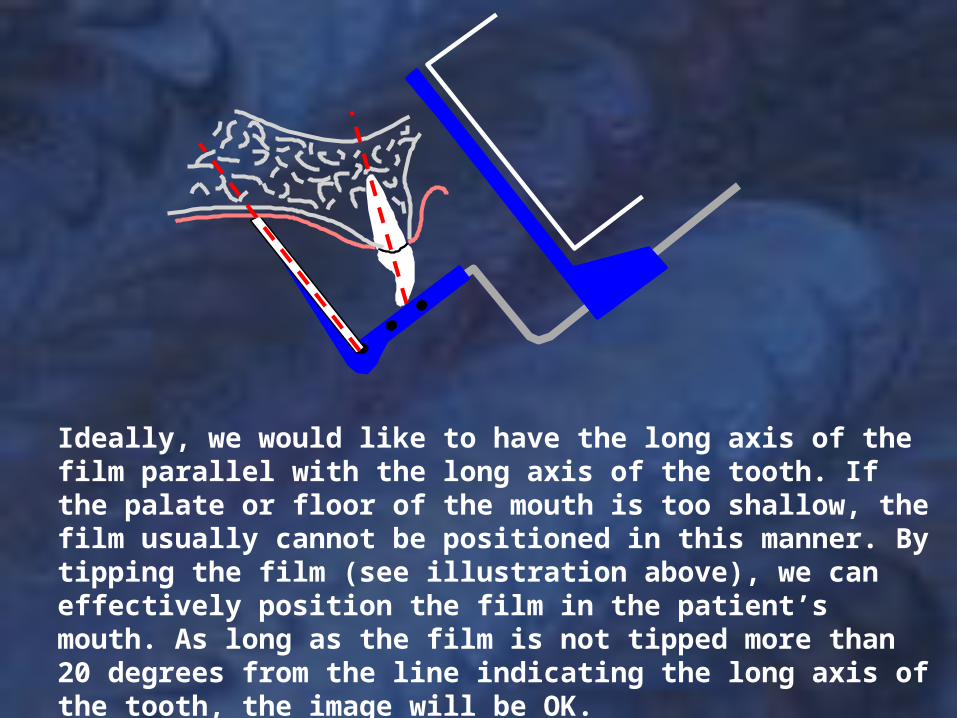
Ideally, we would like to have the long axis of the film parallel with the long axis of the tooth. If the palate or floor of the mouth is too shallow, the film usually cannot be positioned in this manner. By tipping the film (see illustration above), we can effectively position the film in the patient’s mouth. As long as the film is not tipped more than 20 degrees from the line indicating the long axis of the tooth, the image will be OK.
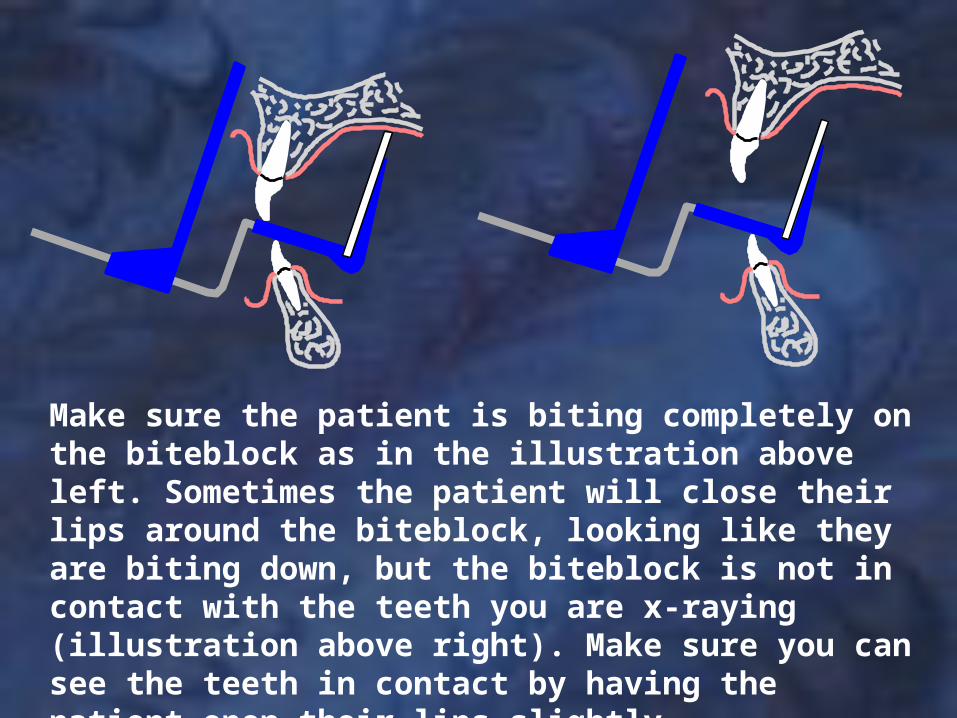
Make sure the patient is biting completely on the biteblock as in the illustration above left. Sometimes the patient will close their lips around the biteblock, looking like they are biting down, but the biteblock is not in contact with the teeth you are x-raying (illustration above right). Make sure you can see the teeth in contact by having the patient open their lips slightly.
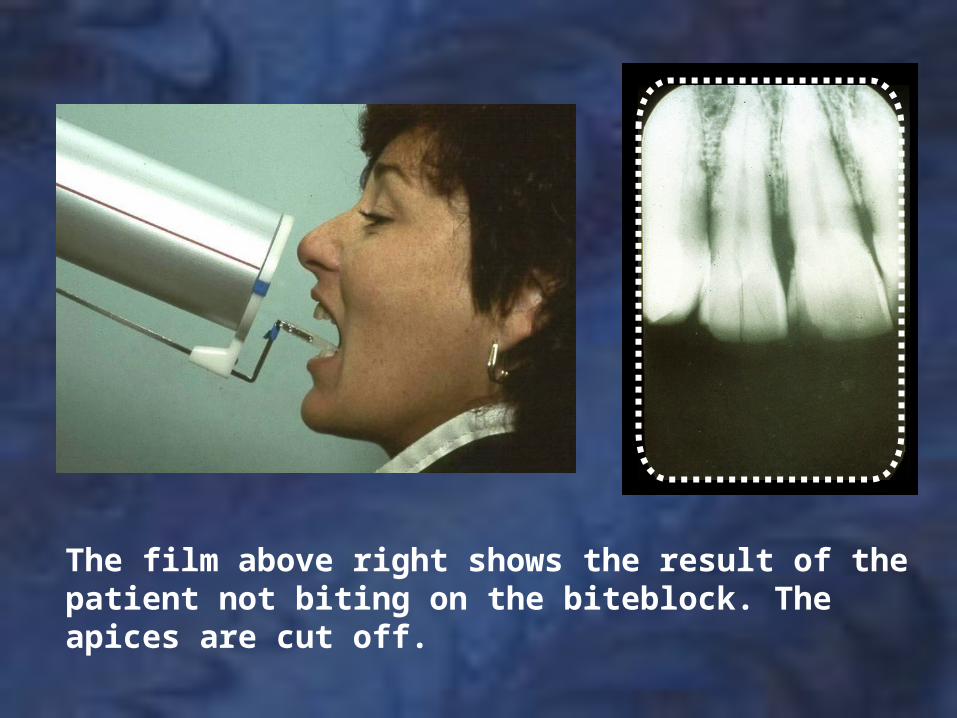
The film above right shows the result of the patient not biting on the biteblock. The apices are cut off.
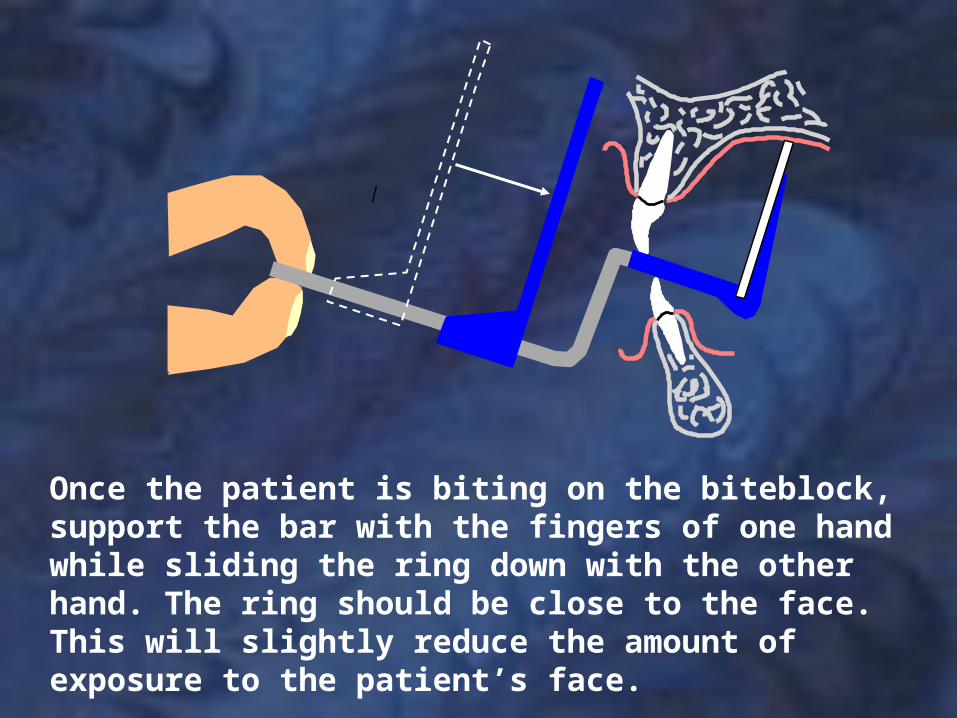
Once the patient is biting on the biteblock, support the bar with the fingers of one hand while sliding the ring down with the other hand. The ring should be close to the face. This will slightly reduce the amount of exposure to the patient’s face.
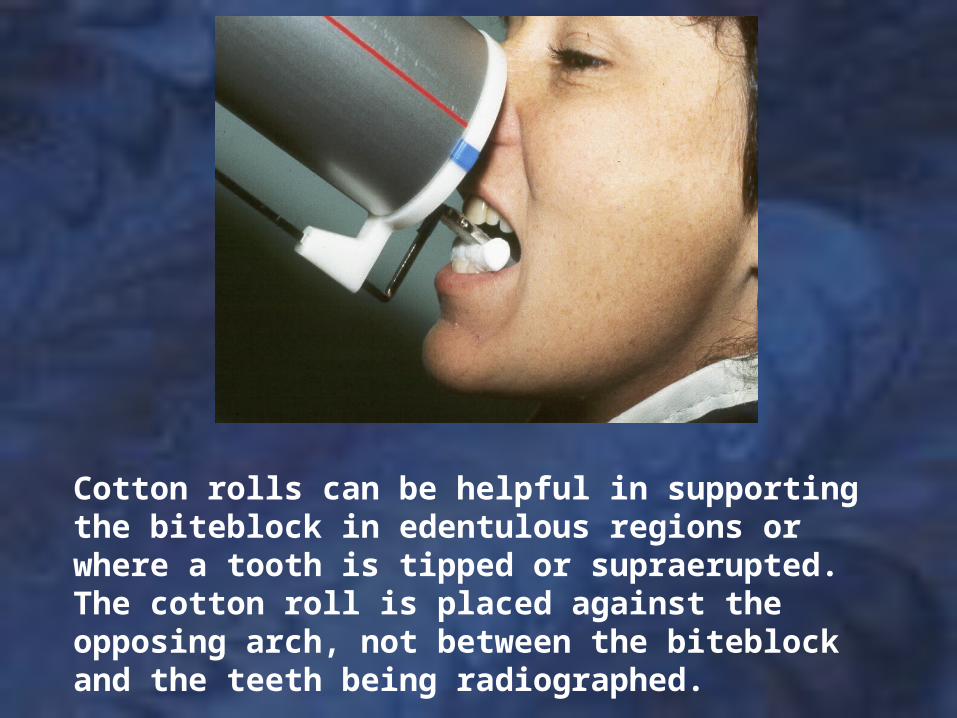
Cotton rolls can be helpful in supporting the biteblock in edentulous regions or where a tooth is tipped or supraerupted. The cotton roll is placed against the opposing arch, not between the biteblock and the teeth being radiographed.
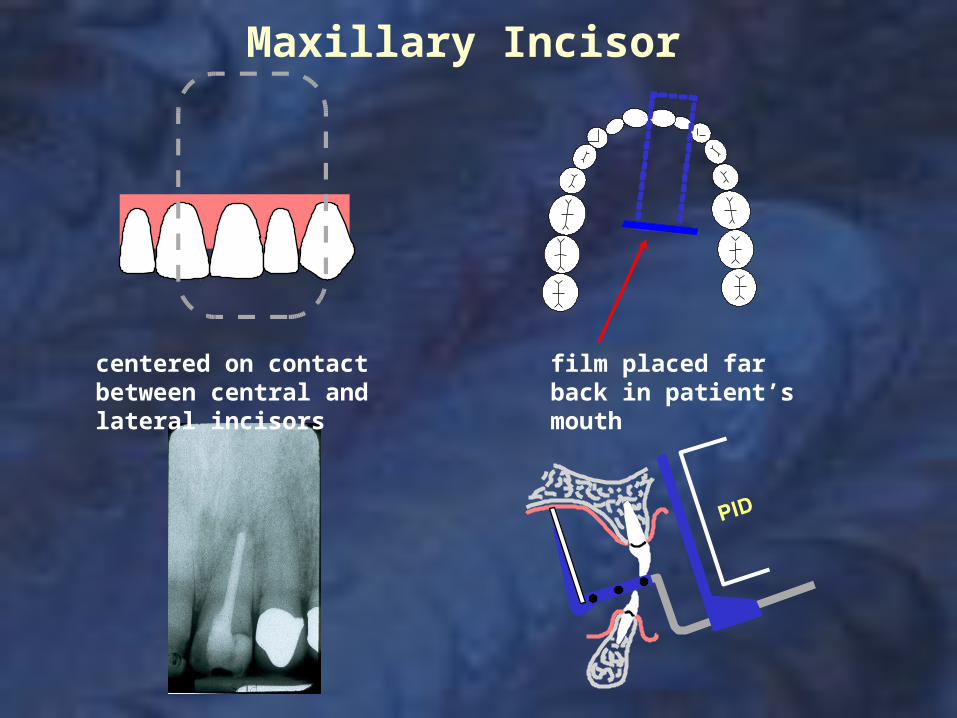
Maxillary Incisor
centered on contact between central and lateral incisors
film placed far back in patient’s mouth
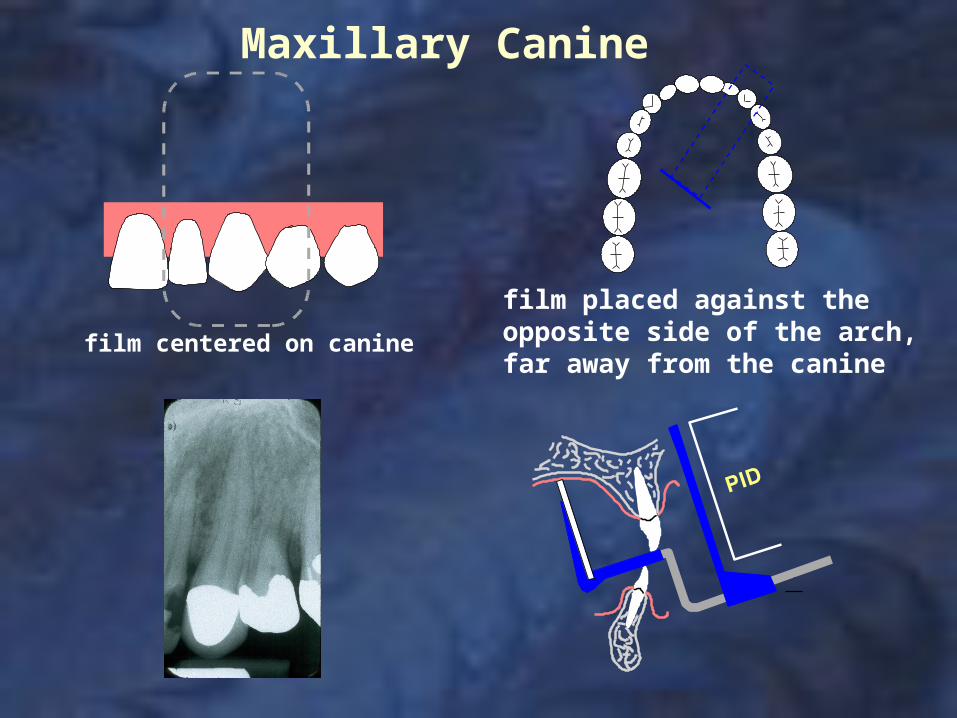
Maxillary Canine
film centered on canine
film placed against the opposite side of the arch, far away from the canine
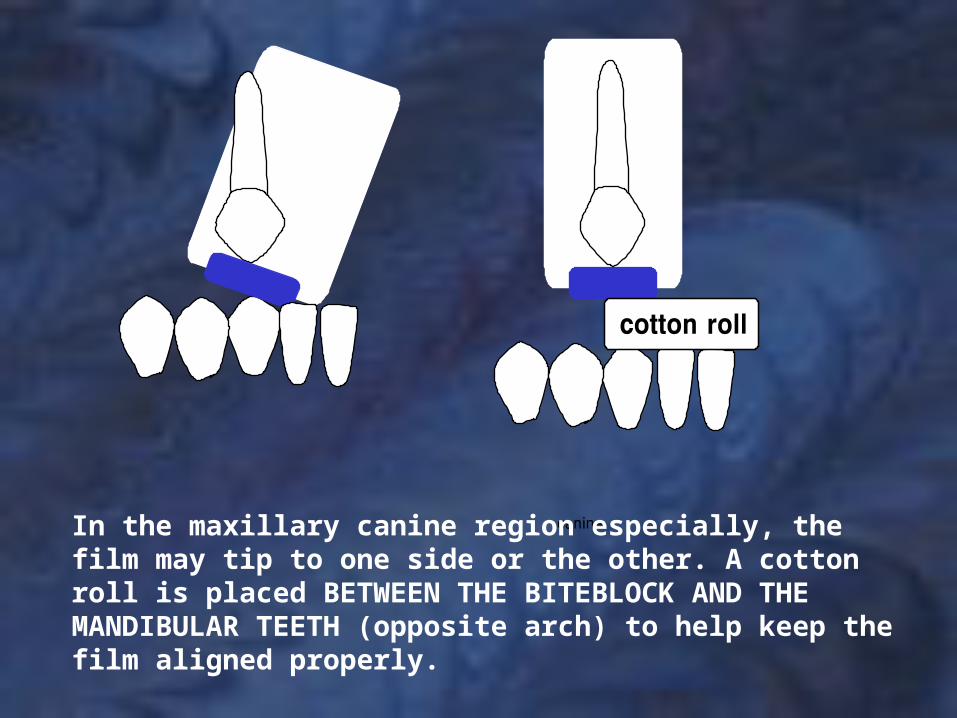
In the maxillary canine region especially, the film may tip to one side or the other. A cotton roll is placed BETWEEN THE BITEBLOCK AND THE MANDIBULAR TEETH (opposite arch) to help keep the film aligned properly.
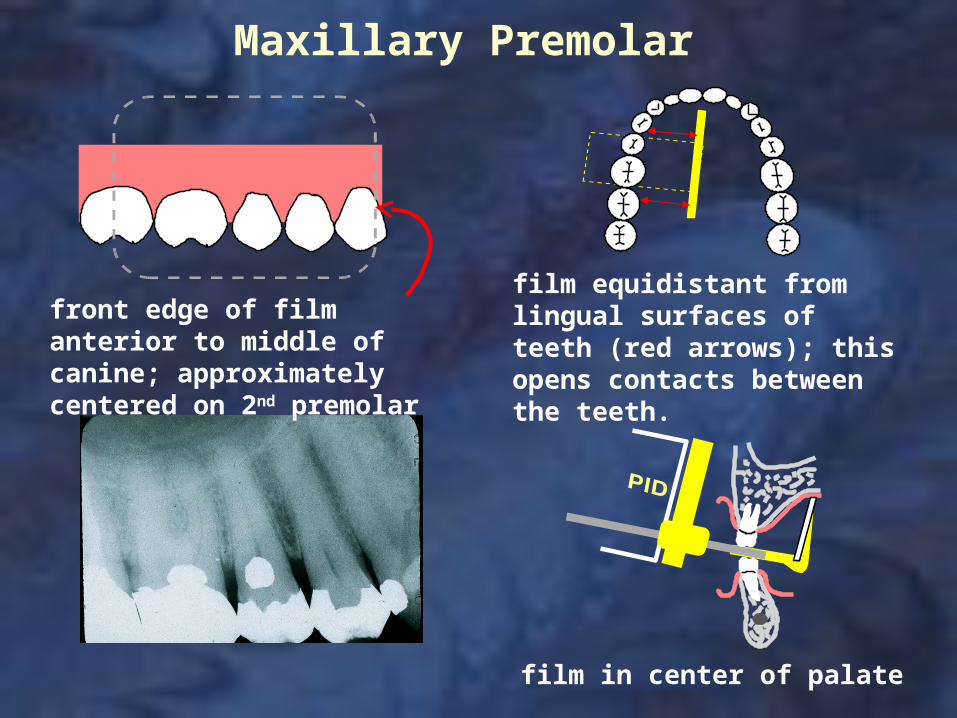
Maxillary Premolar
front edge of film anterior to middle of canine; approximately centered on 2nd premolar
film equidistant from lingual surfaces of teeth (red arrows); this opens contacts between the teeth.
film in center of palate
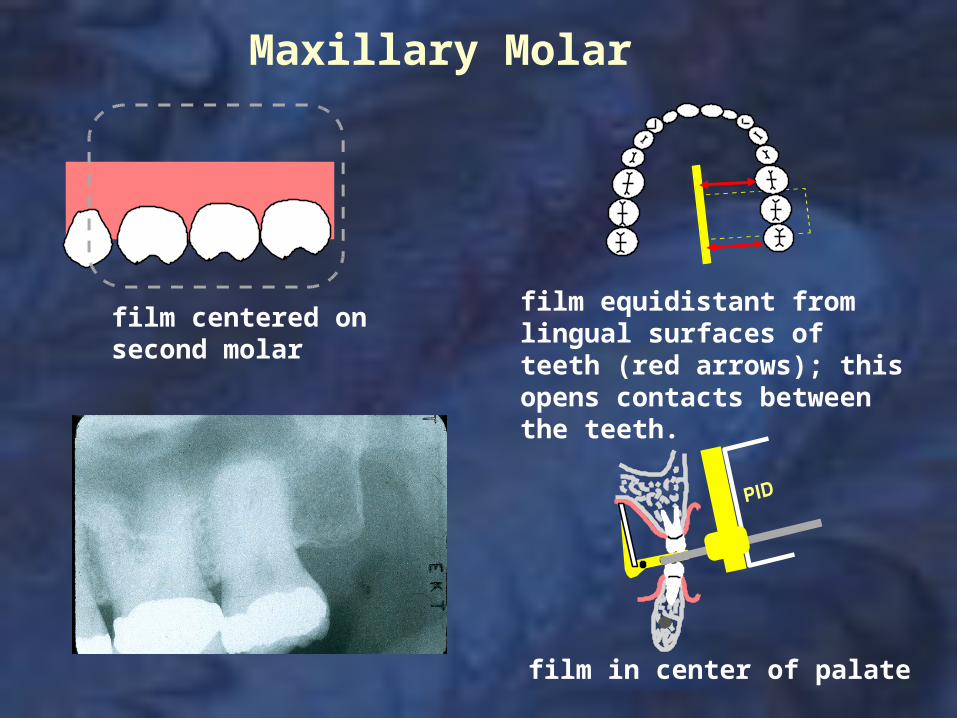
Maxillary Molar
film centered on second molar
film in center of palate
film equidistant from lingual surfaces of teeth (red arrows); this opens contacts between the teeth.
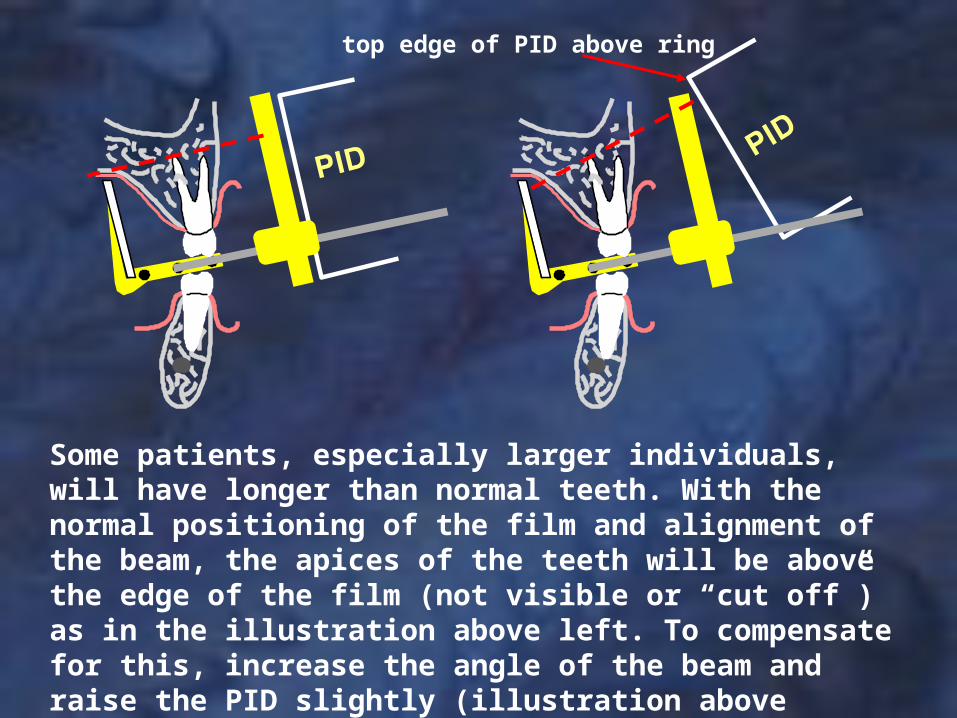
Some patients, especially larger individuals, will have longer than normal teeth. With the normal positioning of the film and alignment of the beam, the apices of the teeth will be above the edge of the film (not visible or “cut off”) as in the illustration above left. To compensate for this, increase the angle of the beam and raise the PID slightly (illustration above right). You are purposely foreshortening the image.
top edge of PID above ring
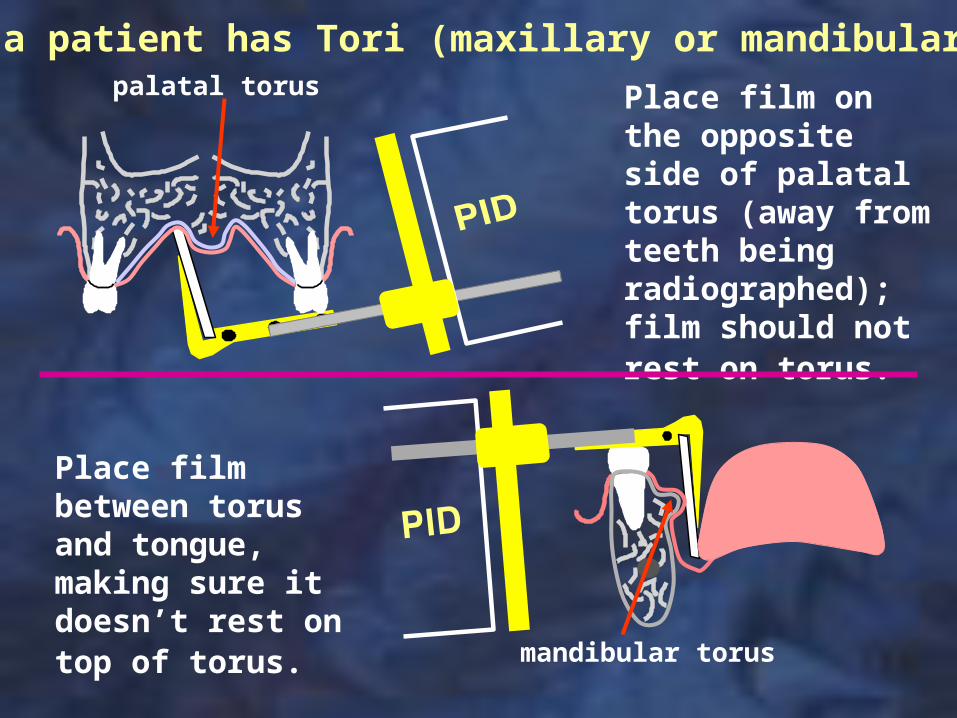
palatal torus
mandibular torus
If a patient has Tori (maxillary or mandibular):
Place film on the opposite side of palatal torus (away from teeth being radiographed); film should not rest on torus.
Place film between torus and tongue, making sure it doesn’t rest on top of torus.

Mandibular Incisor
film centered on midlinefilm positioned away from teeth, pushing tongue back slightly
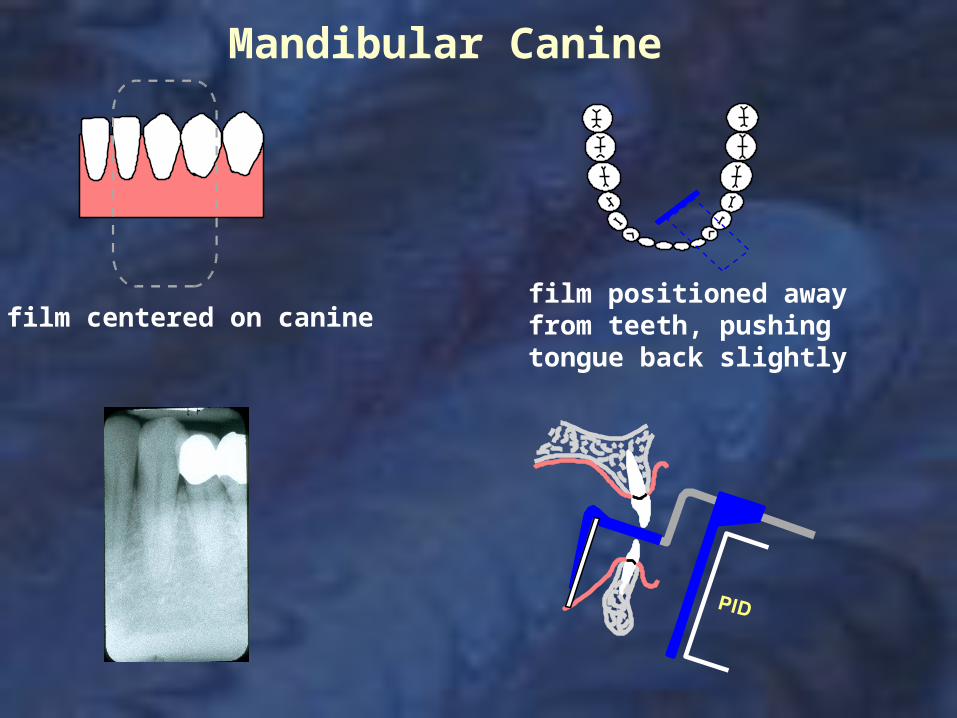
Mandibular Canine
film centered on caninefilm positioned away from teeth, pushing tongue back slightly
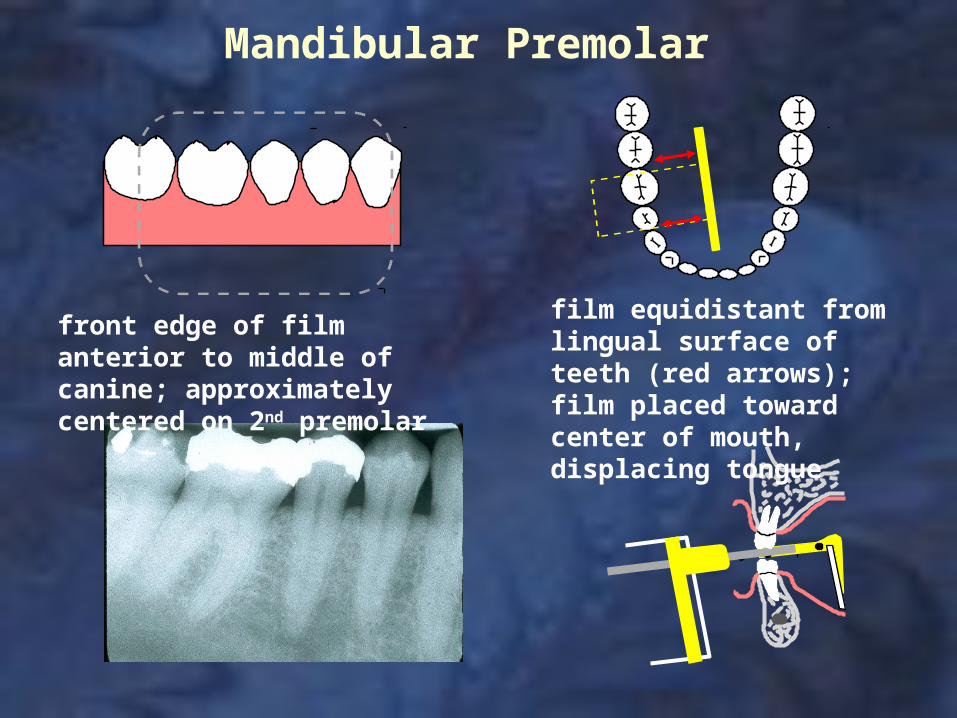
Mandibular Premolar
film equidistant from lingual surface of teeth (red arrows); film placed toward center of mouth, displacing tongue
front edge of film anterior to middle of canine; approximately centered on 2nd premolar
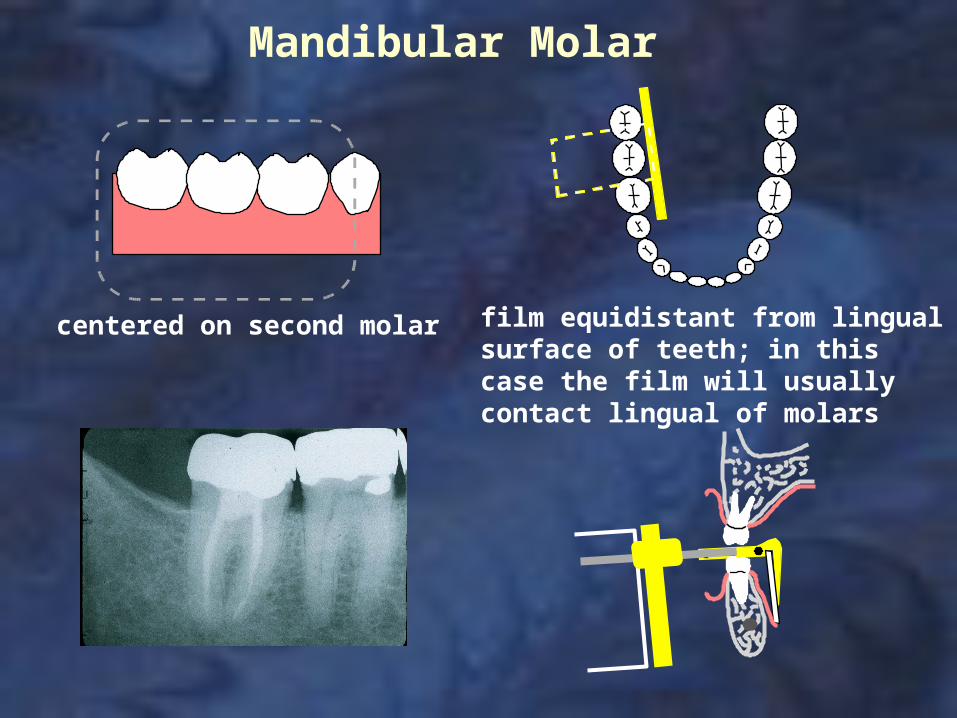
centered on second molar
Mandibular Molar
film equidistant from lingual surface of teeth; in this case the film will usually contact lingual of molars