pcduino os installation guide - amazon s3guide/pcduino+os...fix the incorrect descriptions of the...
TRANSCRIPT

Doc Title pcDunio OS Installation Guide Number WMSBB121219
Version 0.3
Document No WMSBB121219 Page 1 of 22
pcDuino OS
Installation Guide
Copyright © 2013 pcDuino

Doc Title pcDunio OS Installation Guide Number WMSBB121219
Version 0.3
Document No WMSBB121219 Page 2 of 22
HISTORY
Version Date Description Author
0.1 3/08/2013 Initial specification draft Lifeng Zhao
0.2 4/05/2013 Added for new kernel and OS release
Fix the incorrect descriptions of the kernel update procedure for
the previous OS updates.
Lifeng Zhao
0.3 4/09/2013 Fix the incorrect commands for write a bootable SD card on
MacOS
Lifeng Zhao
Doc Title pcDunio OS Installation Guide Number WMSBB121219
Version 0.3
Document No WMSBB121219 Page 3 of 22
INDEX
1. Overview .............................................................................................................................................................4
2. Required hardware for all samples in this user guide ....................................................................................6
3. Required software in this user guide ...............................................................................................................8
4. Install Ubuntu on pcDuino ................................................................................................................................9
4.1 Steps to burn the Linux Kernel and Ubuntu image to NAND flash ............................................................9
4.2 Steps to create SD bootable Ubuntu ............................................................................................................15
5. Install Android on pcDuino .............................................................................................................................18
Steps to update the Android to flash with micro-SD card (RECOMMEND) ...............................................18
6. Steps to update software from USB disk.....................................................................................................22

Doc Title pcDunio OS Installation Guide Number WMSBB121219
Version 0.3
Document No WMSBB121219 Page 4 of 22
1. Overview
This guide gives the detailed instructions on how to reinstall the operating system to the on board flash
storage of pcDuino. We also show how to create a bootable Ubuntu OS on the SD card. Ubuntu is pre-installed
in pcDuino’s on board flash at production. But there are times that you want to upgrade the pre-installed
Ubuntu or install the new Android OS to pcDuino.
The following are top and bottom views of pcDuino.

Doc Title pcDunio OS Installation Guide Number WMSBB121219
Version 0.3
Document No WMSBB121219 Page 5 of 22
There are three status LEDs on the board. These are Power, TX, and RX LEDs respectively. It is important to
take a look at these LEDs when you do troubleshooting or perform the OS updates on flash. The following
table shows how these LEDs look like when you perform various tasks on one well performed board.
LED status on typical working board
Power LED TX LED RX LED
Board boot-up On Off Off
Board boot up to Ubuntu On On On
Good working board On On On
LED status when burn image (dated April 4th.,2013) to the board
Power LED TX LED RX LED
Linux kernel is burning to flash On Blink Slowly Off
Linux kernel burning is complete On Off Off
Linux kernel burning is failed On Blink rapid Off
Linux kernel is updated, wait for
Ubuntu update
On Blink slowly On
Ubuntu image is burning to flash On Blink rapid On
Ubuntu image burning is complete On Blink slowly Blink slowly
Ubuntu image burning is failed On Blink rapid Blink rapid
LED status when burn image (dated before April 1st., 2013) to the board
Power LED TX LED RX LED
Linux kernel is burning to flash On Off Off
Linux kernel burning is complete On Off Off
Linux kernel burning is failed On Off Off
Linux kernel is updated, wait for
Ubuntu update
On Blink slowly On
Ubuntu image is burning to flash On Blink rapid On
Ubuntu image burning is complete On Blink slowly Blink slowly
Ubuntu image burning is failed On Blink rapid Blink rapid
Cautions: the OS installation and status LED act differently for old and latest OS releases. So please be
careful if you work with the OS releases dated before April 1st., 2013 that are treated as old releases. It is
highly recommended that you apply the latest release instead of the old one though.

Doc Title pcDunio OS Installation Guide Number WMSBB121219
Version 0.3
Document No WMSBB121219 Page 6 of 22
2. Required hardware for all samples in this user guide
pcDuino board
micro-USB port power adaptor ( 5V, 2000mA)
Display with HDMI port
HDMI cable
USB keyboard (must)
USB Hub and USB mouse (optional but strongly recommended )
Doc Title pcDunio OS Installation Guide Number WMSBB121219
Version 0.3
Document No WMSBB121219 Page 7 of 22
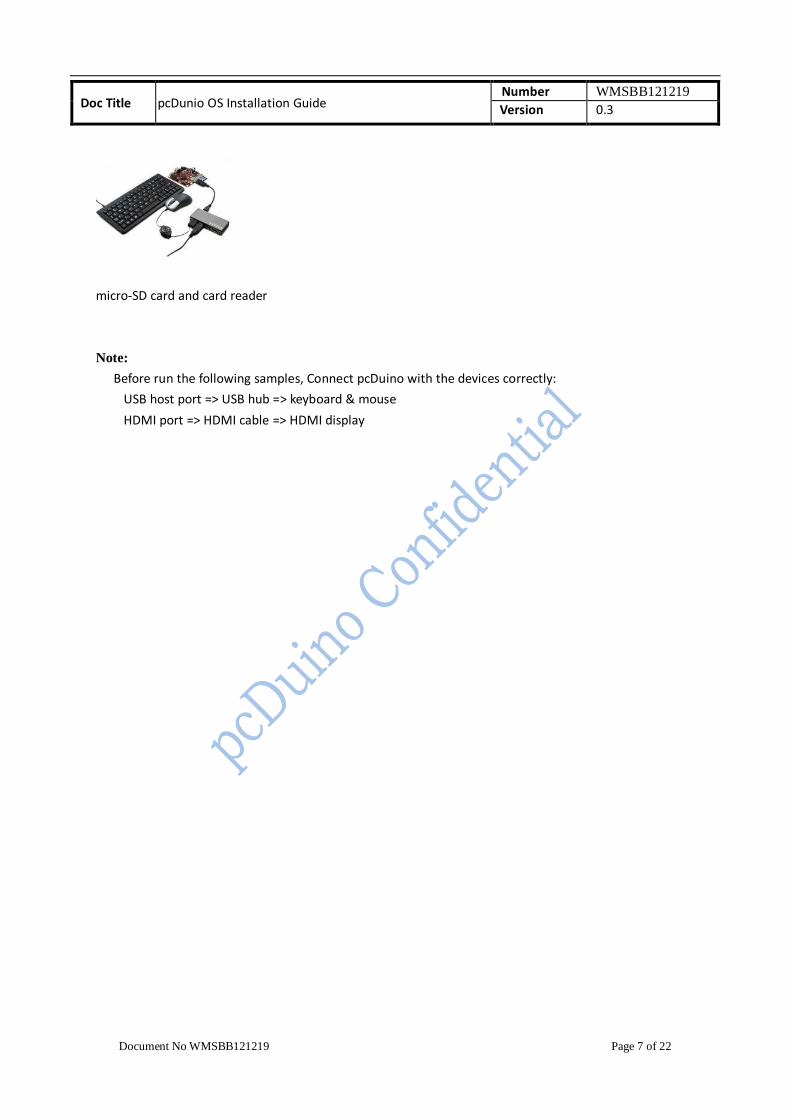
micro-SD card and card reader
Note:
Before run the following samples, Connect pcDuino with the devices correctly:
USB host port => USB hub => keyboard & mouse
HDMI port => HDMI cable => HDMI display
Doc Title pcDunio OS Installation Guide Number WMSBB121219
Version 0.3
Document No WMSBB121219 Page 8 of 22
3. Required software in this user guide
PhonixCard: a free tool that can create the production card for OS installation. This tool will create one
hidden disk partition in your card that you couldn’t format directly in your Windows PC.
Note: before using a micro-SD card to create the production card, please backup all the files on this card.
After installation, you need use PhonixCard to recover the micro-SD card for normal use.
Win32DiskWriter: a Window PC free software that could be used to create bootable SD card for Ubuntu. It is
used to copy the raw OS image file to the SD card. It is the same as dd in Linux or Mac OS.
dd: a free software in Linux or Mac OS that could be used to create bootable SD card for Ubuntu. It is used to
copy the raw OS image file to the SD card.
Cautions: Never use this tool to write to your hard disk, it may destroy your hard disk entirely.
LiveSuit: a free tool that can upgrade firmware by USB device. To use this tool, you must install two USB
drivers. You can download the tool and drivers from internet and read the user manual.
Note: LiveSuit is not very stable on Windows Vista or Windows 7, and it does not work wel l on 64 bits
CPU. So this tool is not recommended. Please use PhonixCard for production and firmware upgrade as your
first choice.
Hyper terminal: with the hyper-terminal tool, you can type the command in the linux shell of the device
when the device is connected to the PC with USB serial cable. SecureCRT is the recommended tool.

Doc Title pcDunio OS Installation Guide Number WMSBB121219
Version 0.3
Document No WMSBB121219 Page 9 of 22
4. Install Ubuntu on pcDuino
Warning: Be sure to copy your valuable (or invaluable) assets from the board before you apply the new OS
images.
This chapter is separated into two parts, the first part discusses how to install a new Ubuntu OS to the NAND flash
with micro-SD card and the second part describes how to create bootable micro-SD card for Ubuntu.
4.1 Steps to burn the Linux Kernel and Ubuntu image to NAND flash
The complete installation of the Ubuntu OS needs install both Linux kernel and Ubuntu image. The process is
separated into two steps. The first step is to update Linux kernel and the second is to install Ubuntu.
Step 1: Install Linux kernel
a) Download the Linux kernel and Ubuntu image files for pcDuino
The download page is:
http://www.pcduino.com/?page_id=14
If burning the old kernel dated before April 1st., 2013, please follow the instructions below:
Find the Ubuntu link in this page and download it. Unzip it and get two files like these:
- a10_kernel_xxx.img
- Ubuntu.zip
The first file is used in kernel upgrade, and the second one is used to update Ubuntu in step 2.
For OS dated after April 1st., 2013, the release is separated into kernel and Ubuntu.
Find the image files for kernel in the download page. There are two different files available. Please use the
LiveSuite or Phonexcard with file downloaded from the link
(https://s3.amazonaws.com/pcduino/Images/a10_kernel_livesuit_20130403.img). Or you could use the
Win32DiskImager in Windows PC or dd in Linux to write the file
(https://s3.amazonaws.com/pcduino/Images/a10_kernel_disk32imager_20130403.7z, unzipped it first) to SD card.
These files are different so please be careful to use correct file for the corresponding tools.
Note: we provide two files simply because there are people prefer using one tool than the other. If it makes you
confuse, my apologies.
b) Download the Phonenix Card software
The download page is:
http://www.pcduino.com/?page_id=14
Find the “Phonenix Card” link under Tools in this page and download it. Unzip it to a new folder with default name
PhoenixCardV306_20120302.

Doc Title pcDunio OS Installation Guide Number WMSBB121219
Version 0.3
Document No WMSBB121219 Page 10 of 22
c) Write Linux Kernel to TF card
i. Plug your micro-SD card to your PC, run “PhoenixCard.exe”. You will see something like this:
ii. Choose the Linux kernel image file a10_kernel_xxx.img that you’ve downloaded and write it to micro-SD
card

Doc Title pcDunio OS Installation Guide Number WMSBB121219
Version 0.3
Document No WMSBB121219 Page 11 of 22
After a few minutes, the TF card is ready to use to burn the kernel to the flash in pcDuino.
d) Burn the Linux Kernel to internal flash from micro-SD card
The RX and TX LEDs are shown differently in the old and new kernel updates. If you update the old kernel
dated before April 1st.,2013,
a) Plug the micro-SD card to the pcDuino, power on the board, and then wait for one minute
b) Eject the TF card and reset the device. If you see the RX LED stays on, and the TX LED is blinking, the
kernel is updated successfully.
Or, if you update the kernel dated after April 1st., 2013,
a) Plug the micro-SD card to the pcDuino, power on the board, the TX LED starts blink slowly while RX LED
stays off when kernel is burning.
b) Wait till the TX LED turns off. It indicates the kernel is burning successfully. Please eject the TF card and
continue to the following steps. Otherwise,
c) If the TX LED blink rapid, the kernel is failed to burn to flash. Please eject the TF card and check if the
kernel image file is correct.
e) Restore the micro-SD card created in step 1, c)
The micro-SD card is specially created in step 1, c) to allow it to be recognized by the ROMBOOT of the board. To
avoid the unexpected update of the kernel, use the PhoenixCard to restore it to normal and clean card
i. Plug your micro-SD card to your PC, run PhoenixCard.exe.
ii. Select the micro-SD card in the disk scroll window, and choose “Format to Normal” to restore the card.

Doc Title pcDunio OS Installation Guide Number WMSBB121219
Version 0.3
Document No WMSBB121219 Page 12 of 22
Burn the kernel in Linux PC
a) Insert the micro-SD card to Linux PC or pcDuino, the card will be mounted automatically. To continue,
un-mount all the partitions on the card. For example,
If the SD has two partitions:
$ sudo umount /dev/mmcblk0p1
$ sudo umount /dev/mmcblk0p2
b) Then burn the downloaded and unzipped image file (a10_kernel_disk32imager_20130403.img) to the
micro-SD card with the following command:
$ sudo dd if=/udisk/a10_kernel_disk32imager_20130403.img of=/dev/mmcblk0 bs=1M
$ sudo sync
The of=/dev/mmcblk0 points to the micro-SD card.
Cautions: Don’t use “of=/dev/xxx” to point to your hard disk. It will destroy the contents in your hard disk.
Now the micro-SD card is ready for use to burn the OS image to internal flash.
c) Burn the OS image to internal flash from micro-SD card

Doc Title pcDunio OS Installation Guide Number WMSBB121219
Version 0.3
Document No WMSBB121219 Page 13 of 22
i. Plug the micro-SD card to the pcDuino, power on the board, and then wait for one minute
ii. Eject the TF card and reset the device. If you see the RX LED stays on, and the TX LED is blinking, the
kernel is updated successfully
Burn the kernel in MAC OS PC
a) Open the terminal in MacOS, insert the micro-SD card, the card will be mounted automatically. To continue,
un-mount all the partitions on the card. For example,
If the SD has two partitions:
$ sudo umount /dev/disk1s1
$ sudo umount /dev/disk1s2
If the SD card is failed to umount, you can use the following script to force umount:
$ sudo diskutil umount force /dev/disk1s1
$ sudo diskutil umount force /dev/disk1s2
b) Then burn the downloaded and unzipped image file (a10_kernel_disk32imager_20130403.img) to the
micro-SD card with the following command:
$ sudo dd if=/udisk/a10_kernel_disk32imager_20130403.img of=/dev/disk1 bs=1m
The of=/dev/disk1 points to the micro-SD card. After this command is complete, your Mac PC will pop up the
message “can’t identify the SD card” that indicates the file system in your card is unknown to Mac PC now.
Cautions: Don’t use “of=/dev/xxx” to point to your hard disk. It will destroy the contents in your hard disk.
Now the micro-SD card is ready for use to burn the OS image to internal flash.
c) Burn the OS image to internal flash from micro-SD card
i. Plug the micro-SD card to the pcDuino, power on the board, and then wait for one minute
ii. Eject the TF card and reset the device. If you see the RX LED stays on, and the TX LED is blinking, the
kernel is updated successfully

Doc Title pcDunio OS Installation Guide Number WMSBB121219
Version 0.3
Document No WMSBB121219 Page 14 of 22
Step 2: Install Ubuntu
a) Unzip the Ubuntu.zip file obtained in Step 1, a)
If you use image file dated after April 1st, 2013, please unzip it to get two files as follows:
- Update.sh: shell script for Ubuntu update
- Ubuntu_xxx.img: image file for Ubuntu
Or, if you use image file dated before April 1st. , 2012, please unzip it to get three files like these:
- Update.sh: shell script for Ubuntu update
- Ubuntu_xxx.img: image file for Ubuntu
- *.tgz (released on March 2013) or *.fex (released on Feb. 2013) file depending on the version that you are
using
b) Copy the three files unzipped in Step 2 , a) to micro-SD card or USB flash disk
c) Burn the Ubuntu to internal flash
Plug the micro-SD card or USB flash disk to pcDuino and power on the device. If the TX LED starts to blink fast and
RX LED always stays on, it indicates the Ubuntu is being burned to internal flash. Wait until both TX LED and RX
LED blink slowly. It indicates that the Ubuntu is burned to internal flash successfully. Otherwise, if both TX LED and
RX LED blink very fast, the Ubuntu is failed to burn to flash. If so, please make sure that you have all three files
unzipped in step 2, a) in your disk and redo this step. This step usually takes around 10 minutes so be patient.
Doc Title pcDunio OS Installation Guide Number WMSBB121219
Version 0.3
Document No WMSBB121219 Page 15 of 22
4.2 Steps to create SD bootable Ubuntu
In order to create a bootable micro-SD for Ubuntu OS, please use micro-SD card that is at least 4GB.
Under Windows:
1. Download the SD bootable Ubuntu image for pcDuino
The download link is:
http://www.pcduino.com/?page_id=14
Find the link for SD bootable Ubuntu image, download it, unzip it if needed, and get one file with .img extension.
2. Download the Win32DiskImager software
The download page is:
http://www.pcduino.com/?page_id=14
Find the Win32DiskImager link under Tools in this page and download it. Unzip it to a new folder with default
name win32diskimager-v0.7-binary.
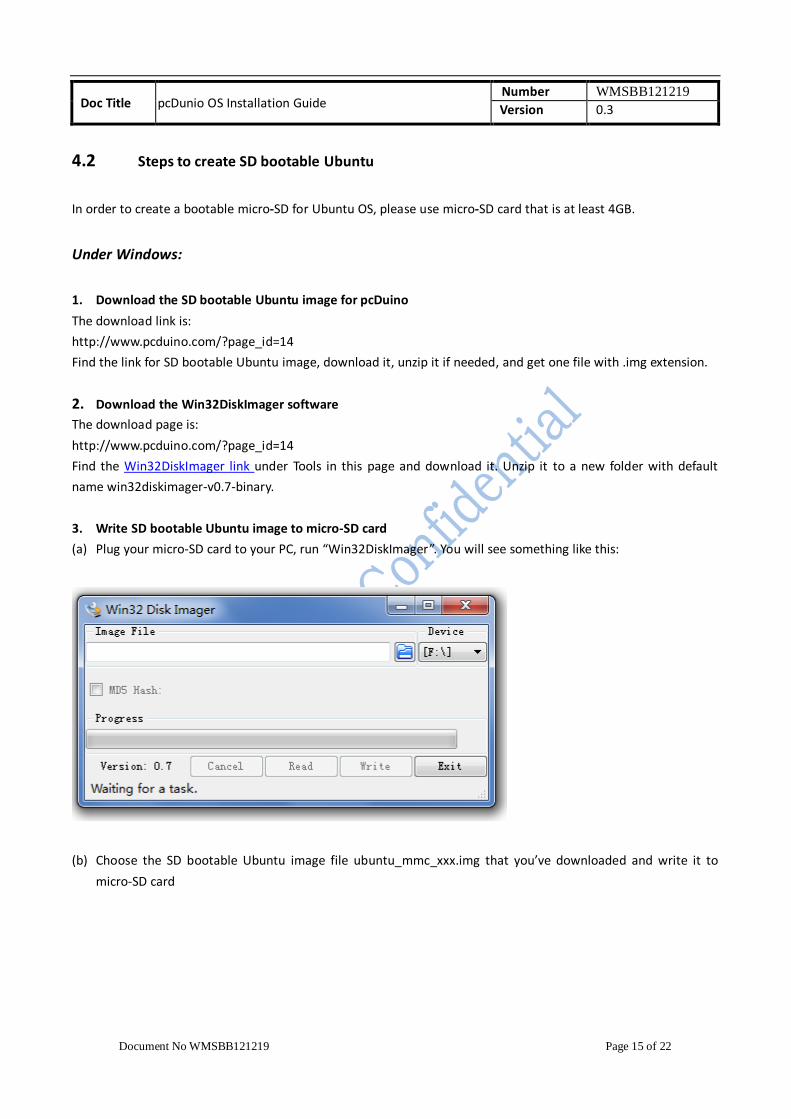
3. Write SD bootable Ubuntu image to micro-SD card
(a) Plug your micro-SD card to your PC, run “Win32DiskImager”. You will see something like this:
(b) Choose the SD bootable Ubuntu image file ubuntu_mmc_xxx.img that you’ve downloaded and write it to
micro-SD card

Doc Title pcDunio OS Installation Guide Number WMSBB121219
Version 0.3
Document No WMSBB121219 Page 16 of 22
After a few minutes, when the progress bar reach 100%, the TF card is ready to use to bootup the pcDuino.
Under Linux:
1. Download the SD bootable Ubuntu image for pcDuino
The download link is:
http://www.pcduino.com/?page_id=14
Find the link for SD bootable Ubuntu image, download it, unzip it if needed, and get one file named like
ubuntu_mmc_xxx.img.
2. Write SD bootable Ubuntu image to micro-SD card
a) Insert the micro-SD card to Linux PC or pcDuino, the card will be mounted automatically. To continue,
un-mount all the partitions on the card. For example,
If the SD has two partitions:
$ sudo umount /dev/mmcblk0p1
$ sudo umount /dev/mmcblk0p2
b) Then burn the downloaded and unzipped SD bootable image file (ubuntu_mmc_xxx.img) to the micro-SD
card with the following command:
$ sudo dd if=/udisk/ubuntu_mmc_xxx.img of=/dev/mmcblk0 bs=1M
$ sudo sync
The of=/dev/mmcblk0 points to the micro-SD card.
Cautious: don’t use “of=/dev/xxx” to point to your hard disk. It will destroy the contents in your hard disk.
Now the micro-SD card is ready for use to boot up the pcDuino.
Doc Title pcDunio OS Installation Guide Number WMSBB121219
Version 0.3
Document No WMSBB121219 Page 17 of 22
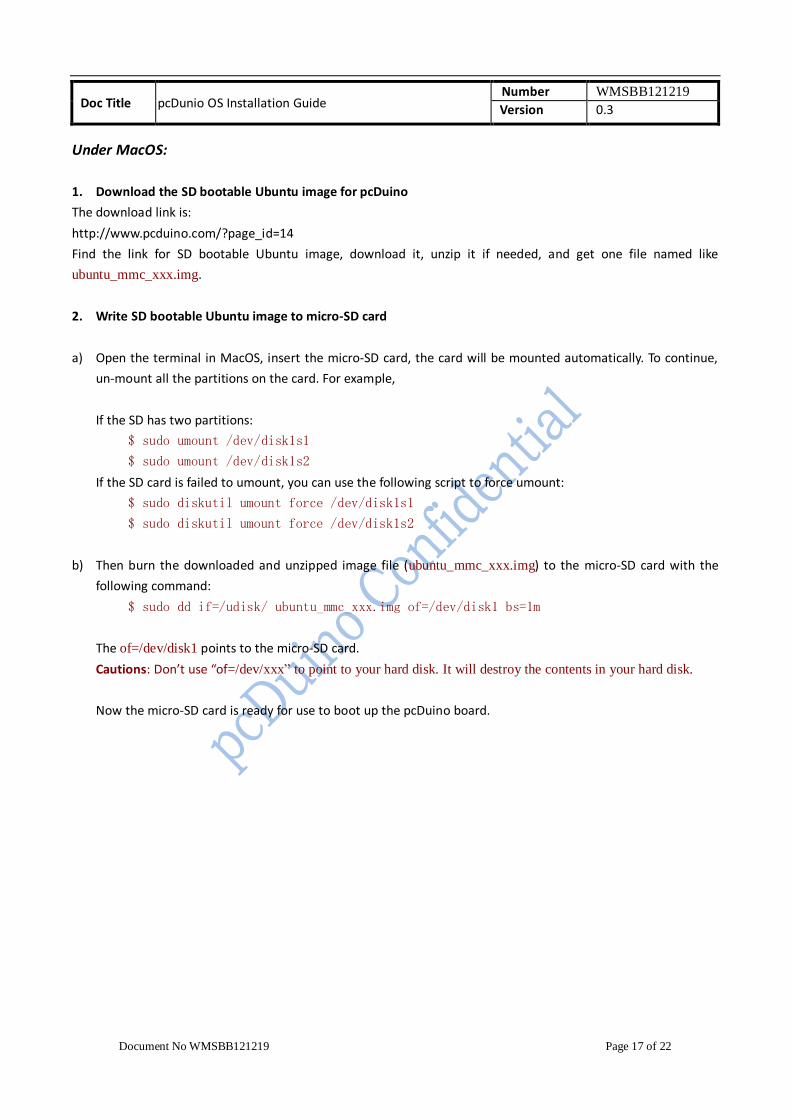
Under MacOS:
1. Download the SD bootable Ubuntu image for pcDuino
The download link is:
http://www.pcduino.com/?page_id=14
Find the link for SD bootable Ubuntu image, download it, unzip it if needed, and get one file named like
ubuntu_mmc_xxx.img.
2. Write SD bootable Ubuntu image to micro-SD card
a) Open the terminal in MacOS, insert the micro-SD card, the card will be mounted automatically. To continue,
un-mount all the partitions on the card. For example,
If the SD has two partitions:
$ sudo umount /dev/disk1s1
$ sudo umount /dev/disk1s2
If the SD card is failed to umount, you can use the following script to force umount:
$ sudo diskutil umount force /dev/disk1s1
$ sudo diskutil umount force /dev/disk1s2
b) Then burn the downloaded and unzipped image file (ubuntu_mmc_xxx.img) to the micro-SD card with the
following command:
$ sudo dd if=/udisk/ ubuntu_mmc_xxx.img of=/dev/disk1 bs=1m
The of=/dev/disk1 points to the micro-SD card.
Cautions: Don’t use “of=/dev/xxx” to point to your hard disk. It will destroy the contents in your hard disk.
Now the micro-SD card is ready for use to boot up the pcDuino board.

Doc Title pcDunio OS Installation Guide Number WMSBB121219
Version 0.3
Document No WMSBB121219 Page 18 of 22
5. Install Android on pcDuino
Steps to install the Android to flash with micro-SD card (RECOMMEND)
1. Download the Android operating system for pcDuino
The download link is:
http://www.pcduino.com/?page_id=14
Find the link for Android image, download it and get one file with .img extension.
Cautions: You could use Livesuite or Phonenix card with this file. Please don’t use Win32DiskImager or dd with
this file, it isn’t raw image file so it won’t work with these tools.
2. Download the Phonenix Card software
The download page is:
http://www.pcduino.com/?page_id=14
Find the “Phonenix Card” link under Tools in this page and download it. Unzip it to a new folder with default name
PhoenixCardV306_20120302.
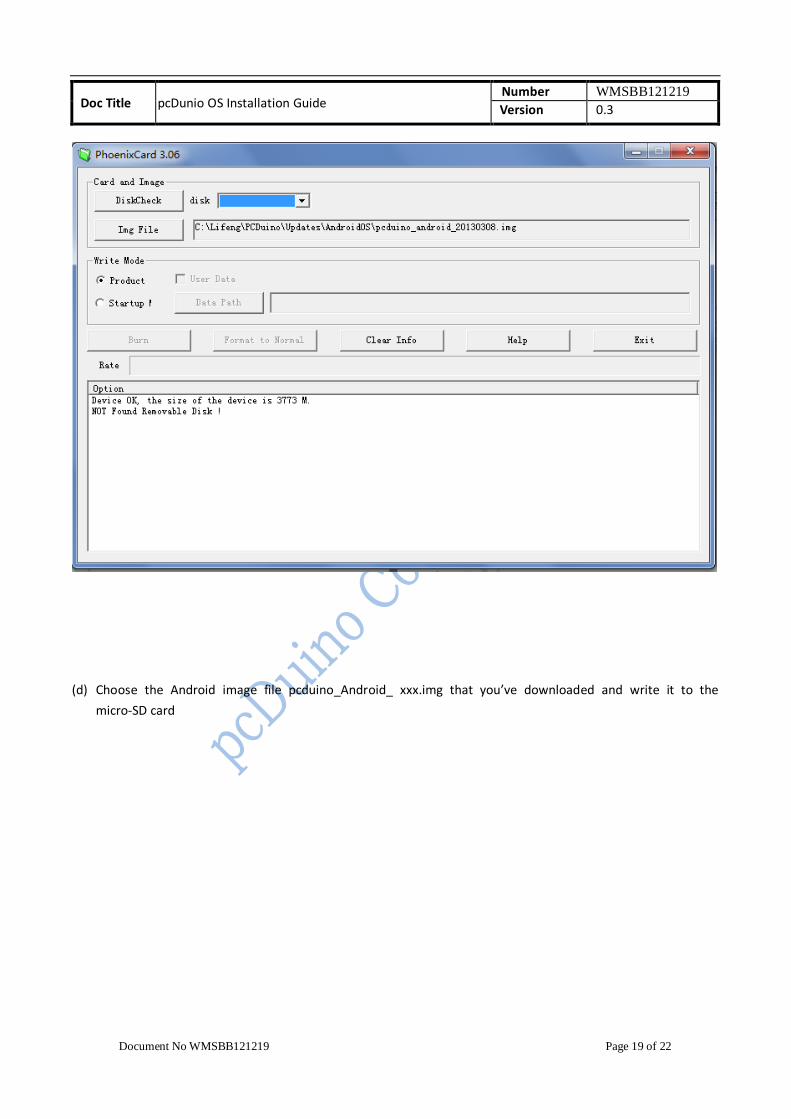
3. Write pcDuino Android image to micro-SD card
(c) Plug your micro-SD card to your PC, run “PhoenixCard.exe”. You will see something like this:
Doc Title pcDunio OS Installation Guide Number WMSBB121219
Version 0.3
Document No WMSBB121219 Page 19 of 22
(d) Choose the Android image file pcduino_Android_ xxx.img that you’ve downloaded and write it to the
micro-SD card

Doc Title pcDunio OS Installation Guide Number WMSBB121219
Version 0.3
Document No WMSBB121219 Page 20 of 22
After a few minutes, the micro-SD card is ready to use.
4. Burn the OS image to internal flash from micro-SD card
a) Plug the micro-SD card to the pcDuino and then power on the board. Wait for about four minutes
b) Eject the micro-SD card and reset the device
* We have a catch in step (a). We don't have any LED to indicate when the boot image is burned completely
unless you connect the hyper terminal to pcDuino, so please wait for four minutes patiently. Moreover, please
eject the TF card before resetting the device. Otherwise, it will start to burn the OS image again if the TF card is
inserted.
5. Restore the micro-SD card created in step 3
The micro-SD card is specially created in step 3 to allow it to be recognized by the ROMBOOT of the board. To
avoid the unexpected update of the Android OS, use the PhoenixCard to restore it to normal and clean card
(e) Plug your micro-SD card to your PC, run “PhoenixCard.exe”.
(f) Select the micro-SD card in the disk scroll window, and choose “Format to Normal” to restore the card.

Doc Title pcDunio OS Installation Guide Number WMSBB121219
Version 0.3
Document No WMSBB121219 Page 21 of 22
Doc Title pcDunio OS Installation Guide Number WMSBB121219
Version 0.3
Document No WMSBB121219 Page 22 of 22
6. Steps to update software from USB disk
Over time, we will have the bug fix or provide new features to pcDuino board. Most of the time, users do not
need to update the whole operating system. Instead, we could add software patch to accomplish this. The
procedure is simply like these:
1. Copy update package to USB disk (for example: update.sh, update.tgz )
2. Power on pcDuino board
3. Plugin the USB disk to USB host port
4. Open a terminal after login to Ubuntu
5. Run commands to update the package
$ cd /media/*/
$ bash ./update.sh
Note:
If the USB disk has more than one partition, enter the whole path which the partition including update
package is mounted, for example “cd /media/Volumn”. If you don’t know which partition to choose, open “File
Manager” to check it.
The name of update script (update.sh) and update package (update.tgz) may be different for the individual
purpose.