desert meets sea - knitoutsidethebox | thinking … meets sea necklace a statement necklace made by...
TRANSCRIPT
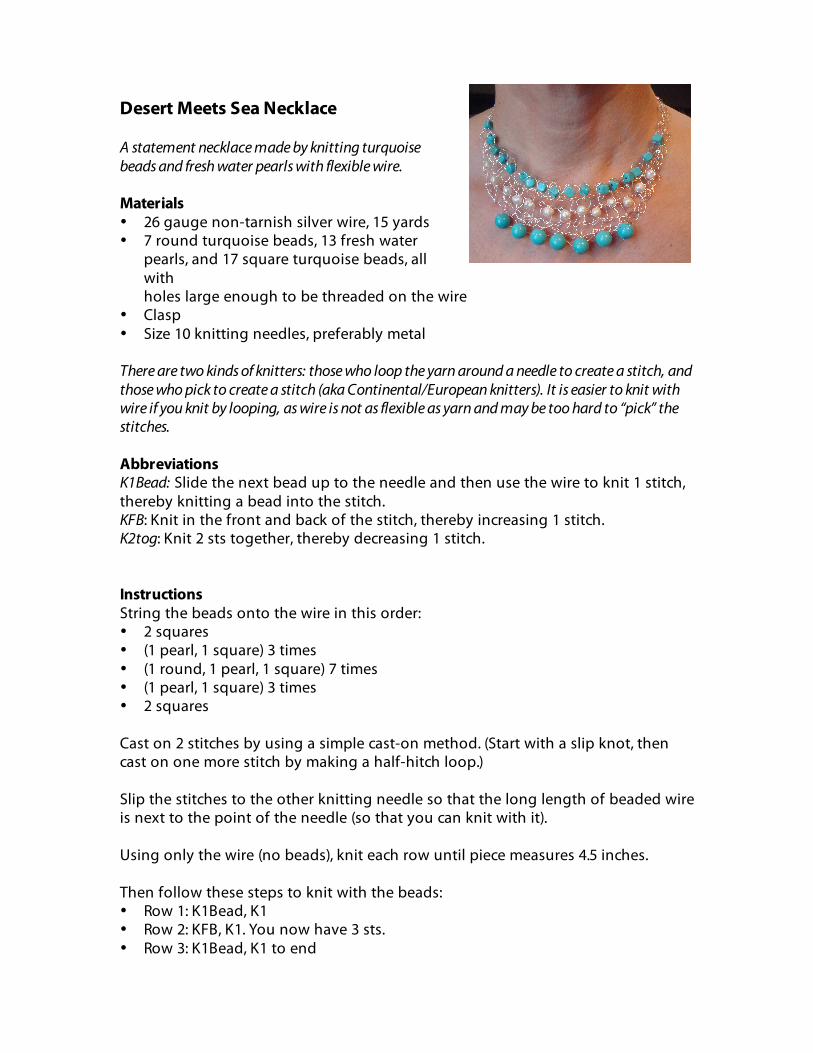
Desert Meets Sea Necklace A statement necklace made by knitting turquoise beads and fresh water pearls with flexible wire. Materials • 26 gauge non-tarnish silver wire, 15 yards • 7 round turquoise beads, 13 fresh water
pearls, and 17 square turquoise beads, all with holes large enough to be threaded on the wire
• Clasp • Size 10 knitting needles, preferably metal There are two kinds of knitters: those who loop the yarn around a needle to create a stitch, and those who pick to create a stitch (aka Continental/European knitters). It is easier to knit with wire if you knit by looping, as wire is not as flexible as yarn and may be too hard to “pick” the stitches. Abbreviations K1Bead: Slide the next bead up to the needle and then use the wire to knit 1 stitch, thereby knitting a bead into the stitch. KFB: Knit in the front and back of the stitch, thereby increasing 1 stitch. K2tog: Knit 2 sts together, thereby decreasing 1 stitch. Instructions String the beads onto the wire in this order: • 2 squares • (1 pearl, 1 square) 3 times • (1 round, 1 pearl, 1 square) 7 times • (1 pearl, 1 square) 3 times • 2 squares Cast on 2 stitches by using a simple cast-on method. (Start with a slip knot, then cast on one more stitch by making a half-hitch loop.) Slip the stitches to the other knitting needle so that the long length of beaded wire is next to the point of the needle (so that you can knit with it). Using only the wire (no beads), knit each row until piece measures 4.5 inches. Then follow these steps to knit with the beads: • Row 1: K1Bead, K1 • Row 2: KFB, K1. You now have 3 sts. • Row 3: K1Bead, K1 to end

• Row 4: KFB, K1 to end. You now have 4 sts. • Row 5, 7, 9: K1Bead, K1, K1Bead, K1 • Row 6, 8: K1 to end • Row 10: KFB, K1 to end. You now have 5 sts. • Row 11, 13, 15, 17, 19, 21, 23: K1Bead, K1, K1Bead, K1, K1Bead • Row 12, 14, 16, 18, 20, 22: K1 to end • Row 24: K2tog, K1 to end. You now have 4 sts. • Row 25, 27, 29: K1Bead, K1, K1Bead, K1 • Row 26, 28: K1 to end • Row 30: K2tog, K1 to end. You now have 3 sts. • Row 31: K1Bead, K1 to end • Row 32: K2tog, K1. You now have 2 sts. • Row 33: K1Bead, K1
Continue knitting for 4.5 more inches. Cast off. Using tails of wire, attach the clasp to each end. Cut the wire (with normal household scissors) and crimp the cut end to the bracelet so that it doesn't scratch when wearing it. I use jewelry pliers to crimp the wire, but you could use tweezers.
All Photos and Content © 2012 by Karen Catlin. All rights reserved. Questions, comments? Email me at [email protected].
Visit me on the web at http://www.knitoutsidethebox.com