minerals - wordpress.com what minerals are used to make those items and list at least 3. determine...
TRANSCRIPT

Girl Scouts of Alaska | Alaska Resource Education | Minerals Patch
Minerals

Page: M-2Version 1 | Copyright Alaska Resource Education 2014
Level: Brownie
Requirements: Complete item 1, or 2, or 3, and at least 2 other activities.
1. JellyBelly Geology
2. Mine a Cookie
3. The Rock Game
4. Speaking ScienceDefine the following terms related to minerals or mining:
a. Rockb. Mineralc. Lusterd. Hardnesse. Explorationf. Operationg. Reclamation
Patch design for the Girl Scouts - Maria Talasz, USKH Inc.
minerals
5. Look Up Find and record information for the following:• A proposed/exploration mining project
(i.e. Donlin Creek, Pebble, Niblack, Livengood)
• An operating mine (i.e. Red Dog, Fort Knox, Pogo, Greens Creek, Kensington, Usibelli)
a. Name the projectb. Locate the project (Within Alaska)c. List the mineral(s) in the deposit/mined. Identify the type of mine (or what is proposed)
6. Compare and ContrastWhat are differences between a rock and a mineral? What are the similarities? List as many of both as you can.
7. Identify List 3 items you use in your everyday life. Research what minerals are used to makethose items and list at least 3. Determine which of those minerals are mined here in Alaska.
Level: Junior, Cadette, or Senior
Requirements: Complete item 1, or 2, or 3, plus activity number 5, and at least 2 other activities.
Girl Scouts of AlaskaAlaska Resource EducationMinerals Patch
For lessons, more information, and helpful links visit: www.akresource.org

Page: M-3Version 1 | Copyright Alaska Resource Education 2014
Time: 1-2 hours
Girl Scouts will learn to identify and classify rocks and minerals by their properties.
Vocabulary
• Geologist• Classification• Characteristics• Opaque• Translucent
WHERE DO MINERALS COME FROM?
Jelly Belly Geology & Rock Identification
Essential Question: How do you identify rocks and minerals?
Information and ProcedureMaterials needed
• Small cups or bag to hold Jelly Bellys• Jelly Bellys (see the Jelly Belly Key for flavors)• Jelly Belly key and Rock Key• Alaska Rock and Mineral Collection (40-speci-
men set can be checked-out at your local Girl Scouts office)
What to do in advance Copy the attached handouts for the Girl Scouts. In each small cup, put 1 of each flavor of Jelly Belly.
Gear up 1. Discuss prior knowledge of rocks and minerals to
gauge how much introduction or review to include in the lesson. Let them describe a favorite rock they have by using one or two descriptive words.
2. Explain the term “geologist.” A geologist is a scientist who studies the solid and liquid matter that constitutes the Earth.
Explore1. Hand out the Jelly Bellys and Keys for the Girl
Scouts. Instruct Girl Scouts to NOT EAT the Jelly Bellys because they are the rocks that they are going to classify and identify.
2. Have the Girl Scouts start with the color of the Jelly Bean and follow the lines that most appropriately describe their Jelly Belly until they reach the flavor. Have them continue until all their Jelly Bellys have been classified.
3. When finished, have the Girl Scouts taste test their Jelly Bellys to see if they matched it with the correct flavor. Have them tally their answers as correct or incorrect and log it in the box on the Jelly Belly Key.
4. Discuss that geologists are not always accurate in their assessments. Rocks can have many similar characteristics but still be different. It is important for geologists to conduct several types of tests and to repeat their work to make sure they are accurate. A mistake in real life could cost millions of dollars to the company.
5. Have Girl Scouts partner up. Show them the Alaska Rock and Mineral Kit and explain that these are materials that are mined currently or historically in Alaska. Pull out the rocks listed on the Rock Key and hand one or two out (depending on class size) to each pair. Be sure to keep the lid of the Rock Key with you as they contain the answers.
6. Instruct the Girl Scouts to classify their rock samples from the rock kit using the Rock Key. Have them write their answer next to their rock on a sheet of paper. Confirm with them if they matched the correct rock with the name.
Generalize• What were some of the observable character-
istics that helped you to identify one rock/min-eral out of many?
• Why might it be important for scientists and geologists to observe and describe things care-fully?
• What makes it difficult to identify one rock from another?

Page: M-4Version 1 | Copyright Alaska Resource Education 2014
Spots Peach
Correct
Incorrect
Orange sherbet
Grapefruit
Lemon
Crushed pineapple
Sizzling cinnamon
BananaButtered popcorn
Pineapple coconut punch
Opaque
Orange
Yellow
Red
Green
Purple
White
Blue Blueberry
Brown
Red
Pink
Translucent
Opaque
Opaque
Opaque
Translucent
Translucent
Translucent Cream soda
Opaque
Translucent
Dark
Dark
Dark
Dark Cinnamon
Dark spots Raspberry
Colored spots Tutti frutti
Small spots Strawberry punch
Spots
No spots
Spots
Dark Watermelon
Dark Grape jelly
Dark Chocolate pudding
Dark Green apple
Light 7-Up
Medium Sunkist lime
Spots Berry smoothie
Spots Toasted marshmallow
No spots Coconut
Spots Cappuchino
No spots Root beer
No spots Bubble gum
Light
Light
Light Cherry
Dark spotsLight spots
Light spots
Jelly Belly Geology Key

Page: M-5Version 1 | Copyright Alaska Resource Education 2014
STA
RT
Can
you
see
crys
tals
?
No
Yes
Larg
e cr
ysta
ls?
Sm
all
crys
tals
?
Is y
our
rock
ligh
tco
lore
d?
Is y
our
rock
dar
kco
lore
d?
Gra
nite
Gab
bro
Sch
ist
Mar
ble
Laye
red
Not
Laye
red
Can
you
see
or f
eel
sand
of p
ebbl
es
Shi
ney Une
ven
Coa
lO
bsid
ian
Sm
ooth
Dul
l
No
Yes
San
dsto
neC
ongl
omer
ate
San
dP
ebbl
es
Laye
red
Not
Laye
red
Has
hole
sso
lidG
ray
Gra
y/Ye
llow
Sla
teP
umic
eLi
mes
tone
Sha
le
Rock
Key

Page: M-6Version 1 | Copyright Alaska Resource Education 2014
Information and ProcedureMaterials needed (1 per student)
• cookie• price chart• tally sheet• flat toothpicks• popsicle stick
What to do in advance • Use cookies that have at least 1 different “miner-
al” (nuts, chocolate chips, raisins, etc.) in it. (Softer cookies work better than hard ones.)
• Adjust the price chart and tally sheet based on the type of cookie you are using. Give the “minerals” which may be rarer a higher value than the others.
Gear up Discuss what mining means and where mining happens in Alaska. Use a map to locate theactive mines in the state.
Explore1. Tell the Girl Scouts they will be “mining” their
cookie for “minerals”. Tell them they may not eat their cookie until after they have mined it.
2. Review the price sheet.3. Cover the cookies with frosting. Have Girl Scouts
predict the type and amount of each mineral they will find in the “mine”. This is true to real life. Miners don’t know what is underground until they actually start digging; they can only predict.
4. Have Girl Scouts choose mining tool(s): a toothpick, popsicle stick, spoon, or fork. If they break their tool, they have to get a new one. They may NOT use their hands.
Time: 1 hour
Girl Scouts “mine” cookies to determine their “mineral” value
WHERE DO MINERALS COME FROM?
Mine a CookieEssential Question: What is mining like and how does it work?
5. Have them try to extract the “minerals” from their cookie and place them on a plate. Once they have mined, tell them they must “mill” the mined material (ore) to concentrate the valuable minerals more. They do this by taking off as much cookie off the “mineral” as possible. Milling in real life separates the earth from the valuable minerals.
6. The clump of mined material (dough and “minerals”) is known as the “ore” and the leftovers are called the tailings. Girl Scouts “mill” their ore to get the minerals out.
7. After the “minerals” have been milled, Girl Scouts tally their totals. For older girls, you may want to add the concept of profit or loss and tell them they are starting off with a certain amount of debt and they have to make more than that to make a profit.
8. Tell Girl Scouts they must put their cookie back together as best they can without the minerals they mined, before they eat it. This is called reclamation.
GeneralizeCompare the predictions and actual amounts mined. Were some of the cookies more valuable than others? How do you think this compares to the way that minerals are really mined? What are some of the things that miners have to pay for to get minerals?
Change it up!Use colored frosting and/or sprinkles to create wetlands, parks, or preserves on the surface of the cookie. These must not be disturbed when mining. Instead of using food, make the mining cookie from clay, mud, gravel and objects like marbles, buttons, etc.
• plastic spoons• plastic forks• napkins• small paper plates• frosting
Vocabulary
• Profit• Mining• Milling
• Reclamation• Ore• Extraction
Page: M-7Version 1 | Copyright Alaska Resource Education 2014
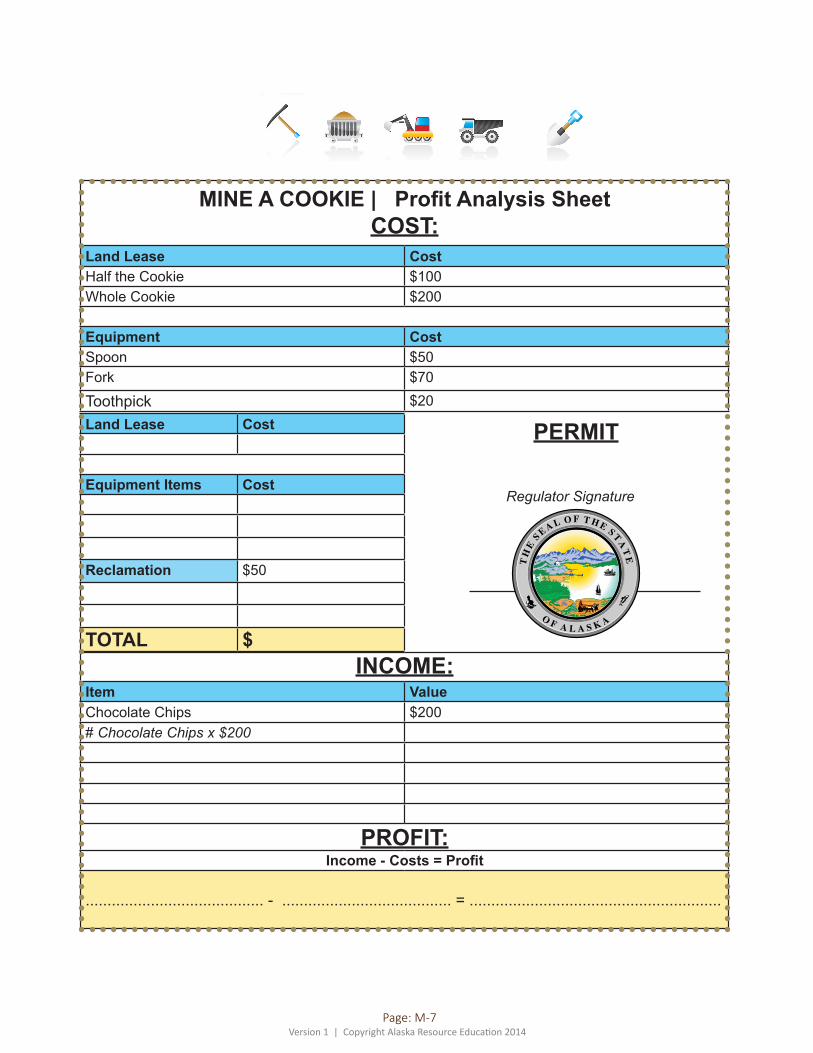
MINE A COOKIE | Profit Analysis SheetCOST:
Land Lease Cost Half the Cookie $100Whole Cookie $200
Equipment CostSpoon $50Fork $70
Toothpick $20
INCOME:Item Value Chocolate Chips $200# Chocolate Chips x $200
PROFIT:Income - Costs = Profit
......................................... - ....................................... = ..........................................................
Land Lease Cost
Equipment Items Cost
Reclamation $50
TOTAL $
Regulator Signature
PERMIT
Page: M-8Version 1 | Copyright Alaska Resource Education 2014
Vocabulary
• Luster• Texture• Stratification
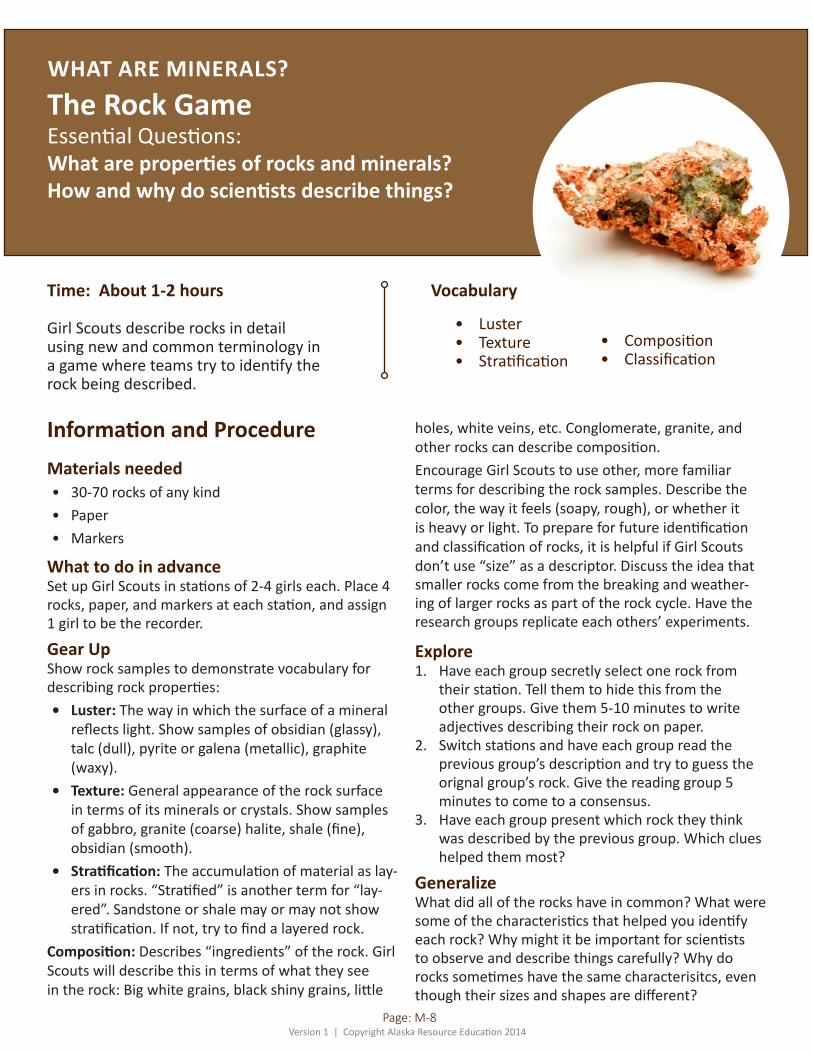
Time: About 1-2 hours
Girl Scouts describe rocks in detail using new and common terminology in a game where teams try to identify the rock being described.
WHAT ARE MINERALS?
The Rock GameEssential Questions: What are properties of rocks and minerals?How and why do scientists describe things?
Information and ProcedureMaterials needed • 30-70 rocks of any kind• Paper• Markers
What to do in advance Set up Girl Scouts in stations of 2-4 girls each. Place 4 rocks, paper, and markers at each station, and assign 1 girl to be the recorder.
Gear UpShow rock samples to demonstrate vocabulary for describing rock properties:• Luster: The way in which the surface of a mineral
reflects light. Show samples of obsidian (glassy), talc (dull), pyrite or galena (metallic), graphite (waxy).
• Texture: General appearance of the rock surface in terms of its minerals or crystals. Show samples of gabbro, granite (coarse) halite, shale (fine), obsidian (smooth).
• Stratification: The accumulation of material as lay-ers in rocks. “Stratified” is another term for “lay-ered”. Sandstone or shale may or may not show stratification. If not, try to find a layered rock.
Composition: Describes “ingredients” of the rock. Girl Scouts will describe this in terms of what they see in the rock: Big white grains, black shiny grains, little
holes, white veins, etc. Conglomerate, granite, and other rocks can describe composition.Encourage Girl Scouts to use other, more familiar terms for describing the rock samples. Describe the color, the way it feels (soapy, rough), or whether it is heavy or light. To prepare for future identification and classification of rocks, it is helpful if Girl Scouts don’t use “size” as a descriptor. Discuss the idea that smaller rocks come from the breaking and weather-ing of larger rocks as part of the rock cycle. Have the research groups replicate each others’ experiments.
Explore1. Have each group secretly select one rock from
their station. Tell them to hide this from the other groups. Give them 5-10 minutes to write adjectives describing their rock on paper.
2. Switch stations and have each group read the previous group’s description and try to guess the orignal group’s rock. Give the reading group 5 minutes to come to a consensus.
3. Have each group present which rock they think was described by the previous group. Which clues helped them most?
GeneralizeWhat did all of the rocks have in common? What were some of the characteristics that helped you identify each rock? Why might it be important for scientists to observe and describe things carefully? Why do rocks sometimes have the same characterisitcs, even though their sizes and shapes are different?
• Composition• Classification