phase installing hardware 1 and software · 6 phase 1 installing hardware and software 14. locate...
TRANSCRIPT

Phase
1
Installing Hardware and Software
84588.book Page 1 Tuesday, October 24, 2006 2:09 PM
COPYRIG
HTED M
ATERIAL

Every common task that is performed by a PC technician is hands on in some way. Although some of the work you do is performed at the keyboard, many of the tasks you will perform in this phase
will be spent underneath a desk in someone’s cubicle or at a workbench. These are the usual loca-tions for opening up a computer case and installing or removing equipment. This phase of the book covers the most common installation tasks for hardware such as RAM, hard drives, and power supplies. In this phase, you’ll also learn how to install and uninstall various types of software, including operating systems, applications, and drivers. In general, you’ll need at least one PC that you can open up and work with as well as some common tools. Each task will list the specific requirements you’ll need in order to complete the job. This is also true of the software portion of this phase. Now it’s time to open the book to the first task, pick up a screwdriver, and get started.
The tasks in this phase map to Domains 1, 2, 3, 4, 7, and 8 for the CompTIA A+ Essentials (220-601) exam objectives; Domains 1, 2, 3, 4, and 8 for the CompTIA IT Technician (220-602) exam objectives; Domains 1, 2, 3, and 6 for the Comp-TIA Remote Support Technician (220-603) exam objectives; and Domains 1, 2.
and 3 for the CompTIA Depot Technician (220-604) exam objectives.
Task 1.1: Installing RAM
RAM, or random access memory, is the desktop of the computer. Anytime a PC user wants to open a program to read email, surf the Web, or play a game, that program is loaded into memory from the hard drive and will stay in memory for as long as it’s active. How many pro-grams a PC can run at the same time without a noticeable slowdown of performance depends on how much RAM is in the computer. Naturally, the more RAM a computer has, the better.
Installing RAM sticks is an extremely common task for a PC technician. You’ll likely spend countless hours on the floor or at a workbench, installing or upgrading RAM. Although choos-ing the correct type of RAM is vitally important, it is fairly simple to research the computer you are working on to discover exactly which type it takes.
Once you have the correct stick of RAM for the computer, all that’s left to do is to power down the PC, open it up, and install the stick. This task will guide you through the steps nec-essary to find the appropriate type of RAM for a particular computer and physically install it.
Scenario
One of the users in accounting has recently had installed on her PC new software that is required for a special project she is working on. She is using an older PC and complains that
84588c01.fm Page 2 Thursday, October 26, 2006 9:26 AM

Task 1.1: Installing RAM
3
when she tries to open the application, computer performance slows to a crawl. Your super-visor has determined that the user’s PC has insufficient RAM to run this piece of software and has assigned you to upgrade the amount of memory in her machine. You will need a com-puter with access to the Internet to research the type of RAM stick that is correct for the particular PC you’ll be working on. You will also need to have a computer in which you can install a RAM stick and the appropriate RAM itself. Make sure you have a screwdriver to remove the side panel of the computer so you can access the interior. You’ll need to take the appropriate steps to prevent electrostatic discharge (ESD) damage to the sensitive electrical components inside the PC as well as to the RAM stick you are about to install. See Task 1.18 for details about ESD precautions.
Scope of Task
Duration
This task should take about 30 minutes.
Setup
All you’ll need for this task is a single computer with at least one empty RAM slot, an appro-priate stick of RAM, and a screwdriver that will fit the screws holding the side access panel on the PC.
Caveat
Depending on the type of computer you are working on, how the PC’s access panel is attached will vary, so the instructions in this task may not be quite the same for your PC. The memory slots can be located on different areas of the motherboard on different computers, so you will have to take a moment to locate them. Some RAM slots can be difficult to reach, making your task a bit harder. The occasional scraped knuckle is to be expected when working inside a PC. Finally, this example uses a computer running Windows XP Professional. If you are using a different operating system, the steps you use to test and verify that RAM has been added may not be identical to the steps in this task.
Procedure
In this task, you will learn how to determine which type of memory is correct for a particular PC, open the PC and install an additional stick of RAM on the motherboard, close the PC, and verify that the additional RAM is detected and being used by the computer. Part of locating the right type of RAM involves visiting the website of a commercial memory vendor. It will not be necessary to purchase RAM from this vendor; you will simply visit this site to find the type of RAM your computer uses.
Equipment Used
You should need only a single screwdriver to complete this task, although some newer PCs come with a latch system that lets you open the panel without any tools at all.
84588c01.fm Page 3 Thursday, October 26, 2006 9:26 AM

4
Phase 1 �
Installing Hardware and Software
Details
The following sections walk you through determining the computer’s manufacturer and model type, using that information to find out what kind of memory is correct for this machine, and installing and testing the additional RAM.
Determining the Correct Type of Memory for a Particular PC
DETERMINING THE MAKE AND MODEL OF A PC
1.
Look at the front of the computer.
2.
Locate the name of the computer manufacturer and the name and number of the model.
LOCATING THE CORRECT RAM TYPE FOR A COMPUTER
1.
Open a web browser on a computer with an Internet connection.
2.
In the URL field, type
http://www.crucial.com
.
3.
On the Crucial Technology website, in the Crucial Memory Advisor Tool, click the Select a Manufacturer drop-down arrow.
84588.book Page 4 Tuesday, October 24, 2006 2:09 PM

Task 1.1: Installing RAM
5
4.
Select the name of the maker of the computer.
5.
Click the Go button.
6.
Click the Select Your Product Line drop-down arrow.
7.
Select the model name of the computer.
8.
Click the Go button.
9.
Click the Select Your Computer Model drop-down arrow.
10.
Select the specific model of the computer.
11.
Click the Go button.
12.
Locate the specific type and amount of RAM you need.
13.
Click the part number of the RAM in the Part # column.
84588.book Page 5 Tuesday, October 24, 2006 2:09 PM

6
Phase 1 �
Installing Hardware and Software
14.
Locate the Specs entry.
15.
Write down the specific details about the stick of RAM you need.
16.
Close the web browser.
Installing a Stick of RAM
OPENING THE CASE
1.
Power down your computer and wait until it is completely off.
2.
Use your screwdriver to remove the screws attaching the access panel to the computer case.
3.
Remove the access panel.
INSTALLING A MEMORY STICK
1.
Place the PC on its side or in a position that gives you access to the motherboard.
2.
Locate the RAM slots.
3.
Remove the RAM stick from its antistatic bag, being careful not to touch the pins.
4.
Pull the latches back from the slot.
5.
Position the stick of RAM so that the notch on the stick is appropriately aligned with the tab on the slot.
6.
Slowly but firmly press down the stick of RAM until both latches on the slot click into position.
7.
Replace the access panel.
8.
Replace the screws so that the access panel is held firmly to the PC’s frame.
9.
Return the PC to its original position.
TESTING THE MEMORY
1.
Power on the computer.
2.
Listen for two beeps as the computer boots.
84588.book Page 6 Tuesday, October 24, 2006 2:09 PM

Task 1.2: Installing a PCI Card
7
Beep codes differ depending on the type of BIOS used in your motherboard. To learn more about different types of BIOS and their associated beep codes, in a web browser type:
www.pchell.com/hardware/beepcodes.shtml
or go to
your favorite search engine and search for “beep codes.”
3.
Look for a message on the monitor indicating that the amount of memory on the computer has changed.
4.
Follow any instructions you see on the monitor.
5.
Allow the computer to continue to boot and the operating system to load.
VERIFYING THE MEMORY
1.
On the computer Desktop, click the Start button.
2.
Right-click My Computer and select Properties.
If My Computer isn’t in your Start menu, it can most likely be found on the
Desktop.
3.
On the General tab of the System Properties box, locate the amount of RAM in the PC.
4.
Click Cancel to close the System Properties box.
Criteria for Completion
You have completed this task when you have verified that the amount of RAM has increased to the correct amount. This amount will vary depending on how much RAM the computer originally had and how much you added.
Task 1.2: Installing a PCI Card
Despite the popularity and ease of use of USB devices, many hardware features of a PC are sup-ported by PCI, or Peripheral Component Interconnect, cards. Actually, PCI is an industry standard that describes how data are managed on the PCI bus of a computer’s motherboard in terms of clock speed and throughput rate. The PCI bus has replaced the older Industry Stan-dard Architecture (ISA) expansion bus in modern computers. PCI cards are added to the main circuit board of a computer to add hardware functionality such as a modem, sound card, or network interface card (NIC).
PCI Express is an up-and-coming standard and is positioned to eventually replace the aging PCI bus. Here’s a link to an excellent overview of this tech-
nology:
http://arstechnica.com/articles/paedia/hardware/pcie.ars/1
.
84588.book Page 7 Tuesday, October 24, 2006 2:09 PM

8
Phase 1 �
Installing Hardware and Software
Installing or upgrading a PCI card in a computer is a very common task for the PC techni-cian; in most cases it is quite easy to do, thanks to Plug and Play (PnP) technology. Older expansion bus cards required the technician to manually configure the I/O and IRQ values for the new card to prevent it from attempting to use resources that were already allocated to another piece of equipment. Today, this configuration is done automatically for the most part (there are exceptions), and all you really need to do is install the card and expect it to work.
Scenario
Your company has just opened a small branch office nearby that requires several computers to be networked on a local LAN and to have Internet access. One of the computers is an older unit and does not have a NIC installed. You have located an appropriate NIC that you can install in a PCI slot on the PC’s motherboard. You must travel to the branch office to install the card. You will need to have a PCI card for this task as well as a screwdriver to remove the screws anchoring the side access panel to the computer’s metal frame. Finally, you’ll need to take the appropriate steps to prevent ESD damage to the sensitive electrical components inside the PC and the new NIC. See Task 1.18 for details.
Scope of Task
Duration
This task should take approximately 30 minutes.
Setup
All you’ll need for this task is a single computer with at least one empty PCI slot, a PCI card, and a screwdriver that will fit the screws holding the side access panel on the PC. PCI slot covers are also usually attached to the computer by screws. You may need an additional screwdriver if the screw types for the access panel and the PCI slots are different. Although the task scenario spec-ifies a NIC, you can use any PCI card to perform the actual task on your computer. In the NIC scenario, the computer is already configured to accept an IP address dynamically, so a Dynamic Host Configuration Protocol (DHCP) server must be available on the network.
Caveat
The same caveats that applied to Task 1.1 apply here in terms of how to actually open the computer’s access panel and where the PCI slots are located on your particular motherboard. The procedure for installing and testing the newly installed card is identical regardless of the operating system installed on the machine.
Procedure
In this task, you will learn how to install a PCI card into the PCI slot on a computer’s mother-board. You will also learn how to determine if the card is functioning correctly once it’s installed.
84588.book Page 8 Tuesday, October 24, 2006 2:09 PM

Task 1.2: Installing a PCI Card
9
Equipment Used
You may need one or two screwdrivers, depending on the types of screws holding the access panel and PCI slot cover to the computer. As mentioned in Task 1.1, some computer access covers use a latch system that doesn’t require the use of a screwdriver. Also, some PCI slot cov-ers are attached by latches that can be opened without a tool.
Details
The following sections guide you through the process of installing a PCI card on a PC and ver-ifying that the card is functioning correctly.
Installing a PCI Card
OPENING THE CASE
1.
Power down your computer and wait until it is completely off.
Some technicians feel that to be completely safe, the power cord should be
unplugged from the computer’s power supply as well.
2.
Locate your screwdriver, and remove the screws attaching the access panel to the computer case.
3.
Remove the access panel.
INSTALLING THE PCI CARD
1.
Locate the PCI slots on the motherboard and select the one you will use.
2.
Locate the appropriate screwdriver, and remove the screws attaching the PCI slot cover from the PC’s frame.
3.
Remove the cover and put it aside.
4.
Remove the PCI card from its antistatic container.
All electronic components should be stored in an antistatic container to
prevent ESD damage.
5.
Orient the card so that the pins line up correctly with the PCI slot.
6.
Orient the card so that the NIC’s port lines up with the opening in the back of the PC.
7.
Gently but firmly press the PCI card into the slot, making sure it is fully engaged.
8.
Use the PCI slot cover screw to secure the PCI card to the PC’s frame.
9.
Replace the access panel.
10.
Replace the screws securing the access panel to the PC’s frame.
11.
Return the PC to its original location.
84588.book Page 9 Tuesday, October 24, 2006 2:09 PM

10
Phase 1 �
Installing Hardware and Software
TESTING THE PCI CARD
1.
Power on the computer.
If you unplugged the power cord, you will need to plug it back in first.
2.
Wait for the PC to boot and load the operating system.
3.
Plug the patch cable into the NIC’s Ethernet port.
The link light on the NIC should go on if the NIC is active and if the other end of the cord is plugged into an active port on a hub or switch.
4. With the mouse, click Start � Run.
5. In the Run box, type cmd and click OK.
6. When the command emulator opens, type ipconfig/all and press Enter.
7. If the output displays the IP address and subnet mask of the PC and other network con-figuration settings, the PCI NIC is working and the computer successfully received an address dynamically.
The one exception is if the computer cannot connect to the DHCP server. Windows 2000 and XP are configured by default to use Automatic Private IP Addressing (APIPA) if the computer cannot acquire a dynamic address. If the address is returned in the 169.254.x.x range and the subnet mask is 255.255.0.0, the computer is using APIPA. Consult with your network admin-istrator to find out what subnet mask and IP address range you should expect the computer to acquire. To learn more about APIPA, follow this link: www.microsoft.com/windows2000/en/advanced/help/default.asp?url=/windows2000/en/advanced/help/sag_TCPIP_ovr_newfeatures.htm.
If the computer hasn’t received addressing information, it doesn’t necessarily mean that the installation didn’t go well. You may have to type ipconfig/release and press Enter, then type ipconfig/renew and press Enter to acquire an IP address from the DHCP server.
84588.book Page 10 Tuesday, October 24, 2006 2:09 PM

Task 1.3: Installing a CPU 11
Criteria for Completion
You have completed the task when the PCI NIC functions correctly, allowing network com-munications between the PC and the rest of the network. You may have installed a different type of PCI card, such as a video or sound card. If so, the criteria for completion would be the successful testing and operation of those cards based on their purpose.
Task 1.3: Installing a CPUAll PCs require a central processing unit (CPU) to perform the calculations necessary to pro-cess all instructions provided by all of the programs running on the computer. You normally don’t have to do this task very frequently because CPUs are pretty robust. The most common situations in which you will install a CPU are when you are building a computer from its com-ponent parts, when you are upgrading a PC to a faster CPU, and when (occasionally) the CPU fails and needs to be replaced.
The actual installation process is very simple, but it does require a bit of preparation. You must make absolutely sure that you have the right CPU for the processor slot on the mother-board. You must also verify that the motherboard supports the CPU’s bus speed, voltage, mul-tiplier, and other settings. Even if it is physically possible to install the processing unit, if the computer’s BIOS doesn’t support the CPU’s specifications, the computer won’t function.
Also, the process of installing a CPU actually consists of two installations—installing the CPU itself and installing the heat sink fan on top. The temperature a CPU attains increases with the amount of work it is asked to do. CPUs in boxes used for heavy gaming take quite a beating. If the unit isn’t kept within operational temperature limits, it may ignite and melt.
Beyond the actual installation, the BIOS must be specifically set for the CPU’s parameters, so the job’s not done until the BIOS recognizes the CPU and successfully boots. That said, let’s move on and see how to install a processor.
Scenario
You have been assigned to upgrade the CPU on a computer. The old processor has been removed and all that needs to be done is to install the new one. Your supervisor wants you to install the CPU in the PC and then power it up, configure the BIOS, and confirm that it is oper-ational. The computer is already open and sitting on the workbench. The correct processor in an antistatic bag is sitting next to the PC along with everything else you need.
If you didn’t know which processors were supported by the motherboard, you could always go to the vendor’s site on the Web and find out. This will be cov-ered in Task 2.1, “Identifying a Motherboard.” Also, your processor’s documen-tation is a great help in informing you of which motherboards support the CPU. Additionally, you can find this information on the CPU manufacturer’s site.
84588.book Page 11 Tuesday, October 24, 2006 2:09 PM
12 Phase 1 � Installing Hardware and Software
From the following site, you can download a free utility that will tell you the man-ufacturer of your PC’s motherboard: www.majorgeeks.com/download181.html.
Your boss leaves and you go over to the workbench and start the installation. All you’ll need is the CPU, the thermal compound, and the heat sink fan. As always, take ESD precau-tions, as described in Task 1.18.
Scope of Task
Duration
This task should take about 30 minutes.
Setup
You’ll need either a PC that doesn’t have a CPU installed or one from which you can remove and reinstall the unit. If you are using the processor already installed in the computer, the heat sink fan will be attached. You will need some fresh thermal compound for this task, though. You can buy a tube of the compound at any computer hardware store. The task is worded as if you are installing the CPU on the motherboard for the first time, so your actual experience may vary a bit.
Caveat
There are a dizzying number of different CPUs and CPU slots and sockets. This means that there are nearly as many ways to install a CPU as there are different CPU slots or sockets on motherboards. This task will describe installing a CPU into a zero insertion force (ZIF) socket. You can open ZIF sockets by lifting a small lever on one side of the socket and then lock them by closing the lever again. ZIF sockets are very common, so if you are installing a CPU that uses a ZIF socket, this task should be very close, if not identical, to what you will actually be doing in the exercise.
Procedure
In this task, you will learn how to install a CPU onto a computer’s motherboard, configure the BIOS, and verify that the computer is operational.
Equipment Used
In addition to the CPU itself, you’ll need a tube of thermal compound to create a seal between the processor and the heat sink fan. Although this scenario starts out with the computer case already open, you’ll need a screwdriver at the end of the exercise to reattach the access panel. You will also need a piece of plastic wrap or a plastic bag to smooth the thermal compound onto the CPU.
84588.book Page 12 Tuesday, October 24, 2006 2:09 PM

Task 1.3: Installing a CPU 13
Details
The following set of instructions will walk you step-by-step through the process of installing a CPU, configuring the BIOS setup, and testing to make sure the computer is operating after the installation.
Installing a CPU and Heat Sink Fan
INSTALLING THE CPU
1. Locate the processor socket on the motherboard.
2. Lift the lever on the side to open the socket.
3. Carefully remove the CPU from the antistatic bag, holding it by its edges.
4. Turn the CPU until you can see the pins.
5. Verify that none of the pins are bent.
Not all CPUs have pins. The Intel Socket 775 has only holes. The pins are mounted on the motherboard.
6. Locate the single diagonal corner on the CPU.
7. Line up the pins and the diagonal corner with their counterparts on the processor socket.
8. Gently lower the CPU onto the socket, keeping the pins aligned so that they insert into the holes in the socket.
9. Verify that the CPU is correctly aligned and positioned firmly in the socket.
10. Push the lever on the side of the socket back to the locked position.
Some CPUs come with a cooling solution and protective plate that must be installed at this step of the process.
INSTALLING THE HEAT SINK FAN
1. Locate the tube of thermal compound.
2. Open the tube and apply drops of the compound to the top of the CPU.
3. Cover your finger with a clean piece of plastic and rub the compound smoothly onto the CPU.
Depending on the installation kit you are using, you may also be applying paste as described in Step 3..
84588.book Page 13 Tuesday, October 24, 2006 2:09 PM

14 Phase 1 � Installing Hardware and Software
Do not use your bare finger or a cloth when smoothing the compound, to avoid introducing contaminants.
4. Locate the heat sink fan.
5. Align the heat sink fan so that the mounting clamps are lined up with the corresponding mount points on the CPU.
6. Place the aligned heat sink fan directly on the CPU.
7. Lock the mounting clamps in place.
There is no one standard method of attaching a heat sink to a CPU. Some sys-tems use clamps, whereas others require screws. Refer to the heat sink’s doc-umentation for details.
Be especially careful when locking the mounting clamps in place. . Applying too much pressure or slipping with a clamp and damaging the motherboard could make all your efforts up to this point useless.
8. Locate the power wire on the heat sink fan.
9. Locate the three-pin heat sink fan header on the motherboard.
10. Connect the power wire to the fan header.
Initial Testing and Configuring the BIOS
INITIALLY TESTING THE INSTALLATION
1. Leave the access panel off of the PC.
2. Place the PC in an upright position.
3. Verify that a monitor, keyboard, and mouse are attached to the PC.
4. Plug the power cord into the PC’s power supply.
5. Plug the power cord into an electrical socket or powered surge protector.
6. Power up the computer.
7. Verify that the heat sink fan is spinning up.
8. Allow the machine to boot while you are looking at the monitor.
CONFIGURING THE BIOS FOR THE CPU
1. Verify that the BIOS setup screen is displayed on the monitor.
84588.book Page 14 Tuesday, October 24, 2006 2:09 PM
Task 1.4: Installing a Power Supply 15
The BIOS setup should appear automatically, but if you are using the same model of processor that was originally installed on the PC, it may not. If it doesn’t, you can manually get into the BIOS. Different computers have differ-ent ways of entering the BIOS setup, including pressing the F7 key or pressing the Esc key.
2. Select the menu item for the CPU.
Because BIOS setups vary, there is no standard method for locating specific menus and submenus.
3. Locate the settings for CPU multiplier, voltage, and memory timing speeds (there may be other entries as well).
4. Set them to Auto if the option exists for each setting. For those settings without an Auto option, set the values for those matching your CPU. For example, if your CPU's bus speed is 133MHz, you may need to set that value in the BIOS.
5. When you have completed the configuration, navigate to the BIOS main menu.
6. Select the Save and Exit option.
7. The PC should now continue the boot process and load the operating system.
8. Once the system is running, reattach the access panel.
9. Secure the access panel by screwing it to the frame of the PC.
Criteria for Completion
You have completed the task when the PC has successfully booted, loaded the operating system, and is running normally.
Task 1.4: Installing a Power SupplyThe term power supply is a bit misleading. A PC’s power supply unit actually takes the AC cur-rent from an electrical wall socket (actually from the wall socket and through a surge protector if you’re smart) and converts it to DC current that the computer can use. Should the power supply fail, however, the PC and its components are about as useful as a box of rocks.
Installing a power supply is pretty straightforward. However, you do need to make sure that the voltage and wattage match the computer’s requirements. Most PCs you buy today come with the power supply preinstalled. You are likely to need to install a power supply only
84588.book Page 15 Tuesday, October 24, 2006 2:09 PM

16 Phase 1 � Installing Hardware and Software
if you’re building a computer from scratch. It is more common that you’ll replace a power sup-ply that has failed. The original power supply will have the necessary specifications recorded on its case, telling you what you need to know to order a suitable replacement.
If you truly don’t know what power supply you need, you can look up the com-puter’s requirements on the manufacturer’s website or go to the motherboard maker’s site and search there.
Replacing a power supply may seem like a daunting task, but it’s one of the easier jobs you’ll face as a PC technician.
Scenario
You receive a trouble ticket stating that the power supply in the HR manager’s computer has failed. You have removed the PC from the manager’s office and now have it on your work-bench. You looked up the computer make and model on the Web and found out the specifi-cations for the appropriate replacement. You pulled the replacement unit from the supply closet and have it on the bench with the computer. You are ready to open the case, remove the old power supply, and install the new one.
Scope of Task
Duration
This task should take about 15 minutes.
Setup
Ideally, you’ll need a PC and an appropriate replacement power supply for the computer. If your power supply doesn’t need to be replaced and you want to save yourself the cost of buy-ing a new one, you can just remove the power supply unit from your PC and then reinstall it. You will follow the same steps in either case. As always, take ESD precautions (discussed in Task 1.18) to avoid accidentally damaging electrical components on the motherboard.
Caveat
You can actually upgrade a PC to use a more robust power supply, especially if you have installed newer components in the computer that are electricity hungry. Just make sure that the specifications of the power supply upgrade match the computer’s requirements. Also, it should go without saying that you will need to completely unplug the power supply from its power source before beginning this exercise.
84588.book Page 16 Tuesday, October 24, 2006 2:09 PM

Task 1.4: Installing a Power Supply 17
Procedure
In this task, you will learn how to replace a PC’s power supply and verify that the new unit is operational.
Equipment Used
Other than the new power supply, all you’ll need is a screwdriver to remove the PC’s access panel and the old power supply. To verify that the replacement is successful, you’ll need a monitor, keyboard, and mouse attached to the PC when you power it up.
Details
The following exercise will walk you through the process of removing a failed power supply and replacing it with a new unit.
Before attempting this exercise, make sure you have powered down the computer and unplugged the power cord from the back of the PC!
Removing and Replacing a Power Supply
REMOVING THE POWER SUPPLY
1. Locate the screwdriver and remove the screws from the PC’s access panel and put them aside.
2. Remove the access panel.
3. Locate the power supply.
It’s virtually impossible to not be able to find a computer’s power supply. The back of the power supply contains a large fan and the connector for the power cord, and is easily seen on the back of the PC.
4. Make note of how the unit is mounted and how the wires are connected to the motherboard.
Not all power supplies have the same number of different power connectors. Three is a common number, but your unit may be different. See the following link for more information: www.atxpowersupplies.com/atx-power-supply-powmax-ag-480-watt.htm.
84588.book Page 17 Tuesday, October 24, 2006 2:09 PM

18 Phase 1 � Installing Hardware and Software
5. Disconnect the power supply’s wires from the motherboard.
6. Unscrew the power supply from the PC’s frame.
7. Lift the old power supply out of the computer.
INSTALLING THE POWER SUPPLY
1. Locate the replacement power supply.
2. Mount the new unit in the PC frame in the same way the old unit was mounted.
3. Screw the new unit to the computer frame, making sure it is secure.
4. Connect the power supply’s wires to the motherboard in the same pattern as the old unit was attached.
5. Make sure the connections are firm.
6. Replace the PC’s access panel.
7. Secure the access panel to the PC by replacing the screws.
TESTING THE POWER SUPPLY
1. Verify that a monitor, keyboard, and mouse are attached to the PC.
2. Plug the power cord into the socket on the back of the power supply.
3. Verify that the power cord is plugged into a surge protector that is receiving AC current.
4. Power up the computer and watch the boot process.
Criteria for Completion
You have successfully completed this task when the PC powers up normally and the operating system loads.
Task 1.5: Installing a Hard DrivePeriodically, hard drives fail (which is why you always back up your computers and servers…right?). If your data is backed up, it’s an inconvenience but not a disaster. You can simply replace the failed unit with a new comparable drive (while you’re at it, you might as well put in a hard drive with more capacity). You might also end up installing a second hard drive in a computer, but that’s pretty unusual in a production environment.
There are a few details that you’ll need to know to successfully install a hard drive, but it’s a fairly routine task. The time-consuming part is reinstalling the operating system and the application software and then restoring the data from your backup tape.
84588.book Page 18 Tuesday, October 24, 2006 2:09 PM

Task 1.5: Installing a Hard Drive 19
Installing an operating system is covered in Task 1.22, and installing applica-tion software is addressed in Tasks 1.24 and 1.25. The actual restoration of data from backups is usually handled by an experienced tech in an IT depart-ment, so that task is beyond the scope of this book.
Scenario
You have been directed to install a hard drive in a new computer. The hard drive already has an operating system and application software installed via ghosting.
It’s typical in production environments to configure a hard drive on a master machine and then ghost it to other drives and install those drives in PCs. This saves a lot of time in deploying PCs with identical configurations in the company.
The computer is on your workbench with the hard drive and IDE ribbon cable sitting next to it.
Scope of Task
Duration
This task should take 15 to 30 minutes.
Setup
For this task, you’ll need a hard drive and a PC. If you are not in a position to install a new hard drive, you can remove the hard disk drive (HDD) from the computer and then replace it. As always, take ESD precautions to avoid damaging electrical components in the computer.
Caveat
In this exercise, you will be installing an Integrated Drive Electronics or IDE hard drive, which is what comes in most PCs. An IDE drive is also referred to as ATA or PATA (Parallel ATA) drive. Some newer computers come with a SATA, or Serial ATA, drive. Installing a serial drive is only slightly different from installing an IDE drive. The major variation is the type of cables and connectors used; however, SATA drives may have no jumpers because SATA supports only one drive per controller. This means that you don’t have to set drives as master and slave or cable select.
84588.book Page 19 Tuesday, October 24, 2006 2:09 PM

20 Phase 1 � Installing Hardware and Software
Procedure
In this task, you’ll learn how to install an IDE hard drive in a computer.
Equipment Used
You’ll need an IDE hard drive and a parallel ribbon cable to connect the hard drive to the motherboard. Besides a screwdriver, you’ll also need a pair of needle-nose pliers or a pair of strong tweezers.
Details
The following steps will guide you through the process of installing an IDE hard drive into a PC.
Installing a Hard Drive
INSTALLING THE HARD DRIVE IN A PC
1. Verify that the PC is powered down and unplugged.
2. Locate a screwdriver and remove the screws from the PC’s access panel.
3. Remove the access panel.
4. Locate the IDE connectors on the PC’s motherboard.
A motherboard usually has two IDE connectors. One is used for the primary hard drive, which you are installing now. The other is typically used to attach a CD or DVD drive or can be used for a second hard drive.
5. Locate the power cord for the hard drive; it will be coming out of the power supply.
6. Locate the holes in the hard drive’s bay in the computer; this is where you will use screws to attach the hard drive to the bay.
7. Locate the drive jumpers or switches.
Hard drives need to be set to function as a master, slave, or only drive or cable select. This is controlled by a set of either jumpers or switches on the hard drive. They are usually located on the part of the drive containing the ribbon and power connectors. A diagram on the hard drive will show you the posi-tion for the jumpers or switches for each role. Your drive is most likely set up to function as the only drive in the PC.
8. Locate the jumper or switch diagram on the drive.
9. If the jumpers or switches are set for the only hard drive or master role, move on.
10. If the jumpers or switches are not configured correctly, move them to the correct position with your needle-nose pliers or your tweezers.
84588.book Page 20 Tuesday, October 24, 2006 2:09 PM

Task 1.5: Installing a Hard Drive 21
11. Connect the ribbon cable to the ribbon connector on the hard drive.
12. Connect the hard drive power cable to the power connector.
Both of these connectors can fit only one way. Be especially careful connect-ing the ribbon cable to the hard drive and motherboard because the pins are thin and easily bent.
13. Place the hard drive in its bay but do not attach it.
Putting one or both hands inside a PC case is difficult; often there isn’t very much room for you to work. Make sure all your connections are in place before you mount the hard drive to the PC bay.
Some hard drives mount more like floppy or CD drives. Instead of installing them from the inside, you must remove the face plate from the front of the PC and slide the hard drive in from the front. However, if this is the case, you will not be able to connect the cables to the drive until after it is mounted in the front loading bay.
14. Connect the ribbon cable to the IDE connector on the motherboard.
15. Use the screws that came with the hard drive to mount the drive into the bay securely.
You could probably leave the hard drive sitting loosely in the bay and finish the installation. PCs don’t move around much once they are installed in an office or cubicle, but there is still a risk that the hard drive will fall out of the bay and damage the motherboard if the PC is subsequently kicked or moved.
16. Replace the access panel.
17. Secure the access panel to the PC by replacing the screws.
TESTING THE HARD DRIVE INSTALLATION
1. Verify that a monitor, keyboard, and mouse are connected to the PC.
2. Make sure the power cord is connected and that the computer is receiving power.
3. Power up the unit and watch the boot.
Because a ghosted hard drive is used in this scenario, there shouldn’t be any issues with hard drive formatting or loading of software.
84588.book Page 21 Tuesday, October 24, 2006 2:09 PM

22 Phase 1 � Installing Hardware and Software
Criteria for Completion
You will have successfully completed the task when the computer boots normally and the operating system loads.
Task 1.6: Installing a Floppy DriveInstalling a floppy drive is not much different than installing a hard drive or CD drive except that the connectors are a bit different and no jumpers need to be set. Also, floppy drives typ-ically slide into their bay from the front rather than being installed from the inside. Occasion-ally you’ll need to configure the BIOS, but this isn’t common.
The day of the floppy drive seems to be coming to an end. Once it is common for computers to be able to boot from USB, there won’t be much use for floppies. Floppy disks can hold only a limited amount of data and are reliable for only short-term storage. Their current primary purpose is as boot disks, but as was just mentioned, time is running out even for that role. Some PCs and laptops are no longer manufactured with floppy drives.
That said, there are still plenty of people who use and are comfortable with floppy drives and disks, and most production environments haven’t provided 100 percent of their employ-ees with ultra-current, state-of-the-art hardware. If you work in an average company, you’ll probably be living with computers with floppy drives for years to come.
Scenario
The sales manager’s floppy drive has failed and you have been assigned to replace it. A replace-ment unit was ordered from the PC’s manufacturer and it has just arrived. You’ve brought the manager’s PC to your workbench, unpacked the drive, and are ready to replace it.
Scope of Task
Duration
This task should take about 15 minutes.
Setup
This task is substantially similar to Task 1.5, “Installing a Hard Drive.” New floppy drives come with a new ribbon cable for connecting the drive to the motherboard. As with the hard drive task, you can remove and reinstall the floppy drive in your lab computer as you follow the steps in this exercise. As always, take ESD precautions to avoid damaging electrical com-ponents in the computer.
84588.book Page 22 Tuesday, October 24, 2006 2:09 PM

Task 1.6: Installing a Floppy Drive 23
Caveat
Newer floppy drives come with ribbon cables with a connector only at each end. Older drives have ribbons with three connectors, including one in the middle used to attach a second drive. If you are using such a cable, the end connector must be used for the primary drive. Unless you are working with fairly old hardware, this shouldn’t be a common issue. Also, with older drives and power supplies, it was possible to connect the power cable to the floppy drive upside down. This resulted in the floppy’s activity light being on constantly once power was restored to the computer. Modern floppy power connectors can be attached only one way.
Procedure
In this task, you will learn how to remove a failed floppy drive and install and test a replace-ment unit.
Equipment Used
You will need a screwdriver to remove the access panel and to screw the floppy drive into its bay. To test the drive, you will need a floppy diskette that you know has data on it and is in working order. Saving a single document to the diskette will be sufficient to verify that the drive is operating correctly.
Details
The following exercise will walk you through the steps of installing a floppy drive into a PC and verifying that the drive is working.
Replacing a Floppy Drive
REMOVING THE FLOPPY DRIVE
1. Verify that the computer is powered down and unplugged.
2. Locate a screwdriver and remove the access panel screws.
3. Remove the access panel.
4. Locate the floppy drive in the computer.
5. Notice how the drive is connected inside the PC.
6. Unplug the power connector from the drive.
7. Unplug the ribbon cable from the drive.
You have the option of using the original ribbon cable with the new drive, but it’s recommended that you replace the old ribbon just in case it has failed.
84588.book Page 23 Tuesday, October 24, 2006 2:09 PM

24 Phase 1 � Installing Hardware and Software
8. Unplug the ribbon cable from the motherboard and remove it.
9. Remove the screws attaching the floppy drive to the bay.
10. From inside the PC case, push the drive forward toward the front of the PC, sliding it out.
On some PCs, you will first need to remove the front panel from the com-puter. On most PCs of this type, you may need a flat head screwdriver to gently pry one side of the panel off the computer’s face. This panel is usually attached only by plastic latches and should (occasionally with some diffi-culty) pop off when pulled or pried. However, before proceeding, examine exactly what mechanism is used to secure the panel. Some front panels have plastic clips that you must release from the inside, using either your fingers or a screwdriver.
11. Slide the old floppy drive completely out of the PC and place it aside.
INSTALLING THE FLOPPY DRIVE
1. Locate the new floppy drive ribbon cable.
2. Look for a twist in the cable near one of the edges. The edge with the twist connects to the drive.
3. Carefully attach the edge of the cable with the twist to the floppy drive connector on the motherboard.
Take care to correctly align the ribbon connector to the pins on the mother-board and do not bend the pins. The edge of the cable with a red or blue stripe indicates that it attaches to pin 1 on the drive.
4. Locate the new floppy unit.
5. Slide it into the bay from the front of the computer.
6. Connect the ribbon cable to the connector on the floppy drive.
7. Connect the power cable from the power supply to the floppy drive.
8. Use the screws that came out of the bay to attach the drive to the bay’s frame.
9. If necessary, replace the faceplate of the computer.
TESTING THE FLOPPY DRIVE INSTALLATION
1. Verify that a monitor, keyboard, and mouse are attached to the PC.
2. Connect the power cord to the socket in the PC’s power supply.
3. Make sure the other end of the power cord is plugged into a power source.
4. Power up the PC.
84588.book Page 24 Tuesday, October 24, 2006 2:09 PM
Task 1.7: Installing a SCSI Drive 25
5. Locate your test floppy disk.
6. After the PC has completely booted, put the disk in the floppy drive.
7. Using the mouse, click Start � My Computer.
For this part of the exercise, it is assumed that the computer’s operating system is Windows XP.
8. Double-click 31/2 Floppy (A:).
Criteria for Completion
You have completed your installation if the drive can access the data on the test disk and you can successfully insert and remove the diskette from the drive.
Task 1.7: Installing a SCSI DriveInstalling a SCSI drive can be a challenge. It is definitely not a plug-and-play technology. As you know, SCSI chains need to be terminated at both ends. Either the motherboard of the computer must have an onboard SCSI controller or you need to install an expansion card with a controller before doing anything else. Also, not all devices on a SCSI chain have to be drives. A wide variety of SCSI devices can be linked, although for the sake of this exercise, we will be dealing with a chain of SCSI drives.
Improperly terminating a SCSI chain is probably the most common problem with an instal-lation. If either end of the chain isn’t properly terminated, electrical signals hitting an unter-minated point will be reflected back along the cable, interfering with normal electrical signals.
Each SCSI device must have a unique ID number in the chain. On some occasions, a specific device needs a particular ID number. Check the manufacturer’s documentation before attempting the installation to avoid any pitfalls. Sometimes you’ll run into a SCSI device that has a built-in terminator, meaning that it must be installed at the end of the chain.
Installing a SCSI device is not for the faint of heart, but with proper preparation, it is an accomplishable task.
Scenario
You are assigned to install a SCSI drive in a small server. The server has four SCSI drives and one of them has failed. The failed drive has already been removed and all you are expected to do is configure, install, and terminate the replacement drive. The high-level formatting and all subsequent tasks will be handled by the supervising technician.
84588.book Page 25 Tuesday, October 24, 2006 2:09 PM

26 Phase 1 � Installing Hardware and Software
Scope of Task
Duration
Due to the level of difficulty in successfully installing a SCSI drive, this task could take about 15 or 20 minutes.
Setup
The ideal setup would be to use an older server with SCSI drives installed. You can sometimes “rescue” old servers as they are being decommissioned. More than one starving student has retrieved an ancient server from the trash heap. Although installing a SCSI drive is quite sim-ilar to installing an IDE drive, there are enough differences to require that you have “the real thing” on hand. As always, take ESD precautions to avoid damaging electrical components in the computer.
Caveat
Unfortunately, the task includes only the physical installation. Formatting a drive and install-ing an operating system are separate tasks and not within the scope of this exercise.
Reformatting a hard drive is covered in Task 1.21, and installing an operating system is discussed in Task 1.22.
Procedure
In this task, you will learn how to install and terminate a SCSI drive.
Equipment Used
You will need a screwdriver or screwdrivers to open the access panel of the server and mount the SCSI drive in its bay. SCSI drives are linked in chains, so the connector and power cables are already inside the server. The drive is to be connected to the end of the chain, so it must be ter-minated. In this scenario, the terminator is the last connector on the linking cable. You will need a small pair of needle-nose pliers or tweezers to adjust the jumpers or switches on the drive.
Details
In this exercise, you will learn each step of the process of installing and terminating a SCSI drive in a server.
Remember, only the ends of the chain need to be terminated. If you were installing the drive somewhere in the middle, the termination portion of this task would be unnecessary.
84588.book Page 26 Tuesday, October 24, 2006 2:09 PM

Task 1.7: Installing a SCSI Drive 27
Installing a SCSI Drive
SETTING THE JUMPERS OR SWITCHES
1. Locate the jumpers or switches on the SCSI drive.
2. Locate the diagram on the drive describing what each jumper setting means.
This part of the task walks you through an example of the default settings on a particular SCSI drive. The drive you are using may require different settings.
3. Set the SCSI ID to an unused number in the chain.
Narrow SCSI IDs are 0 through 7, with the host adapter usually set to 7. You must select an ID for your drive that is not being used by the adapter or any other devices on the chain. Also, some drives are configured to receive an ID number from the host adapter over the I/O channel.
Some SCSI devices must be set for a particular ID number. Consult the doc-umentation that came with the drive to see if this is true for your device.
4. Set Motor Start to Disable.
5. Set Delay Motor Start to Disable.
6. Set Write Protect to Disable.
7. Set Parity Check to Enable.
8. Set Terminator Power to Other.
The Other setting in step 8 means that another device will provide power to the terminator, even though your drive will be terminated. The host adapter typically provides the terminator power.
INSTALLING THE SCSI DRIVE INTO A SERVER
1. Locate your screwdriver and remove the screws securing the access panel.
2. Remove the access panel.
3. Locate the vacant drive bay in the server.
4. Locate an unused power cable from the power supply.
5. Locate the vacant connector and terminator on the end of the SCSI cable.
6. Insert the SCSI drive into the bay but do not secure it.
84588.book Page 27 Tuesday, October 24, 2006 2:09 PM

28 Phase 1 � Installing Hardware and Software
7. Attach the power cable to the power socket on the drive.
8. Attach the SCSI cable connector to the connector socket on the drive.
9. Attach the terminator to the terminator socket on the drive.
10. Locate the screws that are to be used to secure the drive to the bay.
11. Locate the holes for the screws in the bay and drive.
Sometimes, the holes for the screws can be at awkward angles or in tight spaces, making this part of the procedure seem like the most difficult.
12. Secure the drive to the bay with the screws.
13. Replace the access panel.
14. Secure the access panel by replacing the screws.
TESTING THE SCSI DRIVE INSTALLATION
1. Verify that a mouse, keyboard, and monitor are attached to the server.
2. Plug the power cord into the power supply socket.
3. Verify that the other end of the power cord is plugged into a power source.
4. Power up the server.
5. Listen as each SCSI drive spins up in sequence and verify that the newly installed drive is spinning up.
Criteria for Completion
You will have successfully completed this task when you can hear the newly installed SCSI drive spinning up in the server.
Task 1.8: Installing a CD DriveAs you can see in Tasks 1.5, 1.6, and 1.7, installing different types of drives in a computer requires a very similar process with just a few differences. Although installing a SCSI drive involves a few different steps compared to installing an IDE drive, in the end you still use the same tools and connect the drive to the motherboard and the power supply.
Installing a CD drive in a PC involves many of the same steps but does present a difference or two. Most PCs come with at least a basic CD-ROM, CD-W, or CD-RW drive, so you won’t often be installing the first CD drive in a PC. It is more likely that you’ll either be upgrading the optical drive in a computer or adding a second one. For example, a user could have a basic CD drive in their computer but want a CD burner added.
84588.book Page 28 Tuesday, October 24, 2006 2:09 PM

Task 1.8: Installing a CD Drive 29
In any event, the procedures involved are practically the same. Installing a DVD drive is also similar but there are enough differences of substance to require this to be a separate task.
Task 1.9 will go through the details of installing a DVD drive.
Scenario
One of the users at a small branch office has purchased an accounting tutorial on a set of audio CDs. He uses an older computer that does not have a CD drive installed. You have been assigned to go over to the branch office and install a compatible drive. You have been provided with a suitable CD drive kit and tools, have traveled to the branch office, and intend to install the drive in the user’s computer while he is away at lunch.
Although it’s ideal to be able to take the computer back to your office and per-form the installation at your workbench, it’s faster to work on the computer where it is. You’ll find that you spend a great deal of time under people’s desks in their office or cubicle.
Scope of Task
Duration
This task should take no longer than 30 minutes.
Setup
The ideal setup would be to have one PC with no CD drive installed and to possess a suitable CD drive to install in the computer. With just a slight bit of tweaking, you could install a sec-ond drive in a computer that already has a CD drive installed. As always, take ESD precau-tions to avoid damaging electrical components in the computer.
Caveat
You may or may not have to install the drivers for the CD-ROM drive. Windows 2000 Pro-fessional and Windows XP most likely already have the drivers on board. If not, you can use the drivers on the disk accompanying the drive or download them from the manufacturer’s site. Also, you will need to attach the three-wire audio cable to either the sound card or the audio circuitry connector on the motherboard.
Procedure
In this task, you will learn how to install a basic CD-ROM drive.
84588.book Page 29 Tuesday, October 24, 2006 2:09 PM

30 Phase 1 � Installing Hardware and Software
Equipment Used
You should need only a flat head and/or Phillips head screwdriver to open up the access panel and attach the CD drive securely to the drive bay. You will need a pair of needle-nose pliers or tweezers to set the jumpers or switches. You might also need a flat head screwdriver if you must pry the face off the computer to get at the selected drive bay cover. To test the installa-tion, you’ll need an audio compact disc with content on it.
Details
This exercise will guide you through the specific steps necessary to install a CD-ROM drive in a PC and test the installation.
Installing a CD Drive
OPENING THE COMPUTER AND CONFIGURING THE CD DRIVE
1. Power down the PC.
2. Unplug the power cord from the power supply.
3. Attach your ESD strap to your wrist.
See Task 1.18 to learn the specific details of preventing ESD damage.
4. Locate your screwdriver and remove the screws attaching the access panel to the PC’s frame.
5. Remove the access panel.
6. Locate the desired drive bay.
7. Locate the desired drive bay cover on the front of the PC.
8. Remove the drive bay cover.
There are usually two tabs on the drive bay cover that attach inside the com-puter. You need to reach inside the bay, feel for the tabs, depress them, and push the cover out. Some older PCs will require that you pry off the face of the computer before you can access the drive covers.
Some drive bays come with rails installed. If the drive you are installing does not have corresponding drive rails attached, they may come with a kit that has the parts necessary for you to screw on the rails. From there, it is just a matter of sliding the drive in on the rails.
84588.book Page 30 Tuesday, October 24, 2006 2:09 PM

Task 1.8: Installing a CD Drive 31
9. Remove the CD drive from the antistatic bag.
10. Locate the jumpers or switches on the drive.
11. Locate the jumper diagram on the drive.
12. Locate your needle-nose pliers or tweezers and set the jumpers or switches to the master or only drive position.
Step 12 assumes that your CD drive will be on a separate controller from the computer’s hard drive and that it will be either the first or only CD drive in the PC. If you are installing this unit as a second CD drive, you must set the jumpers or switches to the slave position and attach it to the connector at the middle of the ribbon cable rather than the end.
For older drives, do not connect an IDE and a CD drive to the same disk drive controller. IDE and CD drives operate at different read and write speeds and having them on the same ribbon attached to the same controller will reduce data transfer to the level of the slowest drive. This is only true of older drives, however. Modern drives use independent device timing, which has eliminated this issue. See the following link for an article on this issue: www.pcguide.com/ref/hdd/if/ide/confTiming-c.html.
INSTALLING THE CD DRIVE
1. Slide the CD drive into the drive bay from the front.
The front of the CD drive should fit flush against the face of the computer.
2. Locate the ribbon cable that came with the CD drive.
3. Locate the unoccupied disk drive connector on the motherboard.
The second disk drive connector is usually labeled as IDE 2.
4. Locate the red or blue edge on one end of the ribbon cable.
The red or blue edge on the connector indicates the location of pin 1.
84588.book Page 31 Tuesday, October 24, 2006 2:09 PM

32 Phase 1 � Installing Hardware and Software
5. Locate pin 1 on the motherboard disk drive connector.
6. Carefully match the holes in the ribbon connector to the pins on IDE 2, including pin 1.
7. Gently and firmly push the connector down, attaching it to the motherboard.
8. Match the other end of the ribbon cable connector to the pins on the CD drive.
9. Gently and firmly push the connector onto the pins.
In step 9, since you haven’t yet attached the CD drive to the drive bay, you will need to hold the drive in place with your other hand.
10. Locate a vacant power cable coming from the power supply.
11. Connect the power cable to the power socket on the back of the CD drive.
12. Locate the audio cable coming from the back of the CD drive.
13. Locate the three-pin audio connector on either the sound card or the motherboard audio connector.
14. Match the pins on the audio cable to the audio connector.
15. Gently and firmly attach the cable to the connector.
16. Attach the CD drive to the drive bay with the screws that came with the drive.
17. Replace the access panel.
18. Replace the screws, securing the access panel to the PC’s frame.
If necessary, replace the face on the PC after you've completed step 18.
INSTALLING DEVICE DRIVERS AND OTHER SOFTWARE FOR THE CD DRIVE
1. Verify that a standard monitor, keyboard, mouse, and speakers are attached to the PC.
2. Plug the power cable into the PC’s power supply.
3. Power up the PC.
4. Locate the driver disk that came with the CD drive.
The drivers should be on a floppy diskette if the newly installed device is the only CD drive on the PC.
84588.book Page 32 Tuesday, October 24, 2006 2:09 PM

Task 1.8: Installing a CD Drive 33
When working on a user’s computer, you will need to be able to log on to the device without knowing the user’s password. Make sure there is a separate user account on company computers that allows you to log in for testing pur-poses. Otherwise, the user must be present to log in to the computer.
5. When the PC is fully booted, insert the driver disk into the floppy drive.
6. Locate and start the executable file on the floppy (e.g., Setup.exe) and follow the onscreen instructions.
The onscreen instructions vary widely depending on the make and model of the CD drive, but they should guide you in how to correctly load the device drivers and other required software.
7. Reboot the PC if necessary.
TESTING THE CD DRIVE INSTALLATION
1. Plug the power cord into the PC’s power supply.
2. Verify that the other end of the power cord is plugged into a power source.
3. Power up the PC.
4. Verify that speakers are attached to the audio connector on the PC.
5. Verify that the speakers are receiving power and turned on. (Make sure the volume is adjusted to a suitable level.)
6. Locate a test CD that has audio content.
7. Open the CD drive.
8. Place the CD in the drive.
9. Close the drive.
10. Click Start � My Computer.
11. Locate the CD drive in the My Computer window.
Usually, the first CD drive in a Windows computer is drive D.
12. Look for a change in the CD-ROM icon indicating the contents of the CD.
84588.book Page 33 Tuesday, October 24, 2006 2:09 PM

34 Phase 1 � Installing Hardware and Software
If autoplay is set up, the disk will start to play automatically. Otherwise, a dia-log box will open asking which program you want to select to play the disk. If necessary, right-click the CD-ROM icon and select Play.
Criteria for Completion
You will have successfully completed this task when the CD begins to play and you can hear the content.
Task 1.9: Installing a DVD DriveAlthough, in principle, installing a DVD drive is similar to installing a CD drive (see Task 1.8), there are quite a few more cables and connectors involved. Specifications vary for DVD drives made by different vendors, so it is prudent to completely read the instructions that came with your new DVD unit before beginning the installation.
This task will cover a basic DVD installation; however, the details of installing the DVD you are using may be different. You may have to divert from some of the steps presented here to successfully install your particular drive.
Unless specifically ordered with one, most PCs don’t come standard with a DVD drive (although that may change someday). So it would be somewhat common for you to install the first DVD in a computer. The computer is likely to already have a CD drive, so you will be installing the second optical device in the computer. DVD drives are most commonly used to play movies, although they are being increasingly used for mobile data storage.
Scenario
One of your company’s managers wants a DVD drive installed in her computer so she can watch video tutorials. You have brought the PC to your workbench and laid out the appro-priate tools. Your supervisor has provided you with the DVD drive installation kit and you are ready to install the drive.
Scope of Task
Duration
This task should take between 30 and 45 minutes.
Setup
Ideally, you will have one PC and one DVD installation kit available for this exercise. You will need to verify that the DVD unit is supported on your PC. You can get this information from
84588.book Page 34 Tuesday, October 24, 2006 2:09 PM

Task 1.9: Installing a DVD Drive 35
the store where you purchased the unit or from the manufacturer’s website. The kit should contain all of the cables and other parts necessary for you to install the DVD drive. For this task, it is assumed that the computer already has a CD-ROM drive and that the DVD drive will be the second optical drive on board. As always, take ESD precautions to avoid damaging electrical components in the computer.
Caveat
As previously mentioned, there is no one standard method of installing a DVD drive, so the steps you need to take to install your drive may differ from those in this exercise. Also, because of the different features provided by DVD drives, the installation process is somewhat more complex than for a CD or IDE drive. Another consideration is how compressed video data will be managed. DVDs use MPEG-2 compression, so you’ll need a method of decompression. Many high-end graphics cards support hardware decompression, but it is more likely that the computer will need an MPEG expansion card installed.
For this task, there should be an MPEG PCI card already installed and working in the PC. The steps for installing a PCI card are covered in Task 1.2.
Procedure
In this exercise, you will learn to install a generic DVD drive in a computer.
Equipment Used
You may need a flat head screwdriver, Phillips head screwdriver, or both to open the access panel and attach the DVD drive securely to the drive bay. You will need a pair of needle-nose pliers or tweezers to set the jumpers or switches. You might also need a flat head screwdriver if you must pry the face off the computer to get at the selected drive bay cover. To test the installation, you’ll need a DVD disk with content on it. You will also need to have a standard monitor, mouse, keyboard, and pair of speakers available for testing.
Details
This lesson will walk you through the step-by-step process of installing and testing a DVD drive in a computer.
Installing a DVD Drive
OPENING THE COMPUTER AND CONFIGURING THE DVD DRIVE
1. Verify that the power cord is unplugged from the power supply.
2. Locate your screwdriver and remove the screws from the access panel.
3. Remove the access panel.
4. Locate the desired drive bay.
84588.book Page 35 Tuesday, October 24, 2006 2:09 PM

36 Phase 1 � Installing Hardware and Software
5. Locate the desired drive bay cover on the front of the PC.
6. Remove the drive bay cover.
See Task 1.8 for details on how to remove a drive bay cover.
7. Remove the DVD drive from the antistatic bag.
8. Locate the jumpers or switches on the drive.
9. Locate the jumper diagram on the drive.
10. Locate your needle-nose pliers or tweezers.
11. Set the jumpers or switches to the slave position.
Since the PC already has a CD drive installed on the second IDE controller, it is configured as the master drive.
INSTALLING THE DVD DRIVE
1. Slide the DVD drive into the drive bay from the front.
2. Locate the ribbon cable that is attaching the CD-ROM drive to the disk drive controller.
3. Locate the connector at the midpoint of the ribbon cable.
4. Locate the red or blue edge on the midpoint connector of the ribbon cable.
5. Match pin 1 in the connector with pin 1 on the DVD drive.
6. Gently and firmly connect the ribbon to the drive.
7. Locate an unused power cable from the power supply.
8. Attach the cable to the power connector on the drive.
9. Locate the audio cable that came with the DVD drive.
10. Locate the audio connector on the DVD drive.
11. Attach one end of the cable to the drive.
12. Locate the audio-in connectors on the MPEG card.
13. Connect the audio cable from the DVD drive to the first audio-in connector on the card.
14. Locate the audio cable on the CD-ROM drive.
15. Disconnect the cable from the sound card or motherboard.
16. Connect the cable to the second audio-in connector on the MPEG card.
17. Locate the audio-out connector on the MPEG card.
18. Locate the sound card’s three-pin connector.
84588.book Page 36 Tuesday, October 24, 2006 2:09 PM

Task 1.9: Installing a DVD Drive 37
19. Locate an audio cable in the DVD installation kit.
20. Connect one end to the MPEG card’s audio-out connector.
21. Connect the other end to the sound card’s connector.
22. Locate the monitor’s connection to the video card.
23. Locate the monitor connector on the back of the MPEG card.
24. Disconnect the monitor connector from the video card.
25. Connect the monitor connector to the MPEG card.
You will need to have a pair of speakers on hand when you begin testing.
26. Locate the video loopback cable included with the DVD installation kit.
27. Connect one end to the output connector on the video card.
28. Connect the other end of the connector to the MPEG card.
29. Use the screws that came with the drive to attach it securely to the drive bay.
30. Replace the access panel.
31. Replace the screws securing the access panel to the PC frame.
INSTALLING DRIVERS AND SOFTWARE FOR THE DVD DRIVE
1. Verify that a standard monitor, keyboard, mouse, and speakers are attached to the PC.
2. Plug the power cable into the PC’s power supply.
3. Power up the PC.
4. Locate the driver disk that came with the DVD drive.
The drivers could be on either a floppy diskette or CD-ROM disc.
5. When the PC is fully booted, insert the driver disk into the appropriate drive.
6. Navigate to the executable file on the floppy and start it. Then, follow the onscreen instructions.
The onscreen instructions vary widely depending on the make and model of the DVD drive, but they should guide you in how to correctly load the device drivers and other required software.
7. Reboot the PC if necessary.
84588.book Page 37 Tuesday, October 24, 2006 2:09 PM

38 Phase 1 � Installing Hardware and Software
TESTING THE DVD DRIVE INSTALLATION
1. Locate the test DVD disc.
2. Open the DVD drive.
3. Place the disc in the drive.
4. Close the drive.
5. If autoplay is engaged, the disk will begin playing automatically.
The program used by the DVD drive may prompt you to answer some ques-tions before playing the disc.
You can also use a CD-ROM disc for testing, since the DVD drive should play standard CDs as well.
Criteria for Completion
You will have successfully completed this task when you can play a DVD in the drive, view the video, and hear the audio output.
Task 1.10: Installing a MotherboardA motherboard is also called a system board or mobo and is the main circuit board of a com-puter. As a PC technician, you would be installing a motherboard if one were to fail in a PC or if you were building a custom computer from its component parts.
If you are making a PC from scratch, your first step would be to install the power supply in the computer case (see Task 1.4). Next, you would install sticks of RAM and the CPU on the motherboard before actually installing the motherboard in the case (see Tasks 1.1 and 1.3, respectively).
For older motherboards, you will need to configure them using jumpers and switches. You would need to configure CPU voltage and speed as well as bus speed. Modern motherboards don’t have jumpers or switches, so these settings are configured by the complementary metal oxide semiconductor (CMOS). This makes motherboard installation pretty much a straight-forward affair.
84588.book Page 38 Tuesday, October 24, 2006 2:09 PM

Task 1.10: Installing a Motherboard 39
Scenario
One of the engineering staff needs a custom-made computer workstation. Your supervisor has assigned you to assist in making the device by installing the motherboard. You have been provided with all the materials, have opened the new case, and have already installed the power supply, the CPU, and the required RAM. Your next step is to begin the motherboard installation itself.
See Task 1.1 for how to install RAM, Task 1.3 for how to install a CPU, and Task 1.4 for how to install a power supply.
Scope of Task
Duration
This task should take about 30 minutes
Setup
You’ll need an empty PC case with the power supply already installed. You will also need a motherboard with the CPU and RAM sticks installed. Usually new PC cases and mother-boards come with the necessary screws, washers, and riser pins you’ll need. As always, take ESD precautions to avoid damaging electrical components on the motherboard.
Caveat
You’ll need to consider the form factors of the motherboard and the case so they will match. There are a wide variety of motherboard makes and models, so read the motherboard manual prior to beginning the installation to see if you need to make any other preparations in the installation of your particular motherboard.
Procedure
In this exercise, you will learn how to prepare a PC case for a motherboard installation and how to install a motherboard.
Equipment Used
You will need one or more screwdrivers to fit the different screws used in attaching the moth-erboard to the case. You will also need a screwdriver and a pair of needle-nose pliers to remove the PCI covers and any other items in the case prior to the installation. Have a marker handy so you can use it to indicate where the riser pins will go.
84588.book Page 39 Tuesday, October 24, 2006 2:09 PM

40 Phase 1 � Installing Hardware and Software
Details
This lesson will guide you through each step in the installation of a motherboard into a PC case.
Installing a Motherboard
PREPARING THE PC CASE
1. Locate a screwdriver and a pair of needle-nose pliers.
2. Locate the PCI covers and any other panels or slots in the case.
3. Use the tools to remove the metal faceplates covering the external drive bays and pop out the tabs covering the portholes in the I/O shield for the motherboard ports.
4. Pull any loose power supply cables out of the case.
The types of PC case parts and how they are removed are different depending on the make of the case. You will have to look at your particular case carefully to determine how to remove these elements.
PC cases can contain sharp metal corners and edges, so take care not to injure yourself.
5. Locate your marker.
6. Locate the screw holes for the riser pins in the PC case.
7. Use the marker to mark the screw holes in the case that line up with the holes in the motherboard.
Sometimes it’s helpful to position the motherboard in the case and use the motherboard holes as a guide to mark the holes in the case.
8. Locate the riser pins.
9. Screw each riser pin into the indicated screw holes.
Riser pins are installed just like ordinary screws, turning in a clockwise direction. Screw each pin in completely so when the board is mounted, it will lie flat.
84588.book Page 40 Tuesday, October 24, 2006 2:09 PM

Task 1.10: Installing a Motherboard 41
Riser pins are used to keep the motherboard from having direct contact with the metal PC case.
INSTALLING THE MOTHERBOARD
1. Locate the screw holes on the motherboard.
2. Locate the screws and washers to be used in securing the motherboard to the riser pins.
Do not attempt this part of the task without using ESD precautions. See Task 1.18 for details.
3. Lift the motherboard and align it so that the screw holes and riser pins are matched. Also, move the motherboard toward the back of the case so that the ports that stick out from the motherboard are matched up with the corresponding holes in the case.
4. Place the motherboard on the riser pins.
5. Locate a screwdriver.
6. Attach the motherboard to the riser pins using the appropriate washers and screws.
7. Locate the motherboard power cable on the power supply.
8. Locate the motherboard’s power connector.
Consult the motherboard manual if you have difficulty locating the power connector.
9. Carefully align the cable connector to the motherboard connector.
10. Attach the cable to the motherboard connector.
You will not apply power to the motherboard until the entire computer is assembled and ready for testing.
Criteria for Completion
You will have successfully completed this task when the motherboard is attached to the riser pins in the PC case and the power supply cable is connected to the motherboard. The moth-erboard will not be tested until the rest of the components are installed and the completed unit is powered up.
84588.book Page 41 Tuesday, October 24, 2006 2:09 PM

42 Phase 1 � Installing Hardware and Software
Task 1.11: Installing a Video CardUnless you are building a system from scratch, all PCs come with some sort of video capacity—either an integrated video card or a PCI, PCI Express, or accelerated graphics port (AGP) card. Most video expansion cards today are installed in the motherboard’s AGP slot. There is only one AGP slot on a motherboard, so it’s pretty easy to find.
The most common reason for you to install a video card is to upgrade the system to display high-level graphics. Gamers especially need high-end video cards; however, web and graphic designers also require high-quality video displays.
The process isn’t very different from installing a PCI card (see Task 1.2 for details), but there are a few extra steps, especially if you are upgrading a video card.
Scenario
Your company has just hired a new graphic designer. A suitable PC has been located for the new employee but the video card needs to be upgraded to run the design programs the com-pany uses. The PC is already on your workbench, as is the video card and everything else you need to do the upgrade.
Scope of Task
Duration
This task should take about 30 minutes.
Setup
Ideally, you will have a PC with a video card already installed and another video card available so you can use it to replace the original. The driver disk for the new card should be in the installation kit with the video card. As always, before the installation begins, take ESD pre-cautions so you don’t damage electrical components in the PC.
Caveat
Make sure to completely read any documentation that comes with the new video card prior to doing this exercise. Your card may require specific procedures that are not included in this set of instructions. Also, for this task it is assumed you are using Windows XP.
Procedure
In this exercise, you will learn how to upgrade a video card in a computer and install the video card’s drivers.
84588.book Page 42 Tuesday, October 24, 2006 2:09 PM

Task 1.11: Installing a Video Card 43
Equipment Used
You should need only a screwdriver(s) to open the access case, remove the old card, and install the new card in the AGP slot.
Details
This exercise will take you through the motions of uninstalling an old video card and its drivers and installing a new card.
Uninstalling an Old Video Card
UNINSTALLING THE VIDEO CARD DRIVERS
1. With the system powered up, click Start � Control Panel.
Control Panel should be set to Classic view to follow along with this task.
2. Double-click Add/Remove Programs.
The Add/Remove Programs list may take a few moments to populate.
3. Scroll down the list and locate the display drivers for your current video card.
4. Click on the name of the drivers.
5. Click the Change/Remove button.
6. Follow the instructions to remove the video drivers.
7. Close Control Panel.
8. Power down the computer.
If you are using a Windows 9x/Me computer, you must go to the Display Drivers tab on the Video Card Properties box and select Standard Display Adapter and click OK before powering down the PC.
UNINSTALLING THE OLD VIDEO CARD
1. Unplug the power cable from the power supply.
2. Lay the PC on its side.
3. Locate your screwdriver and remove the screws attaching the access panel to the PC frame.
84588.book Page 43 Tuesday, October 24, 2006 2:09 PM

44 Phase 1 � Installing Hardware and Software
4. Remove the access panel.
5. Locate the video card.
6. Unscrew the video card from the frame of the computer.
7. Gently pull the old card out of the AGP socket.
You may have to gently rock the card end to end to loosen it. This prevents putting pressure on the card connector or the AGP port.
8. Remove the card and put it in an antistatic bag.
Installing a Video Card
INSTALLING THE VIDEO CARD IN THE AGP SLOT
1. Locate the new video card.
2. Remove it from the antistatic bag.
3. Line it up with the AGP slot.
4. Gently but firmly press the card into place.
5. Screw the card onto the PC frame.
If the video card has an onboard fan, make sure that no cables are at risk of interfering with the fan’s operation.
6. Replace the access panel.
7. Replace the screws, securing the access panel to the PC frame.
8. Set the PC upright.
9. Plug the power cord into the power supply’s socket.
10. Power up the PC.
INSTALLING THE NEW VIDEO CARD DRIVERS
1. Locate the CD containing the video card drivers.
2. After the PC powers up, follow the onscreen instructions to install the drivers.
The onscreen instructions may be slightly different depending on the make and model of card you’ve installed. You will usually be offered the option of searching for drivers or installing from media. When prompted, insert the CD into the CD drive and install the drivers.
84588.book Page 44 Tuesday, October 24, 2006 2:09 PM

Task 1.12: Installing a Laptop Keyboard 45
3. When prompted, restart the PC.
4. After the PC reboots, right-click anywhere on the Desktop.
5. Click Properties.
6. Click the Settings tab.
7. In the Screen Resolution box, configure the setting for the desired resolution.
8. In the Color Quality box, use the drop-down menu to select the desired color quality in bits.
Before performing this portion of the task, read the monitor and video card documentation and make sure the hardware and software support the desired settings.
9. Click the Advanced button.
10. Under DPI Setting, use the drop-down menu to select the desired refresh rate.
11. In the Compatibility box, click the Apply the New Display Settings without Restarting radio button.
12. Click OK to close the Advanced dialog box.
13. Click OK to close the Display Settings box.
Criteria for Completion
You will have successfully completed this task when the card and drivers are installed, you have set the display to the desired settings, and the monitor is correctly displaying the desktop.
Task 1.12: Installing a Laptop KeyboardSwapping out a keyboard on a PC is just a matter of unplugging the keyboard’s PS/2 or USB connector from the back of the computer and plugging in the new one. On a laptop, the pro-cedure is quite a bit more involved. New PC techs sometimes shy away from working on lap-tops because it seems so much more difficult to access the various components. Also, depending on the make and model of laptop, the process of performing repair tasks is highly variable.
All this is true; however, sooner or later you’ll have to face laptop repair and maintenance as part of your job. With a bit of practice, you’ll become more comfortable working on laptops.
Users can be particularly hard on laptop computers. If a user travels a lot with the laptop, it probably gets a great deal of use and sometimes abuse. Keyboards are vulnerable to having all manner of substances dropped or spilled in and on them. Keys can get stuck and even come off. If the keyboard can’t be repaired by a good cleaning, it will need to be removed and a suitable replacement installed.
84588.book Page 45 Tuesday, October 24, 2006 2:09 PM

46 Phase 1 � Installing Hardware and Software
Scenario
One of the sales associates has just come back from a trip and brings you her laptop. She com-plains that one of the keys has fallen off and several others are stuck or nonfunctioning. After a careful examination, you explain that the keyboard will need to be replaced. You put in an order to the manufacturer for a replacement keyboard. The sales associate has already uploaded her data to the file server and will be working on her PC at her desk for the next few weeks. She leaves the laptop with you. The keyboard arrives within a few days. You take the laptop and new keyboard to your workbench and prepare to replace the broken keyboard.
Scope of Task
Duration
This task should take from 30 to 45 minutes.
Setup
Ideally, you should have a laptop and replacement laptop keyboard on hand to perform this task. You can also simply remove the keyboard and install it again to perform the same set of actions. Of course, you will absolutely need a laptop of some type to do this exercise. As always, use ESD precautions to avoid damaging electrical components in the laptop.
Caveat
There seem to be as many types of laptops as there are stars in the sky. This translates into as many different ways of replacing a keyboard on a laptop. In this task, a Dell Inspiron 8200 laptop is used; however, the actual process of doing the same exercise on your laptop could be quite different. Always consult the documentation for your machine or the manufacturer’s website for instructions relevant to the laptop you are using.
Procedure
In this exercise, you will learn how to remove and replace a keyboard on a Dell laptop.
Equipment Used
You will need a screwdriver to remove a number of screws on the bottom of the keyboard. You will also need a plastic scribe or similar object to pry the keyboard up from the laptop once it’s unsecured.
Details
This task will walk you through the steps of removing a laptop keyboard and installing a new one.
84588.book Page 46 Tuesday, October 24, 2006 2:09 PM

Task 1.12: Installing a Laptop Keyboard 47
Replacing a Laptop Keyboard
PREPARING TO WORK ON THE LAPTOP KEYBOARD
1. Power down the laptop.
2. Unplug the power cord and external mouse cable, if present.
3. Remove any PC cards, if present.
4. Close the display lid.
5. Remove the battery.
On an Inspiron 8200, the battery is usually located on the front edge of the lap-top on the right. To remove it, locate the triangular latch on the bottom of the laptop just under the battery. Depress the latch and pull the battery forward. It should just slide out.
The preceding instructions should be followed when you are planning on repairing or replacing any component in the laptop.
REMOVING THE LAPTOP KEYBOARD
1. Turn the laptop over and place it so the front is facing you.
2. Locate three screws labeled with a K in a circle.
3. Locate one screw labeled with a K/M in a circle.
4. Locate your screwdriver and remove each of these screws.
The screws in a laptop can be quite long and it can be somewhat time- consuming to remove them.
5. Turn the laptop over with the front facing you.
6. Open the display.
7. Locate your plastic scribe.
8. Locate the “blank” key on the keyboard.
The blank key is located just above the right arrow key on the lower-right side of the keyboard on the Inspiron 8200.
84588.book Page 47 Tuesday, October 24, 2006 2:09 PM

48 Phase 1 � Installing Hardware and Software
9. Place the scribe under the right side of the blank key.
10. Apply pressure from left to right, pushing the keyboard to disengage the tabs on the left side.
11. Gently lift the right side of the keyboard and balance it on its left side on the laptop.
12. Locate the keyboard ribbon cable.
13. Disconnect the cable from the bottom of the keyboard.
14. Lay the keyboard aside.
INSTALLING THE NEW KEYBOARD
1. Locate the new keyboard.
2. Remove it from the antistatic bag.
3. Rest it on its left side on the laptop.
4. Connect the keyboard ribbon cable to the bottom of the keyboard.
Make sure that the cable does not get crimped when you install the keyboard.
5. Locate the two tabs on the left side of the keyboard.
6. Insert the tabs under the edge of the keyboard housing.
7. Slowly place the keyboard in the housing.
8. Verify that the keyboard is lying flush in the housing.
9. Close the display.
10. Turn the laptop over with the front facing you.
11. Locate the screws removed from the bottom of the laptop.
12. Locate your screwdriver and replace the screws.
13. Turn the laptop over so its bottom is on the workbench and the front is facing you.
TESTING THE KEYBOARD INSTALLATION
1. Replace the battery.
The battery should just slide back in and click into place.
2. Replace the power cord.
3. Lift the display.
4. Power up the laptop.
5. After the laptop has completely booted, open a blank document.
84588.book Page 48 Tuesday, October 24, 2006 2:09 PM

Task 1.13: Installing SO-DIMM in a Laptop 49
6. Type in the document, verifying that all the keys function properly.
7. Replace any PC cards and other equipment that were attached to the laptop when you received it.
Criteria for Completion
You will have successfully completed this task when the keyboard is installed, the laptop is com-pletely reassembled, and you can use the keyboard normally with all of the keys functioning.
Task 1.13: Installing SO-DIMM in a LaptopIn some ways, installing memory in a laptop is easier than performing the same action in a PC. There seems to be a universal law that says whatever component you need to reach in a PC will be in the most inconvenient and hard-to-reach place. On a laptop, this isn’t necessarily so…at least for memory.
The trade-off is that laptop components are smaller and sometimes more delicate (read “easier to break”). SO-DIMM (which stands for small-outline dual inline memory module) sticks are quite a bit smaller than DRAM (or dynamic random access memory), and the clips that hold them into the SO-DIMM sockets are tiny. That’s the only real hang-up, though. The actual installation is uncomplicated. You can upgrade a laptop’s memory in no time.
Scenario
You have received a trouble ticket stating that one of the testing engineers needs a memory upgrade for his laptop. You receive the specifics regarding the make and model of the laptop and look up the appropriate SO-DIMM module.
See Task 1.1, “Installing RAM,” to learn how to research which type of mem-ory is right for a particular computer.
You order the appropriate module, and when it arrives, you take it and your tools to the user’s cubicle. The user is about to take a break, leaving you free to upgrade his laptop’s memory.
Scope of Task
Duration
This task will take about 10 minutes.
84588.book Page 49 Tuesday, October 24, 2006 2:09 PM

50 Phase 1 � Installing Hardware and Software
Setup
You’ll need a laptop and an appropriate stick of SO-DIMM to upgrade its memory. In a pinch, you can simply remove an existing memory module in your laptop and replace it to simulate the task. As always, take ESD precautions to keep from damaging any electronic components.
Caveat
This task is based on upgrading memory in a Dell Inspiron 8200. The exact method of upgrad-ing memory in your laptop may vary. Consult the documentation for your laptop or search the manufacturer’s website for specific instructions.
Procedure
This exercise will teach you how to upgrade the memory of a laptop.
Equipment Used
You should only need a screwdriver to open the memory module cover on the bottom of the laptop.
Details
In this task, you will learn the procedures necessary to upgrade the memory in a laptop.
Installing SO-DIMM in a Laptop
PREPARING TO WORK ON THE LAPTOP
1. Power down the laptop.
2. Unplug the power cord and external mouse cable, if present.
3. Remove any PC cards, if present.
4. Close the display lid.
5. Remove the battery.
Find the procedure for removing a battery in the section “Preparing to Work on the Laptop Keyboard” in Task 1.12.
UPGRADING SO-DIMM IN THE LAPTOP
1. Turn the laptop over with the front facing you.
2. Locate the memory module cover.
84588.book Page 50 Tuesday, October 24, 2006 2:09 PM

Task 1.13: Installing SO-DIMM in a Laptop 51
The memory module cover on an Inspiron 8200 is a small panel located on the left-hand side of the laptop (when it is upside down) and attached by a single screw. Consult the documentation for your laptop to locate the module cover on your device.
3. Locate your screwdriver and remove the screw securing the module cover.
4. Release the two metal tabs holding the cover in place.
5. Lift out the cover.
6. Locate an empty SO-DIMM module slot.
The Inspiron 8200 typically has two slots. The original SO-DIMM module should be in the slot labeled DIMM A.
7. Locate the slot labeled DIMM B.
8. Locate the SO-DIMM module you brought with you.
9. Remove it from the antistatic bag, holding it by its side edges.
10. Align the module to the slot in the correct direction.
The module is made to fit in the slot in only one direction.
11. Slide the module into the slot.
The latches on either side will move aside slightly to allow the module to be placed in the slot.
12. Push the module down into the slot until the two latches on either side click into place.
If the latches don’t click and engage, the module may be misaligned. Remove the module and replace it again.
13. Replace the module cover, inserting the side with the metal tabs first.
14. Replace the screw securing the module cover.
84588.book Page 51 Tuesday, October 24, 2006 2:09 PM

52 Phase 1 � Installing Hardware and Software
15. Place the laptop right side up with the front facing you.
16. Replace the power cord and any other cords and cards you previously removed.
TESTING THE MEMORY
1. Open the display lid.
2. Power on the laptop.
3. Listen for two beeps as the computer boots.
4. Look for a message on the display screen indicating that the amount of memory on the computer has changed.
5. Follow any instructions you see on the screen.
6. Allow the laptop to continue to boot and the operating system to load.
VERIFYING THE MEMORY
1. On the computer’s Desktop, click the Start button.
2. Right-click My Computer and select Properties.
3. On the General tab of the System Properties box, locate the amount of SO-DIMM in the laptop.
4. Click Cancel to close the System Properties box.
The steps to test and verify the memory upgrade are identical to those found in Task 1.1.
Criteria for Completion
You will have successfully completed this task when you have verified that the amount of mem-ory has increased to the correct amount. This amount will vary depending on how much memory the computer originally had and how much you added.
Task 1.14: Installing a Laptop Hard DriveAs you learned in Task 1.5, “Installing a Hard Drive,” hard disk drives periodically fail for a number of reasons. The same can be said for laptop hard drives; however, the procedure to replace a laptop’s hard drive is quite a bit different and, in many cases, easier than replacing a drive in a PC.
This task is about as common as replacing an IDE drive in a PC. As always, replacing the drive is easy. Recovering the lost data is harder.
84588.book Page 52 Tuesday, October 24, 2006 2:09 PM

Task 1.14: Installing a Laptop Hard Drive 53
Scenario
You have received a trouble ticket stating that a marketing associate’s hard drive appears to have locked up. You call the associate and she agrees to bring the laptop to the IT department.
When she arrives, she explains that while she was out of town and using her laptop, she started hearing clicking noises coming from the computer. The noises increased in frequency until they abruptly stopped. At that point, she got a blue screen displaying error messages she couldn’t understand. She turned off the power by pressing and holding the power button down. When she tried to power the device back up, power was applied but the screen remained blank.
You verify that the problem is the hard drive, agree to replace it, reload the operating system and application software, and upload her data from the most recent backup on the file server.
You order a new hard drive and when it arrives, you take it and the laptop to your work-bench and begin to work.
This task will cover only the physical replacement of the hard drive. Task 1.22 covers installing an operating system and Tasks 1.24 and 1.25 describe install-ing Microsoft and non-Microsoft application software.
Scope of Task
Duration
Physically replacing the drive should take about 15 minutes.
Setup
The ideal setup is to have a laptop and a compatible spare hard drive unit to use in this task. If a spare unit is not available, you can remove the existing hard drive and then replace it. As always, use ESD precautions to prevent damaging the electrical components in your laptop.
Caveat
As with all laptop tasks, there are many different ways to do this exercise, depending on the make and model of your computer. Read the documentation for your laptop, either the hard copy or online at the vendor’s site. In this task, a Dell Inspiron 8200 is used.
Procedure
This exercise will teach you how to replace a hard drive in a laptop.
Equipment Used
You’ll only need a screwdriver to remove the screw securing the hard drive to the laptop.
84588.book Page 53 Tuesday, October 24, 2006 2:09 PM

54 Phase 1 � Installing Hardware and Software
Details
This lesson will take you through the steps of removing a hard drive from a laptop and replacing it with a new unit.
Replacing a Laptop Hard Drive
PREPARING TO WORK ON THE LAPTOP
1. Power down the laptop.
2. Unplug the power cord and external mouse cable, if present.
3. Remove any PC cards, if present.
4. Close the display lid.
5. Remove the battery.
REMOVING THE LAPTOP HARD DRIVE
1. Locate the hard drive.
The hard drive on an Inspiron 8200 is located on the left side of the laptop (when it’s upside down) at about the midsection.
2. Locate the screw securing the hard drive.
3. Locate your screwdriver and remove the hard drive’s restraining screw.
4. Grasp the hard drive and slide it out of its bay.
5. Put the unit aside.
INSTALLING THE LAPTOP HARD DRIVE
1. Locate the new hard drive.
2. Remove it from the antistatic bag.
3. Orient it correctly at the opening of the bay.
4. Slide the hard drive into the bay until it snaps into place.
5. Replace the restraining screw.
6. Turn the laptop right side up with its front facing you.
VERIFYING THE INSTALLATION
1. Once the laptop is completely reassembled and connected to a power supply, power it up.
2. When the drive boots, you should receive a message indicating that there is no operating system installed.
The hard drive is now ready to have an OS installed.
84588.book Page 54 Tuesday, October 24, 2006 2:09 PM

Task 1.15: Installing a Laptop Optical Drive 55
Criteria for Completion
You will have successfully completed this task when your laptop successfully boots. In the task scenario, a complete recovery would require the installation of the operating system, applica-tions, and backed-up data.
Task 1.15: Installing a Laptop Optical DriveAs you saw in Tasks 1.8 and 1.9, there is quite a bit of difference in installing a CD drive and a DVD drive in a PC. In a laptop, however, the process is exactly the same. Part of what makes it more simple is that laptops support only one optical drive and one hard drive, so there’s no need to set jumpers or switches to master and slave position. Also, the units are modular so there are no cables to deal with.
The drawbacks are size, capacity, and heat. All of the laptop components are literally on top of each other, so dispelling excess heat remains a problem. However, the process of installing a laptop CD or DVD drive is about the same as installing a laptop hard drive (see Task 1.14).
Scenario
You receive a trouble ticket stating that one of the sales reps is complaining that the DVD player on his laptop is broken. You arrange a time to meet the rep at his cubicle. Once there, he explains that he was placing a DVD into the open drive two days ago and he slipped and fell forward, cracking the unit. You examine the drive and confirm that it is damaged.
You take the laptop back to the IT department and place it on your workbench. You locate a suitable replacement unit in the stock room and place it next to the laptop. You lay out your tools and begin your work.
Scope of Task
Duration
This task should take about 15 minutes.
Setup
The setup is virtually identical to the one in Task 1.14. If you don’t have a spare optical drive, just remove and replace the existing optical drive on your laptop.
Caveat
As with all laptop tasks, before you begin, check the documentation for your particular laptop and determine if the procedure to perform this exercise differs from the instructions you are reading here. The laptop used in this task is a Dell Inspiron 8200.
84588.book Page 55 Tuesday, October 24, 2006 2:09 PM

56 Phase 1 � Installing Hardware and Software
Procedure
This exercise will show you how to replace the optical drive in a laptop.
Equipment Used
All you should need is a screwdriver to remove the screw holding the optical drive in place. Have a DVD disk handy for testing purposes.
Details
This lesson will walk you through the steps of removing an optical drive from a laptop and replacing it with another unit.
Replacing a Laptop Optical Drive
PREPARING TO WORK ON THE LAPTOP
1. Power down the laptop.
2. Unplug the power cord and external mouse cable, if present.
3. Remove any PC cards, if present.
4. Close the display lid.
5. Remove the battery.
REMOVING THE OPTICAL DRIVE FROM A LAPTOP
1. Locate the optical drive.
On an Inspiron 8200, the optical drive is located on the right-hand side (when the laptop’s upside-down) of the computer.
2. Locate the drive’s restraining screw.
You should find the screw on the bottom of the laptop, directly below the drive. Verify the location of the screw for your laptop in its documentation.
3. Locate your screwdriver and remove the restraining screw.
4. Locate the tab on the optical drive.
5. Pull the tab, sliding the drive out of the bay.
6. Put the drive aside.
INSTALLING THE NEW OPTICAL DRIVE IN A LAPTOP
1. Locate the replacement optical drive.
2. Remove it from the antistatic bag.
84588.book Page 56 Tuesday, October 24, 2006 2:09 PM

Task 1.16: Installing a KVM Switch 57
3. Correctly orient the drive to the bay.
4. Slide the drive into the bay until it clicks into place.
5. Replace the restraining screw.
6. Turn the laptop to its upright position.
TESTING THE OPTICAL DRIVE INSTALLATION
1. Plug the power cable back in.
2. Replace the battery.
3. Lift the display lid.
4. Power on the laptop.
5. After the laptop boots, open the DVD door.
6. Locate your test DVD and place it into the drive.
7. Close the drive door.
You should hear the optical drive spin up as it prepares to play the DVD disk.
8. If autoplay is functioning, the DVD’s display program will open and the disk will start to play.
In this scenario, the unit that was replaced was identical to the original, so the appropriate drivers and software were already loaded on the laptop.
Criteria for Completion
You will have successfully completed this task when the new optical unit is installed and it cor-rectly plays the test media.
Task 1.16: Installing a KVM SwitchThe idea of a keyboard-video-mouse (KVM) switch is that it allows you to use a single key-board, monitor, and mouse on two or more computers or servers. KVMs are traditionally used to attach several servers so you can switch the use of your keyboard, monitor, and mouse between them. After all, this equipment takes up a lot of space, and space is usually at a pre-mium in a server room. Chances are you don’t need to see the display of more than one of your servers at any given time.
84588.book Page 57 Tuesday, October 24, 2006 2:09 PM

58 Phase 1 � Installing Hardware and Software
If you have two computers connected through a KVM device, you can switch to unit A and work on the first server and then switch to unit B and access the second server. Although junior PC techs don’t do a large amount of work with server maintenance (the more typical role is in desktop support), occasionally you’ll be asked to install a KVM switch and verify that it works.
Scenario
A second server has just been installed at one of your company’s branch offices. Both servers have been configured but are currently shut down. You’ve been assigned to install a KVM switch so that a single keyboard, monitor, and mouse setup in the server room can be used to work with both servers.
The senior tech provides you with a KVM installation kit and explains the setup. You take the kit and your tools and drive to the branch office. You introduce yourself to the supervisor on duty and she takes you to their small server room. You set the KVM unit and toolkit on the table next to the monitor, mouse, and keyboard and start the job.
Scope of Task
Duration
This task should take about 20 minutes
Setup
You will need to have two PCs, one KVM unit, and one monitor, keyboard, and mouse. Have both PCs powered down before starting this exercise. You will also need the appropriate cabling to connect both computers to the KVM device. Those cables should come with the KVM switch. ESD procedures are not necessary because you won’t be coming in direct contact with delicate electrical components.
Caveat
There are a number of different makes and models of KVM switches on the market, so the pro-cedure for installing yours may differ slightly.
Procedure
This lesson will teach you how to connect two computers to a single KVM switch and, using a single monitor, keyboard, and mouse, switch back and forth between the two computers.
Equipment Used
No tools are needed to complete this task besides what is described in the scope of task section. The only thing you might need is a set of plastic ties for cable management.
84588.book Page 58 Tuesday, October 24, 2006 2:09 PM

Task 1.16: Installing a KVM Switch 59
Details
You will be guided through the steps necessary to connect two computers to a KVM switch; attach a single monitor, keyboard, and mouse to the switch; and use the switch to toggle back and forth between the two computers.
Installing a Two-Port KVM Switch
CONNECTING THE PERIPHERALS TO THE KVM SWITCH
1. Place the switch in its permanent location in proximity to the servers, monitor, keyboard, and mouse.
2. Verify that both servers have power cords plugged into their power supplies.
3. Verify that both servers are powered down.
4. Locate the output ports for the monitor, keyboard, and mouse on the back of the KVM switch.
5. Attach the monitor connector to the video output port on the switch.
6. Attach the keyboard connector (PS/2 or USB) to the keyboard output port on the switch.
7. Attach the mouse connector (PS/2 or USB) to the mouse output port on the switch.
CONNECTING COMPUTERS TO THE KVM SWITCH
1. Locate the input ports for the monitor, keyboard, and mouse connections for position A.
2. Locate the input ports for the monitor, keyboard, and mouse connections for position B.
3. Locate the two sets of KVM cables to be used to connect the KVM switch to the two servers.
4. Attach the monitor, keyboard, and mouse connectors on one end of the first cable to the input ports for the monitor, keyboard, and mouse connectors for position A on the switch.
5. Locate the monitor, keyboard, and mouse connectors on the first server.
6. Locate the loose end of the cable you just attached to the switch.
7. Attach the monitor, keyboard, and mouse connectors on the cable to the appropriate ports on the first server.
Connecting individual cables switch to server and then switch to server again will help avoid confusion as to which cable goes with which server.
8. Attach the monitor, keyboard, and mouse connectors on the second cable to the appro-priate input ports for position B on the KVM switch.
9. Locate the loose end of the second cable.
10. Attach the monitor, keyboard, and mouse connectors on the cable to the appropriate ports on the back of the second server.
84588.book Page 59 Tuesday, October 24, 2006 2:09 PM

60 Phase 1 � Installing Hardware and Software
11. Locate the power cord for the KVM switch.
12. Plug it into the power socket of the switch.
13. Locate a vacant plug on the power strip or UPS unit.
14. Plug the other end of the KVM power cord into the power device.
15. Locate your plastic ties in your toolkit.
16. Organize the different sets of cables and contain each bundle with a set of ties.
Although you don’t need to practice good cable management for the sake of this exercise, in the real world you are expected to be not only technically pro-ficient, but also tidy. Nobody wants to deal with a nest of snakes…or cables.
TESTING THE KVM INSTALLATION
1. Power up the KVM device.
2. Power up the first server.
3. Power up the second server.
4. When all devices are fully powered and booted, press the A button.
You should see the desktop of the first server with the login dialog box.
It is assumed that you have login credentials for these servers.
5. Log in to server A.
6. Set the background color or some other obvious visual indicator to a nondefault configuration.
7. Press the B button to switch to the other server.
8. Log in to server B.
9. Repeat switching back and forth between A and B to test the installation.
10. Practice using the keyboard and mouse on both servers A and B to test them.
11. When done, log off both servers.
84588.book Page 60 Tuesday, October 24, 2006 2:09 PM

Task 1.17: Installing a Complete Workstation from the Box 61
Criteria for Completion
You will have successfully completed this task when you are able to freely switch back and forth between both computers and use the monitor, keyboard, and mouse normally on both machines.
Task 1.17: Installing a Complete Workstation from the BoxWhen you think of working as a PC technician, especially from the hardware point of view, you probably imagine either repairing or replacing bits and pieces of an overall computer. However, there is something called a workstation rollout that you will occasionally partici-pate in. This is when a company is opening a new department or expanding a department and needs to have 80 new workstations up and running in two days. You can also have a rollout when PC hardware and the OS are being upgraded in an existing office.
What you can face as a tech is 80 boxes sitting beside 80 desks in different offices and cubicles waiting for you (and the rest of your team) to unbox them, assemble the different parts, hook them up to the network and power, and boot them. If you are operating on a much smaller scale, you could be solely responsible for the rollout.
Then the fun begins because they all have to be set up to a specific set of configurations, which means either you’ll be carrying around a CD to load that information on the computer or the computer’s hard drive is ghosted and you’ll need to go through a setup wizard. It’s not all a drag though. If you have to work long hours on a large rollout over the weekend, the team lead usually springs for pizza.
Scenario
One of your company’s branch offices is still using Windows NT 4 on its PCs. You have been assigned to perform a complete hardware and operating system upgrade for the office’s six PCs. You will need to physically replace the computers and configure the new PCs to connect to a local server and run proprietary software. You will also be responsible for boxing up the old equip-ment and using the provided labels to prepare them for shipping back to the corporate office.
You’ve been provided with instructions that will walk you through the procedure of perform-ing the hardware and OS rollout. You have been assigned to start on a Friday morning so you’ll be working around the employees at the branch office. You have arrived at the branch office and introduced yourself to the manager. She has shown you where all the boxes containing the new machines are placed as well as the tape and packing labels you’ll need later. You go to the first workstation, lay out your instructions, and begin to follow them.
84588.book Page 61 Tuesday, October 24, 2006 2:09 PM

62 Phase 1 � Installing Hardware and Software
Scope of Task
Duration
Realistically, rolling out six desktops and testing them should take 4 to 5 hours, depending on how much configuration is needed and how smoothly the job goes. Performing this task with a single computer should take about an hour.
Setup
The setup for this exercise can only be approximated in a home or small lab environment. The best you could do would be to have access to a completely boxed computer that needs to be unboxed, have all of the physical cabling connected, have a connection to the network, and be set up to communicate with the other computers in the network.
Caveat
This is a very common task for a PC tech at a company that is budgeted to slowly upgrade its PC hardware and operating system platforms. However, it is a difficult task to replicate in terms of practicing because the PCs involved in a rollout have already been configured to run through a setup routine when booted. Your job is to follow instructions, call the IT department if something doesn’t go as planned, and clean up after yourself. Part of your job in this case is to empty the garbage, or at least take the empty boxes to the nearest dumpster.
Even if you aren’t in a position to follow every step of this task, just going through it will provide you with an inside glimpse into one of the more ordinary activities done by techni-cians. Although it is typical for your instructions to include all six PCs, this task will cover only the first one; it is assumed that the setup for the other five is identical.
Procedure
This lesson will show you how to perform a small hardware and OS rollout.
Equipment Used
You won’t be opening up any of the PC cases so you won’t need much in the way of tools. In a scenario such as this, you will need a box cutter to open the boxes, tape to seal them once you put the old units inside and ready them for shipping, and probably some plastic ties to tidy up the cabling.
Details
This exercise will take you through the whole process of a hardware and OS rollout, including unboxing the new computer, physically setting up the computer, running the configuration wizard, and verifying that the PC can communicate with the network, including the server.
84588.book Page 62 Tuesday, October 24, 2006 2:09 PM

Task 1.17: Installing a Complete Workstation from the Box 63
Preparing to Roll Out the First Computer
INVENTORYING THE NEW EQUIPMENT
1. Locate your box cutter.
2. Carefully cut the tape on the top of the box.
3. Open the box.
4. Remove the invoice from inside the box.
5. Read the invoice, taking note of what you should find in the box.
6. Remove all of the equipment from the box, including the new PC.
7. Compare the equipment to the invoice, making sure they match.
8. Write on the invoice that everything listed was delivered.
You will be expected to keep track of all of the paperwork and transport it to the main IT department when the work is done.
DECOMMISSIONING THE FIRST WINDOWS NT WORKSTATION
1. Locate the first computer you are going to replace.
2. Ask the user to log off the computer.
3. After the user logs off, sit at the workstation and perform a graceful power down.
As part of your introduction to the workers at the office, you are usually instructed to tell them what to expect and that you will try to disrupt their work as little as possible. They have typically received this information before your arrival, but you need to be polite and remember that you are a guest in their office.
4. Get under the desk and access the old unit.
5. Unplug the keyboard, mouse, and monitor connectors.
6. Unplug the Ethernet connector and the power cord.
7. Lift the old PC out from under the desk.
It is very common for users to keep their PCs under their desks, but of course some PCs are situated on desks or otherwise positioned.
8. Place the old PC in the box the newer unit arrived in.
9. Replace the packing material (such as Styrofoam) to protect the older unit.
84588.book Page 63 Tuesday, October 24, 2006 2:09 PM

64 Phase 1 � Installing Hardware and Software
10. Seal the box securely with packing tape.
11. Attach the preaddressed shipping label to the box.
12. Set the box in a preselected area in the office, out of the way of the users.
Rolling Out the First Computer
PHYSICALLY INSTALLING THE FIRST COMPUTER
1. Locate the first new PC.
2. Place it under the user’s desk in the same position the old PC occupied.
3. Locate the power cord used by the old PC.
In this scenario, you’ll be using all of the old cables and peripherals for the rollout. Only the PC will be new.
4. Plug the cord into the new computer’s power supply. The power supply is inside the PC. A connection for it is located on the back of the computer. See Task 1.4 for the definition of a computer’s power supply.
5. Locate the Ethernet cable you removed from the old PC.
6. Plug the Ethernet cable into the new computer’s NIC port.
7. Locate the keyboard, mouse, and monitor connectors from the old PC.
8. Connect them to the appropriate ports on the new PC.
PERFORMING THE INITIAL CONFIGURATION
1. Sitting at the keyboard, power up the PC and let it boot.
Usually once the operating system loads, a proprietary login screen appears. Your instructions will include login credentials. The credentials used in the subsequent steps, including the IP address of the local server, are bogus and just used as examples.
2. Type the username tech01 in the Username field.
3. Type the password csicsic in the Password field.
4. Click Start.
5. Click Run.
6. In the Run box, type cmd and press Enter.
7. At the command prompt, type ipconfig/all.
8. Verify that the PC has received a dynamic IP address from the DHCP server at the branch.
84588.book Page 64 Tuesday, October 24, 2006 2:09 PM

Task 1.17: Installing a Complete Workstation from the Box 65
It seems prudent to mention again that Windows 2000 and XP are configured by default to use Automatic Private IP Addressing (APIPA) in the event that the computer cannot acquire a dynamic address. If the address is returned in the 169.254.x.x range and the subnet mask is 255.255.0.0, the computer is using APIPA. Consult with your network administrator to find out what subnet mask and IP address range you would expect the computer to acquire.
9. Type ping 192.168.0.1 at the prompt and verify that there is a connection to the server.
10. Type ping www.google.com at the prompt and verify that there is a connection to the Internet.
11. Close the command-line interface (CLI).
At this point, you usually run through a routine to configure the new PC for the office. The following is an example. This part of the process can be highly variable.
CONFIGURING THE NEW PC FOR ITS ENVIRONMENT
1. Double-click the CSIC icon on the Desktop.
2. In the Available Servers list, click on server CSIC-1701 to select it.
3. Click OK.
4. When the Configuration Status box appears, watch the green progress indicator until it moves completely across the box and flashes green.
5. Click Done.
6. Log out of the workstation.
7. Repeat the entire process for the other five computers.
Completing the Rollout
WRAPPING UP
1. Verify that you have completed the rollout for all six new machines.
2. Verify that you have boxed and sealed all six of the old workstations in their boxes.
3. Verify that you have correctly labeled all six boxes for shipping and staged them in an out-of-the-way area.
On the next business day, the office will arrange for its selected shipping com-pany to come, take the boxes, and transport them to their destination.
84588.book Page 65 Tuesday, October 24, 2006 2:09 PM

66 Phase 1 � Installing Hardware and Software
4. Clean up any excess packing material or other waste that was created during the rollout and dispose of it in a nearby dumpster.
5. Verify that all six users can log in to the network and perform their jobs.
6. Complete and sign all documentation and have the manager countersign.
7. Call the IT department and advise them that the job is completed and you’ll be bringing in the paperwork.
Criteria for Completion
In the scenario, you will have successfully completed the task when all six new workstations are fully operational and networked. If you have been simulating the exercise by assembling and networking a PC, you will have successfully completed the task when you have attached all peripherals to the PC, connected it physically to the rest of the network, powered up the machine, and are able to perform typical tasks and have network connectivity.
Task 1.18: Preventing ESD DamageIt is amazingly easy to damage the delicate electrical circuitry inside of a computer. As a child, you may have rubbed your feet back and forth on a carpet and then touched another person’s hand to give them a static shock. What you probably don’t realize is that your body carries some electrical potential all of the time. Most of the time, though, the discharge is insufficient to be perceived by the human nervous system. Unfortunately, it is more than enough to fry some components inside a PC. This type of damage can cause maddening intermittent faults in the computer that can seem to be impossible to diagnose.
Happily, there are precautions you can take to prevent such damage. The most common method (though not recommended as the only method) is to open the PC’s access panel and touch the frame of the computer to equalize the electrical potential between you and the com-puter. This is the “quick and dirty” method of preventing electrostatic discharge (ESD). If you want to do this while working on your own computer, go for it. When you are working with other people’s equipment, you’d better stick to safer procedures.
Scenario
You have a PC on your workbench that needs to have its memory upgraded (see Task 1.1). You are about to remove the panel’s screws and take off the panel. You have just been briefed by your supervisor on the proper method of preventing ESD damage to the inside of the computer. All of the necessary equipment has been provided and you begin going through the necessary pre-cautionary procedures.
84588.book Page 66 Tuesday, October 24, 2006 2:09 PM

Task 1.18: Preventing ESD Damage 67
Scope of Task
Duration
This should only take a few minutes.
Setup
You don’t actually have to open the computer for this task; all you’ll need to do is set up the ESD precautions.
Caveat
Although this is a single task, you would be wise to “perform” this task every time you open up a computer case. The few minutes it takes to implement these procedures could save you hours of trying to figure out some problem caused by a stray static shock.
Procedure
This lesson will show you how to implement proper ESD procedures.
Equipment Used
You’ll need at least an ESD wrist strap, but you can also get an ESD cover for your workbench and a mat to stand on while working on the computer. Always have antistatic bags ready for any components you remove from the computer.
Details
This exercise will show you the steps to take to prevent ESD damage while working on a computer.
Taking Steps to Prevent ESD Damage
PREPARING YOUR WORK AREA AND YOURSELF
1. Verify that your workbench is covered with an ESD mat before placing a computer on the bench.
2. Make sure there is an ESD mat where you will be standing while working on a computer.
3. Check to make sure whatever component you are installing is stored in an antistatic bag.
Try not to wear synthetic clothing while working on a computer.
84588.book Page 67 Tuesday, October 24, 2006 2:09 PM

68 Phase 1 � Installing Hardware and Software
Don’t use Styrofoam while working on the computer. If you have to have a cup of coffee, use a ceramic cup (although drinking anything around an open computer is asking for trouble). Passing a piece of Styrofoam over electrical components can damage them.
4. Place an antistatic strap around one of your wrists.
5. Clip the other end of the cable attached to the strap to the frame of the computer.
Another activity that can cause ESD damage is vacuuming the interior of the PC case. (Use a can of compressed air instead.) To clean components, use antistatic sprays instead of detergents. Rubbing erasers inside the case also can build up static.
Criteria for Completion
You will have successfully completed this task when you have secured your work area and yourself with ESD equipment. You are now ready to open the computer case.
Task 1.19: Installing Drivers from a DiskLong gone are the days when a computer can contain by default all of the hardware drivers necessary to work and play well with every device and component on the market. Chances are, if you install a piece of hardware or a peripheral, you’ll also have to install the drivers.
Most of the time this isn’t much of a chore, especially if you are installing a new device and have the driver disk that came with the hardware. Windows makes it pretty easy, but you do have to go through a few steps. Get used to them. As a PC tech, you’ll be installing or updating drivers almost all the time.
Scenario
A user has turned in a trouble ticket stating that he is having trouble playing audio tutorials on his PC. You’ve investigated and determined that the problem is his sound card. You install a replacement PCI sound card (see Task 1.2) and now you need to install the drivers. You have the driver disk that came with the sound card and are ready to do the installation.
The sound card scenario is only an example. You’ll end up installing drivers for a wide variety of components.
84588.book Page 68 Tuesday, October 24, 2006 2:09 PM

Task 1.19: Installing Drivers from a Disk 69
Scope of Task
Duration
This task should take about 10 minutes.
Setup
Ideally, you will have just installed a new device or component and have the driver disk for the new piece of hardware handy.
Caveat
In this lesson, you’ll be using Windows to do the installation, but often the vendor’s driver disk has its own interface and installation procedure. In the vast majority of cases, you just need to follow the onscreen instructions and the drivers will be successfully installed.
Procedure
This lesson will teach you how to install device drivers from a CD.
Equipment Used
The only thing you’ll need after the device is installed is the driver disk.
Details
This task will walk you through the steps of using Windows to install a device driver from a CD.
Installing Device Drivers from a Disk
GETTING READY TO INSTALL DRIVERS FROM THE DISK
For this task, you should have already installed the sound card and powered up the Windows XP computer.
1. Locate the driver disk.
2. Locate the driver installation instructions.
3. Verify that the correct procedure is to use Windows to install the drivers.
You may fail to correctly install the device drivers if you don’t follow the rec-ommended method of installing them from the driver disk.
84588.book Page 69 Tuesday, October 24, 2006 2:09 PM

70 Phase 1 � Installing Hardware and Software
INSTALLING FROM THE DEVICE DRIVER DISK USING WINDOWS
1. Sitting at the keyboard, click Start.
2. Right-click My Computer.
3. Click Properties.
4. Click the Hardware tab.
5. Click the Device Manager button.
6. Locate the new device in the Device Manager list.
A yellow exclamation point may appear next to the device, indicating that it is not functional at this time.
7. Expand the Sound Card notation in the list.
8. Right-click the name of the sound card.
9. Click Properties.
10. Click the Update Drivers button.
11. In the Hardware Update Wizard, click the Install from a List or Specific Location (Advanced) radio button.
12. Click Next.
13. Insert the driver disk in the PC’s CD or DVD drive.
14. Click the Search for the Best Driver in These Locations radio button.
15. Verify that the Search Removable Media (Floppy, CD-ROM) box is checked.
16. Click Next.
17. When the search of the disk locates the driver, select it and click OK.
A dialog box may appear indicating that the driver isn’t digitally signed. This is not a serious situation; it only means that Microsoft has not specifically tested the driver with Windows XP. Click the Continue Anyway button.
18. After the driver installs, click Finish.
19. If prompted, click the Restart button to reboot the PC.
20. Remove the driver disk.
Criteria for Completion
You will have successfully completed this task when the computer reboots and you can use the new device normally.
84588.book Page 70 Tuesday, October 24, 2006 2:09 PM

Task 1.20: Installing Drivers from the Internet 71
Task 1.20: Installing Drivers from the InternetProbably the most difficult task in installing drivers from the Internet is finding them. Although it makes sense to go to the manufacturer’s site first, depending on how the company’s site is set up, it may not be easy to locate the right drivers. Also, if you are looking for drivers for a legacy device, the vendor may have gone out of business. Task 2.4 will focus on how to find drivers online. For this task, it is assumed that you’ve located the right driver page to find the needed driver, download, and install it.
Scenario
You are installing an HP All-in-One device as a local printer/fax/scanner on a user’s com-puter. You don’t have the driver disk that originally came with the device but can find the drivers online. The computer has an Internet connection and you can go to HP’s site and find the drivers page for the product.
Scope of Task
Duration
This task should take about 15 minutes.
Setup
You’ll need a computer with an Internet connection and, ideally, a device that’s connected to the PC and needs updated drivers. You can also download the drivers for just about any device but not install them.
Caveat
If you wanted to update the drivers of a device already installed on your computer, you could just use the Device Manager to search for drivers online. (Task 1.19 used the device manager to install drivers from a CD.) This task focuses on a situation in which you are installing a new device and must locate and download drivers from the Internet. In this example, you are downloading an HP device driver, but this task is applicable for any man-ufacturer or device.
Procedure
This task will show you how to download and install device drivers from an Internet site.
84588.book Page 71 Tuesday, October 24, 2006 2:09 PM

72 Phase 1 � Installing Hardware and Software
Equipment Used
You only need a computer with an Internet connection to complete this task.
Details
This task will show you the steps necessary to download and install device drivers from a manufacturer’s site.
Downloading and Installing Device Drivers
SELECTING AND DOWNLOADING DRIVERS
1. With the manufacturer’s device driver site open in your browser, select your product type.
2. On your product type’s page, type the make and model of your device in the available field.
3. Press Enter.
Your product make and model may have several submodel numbers and you may have to select which one most closely matches your device.
4. Click the Software and Driver downloads link.
5. Click the name of your operating system.
6. Find the specific driver you need and click the link.
7. Review the information on this page to make sure it is the correct driver.
8. Click the Download Only button.
9. Browse to the folder on your hard drive where you want to place the driver.
When downloading drivers or any file from the Internet, prepare a folder in your directory system ahead of time so you can find the file later. For example, you could create a folder named Drivers off of your C drive and download all your drivers to one folder. This makes it easy to find them later.
10. Click OK to download the driver to the selected folder.
The amount of time it takes for the drivers to download depends on your connection speed and the size of the software package.
INSTALLING DEVICE DRIVERS
1. Browse to the folder where you downloaded the driver package.
2. Double-click the driver package.
84588.book Page 72 Tuesday, October 24, 2006 2:09 PM

Task 1.21: Reformatting a Hard Drive 73
3. In the installation wizard, accept the default location for the installation.
4. Click Next to extract the drivers.
This part of the task may take a few minutes. After the drivers are extracted, the process is largely automatic, with the installation software checking your system, preparing for the installation, conducting the installation, and config-uring the product.
5. After the installation is complete, restart the computer.
Depending on the device involved, you may have to complete the configuration wizard before being able to use the device.
Criteria for Completion
You will have successfully completed the task when the drivers are installed, the device is con-figured, and you are able to use the device normally.
Task 1.21: Reformatting a Hard DriveReformatting a hard drive is no fun. It usually means that there is something seriously wrong with the computer that cannot be repaired in any other way. Reformatting means erasing everything on the hard drive and then reinstalling the OS, drivers, application software, and data. If possible, back up all of the data on the drive before reformatting.
Reformatting a hard drive will erase everything on it and all of your data will be lost.
Sometimes a computer will become so overrun with malware that it becomes impossible to recover it through normal means. The solution of last resort is to wipe the drive and reinstall everything. The Windows XP Recovery Console provides an ideal tool for doing this.
Scenario
You receive a trouble ticket from a user that his Windows XP laptop seems to go out of control when powered up and connected to the network. You investigate and determine that the lap-top has been severely compromised by malware during a business trip taken by the user. Anti-virus and anti-malware removal solutions have been unsuccessful. Your supervisor advises
84588.book Page 73 Tuesday, October 24, 2006 2:09 PM

74 Phase 1 � Installing Hardware and Software
you to reformat the hard drive of the laptop. Fortunately, most of the data on the laptop also exists on the user’s office PC.
You take the laptop to your workbench and locate the Windows XP installation disk that you’ll need for the reformatting. You know that the filesystem on the XP machine is NTFS.
Scope of Task
Duration
This task should take about 20 minutes
Setup
You’ll need to have a computer running Windows XP that must be able to boot from a CD drive. You’ll also need to have the recovery disk. Most importantly, the computer must not contain data and software that you will need.
Caveat
Be very sure you have any data you want backed up before proceeding with this task. Once you’re done, any data on the drive will be gone forever. If your computer doesn’t check the optical drive before the hard drive when it starts booting, you’ll have to change the boot order in the BIOS. Once this process is done, make sure you have all of the application installation disks if you want to reinstall the operating system and all the apps.
To reinstall the operating system and all the apps, see Task 1.22, “Installing an Operating System (Windows XP Professional) as a Fresh Install,” Task 1.24, “Installing Microsoft Applications,” and Task 1.25, “Installing Non-Microsoft Applications.”
Procedure
This task will show you how to reformat a hard drive using the Recovery Console in Windows XP.
Equipment Used
You won’t need any tools for this task, just the Windows XP computer itself and the recovery or installation CD.
84588.book Page 74 Tuesday, October 24, 2006 2:09 PM

Task 1.21: Reformatting a Hard Drive 75
Depending on where you bought your computer, you were given either the full installation disk with the computer when you received it or a recovery disk that contains all the XP repair tools but not the operating system installer. If at all possible, when you buy a computer, make sure the full installation disk comes with it.
Details
This task will show you all of the information regarding changing the boot order of a com-puter and using Windows XP Recovery Console to reformat the hard drive.
Changing the Boot Order of a Computer
GETTING INTO THE BIOS AND CHANGING THE BOOT ORDER
1. Verify that the laptop is connected to a power source.
2. Open the CD or DVD drive.
3. Insert the recovery disk.
4. Boot the computer.
5. As the boot sequence begins, scan the bottom of the screen for the key or key combination that will let you enter the setup.
The key or key combination depends on the computer manufacturer and the type of BIOS the computer uses. Some of the more common are F1, F2, Del, Esc, or Ctrl+Alt+Del.
6. When the setup screen appears, look for an area or list referencing the boot order.
Exactly how the setup screen is configured varies widely. This task takes you through a basic procedure, but how your BIOS is set up may differ.
7. Follow the onscreen notes to enter the boot order menu.
8. View the listing of the boot order.
9. If necessary, change the boot order to make the CD or DVD drive the first in the list.
10. Press the key that will save your changes and restart the computer.
84588.book Page 75 Tuesday, October 24, 2006 2:09 PM

76 Phase 1 � Installing Hardware and Software
Reformatting a Hard Disk
USING WINDOWS XP RECOVERY CONSOLE TO REFORMAT THE HARD DISK
1. As the computer boots from the CD, look for the Welcome to Windows Setup screen.
2. Press either the F10 function key or the r (for repair) key.
3. When the Recovery Console opens, select the Windows installation from the list.
Windows will most likely be at the top of the list and be called C:\WINDOWS.
4. Press Enter.
5. At the login screen, use your administrator name and password to log in.
On home Windows systems, the primary user is usually the administrator. In a work setting, admin usernames and passwords are set by the IT department staff. Your supervisor will have provided you with this information.
6. Press Enter.
7. In the command-line emulator, type map at the prompt.
Typing map will provide a list of drive letters with the associated file system, size, and device name of each drive.
8. Press Enter.
9. Type format C: /fs:ntfs.
Step 9 assumes that the drive you want to reformat is the primary or C drive. If the drive you are reformatting uses a different drive letter, use that one instead.
10. Press Enter.
11. Type y and then press Enter.
12. After the reformatting process finishes, type exit.
13. Press Enter to restart the computer.
84588.book Page 76 Tuesday, October 24, 2006 2:09 PM

77
Criteria for Completion
You will have successfully completed the task when the computer reboots and the hard drive has been reformatted with the operating system, application software, and data deleted.
Task 1.22: Installing an Operating System (Windows XP Professional) as a Fresh InstallAs you saw in Task 1.21, there are times when even good PCs go bad and there’s nothing left to do but reformat the hard drive. Of course, this is only part of the rehabilitative therapy for your ailing computer. To fix the original problem, you had to throw out the good software with the bad. Although you have guaranteed that all viruses and other malware have been removed from the hard drive, you also deleted the operating system, application software, and all your data.
Hopefully you backed up your data and located software installation disks. You’re going to need them if you ever want to use your computer for more than a paperweight. Assuming you took all of the appropriate steps to find your software disks, you’ll soon be tapping away at the keyboard and clicking the mouse once again.
Scenario
You have just completed reformatting the hard drive of a laptop that had been corrupted with various forms of malware (see Task 1.21). You have located a Windows XP Professional installation disk and are ready to reinstall the operating system. You will be performing a fresh install so it will be as if you were installing Windows XP on a brand-new hard drive.
You can use a Windows XP Home edition install disk for this task because the installation process is virtually identical.
Scope of Task
Duration
This task should take about 30 to 45 minutes, depending on the capacity of your computer’s CPU and memory.
Task 1.22: Installing an Operating System as a Fresh Install
84588.book Page 77 Tuesday, October 24, 2006 2:09 PM

78 Phase 1 � Installing Hardware and Software
Setup
You’ll need a computer with a newly reformatted hard drive. You will also need a genuine Windows XP Professional installation disk and the accompanying product key.
Caveat
This task will take you only as far as the installation of the operating system. Tasks 1.24 and 1.25 will continue the recovery process by teaching you how to install Microsoft and non-Microsoft application software. You can complete this task only by reinstalling Windows XP on a reformatted drive.
Procedure
This task will instruct you on how to reinstall Windows XP on the reformatted hard drive of a computer.
Equipment Used
You will need only a computer with a reformatted hard drive and a valid Windows XP instal-lation disk with the accompanying product key.
Do not use pirated software for this or any other task you perform in this book!
Details
This lesson will walk you step-by-step through the procedure of performing a fresh install of Windows XP on a reformatted hard drive.
Reinstalling Windows XP
REINSTALLING WINDOWS XP ON A REFORMATTED COMPUTER
1. Verify that your computer is hooked up to a power supply.
2. Locate the Windows XP install disk.
3. Insert the disk into the CD or DVD drive of the computer.
4. Reboot the computer.
84588.book Page 78 Tuesday, October 24, 2006 2:09 PM

79
In Task 1.21, you made sure that the computer would look to the optical drive first to boot. Watch carefully for the message “Press any key to boot from CD.” It will appear for only a few seconds, so quickly press any key on the key-board to initiate a boot from the CD.
You may be asked to activate the product (operating system) at this time or at some point in the installation process. Skip this part of the setup since you will need an Internet connection to complete product activation.
5. When the Welcome to Microsoft Windows XP window appears, click the arrow in the green box next to Install Windows XP.
You can also press Enter at this step.
6. The initial Windows Setup window appears. At this point, Setup will format the partition.
7. When the Welcome to Setup window appears, press Enter.
8. When the End-User License Agreement appears, press F8 to agree.
9. When the partition window appears, verify that the desired partition is selected and the press Enter to install Windows XP on that partition.
Task 1.22: Installing an Operating System as a Fresh Install
84588.book Page 79 Tuesday, October 24, 2006 2:09 PM

80 Phase 1 � Installing Hardware and Software
You can also create a new partition by pressing C. To toggle through a list of partitions in the partition window, use the Up and Down arrow keys.
10. When the file system window appears, use the Up and Down arrow keys to select Format the Partition Using the NTFS File System, and then press Enter.
11. Setup will format the partition and then copy files to the Windows installation folders. When it finishes copying files, Windows will reboot.
After Windows reboots, the GUI installation screen appears, informing you of the current stage of the installation and about how long it will take. Notice the flashing green lights at the lower-right side of the screen. The moving lights indicate that the installation is proceeding.
If those lights stop moving or are moving extremely slowly, it probably indi-cates a problem with the install. The most common cause is a smudge or dirt on the disk. You will need to stop the installation, remove the disk, and exam-ine it for smudges or damage. If possible, clean the disk and make another attempt to do the installation.
12. When the Regional and Language Options box appears, click Next.
84588.book Page 80 Tuesday, October 24, 2006 2:09 PM

81
If you live someplace besides the United States, you will want to click the Cus-tomize and Details buttons to adjust the Regional and Language Options set-tings so they are appropriate to your location. After these settings are adjusted, you can click Next to proceed.
13. When the Personalize Your Software box appears, enter your name or the name of the end user in the Name field. You can optionally enter a company name in the Organization field.
14. Click Next.
15. When the Your Product Key box appears, enter the 25-character product key that came with the installation disk.
You can usually find the product key on a label attached to the disk case.
16. After you’ve entered the key, click Next.
17. When the Computer Name and Administrator Password box appears, type the hostname of the computer in the Computer Name field.
18. Type the password for the local computer administrator account in the Administrator Password field and repeat this step in the Confirm Password field.
Task 1.22: Installing an Operating System as a Fresh Install
84588.book Page 81 Tuesday, October 24, 2006 2:09 PM

82 Phase 1 � Installing Hardware and Software
This is the password for the administrator account on the local machine, not the domain administrator password.
19. Click Next.
20. When the Date and Time Settings box appears, adjust the Date, Time, and Time Zone set-tings using the drop-down lists and arrow keys.
Usually, the Date and Time are correct and you will only have to adjust the Time Zone setting.
21. If desired, verify that the Automatically Adjust Clock for Daylight Saving Changes check box is checked, and click Next.
After you click Next in the Date and Time Settings window, you will be returned to the GUI installation window. Allow the installation process to continue until your input is required.
84588.book Page 82 Tuesday, October 24, 2006 2:09 PM
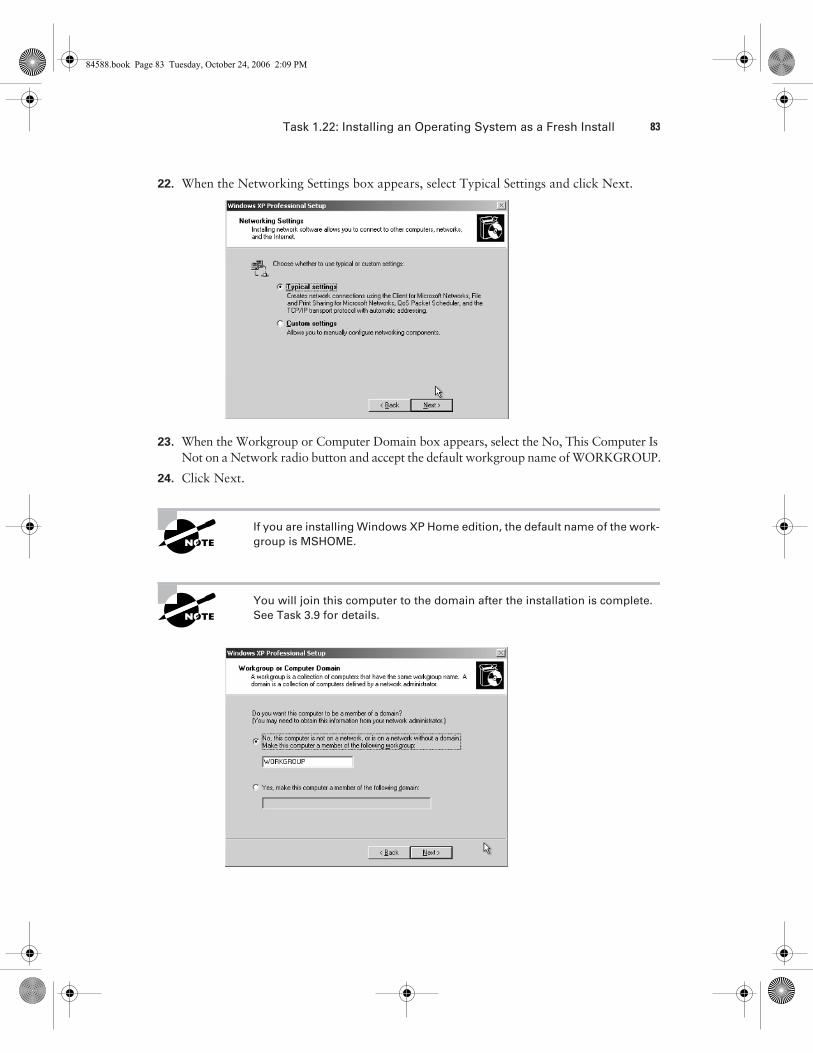
83
22. When the Networking Settings box appears, select Typical Settings and click Next.
23. When the Workgroup or Computer Domain box appears, select the No, This Computer Is Not on a Network radio button and accept the default workgroup name of WORKGROUP.
24. Click Next.
If you are installing Windows XP Home edition, the default name of the work-group is MSHOME.
You will join this computer to the domain after the installation is complete. See Task 3.9 for details.
Task 1.22: Installing an Operating System as a Fresh Install
84588.book Page 83 Tuesday, October 24, 2006 2:09 PM

84 Phase 1 � Installing Hardware and Software
After you click Next in the Workgroup or Computer Domain window, you will be returned to the GUI installation window. The installation will proceed to its conclusion after about 30 minutes and the computer will reboot at that time.
25. When the computer reboots and the Display Setting box appears asking to adjust the screen resolution, click OK.
26. When the screen resolution is adjusted, if you can read the message in the Monitor Settings box, click OK.
After you click OK in the Monitor Settings box, Windows XP will load.
CONFIGURING A NEWLY INSTALLED WINDOWS XP PROFESSIONAL COMPUTER
1. When the Welcome to Microsoft Windows screen appears, click Next.
If you have speakers attached to the computer, turn them on and turn up the volume. If the sound card and speakers are operating correctly, you will hear a test “song.”
84588.book Page 84 Tuesday, October 24, 2006 2:09 PM

85
2. When the Internet Connection screen appears, select the Yes, This Computer Will Con-nect through a Local Area Network or Home Network radio button and click Next.
You also have the option to skip the screen in step 2 by clicking Skip.
3. When the Ready to Register with Microsoft? screen appears, select the No, Not at This Time radio button and click Next.
4. When the Who Will Use This Computer? screen appears, type the name of the primary user in the Your Name field.
Task 1.22: Installing an Operating System as a Fresh Install
84588.book Page 85 Tuesday, October 24, 2006 2:09 PM

86 Phase 1 � Installing Hardware and Software
5. If other users need to have their own local computer accounts on this PC, use the addi-tional fields to enter their names.
6. Click Next.
7. When the Thank You! screen appears, indicating that Windows XP Professional has been successfully configured, click Finish.
Windows will reboot and the operating system will complete loading. The Desktop will then appear, and you will be ready to start using Windows XP Professional. You can remove the installation CD at this time.
Criteria for Completion
You will have successfully installed and configured Windows XP on a computer when the operating system loads and you can use the computer normally.
Under normal circumstances, your next steps are to activate the onboard fire-wall, configure the network connection, connect to the Internet, and go to the Windows Update site. You will need to install all the service packs and secu-rity patches before you resume any other activity on the computer.
84588.book Page 86 Tuesday, October 24, 2006 2:09 PM

Task 1.23: Uninstalling Software 87
Task 1.23: Uninstalling SoftwareSometimes it’s necessary to uninstall software on a computer. Usually you do this when a pro-gram is no longer used by the company because it has become obsolete or the firm has decided to go with another vendor for that type of software. Although there is quite a variety of pro-grams out there, Windows uses the same process to uninstall a program and all its components. It’s really a piece of cake.
Scenario
The payroll department has decided to discontinue the use of its current accounting software and has purchased similar software from a different vendor. You have been assigned to go to the payroll office and uninstall the relevant program from the computers there. It is just past regular business hours so none of the users will be present. You are free to log on to each PC using your administrator credentials and remove the programs.
Scope of Task
Duration
This task will take 10 to 15 minutes.
Setup
You will need one computer with a program you can uninstall. It can be any sort of software.
Caveat
This is a fairly benign task so there shouldn’t be any particular issues.
Procedure
This task will teach you how to remove a program from a Windows XP computer.
Equipment Used
You will only need a computer and a program on that computer you are willing to remove.
Details
This task will show you the process of removing a program from a Windows XP computer.
84588.book Page 87 Tuesday, October 24, 2006 2:09 PM

88 Phase 1 � Installing Hardware and Software
Uninstalling a Program
UNINSTALLING A PIECE OF SOFTWARE FROM A WINDOWS XP COMPUTER
For this task, it is assumed that you are at a computer that is powered up and you are logged on with an account that has administrator privileges.
1. Click Start � Control Panel.
If your Control Panel is currently in Category view, switch it to Classic view.
2. Double-click the Add or Remove Programs icon.
3. When the list populates, click the name of the program you want to remove.
4. Click the Change/Remove button.
5. When the dialog box opens asking if you are sure you want to remove the program, click Yes.
You may be asked to remove multiple components. In this event, click Delete All.
Criteria for Completion
You will have successfully completed the task when you return to the Add or Remove Programs list and the program you selected is no longer present.
Task 1.24: Installing Microsoft ApplicationsAlthough most computers you will purchase come with all the necessary application software already installed, you may occasionally have to install some piece of Microsoft application software. Like installing an MS operating system, the process is heavily scripted and doesn’t leave much to chance. In the vast majority of cases, you’ll need the product key to install the software and you’ll need to activate it within 30 days of the installation.
IT departments tend to keep their software disks, including the product keys, under lock and key, and they will be keeping track of the number of licenses they have available. Before doing an install, always verify the number of licenses your company has for the software.
84588.book Page 88 Tuesday, October 24, 2006 2:09 PM

Task 1.24: Installing Microsoft Applications 89
Installing a Microsoft application is as simple as popping the install CD in the CD or DVD drive and following the instructions.
Scenario
You have just finished installing Windows XP on a laptop that had to have its hard drive refor-matted (see Tasks 1.21 and 1.22). You have configured a network connection and restored all of the service packs and security updates. Your next step is to install all of the Microsoft appli-cation software. You will start by installing Microsoft Office 2003 Professional.
The Microsoft Office suite is used as an example for the sake of this task. You may have access to a different Microsoft application that you’ll install for this lesson, so the steps may not be quite the same.
You have located the disk and product key and are ready to begin.
Scope of Task
Duration
Depending on the software package, this task will take about 15 to 20 minutes.
Setup
You’ll need access to a computer and an installation disk containing a Microsoft application program.
Caveat
As you must be aware, Microsoft products are not inexpensive, so you may not want to go out and buy an MS Office suite. In a pinch, you can uninstall and reinstall an MS application on your computer. Make sure you have the appropriate install disks available before you begin.
Procedure
This task will show you how to install a piece of Microsoft application software.
Equipment Used
All you’ll need is a computer and a Microsoft application installation disk.
Details
This lesson will guide you through the process of installing a piece of Microsoft application software.
84588.book Page 89 Tuesday, October 24, 2006 2:09 PM

90 Phase 1 � Installing Hardware and Software
Installing Microsoft Application Software
INSTALLING MICROSOFT OFFICE 2003 PROFESSIONAL FROM A CD
1. Verify that the computer is powered up.
2. Log on as Administrator.
3. Locate the MS Office 2003 installation disk.
4. Insert the disk into the computer’s optical drive.
The disk should autoplay; if it doesn’t, you’ll need to open My Computer, right-click the CD or DVD icon, and click Open. Look for a launch or startup file and double-click to execute it. The installation program should launch.
5. When the Product Key screen appears, input the product key that accompanied your installation disk and click Next.
The product key is usually found on a label attached to the disk case.
6. When the user information dialog box opens, type the name of the user and the organi-zation in the appropriate fields.
7. Click Next.
8. When the licensing agreement dialog opens, check the I Accept the Terms in the Licensing Agreement check box.
9. Click Next.
10. In the Type of Installation area, verify that the default location (path) is present.
The path for Microsoft Office will look like this: C:\Program Files\Microsoft Office\.
11. Click Complete Install.
12. Click Next.
13. In the Summary box, click the Install button.
The installation process will begin when you click the Install button in the Summary box..
84588.book Page 90 Tuesday, October 24, 2006 2:09 PM

Task 1.25: Installing Non-Microsoft Applications 91
14. When the Setup Completed box appears, select the Check the Web for Updates and Addi-tional Downloads check box.
15. Click Finish.
16. Internet Explorer will launch; when the Windows Update page displays, click the Check for Updates button and then download and install all Microsoft Office updates.
For this task, you should have already established a network connection and downloaded and installed all service packs and security patches for Windows XP.
17. When prompted, reboot the computer.
18. When the computer reboots, log on as administrator and verify that Microsoft Office 2003 Professional was installed.
Criteria for Completion
You will have successfully completed this task when you can verify that the Microsoft Office suite has been installed on the computer.
Task 1.25: Installing Non-Microsoft ApplicationsIt is said that man does not live by bread alone, and neither does he (or she) work with just Microsoft application software. Beyond using a wide variety of well-known commercial soft-ware packages, organizations also can use proprietary software and packages that are written just for certain types of businesses or business functions. You will find that one of your more common tasks is installing both Microsoft and other vendor software.
This task will have to use a specific piece of software for demonstration purposes, so the exact installation procedure may be different from what you experience. That being said, most software installs use some sort of “wizard-like” framework, so it’s usually a matter of follow-ing the instructions and clicking Next.
Scenario
You have reinstalled Windows XP and all the Microsoft application software on a recently refor-matted laptop (see Tasks 1.21, 1.22, and 1.24 for details). Now you need to restore the non-Microsoft applications. You have the different installation disks available and are ready to begin.
84588.book Page 91 Tuesday, October 24, 2006 2:09 PM

92 Phase 1 � Installing Hardware and Software
Scope of Task
Duration
This task should take about 15 to 20 minutes.
Setup
You will need a computer and access to the installation disk of a non-Microsoft application program. Alternately, you can download application software from the Internet and install it on your computer.
You can find and download plenty of freeware at www.framasoft.net/rubrique259.html.
Caveat
If you are going to download and install freeware, make sure you are using a trusted source. There are plenty of dodgy websites that advertise free software just to get you to download and install some vicious variety of malware that hangs onto your PC worse than a third-degree burn.
Procedure
This lesson will show you how to install non-Microsoft software applications.
Equipment Used
All you’ll need is a computer and a software installation disk. Alternately, you’ll need an Inter-net connection so you can download and install freeware from the Internet.
Details
This task will walk you through the procedure for installing a non-Microsoft application.
For the sake of this task, a freeware program called HTML Tidy will be installed. The exact steps you use to install your software may differ.
Installing a Non-Microsoft Application
INSTALLING NON-MICROSOFT APPLICATION SOFTWARE FROM A DISK
1. Verify that the computer is powered up.
2. Verify that you are logged on with an account that has administrator privileges.
84588.book Page 92 Tuesday, October 24, 2006 2:09 PM

Task 1.26: Upgrading Windows 2000 to Windows XP 93
3. Locate the application’s installation disk.
4. Insert the disk into the CD or DVD drive.
The disk should autoplay; if it doesn’t, see Task 1.24 for details regarding launching the installation program manually.
5. When the install wizard launches, click Next.
6. Use the default location (path) to install the program.
The path for the default location will look something like C:\Program Files\HTML Tidy\.
7. Click Next.
8. If the program offers you the option of putting an icon on the Desktop, accept it.
9. Click Next.
10. Review your selections in the Ready to Install dialog to make sure they are correct.
11. Click Install.
12. When the program installs, click Finish.
13. If necessary, reboot the computer.
Criteria for Completion
You will have successfully completed this task when the computer reboots (assuming this was required) and you click Start � All Programs and see the new program in the list displayed.
Task 1.26: Upgrading Windows 2000 to Windows XPUsually, most companies maintain an upgrade schedule for their equipment based on their budget and the usability of devices and utilities. Although Windows 2000 is getting a little long in the tooth, there’s still plenty of life in the OS. However, many companies believe the time has come for their Windows 2000 computers to be upgraded to Windows XP.
84588.book Page 93 Tuesday, October 24, 2006 2:09 PM

94 Phase 1 � Installing Hardware and Software
Windows Vista is due out in late 2006 or early 2007 (at least as of the time this is being written). You might think that XP’s days are numbered as well; how-ever, most organizations value productivity over possessing the latest “bleed-ing edge” technologies. If your company is like most others, it’ll wait until the first service pack for Vista is issued before considering a mass migration.
Operating system upgrades can be managed in two ways:
1. Both the hardware and operating systems can be upgraded at the same time.
2. The operating system on an existing piece of hardware can be upgraded via installation or upgrade disk.
This task presents the latter solution. (See Task 1.17 for an example of the former solution.) Assuming the hardware is robust enough to run XP reasonably well, your CIO could save quite a chunk of change by not having to pop for 50 or 100 new PCs as well as the software licenses.
Scenario
You’ve been assigned to upgrade the four PCs in your company’s shipping department from Windows 2000 to Windows XP. You have come in on the weekend so that you’ll have free access to the computers and won’t have to interrupt the users. You have been provided with the necessary installation disk and product key to accomplish your task.
Scope of Task
Duration
This task should take about an hour.
Setup
You’ll need a computer running Windows 2000 Professional and a Windows XP Professional installation or upgrade disk.
Caveat
On most occasions, the upgrade from 2000 to XP is fairly routine, but always plan for the unex-pected. Make sure you’ve backed up your data in case the upgrade goes wrong. There is no viable upgrade path from Windows 2000 to Windows XP Home Edition. You must upgrade to Windows XP Professional.
84588.book Page 94 Tuesday, October 24, 2006 2:09 PM

Task 1.26: Upgrading Windows 2000 to Windows XP 95
Procedure
You will learn how to upgrade a computer’s operating system from Windows 2000 Profes-sional to Windows XP.
Equipment Used
You will only need a computer running Windows 2000 and a Windows XP upgrade disk.
Details
This task will conduct you through the procedure of upgrading a Windows 2000 Pro com-puter to a Windows XP computer.
Upgrading a Windows 2000 Computer to Windows XP
PREPARING THE COMPUTER FOR UPGRADE
1. Defragment the hard drive of the computer before beginning the upgrade.
Task 2.10 will cover how to defragment a hard drive.
For this task, it is assumed that the IT staff has already checked the Win-dows Hardware Compatibility List (HCL) at www.microsoft.com/whdc/hcl/default.mspx to make sure the hardware will be able to run Windows XP.
2. Close any applications that may be running, especially the antivirus program.
3. Make sure you have the original Windows 2000 installation disk as a precaution in the event that the upgrade fails.
4. Locate the Windows XP upgrade disk.
5. Insert the disk in the computer’s CD or DVD drive.
6. When the Welcome to Windows XP Upgrade screen appears, choose Check System Compatibility.
RUNNING THE WINDOWS XP UPGRADE ADVISOR
1. When the Windows XP Upgrade Advisor Welcome screen appears, click Next.
2. When the program asks if you want to download the latest files, click Yes.
84588.book Page 95 Tuesday, October 24, 2006 2:09 PM

96 Phase 1 � Installing Hardware and Software
Step 2 is optional but advisable.
3. When the informational screen appears telling you that most computers will support Windows XP, click Next.
4. When the upgrade advisor screen appears, click Next.
The upgrade advisor screen will list any issues that might affect the upgrade in Blocking and Compatibility. A blocking issue would be a condition that would prevent Windows XP from being run on the computer (which is exceed-ingly rare). A compatibility issue is when some piece of hardware or software on the computer may not run with Windows XP. Usually, these sorts of issues are resolved by driver updates.
Most of what happens after step 4 is automatic. The option to download the latest files you selected in step 2 will now cause these files to download. Next, the Update Advisor examines the system and generates a report listing any issues that will affect the upgrade. There are bound to be at least some issues. Take note of them because you will be required to take steps to resolve these issues once Windows XP is installed.
5. After the Update Advisor report appears, click Finish.
In this example, there won’t be any significant issues affecting the upgrade. When the Advisor finishes, leave the Windows CD in the computer.
UPGRADING TO WINDOWS XP
1. When the Welcome to Windows XP screen appears, select Install Windows XP.
2. When the Choose an Installation Type screen appears, select the Upgrade option.
3. Click Next.
4. When the License Agreement page appears, press F8 to agree to the terms of the license.
5. When the Product Key page appears, enter the key that came with the Windows XP disk.
6. When prompted, choose to update the computer over the Internet from the Windows Update site.
84588.book Page 96 Tuesday, October 24, 2006 2:09 PM

Task 1.26: Upgrading Windows 2000 to Windows XP 97
For this task, it is assumed that the computer has an “always on” Internet connection.
7. Click Next.
The Update Advisor may show you a report again on software and hardware compatibility issues. You should already have made notes from this report in section “Running the Windows XP Upgrade Advisor” earlier in this task. Ver-ify that the report is the same.
After the necessary files are downloaded and installed, the computer will automatically reboot.
If you see a message saying to press “any key” to boot from the CD-ROM, do not do so. To complete the installation, you must boot from the hard drive.
The next part of the process is the actual installation of Windows XP. This is pretty automated so there won’t be a lot for you to do until the installation is complete.
Postinstallation Tasks
1. Once the installation is complete, open Internet Explorer.
2. Select Tools � Windows Update.
Windows Update will check your computer for any needed security updates, hotfixes, and drivers.
3. When prompted, select Express Update.
4. Select all the update options offered.
Windows Update will download and install the necessary software.
84588.book Page 97 Tuesday, October 24, 2006 2:09 PM

98 Phase 1 � Installing Hardware and Software
5. When prompted, reboot the computer.
6. After the computer has rebooted, defrag the hard drive again.
During the Windows Update process, the data on the drive becomes signifi-cantly fragmented, slowing performance.
7. Verify that the computer seems to be operating normally.
Your supervisor usually will give you a list of tasks to perform to test the com-puter. This includes playing a music CD to test sound, doing a test print, con-necting to mapped drives, and any other activity the user will need to perform as a normal part of their work.
8. Reactivate the antivirus program and any other security measures you turned off during the upgrade.
9. Log off the computer.
Criteria for Completion
You will have successfully completed this task when the computer displays as a Windows XP computer and you are able to perform tasks on the PC normally.
Task 1.27: Using Restore Points in Windows XPWindows XP comes with a handy little tool called System Restore. Sometimes making a change on a computer, such as downloading a program or updating a device driver, will cause some unforeseen damage. System Restore automatically creates restore points every time a major change is made to the computer. If something goes wrong with a change, you can lit-erally turn back the clock and restore the computer’s configuration settings to a previous point in time. You can also manually create a restore point if necessary. System Restore can solve a multitude of problems by taking the computer to a point when it was functioning well and at the same time preserving all of your documents, emails, and any other settings and data.
Scenario
You receive a trouble ticket stating that a user is unable to open Windows Explorer and Internet Explorer on her Windows XP computer. After an investigation, your supervisor determines
84588.book Page 98 Tuesday, October 24, 2006 2:09 PM

Task 1.27: Using Restore Points in Windows XP 99
that a number of system files have been corrupted within the past few days. You are instructed to use System Restore to take the computer’s configuration back to a restore point created a week ago. You are at the user’s computer in her cubicle and ready to perform the task.
Scope of Task
Duration
The task should take about 10 minutes.
Setup
All you’ll need is a computer running Windows XP.
Caveat
System Restore is a useful and benign program and there should be no issues in restoring the computer to a particular restore point. If you restore a computer to a previous point and the problem is still not corrected, you can run System Restore again and take the computer further back in time.
Procedure
In this task, you will learn how to use the Windows XP System Restore utility to undo a harm-ful change to a computer.
Equipment Used
You will need no equipment for this task.
Details
This task will take you through the process of restoring a Windows XP computer’s settings to a previous point in time.
Using the Restore Point System on Windows XP
VERIFYING THAT THERE IS SUFFICIENT SPACE FOR RESTORE POINT STORAGE
By default, System Restore allocates a maximum of 12 percent of hard drive space to store restore points. After this space becomes full, the system over-writes the stored data from the oldest restore points to the newest.
1. Click Start � Control Panel.
84588.book Page 99 Tuesday, October 24, 2006 2:09 PM

100 Phase 1 � Installing Hardware and Software
In this example, Control Panel is in Classic view.
2. Double-click the System applet.
3. Click the System Restore tab on the System Properties box.
4. Confirm the Disk Space to Use bar is set at 12%.
5. Click OK.
System Restore might be turned off on your computer. Verify that the Turn Off System Restore check box is unchecked.
6. Close Control Panel.
SETTING A WINDOWS XP COMPUTER TO A RESTORE POINT
1. Click Start � All Programs � Accessories � System Tools � System Restore.
2. When the Welcome to System Restore box opens, click Restore My Computer to an Earlier Time.
3. Click Next.
4. In the Select a Restore Point box, click on the day on the calendar where you want the computer restored.
You may have to click on the left-pointing arrow at the top of the calendar to go to the previous month.
5. Select the specific restore point you want to use, and then click Next.
6. On the Confirm Restore Point Selection page, verify that the correct restore point has been selected.
7. Click Next.
The computer will automatically reboot.
8. Log on to the computer after it reboots.
9. On the Restoration Complete page, click OK.
84588.book Page 100 Tuesday, October 24, 2006 2:09 PM

Task 1.28: Shutting Down Programs 101
10. Test the computer to see if it is functioning normally and perform the tasks the user said she was not able to do.
Criteria for Completion
You will have successfully completed this task when the Restoration Complete message displays and you can use the computer normally.
Task 1.28: Shutting Down ProgramsEvery so often, a program in Windows will hang and refuse to close. Worse, it might be a pro-gram that has a memory leak, sucking up more and more of your available RAM and giving nothing back. When an average user wants to close MS Word or Internet Explorer, they click the little red box with the white X inside in the upper-right corner of the document or window. The vast majority of the time this works quite well, but when it doesn’t, an end user could wind up both frustrated and unproductive. There is actually a very simple way to shut down a stubborn program.
Scenario
You are walking past the accounting department when one of the users motions you over to her desk. She has been working extensively in Excel for most of the morning but complains that the application has now locked up on her. She asks if you’d mind helping fix the problem. You take a look at the Excel header bar and see the message “Not Responding.” You realize this could be a pretty easy fix, and since you have a few minutes, you agree to help her.
In a larger business with an in-house IT department, requesting help for a com-puter problem requires the end user to call the help desk and file a trouble ticket before a tech is assigned to respond. Smaller businesses are less formal, but if you drop whatever you’re doing all the time to help out just because you’re handy, you’ll never get any of your assigned work finished. Word to the wise.
Scope of Task
Duration
This task should take less than 5 minutes.
84588.book Page 101 Tuesday, October 24, 2006 2:09 PM

102 Phase 1 � Installing Hardware and Software
Setup
All you’ll need is a Windows XP computer running some application. The easiest way to set up the task is to start a program you’ll recognize as it’s listed in the Processes tab in Task Man-ager. You’ll easily be able to recognize the program and shut it down.
Sometimes, the offending process is not a normal application like Excel. You may have a rogue process running that was planted there by a virus or other malware. If you don’t recognize some of the listings on the Processes tab, you can do an Internet search for the names of the processes to see what results you get. Alternately, you can go to a site such as www.neuber.com/taskmanager/process/ and search there for the definitions of Windows processes.
Even when you have no application software running (look in Task Manager’s Applications tab), the Processes tab will still show numerous programs run-ning. The vast majority of those processes are necessary to provide various services. Occasionally, one is an indication of a problem.
Caveat
Every once in a while, closing a program in this manner causes unusual results in the com-puter. You’ll receive a warning dialog box when you attempt to close the program later on in the task. However, it is considered a safe method of shutting down stalled processes.
Procedure
In this task, you’ll learn how to shut down stalled processes including background processes in Windows XP.
This method also works on Windows 2000 computers and is similar but not the same on Windows 98.
Equipment Used
You won’t need any equipment to complete this task.
Details
This task will take you through the steps of shutting down a running process in Windows XP.
84588.book Page 102 Tuesday, October 24, 2006 2:09 PM
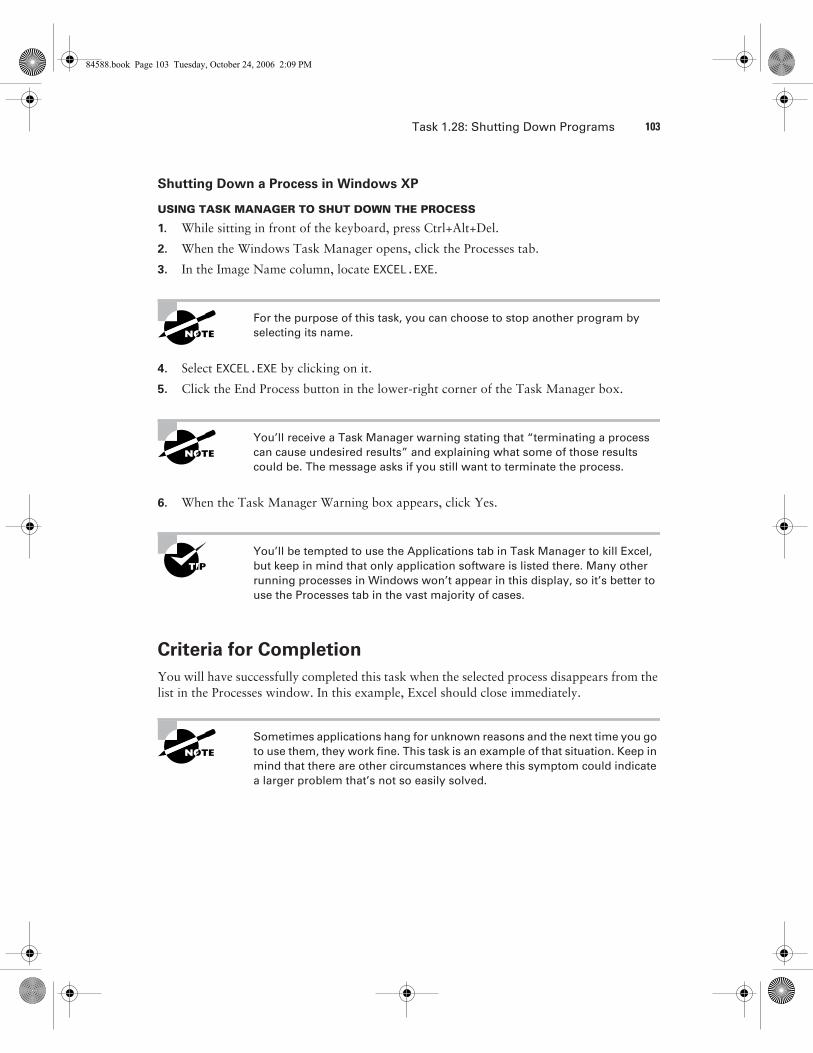
Task 1.28: Shutting Down Programs 103
Shutting Down a Process in Windows XP
USING TASK MANAGER TO SHUT DOWN THE PROCESS
1. While sitting in front of the keyboard, press Ctrl+Alt+Del.
2. When the Windows Task Manager opens, click the Processes tab.
3. In the Image Name column, locate EXCEL.EXE.
For the purpose of this task, you can choose to stop another program by selecting its name.
4. Select EXCEL.EXE by clicking on it.
5. Click the End Process button in the lower-right corner of the Task Manager box.
You’ll receive a Task Manager warning stating that “terminating a process can cause undesired results” and explaining what some of those results could be. The message asks if you still want to terminate the process.
6. When the Task Manager Warning box appears, click Yes.
You’ll be tempted to use the Applications tab in Task Manager to kill Excel, but keep in mind that only application software is listed there. Many other running processes in Windows won’t appear in this display, so it’s better to use the Processes tab in the vast majority of cases.
Criteria for Completion
You will have successfully completed this task when the selected process disappears from the list in the Processes window. In this example, Excel should close immediately.
Sometimes applications hang for unknown reasons and the next time you go to use them, they work fine. This task is an example of that situation. Keep in mind that there are other circumstances where this symptom could indicate a larger problem that’s not so easily solved.
84588.book Page 103 Tuesday, October 24, 2006 2:09 PM

104 Phase 1 � Installing Hardware and Software
Task 1.29: Tweaking Windows XPTweaking or hacking a computer is a method or series of methods designed to improve hard-ware and software performance beyond their default settings.
The title of this task could have just as easily been “Hacking Windows XP,” but the word hacking is sometimes taken the wrong way.
There is no one procedure for tweaking a computer, so this task will actually be a series of “mini-tasks” written to show you different ways to improve the performance of a Windows XP computer. The list is by no means exhaustive; entire books can be (and have been) written on hacking operating systems and software.
Scenario
You’ve received a trouble ticket from a user stating that his computer is running slowly but not complaining of a specific set of symptoms. After looking into the matter, your supervisor sug-gests that you perform a “tune-up” on the user’s computer, optimizing various settings for faster and more efficient performance.
Scope of Task
Duration
This task could take anywhere from 15 minutes to an hour depending on the extent of the “tweaking.”
Setup
All you’ll need to do for this task is to sit at a Windows XP computer and follow the task instructions. You’ll need to use Windows XP Professional to complete this task successfully.
Caveat
The results of this task on your computer may vary from the “ideal,” depending on a number of factors such as the age of the computer and how well it has been maintained.
Procedure
You’ll learn a number of techniques that will result in improved performance of your Windows XP computer.
84588.book Page 104 Tuesday, October 24, 2006 2:09 PM

Task 1.29: Tweaking Windows XP 105
Equipment Used
No special equipment will be needed.
Details
This task will show you the specific activities to perform that will result in a general improve-ment of computer performance.
Free System Resources
CUSTOMIZING HOW VISUAL EFFECTS ARE DISPLAYED
1. Click Start
2. Right-click My Computer.
3. Click Properties.
4. When the System Properties box opens, click the Advanced tab.
5. Under Performance, click the Settings button.
6. Click the Visual Effects tab if it doesn’t display by default.
7. Click the Customize radio button.
Most of the boxes in the display window will be checked.
8. Uncheck the checked boxes.
9. Click OK.
You may notice a change in how objects display visually as a result of shut-ting down all of these effects. You’ll most likely have to re-enable some of them until you get your system displaying as you desire.
DISABLING A HARD DRIVE’S INDEXING SERVICE
1. Click Start � My Computer.
2. Right-click the hard drive of your choice and click Properties..
3. Verify that the General tab is selected in the Local Disk properties box.
4. Uncheck the Allow Indexing Service to Index This Disk for Fast File Searching check box.
84588.book Page 105 Tuesday, October 24, 2006 2:09 PM

106 Phase 1 � Installing Hardware and Software
The disk indexing service uses an executable named Cidaeamon.exe to create and update the indexing catalog on the disk drive. Although this does make searching for files and folders faster, the process also consumes a great deal of CPU processing and page file space. (See “Customizing Virtual Memory” later in this task to learn more about page files.)
5. In the box that pops up, check Apply Change to (Select the letter of the drive):\ Subfolders and Files.
6. Click OK.
7. Close the My Computer box.
8. Reboot the computer.
CUSTOMIZING THE START MENU
1. Right-click Start.
2. Click Properties
3. Click the Classic Start Menu radio button.
4. Click the Customize button.
5. In the Advanced Start menu options window, scroll up and down checking or unchecking the features you want to appear in the menu.
6. Click the Add button.
7. Click OK.
The Start menu will change to an older version that takes up less space on the Desktop and uses fewer resources to open and display.
DISABLING WALLPAPER
1. Right-click any empty area on the Desktop.
2. Click Properties
3. Select the Desktop tab.
4. Scroll to the top of the Background window.
5. Click None.
6. Click OK.
84588.book Page 106 Tuesday, October 24, 2006 2:09 PM

Task 1.29: Tweaking Windows XP 107
This saves some memory and will make your boot time a bit faster. Of course, the desktop will be completely impersonal.
In large enterprise settings using Active Directory domains, end user desk-tops and a variety of other services and features are configured automatically on all user computers by Active Directory Group Policy objects (GPOs).
CUSTOMIZING VIRTUAL MEMORY
Virtual memory uses hard drive space to supplement the RAM in a computer. When a PC has insufficient RAM, some open services and data requiring memory are temporarily switched to a page file on the hard drive. This frees up memory; however, excessive “paging” (switching of data and services back and forth between RAM and the hard drive) results in performance slowdowns.
This exercise requires that you have more than one partition on the com-puter’s hard drive.
1. Click Start.
2. Right-click My Computer.
3. Click Properties.
4. In the System Properties box, click the Advanced tab.
5. In the Performance box, click Settings.
6. In the Performance Options box, click the Advanced tab.
7. Click the Programs radio buttons under both Processor Scheduling and Memory Usage.
8. Under Virtual Memory, click the Change button.
9. Select a drive partition other than C:\.
10. Set the initial size and the maximum size of the page file to 11/2 times the amount of RAM in your computer.
11. Click Set.
12. Click OK.
84588.book Page 107 Tuesday, October 24, 2006 2:09 PM

108 Phase 1 � Installing Hardware and Software
This process is more effective if the partition you create the second page file on is using FAT32 rather than NTFS.
Leave the original page file on the C drive in place but verify that its size is also about 11/2 times the capacity of the computer’s RAM.
DISABLING SYSTEM SOUNDS
1. Click Start � Control Panel.
2. Double-click Sounds and Audio Devices.
3. On the Volume tab, uncheck the Place Volume Icon in the Taskbar check box.
4. Click the Sounds tab.
5. On the Sounds tab, click the Save As button.
6. Save your current sound scheme under a name such as Normal.
7. Click the Sound Scheme drop-down menu.
8. Select No Sounds.
9. Click OK.
Criteria for Completion
You will have successfully completed this set of tasks when you’ve customized all of the set-tings as described. Performance on the computer should be improved; however, your mileage may vary.
There are literally hundreds of tweaks you can perform on XP to improve system perfor-mance and stability. The ones presented in this set of tasks are only a sample of the more com-mon methods.
Task 1.30: Installing a Local PrinterIn most business settings, users print to one or more network printers. This allows printer resources to be shared among a large number of users, avoiding the need to rely on one user sharing their printer with the rest of the workgroup. A print server performs the queuing and is always (hopefully) available to the network.
There are occasions when one or more users will require a local printer to be attached to their PC. Some businesses still use old dot matrix printers to print multicopy No Carbon Required (NCR) documents such as invoices. Department heads may want to print out
84588.book Page 108 Tuesday, October 24, 2006 2:09 PM

Task 1.30: Installing a Local Printer 109
confidential documents in their offices rather than risk sensitive material being printed on a network printer shared by the rest of the staff. You will occasionally find it necessary to install a local printer on a computer.
Scenario
You receive the assignment of installing a local printer on a new sales executive’s PC. You are provided with the new printer and installation kit on a cart and you take the equipment to the appropriate office and get ready to install it.
Duration
This task should take about 15 to 20 minutes at most.
Setup
You’ll need a PC, a printer, a USB or printer cable, and the drivers for the printer. If you already have a printer installed, you can uninstall the printer drivers and disconnect the printer from your computer. Then follow the instructions in this task to reinstall the printer. In most cases, you probably don’t even need to have the driver disk since XP contains an extensive list of drivers for common print devices.
Caveat
Installing a printer on Windows XP should be a snap. Just make sure you have the right driver disk (just in case Windows doesn’t have the drivers on board). Also, some printers require that you use their installation software to do the setup rather than using the Add a New Printer Wizard. Read the instructions that come with your printer completely before beginning this exercise. In this task, a USB cable is used, but if you are using a standard printer cable, nothing is really changed.
Procedure
This task will take you through the process of installing a local printer on a PC.
Equipment Used
The only piece of equipment you might need is a small screwdriver if you are using a standard printer cable. Even then, some of the connectors are screwed in while others can be tightened by hand. If you are unpacking a brand-new printer from a box, you may need a box cutter to cut through the tape and any other restraints used to secure the printer for shipping.
Details
This exercise shows you the steps necessary to connect a local printer to a PC and verify that it’s working.
84588.book Page 109 Tuesday, October 24, 2006 2:09 PM

110 Phase 1 � Installing Hardware and Software
Installing a Local Printer
CONNECTING THE PRINTER
1. Power up the computer.
2. Log on as the local administrator.
3. Unpack the printer.
4. Place the printer at a desired location near the computer.
5. Verify that all packing equipment and tape have been removed from the printer.
6. Locate the USB cable used to attach the printer to the PC as well as the printer’s power cable.
7. Locate the installation kit, which should include a driver disk, installation manual, and any other equipment or materials that came with the printer.
8. Read the installation manual completely before proceeding.
9. Attach the power cable to the printer and plug the other end into a power socket or surge protector.
10. Attach one end of the USB cable to the printer’s USB port and attach the other end to the PC’s USB port.
The connectors at each end of the USB cable will be different. The connector for the printer will be more of a square while the connector for the computer will look like a thin rectangle.
11. Following the instructions that came with the printer, open the printer and find the printer head(s).
12. Locate the printer cartridge(s) that came with the printer.
If cartridges did not come with the printer, your supervisor should provide you with the appropriate cartridges for this device.
13. Install the cartridge(s) in the printer following the instruction guide.
There’s no one method of installing printer cartridges, so this part of the task is left undetailed.
14. Close the printer.
15. Power up the printer.
84588.book Page 110 Tuesday, October 24, 2006 2:09 PM

Task 1.30: Installing a Local Printer 111
The printer should go through a self-check routine and perform the alignment of the printer head(s) at this point or it may perform some parts of this process after it is fully installed.
INSTALLING THE PRINTER
1. Click Start � Printers and Faxes.
If you are using the same machine for this task as the one you used for Task 1.29, the option in step 1 will not be present. In this situation, you will need to click Start � Settings � Control Panel � Printers and Faxes.
If Windows autodetects the printer as a new USB device or the Add Hardware Wizard launches, close the wizard and proceed with the instructions in this task.
2. In the upper-left corner of the Printers and Faxes page, click Add a Printer.
3. When the Welcome to the Add Printer Wizard launches, click Next.
4. On the Local or Network Printer page, click the Local Printer Attached to This Computer radio button and check the Automatically Detect and Install My Plug and Play Printer check box.
5. Click Next.
6. Under Select a Printer Port, use the drop-down menu to select USB.
If you are using a standard printer cable, select LPT1: [Recommended printer port].
7. Click Next.
8. On the Install Printer Software page, in the Manufacturer window, scroll down and select the manufacturer of the printer (HP, Brother, etc.).
9. In the Printers window, scroll down and select the specific model of printer you have.
In the vast majority of cases, your computer manufacturer and model will be included in these lists.
84588.book Page 111 Tuesday, October 24, 2006 2:09 PM

112 Phase 1 � Installing Hardware and Software
10. Click Next.
11. On the Name Your Printer page, give a name to the printer.
Use a name that clearly identifies the printer.
12. Click Next.
13. On the Printer Sharing page, verify that the Do Not Share This Printer radio button is selected.
14. Click Next.
15. On the Location and Comment page, you can add the location of the printer and a brief description. This step is completely optional, especially for an unshared local printer.
16. Click Next.
TESTING THE PRINTER
1. When the Print a Test Page window appears, click Yes.
A box will appear asking if the test page printed properly. The page should print after a few seconds.
2. When the test page prints, click OK.
If the test page doesn’t print or if it doesn’t print properly, instead of clicking OK in step 2, click Troubleshoot. The Help and Support Center page will open and you can work your way through a wizard process to diagnose the problem.
3. Click Next.
4. When the Completing the Add Printer Wizard page appears, click Finish.
5. Once the wizard closes, open the application or applications the user will normally print from.
The user will probably print from Word and Excel, but find out in advance which applications will be used to print. Occasionally the test page will print fine but a particular application will refuse to share and play well with the printer.
6. Systematically open each application, create a small document, and then print it.
7. When you have successfully printed from each application, close it.
84588.book Page 112 Tuesday, October 24, 2006 2:09 PM

Task 1.31: Installing Printer Drivers 113
8. When the test is completed, verify that all application software is closed.
9. Log off the PC.
10. Make sure that the user has plenty of printer paper and extra print cartridges.
Criteria for Completion
You will have successfully completed this task when you have printed a test page both from the Add a Printer Wizard and from each application you will be printing from.
Task 1.31: Installing Printer DriversYou may think this task is a subset of Task 1.30. Although the steps are similar, the situation is different. Besides, there’s more than one way to install printer drivers.
Occasionally drivers (or any kind of software) will become corrupt or newer drivers will become available. Sometimes, the print device begins to act strangely and the solution is to update or reinstall the drivers. In any event, there are various reasons why you will be asked to perform this task.
Scenario
One of the marketing executive’s local printers has started printing “garbage.” Your supervi-sor believes the printer drivers have been corrupted and provides you with the driver disk appropriate for the user’s device. You have been assigned to reinstall the printer drivers and correct the problem.
Duration
This task should take about 10 minutes.
Setup
You will need a driver disk for your local print device.
Caveat
You can also attempt to install drivers from Windows Update if they are available.
Procedure
You will learn the steps necessary to install printer drivers on a computer.
Equipment Used
You will need no special equipment to complete this task.
84588.book Page 113 Tuesday, October 24, 2006 2:09 PM
114 Phase 1 � Installing Hardware and Software
Details
This task will walk you through the procedure of installing new printer drivers on a computer from a disk.
Installing Printer Drivers
INSTALLING PRINTER DRIVERS USING THE ADD A PRINTER DRIVER WIZARD
1. Click Start � Printers and Faxes.
If you are using the same machine for this task as the one you used for Task 1.29, the option in step 1 will not be present. In this situation, you will need to click Start � Settings � Control Panel � Printers and Faxes.
2. Right-click the desired printer.
3. Click Properties.
4. Click the Advanced tab.
5. Click the New Driver button.
6. Click Next.
After you click the New Driver button and click Next, the Welcome to the Add a Printer Driver Wizard page will launch.
7. In the Printer Driver Selection page, in the Manufacturer window, scroll down and select the manufacturer of your printer.
8. In the Printers window, scroll down and select the specific model of your printer.
9. Click the Have Disk button.
10. Insert the drivers disk in the computer’s CD or DVD drive.
11. In the Install from Disk box, use the drop-down menu to select the drive letter of the opti-cal drive.
Instead of using the drop-down menu to select a drive letter, you can click the Browse button and use Windows Explorer to browse to the correct drive.
12. Click OK.
13. Click Next.
14. When the Completing the Add Printer Driver Wizard page appears, click Finish.
84588.book Page 114 Tuesday, October 24, 2006 2:09 PM

Task 1.31: Installing Printer Drivers 115
The drivers should install at this point of the process.
TESTING THE PRINTER DRIVER INSTALLATION
1. In the Printers and Faxes box, right-click the printer.
2. Click Properties.
3. On the General tab, click Print Test Page.
After you click Print Test Page, a box will appear asking if the test page printed properly. The page should print after a few seconds.
4. When the test page prints, click OK.
If the test page doesn’t print or if it doesn’t print properly, instead of clicking OK in step 4, click Troubleshoot. The Help and Support Center page will open and you can work your way through a wizard process to diagnose the problem.
5. Click OK to close the Printer Properties box.
6. Open the applications the user will use to print.
7. Create a test document in each application and print it.
8. When done, close all applications.
Criteria for Completion
You will have successfully completed this task when you have installed the drivers and the printer operates normally.
84588.book Page 115 Tuesday, October 24, 2006 2:09 PM

84588.book Page 116 Tuesday, October 24, 2006 2:09 PM