playful posies - fairfield world · 1 playful posies finished size 40.5” x 48” fabric...
TRANSCRIPT
1
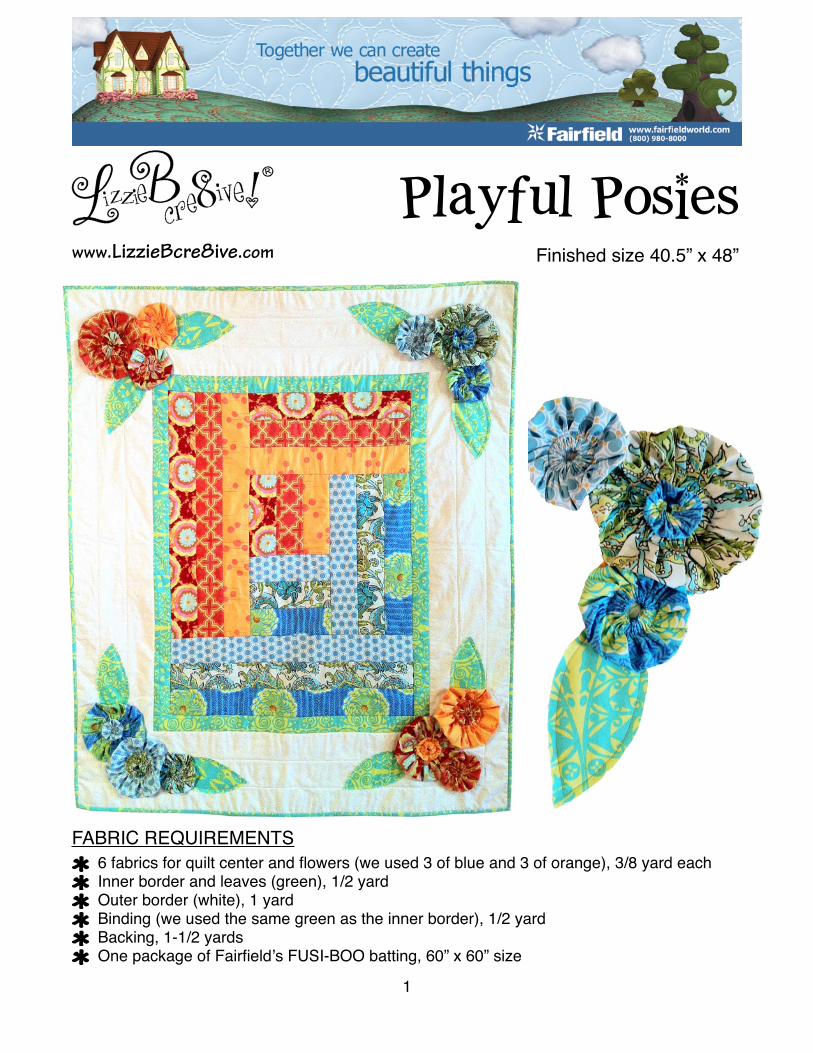
Playful Posieswww.LizzieBcre8ive.com Finished size 40.5” x 48”
FABRIC REQUIREMENTS 6 fabrics for quilt center and flowers (we used 3 of blue and 3 of orange), 3/8 yard each Inner border and leaves (green), 1/2 yard Outer border (white), 1 yard Binding (we used the same green as the inner border), 1/2 yard Backing, 1-1/2 yards One package of Fairfieldʼs FUSI-BOO batting, 60” x 60” size
2
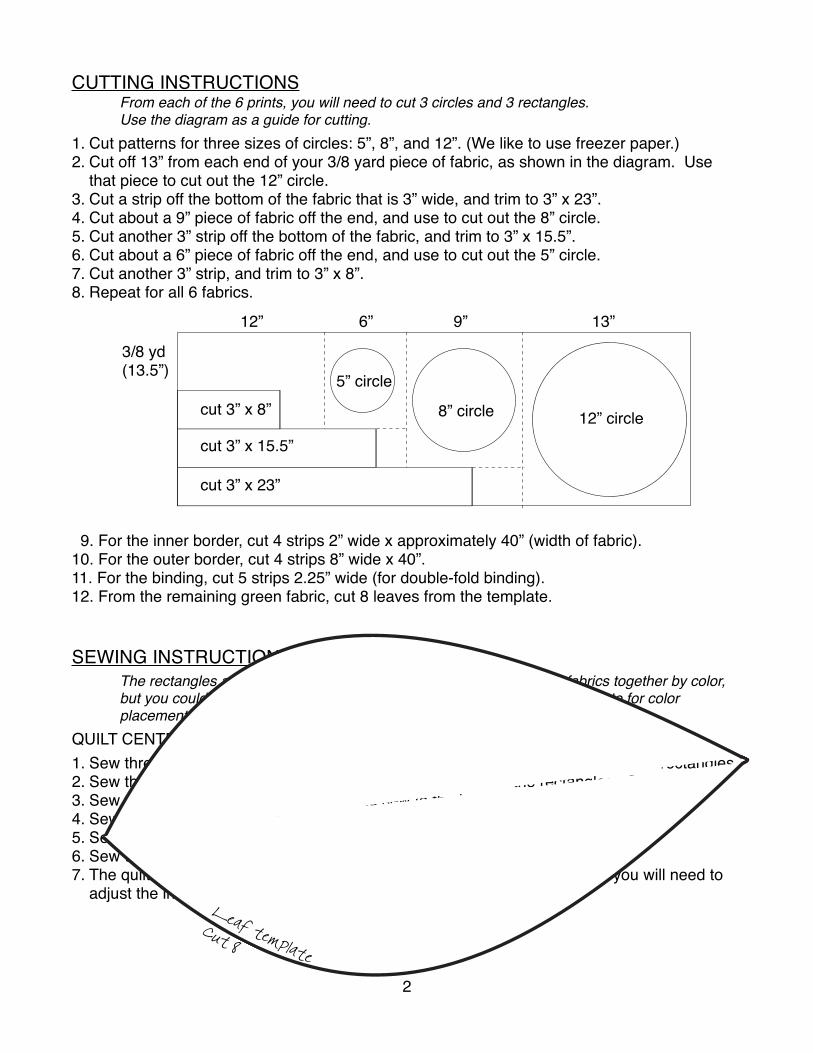
CUTTING INSTRUCTIONS" From each of the 6 prints, you will need to cut 3 circles and 3 rectangles. ! Use the diagram as a guide for cutting.1. Cut patterns for three sizes of circles: 5”, 8”, and 12”. (We like to use freezer paper.)2. Cut off 13” from each end of your 3/8 yard piece of fabric, as shown in the diagram. Use
that piece to cut out the 12” circle.3. Cut a strip off the bottom of the fabric that is 3” wide, and trim to 3” x 23”.4. Cut about a 9” piece of fabric off the end, and use to cut out the 8” circle.5. Cut another 3” strip off the bottom of the fabric, and trim to 3” x 15.5”.6. Cut about a 6” piece of fabric off the end, and use to cut out the 5” circle.7. Cut another 3” strip, and trim to 3” x 8”.8. Repeat for all 6 fabrics.
12” circle8” circle
5” circlecut 3” x 8”
cut 3” x 15.5”
cut 3” x 23”
13”9”6”
3/8 yd(13.5”)
12”
9. For the inner border, cut 4 strips 2” wide x approximately 40” (width of fabric).10. For the outer border, cut 4 strips 8” wide x 40”.11. For the binding, cut 5 strips 2.25” wide (for double-fold binding).12. From the remaining green fabric, cut 8 leaves from the template.
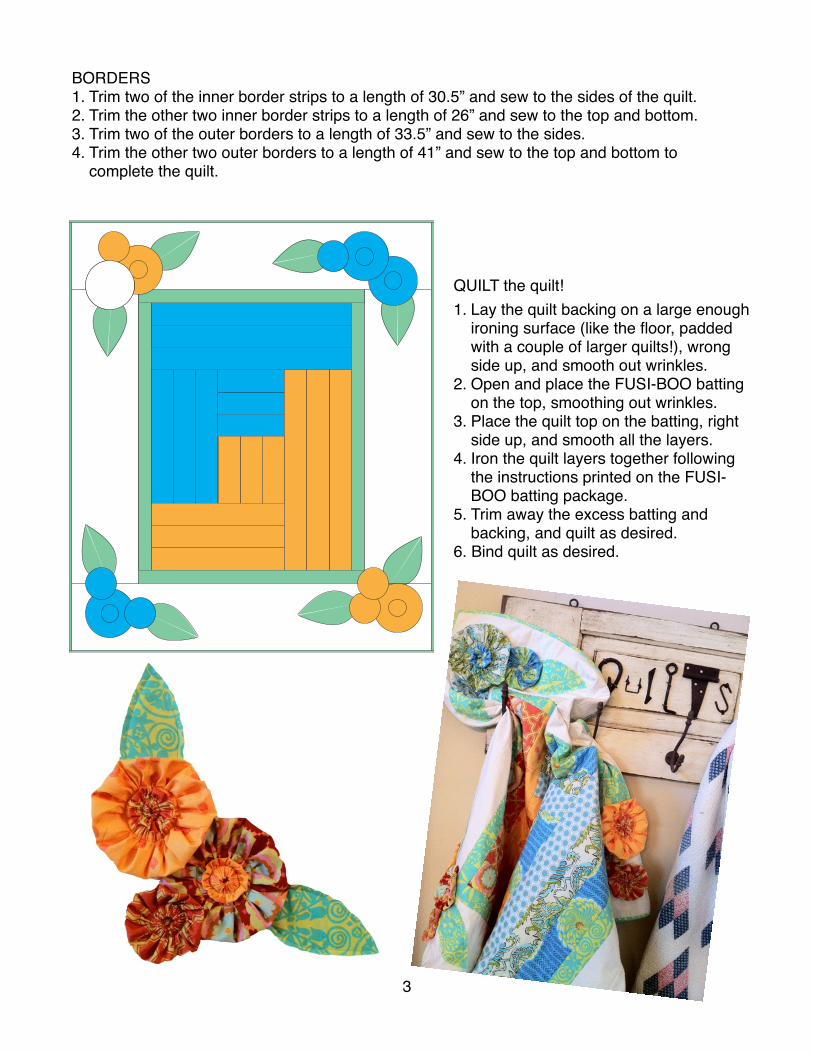
SEWING INSTRUCTIONS! The rectangles are sewn together in groups of three. We placed our fabrics together by color, ! but you could also mix up your fabrics for a scrappier look. Refer to the photo for color ! placement if you would like to mimic our color scheme. All seams are 1/4”.QUILT CENTER...1. Sew three 8” rectangles together to form a square. Repeat for the other three 8” rectangles.2. Sew those two squares together, alternating the direction of the rectangles. See diagram.3. Sew three 15.5” rectangles together, and sew to the left side of the center square unit.4. Sew the other three 15.5” rectangles together, and sew to the bottom of the unit.5. Sew three 23” rectangles together, and sew to the right side of the unit.6. Sew the other three 23” rectangles together, and sew to the top of the unit.7. The quilt center should measure 22.5” x 30”. If your measurements differ, you will need to
adjust the inner and outer border measurements in the next steps.Leaf template
Cut 8
3
BORDERS1. Trim two of the inner border strips to a length of 30.5” and sew to the sides of the quilt.2. Trim the other two inner border strips to a length of 26” and sew to the top and bottom.3. Trim two of the outer borders to a length of 33.5” and sew to the sides.4. Trim the other two outer borders to a length of 41” and sew to the top and bottom to
complete the quilt.
QUILT the quilt!1. Lay the quilt backing on a large enough
ironing surface (like the floor, padded with a couple of larger quilts!), wrong side up, and smooth out wrinkles.
2. Open and place the FUSI-BOO batting on the top, smoothing out wrinkles.
3. Place the quilt top on the batting, right side up, and smooth all the layers.
4. Iron the quilt layers together following the instructions printed on the FUSI-BOO batting package.
5. Trim away the excess batting and backing, and quilt as desired.
6. Bind quilt as desired.
4
MAKE THE YO-YO FLOWERS! Use all 18 of the circles to make yo-yo flowers! We recommend a really strong thread, such as ! carpet thread, so the thread does not break when you gather the stitching to form the yo-yo.
1. Thread a hand-stitching needle with a long enough length of thread to go around the circle, and make a knot in the end.
2. Fold the edge of the circle under 1/4”, wrong sides together, and make a running stitch all around the edge of the circle. Longer stitches will result in a yo-yo with a more closed-up center, and shorter stitches will make the center of the yo-yo more open.
3. When you have gone around the entire circle, gently gather your stitches and pull them tight. Make a couple of backstitches to secure your threads, and trim.
4. Flatten the yo-yo, with the gathers centered on top. 5. There ya go! Now make 17 more.....
ADD THE FLOWERS to your quilt1. Use the template to trace and cut 8 leaves from the remaining green inner border fabric.2. Decide where youʼd like to place your flowers, and pin each yo-yo in place. We used the
smallest yo-yos as centers for the largest yo-yos.3. Tuck the leaves under the yo-yo flowers, and stitch them down, by machine and through all
of the quilt layers, using a raw-edge applique technique. (That just means you need to stitch around each leaf, 1/4” in from the edge!) Make sure that the leaves will be tucked under the flowers when they are sewn.
4. Stitch the large and medium yo-yos onto the quilt, by machine, by sewing through the gathers, all around in a circle. Your stitching can be anywhere on the yo-yo. If you stitch closer to the centers, then your yo-yos will be more “floppy”...if you stitch nearer the outer edges, then they will look a bit flatter on the quilt.
5. Sew the smaller yo-yos onto the largest flowers in the same way, but be sure to go a bit slower on your machine since you are sewing through a LOT of layers.
Enjoy your quilt!
©2011 LizzieBCre8ive
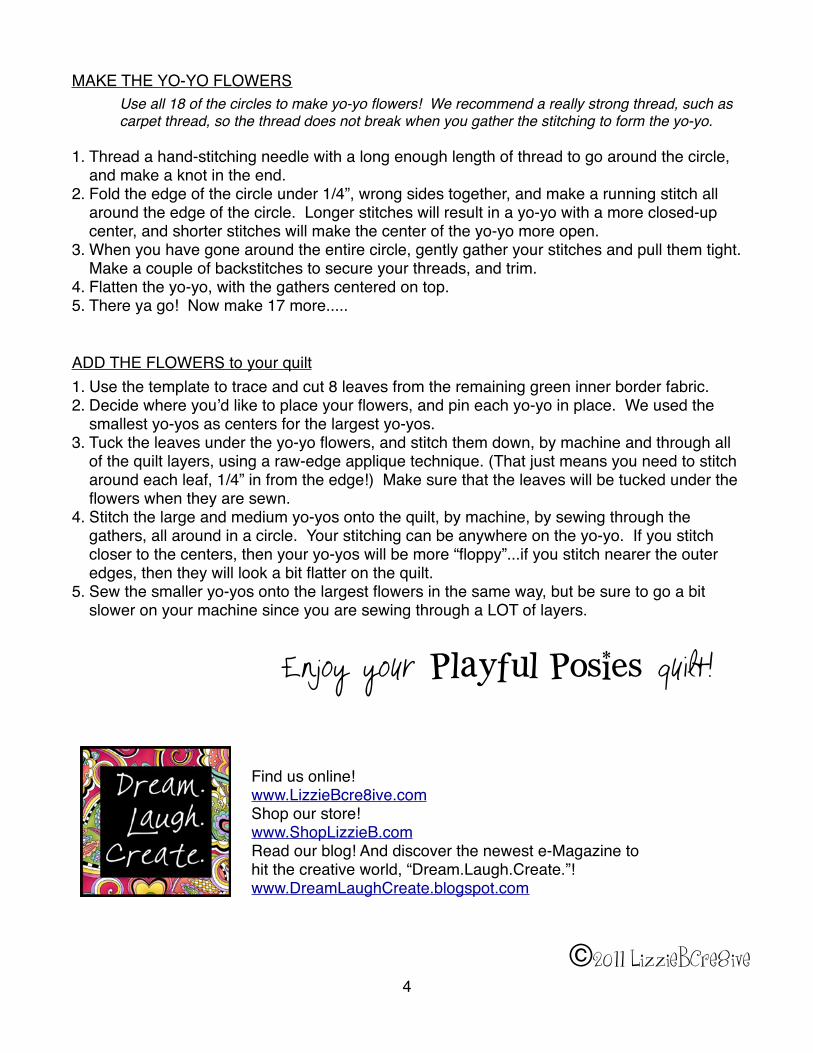
Find us online!www.LizzieBcre8ive.com Shop our store!www.ShopLizzieB.comRead our blog! And discover the newest e-Magazine to hit the creative world, “Dream.Laugh.Create.”!www.DreamLaughCreate.blogspot.com
Playful Posies