pong materials.pptx
TRANSCRIPT

PONG Pong is a simple consists of a (controlled and a ball. bounces and three hits the paddle, points. If the behind the game is
game, which paddle
by the user) The ball
off the paddle walls. If the ball
the user gains ball hits
paddle, the over.
Last update 5a/13

Prerequisites o Set-up App Inventor on computer and phone o Complete HelloPurr, Magic8Ball, and PaintPic tutorials
Learning Goals After completing this tutorial, students will be able to: o Operate within the App Inventor environment (designer, block editor,
emulator and/or mobile phone) o Associate App Inventor components (canvas, buttons, labels,
animation sprites, procedures with no parameters, global variables, and conditionals) with their corresponding functions
o Create an interactive game with user input (touch) and computer generated outputs (ball heading, score, text prompt)
Materials o Images & Sounds
http://appinventor.mit.edu/teach/curriculum/media-library.htmlo MIT Quick Reference Guide, MIT App Inventor Development Guide
http://appinventor.mit.edu/teach/curriculum/getting-started-guide.html
o Video (snippets to assist students through this lesson) http://www.valdosta.edu/~kroy/ai-tutorials.html
Set-up o Open App Inventor Designer window
http://beta.appinventor.mit.edu o Sign in with Google ID o Download and save image of paddle and ding sound file at
http://appinventor.mit.edu/teach/curriculum/media-library.html (look for Pong media files)!
Getting Started
1

Brainstorm, Plan, and Sketch What will your game look like? What will each component do? What are the constraints or rules of the game? In the space provided below and on the left, draw and write out your ideas for PONG. Think about it from a programmer’s perspective.
2

How to use this tutorial > Design (if you are familiar with App Inventor and want to start making
PONG, skip to page 9) To use this tutorial to design an app, start with step 1 (first column) of the tutorial. The “Palette Group” column in the Table corresponds to the Palette Group in the App Inventor Design Window.
Within the palette group, you’ll see a palette called “Basic,” within which you will find the component called “Label.”
The “Action” column tells you what to do with the component. The two columns on the right (“What You’ll Rename It” and “Properties”) correspond to the “Components” and “Properties” area of the Design Window. These two columns tell you what to rename the components and what parameters to input for each component type. Design!Tutorial!Table!
Design!Screenshot!
3

How to use this tutorial > Build
Build!Tutorial!Table!
Build!Screenshot!
You can use this tutorial to build an app in the same way that you use it to design an app. The “Palette Group” column in the table corresponds to the three Palette Group tabs in the App Inventor Build Window.
The screenshot to the left demonstrates how to perform steps 4-6 of the tutorial. Step 4 directs you to the “My Blocks” palette group to find a drawer called “Ball1”. Within “Ball1”, locate the “when Ball1.EdgeReached” block (all blocks are annotated using brackets [ ]). Drag the block into the work area. Then locate the “call Ball1.Bounce” block and drag into “Ball1.EdgeReached”.
Continue to follow along with the instructions in the “Action” column. If you are ever confused about the steps, look at the “Purpose” column for an explanation of the step. 4
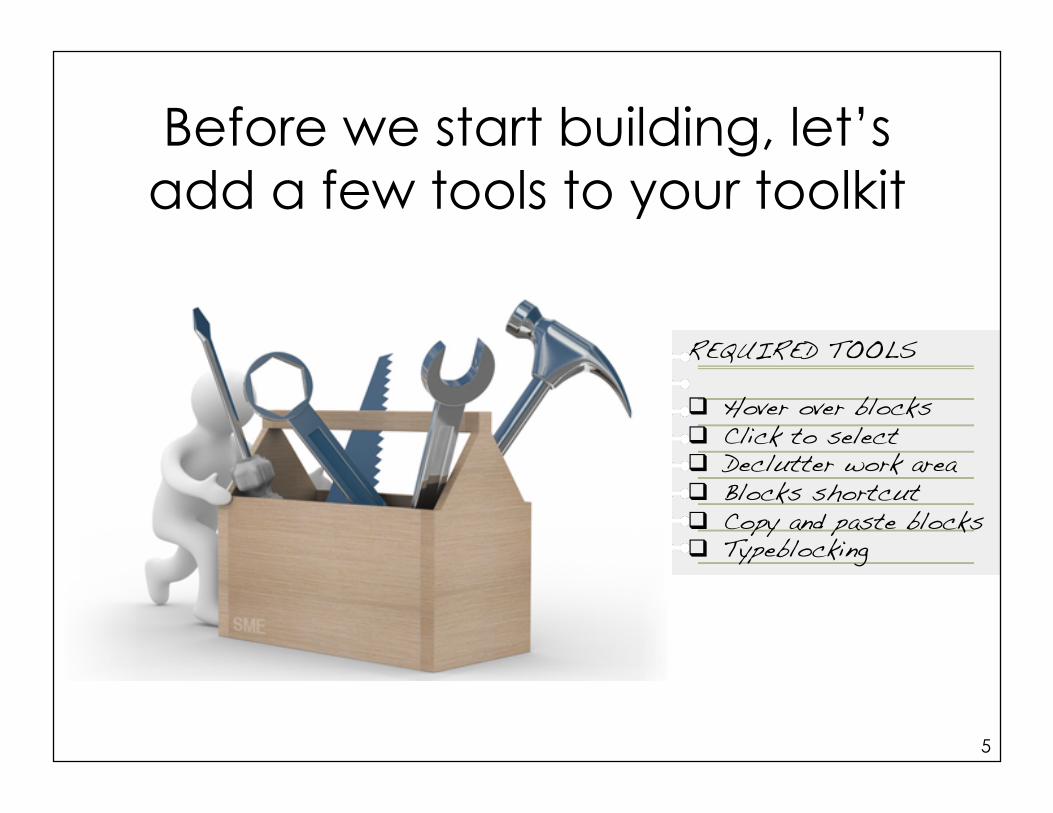
Before we start building, let’s add a few tools to your toolkit
5
REQUIRED TOOLS!
Hover over blocks! Click to select! Declutter work area! Blocks shortcut! Copy and paste blocks! Typeblocking!

Some techniques and shortcuts that make life easier in App Inventor HOVER!OVER!BLOCKS!
DECLUTTER!WORK!AREA!
CLICK!TO!SELECT!
Although the instructions in this tutorial tell you to “drag” blocks into the work area or into other blocks, you can also select a block without dragging it by simply clicking on it once. This will make the block appear in your work area, at which point you can drag it anywhere you want.
If you ever want to know more about what a particular block does, especially if you are using that block for the first time, you can hover your pointer over the block and a text box with explanation will appear.
As you work on increasingly complex projects, you may find that you don’t have much room in the work area. You can solve this dilemma by minimizing a block that you aren’t using. There is a black triangle on the upper left hand corner of the block. If you click on this triangle, the block will minimize and the triangle will turn upside down. If you click on it again, the block will maximize to its original appearance.
In! programming,! syntax! and! accuracy!
maFers.! The! computer! recognizes! a! lower!
case! leFer! and! an! upper! case! leFer! as!
different! enKKes! (ex:! imagesprite1! vs.!
imageSprite1).! Be! consistent! in! inpuQng!
variables.! This! includes! spaces,! colons,!
underscores,! upper! case,! and! lower! case.!
Minor!differences!may!seem!insignificant!to!
us,! but! they! mean! different! things! to! App!
Inventor.!6

BLOCKS!SHORTCUT!TYPEBLOCKING!
COPY!AND!PASTE!BLOCKS!
And a few more for good measure…
Typeblocking is another time and effort-saving feature built into App Inventor. By simply typing a number or text, you can create a corresponding number or text block. In the example above, we want to insert a number block into the second socket of the division block. By simply clicking at the empty socket and typing “2,” you can create a “number 2” block. You will, however, have to drag the block into the socket to complete the action.
Blocks shortcut is a time and effort-saving feature that allows you to create blocks without having to access the palette and drawer on the left side of the build browser. By clicking once anywhere within the work area, you bring up a drawer menu from which to choose blocks. In the example above, we can call on the “true” block by simply clicking once in the work area, choosing “Logic” from the menu blocks and choosing “true” from the dropdown menu.
Did you know that App Inventor has a copy and paste function? By clicking on the block or group of blocks and pressing CTRL+C (or CMD+C for Mac users), you can copy blocks. Pressing CTRL+V (or CMD+V for Mac users) pastes the block in the work area. 7
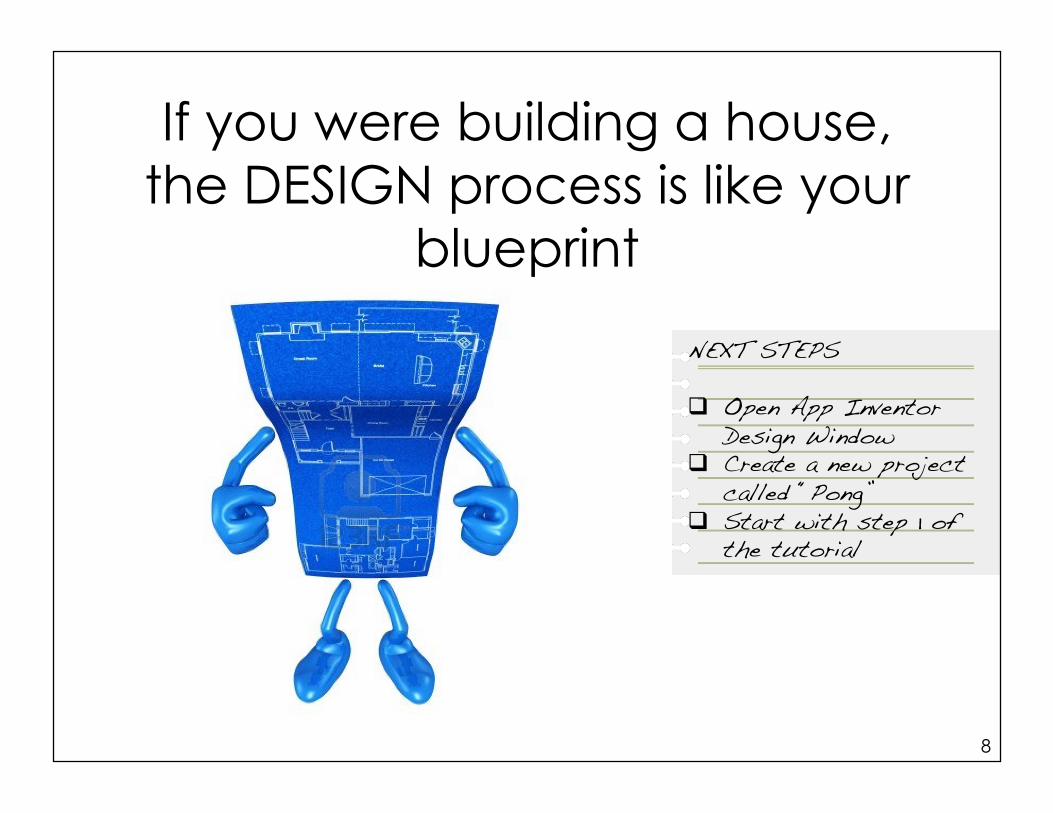
If you were building a house, the DESIGN process is like your
blueprint
8
NEXT STEPS!
Open App Inventor Design Window!
Create a new project called “Pong”!
Start with step 1 of the tutorial!

9
Step Palette Group Component Type Action What You'll Rename It (in Components pane)
Properties Purpose
1 Basic Label Drag to Viewer ScoreLabel Font size: 18Text: ScoreWidth: 150 pixelsHeight: 30 pixels
2 Basic Button Drag to Viewer StartButton Text: Start
3 Basic Button Drag to Viewer ResetButton Text: Reset
4 Screen Arrangement Horizontal Arrangement Drag to Viewer HorizontalArrangement1(Default)
5 *Viewer ScoreLabel (1) Drag into Horizontal ArrangementStartButton (2) Drag into Horizontal Arrangement
(to the right of ScoreLabel)ResetButton (3) Drag into Horizontal Arrangement
(to the right of ResetButton)
6 Basic Canvas Drag to Viewer Canvas1 Background Color: Your choice(Default) Width: 300 pixels
Height: 390 pixels
7 Animation Ball Drag into Canvas component Ball1 Heading: 30(Default) Interval: 50
Paint Color: Your choiceRadius: 20Speed: 5
8 Animation ImageSprite Drag into Canvas component ImageSprite1 Interval: 1000(Default) Picture: Paddle.gif
Y: 350 (you can adjust this number to move the paddle up or down on the screen)
SUBGOAL #1: Create a score label, start button, and reset button.
SUBGOAL #2: Arrange the score label, start button, and reset button along the top of the screen, adjacent to one another.
SUBGOAL #3: Incorporate a background, ball, and paddle into the game.The canvas serves as the background, or pong table.
This is the ball the player will hit to gain points.
This is the paddle the player will use to hit the ball.
Label will populate with the score during the game.
Button starts the game.
Button resets the game and the score.
This function arranges buttons horizontally across the screen.
Includes button in horizontal arrangement.

Here’s a screen shot of the Design window once all 8 steps are complete
Give yourself a pat on the back. You are done designing. Be sure to save your work periodically throughout the design (and build) process.
10
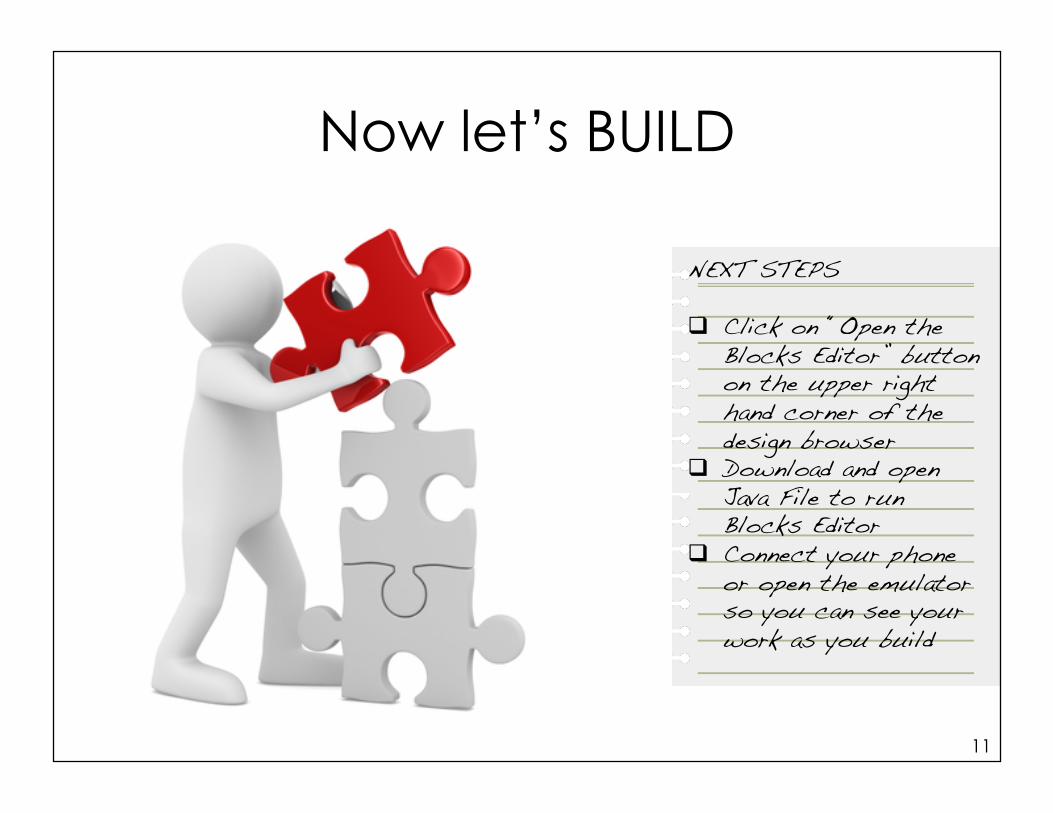
Now let’s BUILD
11
NEXT STEPS!
Click on “Open the Blocks Editor” button on the upper right hand corner of the design browser!
Download and open Java File to run Blocks Editor!
Connect your phone or open the emulator so you can see your work as you build!
12
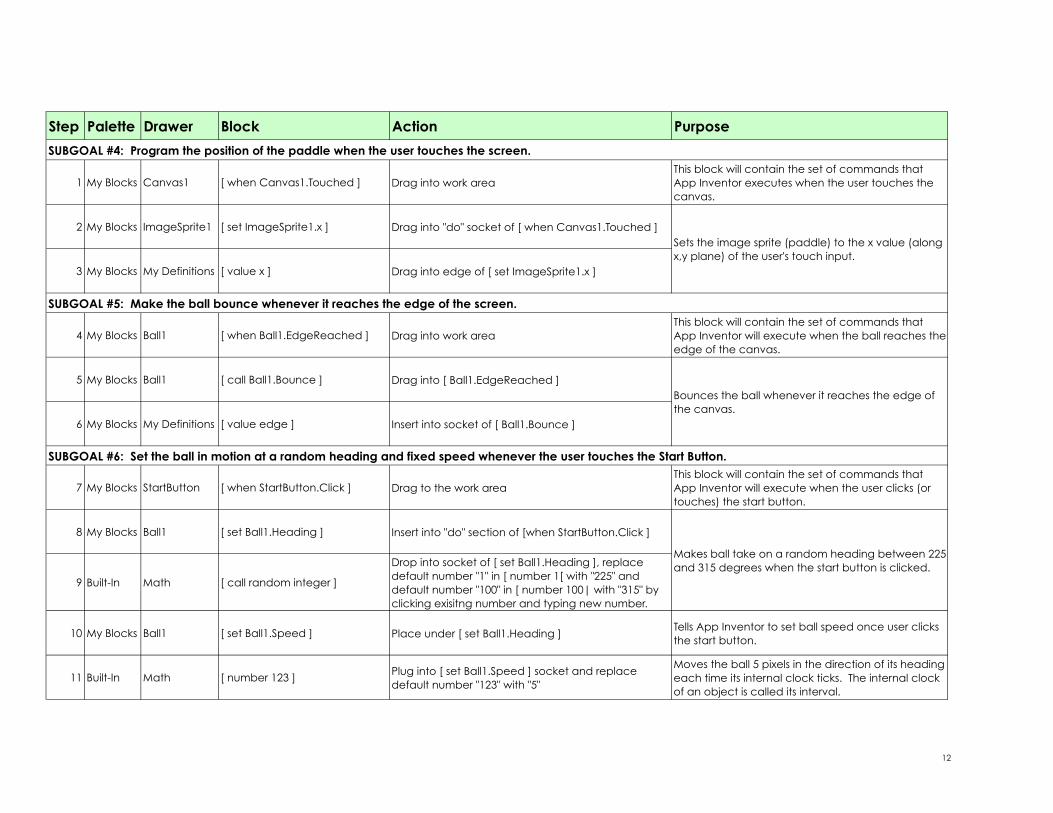
Step Palette Drawer Block Action Purpose
1 My Blocks Canvas1 [ when Canvas1.Touched ] Drag into work areaThis block will contain the set of commands that App Inventor executes when the user touches the canvas.
2 My Blocks ImageSprite1 [ set ImageSprite1.x ] Drag into "do" socket of [ when Canvas1.Touched ]
3 My Blocks My Definitions [ value x ] Drag into edge of [ set ImageSprite1.x ]
4 My Blocks Ball1 [ when Ball1.EdgeReached ] Drag into work areaThis block will contain the set of commands that App Inventor will execute when the ball reaches the edge of the canvas.
5 My Blocks Ball1 [ call Ball1.Bounce ] Drag into [ Ball1.EdgeReached ]
6 My Blocks My Definitions [ value edge ] Insert into socket of [ Ball1.Bounce ]
7 My Blocks StartButton [ when StartButton.Click ] Drag to the work areaThis block will contain the set of commands that App Inventor will execute when the user clicks (or touches) the start button.
8 My Blocks Ball1 [ set Ball1.Heading ] Insert into "do" section of [when StartButton.Click ]
9 Built-In Math [ call random integer ]
Drop into socket of [ set Ball1.Heading ], replace default number "1" in [ number 1[ with "225" and default number "100" in [ number 100| with "315" by clicking exisitng number and typing new number.
10 My Blocks Ball1 [ set Ball1.Speed ] Place under [ set Ball1.Heading ]Tells App Inventor to set ball speed once user clicks the start button.
11 Built-In Math [ number 123 ]Plug into [ set Ball1.Speed ] socket and replace default number "123" with "5"
Moves the ball 5 pixels in the direction of its heading each time its internal clock ticks. The internal clock of an object is called its interval.
Makes ball take on a random heading between 225 and 315 degrees when the start button is clicked.
SUBGOAL #4: Program the position of the paddle when the user touches the screen.
SUBGOAL #5: Make the ball bounce whenever it reaches the edge of the screen.
SUBGOAL #6: Set the ball in motion at a random heading and fixed speed whenever the user touches the Start Button.
Sets the image sprite (paddle) to the x value (along x,y plane) of the user's touch input.
Bounces the ball whenever it reaches the edge of the canvas.
13
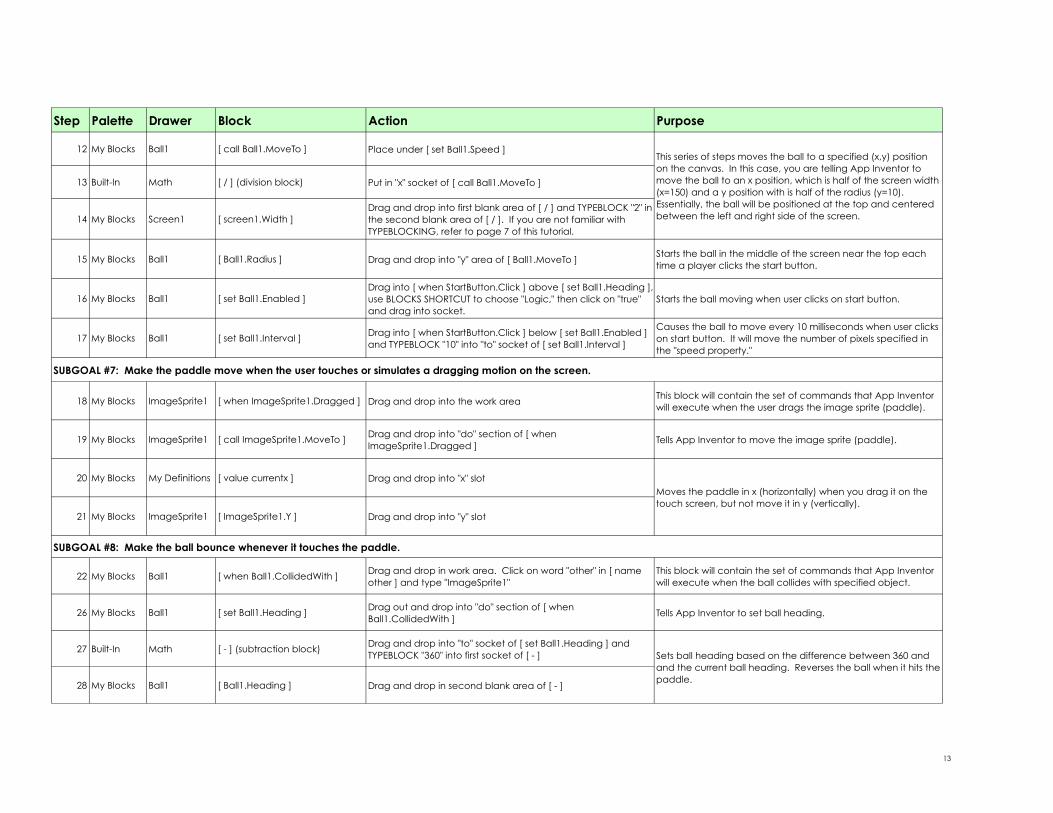
Step Palette Drawer Block Action Purpose
12 My Blocks Ball1 [ call Ball1.MoveTo ] Place under [ set Ball1.Speed ]
13 Built-In Math [ / ] (division block) Put in "x" socket of [ call Ball1.MoveTo ]
14 My Blocks Screen1 [ screen1.Width ]Drag and drop into first blank area of [ / ] and TYPEBLOCK "2" in the second blank area of [ / ]. If you are not familiar with TYPEBLOCKING, refer to page 7 of this tutorial.
15 My Blocks Ball1 [ Ball1.Radius ] Drag and drop into "y" area of [ Ball1.MoveTo ]Starts the ball in the middle of the screen near the top each time a player clicks the start button.
16 My Blocks Ball1 [ set Ball1.Enabled ]Drag into [ when StartButton.Click ] above [ set Ball1.Heading ], use BLOCKS SHORTCUT to choose "Logic," then click on "true" and drag into socket.
Starts the ball moving when user clicks on start button.
17 My Blocks Ball1 [ set Ball1.Interval ]Drag into [ when StartButton.Click ] below [ set Ball1.Enabled ] and TYPEBLOCK "10" into "to" socket of [ set Ball1.Interval ]
Causes the ball to move every 10 milliseconds when user clicks on start button. It will move the number of pixels specified in the "speed property."
18 My Blocks ImageSprite1 [ when ImageSprite1.Dragged ] Drag and drop into the work areaThis block will contain the set of commands that App Inventor will execute when the user drags the image sprite (paddle).
19 My Blocks ImageSprite1 [ call ImageSprite1.MoveTo ]Drag and drop into "do" section of [ when ImageSprite1.Dragged ]
Tells App Inventor to move the image sprite (paddle).
20 My Blocks My Definitions [ value currentx ] Drag and drop into "x" slot
21 My Blocks ImageSprite1 [ ImageSprite1.Y ] Drag and drop into "y" slot
22 My Blocks Ball1 [ when Ball1.CollidedWith ]Drag and drop in work area. Click on word "other" in [ name other ] and type "ImageSprite1"
This block will contain the set of commands that App Inventor will execute when the ball collides with specified object.
26 My Blocks Ball1 [ set Ball1.Heading ]Drag out and drop into "do" section of [ when Ball1.CollidedWith ]
Tells App Inventor to set ball heading.
27 Built-In Math [ - ] (subtraction block)Drag and drop into "to" socket of [ set Ball1.Heading ] and TYPEBLOCK "360" into first socket of [ - ]
28 My Blocks Ball1 [ Ball1.Heading ] Drag and drop in second blank area of [ - ]
SUBGOAL #7: Make the paddle move when the user touches or simulates a dragging motion on the screen.
SUBGOAL #8: Make the ball bounce whenever it touches the paddle.
Moves the paddle in x (horizontally) when you drag it on the touch screen, but not move it in y (vertically).
Sets ball heading based on the difference between 360 and and the current ball heading. Reverses the ball when it hits the paddle.
This series of steps moves the ball to a specified (x,y) position on the canvas. In this case, you are telling App Inventor to move the ball to an x position, which is half of the screen width (x=150) and a y position with is half of the radius (y=10). Essentially, the ball will be positioned at the top and centered between the left and right side of the screen.

We’re about halfway done. Let’s take a break and see if
we’re on track.
14

While you are taking a well-deserved break…
Take a step back and examine your work. Computer programmers often build their program in manageable chunks and test regularly to identify and fix bugs. If you tested the app right now, what would happen?
What would your app do and what would it NOT do? Look at how many events you’ve created and what they actually mean.
Can you think of any other events that we have not yet covered for PONG to be a fully-functional game? Once you’ve identified these events, you’re ready to move on.
Answer.!!At!this!point,!your!app!can!perform!the!following!tasks:!1)!Paddle!will!posiKon!to!point!of!user!touch!(x,!but!not!yZ
coordinate)!and!will!move!when!dragged,!2)!Ball!will!bounce!off!all!four!edges!of!the!screen,!3)!Ball!will!posiKon!to!the!top!center!of!
screen!when!start!buFon!clicked!and!move!at!set!speed!and!random!heading!within!defined!range,!4)!Ball!will!bounce!off!paddle.!
15

One more thing you should know…
Before you start on part 2 of PONG, there’s something you should know that will help you understand the mechanics of ball movement on the screen.
App Inventor assigns numeric values to the edges of the canvas as follows:
Top = 1 Right = 3 Bottom = -1 Left = -3
This is important if you want to differentiate what the game does when the ball touches the left and right edges, as opposed to the bottom edge.
Also, heading values for animated objects go in full circle like a compass, with values between 0 and 360 degrees. An object moving toward the top of the screen is said to have a heading of 90 degrees.
In part 1 of the tutorial, what ball heading range did you specify when the user clicks the start button? How does that translate into where the ball will actually move? Can you see how the ball will bounce back in reverse when it collides with the paddle?
16

17
Step Palette Drawer Block Action Purpose
29 Built-In Control [ Ifelse ] Drag out
30 Built-In Math [ = ] (equal block) Drag out and drop into "test" socket of [ Ifelse ]
31 My Blocks My Definitions [ value edge ]Drag and drop into first empty area of [ = ], click on second empty area and TYPEBLOCK "-1" into second empty area.
32 My Blocks Ball1 [ set Ball1.Enabled ]Drag and drop in the "then-do" area of [ Ifelse ]. Click to the right of the block to get the popup menu, then click "Logic" and choose "false." Drag [ false ] into socket
Stops the ball from moving when it gets past the paddle.
33 My Blocks ScoreLabel [ set scoreLabel.Text ]Attach it underneath [ set Ball1.Enabled ]" then-do" socket (not in [ else do ])
34 Built-In Text [ text text ]Drag out and drop after "to" of [ set ScoreLabel.Text ] (you can also click the work area to get the blocks shortcut menu and choose text). Click the text and change to "Game Over!"
35 *Work area [ when Ball1.EdgeReached ]
Find [ when Ball1.EdgeReached ] from earlier (step 4), drag [ call Ball1.Bounce ] out from [ when Ball1.EdgeReached ], and drop into "else-do" socket of [ Ifelse ]. Drag [ Ifelse ] into [ when Ball1.EdgeReached edge ]
This entire [ Ifelse ] will cause the ball to bounce off of all edges except the bottom (southern) one.
36 Built-In Definition [ def variable ]Drag and drop into open area. Click on "variable" and type "score."
Changes the name of the variable to "score".
37 Built-In Math [ number 123 ] Put into "as" socket of [ def score ] and replace "123" with "0" Creates a variable named "score" and sets its value to 0.
38 Built-In Definition [ to procedure ]Drag out and drop in open area, click on "procedure" and rename it "updateScore"
Creates a procedure called "updateScore"
39 Built-In Definition [ name name ]Drag out and drop in open area, click on "name" and type "scorevalue." Move this piece in into [ to update Score ] "arg" socket
Creates a parameter for the procedure that is named "scorevalue." A parameter is a temporary variable that holds a value for a procedure. The value is specified when the procedure is called.
SUBGOAL #9: Stop the ball and end the game when the ball reaches the southern edge of the screen.
SUBGOAL #10: Increase the score count by 1 everytime the ball bounces off the paddle.
Makes the text "Game Over!" appear on the screen in the ScoreLabel when the ball gets past the paddle.
This set of blocks tells App Inventor what to do when the ball reaches an edge. In this case, we want App Inventor to test if the edge reached is the southern (or bottom) edge. If the ball has reached the bottom edge of the canvas, then App Inventor should execute a certain action (end the game), but if the ball reaches any other edge, then it should bounce.

18
Step Palette Drawer Block Action Purpose
40 My Blocks My Definitions [ set global score ] Drag and drop in "do" area of [ to updateScore ]
41 My Blocks My Definitions [ value scorevalue ] Drag and drop in "to" area of [ set globalscore ]
42 My Blocks ScoreLabel [ set scoreLabel.Text ] Drag and drop under [ set globalscore ]
43 Built-In Text [ join ]Drag and drop into "to" socket of [ set ScoreLabel.Text ] and use blocks shortcut menu to make the first blank area [ text ], which reads "Score: "
44 My Blocks My Definitions [ global score ] Drag and drop into the second empty area of [ join ]Sets the text of the score label to a string that joins together "Score:" and the actual value of the score variable.
45 My Blocks My Definitions [ call updateScore ]Drag and drop at the bottom of [ startButton.Click ] below [ call Ball1.MoveTo ]. TYPEBLOCK "0" into "scorevalue" socket.
Updates the score to 0.
46 My Blocks My Definitions [ call updateScore ]Drag and drop in [ Ball1.CollidedWith ] below [ set Ball1Heading ]
47 Built-In Math [ + ] (addition block)Drag and drop into [ call UpdateScore ] "scorevalue" socket of [ when Ball1.CollidedWith ]
48 My Blocks My Definitions [ global score ]Drag and drop into first empty area, click on second empty area and TYPEBLOCK "1" and drag into socket.
49 My Blocks ResetButton [ when ResetButton.Click ] Drag to open areaThis block will contain the set of commands that App Inventor will execute when the user clicks on the reset button.
50 *Work areaGo to set of blocks inside [ startButton.Click ] that you created previously and highlight [ Ball1.Move to ] by clicking the block and hitting CTRL+C (or CMD+V)
Copies the the entire procedure within [ Ball1.Move ].
51 *Work areaClick anywhere in open area and hit CTRL+V (or CMD+V), then drag the whole procedure block in [ ResetButton.Click ]
Pastes the blocks you copied and moves the ball to start position when user clicks on "Reset" button.
52 My Blocks ScoreLabel [ set ScoreLabel.Text ]Drag and place under [ call Ball1.MoveTo ] within [ when ResetButtonClick ]
53 Built-In Text [ join ]
Drag and drop into "to" socket of [ set ScoreLabel.Text ], set the first empty area to text "Score: " by using blocks schortcut menu (click "text" twice and type "Score: ") and TYPEBLOCKING "0" into second empty area.
Updates the score by +1 everytime the ball hits the paddle.
Moves the ball back to the start position (at the top of the screen, centered between left and right side) and resets the score to "0".
This set of blocks sets the score label and updates the score variable. The global score is the current (or old score), whereas the scorevalue is the new score when the player successfully bounces the ball off the paddle.
SUBGOAL #11: Program the sequence of action when the user touches the Reset button. Reposition the ball to its start position and reset the score to 0.

The Big Picture Great job getting to the end of this tutorial! If you’ve followed all the steps in the design and build processes, these are the blocks you should see in your build window.
Now is a good time to examine the blocks and think about how each step relates to what’s happening on your phone (or emulator).
Do you understand what each block does in your app? Once you’ve had a chance to step back, look at the big picture, and test your app a few times, you’re ready to move on to packaging the app and tackling some additional challenges!
19

Congratulations! You’ve built PONG!
Package!App!
NoKce!that!your!app!disappears!when!
you!unplug!your!phone!from!the!USB!
cable!or!disconnect!from!wifi.!!This!is!because!the!app!is!sKll!stored!in!the!
App!Inventor!server!and!not!in!your!
phone.!!To!learn!how!to!package!your!
app!to!your!phone,!go!to:!
hFp://appinventor.mit.edu/teach/curriculum/packagingZapps.html!
Return!to!Module!1!
hFp://appinventor.mit.edu/
teach/curriculum/
moduleZ1.html!
Challenge!1!
Increase!the!speed!of!the!ball!and!
decrease!the!size!of!the!ball!when!the!
score!increases!an!increment!of!10.!!(Hint:!Under!the!Math!drawer,!the!|
remainder|!(a,b)!returns!the!result!of!
dividing!a!by!b!and!taking!the!
remainder.!
Challenge!2!
Download!audio!file!from!the!App!
Inventor!Media!Library!page!and!
upload!them!to!the!Designer.!!Make!the!“noink”!sound!play!when!the!ball!
hits!the!edge!of!the!wall,!the!“taZda”!
sound!when!the!speed!of!the!ball!
increases,!and!the!buzzer!sound!when!
the!ball!hits!behind!the!paddle.!
Even!More!Challenges!
!Give!the!player!3!lives!so!they!get!3!tries!before!“Game!Over!”!
!With!mulKple!lives,!decrease!the!score!by!1!each!Kme!the!player!loses!a!
life!
!InvesKgate!what!happens!if!you!change!the!range!of!random!numbers!
for!the!start!heading!when!the!start!buFon!is!clicked!
!Make!the!app!respond!to!KlKng!of!
the!phone!instead!of!dragging!the!
paddle.!Feel free to send comments or feedback about
this tutorial to: [email protected]!!20