power quality controller – pqc - frako quality controller – pqc reactive power control relay...
TRANSCRIPT

Power Quality Controller – PQCReactive Power Control RelayOperating Manual
FRAKO Kondensatoren- und Anlagenbauwww.frako.com

2
Inhalt 1 Safety 6 1.1 Objective 6 1.2 Safety instructions 6 1.3 Intended use 7 1.4 Improper use 8 1.5 Repair 8 1.6 Symbols used 8
2 Technical data 9
3 Instrument description 13 3.1 Function 13 3.2 Regeneration 13
4 Mounting the instrument 13 4.1 Suitable location 13 4.2 Installing the instrument 14
5 Installation 16 5.1 Electrical connections 16 5.2 Earth connection 17 5.3 Supply voltage 18 5.4 Voltage measurement 18 5.5 Current measurement 19 5.6 Output relays (control outputs) 21 5.7 Connection diagrams of all PQC instrument types 22 5.7.1 Connection diagram: version PQC 1202401-XX 22 5.7.2 Connection diagram: version PQC 1202403-XX 23 5.7.3 Connection diagram: version PQC 0602401-XX 24 5.7.4 Connection diagram: version PQC 1204801-XX 25 5.7.5 Connection diagram: version PQC 1204803-XX 26 5.7.6 Connection diagram: version PQC 0614801-XX 27 5.7.7 Options for connecting the AUX power supply for PQC XXX480X-XX versions 27 5.7.7.1 Connection diagram for 400/415 V networks with no neutral conductor 28 5.7.7.2 Connection diagram for 690 V networks with a neutral conductor 28
6 Commissioning (Initial start-up) 29 6.1 Alarm function 29 6.1.1 List of alarms and messages 29 6.2 Safety precautions before start-up 30 6.3 Functional checkout 30 6.4 Configuration 30 6.5 Automatic commissioning 30 6.5.1 Automatic connection identification 30 6.5.2 Automatic identification of the connected capacitor stages 31 6.5.3 Calculation of c/k 32
7 Description of the menu 33 7.1 Menu overview 34

3
8 Main menu 36 8.1 PQC initial start-up 37 8.1.1 Language selection on start-up 37 8.1.2 Start-up 39 8.2 PQC overview 39 8.2.1 Displayed parameters 40 8.3 Control diagram 41 8.3.1 Scale 41 8.4 Manual control 42 8.4.1 Stages menu 43 8.5 Settings 44 8.5.1 Settable control profiles 44 8.5.2 Typical control profile applications 45 8.5.2.1 Setting target cos φ 46 8.5.2.2 Parallel shift 47 8.5.2.3 Limitation L 48 8.5.2.4 Switching delay 50 8.5.2.5 Selecting the control phase 50 8.5.3 General settings 50 8.5.3.1 Capacitor stages menu 51 8.5.3.2 Setting alarm limits 52 8.5.3.2.1 Overcurrent 53 8.5.3.2.2 Detection of voltage blackout (sag) 53 8.5.3.3 Alarm management 54 8.5.3.4 Optional Modbus RTU interface 55 8.5.3.5 Factory settings 56 8.5.3.6 Password protection 56 8.6 Info / status 57 8.6.1 PQC status 58 8.6.2 Corrective power 58 8.6.3 Capacitor stages table 59 8.6.4 Capacitor stages rating diagram 59 8.6.5 Switch cycle diagram 59 8.6.6 Voltage and current harmonics diagram 60 8.6.7 Voltage and current harmonics table 60 8.6.8 Manual frequency analysis 61 8.7 About PQC submenu 61 8.8 Factory default settings 62 8.9 Update 64
9 Instrument versions 65 10 Maintenance 66 10.1 Cleaning 66
11 Decommissioning and removal, storage and disposal 67 11.1 Decommissioning and removal 67 11.2 Storage 69 11.3 Disposal 69
12 General operation 69 12.1 Troubleshooting 70
13 Scope of supply 71

4
FiguresFigure 1 PQC dimensions in mm 14Figure 2 Connection diagram for PQC 1202401-XX 22Figure 3 Connection diagram for PQC 1202403-XX 23Figure 4 Connection diagram for PQC 0602401-XX 24Figure 5 Connection diagram for PQC 1204801-XX 25Figure 6 Connection diagram for PQC 1204803-XX 26Figure 7 Connection diagram for PQC 0614801-XX 27Figure 8 Part of the connection diagram for 400 /415 V networks with no neutral
conductor 28Figure 9 Part of the connection diagram for 690 V networks with a neutral conductor 28Figure 10 PQC Start screen (firmware version number may be different) 30Figure 11 Menu structure 1 34Figure 12 Menu structure 2 35Figure 13 Menu structure 3 35Figure 14 Main menu 1/3 36Figure 15 Main menu 2/3 36Figure 16 Main menu 3/3 36Figure 17 Changing the working language 37Figure 18 Identification: Stage + Connection 38Figure 19 Identification: Connection 38Figure 20 Identification: Connection submenu 38Figure 21 Identification: Stage 38Figure 22 Identification: Stage submenu 38Figure 23 Identification: Manual 38Figure 24 Identification: Manual submenu 38Figure 25 Connection identification started 39Figure 26 Capacitor stage identification started 39Figure 27 Start-up completed 39Figure 28 PQC overview L1 (1-phase) 40Figure 29 PQC overview L1 (3-phase) 40Figure 30 Capacitor stage statuses (1-phase, 6 stages) 40 Figure 31 Capacitor stage statuses (3-phase, 12 stages) 40Figure 32 Control diagram 41Figure 33 Control diagram with additional information 41Figure 34 Zoomed in on control diagram 41Figure 35 Manual control 42Figure 36 Manual control enabled 42Figure 37 Manual control: Switch out stages 42Figure 38 Manual control: Stages menu 43Figure 39 Example of a selected stage 43Figure 40 Message on failed attempt to switch in a stage 44Figure 41 Settings 44Figure 42 Control profiles 45Figure 43 Control profile parameters 45Figure 44 Control response after setting target cos φ = 1, limitation = 0, parallel shift = 0 46Figure 45 Control response after setting target cos φ = 0.92 ind, limitation = 0,
parallel shift = 0 47Figure 46 Control response after setting target cos φ = 1, limitation = 0,
parallel shift = +1.0 47Figure 47 Control response after setting target cos φ = 0.92 ind, limitation = OFF,
parallel shift = -1.0 48

5
Figure 48 Control response after setting target cos φ = 0.92 ind, limitation = +1.0 48Figure 49 Control response after setting target cos φ = 0.92 ind, limitation = +1.0,
parallel shift = -1.0 49Figure 50 Control response after setting target cos φ = 0.95 cap, limitation = -1.0,
parallel shift = 0 49Figure 51 Phase L1 is the control phase 50Figure 52 General settings menu 51Figure 53 Capacitor stages 52Figure 54 Set limits 1/2 52Figure 55 Set limits 2/2 52Figure 56 Change set limit for switching cycle counter 53Figure 57 Alarm management 54Figure 58 Alarm management; here the Display alarm option 54Figure 59 Extensions menu 55Figure 60 Modbus configuration 55Figure 61 Factory default settings 56Figure 62 Password prompt 57Figure 63 Info / status 1/3 57Figure 64 Info / status 2/3 57Figure 65 Info / status 3/3 58Figure 66 PQC status overview 58Figure 67 Total corrective power Q 58Figure 68 Capacitor stages table 59Figure 69 Diagram showing all stages at 100% 59Figure 70 Diagram showing corrective power of all stages 59Figure 71 Switch cycle diagram 60Figure 72 Current harmonics diagram, y-axis 100% 60Figure 73 Current harmonics zoomed in, y-axis 25% 60Figure 74 Voltage harmonics table 60Figure 75 Manual frequency analysis 61Figure 76 About PQC 61
TablesTable 1 Connection types for current transformers in L1, L2 and L3 31Table 2 c/k settings at 400 V AC and 50 Hz 32Table 3 Key functions 33Table 4 Factory default settings 62Table 5 Instrument versions 65
FormulasFormula 1 Calculation of c/k 32

6
1 Safety 1.1 ObjectiveThis operating manual has been prepared for persons who install, connect, commission and operate the PQC Power Quality Controller.
1.2 Safety instructions
No claims under guarantee shall be valid in the event of damages caused by failure to observe the instructions in this operating manual. We shall not be held liable for consequential damages!
Incorrect operation or failure to observe the safety instructions will invalidate all claims under the guarantee, and no liability is accepted for any injuries to persons or damages to assets arising therefrom or occasioned thereby!
DANGER!
The following instructions must be observed to prevent danger to life and limb or damage to equipment and other assets:
Installation and commissioning of the instrument in industrial plant must be car-ried out in strict compliance with the standards IEC 61508 and DIN VDE 0801.
Any other laws, standards, regulations and safety rules (IEC, EN, VDE, etc.) relevant to this product and the protection of persons and assets must be observed. In Germany, it is essential to comply with the Equipment Safety Act (GSG) and the regulations of the German Social Accident Insurance Institutions. In other countries, the equivalent local regulations must be followed.
Installation, commissioning, modifications and retrofitting may only be carried out by appropriately qualified personnel.
In Germany, it is essential to comply with the regulations of the Social Accident Insurance Institution covering electrical installations. In other countries, the equivalent local regulations must be followed.
The instrument contains live components at the AC supply voltage and must therefore not be opened.
If the instrument is visibly damaged, it must not be installed, connected or commissioned.
Only approved installation cables must be used.
If the instrument does not work after commissioning, it must again be isolated from the power supply.
The instrument must only be employed on duties up to the specified maximum power. Overloading the instrument can result in its destruction, create a fire hazard or cause an electrical accident. The load ratings for the various connec-tions must not be exceeded.
Do not expose the instrument to direct sunlight or high temperatures, as these could damage it or shorten its service life.
Do not install the instrument near to sources of heat such as radiators or other devices that generate heat.
Do not expose the instrument to rain, water, dampness or high levels of humi-dity. Avoid direct contact with water at all cost.

7
Failure to observe the safety instructions can result in death, serious injury or severe damage to equipment and other assets.
In commercial premises, the local accident prevention regulations must be complied with (e.g. in Germany, the regulations of the German Social Accident Insurance Institutions for electrical installations and equipment).
The safety of the system in which the PQC is incorporated is the responsibility of the persons installing and operating the system.
For safety reasons and to retain conformity with product approval requirements (CE marking), the user is not permitted to convert or otherwise modify the inst-rument.
The instrument must always be handled with due care; if it is jolted, knocked or dropped from even a low height, it will be damaged.
This operating manual may be changed without notification. Please consult our website www.frako.com for the up-to-date version.
When work is carried out on the instrument terminals and connecting cables, there is a risk of live components being touched inadvertently. The working voltage may present a hazard to health or may even be life-threatening.
The risk to life and limb can be significantly reduced by observing the above safety precautions.
The user must ensure that all operators are familiarized with this operating manual and follow it ·at all times.
This operating manual must be read through carefully and completely before the instrument is ·installed, connected, commissioned and operated. All actions taken must be in accordance with this operating manual.
The operating manual must be held for future reference. ·
· ⚠ Wherever this symbol is shown, the documentation must be referred to.
1.3 Intended useThe PQC Power Quality Controller is intended for the following applications within the scope of the technical data [see Section 2, Technical data]:
Control of reactive power in stages. Output relays (switched outputs, stages) are provided for ·this purpose. Capacitors can be connected to these via current-amplifying electromechanical devices (relays, contactors).
Measurement of data relevant to network power quality, such as voltage, current and fre- ·quency, either in any desired phase L1 or in all three phases L1, L2 and L3, depending on the instrument version [see Section 2, Technical data]; connection of an alarm contact rated within the allowable limits for the electrical parameters [see Section 2, Technical data].
The PQC is intended for installation in stationary, weather-protected control cabinets and enclo-sures located indoors. Exposure to dampness is not permitted. The instrument is installed verti-cally, usually on the outside of the control cabinet or enclosure, so that the controls and display are accessible to the operator.
The USB port is a service interface provided solely for updating the PQC firmware. Users are not permitted to use this USB port for any other purpose, and therefore must not connect any cable or device to it. When the PQC is in operation, the USB port must not be touched. It is intended for connecting a battery-powered notebook.
8
1.4 Improper useAny use of the instrument that deviates from its intended use is considered improper and therefore not permitted. If the PQC is used in a way not specified in this operating manual, the protection supported by the instrument may be adversely affected.
1.5 RepairRepairs may not be carried out by the customer or user. Should repair work be necessary, the customer or user must contact the manufacturer:
FRAKO Kondensatoren und Anlagenbau GmbH, Tscheulinstrasse 21A, D-79331 Teningen, Germany, www.frako.com.
1.6 Symbols usedSpecial instructions in this operating manual are marked by symbols.
The corresponding word that expresses the extent of the danger is also printed above the inst-ructions.
In order to avoid accidents, death or injury and damage to assets, these instructions must be complied with at all times.
Warning signs
DANGER!
Indicates an immediate danger that if not avoided can result in death or serious injury.
DANGER!
Indicates an immediate danger of electric shock that if not avoided can result in death or serious injury.
Notes for the correct functioning of the instrument
CAUTION!
These instructions indicate dangers that could result in damage to equipment if the instructions are not followed.
They can also cover aspects of environmental protection.
NOTE!
These instructions, when followed, serve to ensure the correct functioning and fault-free operation of the instrument.

9
2 Technical dataPower supply
Supply voltage PQC version: PQC xxx240x-xx: ·85 – 267 V AC (absolute limits), frequency 45 – 65 Hz or 100 – 377 V DC (absolute limits) PQC version: PQC xxx480x-xx: 85 – 530 V AC (absolute limits), frequency 45 – 65 Hz or 100 – 750 V DC (absolute limits) UL / CSA standard: 110 – 480 V AC, 50 / 60 Hz
Power draw maximum 5 VA ·
Overcurrent protection External, maximum 2 A (slow-blow) specified ·
Inputs
Voltage path measurement PQC version: PQC xxxxxx1-xx: single phase ·PQC version: PQC xxxxxx3-xx: 3-phase 3-phase 80 V AC – maximum 760 V AC (phase–phase, absolute limits), this corresponds to 115 – 690 V AC networks, electrically interconnected via high resistance, medium voltage measure-ment via ../100 V transformer possible
Power failure detection after duration of a half-wave
Current path measurement PQC version: PQC xxxxxx1-xx: single phase ·PQC version: PQC xxxxxx3-xx: 3-phase
x/5 A AC or x/1 A AC (transformer secondary current ≥ 15 mA), electrically isolated, power draw maximum 1 VA per trans-former connection, continuous overload rating up to 6 A AC, transient overload maximum 10 A AC for 10 seconds maximum insulation voltage 300 V AC
Digital inputs and outputs PQC version: PQC xxxxxxx-x1: ·Up to 5 × 5 – 24 V DC inputs, alternatively usable as up to 5 × 24 V DC, 100 mA outputs, electrically interconnected with each other and the temperature input
Temperature inputs PQC version: PQC xxxxxxx-x1: ·1 × PT-100 or PT-1000 RTD, 4-wire or 2-wire configuration, automatic detector type identification 2 × NTC thermistor type TDK/Epcos-B57861S0502F040, FRAKO Article No. 29-20094 Measurement range -50 – 200 °C Electrically connected with the digital outputs
Outputs
Output relays (control outputs, Normally open with common pole P ·PQC version: PQC 120xxxx-xx: 12 output relays and PQC version: PQC 060xxxx-xx: 6 output relays, AC -14 250 V AC, maximum 3 A or DC -13 30 V DC, maximum 3 A, mechanical service life 2 × 10⁷ switching cycles, electrical service life AC -14 at 3 A 1 × 10⁵ switching cycles, AC -14 at 0.5 A 2 × 10⁶ switching cycles In areas where UL / CSA standards apply: Output rated 250 V AC, 30 V DC, 3 A Resistive and General Use;
capacitor stages)
inputs
inputs

10
250 V AC and 30 V DC, 1 A Pilot Duty
PQC version: PQC 061xxxx-xx: 6 output relays AC-14 440 V AC, maximum 3 A or DC-13 125 V DC, maximum 3 A, mechanical service life 1 × 10⁷ switching cycles, electrical service life AC -14 at 3 A 1 × 10⁵ switching cycles, AC -14 at 0.5 A 2 × 10⁶ switching cycles In areas where UL / CSA standards apply: Outputs rated 250 V AC, 30 V DC, 3 A Resistive, B 300 and R 300 Pilot Duty
Common supply conductor P to the output relays maximum 10 A Note: utilization category AC-14 / DC-13 as per IEC 60947-5-1
Alarm contact Volt-free, normally open, ·AC -14 250 V AC, maximum 3 A or DC -13 30 V DC, maximum 3 A, mechanical service life 2 × 10⁷ switching cycles, electrical service life AC -14 at 3 A 1.5 × 10⁵ switching cycles, AC -14 at 0.5 A 2 × 10⁶ switching cycles Note: utilization category AC / DC as per IEC 60947-5-1
In areas where UL / CSA standards apply: Output rated 250 V AC, 30 V DC, 3 A Resistive and General Use; 250 V AC and 30 V DC, 1 A Pilot Duty
Digital outputs PQC version: PQC xxxxxxx-x1: ·Up to 5 × 24 V DC, 100 mA outputs, electrically interconnected with each other and the temperature input, alternatively usable as up to 5 × 5 – 24 V DC inputs.
Interfaces
Modbus RTU connection PQC version: PQC xxxxxxx-2x: ·120 Ω terminating resistor required at the end of the bus system
Connections Via pluggable screw terminals
Instrument power AUX Conductor cross section max. 2.5 mm², min. 0.2 mm² ·
PQC version: PQC xxx240x-xx: Insulation rating: min. 250 V AC, 75 °C In areas where UL / CSA standards apply: Use 60 / 75 °C copper wires
PQC version: PQC xxx480x-xx: Insulation rating: min. 500 V AC, 75 °C In areas where UL / CSA standards apply: Use 60 / 75 °C copper wires
Protective earth PE Via 6.3 mm female slide connector ·Conductor cross section at least equal to the largest conductor cross section of the AUX phases, the voltage measurement connections, the output relays and the alarm connections; insulation colour yellow/green
Voltage measurement inputs Conductor cross section max. 2.5 mm², min. 0.2 mm² ·Insulation rating: Example 1: 230 V AC, select at least 250 V AC, 75 °C Example 2: 690 V AC, select at least 750 V AC, 75 °C
L1, L2, L3, N

11
Current measurement inputs Conductor cross section max. 2.5 mm², min. 0.2 mm² ·Insulation rating: min. 250 V AC, 75 °C In areas where UL / CSA standards apply: Use 60 / 75 °C copper wires
Output relays (control outputs, Conductor cross section max. 2.5 mm², min. 0.2 mm² ·PQC version: PQC xx0xxxx-xx: 250 V relays Insulation rating: min. 250 V AC, 75 °C In areas where UL / CSA standards apply: Use 60 / 75 °C copper wires PQC version: PQC xx1xxxx-xx: 440 V relays Insulation rating: min. 500 V AC, 75 °C In areas where UL / CSA standards apply: Use 60 / 75 °C copper wires
Alarm contact Conductor cross section max. 2.5 mm², min. 0.2 mm² ·Insulation rating: min. 250 V AC, 75 °C
USB for updates USB Micro-A and Micro-B ports ·
Digital inputs and outputs PQC version: PQC xxxxxxx-1x: ·Conductor cross section max. 1.5 mm², min. 0.14 mm² Insulation rating: 50 V DC, 80 °C
Temperature inputs PQC version: PQC xxxxxxx-1x: ·Conductor cross section max. 1.5 mm², min. 0.14 mm² Insulation rating: min. 50 V DC, 80 °C
Modbus RTU connection PQC version: PQC xxxxxxx-2x: ·Conductor cross section max. 1.5 mm², min. 0.14 mm² Insulation rating: min. 50 V DC, 80 °C
Note: 0.14 mm² = AWG 26; 0.2 mm² ≈ AWG 25; ·1.4 mm² ≈ AWG 16; 2.5 mm² = AWG 14
Design data
Dimensions (W × H × D) 144 mm × 144 mm × 70 mm casing ·144 mm × 165 mm × 70 mm including connectors
Mounting Front of panel in 138 mm × 138 mm cutout to IEC 61554, held ·by four retaining lugs at the corners of the casing Maximum screw tightening torque 0.4 Nm / 3.5 In-Lbs.
Weight approx. 770 g without packaging ·
Ingress protection Front of instrument when mounted in cabinet IP40, when ·mounted in cabinet with upgrade kit (Item No. 20-50015) IP54; rear of instrument and terminals IP20; all as per EN 60529 Pollution degree 2 as per EN 61010-1:2011-07 In areas where UL / CSA standards apply: Use in Pollution Degree 2 only, Enclosure type 12 (front side) and open type (Back side)
Electrical design Casing protection class I as per EN 61140 ·Working voltage up to max. 760 V AC absolute value at voltage measurement inputs. Overvoltage category: IEC mains supply lineCat III, measurement inputs Cat II, In areas where UL / CSA standards apply: Cat III TNV1 circuits, some of which interconnected:
capacitor stages)
L1, L2, L3, terminals S1 and S2 in each case
(service interface)

12
digital inputs and outputs, optional temperature inputs, optional Modbus connection. In areas where UL / CSA standards apply: U.S. National Standard UL 508 Canadian National Standard C22.2 No. 14-13
Casing design Flammability rating UL 94 V-0 according to casing manufacturer ·Impact resistance IK06 as per EN 61010-1:2011-07, 8.2.2
Service life At +25 °C ambient temperature 15 years ·
EMC EMC as per EN 61326-1 ·EN 61000-4-2, electrostatic discharge: air 8 kV and contact 6 kV with horizontal and vertical coupling plane EN 61000-4-3, radiated immunity (EMS) 80 MHz – 1 GHz, horizontal and vertical, level 10 V/m = industrial environment radiation, Class A Hardware version V1.0: EN 55022 A EMI 30 MHz – 1 GHz = industrial environment, Class A From hardware version V1.1: EN 55022 B EMI 30 MHz – 1 GHz = office and residential area, Class B EN 61000-4-6, immunity to conducted disturbances, level 10 V RMS, 150 kHz – 80 MHz1 EN 61000-4-4, burst immunity, 5 kV capacitive coupling, 5 kV injection into power supply cable and voltage measurement inputs EN 61000-4-5 surge immunity, 6 kV injection into power supply cable and voltage measurement inputs
Ambient conditions
Temperature range -25 °C to +65 °C, noncondensing ·In areas where UL / CSA standards apply: maximum 60 °C
Installation altitude Maximum height above sea level 2000 m ·
Measuring system
Accuracy Voltage and current measurement ±1 % of full scale reading at ·50/60 Hz and 25 °C ambient temperature
Averaging function Over 1 second, updated every 100 ms ·
Harmonics Measured via Lx – N ·All even and uneven harmonics up to the 19th
¹ The standard radio-frequency field test as per EN 61000-4-6 (EMC immunity) calls for amplitude modu-lation at a modulation frequency of 1 kHz. However, this frequency lies within the measurement range of the instrument in its intended use (20th harmonic of 50 Hz = 1 kHz). It is therefore to be expected that the measuring circuit clearly responds to this. For this reason, the radio-frequency field test can only be carried out without amplitude modulation.

13
3 Instrument description 3.1 FunctionThe PQC Power Quality Controller is a reactive power control relay. It continuously calculates the reactive and active power components of the supply network using the measurement data from the current path (current transformer) and the voltage path (voltage measurement connection). If the reactive power component exceeds certain thresholds, which the PQC has determined during the calibration procedure or which have been set as described, switching commands are given via the instrument outputs. If the inductive reactive power is greater than the value preset during instrument configuration (target cos φ), after an adjustable time delay one or more of the PQC control contacts are closed. The PQC thus switches capacitor stages in as required in order to restore the target power factor. If the inductive reactive power component of the loads reduces again, this causes capacitor stages to be switched out. The PQC makes a variety of options pos-sible for customizing the control settings to suit the individual application. The clear overview in the display provides effective monitoring of power factor correction. So-called ‘cyclic switching’ is a useful feature for prolonging the service life of the installation, since it ensures that all capacitor stages of the same power rating are on average switched in equally frequently.
3.2 RegenerationThe PQC has a four-quadrant control function. If active power is fed back into the supply net-work, for example by combined heat and power systems, the PQC continues to correct for the reactive power drawn from the supply network. When this regeneration occurs, the active power P is displayed with a minus sign before it. Regeneration mode is also indicated by a symbol appearing on the display screen.
4 Mounting the instrument 4.1 Suitable location[see Section 1.3, Intended use] Hardware version V1.0: This is a Class A device. In office and residential areas, it can cause interference to radio reception. In this case, it may be necessary to take appropriate precautions with the installation.

14
4.2 Installing the instrument
Figure 1 PQC dimensions in mm
Upgrade kit for IP54:
In the optional upgrade kit (Article No. 20-50015) a gasket is available that must be used when mounting the PQC in control cabinets with IP54 ingress protection. It is fitted in the groove at the rear of the instrument’s front panel (moulded polymer) before the PQC is mounted in the cutout. The gasket seals the gap between the PQC front panel and the wall of the control cabinet.
DANGER!
The rear of the panel-mounting PQC inside the control cabinet or enclosure only has IP20 ingress protection. Adequate protection against inadvertently touching live components must be provided, and the ingress of dust and water must be prevented by ensuring that the instrument is installed in a suitable enclosure (e.g. control cabinet or distribution panel).
DANGER!
The PQC must not be installed in a hazardous zone, as its switching operations generate sparks that could ignite flammable gases.
Only install the instrument in areas where there is no danger of a gas or dust explosion.
7
70
63
3712
12
168
144
135.
5
earthing tab6.3 mm × 0.8 mm

15
The PQC is designed for mounting in a 138 mm × 138 mm cutout to IEC 61554 in the front of a control cabinet.
It is held in place by four retaining lugs in the corners of the instrument.
Fitting:
Preparation: the four retaining lugs at the corners of the instrument are swivelled to lie flat ·behind its front panel by turning the retaining screws (accessible from the front) anticlockwise.
Insert the sheet-metal rear of the PQC through the cutout provided in the control cabinet until ·fully home (having first fitted the IP54 gasket in the groove behind the PQC front panel when appropriate).
Press the PQC front panel gently against the control cabinet exterior and tighten the four ·retaining screws at the corners by turning them clockwise, applying a torque of no more than 0.4 Nm. This causes the retaining lugs to swivel outwards and be drawn toward the inner side of the cabinet wall until they are held tightly up against it.
DANGER!
To avoid accidents, the following must be observed: - The PQC must be installed in accordance with its intended use before power is switched on. - All the connectors supplied with the instrument must be plugged in.
If the above precautions are taken, the danger to life and limb can be signifi-cantly reduced.
DANGER!
To prevent the PQC overheating, the following must be observed: - The PQC must be installed in an adequately ventilated space, and its rear and sidewalls must not be covered. - No sources of heat must be located in the vicinity. - The PQC must not be exposed to direct sunlight.
If the above safety precautions are taken, the risk of damaging equipment and assets or endangering life and limb can be significantly reduced.
IMPORTANT SAFETY NOTICE! To avoid accidents, the following must be observed:
When the FRAKO panel-mounting instrument is fitted in the front of a control cabinet for its intended use, there is a danger that its four retaining screws could become live and therefore a safety hazard if there is a fault in the wiring adjacent to the instrument. If a wire at a dangerous voltage works loose, it could make electrical contact with one of the four retaining screws. This means that it cannot be excluded that the head of the screw, which can be touched from outside the cabinet, could become live. In rare cases this could constitute a danger to life and limb.
At the location where the FRAKO panel-mounting instrument is installed (e.g. control cabinet, enclosure), all wires and cables must be securely fastened or grouped in harnesses to ensure that any stray wire or strand cannot contact one or more of the instrument's retaining screws, thus making it or them live and therefore dangerous.
If the above safety precautions are taken, the risk of damaging equipment and assets or endangering life and limb can be significantly reduced.
16
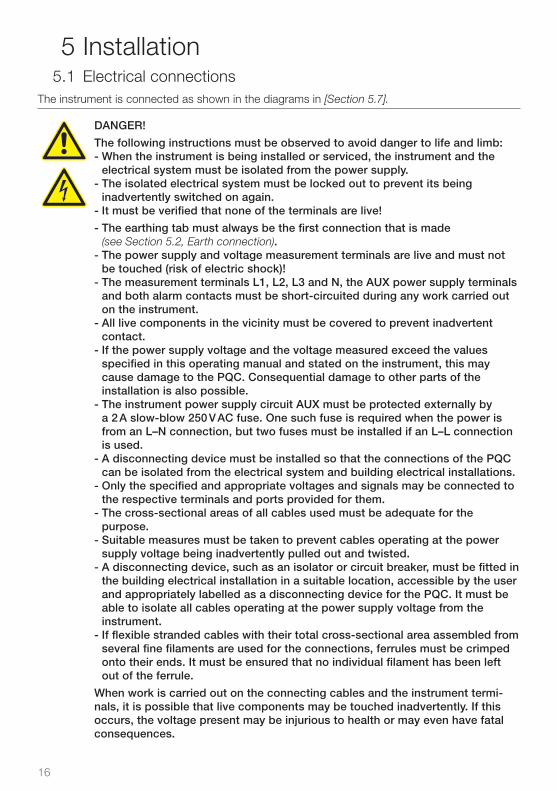
5 Installation 5.1 Electrical connectionsThe instrument is connected as shown in the diagrams in [Section 5.7].
DANGER!
The following instructions must be observed to avoid danger to life and limb: - When the instrument is being installed or serviced, the instrument and the electrical system must be isolated from the power supply. - The isolated electrical system must be locked out to prevent its being inadvertently switched on again. - It must be verified that none of the terminals are live!
- The earthing tab must always be the first connection that is made (see Section 5.2, Earth connection). - The power supply and voltage measurement terminals are live and must not be touched (risk of electric shock)! - The measurement terminals L1, L2, L3 and N, the AUX power supply terminals and both alarm contacts must be short-circuited during any work carried out on the instrument. - All live components in the vicinity must be covered to prevent inadvertent contact. - If the power supply voltage and the voltage measured exceed the values specified in this operating manual and stated on the instrument, this may cause damage to the PQC. Consequential damage to other parts of the installation is also possible. - The instrument power supply circuit AUX must be protected externally by a 2 A slow-blow 250 V AC fuse. One such fuse is required when the power is from an L–N connection, but two fuses must be installed if an L–L connection is used. - A disconnecting device must be installed so that the connections of the PQC can be isolated from the electrical system and building electrical installations. - Only the specified and appropriate voltages and signals may be connected to the respective terminals and ports provided for them. - The cross-sectional areas of all cables used must be adequate for the purpose. - Suitable measures must be taken to prevent cables operating at the power supply voltage being inadvertently pulled out and twisted. - A disconnecting device, such as an isolator or circuit breaker, must be fitted in the building electrical installation in a suitable location, accessible by the user and appropriately labelled as a disconnecting device for the PQC. It must be able to isolate all cables operating at the power supply voltage from the instrument. - If flexible stranded cables with their total cross-sectional area assembled from several fine filaments are used for the connections, ferrules must be crimped onto their ends. It must be ensured that no individual filament has been left out of the ferrule.
When work is carried out on the connecting cables and the instrument termi-nals, it is possible that live components may be touched inadvertently. If this occurs, the voltage present may be injurious to health or may even have fatal consequences.

17
The risk to life and limb can be significantly reduced by observing the above safety precautions.
NOTE!
The instrument can be damaged by incorrect operation. - Only the specified and appropriate voltages and signals may be connected to the respective terminals and ports provided for them. - The cross-sectional areas of all cables used must be adequate for the purpose. - The required cable types are specified in [Section 2, Technical Data].
If any incorrect cables, voltages or signals are applied to the terminals, this can result in damage to the PQC and the electrical installation.
DANGER!
To avoid accidents, the following must be observed:
At the PQC installation site (e.g. control cabinet, enclosure), all wires and stran-ded cables must be adequately secured or grouped in harnesses to ensure that no conductor can work free and touch one or more of the instrument retaining screws so as to make them live and a source of danger.
If the above safety precautions are taken, the risk of damaging equipment and assets or endangering life and limb can be significantly reduced.
NOTE!
If flexible stranded cables used for the connections, insulated ‘short’ ferrules 6 mm in length must be crimped onto their ends.
5.2 Earth connection
DANGER!
To avoid accidents, the following must be observed: - The earthing conductor PE must always be connected to the PQC instrument casing before any other connections are made.
- The PE conductor cross section must be at least equal to that of the largest conductor of the AUX phases, the voltage measurement connections, the output relays or the alarm connections. Its insulation colour is yellow/green. Earthing connections for network power circuits must have at least the same current-carrying capacity rating as the circuits themselves.
- If the earthing tab has broken off, the PQC must not be started up. The instrument must either be repaired or replaced.
- The PQC may only be put into service when the earthing conductor is connected to it.
If the above safety precautions are taken, the risk of damaging equipment and assets or endangering life and limb can be significantly reduced.
The earthing conductor PE must always be connected to the PQC instrument casing. An earthing tab is provided for this in the rear wall of the casing. It is marked with the earthing symbol as per EN 60617-2 shown at left.
18
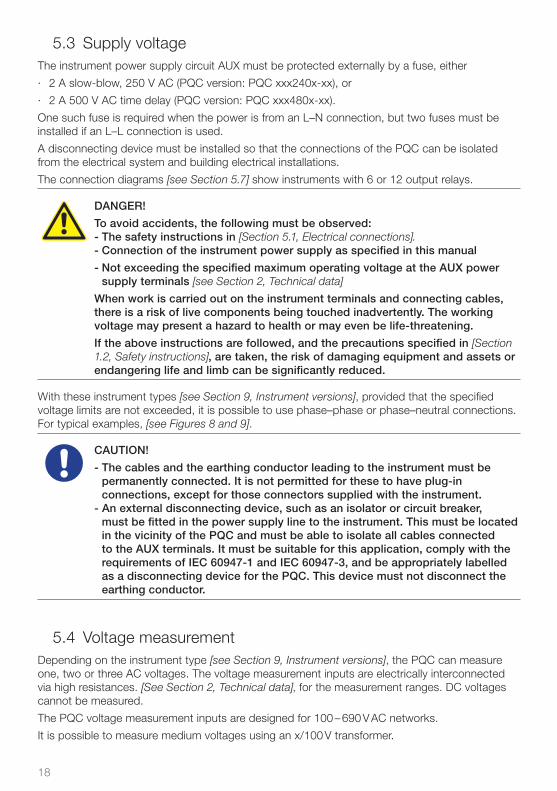
5.3 Supply voltageThe instrument power supply circuit AUX must be protected externally by a fuse, either
2 A slow-blow, 250 V AC (PQC version: PQC xxx240x-xx), or ·
2 A 500 V AC time delay (PQC version: PQC xxx480x-xx). ·
One such fuse is required when the power is from an L–N connection, but two fuses must be installed if an L–L connection is used.
A disconnecting device must be installed so that the connections of the PQC can be isolated from the electrical system and building electrical installations.
The connection diagrams [see Section 5.7] show instruments with 6 or 12 output relays.
DANGER!
To avoid accidents, the following must be observed: - The safety instructions in [Section 5.1, Electrical connections]. - Connection of the instrument power supply as specified in this manual
- Not exceeding the specified maximum operating voltage at the AUX power supply terminals [see Section 2, Technical data]
When work is carried out on the instrument terminals and connecting cables, there is a risk of live components being touched inadvertently. The working voltage may present a hazard to health or may even be life-threatening.
If the above instructions are followed, and the precautions specified in [Section 1.2, Safety instructions], are taken, the risk of damaging equipment and assets or endangering life and limb can be significantly reduced.
With these instrument types [see Section 9, Instrument versions], provided that the specified voltage limits are not exceeded, it is possible to use phase–phase or phase–neutral connections. For typical examples, [see Figures 8 and 9].
CAUTION!
- The cables and the earthing conductor leading to the instrument must be permanently connected. It is not permitted for these to have plug-in connections, except for those connectors supplied with the instrument. - An external disconnecting device, such as an isolator or circuit breaker, must be fitted in the power supply line to the instrument. This must be located in the vicinity of the PQC and must be able to isolate all cables connected to the AUX terminals. It must be suitable for this application, comply with the requirements of IEC 60947-1 and IEC 60947-3, and be appropriately labelled as a disconnecting device for the PQC. This device must not disconnect the earthing conductor.
5.4 Voltage measurement Depending on the instrument type [see Section 9, Instrument versions], the PQC can measure one, two or three AC voltages. The voltage measurement inputs are electrically interconnected via high resistances. [See Section 2, Technical data], for the measurement ranges. DC voltages cannot be measured.
The PQC voltage measurement inputs are designed for 100 – 690 V AC networks.
It is possible to measure medium voltages using an x/100 V transformer.

19
It is not necessary to provide external overcurrent protection in the voltage measurement circuits since these are safety impedance-protected. In this case, a short-circuit-proof cable (double insulated stranded wire) must be used to connect the voltage measurement inputs.
DANGER!
To avoid accidents, the following must be observed:
- The safety instructions in [Section 5.1, Electrical connections].
When work is carried out on the instrument terminals and connecting cables, there is a risk of live components being touched inadvertently. The working voltage may present a hazard to health or may even be life-threatening.
If the above instructions are followed, and the precautions specified in [Section 1.2, Safety instructions], are taken, the risk of damaging equipment and assets or endangering life and limb can be significantly reduced.
Instrument types with single-phase measurement [see Section 9, Instrument versions]:
For single-phase measurement, the terminals L1 and N are connected as shown in the connec-tion diagrams in Section 5.7. The voltage can be measured between any two phases or between any phase and neutral.
Instrument types with 3-phase measurement [see Section 9, Instrument versions]:
For 3-phase measurement, the terminals L1, L2, L3 and N are connected as shown in the connection diagrams in [Section 5.7]. Phases L1, L2 and L3 must be connected in correct phase sequence.
If an instrument of the 3-phase type is used for single-phase measurement, only the terminals L1 and N are to be used. In this case, it is necessary to connect the terminals L2 and L3 to terminal N in order to avoid false readings being obtained.
For 3-phase measurement, it is advisable to connect the N terminal as well. This enables the high measurement accuracy of the PQC to be achieved when measuring phase–neutral voltages and the parameters derived from these. If no neutral conductor is present, the N terminal can be left unconnected. However, this is only advisable when the phases are symmetrically loaded.
NOTE!
With instrument types designed for three-phase measuring, the voltage mea-surement inputs not in use must be commoned with the terminal N. This is necessary, for example, with single-or two-phase connections.
If this is not done, phantom measurement readings may be displayed for the inputs that are not in use.
With three-phase measurement, automatic connection identification is not possible.
5.5 Current measurementThe PQC is designed for connection to x / 1 A and x / 5 A current transformers. Only AC currents can be measured; DC currents cannot be measured. Depending on the instrument type [see Section 9, Instrument versions], the PQC can measure one, two or three AC currents. [See Sec-tion 2, Technical data], for the measurement ranges.

20
DANGER!
If live current transformer circuits are interrupted, there is the danger that arcing may occur, which would cause electric shock, burns or eye injuries. In addition, red-hot metal particles could be spattered, which apart from the health hazard also constitute a fire risk.
To avoid accidents, the following must be observed:
- The safety instructions in [Section 5.1, Electrical connections]. - The current measurement inputs must be connected as specified. - The retaining screws on the connectors must be tightened to prevent the connectors accidently working loose. - The secondary-side connections of the current transformers must be short- circuited before the circuits to the PQC are interrupted or the connector removed!
When work is carried out on the instrument terminals and connecting cables, there is a risk of live components being touched inadvertently. The working voltage may present a hazard to health or may even be life-threatening.
If the above instructions are followed, and the precautions specified in [Section 1.2, Safety instructions], are taken, the risk of damaging equipment and assets or endangering life and limb can be significantly reduced.
DANGER!
The retaining screws on the sides of the connectors for the current transformer circuits must always be tightened before the instrument is put into service.
Tightening these retaining screws prevents the connectors from accidentally working loose and therefore reduces the risk of arcing.
DANGER!
If an earth terminal is provided at the secondary side of the current transformer, this must be connected to an earthing conductor!
CAUTION!
The following must be observed to ensure safe and reliable operation:
- The connection of the current measurement inputs must be via an external, electrically isolating current transformer.
- Overloading of the current transformers incorporated in the instrument must be avoided. The maximum allowable continuous current is 6 A AC; transient peaks 10 A.
These measures must be taken to ensure that the instrument is not damaged.
CAUTION!
The instrument terminals can become hot during operation.
- After the PQC has been operating, sufficient time must be allowed for the instrument and its terminals to cool down before work is carried out on the terminals.
Compliance with this stipulation will avoid the risk of burns.

21
Instrument types with single-phase measurement [see Section 9, Instrument versions]:
The current in any desired phase L is measured via an external, electrically isolating current transformer.
[See Section 2, Technical data], for the measurement range.
The terminals L1 – S1-S2 are connected as shown in the connection diagram in [Figure 2].
Instrument types with 3-phase measurement [see Section 9, Instrument versions]:
The currents in phases L1, L2 and L3 are measured via external, electrically isolating current transformers.
See Section 2, Technical data, for the measurement range.
The terminals L1 – S1-S2, L2 – S1-S2 and L3 – S1-S2 must be connected as shown in the con-nection diagram in [Figure 3], in correct phase sequence.
Unassigned current measurement inputs can be left unconnected.
NOTE!
In networks with a nominal voltage of 1000 V and more, the regulations call for the current transformer circuits to be earthed.
If networks with a nominal voltage of 1000 V or over are left unearthed, damage may occur to the instrument.
With three-phase measurement, automatic connection identification is not possible.
5.6 Output relays (control outputs)
DANGER!
To avoid accidents, the following must be observed:
- The safety instructions in [Section 5.1, Electrical connections].
- The output relays must be connected as set out in this operating manual.
- The working voltage of the relay contacts must not exceed the specified maximum level. Please refer to [Section 2, Technical data].
When work is carried out on the instrument terminals and connecting cables, there is a risk of live components being touched inadvertently. The working voltage may present a hazard to health or may even be life-threatening.
If the above instructions are followed, and the precautions specified in [Sec-tion1.2, Safety instructions], are taken, the risk of damaging equipment and assets or endangering life and limb can be significantly reduced.
CAUTION!
The following must be observed to ensure safe and reliable operation:
- Each of the output relay connections Q1 to Q12 may carry a current of no more than 3 A AC. [See Section 2, Technical data].
- The common pole P of the output relays may carry a current of no more than 10 A AC. [See Section 2, Technical data].
Compliance with these stipulations will avoid the risk of fire or possible damage to the instrument.

22
CAUTION!
The instrument terminals can become hot during operation.
- After the PQC has been operating, sufficient time must be allowed for the instrument and its terminals to cool down before work is carried out on the terminals.
Compliance with this stipulation will avoid the risk of burns.
Depending on instrument type, the PQC is equipped with 6 or 12 output relays (control outputs). Capacitors are connected to these via current-amplifying electromechanical devices (relays, contactors).
Connections are made to the terminals ‘Output relays Q1 to Q12, P’ as shown in the connec-tion diagrams in [Section 5.7].
In the case of the instrument versions with 6 output relays, the connections are made to the terminals ‘Output relays Q1 to Q6, P’.
The terminal P is used for connecting the common feed to the output relays.
If not all of the available output relays are to be used, it is recommended to connect the output cables starting with output 1 and leaving no gaps.
5.7 Connection diagrams of all PQC instrument types
5.7.1 Connection diagram: version PQC 1202401-XX
Figure 2 Connection diagram for PQC 1202401-XX
max
.6A
N
PE
L
ba
L/N L L/NL
2A T
AUX
S2S1
L
max
.10
A
Alarm Q1
Q11
Q10
Q9
Q8
Q7
Q6
Q5
Q4
Q3
Q2
Q12
P
Ausgangsrelaisoutput relays
250VAC~ 3A cos φ =1
Alarmrelaisalarm relays250VAC~ 3A cos φ =1
Versorgungsspannungsupply voltage
100V-15% – 240V+10% AC~5VA
Messspannungvoltage measurement100V–690VAC~ VDE

23
5.7.2 Connection diagram: version PQC 1202403-XX
Figure 3 Connection diagram for PQC 1202403-XX
max
.6A
L3L2
N
PE
L2
L3
L1
ba
L/N L1 L/NL
2A T
AUX
S2S1
L3L2
L1
max
.10
A
Alarm Q1
Q11
Q10
Q9
Q8
Q7
Q6
Q5
Q4
Q3
Q2
Q12
P
Ausgangsrelaisoutput relays
250VAC~ 3A cos φ =1
Alarmrelaisalarm relays250VAC~ 3A cos φ =1
Versorgungsspannungsupply voltage
100V-15% – 240V+10% AC~5VA
Messspannungvoltage measurement100V–690VAC~ VDE
max
.6A
max
.6A S2S1S2S1

24
5.7.3 Connection diagram: version PQC 0602401-XX
Figure 4 Connection diagram for PQC 0602401-XX
max
.6A
N
PE
L
ba
L/N L L/NL
2A T
AUX
S2S1
L
max
.10
A
Alarm Q1
Q6
Q5
Q4
Q3
Q2
P
Ausgangsrelaisoutput relays
250VAC~ 3A cos φ =1
Alarmrelaisalarm relays250VAC~ 3A cos φ =1
Versorgungsspannungsupply voltage
100V-15% – 240V+10% AC~5VA
Messspannungvoltage measurement100V–690VAC~ VDE

25
max
.6A
N
PE
L2
L3
L1
ba
L/N L1 L/NL
2A T
AUX
S2S1
L
max
.10
A
Alarm Q1
Q11
Q10
Q9
Q8
Q7
Q6
Q5
Q4
Q3
Q2
Q12
P
Ausgangsrelaisoutput relays
250VAC~ 3A cos φ =1
Alarmrelaisalarm relays250VAC~ 3A cos φ =1
Versorgungsspannungsupply voltage
100V-15% – 480V+10% AC~5VA
Messspannungvoltage measurement100V–690VAC~ VDE
5.7.4 Connection diagram: version PQC 1204801-XX
Figure 5 Connection diagram for PQC 1204801-XX

26
5.7.5 Connection diagram: version PQC 1204803-XX
Figure 6 Connection diagram for PQC 1204803-XX
Messspannungvoltage measurement100V–690VAC~ VDE100V–600VAC~ UL
max
.6A
L3L2
N
PE
L2
L3
L1
ba
L/N L1 L/NL
2A T
AUX
S2S1
L3L2
L1
max
.10
A
Alarm Q1
Q11
Q10
Q9
Q8
Q7
Q6
Q5
Q4
Q3
Q2
Q12
P
Ausgangsrelaisoutput relays
250VAC~ 3A cos φ =1
Alarmrelaisalarm relays250VAC~ 3A cos φ =1
Versorgungsspannungsupply voltage
100V-15% – 480V+10% AC~5VA
max
.6A
max
.6A S2S1S2S1

27
5.7.6 Connection diagram: version PQC 0614801-XX
Figure 7 Connection diagram for PQC 0614801-XX
max
.6A
N
PE
L
ba
L/N L L/NL
2A T
AUX
S2S1
L
max
.10
A
Alarm Q1
Q6
Q5
Q4
Q3
Q2
P
Ausgangsrelaisoutput relays
440VAC~ 3A cos φ =1 VDE250VAC~ 3A cos φ =1 VDE
Alarmrelaisalarm relays250VAC~ 3A cos φ =1
Versorgungsspannungsupply voltage
100V-15% – 480V+10% AC~5VA
Messspannungvoltage measurement100V–690VAC~ VDE100V–600VAC~ UL

28
5.7.7 Options for connecting the AUX power supply for PQC XXX480X-XX versionsConnecting the AUX terminals to a 100 to 480 V AC power supply.
Version: PQC XXX480X-XX:
400 V AC / 415 V AC – networks without a neutral conductor N
5.7.7.1 Connection diagram for 400/415 V networks with no neutral conductor
Figure 8 Part of the connection diagram for 400 /415 V networks with no neutral conductor
Version: PQC XXX480X-XX: 690 V AC – Networks with a neutral conductor N (voltage phase–neutral N = 400 V AC)
5.7.7.2 Connection diagram for 690 V networks with a neutral conductor
Figure 9 Part of the connection diagram for 690 V networks with a neutral conductor
N
L2
NL3
L1
L2L1 L3 L/NL
2A T
PQC
AUX
2A T
L2
L3
L1
L2L1 L3 L/NL
2A T
PQC
AUX
N
L2
NL3
L1
L2L1 L3 L/NL
2A T
PQC
AUX
2A T
L2
L3
L1
L2L1 L3 L/NL
2A T
PQC
AUX

29
6 Commissioning (Initial start-up)DANGER!
To avoid accidents, the following must be observed:
The PQC must be installed in accordance with its intended use before power is switched on.
All the connectors supplied with the instrument must be plugged in, and the earth connection must be made.
Before start-up, it must be ensured, for example by means of a closed door or a suitable cover, that the instrument terminals can no longer be touched.
If the instrument terminals and connecting cables are exposed during opera-tion, there is a risk of live components being touched inadvertently. The working voltage may present a hazard to health or may even be life-threatening.
If the above instructions are followed, and the precautions specified in [Section 1.2, Safety instructions], are taken, the risk of damaging equipment and assets or endangering life and limb can be significantly reduced.
6.1 Alarm functionAlarm signals generated internally in the instrument can be assigned to the volt-free contact of the alarm relay. These alarm signals can comprise status signals, status of the optional digital inputs, set alarm limits exceeded or instrument faults.
The assignment of the internal PQC alarm signals to the alarm relay is carried out in a menu dialogue.
[See Section 8.5.3.2, Alarm management].
The terminals Alarm a and Alarm b are connected as shown in the connection diagrams in [Section 5.7]. Connection diagrams of all PQC instrument types. [See Section 2, Technical data], for the contact rating.
6.1.1 List of alarms and messagescos · φ – alarm Given if PQC cannot adjust cos φ into the control band.
Undervoltage Given if measured voltage drops below the set limit. ·
Untercurrent Given if measured current falls below 15 mA. ·
Overcurrent Given if ratio I · rms/I50 Hz / 60 Hz exceeds the set limit.
TDHI Given if THDI exceeds the set limit. ·
Switching cycles Given if the number of switching cycles for the capacitors ·exceeds the set limit.
V harmonic Given if a harmonic voltage exceeds the set limit. ·
I harmonic Given if a harmonic current exceeds the set limit. ·
Zero stage (dud) detected Given if a capacitor stage in operation loses more corrective ·power than the set limit.
Voltage blackout detected Given if the power supply is interrupted for longer than ·x ¼ cycles.

30
Connection not identified Given if the connection has not been identified during initial ·start-up.
Stages not identified Given if the corrective power of the capacitor stages has not ·been identified during initial start-up.
6.2 Safety precautions before start-upAfter all installation work has been carried out as described in [Section 5, Installation], and the above safety instructions have been complied with, the power supply may be switched on and the PQC started up.
6.3 Functional checkoutOnce the power has been switched on, it takes several seconds until the PQC starts up. The backlighting of the LCD display is the first visible indication, then, after about five seconds, the PQC is ready for operation. Information is displayed on the LCD screen, and the PQC can be operated by means of the keys.
Figure 10 PQC Start screen (firmware version number may be different)
6.4 ConfigurationThe PQC is configured using the keys to navigate the menu [see Table 3, Key functions].
6.5 Automatic commissioningIf Detection is selected in the Initial start-up menu, then Stage + connection and confirmed with Continue, the instrument carries out the capacitor stage and connection identification procedure automatically.
6.5.1 Automatic connection identificationWhen the operating voltage is applied to the instrument for the first time, and Continue is selected in the Initial start-up dialogue, it is possible that the PQC automatically carries out the connection identification procedure, i.e. the instrument itself identifies in which phase angle the current and voltage paths are connected. If the PQC does not succeed in this, for example because the network is very unstable, the calibration procedure should be repeated under more stable network conditions. It is also possible to enter the phase angle (connection type) manu-ally, [see Section 8.1, PQC initial start-up. Table 1 below shows the appropriate connections for current transformers].

31
Automatic connection identification is not possible with 3-phase measurement. The voltage and current inputs must be connected in correct phase sequence.
Table 1 Connection types for current transformers in L1, L2 and L3
Connection type Connection to voltage path
L/N – L L/N – L L/N – L
0 L1 – N L2 – N L3 – N
1 L1 – L3 L2 – L1 L3 – L2
2 N – L3 N – L1 N – L2
3 L2 – L3 L3 – L1 L1 – L2
4 L2 – N L3 – N L1 – N
5 L2 – L1 L3 – L2 L1 – L3
6 N – L1 N – L2 N – L3
7 L3 – L1 L1 – L2 L2 – L3
8 L3 – N L1 – N L2 – N
9 L3 – L2 L1 – L3 L2 – L1
10 N – L2 N – L3 N – L1
11 L1 – L2 L2 – L3 L3 – L1
Current transformer in:
↑ L1
↑ L2
↑ L3
6.5.2 Automatic identification of the connected capacitor stagesHaving performed the connection identification procedure, the PQC then carries out the automa-tic capacitor stage identification process (c/k setting). During this calibration procedure, all the control contacts of the instrument are individually closed and opened again several times. This identifies the switching sequence, but the procedure can take several minutes.
Later, during normal operation, the PQC checks its saved parameters at certain intervals of time. If a capacitor stage fails, after a certain time this will be identified as a zero stage (with zero power rating) and no longer used in the regular control process.
Note: If the low voltage network is fed from several transformers arranged in parallel, the capa-citor current is distributed between all the transformers. If the measurement is not carried out via summation current transformers, the change in the current measurable by the PQC when capacitor stages are switched in is too small, which may result in errors in the automatic capa-citor stage identification process. We therefore recommend that in such situations the automatic capacitor stage identification function be disabled and the appropriate parameters (c/k setting, switching sequence and number of capacitor stages) programmed manually [see Section 8.1].

32
6.5.3 Calculation of c/kFormula 1 Calculation of c/k
where IA = Response current in mA to be set Qsmallest stage = Capacitor power rating of the smallest stage in var (not the total system power rating) V = Network voltage in volts at the primary side of the voltage transformer k = Transformer ratio (primary side / secondary side)
Table 2 c/k settings at 400 V AC and 50 Hz
c/k settings for 400 V AC 50 Hz networks
Current Stage rating (not total) in kvar of the power factor correction system
A /A k 2.5 5 6.25 7.5 10 12.5 15 20 25 30 40 50 60 100
30 / 5 6 400 800 980 1200 1600
40 / 5 8 300 600 740 900 1200 1500
50 / 5 10 240 480 590 720 960 1200 1440
60 / 5 12 200 400 490 600 800 1000 1200 1600
75 / 5 15 160 320 390 480 640 800 960 1280 1600 1920
100 / 5 20 120 240 300 360 480 600 720 960 1200 1440 1920
150 / 5 30 80 160 200 240 320 400 480 640 800 960 1280 1600 1920
200 / 5 40 60 120 150 180 240 300 360 480 600 720 960 1200 1440
250 / 5 50 50 100 120 140 190 240 290 380 480 580 770 960 1150 1920
300 / 5 60 40 80 100 120 160 200 240 320 400 480 640 800 960 1600
400 / 5 80 30 60 80 90 120 150 180 240 300 360 480 600 720 1200
500 / 5 100 20 50 60 70 100 120 140 190 240 290 380 480 580 960
600 / 5 120 40 50 60 80 100 120 160 200 240 320 400 480 800
750 / 5 150 30 40 50 60 80 100 130 160 190 260 320 380 640
1000 / 5 200 20 30 40 50 60 70 100 120 140 190 240 290 480
1500 / 5 300 20 20 30 40 50 60 80 100 130 160 190 320
2000 / 5 400 20 30 40 50 60 70 100 120 140 240
2500 / 5 500 20 30 40 50 60 80 100 120 190
3000 / 5 600 20 30 40 50 60 80 100 160
4000 / 5 800 20 30 40 50 60 70 120
5000 / 5 1000 20 30 40 50 60 100
6000 / 5 1200 20 30 40 50 80
7000 / 5 1400 20 30 40 70
If the ratings of the stages and the current transformers are not to be found in the table, or the nominal voltage of the power factor correction system is different, the above formula must be used to calculate the c/k setting.
IA = 0.65 · Qsmallest stage · 1000 ≈ 0.375 · Qsmallest stage · 1000 [mA]V · √3 · k V · k

33
7 Description of the menu
Key
Action PQC overview Up Down Start submenuDisplay
information
The instrument is operated with the following keys:
Table 3 Key functions
Icon Key Function
Escape Go back one level in the system tree.
UpIncrease a selected parameter.
Select another menu item above.
DownDecrease a selected parameter.
Select another menu item below.
Return/EnterOne level lower in the system tree (e.g. selecting a highlighted parameter).
Select and confirm a selected element (e.g. adopt value).
Info Help text
The PQC can be operated in three languages, which are selected from the main menu via Initial start-up � Language [see Section 8.1]:
German ·
English ·
French ·

34
7.1 Menu overview
Figure 11 Menu structure 1
Commissioning About PQC...Info / statusSettingsManualControl
Overview phaseL1
Overview phaseL3
Overview phaseL2
Overview cap. stages
Main Menu
PQCoverview
Controldiagramm
Profiles 1 ... 5
NominalvoltageAlarm relay
Temperature and IO Extension
Output 1...5
Set limits ExtensionsNetworkratings
Capacitorstages Alarmmanagement
Factory settings
Detuning p
Dischargetime
Zero stagelimit
Fixedstages
Cyclicswitching
Displayalarm
controltrip
Limitation PhaseSoll cos φ SwitchingdelayParallelshift
General
Nominalfrequency
Settings
Controlprofiles

35
Figure 12 Menu structure 2
Figure 13 Menu structure 3
Q powerstill available OvercurrentTotal
Q power
Controlstatus
c/k settings Connectiontype
Switchingsequence
Availablestages
Automatic ormanual control
System power
Extensions: Inputs and Outputs
Extensions:Temperature
Manual frequency analysis
Cap. stagepower table
I harmonicsdiagram
I harmonicstable
V harmonicstable
V harmonicsdiagram
Info / status
Factorysettings
Clearswitching cycles
PQCreset
Flashmode service(coming soon)
CLI service(coming soon)
Flashmodetemperature and IO
CLI,temperature and IO

36
8 Main menuThe following submenus can be selected from the main menu:
PQC overview ·
Control diagram ·
Manual control (password protected) ·
Settings (password protected) ·
Info / status ·
Initial start-up (password protected) ·
About PQC… ·
Key
Action PQC overview Select SelectOpen
submenu–
Figure 14 Main menu 1/3
Figure 15 Main menu 2/3
Figure 16 Main menu 3/3

37
8.1 PQC initial start-up
Key
ActionBack to
main menu
Select language de, en, fr
Select language de, en, fr
Confirm language and return to
parameter selection–
8.1.1 Language selection on start-up
Figure 17 Changing the working language
When the PQC is commissioned, the following parameters can be changed:
Language · German, English (factory default setting), French
Voltage transformer · Range 1 to 300
Current transformer · Range 1 to 7000
Detection · Stage + Connection, Stage, Connection or Manual
Stage + Connection
The PQC carries out the automatic stage and connection identification procedure [see Figure 18 on page 38].
Stage
The PQC carries out the automatic stage identification procedure. The connection must be set manually [see Figures 21 and 22 on page 38].
Connection
The PQC carries out the automatic connection identification procedure. The parameters for stage detection must be set manually [see Figures 19 and 20 on page 38].
Manual
All parameters for connection and stage identification must be set manually [see Figures 23 and 24 on page 38].
Key
ActionBack to
main menuSelect
parameter +Select
parameter -Confirm –

38
All start-up variants and their submenus:
Figure 18 Identification: Stage + Connection
�
Figure 19 Identification: Connection Figure 20 Identification: Connection submenu
�
Figure 21 Identification: Stage Figure 22 Identification: Stage submenu
�
Figure 23 Identification: Manual Figure 24 Identification: Manual submenu
The types of connection shown in Figures 22 and 24 correspond to the second column in [Table 1] (current transformer in L1 path, installed in the forward direction).

39
8.1.2 Start-upIn the first step, the type of connection is determined with the help of the phase angle.
In the second step, the connected capacitor stages are identified.
Figure 25 Connection identification started Figure 26 Capacitor stage identification started
Once the capacitor stage identification procedure is completed, the results are indicated. Pressing the Enter key then displays the PQC overview screen.
Figure 27 Start-up completed
If the ESC key is pressed to cancel the start-up procedure, or if the procedure could not be suc-cessfully completed, this is displayed with an error message. In this state, the PQC is not able to control correctly. The initial start-up procedure (automatic or manual) must be started afresh.
8.2 PQC overviewIn instrument types with 3-phase measurement, the phase marked with an asterisk * is the one that the PQC is using for control [see Figure 29 on page 40]. Once the automatic commissio-ning procedure has been completed, the PQC overview screen appears. Pressing the ESC key displays the main menu again. In instrument versions with only single-phase measurement, L1 is always shown as the phase that the PQC is using for control, regardless of which phase the current is actually being measured in [see Figures 28 and 30 on page 40]
Key
ActionBack to
main menu– –
Display each screen in turn (preselected
control phase)–
40
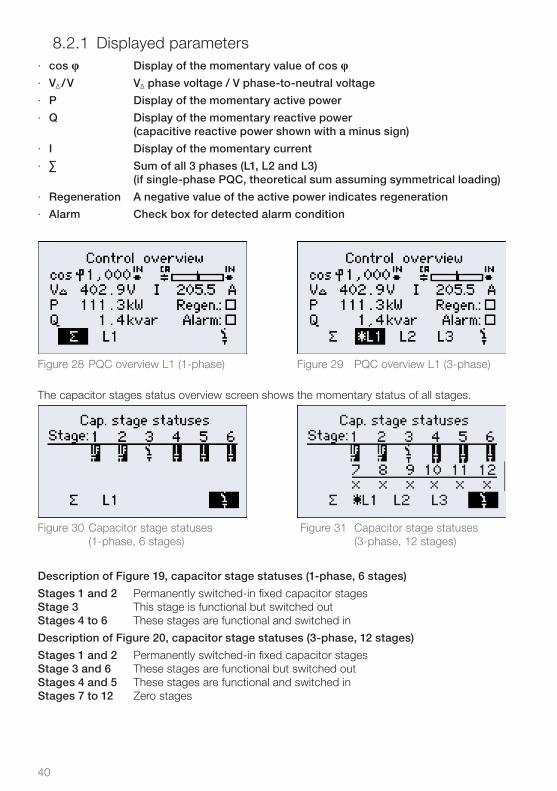
8.2.1 Displayed parameterscos · φ Display of the momentary value of cos φ
V · ∆ / V V∆ phase voltage / V phase-to-neutral voltage
P Display of the momentary active power ·
Q Display of the momentary reactive power · (capacitive reactive power shown with a minus sign)
I Display of the momentary current ·
∑ Sum of all 3 phases (L1, L2 and L3) · (if single-phase PQC, theoretical sum assuming symmetrical loading)
Regeneration A negative value of the active power indicates regeneration ·
Alarm Check box for detected alarm condition ·
Figure 28 PQC overview L1 (1-phase) Figure 29 PQC overview L1 (3-phase)
The capacitor stages status overview screen shows the momentary status of all stages.
Figure 30 Capacitor stage statuses Figure 31 Capacitor stage statuses (1-phase, 6 stages) (3-phase, 12 stages)
Description of Figure 19, capacitor stage statuses (1-phase, 6 stages)
Stages 1 and 2 Permanently switched-in fixed capacitor stages Stage 3 This stage is functional but switched out Stages 4 to 6 These stages are functional and switched in
Description of Figure 20, capacitor stage statuses (3-phase, 12 stages)
Stages 1 and 2 Permanently switched-in fixed capacitor stages Stage 3 and 6 These stages are functional but switched out Stages 4 and 5 These stages are functional and switched in Stages 7 to 12 Zero stages

41
8.3 Control diagramThe control diagram shows the currently selected control characteristic curve (active control profile) and provides visualization of the momentary operating point.
8.3.1 ScaleOne scale division on the y-axis represents ²⁄³ × smallest capacitor stage.
Key
ActionBack to main
menuZoom + Zoom - – Additional info
Zoom + Zoom in on control diagram
Zoom - Zoom out of control diagram
Additional Info
The following parameters are displayed in a separate dialogue:
target cos φ, limitation L, parallel shift PS and zoom factor
Figure 32 Control diagram Figure 33 Control diagram with additional information
Figure 34 Zoomed in on control diagram

42
8.4 Manual control
CAUTION!
Switching in capacitor stages manually can result in overcorrection of the sys-tem. This can cause other problems, such as resonance-induced overvoltage in the supply network and/or damage to the capacitor stages.
The supply network from which the capacitor stages controlled by the PQC are operated must be monitored for resonant conditions and overvoltage whenever stages are switched in manually.
This measure will avoid damage to the capacitor stages or to loads connected to the supply network concerned.
When Manual control is selected in the main menu, the following submenu appears.
∆Q power Corrective power still lacking to achieve target cos φ – Capacitive corrective power lacking is shown as positive. – Inductive corrective power lacking is shown as negative.
Available Q power Corrective power still available for switching in
Figure 35 Manual control
Key
Action – Select Select Set / Select –
Manual Control: · When this function is enabled, selecting Continue then displays the Stages submenu.
Switch out stages: · This function switches all switched-in capacitor stages out again.
Figure 36 Manual control enabled Figure 37 Manual control: Switch out stages
43
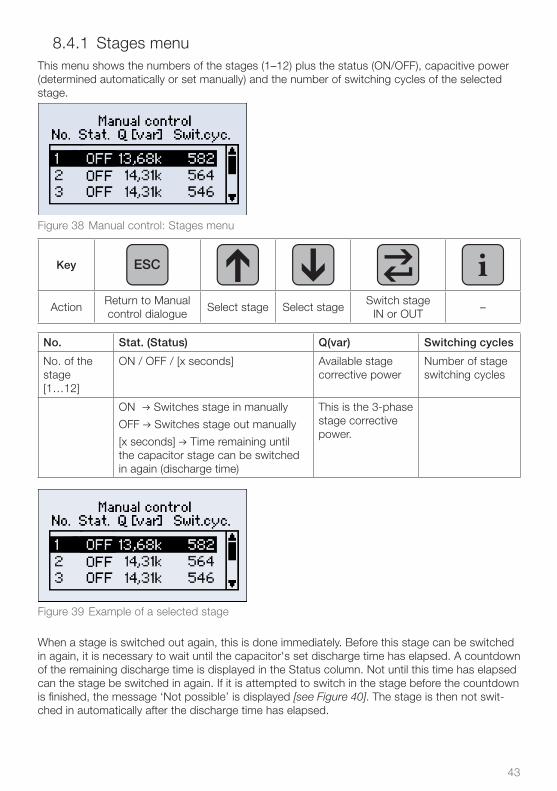
8.4.1 Stages menu This menu shows the numbers of the stages (1–12) plus the status (ON/OFF), capacitive power (determined automatically or set manually) and the number of switching cycles of the selected stage.
Figure 38 Manual control: Stages menu
Key
ActionReturn to Manual control dialogue
Select stage Select stageSwitch stage
IN or OUT–
No. Stat. (Status) Q(var) Switching cycles
No. of the stage [1…12]
ON / OFF / [x seconds] Available stage corrective power
Number of stage switching cycles
ON � Switches stage in manually
OFF � Switches stage out manually
[x seconds] � Time remaining until the capacitor stage can be switched in again (discharge time)
This is the 3-phase stage corrective power.
Figure 39 Example of a selected stage
When a stage is switched out again, this is done immediately. Before this stage can be switched in again, it is necessary to wait until the capacitor's set discharge time has elapsed. A countdown of the remaining discharge time is displayed in the Status column. Not until this time has elapsed can the stage be switched in again. If it is attempted to switch in the stage before the countdown is finished, the message ‘Not possible’ is displayed [see Figure 40]. The stage is then not swit-ched in automatically after the discharge time has elapsed.

44
Figure 40 Message on failed attempt to switch in a stage
8.5 SettingsThe Settings menu is selected from the main menu. It offers the following submenus:
Control profiles · 5 profiles, [see Section 8.5.1].
General · Capacitor stages, Set limits, Alarm management, Extensions
Factory settings · PQC reset, Clear switching cycles
Key
ActionBack to main
menuSelect Select Open submenu –
Figure 41 Settings
8.5.1 Settable control profilesFive control profiles can be individually selected and edited. The instrument is supplied with the following factory settings:
Profile 1 2 3 4 5
Target cos φ 0.92 ind 1.0 1.0 0.92 ind 0.96 cap
Parallel shift -1.0 0.0 +1.0 -1.0 -1.0
Limitation +1.0 off off off off
Switching delay 45 sec 45 sec 45 sec 45 sec 45 sec
Phase L1 L1 L1 L1 L1

45
8.5.2 Typical control profile applicationsProfile 1 Describes the ideal control characteristic curve for all · consumer networks where an inductive cos φ is called for.
Profile 2 Suitable for · consumer networks where an average cos φ =1 is to be achieved.
Profile 3 Suitable for · consumer networks where cos φ is close to 1 but overcorrection is to be avoided.
Profile 4 Suitable for · consumer networks, as described in Profile 1, but which have their own generating facilities (e.g. CHP units) with permanent or frequent feed-in (regeneration) to the power supply network.
Profile 5 Suitable for · generating networks, such as hydropower or wind turbines, where a capacitive cos φ is called for.
More information is given in the FRAKO Application Note.
Figure 42 Control profiles
Key
Action Control setting Select profile Select profile Set profile –
Figure 43 Control profile parameters
Key
ActionProfile selection (Save Yes/No)
Select parameter
Select parameter
Parameter selection Back to parameter
selection–

46
Active power
Reactive powerind
2
3
cap
Regeneration
Switch in
Switch out
One division =0.65 × smallest cap. stage
-3
-2
Key
ActionProfile selection (Save Yes/No)
Increase value +
Increase value -
Back to parameter selection
–
Target cos · φ 0.90 capacitive to 0.80 inductive (in increments of 0.01)
Parallel shift · -2.0 to +4.0 (in increments of 0.5)
Limitation · -2.0 to +2.0 (in increments of 0.5) and OFF
Switching delay · 5 to 500 s (in 1 s increments)
Phase · L1, L2 or L3: select control phase
Active · Activate control profile (only one profile can be active)
Save · Save changes in control profile
8.5.2.1 Setting target cos φThe desired value of target cos φ can be set from 0.80 inductive to 0.90 capacitive in increments of 0.01.
The mode of operation of this adjustment can be seen in [Figure 44] and [Figure 45].
If the system operates within the band range shown, no switching operations will be activated.
However, if the system operates outside the band range, the PQC will try to return to within the band range with the minimum number of switching cycles.
Figure 44 Control response after setting target cos φ = 1, limitation = 0, parallel shift = 0

47
Figure 45 Control response after setting target cos φ = 0.92 ind, limitation = 0, parallel shift = 0
In [Figure 45] the action of the PQC during regeneration (feed-in to the supply network) can be seen. The ‘kink’ in the band (characteristic line) is not reflected in the regeneration quadrants. Instead, the band extends laterally from the point where it crosses the reactive power axis (y-axis).
By shifting the band into the capacitive range [see Figure 47], inductive reactive power during regeneration can be virtually avoided.
When a capacitive target cos φ is set, the control band is a mirror image from the power draw side to the regeneration side [see Figure 50].
8.5.2.2 Parallel shiftThis setting causes a parallel shift of the band range shown above through the set value. It will shift in the inductive direction if the plus sign is used, and in the capacitive direction if the minus sign is used.
The values -2 to +4 can be set in increments of 0.5. The effects are illustrated by the two examp-les in [Figure 46] and [Figure 47].
Figure 46 Control response after setting target cos φ = 1, limitation = 0, parallel shift = +1.0
Active power
Reactive powerind
1
3
cap
Regeneration
Switch in
Switch out
One division =0.65 × smallest cap. stage
-2
-3
-1
Active power
Reactive powerind
3
2
cap
Regeneration
Switch in
Switch out
One division =0.65 × smallest cap. stage
-3
-2
Active power
Reactive powerind
1
3
cap
Regeneration
Switch in
Switch out
One division =0.65 × smallest cap. stage
-2
-3
-1
Active power
Reactive powerind
3
2
cap
Regeneration
Switch in
Switch out
One division =0.65 × smallest cap. stage
-3
-2

48
The set target cos φ is therefore the upper limit of the control band. Overcompensation is avoi-ded.
Figure 47 Control response after setting target cos φ = 0.92 ind, limitation = OFF, parallel shift = -1.0
Here the set target cos φ constitutes the lower (more inductive) limit of the control band. When regeneration occurs, the lower (more inductive) limit constitutes a target cos φ of 1. This means that no inductive reactive power can result during feed-in operation.
(This is the recommended setting when operating induction generators in parallel with the supply network.)
8.5.2.3 Limitation LThis setting gives new possibilities that could not be attained previously due to conflicting requi-rements.
The range of values for L are -2 to +2 in increments of 0.5, including the setting OFF. Setting L at 1 and the target power factor at 1.00 has the same effect as the parallel shift described above.
If the target cos φ is not set at 1, a kink results in the control curve, as shown in the example in [Figure 48]. The limitation forms an absolute boundary beyond which the reactive power may not go.
Reactive powerind
4
3
cap
Regeneration
Switch in
Switch out
One division =0.65 × smallest cap. stage
-2
-1
Active power
Reactive powerind
2
1
cap
Regeneration
Switch in
Switch out
One division =0.65 × smallest cap. stage
-3
Active power
Reactive powerind
4
3
cap
Regeneration
Switch in
Switch out
One division =0.65 × smallest cap. stage
-2
-1
Active power
Reactive powerind
2
1
cap
Regeneration
Switch in
Switch out
One division =0.65 × smallest cap. stage
-3
Active power
Figure 48 Control response after setting target cos φ = 0.92 ind, limitation = +1.0

49
This setting has the following effects:
The target power factor is attained, on average, in the upper power range. ·
Overcorrection (capacitive, usually disruptive) is avoided in the low load range. ·
An effective combination of parallel shift and limitation is illustrated in [Figure 49].
Figure 49 Control response after setting target cos φ = 0.92 ind, limitation = +1.0, parallel shift = -1.0
This example illustrates:
In the · upper power range, the set cos φ is specified as the lower more inductive limit value.
Overcorrection is avoided in the · low load range.
For the sake of completeness, the following [Figure 50] shows the characteristics of the control band when set for a capacitive target cos φ. In this case, the control range does not extend late-rally at the reactive power axis into the regeneration quadrants, but is mirrored from the power draw side into the regeneration side.
Active power
Reactive powerind
cap
Regeneration
Switch in
Switch out
One division =0.65 × smallest cap. stage
-2
-3
4
3
-1
Active power
Reactive powerind
cap
Regeneration
Switch in
Switch out
One division =0.65 × smallest cap. stage
-3
3
2
-2
Active power
Reactive powerind
cap
Regeneration
Switch in
Switch out
One division =0.65 × smallest cap. stage
-2
-3
4
3
-1
Active power
Reactive powerind
cap
Regeneration
Switch in
Switch out
One division =0.65 × smallest cap. stage
-3
3
2
-2
Figure 50 Control response after setting target cos φ = 0.95 cap, limitation = -1.0, parallel shift = 0

50
8.5.2.4 Switching delayThe switching delay, i.e. the time between one switching action and the next for the same capacitor stage, can be set between the values of 5 and 500 seconds in 5-second increments. When a stage is to be switched in or out, the PQC waits for this switching delay to elapse before switching takes place. If more stages are required, the switching time delay is shortened in accordance with the number of stages concerned:
e.g. 2 stages required = switching delay time / 2, or 3 stages required = switching delay time / 3.
In order to keep the wear of the contacts to a minimum, the switching delay time should be set to less than 45 seconds only in exceptional cases. The discharge time, which ensures that the capacitors are fully discharged before they are switched on again, takes precedence over, i.e. overrides, the switching delay.
8.5.2.5 Selecting the control phaseThe control profiles menu also includes the Phase setting. This is used to select the phase used by the PQC for control purposes (can only be edited on 3-phase PQCs).
Any one of the three phases L1, L2 and L3 may be selected (with single-phase PQCs, the phase L1 is a fixed setting).
On the PQC overview screen, the phase marked with an asterisk * on its left is the one selected for the PQC to use for control purposes.
Note: with single-phase PQCs, the connected phase is always the one used for control purpo-ses.
Figure 51 Phase L1 is the control phase
8.5.3 General settingsSelecting Settings in the main menu enables the General menu to be displayed. The following submenus can then be selected:
Capacitor stages · Cyclic switching, discharge time, fixed capacitor stages, choke factor, zero stage limit
Set limits · Settings for the limits of parameters
Alarm management · Alarm relay, PQC trip and display alarms
Network ratings · Nominal Voltage, nominal frequency
Extensions · A submenu is provided for every optional Extension.
Key
Action Back to Settings Select Select Open submenu –
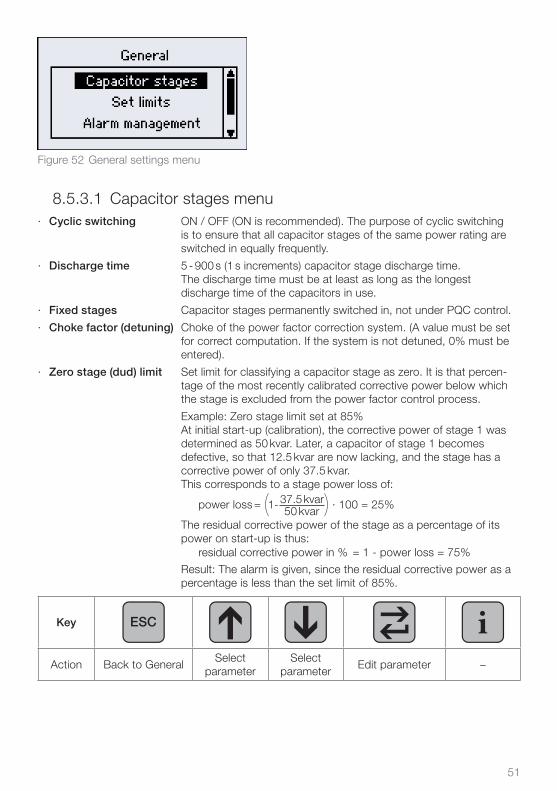
51
Figure 52 General settings menu
8.5.3.1 Capacitor stages menuCyclic switching · ON / OFF (ON is recommended). The purpose of cyclic switching
is to ensure that all capacitor stages of the same power rating are switched in equally frequently.
Discharge time · 5 - 900 s (1 s increments) capacitor stage discharge time. The discharge time must be at least as long as the longest discharge time of the capacitors in use.
Fixed stages · Capacitor stages permanently switched in, not under PQC control.
Choke factor (detuning) · Choke of the power factor correction system. (A value must be set for correct computation. If the system is not detuned, 0% must be entered).
Zero stage (dud) limit · Set limit for classifying a capacitor stage as zero. It is that percen-tage of the most recently calibrated corrective power below which the stage is excluded from the power factor control process.
Example: Zero stage limit set at 85% At initial start-up (calibration), the corrective power of stage 1 was determined as 50 kvar. Later, a capacitor of stage 1 becomes defective, so that 12.5 kvar are now lacking, and the stage has a corrective power of only 37.5 kvar. This corresponds to a stage power loss of: The residual corrective power of the stage as a percentage of its power on start-up is thus:
Result: The alarm is given, since the residual corrective power as a percentage is less than the set limit of 85%.
Key
Action Back to GeneralSelect
parameterSelect
parameterEdit parameter –
residual corrective power in % = 1 - power loss = 75%
power loss = (1- 37.5 kvar) · 100 = 25%50 kvar

52
Figure 53 Capacitor stages
Key
ActionCapacitor
stage menuChange
parameterChange
parameterSave
parameter–
8.5.3.2 Setting alarm limitsThe following parameters can be adjusted in the Set limits menu:
Switching cycle counter · 10 k – 500 k (in increments of 1k), default setting 80 kTHDI · 5% – 500% (in increments of 1%)V/I harmonics · 0% – 100% (in increments of 0.01%)Overcurrent · 1.00 – 2.00 (in increments of 0.01)Voltage blackout (sag) · 50% – 93% (in increments of 1%)Number of ¼ cycles · 2 – 4 (in increments of 1)Detecting phase · L1, L2, L3
Key
Action Back to Settings Select limit Select limit Edit limit –
Figure 54 Set limits 1/2 Figure 55 Set limits 2/2

53
Figure 56 Change set limit for switching cycle counter
8.5.3.2.1 OvercurrentOvercurrent is the theoretically determined ratio of the root-mean-square current to the funda-mental current in the capacitor (Irms/I50Hz/60Hz). It therefore indicates how large the proportion of harmonic currents is in comparison with the fundamental current.
The choke factor (detuning) p of the power factor correction system is also taken into account in this theoretical computation.
The overcurrent in the capacitor can only be computed accurately if the system's choke ·factor (detuning) is entered correctly. If the system is not detuned, the value p = 0% should be entered.
8.5.3.2.2 Detection of voltage blackout (sag)The detection of voltage sag is a function designed to protect the capacitors and their contactors against power cuts that are short enough to make the capacitor contactors open and immedia-tely close again.
This function has the following setting options:
Detecting phase: The phase to which the operating coil of the capacitor contactor is ·connected
Number of ¼ cycles: Time before an undervoltage alarm is given ·Adjustable from a ½ wave to a full wave of the sinusoidal voltage signal in increments of ¼ waves
Example: In a 50 Hz supply, ½ wave = 10 ms, ¾ wave = 15 ms, full wave (4/4) = 20 ms
Voltage sag in % (100% being the nominal supply voltage):
This is the root-mean-square voltage setting at which the voltage blackout (sag) detection function is to react.
Presettings: Half-wave detection, alarm given if voltage at L1 drops below 85% of the nominal voltage.
Settings: Voltage blackout (sag): 85% Number of ¼ cycles: 2 (½ wave) Detecting phase: L1
For this very important function to operate effectively, it is vitally important that the phase selected for the instrument power supply to the switching outputs is the same one selected for the voltage measurement.
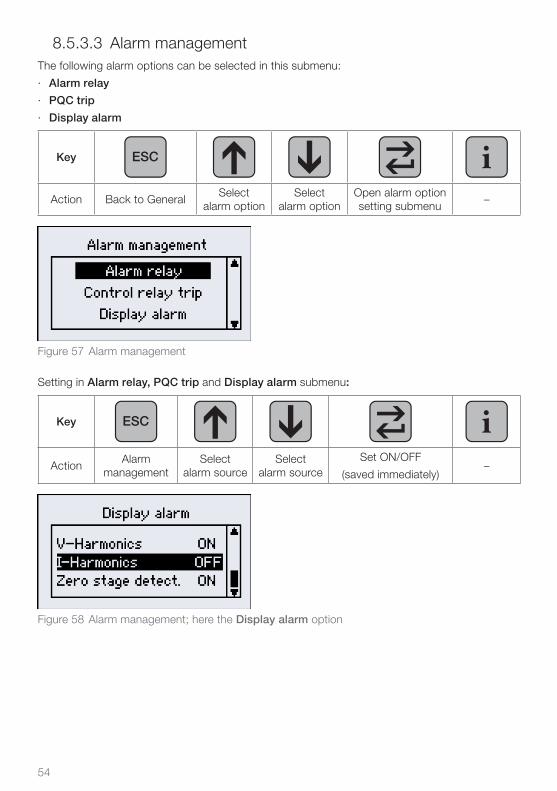
54
8.5.3.3 Alarm managementThe following alarm options can be selected in this submenu:
Alarm relay ·
PQC trip ·
Display alarm ·
Key
Action Back to GeneralSelect
alarm optionSelect
alarm optionOpen alarm option setting submenu
–
Figure 57 Alarm management
Setting in Alarm relay, PQC trip and Display alarm submenu:
Key
ActionAlarm
managementSelect
alarm sourceSelect
alarm sourceSet ON/OFF
(saved immediately)–
Figure 58 Alarm management; here the Display alarm option

55
The following alarms / actions can be enabled / disabled in all submenus of the Alarm manage-ment menu:
cos · φ alarm
Undervoltage ·
Undercurrent ·
Overcurrent ·
THDI ·
Switching cycles ·
V harmonics (harmonic voltage) ·
I harmonics (harmonic current) ·
Zero stage (dud) detected ·
Voltage blackout (sag) detected ·
8.5.3.4 Optional Modbus RTU interface
Key
ActionBack to
main menuSelect
parameterSelect
parameterEdit parameter –
The Modbus setting menu is navigated to as follows: Settings / General / Extensions / Modbus
These settings are only possible with PQC versions xxxxx-2x.
Figure 59 Extensions menu Figure 60 Modbus configuration
The following parameters can be set in the Modbus configuration menu:
Bus address · The instrument is accessed at the set bus address
Baud rate · 1200, 2400, 4800, 9600, 19 200, 38 400, 57 600, 115 200
Data bits · 5 to 8
Stop bits · 1 or 2
Parity · even, odd or none
Further details are given in the Modbus specification.

56
8.5.3.5 Factory settingsReset PQC · Reset the PQC to its factory settings
(This does not affect the switching cycle counters.)
Clear switching cycle counter · Reset switching cycle counters for all stages to zero (singly or individually, service password necessary; [see Section 8.5.3.6].
Note: A switching cycle counter may only be reset after the corresponding contactor has been replaced!
Key
ActionBack to
Settings / GeneralSelect
reset typeSelect
reset typeSelect
reset type–
Figure 61 Factory default settings
Key
ActionBack to factory default settings
Up Down Confirm action –
8.5.3.6 Password protectionThe PQC uses a password to prevent sensitive menu items being accessed by unauthorized persons. This is entered by means of the Up and Down keys.
Protected menu items:
Settings · Security level 1
Manual control · Security level 1
Initial start-up · Security level 1
Reset switching cycle counters · Security level 2
Security level 1: Password: last four digits of the serial number [see label on PQC or Section 8.7]
Example: Serial number 11024 � Password 1024
Security level 2: password: 3725
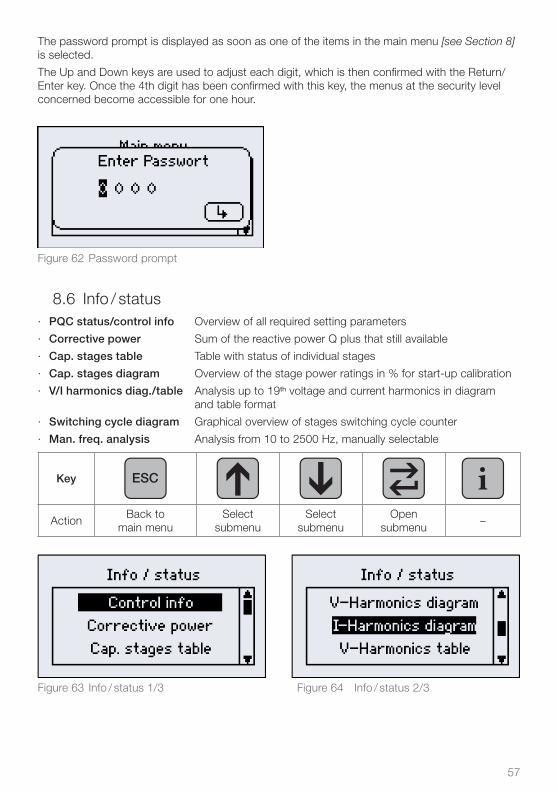
57
The password prompt is displayed as soon as one of the items in the main menu [see Section 8] is selected.
The Up and Down keys are used to adjust each digit, which is then confirmed with the Return/Enter key. Once the 4th digit has been confirmed with this key, the menus at the security level concerned become accessible for one hour.
Figure 62 Password prompt
8.6 Info / status
PQC status/control info · Overview of all required setting parameters
Corrective power · Sum of the reactive power Q plus that still available
Cap. stages table · Table with status of individual stages
Cap. stages diagram · Overview of the stage power ratings in % for start-up calibration
V/I harmonics diag./table · Analysis up to 19th voltage and current harmonics in diagram and table format
Switching cycle diagram · Graphical overview of stages switching cycle counter
Man. freq. analysis · Analysis from 10 to 2500 Hz, manually selectable
Key
ActionBack to
main menu Select
submenu Select
submenu Open
submenu–
Figure 63 Info / status 1/3 Figure 64 Info / status 2/3

58
Figure 65 Info / status 3/3
8.6.1 PQC statusPQC status: � Overview of all necessary setting parameters
The following parameters are displayed in the PQC status menu:
PQC status · Automatic or manual control mode.
Switching sequence · Display of the capacitor stages detected. The relative values (switching sequence) can be distributed over the available stages as desired. The largest permitted relative value is 16, the smallest 0.
Available stages · Number of capacitor stages detected.
c/k setting [mA] · The response current is determined from the smallest capacitor stage detected.
Type of connection · [See Table 1 Connection types for current transformers in L1, L2 and L3]
Figure 66 PQC status overview
8.6.2 Corrective power
Figure 67 Total corrective power Q

59
∑ Q power · The sum total corrective power of all connected 3-phase capacitor stages
Available Q power · 3-phase corrective power still available for switching in
Overcurrent · The overcurrent ratio Irms/I50Hz/60Hz is displayed.
Overcurrent is the theoretically determined ratio of the root-mean-square current to the fundamental current in the capacitor. The choke factor p of the power factor correction system is also taken into account in this theoretical computation. – The overcurrent in the capacitor can only be computed accurately if the system's choke factor is entered correctly.
8.6.3 Capacitor stages table
Figure 68 Capacitor stages table
8.6.4 Capacitor stages rating diagramThe capacitor stages rating diagram shows the momentary corrective power of the capacitor stages as a percentage. After the instrument has been started up, this graphic shows every detected stage as 100%. With time, however, capacitor wear causes this corrective power to fall. When it falls below a set level, the PQC gives an alarm.
Figure 69 Diagram showing all stages at 100% Figure 70 Diagram showing corrective power of all stages
8.6.5 Switch cycle diagramThis diagram shows the switching cycle counters for all the stages as a column chart. 100% on the y-axis represents the set limit for the number of switching cycles counted.

60
Figure 71 Switch cycle diagram
8.6.6 Voltage and current harmonics diagram
Key
ActionBack to
Info / status menuZoom + Zoom -
Switch between harmonics 1–12
and 8–19Additional info
100% corresponds to the fundamental wave at 50 / 60 Hz.
One scale division on the y-axis represents 5%.
The harmonics are displayed graphically:
Figure 72 Current harmonics diagram, Figure 73 Current harmonics zoomed in, y-axis 100% y-axis 25%
8.6.7 Voltage and current harmonics tableThis menu item displays a table showing all the harmonics as percentages of the fundamental.
Figure 74 Voltage harmonics table

61
8.6.8 Manual frequency analysis
Key
ActionBack to
Info / status menuFrequency
+10 HzFrequency
-10 HzSelect phase
–
Phase · Measurement at Lx [1 ≤ x ≤ 3]
Frequency · 10–2500 Hz in increments of 10 Hz
V(f) · Magnitude of the voltage at the given frequency as a percentage of the fundamental voltage V1 (f = 50/60 Hz)
I(f) · Magnitude of the current at the given frequency as a percentage of the fundamental current I1 (f = 50/60 Hz)
Angle · φ Angle between V(f) and I(f) in degrees
Angle · γ Angle between V1 (fundamental frequency) and I(f) in degrees
Note: V1 and I1 are respectively the magnitudes of the voltage and current at the fundamental frequency f1 = 50 or 60 Hz
Figure 75 Manual frequency analysis
8.7 About PQC submenuThis dialogue displays information about the instrument:
FW · Firmware version number
HW · Hardware version number
PCB · Printed circuit board numbers
SN · Serial number
Figure 76 About PQC

62
8.8 Factory default settingsTable 4 Factory default settings
Initial start-up
Connection type 0 (L1-N)
c/k setting 2000 mA
Switching sequence 1;1;1;1;1;
Number of capacitor stages 6 or 12 (depending on type)
Settings of control profile 1
cos φ 0.92 ind
Parallel shift -1
Limitation 1
Delay time 45 sec
Phase L1
Active Yes
Settings of control profile 2
cos φ 1.0
Parallel shift 0
Limitation OFF
Delay time 45 sec
Phase L1
Active No
Settings of control profile 3
cos φ 1
Parallel shift +1
Limitation OFF
Delay time 45 sec
Phase L1
Active No
Settings of control profile 4
cos φ 0.92 ind
Parallel shift -1
Limitation OFF
Delay time 45 sec
Phase L1
Active No
Settings of control profile 5
cos φ 0.96 cap
Parallel shift -1
Limitation OFF
Delay time 45 sec
Phase L1
Active No

63
Settings � General � Capacitor stages
Cyclic switching ON
Discharge time 60 sec
Fixed stages 0
choke factor (detuning) 7%
Zero stage set limit 80%
Nominal voltage 400 V
Settings � General � Set limits
Switching cycle counters 80 000
THDI 50%
V harmonics
Harmonic23456789
10111213141516171819
Set limit in %2
10016
1005
0.51000.53.5100
30.431000.41
21001.76
I harmonics 100% (all)
Overcurrent ratio 1.2
Voltage blackout (sag) limit 85%
Number of ¼ cycles 2 (½ wave)
Detecting phase L1
Settings � General � Alarm management
Alarm relay
Alarmcos φ alarm
UndervoltageUndercurrent
OvercurrentTHDI
Switching cyclesV harmonicsI harmonics
Zero stage (dud) detectionVoltage blackout (sag)
detection
ON/OFFON ONOFFONOFFOFFOFFOFFONON

64
Settings � General � Alarm management
PQC trip
Alarmcos φ alarm
UndervoltageUndercurrent
OvercurrentTHDI
Switching cyclesV harmonicsI harmonics
Zero stage (dud) detectionVoltage blackout (sag)
detection
ON/OFFOFF ONONONOFFOFFOFFOFFOFFON
Display alarm
Alarmcos φ alarm
UndervoltageUndercurrent
OvercurrentTHDI
Switching cyclesV harmonicsI harmonics
Zero stage (dud) detectionVoltage blackout (sag)
detection
ON/OFFON ONONONOFFONONOFFONON
8.9 Update
DANGER!
The following instructions must be observed to avoid danger to life and limb: - The update may only be installed by a qualified technician. - In Germany, it is essential to comply with the regulations of the Social Acci- dent Insurance Institution covering electrical installations. In other countries, the equivalent local regulations must be followed. - Before beginning the update procedure and plugging in the USB cable required for this, the instrument and its associated cables must be isolated from the power supply. - The isolated electrical system must be locked out to prevent its being inadvertently switched on again. - The immediate vicinity must be covered. - The USB connector may now be plugged into the PQC (not before!). - The instructions for the update procedure must be followed exactly. For further information please contact the manufacturer: FRAKO Kondensatoren und Anlagenbau GmbH, Tscheulinstrasse 21A, D-79331 Teningen, Germany, www.frako.com
When work is carried out in the vicinity of the instrument terminals and connecting cables, there is a risk of live components being touched inad-vertently. The working voltage may present a hazard to health or may even be life-threatening.
If the above instructions are followed, the risk of endangering life and limb can be significantly reduced.

65
The USB port is a service interface provided solely for updating the PQC firmware. Users are not permitted to use this USB port for any other purpose, and therefore must not connect any cable or device to it. When the PQC is in operation, the USB port must not be touched. It is intended for connecting a battery-powered notebook.
A USB cable with a Micro-A or Micro-B male connector is required for the update procedure. The USB port is located underneath the instrument inside the control cabinet. The above safety instructions must be observed before the control cabinet is opened!
Depending on where the instrument is mounted, access to the USB interface port on the PQC may be difficult.
For further information, please contact the instrument manufacturer: FRAKO Kondensatoren und Anlagenbau GmbH, Tscheulinstrasse 21A, D-79331 Teningen, Germany, www.frako.com.
9 Instrument versionsTable 5 Instrument versions
Article No. Version Number of relay stages
Instrument power supply AUX²
Measure-ment
Option
38-00400 PQC 1202401-0 12 (250 V AC, 3 A, cos φ = 1)
100 V –15 % to 240 V +10 % AC approx. 5 VA³
single-phase –
38-00403 PQC 1202401-01 12 (250 V AC, 3 A, cos φ = 1)
““ single-phase Temp. I/O
38-00404 PQC 1202401-20 12 (250 V AC, 3 A, cos φ = 1)
““ single-phase Modbus RTU
38-00405 PQC 1202401-21 12 (250 V AC, 3 A, cos φ = 1)
““ single-phase Modbus RTU, Temp. I/O
38-00401 PQC 1202403-0 12 (250 V AC, 3 A, cos φ = 1)
““ 3-phase –
38-00411 PQC 1202403-01 12 (250 V AC, 3 A, cos φ = 1)
““ 3-phase Temp. I/O
38-00412 PQC 1202403-20 12 (250 V AC, 3 A, cos φ = 1)
““ 3-phase Modbus RTU
38-00413 PQC 1202403-21 12 (250 V AC, 3 A, cos φ = 1)
““ 3-phase Modbus RTU, Temp. I/O
38-00402 PQC 0602401-0 6 (250 V AC, 3 A, cos φ = 1)
““ single-phase –
38-00416 PQC 0602401-01 6 (250 V AC, 3 A, cos φ = 1)
““ single-phase Temp. I/O
38-00417 PQC 0602401-20 6 (250 V AC, 3 A, cos φ = 1)
““ single-phase Modbus RTU
38-00418 PQC 0602401-21 6 (250 V AC, 3 A, cos φ = 1)
““ single-phase Modbus RTU, Temp. I/O
² AUX as in the connection diagrams in [Section 5.7, Connection diagrams of all PQC instrument types].
³ 85 V AC - 267 V AC (absolute limits, networks 100 V AC - 240 V AC), frequency 45 - 65 Hz or 100 V DC - 377 V DC (absolute limits)

66
Article No. Version Number of relay stages
Instrument power supply AUX²
Measure-ment
Option
38-00406 PQC 1204801-0 12 (250 V AC, 3 A, cos φ = 1)
100 V – 10 % to 480 V +10 % AC approx. 5 VA4
single-phase –
38-00421 PQC 1204801-01 12 (250 V AC, 3 A, cos φ = 1)
““ single-phase Temp. I/O
38-00422 PQC 1204801-20 12 (250 V AC, 3 A, cos φ = 1)
““ single-phase Modbus RTU
38-00423 PQC 1204801-21 12 (250 V AC, 3 A, cos φ = 1)
““ single-phase Modbus RTU, Temp. I/O
38-00407 PQC 1204803-0 12 (250 V AC, 3 A, cos φ = 1)
““ 3-phase –
38-00426 PQC 1204803-01 12 (250 V AC, 3 A, cos φ = 1)
““ 3-phase Temp. I/O
38-00427 PQC 1204803-20 12 (250 V AC, 3 A, cos φ = 1)
““ 3-phase Modbus RTU
38-00428 PQC 1204803-21 12 (250 V AC, 3 A, cos φ = 1)
““ 3-phase Modbus RTU, Temp. I/O
38-00410 PQC 0614801-0 6 (440 V AC, 3 A, cos φ = 1)
““ single-phase –
38-00431 PQC 0614801-01 6 (440 V AC, 3 A, cos φ = 1)
““ single-phase Temp. I/O
38-00432 PQC 0614801-20 6 (440 V AC, 3 A, cos φ = 1)
““ single-phase Modbus RTU
38-00433 PQC 0614801-21 6 (440 V AC, 3 A, cos φ = 1)
““ single-phase Modbus RTU, Temp. I/O
10 Maintenance
The PQC needs no maintenance.
DANGER!
The following instructions must be observed to avoid danger to life and limb: - The instrument casing must not be opened.
The voltages inside the casing may present a hazard to health or may even be life-threatening if live components are inadvertently touched.
² AUX as in the connection diagrams in [Section 5.7, Connection diagrams of all PQC instrument types].
4 85 V AC - 530 V AC (absolute limits, networks 100 V AC - 480 V AC), frequency 45 - 65 Hz or 100 V DC - 750 V DC (absolute limits)

67
10.1 Cleaning
DANGER!
The following instructions must be observed to avoid danger to life and limb: - During cleaning, the instrument and the connecting cables must be isolated from the power supply. - The isolated electrical system must be locked out to prevent its being inadvertently switched on again. - The immediate vicinity must be covered. - All connections must be checked to verify that they are no longer live! - Power must not be switched on again to the installation until the cleaning work is completed.
When work is carried out in the vicinity of the instrument terminals and con-necting cables, there is a risk of live components being touched inadvertently. A moist cleaning cloth, which conducts electricity, must never be used. The working voltage may present a hazard to health or may even be life-threatening.
If the above instructions are followed, the risk of endangering life and limb can be significantly reduced.
The instrument may only be cleaned with a dry cloth. When this is done, the above safety instructions must be followed. All power to the instrument must be switched off before cleaning is begun. Power must not be switched on to the instrument again until the cleaning procedure is completed.
If the cleaning is restricted only to the front of the closed control cabinet, it is not necessary to isolate the PQC from the power supply, but in this case also only a dry cleaning cloth may be used.
11 Decommissioning and removal, storage and disposal 11.1 Decommissioning and removalWhen decommissioning and removal work is carried out, please note the following:
DANGER!
The following instructions must be observed to prevent danger to life and limb or damage to equipment and other assets: - When the instrument is removed, it is essential to switch off the power to the instrument and the installation beforehand. - The isolated electrical system must be locked out to prevent its being inadvertently switched on again. - All connections must be checked to verify that they are no longer live! - All live components in the immediate vicinity must be covered to prevent inadvertent contact.
When work is carried out on the instrument terminals and connecting cables, there is a risk of live components being touched inadvertently. The working voltage may present a hazard to health or may even be life-threatening.

68
If the above instructions are followed, the risk of endangering life and limb or damaging equipment can be significantly reduced.
DANGER!
The following instructions must be observed to prevent danger to life and limb or damage to equipment and other assets: - The current transformers must be short-circuited.
- All live cables must be disconnected from the instrument.
- All disconnected cables must be individually isolated and insulated, and measures must be taken to prevent their inadvertent contact with live components or electrically conducting parts. - If it is intended that connecting cables that have been disconnected from the instrument are to become live again after the instrument has been removed, adequate measures must be taken to prevent their inadvertent contact with other live components or electrically conducting parts.
Exposed electrical conductors that can be touched are a hazard to life and limb. If they come into contact with other electrically conducting components, the latter can also become live. In addition, cables designated only for low vol-tages can carry life-threatening higher voltages if they come into contact with cables at the supply network voltage.
To prevent this danger to life and limb, the exposed ends of disconnected cables must be individually insulated in a workmanlike manner. The ends of these cables must not be joined to each other, and it must be ensured that cable ends cannot be touched, and that they do not touch each other or other components.
CAUTION!
If the exposed ends of disconnected cables come into contact with each other, this can result in short-circuits and overloading of the installation conductors, resulting in damage to equipment and other assets.
All disconnected cables must be individually isolated and insulated, and mea-sures must be taken to prevent their inadvertent contact with live components or electrically conducting parts.
Instrument removal:
DANGER!
The following instructions must be observed to prevent danger to life and limb or damage to equipment and other assets: - All power to the entire control cabinet must be switched off before the PQC is removed!
If the above instructions are followed, and the precautions specified in [Section 1.2, Safety instructions], are taken, the risk of damaging equipment and assets or endangering life and limb can be significantly reduced.
The PQC is held in place against the rear of the cabinet front wall by four retaining lugs in the ·corners of the instrument. These can be released by turning the retaining screws (accessible from the front) anticlockwise with a screwdriver. This slackens the four retaining lugs and swivels them to lie flat behind the PQC front panel, so that the instrument can then be with-drawn from the front of the cabinet.

69
11.2 StorageThe PQC must be stored in a clean, dry and dust-free location. ·
The storage temperature must be within the range -20 °C to +80 °C. ·
11.3 DisposalAny electronic instrument that is no longer required must be disposed of in an environmentally sound manner.
CAUTION!
Incorrect disposal can cause environmental pollution.
In the European Union, electrical scrap and electronic components are subject to the WEEE (Waste Electrical and Electronic Equipment) Directive. These com-ponents must not be disposed of as normal domestic or commercial waste.
If this is not complied with, there is a danger that environmental pollution may result and a violation of the Directive will have occurred.
In other countries, the equivalent local regulations must be followed when elect-ronic instruments are disposed of. They must be handed in at special recycling centres.
One way of ensuring environmentally sound disposal is to return the instruments to FRAKO Kondensatoren und Anlagenbau GmbH or the company's local repre-sentatives. Alternatively, the instruments can be given to a firm specializing in the recycling of electronic equipment.
12 General operationThe following points must be observed when operating the instrument:
The instrument must always be operated in a closed control cabinet as described in · [Section 4, Mounting the instrument].
All voltages applied to the instrument must never exceed the limits specified in the technical ·data.
The ambient temperatures must always be within the range specified in the technical data. ·

70
12.1 TroubleshootingFaults during operation: If disruptions occur during operation of the PQC, the following table provides assistance in iden-tifying and remedying the faults.
No. Fault Possible cause Remedial action
1 PQC not working; no display at all on the screen
No power supply to the instrument, or the wrong voltage
Check whether the power supply at the correct voltage is reaching the PQC. Is the fuse in the power supply circuit in order?
2 The LCD backlighting comes on for a short time then goes off again, while the LCDs display nothing or only the starting logo – the instrument restarts repeatedly.
Supply voltage too low Check whether the correct voltage is reaching the PQC.
Is there is a high contact resistance in the power supply circuit?
3 Capacitor stage statuses display appears on screen but capacitor contactors are not activated.
Control circuit is not connected properly or there is no control voltage.
Check the control circuit against the connection diagram and check the fuses.
No neutral conductor at the contactors.
4 PQC can not complete the automatic calibration procedure.
Heavy reactive power fluctuations
Wait for power supply to stabilize; set c/k factor and connection type manually.
5 During automatic calibration this message appears:
Alarm detected
No cap. stage
Fault in control circuit (contactors not switching)
Check the control circuit against the connection diagram and check the fuses.
Capacitor stage discharge resistors are missing or defective
Check whether capacitors are energized after switching.
Current transformer installed at the wrong location
Check whether the current transformer has been installed as per the connection diagram.
6 No value for current shown in the display
Break or short-circuit in the current transformer cable
Use an ammeter to check current in current path (Imin ³ ≥ 0.015 A).
Danger: see [Section 5.6].
The current in the current path is too low.
(Imin ³ ≥ 0.015 A)
Install a smaller current transformer.
Defective current transformer
Check the current transformer.

71
No. Fault Possible cause Remedial action
7 Despite inductive load, no stages are switched on when PQC is in automatic mode.
When the PQC was programmed, c/k, switching time delay, or discharge time have been set too high.
Check the PQC programming and change if necessary.
In automatic operation, the response current c/k was not correctly identified.
Check the control circuit against the connection diagram and repeat the calibration procedure.
Another current measuring instrument (e.g. an ammeter) has been connected in parallel with the current path.
All measuring instruments in the current path must be connected in series.
8 In automatic mode, one stage is continually being switched in and out (hunting).
The value of c/k was set too low when the PQC was programmed.
Set c/k value correctly according to the table.
Severe load fluctuations; the delay time was set too low.
Set higher delay time.
9 The displayed power factor (cos φ) is less than the target power factor although the PQC has switched in all stages.
Type of connection incorrectly set.
Reset type of connection.
Fault in control circuit. Check whether the capacitor contactors have been activated.
Fault in capacitor circuit. Check the fuses and contacts of the capacitor contactors and possibly also measure the currents of each capacitor stage with a tong tester.
System underdimensioned Read off the corrective power still lacking from the menus.
Faulty calibration Repeat the calibration procedure.
10 PQC does not switch out all stages under low load conditions or during plant shutdown.
c/k set too high. Set c/k according to table.
PQC is in manual mode. Deactivate manual control.
Wrong control profile selected
Adjust control profile to suit requirements.
13 Scope of supply1 PQC instrument ·
4 different male connectors, supplied loose ·
1 operating manual ·

Power Capacitors
Reactive Power Control Relays
Power Factor Correction Systems
Modules
EMS Components
Measuring Instruments and Network Analysers
Power Quality
EMS ISO 50001
FRAKO Kondensatoren- und Anlagenbau GmbH
Tscheulinstraße 21a D-79331 Teningen
Tel: +49 7641 453-0 Fax: +49 7641 453-535
[email protected] www.frako.com FR
AK
O 5
5-06
006/
11/1
7/97
69
Sub
ject
to
tech
nica
l cha
nges