powermill 2012 r2 user guide -...
TRANSCRIPT

PowerMILL 2012 R2
User Guide Macro Programming Guide
Release issue 1

Copyright 1996 - 2012 Delcam plc. All rights reserved.
Delcam plc has no control over the use made of the software described in this manual and cannot accept responsibility for any loss or damage howsoever caused as a result of using the software. Users are advised that all the results from the software should be checked by a competent person, in accordance with good quality control procedures.
The functionality and user interface in this manual is subject to change without notice in future revisions of software.
The software described in this manual is furnished under licence agreement and may be used or copied solely in accordance with the terms of such licence.
Delcam plc grants permission for licensed users to print copies of this manual or portions of this manual for personal use only. Schools, colleges and universities that are licensed to use the software may make copies of this manual or portions of this manual for students currently registered for classes where the software is used. Acknowledgements
This documentation references a number of registered trademarks and these are the property of their respective owners. For example, Microsoft and Windows are either registered trademarks or trademarks of Microsoft Corporation in the United States. Patents
The Raceline smoothing functionality is subject to patent applications.
Patent granted: GB 2374562 Improvements Relating to Machine Tools
Patent granted: US 6,832,876 Machine Tools
Some of the functionality of the ViewMill and Simulation modules of PowerMILL is subject to patent applications.
Patent granted: GB 2 423 592 Surface Finish Prediction Licenses
Intelligent cursor licensed under U.S. patent numbers 5,123,087 and 5,371,845 (Ashlar Inc.)
PowerMILL 2012 R2. Published on 28 February 2012

PowerMILL 2012 R2 User Guide Contents • i
Contents Macros 1
Creating macros ................................................................................................. 1 Recording macros in PowerMILL ........................................................................ 2
Running macros ......................................................................................... 3 Editing macros ............................................................................................ 3 Running macros from within macros .......................................................... 4
Writing your own macros .................................................................................... 5 PowerMILL commands for macros ............................................................. 6 Adding comments to macros ...................................................................... 7 Macro User Guide ...................................................................................... 8 Variables in macros .................................................................................. 25 Using expressions in macros .................................................................... 41 Operator precedence ............................................................................... 43 Macro functions ........................................................................................ 45 IF statement ............................................................................................. 49 IF - ELSE statement ................................................................................. 50 IF - ELSEIF - ELSE statement .................................................................. 50 SWITCH statement .................................................................................. 52 BREAK statement in a SWITCH statement .............................................. 53 Repeating commands in macros .............................................................. 54 RETURN statement .................................................................................. 59 Printing the value of an expression .......................................................... 59 Constants ................................................................................................. 60 Built-in functions ....................................................................................... 60 Entity based functions .............................................................................. 86
Organising your macros .................................................................................... 88 Recording the pmuser macro ............................................................................ 89 Recording a macro to set up NC preferences ................................................... 91 Tips for programming macros ........................................................................... 92
Index 95

PowerMILL 2012 R2 User Guide Macros • 1
A macro is a file which contains a sequence of commands to automate recurrent operations. You can create macros by recording operations as they occur in PowerMILL, or by entering the commands directly into a text editor. Recorded macros have a .mac extension, and can be run from the Macro node in the explorer.
You can record single or multiple macros to suit your needs. You can call a macro from within another macro.
There are two types of macros:
The initialisation macro, pmuser.mac, is run when PowerMILL starts. By default, a blank copy of this macro exists in C:\Program Files\Delcam\PowerMILL xxx\lib\macro folder. By overwriting or adding PowerMILL commands to it, you can set up your own default parameters and settings. You can also place the pmuser macro in the pmill folder, directly below your Home area. Doing this enables personalised macro settings for individual login accounts.
User-defined macros are macros you define to automate various operations.
In addition to tailoring PowerMILL by the creation of an initialisation macro, you can create macros for undrawing, drawing and resetting leads and links, setting NC preferences, defining regularly used machining sequences, and so on.
Creating macros You can create macros by:
Recording (see page 2) a sequence of commands within PowerMILL.
Writing (see page 5) your own macro using a text editor.
Macros

2 • Macros PowerMILL 2012 R2 User Guide
Recording macros in PowerMILL An easy way to create a macro is to record PowerMILL commands as you work. Only the values that you change in the dialogs are recorded in the macro. Therefore, to record a value that's already set, you must re-enter it in a field, or re-select an option. For example, if the finishing tolerance is currently set to 0.1 mm, and you want the macro to store the same value, you must re-enter 0.1 in the Tolerance field during recording.
To record a macro:
1 From the Macros context menu, select Record.
This displays the Select Record Macro File dialog which is a standard Windows Save dialog.
2 Move to the appropriate directory, enter an appropriate File name and click Save.
The macro icon changes to red to show recording is in progress.
All dialog options that you want to include in your macro must be selected during its recording. If an option already has the desired value, re-enter it.
3 Work through the set of commands you want to record.
4 From the Macros context menu, select Stop to finish recording.
For more information, see Recording the pmuser macro (see page 89) and Recording the NC preference macro (see page 91).

PowerMILL 2012 R2 User Guide Macros • 3
Running macros When you run a macro the commands recorded in the macro file are executed.
1 Expand Macros, and select the macro you want to run.
2 From the individual macro menu, select Run.
You can also run a macro by double-clicking its name in the explorer.
Running the macro you have just recorded The location of the macro you have just recorded becomes the local folder. So, the macro you have just recorded is available in the local macro search path . However, the list of macros isn't updated dynamically. To force an update:
1 Click next to Macros to collapse the contents.
2 Click next to Macros to expand and regenerate the contents.
3 Click next to to see the macros in this directory, which includes the one you have just created.
Editing macros You can edit recorded macros to troubleshoot and correct any errors.
1 Expand Macros and select the macro you want to edit.

4 • Macros PowerMILL 2012 R2 User Guide
2 From the individual macro menu, select Edit.
A standard WordPad document opens.
If you get an error message advising you that your macro can't be edited, open Windows Explorer, and from the Tools menu select Folder Options. Click the File Types tab, and set WordPad as the default program for files with the .mac extension.
3 Edit the macro commands, and then save the file.
Running macros from within macros You can create small macros that perform a single operation, and then call them from within a larger macro. This example shows how to add the h400_prefs macro and the iniblock macro to the pmuser macro.
1 From the pmuser macro context menu, select Edit. 2 Scroll to the bottom of the file, and add the following lines:
macro h400_prefs

PowerMILL 2012 R2 User Guide Macros • 5
macro iniblock
If you precede a line with two forward slash characters (//), it is treated as a comment, and is not executed.
3 Save and close pmuser.mac.
4 Exit and restart PowerMILL to check that the settings from the pmuser macro have been activated.
Writing your own macros A more powerful way of creating macros is to write your own. The principles are described in the Macro User Guide (see page 8).
Macros enable you to:
Construct expressions (see page 41).
Use expressions to control macro flow (see page 22).
Use a range of relational (see page 36) and logical (see page 38) operators.
Evaluate both expressions (see page 41).
Assign values to variables and parameters by using assignments (see page 26).
The Menu bar option Help >Parameters >Reference > Functions lists all the standard functions you can use in macros.

6 • Macros PowerMILL 2012 R2 User Guide
PowerMILL commands for macros When you use PowerMILL interactively, every menu click and entry in a dialog sends a command to the program. These are the commands that you must enter in your macro file if you want to drive PowerMILL from a macro.
This example shows you how to:
Find the PowerMILL commands to include in your macros.
Place them in a text editor such as WordPad.
Display the macro in the explorer.
To create a macro:
1 From the Menu bar, select View > Toolbar > Command to open the command window.
2 Select Tools > Echo Commands from the Menu bar to echo the issued commands in the command window.
3 To see the commands needed to calculate a block:
a Click the Block button on the Main toolbar.
b When the Block dialog opens, click Calculate, and then click Accept.
The command window shows the commands issued:
The commands are shown in square brackets; \r should be ignored. The commands you need are: FORM BLOCK, EDIT BLOCK RESET, and BLOCK ACCEPT.
4 Open WordPad, and enter the commands into it.
The commands aren't case-sensitive so FORM BLOCK is the same as Form Block which is the same as foRm bLock.

PowerMILL 2012 R2 User Guide Macros • 7
5 Save the file as say, iniblock.mac. The macro is added to the macro tree.
For more information see Running macros (see page 3).
Adding comments to macros It is good practice to put comments into a macro file to explain what it does. A comment is a line of text which has no effect on the running of the macro file but will help anyone examining the file to understand it. Comment lines start with //. For example, // This macro imports my standard model, creates a block, // and a ball nosed tool.
It is also good practice to have comments explaining what each section of the macro file does. This may be obvious when you write the macro but later it may be difficult to understand. It is good practice to put the comments which describe commands before the actual commands. // Clean all the Roughing boundaries MACRO Clean 'boundary\Roughing'
Another use of comments is to temporarily remove a command from a macro. When debugging or writing a macro, it is a good idea to write one step at a time and re-run the macro after each change. If your macro contains a lengthy calculation, or the recreation of toolpaths, you may want to temporarily comment out the earlier parts of the macro whilst checking the later parts. For example: // Import the model

8 • Macros PowerMILL 2012 R2 User Guide
// IMPORT TEMPLATE ENTITY TOOLPATH "Finishing/Raster-Flat-Finishing.ptf"
Macro User Guide This example shows you how to use the PowerMILL macro programming language to create a macro which prints the words of the counting song "Ten Green Bottles".
10 green bottles sitting on the wall
10 green bottles sitting on the wall
And if 1 green bottle should accidentally fall
There will be 9 green bottles sitting on the wall
9 green bottles sitting on the wall
9 green bottles sitting on the wall
And if 1 green bottle should accidentally fall
There will be 8 green bottles sitting on the wall
and so on until the last verse
1 green bottle sitting on the wall
1 green bottle sitting on the wall
And if 1 green bottle should accidentally fall
There will be 0 green bottles sitting on the wall.
The main steps are:
1 Creating the basic macro (see page 9).
2 Adding macro variables (see page 9).
3 Adding macro loops (see page 10).
4 Running macros with arguments (see page 11).
5 Decision making in macros (see page 13).
6 Using functions in macros (see page 15).
7 Using a SWITCH statement (see page 17).
8 Returning values from macros (see page 18).
9 Using a FOREACH loop in a macro (see page 22).
10 Using arrays in a FOREACH loop (see page 24).

PowerMILL 2012 R2 User Guide Macros • 9
Basic macro This shows you how to create and run a basic macro using PowerMILL's programming language.
1 In a text editor such as WordPad enter: PRINT "10 green bottles sitting on the wall" PRINT "10 green bottles sitting on the wall" PRINT "And if 1 green bottle should accidentally fall" PRINT "There will be 9 green bottles sitting on the wall"
2 Save the file as example.mac.
3 In PowerMILL, from the Tools menu select Toolbar > Command.
4 From the Macro context menu, select Run. This displays the Select Macro to Run dialog.
5 Move to the appropriate directory, select example.mac, and click Open. The macro runs and the command windows displays the text enclosed in quotations marks (") in the macro.
Adding macro variables The first two lines of example.mac are the same. To minimise repetition (and for ease of maintenance) it is good practise to write the line once and then recall it whenever it is needed. To do this you must create a local variable to hold the line of text.
You can create different types of variables (see page 25) in PowerMILL. To store a line of text you must use a STRING variable.
1 Open example.mac in your text editor and change it to: // Create a variable to hold the first line STRING bottles = "10 green bottles sitting on the wall" PRINT $bottles PRINT $bottles PRINT "And if 1 green bottle should accidentally fall" PRINT "There will be 9 green bottles sitting on the wall"
The first line is a comment which explains the second line.
2 Save the file as example.mac.

10 • Macros PowerMILL 2012 R2 User Guide
3 In PowerMILL, Run the Macro. The command windows displays the same as before:
You should be aware of several issues with variables:
You must define all local variables before they are used, in this case STRING bottles = "10 green bottles sitting on the wall" defines the local variable bottles.
The variable bottles is a local variable, so is only valid within the macro where it is defined. It isn't a PowerMILL variable. Typing it into the command window gives an error.
When you have defined a local variable you can use it as many
times as you want in a macro.
You can define as many local variables as you want in a macro.
Adding macro loops There are two lines of the macro which are the same: PRINT $bottles. This is acceptable in this case since the line only appears twice, but if you wanted to repeat it 5 or 20 times it would be better to use a loop. PowerMILL has three looping statements:
WHILE (see page 56)
DO - WHILE (see page 57)
FOREACH (see page 55)
This example uses the WHILE statement to repeat the command 5 times.
1 Open example.mac in your text editor and change it to: // Create a variable to hold the first line STRING bottles = "10 green bottles sitting on the wall" // Create a variable to hold the number of times // you want to print the first line. // In this case, 5 INT Count = 5

PowerMILL 2012 R2 User Guide Macros • 11
// Repeat while the condition Count is greater than 0 WHILE Count > 0 {
// Print the line PRINT $bottles // Reduce the count by 1 $Count = Count - 1
} // Print the last two lines PRINT "And if 1 green bottle should accidentally fall" PRINT "There will be 9 green bottles sitting on the wall"
$Count = Count - 1 is an assignment statement which is why the variable ($Count) to the left of = must be prefixed with $.
The empty lines aren't necessary, but make it easier to read the macro.
2 Save the file as example.mac.
3 In PowerMILL, Run the Macro. The command windows displays:
Changing INT Count = 5 to INT Count = 10 prints 10 green bottles sitting on the wall ten times, rather than five.
Running macros with arguments The loop you added to example.mac works well if you always want to print 10 green bottles sitting on the wall the same number of times. However, if you want to change the number of repetitions at run time, rather than editing the macro each time, it is much better to write the macro so it is given the number of repetitions. To do this you need to create a Main FUNCTION (see page 45).
1 Open example.mac in your text editor and change it to: // Create a Main FUNCTION to hold the number of times // you want to print the first line. FUNCTION Main (INT Count) {
// Create a variable to hold the first line

12 • Macros PowerMILL 2012 R2 User Guide
STRING bottles = "10 green bottles sitting on the wall" // Repeat while the condition Count is greater than 0 WHILE Count > 0 {
// Print the line PRINT $bottles // Reduce the count by 1 $Count = Count - 1
} // Print the last two lines PRINT "If 1 green bottle should accidentally fall" PRINT "There will be 9 green bottles sitting on the wall"
}
2 Save the file as example.mac.
3 To run the macro you can't select Run from the Macro context menu, as you need to give a value for Count. Therefore, in the command window type:
MACRO example.mac 5
Where 5 is the value for Count. The command windows displays:
If you get a warning that the macro can't be found, check you have created the necessary macro path (see page 88).
Adding your own functions As well as a Main function you can create your own functions. This is useful as a way of separating out a block of code. You can use functions:
to build up a library of useful operations
to make a macro more understandable.
You can call a function any number of times within a macro.
This example separates out the printing of the first line into its own function so that the Main function is more understandable.
1 Open example.mac in your text editor and change it to: FUNCTION PrintBottles(INT Count) {
PowerMILL 2012 R2 User Guide Macros • 13
// Create a variable to hold the first line STRING bottles = "10 green bottles sitting on the wall" // Repeat while the condition Count is greater than 0 WHILE Count > 0 {
// Print the line PRINT $bottles // Reduce the count by 1 $Count = Count - 1
} } FUNCTION Main (INT Count) {
// Print the first line Count number of times CALL PrintBottles(Count) // Print the last two lines PRINT "If 1 green bottle should accidentally fall" PRINT "There will be 9 green bottles sitting on the wall"
}
2 Save the macro.
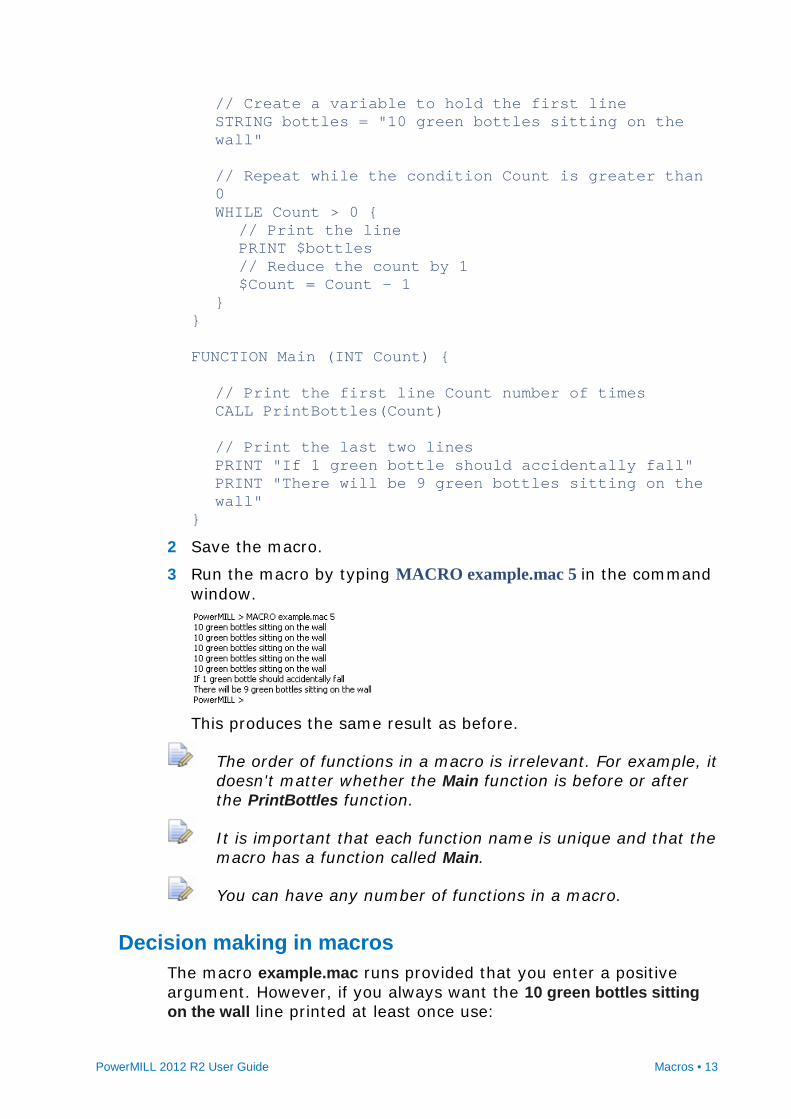
3 Run the macro by typing MACRO example.mac 5 in the command window.
This produces the same result as before.
The order of functions in a macro is irrelevant. For example, it doesn't matter whether the Main function is before or after the PrintBottles function.
It is important that each function name is unique and that the macro has a function called Main.
You can have any number of functions in a macro.
Decision making in macros The macro example.mac runs provided that you enter a positive argument. However, if you always want the 10 green bottles sitting on the wall line printed at least once use:

14 • Macros PowerMILL 2012 R2 User Guide
A DO - WHILE (see page 57) loop as it executes all the commands before testing the conditional expression.
An IF (see page 49) statement.
DO - WHILE loop 1 Edit the PrintBottles function in example.mac to
FUNCTION PrintBottles(INT Count) {
// Create a variable to hold the first line STRING bottles = "10 green bottles sitting on the wall" // Repeat while the condition Count is greater than 0 DO { // Print the line PRINT $bottles // Reduce the count by 1 $Count = Count - 1 } WHILE Count > 0
}
The main function remains unchanged: FUNCTION Main (INT Count) {
// Print the first line Count number of times CALL PrintBottles(Count) // Print the last two lines PRINT "And if 1 green bottle should accidentally fall" PRINT "There will be 9 green bottles sitting on the wall"
}
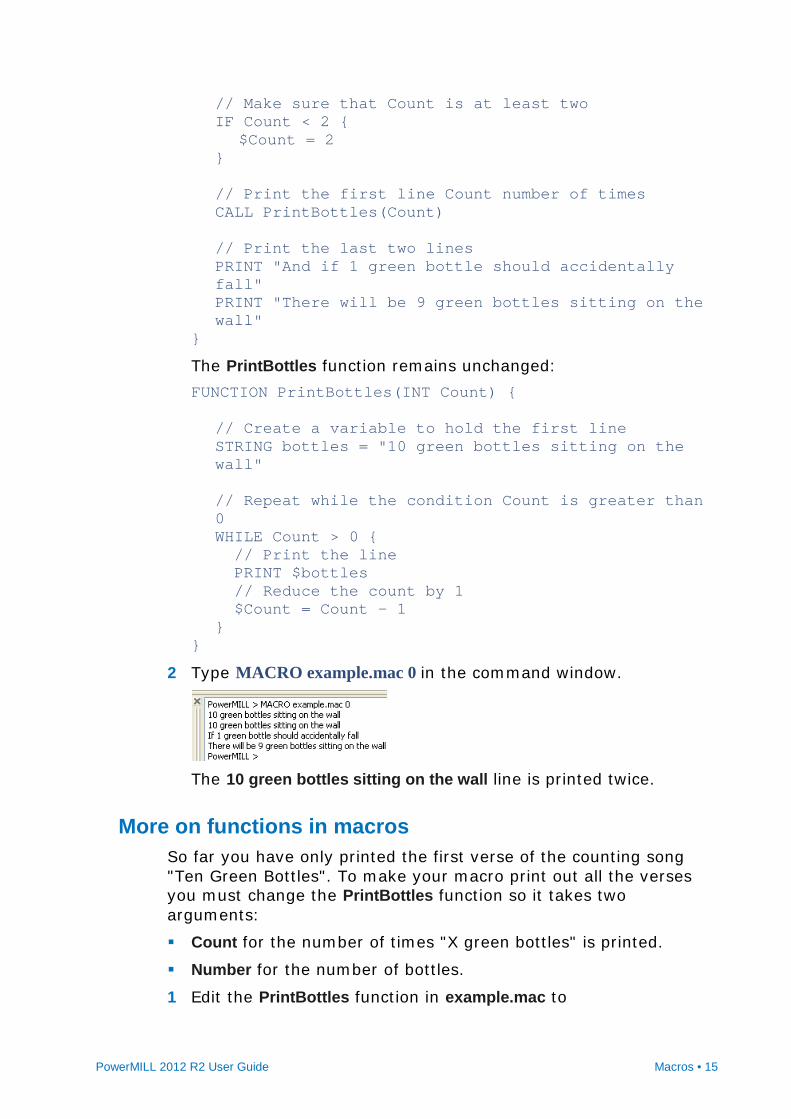
2 Type MACRO example.mac 0 in the command window.
The 10 green bottles sitting on the wall line is printed once.
IF statement You can use an IF statement to ensure the 10 green bottles sitting on the wall line is printed at least twice.
1 Edit the Main function in example.mac to: FUNCTION Main (INT Count) {
PowerMILL 2012 R2 User Guide Macros • 15
// Make sure that Count is at least two IF Count < 2 {
$Count = 2 } // Print the first line Count number of times CALL PrintBottles(Count) // Print the last two lines PRINT "And if 1 green bottle should accidentally fall" PRINT "There will be 9 green bottles sitting on the wall"
}
The PrintBottles function remains unchanged: FUNCTION PrintBottles(INT Count) {
// Create a variable to hold the first line STRING bottles = "10 green bottles sitting on the wall" // Repeat while the condition Count is greater than 0 WHILE Count > 0 { // Print the line PRINT $bottles // Reduce the count by 1 $Count = Count - 1 }
}
2 Type MACRO example.mac 0 in the command window.
The 10 green bottles sitting on the wall line is printed twice.
More on functions in macros So far you have only printed the first verse of the counting song "Ten Green Bottles". To make your macro print out all the verses you must change the PrintBottles function so it takes two arguments:
Count for the number of times "X green bottles" is printed.
Number for the number of bottles.
1 Edit the PrintBottles function in example.mac to

16 • Macros PowerMILL 2012 R2 User Guide
FUNCTION PrintBottles(INT Count, INT Number) { // Create a variable to hold the first line STRING bottles = String(Number) + " green bottles sitting on the wall" // Repeat while the condition Count is greater than 0 WHILE Count > 0 {
// Print the line PRINT $bottles // Reduce the count by 1 Count = Count - 1
} }
This adds a second argument to the PrintBottles function. It then uses a parameter function to convert the Number to a string value, STRING (Number). It is then concatenated (+)with green bottles sitting on the wall to make up the bottles string.
2 Edit the Main function in example.mac to: FUNCTION Main (INT Count) {
// Make sure that Count is at least two IF Count < 2 {
$Count = 2 } // Start with ten bottles INT Bottles = 10 WHILE Bottles > 0 {
// Print the first line 'Count' number of times CALL PrintBottles(Count, Bottles) // Count down Bottles $Bottles = $Bottles - 1 // Build the number of 'bottles_left' string STRING bottles_left = "There will be " + string(Bottles) + " green bottles sitting on the wall" // Print the last two lines PRINT "If 1 green bottle should accidentally fall" PRINT $bottles_left
} }
PowerMILL 2012 R2 User Guide Macros • 17
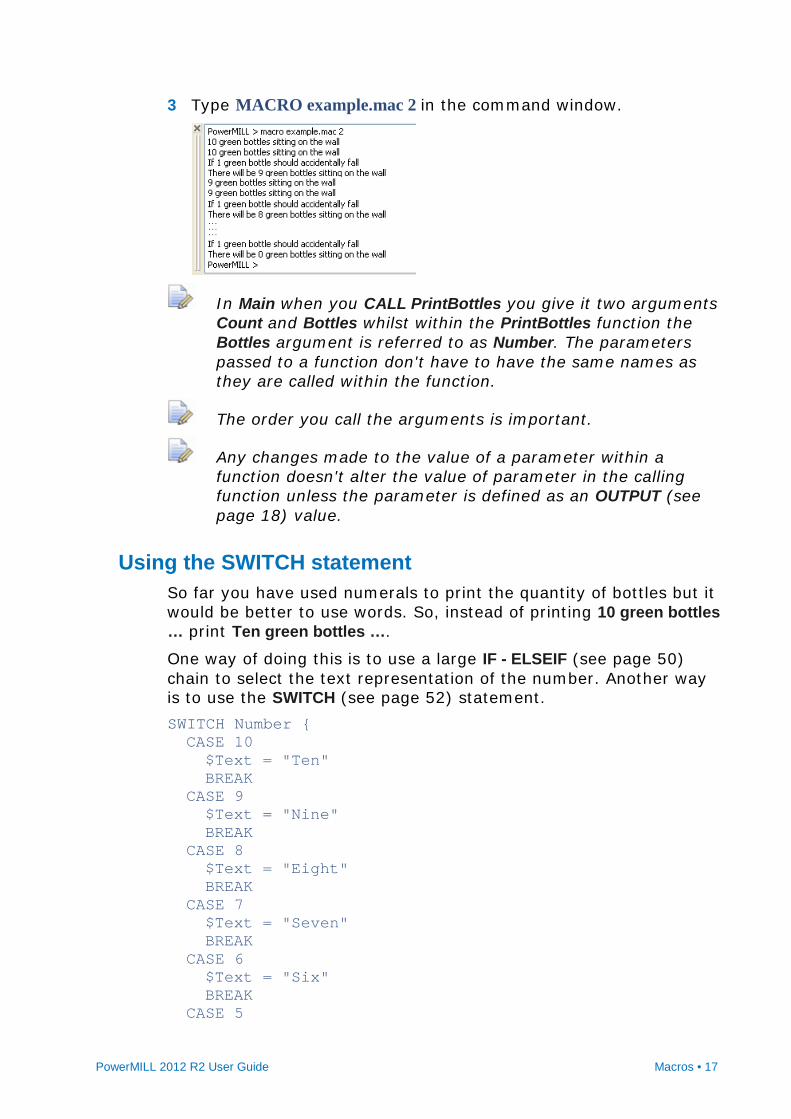
3 Type MACRO example.mac 2 in the command window.
In Main when you CALL PrintBottles you give it two arguments Count and Bottles whilst within the PrintBottles function the Bottles argument is referred to as Number. The parameters passed to a function don't have to have the same names as they are called within the function.
The order you call the arguments is important.
Any changes made to the value of a parameter within a function doesn't alter the value of parameter in the calling function unless the parameter is defined as an OUTPUT (see page 18) value.
Using the SWITCH statement So far you have used numerals to print the quantity of bottles but it would be better to use words. So, instead of printing 10 green bottles … print Ten green bottles ….
One way of doing this is to use a large IF - ELSEIF (see page 50) chain to select the text representation of the number. Another way is to use the SWITCH (see page 52) statement. SWITCH Number { CASE 10 $Text = "Ten" BREAK
CASE 9 $Text = "Nine" BREAK
CASE 8 $Text = "Eight" BREAK
CASE 7 $Text = "Seven" BREAK
CASE 6 $Text = "Six" BREAK
CASE 5
18 • Macros PowerMILL 2012 R2 User Guide
$Text = "Five" BREAK
CASE 4 $Text = "Four" BREAK
CASE 3 $Text = "Three" BREAK
CASE 2 $Text = "Two" BREAK
CASE 1 $Text = "One" BREAK
DEFAULT $Text = "No" BREAK
}
The switch statement matches the value of its argument (in this case Number) with a corresponding case value and executes all the subsequent lines until it encounters a BREAK statement. If no matching value is found the DEFAULT is selected (in this case No).
DEFAULT is an optional step.
Returning values from macros This shows you how to create an OUTPUT variable from a SWITCH statement.
1 Create a new function called NumberStr containing the SWITCH statement in Using the SWITCH statement (see page 17) and a first line of: FUNCTION NumberStr(INT Number, OUTPUT STRING Text) {
and a last line of: }
2 Edit the PrintBottles function in example.mac to FUNCTION PrintBottles(INT Count INT Number) {
// Convert Number into a string STRING TextNumber = '' CALL NumberStr(Number,TextNumber) // Create a variable to hold the first line STRING bottles = TextNumber + " green bottles sitting on the wall"

PowerMILL 2012 R2 User Guide Macros • 19
// Repeat while the condition Count is greater than 0 WHILE Count > 0 {
// Print the line PRINT $bottles // Reduce the count by 1 $Count = Count - 1
} }
This adds the OUTPUT variable to the PrintBottles function.
3 Edit the Main function in example.mac to: FUNCTION Main (INT Count) {
// Make sure that Count is at least two IF Count < 2 {
$Count = 2 } // Start with ten bottles INT Bottles = 10 WHILE Bottles > 0 {
// Print the first line Count number of times CALL PrintBottles(Count, Bottles) // Countdown Bottles $Bottles = $Bottles - 1 // Convert Bottles to string STRING BottlesNumber = '' CALL NumberStr(Bottles, BottlesNumber) // Build the number of bottles left string STRING bottles_left = "There will be " + lcase(BottlesNumber) + " green bottles sitting on the wall" // Print the last two lines PRINT "If one green bottle should accidentally fall" PRINT $bottles_left
} }
The BottlesNumber variable is declared in the WHILE loop of the MAIN function.
Each code block or function can define its own set of local variables; the scope of the variable is from its declaration to the end of the enclosing block or function.
4 Add the NumberStr function into example.mac.

20 • Macros PowerMILL 2012 R2 User Guide
FUNCTION PrintBottles(INT Count, INT Number) { // Convert Number into a string STRING TextNumber = '' CALL NumberStr(Number,TextNumber) // Create a variable to hold the first line STRING bottles = TextNumber + " green bottles sitting on the wall" // Repeat while the condition Count is greater than 0 WHILE Count > 0 { // Print the line PRINT $bottles // Reduce the count by 1 $Count = Count - 1
} } FUNCTION Main (INT Count) { // Make sure that Count is at least two IF Count < 2 { $Count = 2 } // Start with ten bottles INT Bottles = 10 WHILE Bottles > 0 { // Print the first line Count number of times CALL PrintBottles(Count, Bottles) // Countdown Bottles $Bottles = $Bottles - 1 // Convert Bottles to string STRING BottlesNumber = '' CALL NumberStr(Bottles, BottlesNumber) // Build the number of bottles left string STRING bottles_left = "There will be " + lcase(BottlesNumber) + " green bottles sitting on the wall" // Print the last two lines PRINT "If one green bottle should accidentally fall" PRINT $bottles_left
} } FUNCTION NumberStr(INT Number, OUTPUT STRING Text) { SWITCH Number {

PowerMILL 2012 R2 User Guide Macros • 21
CASE 10 $Text = "Ten" BREAK
CASE 9 $Text = "Nine" BREAK
CASE 8 $Text = "Eight" BREAK
CASE 7 $Text = "Seven" BREAK
CASE 6 $Text = "Six" BREAK
CASE 5 $Text = "Five" BREAK
CASE 4 $Text = "Four" BREAK
CASE 3 $Text = "Three" BREAK
CASE 2 $Text = "Two" BREAK
CASE 1 $Text = "One" BREAK
DEFAULT $Text = "No" BREAK
} }
To run the macro:
Type MACRO example.mac 2 in the command window.

22 • Macros PowerMILL 2012 R2 User Guide
Using a FOREACH loop in a macro This example shows you how to use a FOREACH (see page 55) loop to control the number of bottles rather than a WHILE loop.
1 Edit the Main function in example.mac to: FUNCTION Main (INT Count) {
// Make sure that Count is at least two IF Count < 2 {
$Count = 2 } FOREACH Bottles IN {10,9,8,7,6,5,4,3,2,1} {
// Print the first line Count number of times CALL PrintBottles(Count, Bottles) // Countdown Bottles $Bottles = $Bottles - 1 // Convert Bottles to string STRING BottlesNumber = '' CALL NumberStr(Bottles, BottlesNumber) // Build the number of bottles left string STRING bottles_left = "There will be " + lcase(BottlesNumber) + " green bottles sitting on the wall" // Print the last two lines PRINT "If one green bottle should accidentally fall" PRINT $bottles_left
} }
The rest of example.mac remains unaltered. FUNCTION PrintBottles(INT Count, INT Number) { // Convert Number into a string STRING TextNumber = '' CALL NumberStr(Number,TextNumber) // Create a variable to hold the first line STRING bottles = TextNumber + " green bottles sitting on the wall" // Repeat while the condition Count is greater than 0 WHILE Count > 0 { // Print the line PRINT $bottles // Reduce the count by 1 $Count = Count - 1

PowerMILL 2012 R2 User Guide Macros • 23
} } FUNCTION Main (INT Count) { // Make sure that Count is at least two IF Count < 2 { $Count = 2 } FOREACH Bottles IN {10,9,8,7,6,5,4,3,2,1} { // Print the first line Count number of times CALL PrintBottles(Count, Bottles) // Countdown Bottles $Bottles = $Bottles - 1 // Convert Bottles to string STRING BottlesNumber = '' CALL NumberStr(Bottles, BottlesNumber) // Build the number of bottles left string STRING bottles_left = "There will be " + lcase(BottlesNumber) + " green bottles sitting on the wall" // Print the last two lines PRINT "If one green bottle should accidentally fall" PRINT $bottles_left
} } FUNCTION NumberStr(INT Number, OUTPUT STRING Text) { SWITCH Number { CASE 10 $Text = "Ten" BREAK
CASE 9 $Text = "Nine" BREAK
CASE 8 $Text = "Eight" BREAK
CASE 7 $Text = "Seven" BREAK
CASE 6 $Text = "Six" BREAK
CASE 5 $Text = "Five" BREAK
CASE 4
24 • Macros PowerMILL 2012 R2 User Guide
$Text = "Four" BREAK
CASE 3 $Text = "Three" BREAK
CASE 2 $Text = "Two" BREAK
CASE 1 $Text = "One" BREAK
DEFAULT $Text = "No" BREAK
} }
You don't need to declare the type or initial value of the Bottles variable as the FOREACH loop handles this.
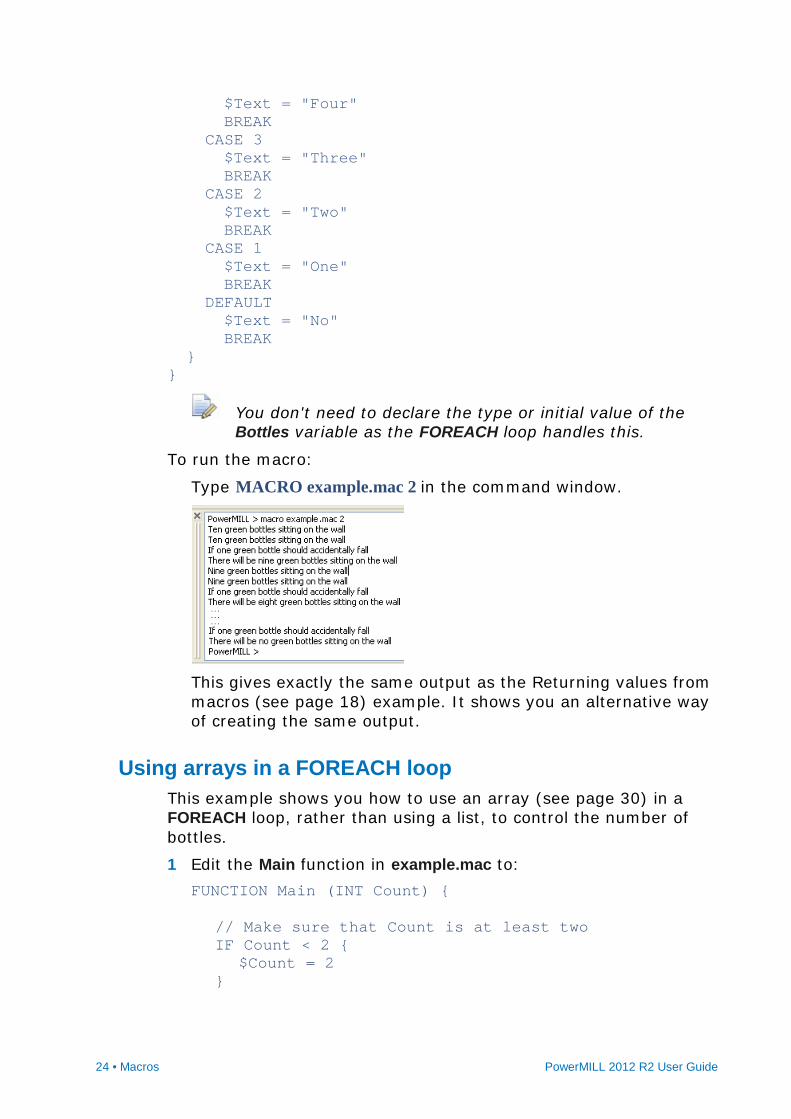
To run the macro:
Type MACRO example.mac 2 in the command window.
This gives exactly the same output as the Returning values from macros (see page 18) example. It shows you an alternative way of creating the same output.
Using arrays in a FOREACH loop This example shows you how to use an array (see page 30) in a FOREACH loop, rather than using a list, to control the number of bottles.
1 Edit the Main function in example.mac to: FUNCTION Main (INT Count) {
// Make sure that Count is at least two IF Count < 2 {
$Count = 2 }

PowerMILL 2012 R2 User Guide Macros • 25
// Define an array of bottle numbers INT ARRAY BottleArray[10] = {10,9,8,7,6,5,4,3,2,1} FOREACH Bottles IN BottleArray {
// Print the first line Count number of times CALL PrintBottles(Count, Bottles) // Count down Bottles $Bottles = $Bottles - 1 // Convert Bottles to string STRING BottlesNumber = '' CALL NumberStr(Bottles, BottlesNumber) // Build the number of bottles left string STRING bottles_left = "There will be " + lcase(BottlesNumber) + " green bottles sitting on the wall" // Print the last two lines PRINT "If one green bottle should accidentally fall" PRINT $bottles_left
} }
The rest of example.mac remains unaltered.
2 Type MACRO example.mac 2 in the command window.
This gives exactly the same output as the Returning values from macros (see page 18) example. It shows you an alternative way of creating the same output.
Variables in macros You can create variables in macros just as you can in a PowerMILL project. When you create a variable in a macro, it has the same properties as a PowerMILL parameter, and can store either a value or an expression.
There are some restrictions on the use of macro variables.

26 • Macros PowerMILL 2012 R2 User Guide
Variable names must start with an alphabetic character (a-z, A-Z) and may contain any number of subsequent alphanumeric characters (a-z, A-Z, 1-9, _). For example, you can name a variable Count1 but not 1Count.
Variable names are case insensitive. For example, Count, count, and CoUnT all refer to the same variable.
All variables must have a type which can be:
INT - integer numbers. For example, 1, 21, 5008.
REAL - real numbers. For example, 201, -70.5, 66.0.
STRING - a sequence of characters. For example, hello.
BOOL - truth values, either 0 (false) or 1 (true).
You must declare the variable type. For example, INT Count = 5 REAL Diameter = 2.5 STRING Tapefile = "MyFile.tap"
You can access any of the PowerMILL parameters in variable declarations, expressions, or assignments.
Any variables you create in a macro are only accessible from within the macro. When the macro has finished the variable is no longer accessible and can't be used in expressions or other macros.
If you need to create a variable that can be used at any time in a PowerMILL project then you should create a User Parameter.
Assigning parameters When you assign a value to a variable the expression is evaluated and the result is assigned, the actual expression is not retained. This is the same as using the EVAL modifier in the PowerMILL parameter EDIT PAR command. These two statements are equivalent: EDIT PAR "Stepover" EVAL "Tool.Diamter * 0.6" $Stepover = Tool.Diameter * 0.6
Variable and parameter names may optionally be prefixed with a $ character. In most cases, you can omit the $ prefix, but it MUST be used when you assign a value to either a variable or parameter within a macro.
Inputting values into macros An input dialog enables you to enter specific values into a macro.

PowerMILL 2012 R2 User Guide Macros • 27
The basic structure is: $<variable> = INPUT <string-prompt>
This displays an input dialog with a specified prompt as its title which enables you to enter a value.
If you add an input dialog you should consider adding an error function to check the value entered is reasonable.
For example: string prompt = "Enter a number" $i = input $prompt $err = ERROR i }
produces this dialog:
Asking a Yes/No question A Yes/No query dialog is a very simple dialog.
Selecting Yes assigns 1 to the variable.
Selecting No assigns 0 to the variable.
The basic structure is: $<variable> = QUERY <string-prompt>
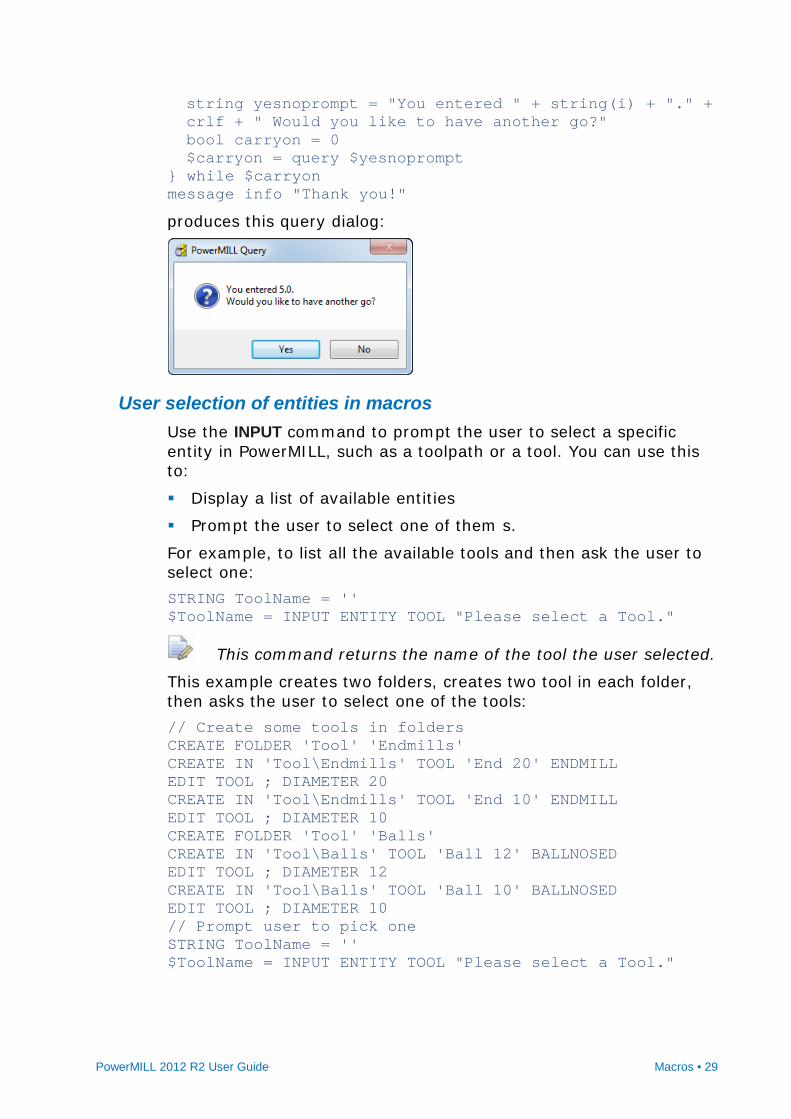
For example: string yesnoprompt = "You entered 5. Would you like to have another go?" bool carryon = 0 $carryon = query $yesnoprompt
produces this dialog:
Creating a message dialog There are three types of message dialogs:
Information dialogs
Warning dialogs
Error dialogs

28 • Macros PowerMILL 2012 R2 User Guide
The basic structure is: MESSAGE INFO|WARN|ERROR <expression>
For example, an input dialog to enter a number into a macro: real i = 3 string prompt = "Enter a number" do { bool err = 0 do { $i = input $prompt $err = ERROR i if err { $prompt = "Please 'Enter a number'"
} } while err string yesnoprompt = "You entered " + string(i) + ". Would you like to have another go?" bool carryon = 0 $carryon = query $yesnoprompt
} while $carryon message info "Thank you!"
An example to find out if a named toolpath exists: string name = "" $name = input "Enter the name of a toolpath" if pathname('toolpath',name) == "" { message error "Sorry. Couldn't find toolpath " + name
} else { message info "Yes! Toolpath " + name + " exists!"
}
Carriage return in dialogs You can specify a carriage return to control the formatting of the text in a message dialog using crlf..
For example, looking at the input dialog to enter a number into a macro: real i = 3 string prompt = "Enter a number" do { bool err = 0 do { $i = input $prompt $err = ERROR i if err { $prompt = "Please 'Enter a number'"
} } while err
PowerMILL 2012 R2 User Guide Macros • 29
string yesnoprompt = "You entered " + string(i) + "." + crlf + " Would you like to have another go?" bool carryon = 0 $carryon = query $yesnoprompt
} while $carryon message info "Thank you!"
produces this query dialog:
User selection of entities in macros Use the INPUT command to prompt the user to select a specific entity in PowerMILL, such as a toolpath or a tool. You can use this to:
Display a list of available entities
Prompt the user to select one of them s.
For example, to list all the available tools and then ask the user to select one: STRING ToolName = '' $ToolName = INPUT ENTITY TOOL "Please select a Tool."
This command returns the name of the tool the user selected.
This example creates two folders, creates two tool in each folder, then asks the user to select one of the tools: // Create some tools in folders CREATE FOLDER 'Tool' 'Endmills' CREATE IN 'Tool\Endmills' TOOL 'End 20' ENDMILL EDIT TOOL ; DIAMETER 20 CREATE IN 'Tool\Endmills' TOOL 'End 10' ENDMILL EDIT TOOL ; DIAMETER 10 CREATE FOLDER 'Tool' 'Balls' CREATE IN 'Tool\Balls' TOOL 'Ball 12' BALLNOSED EDIT TOOL ; DIAMETER 12 CREATE IN 'Tool\Balls' TOOL 'Ball 10' BALLNOSED EDIT TOOL ; DIAMETER 10 // Prompt user to pick one STRING ToolName = '' $ToolName = INPUT ENTITY TOOL "Please select a Tool."

30 • Macros PowerMILL 2012 R2 User Guide
User selection of a file name You can prompt your user for a filename with Use the FILESELECT command to prompt the user for a file name. This command displays an Open dialog which enables user to browse for a file.
For example: STRING Filename = '' $Filename = FILESELECT "Please select a pattern file"
Arrays and lists Arrays In addition to simple variables of type INT, REAL, or STRING you can also have arrays of these types. When you declare an array you must initialise all of its members using an initialisation list. When you have specified an array you cannot change its size. The syntax for an array is: BASIC-TYPE ARRAY name[n] = {…}
For example, to declare an array of three strings: STRING ARRAY MyArray[3] = {'First','Second','Third'}
All the items in the initialisation list must be the same BASIC-TYPE as the array.
You can access the items of the array by subscripting. The first item in the array is subscript 0. For example: INT Index = 0 WHILE Index < size(MyArray) { PRINT MyArray[Index] $Index = Index + 1
}
Prints: First Second Third
If you leave the size of the array empty, then PowerMILL determines its size from the number of elements in the initialisation list. For example: STRING ARRAY MyArray[] = {'First','Second','Third','Fourth'} PRINT = size(MyArray)
Prints: 4

PowerMILL 2012 R2 User Guide Macros • 31
Lists PowerMILL also has a LIST type. The main difference between a list and an array is that the list doesn't have a fixed size, so you can add and remove items to it. You can create lists:
that are empty to start with
rom an initialisation list
from an array. // Create an empty list STRING LIST MyStrings = {} // Create a list from an array STRING LIST MyList = MyArray // Create a list using an initialisation list STRING LIST MyListTwo = {'First','Second'}
You can use two inbuilt functions add_first() and add_last() to add items to a list.
For example using the inbuilt function add_last(): CREATE PATTERN Daffy CREATE PATTERN Duck // Create an empty list of strings STRING LIST Patterns = {} FOREACH pat IN folder('Pattern') { // Add the name of the pattern to the list int s = add_last(Patterns, pat.Name)
} FOREACH name IN Patterns { PRINT = $name }
Prints: Daffy Duck
You can also add items to the front of a list by using the inbuilt function add_first(): CREATE PATTERN Daffy CREATE PATTERN Duck // Create an empty list of strings STRING LIST Patterns = {} FOREACH pat IN folder('Pattern') { // Add the name of the pattern to the list int s = add_first(Patterns, pat.Name)
} FOREACH name IN Patterns { PRINT = $name
}

32 • Macros PowerMILL 2012 R2 User Guide
Prints: Duck Daffy
Using lists A list, like an array, contains multiple values. You can create a list with initial values: INT LIST MyList = {1,2,3,4}
Unlike an ARRAY, you do not use the [] syntax.
You can specify an empty list: INT LIST MyEmptyList = {}
You can use lists anywhere you might use an array. For instance, you can use a list in a FOREACH loop: FOREACH i IN MyList { PRINT = i
}
or to initialise an array: INT ARRAY MyArray[] = MyList
You can also use an array to initialise a list: INT LIST MyList2 = MyArray
You can pass a list to macro functions that expect an array: FUNCTION PrintArray(INT ARRAY MyArray) { FOREACH i IN Myarray { PRINT = i
} } FUNCTION Main() { INT LIST MyList = {10,20,30,40} CALL PrintArray(MyList)
}
You will normally access the elements of a list with a FOREACH loop, but you can also access the elements using the array subscripting notation: INT Val = MyList[2]
Adding items to a list summary The main differences between a list and an array is that a list can have items added to it and removed from it.

PowerMILL 2012 R2 User Guide Macros • 33
To add an item to a list you can use either of the inbuilt functions add_first() or add_last().
For example, to collect the names of all the toolpaths in a folder: // Create an empty list STRING LIST TpNames = {} FOREACH tp IN folder('Toolpath\MyFolder') { INT Size = add_last(TpNames, tp.name)
}
For more information see Adding comments to macros (see page 7).
Removing items from a list summary The main differences between a list and an array is that a list can have items added to it and removed from it.
To remove an item from a list you can use either of the inbuilt functions remove_first() or remove_last().
For example, if you have a list of toolpath names some of which are batched and you want to ask the user whether they want them calculated now. You can use a function which removes calculated toolpaths from the list and creates a query message for the rest. FUNCTION CalculateNow(STRING LIST TpNames) { // Cycle through the list FOREACH Name IN TpNames { IF entity('toolpath',Name).Calculated { // Toolpath already calculated so // remove name from list BOOL success = remove(TpNames,Name)
} } // Do we have any names left IF size(TpNames) > 0 { // Build the prompt string STRING Msg = "These toolpaths are uncalculated" FOREACH name IN TpNames { $Msg = Msg + CRLF + name
} $Msg = Msg + CRLF + "Do you want to calculate them now?" // Ask the user if they want to proceeed bool yes = 0 $yes = QUERY $msg IF yes { // Loop through the toolpaths and calculate them WHILE size(TpNames) > 0 { STRING Name = remove_first(TpNames) ACTIVATE TOOLPATH $Name EDIT TOOLPATH ; CALCULATE

34 • Macros PowerMILL 2012 R2 User Guide
} }
} }
You could use a FOREACH loop rather than a WHILE loop: FOREACH Name IN TpNames { ACTIVATE TOOLPATH $Name EDIT TOOLPATH ; CALCULATE
}
PowerMILL has an inbuilt function which allows you to remove duplicate items from a list: remove_duplicates. For example, to determine how many different tool diameters there are in your toolpaths you could add the tool diameters from each toolpath and then remove the duplicates: REAL LIST Diameters = {} FOREACH tp IN folder('toolpath') { INT s = add_first(Diameters, tp.Tool.Diameter)
} INT removed = remove_duplicates(Diameters)
For more information, see Removing items from a list (see page 76) or Removing duplicate items in a list (see page 75).
Building a list You can use the inbuilt member() function in a macro function to build a list of tool names used by toolpaths or boundaries without any duplicates: FUNCTION ToolNames(STRING FolderName, OUTPUT STRING LIST ToolNames) { // loop over all the items in FolderName FOREACH item IN folder(FolderName) {
// Define local working variables STRING Name = '' INT size = 0
// check that the item's tool exists // it might not have been set yet IF entity_exists(item.Tool) { // get the name and add it to our list $Name = item.Tool.Name IF NOT member(FolderName, Name) { $dummy = add_last(FolderName, Name) }
}
// Check whether this item has a reference tool

PowerMILL 2012 R2 User Guide Macros • 35
// and that it has been set IF active(item.ReferenceTool) AND entity_exists(item.ReferenceTool) { // get the name and add it to our list $Name = item.ReferenceTool.Name IF NOT member(FolderName, Name) { $dummy = add_last(FolderName, Name) }
} }
}
Since this function can work on any toolpath, or boundary folder, you can collect all the tools used by the toolpaths in one list and all of the tools used by boundaries in another list. You can do this by calling the macro function twice: STRING LIST ToolpathTools = {} STRING LIST BoundaryTools = {} CALL ToolNames('Toolpath',ToolpathTools) CALL ToolNames('Boundary',BoundaryTools)
To return a list containing the items from both sets with any duplicates removed: STRING LIST UsedToolNames = set_union(ToolpathTools, BoundaryTools)
Subtract function
You can use the subtract() function to determine what happened after carrying out a PowerMILL command. For example, suppose you to find out if any new toolpaths are created during a toolpath verification. If you get the list of toolpath names before the operation, and the list of names after the operation, and then subtract the ‘before’ names from the ‘after’ names you are left with the names of any new toolpaths. FUNCTION GetNames(STRING FolderName, OUTPUT STRING LIST Names) { FOREACH item IN folder(FolderName) { INT n = add_last(Names, item.Name)
} } FUNCTION Main() { STRING LIST Before = {} CALL GetNames('toolpath',Before)
EDIT COLLISION APPLY
STRING LIST After = {}

36 • Macros PowerMILL 2012 R2 User Guide
CALL GetNames('toolpath',After) STRING LIST NewNames = subtract(After, Before)
IF is_empty(NewNames) { PRINT "No new toolpaths were created."
} ELSE { PRINT "The new toolpaths created are:" FOREACH item IN NewNames { PRINT = item
} }
}
Vectors and points In PowerMILL vectors and points are represented by an array of three reals.
PowerMILL contains point and vector parameters, for example the Workplane.Origin, Workplane.ZAxis, ToolAxis.Origin, and ToolAxis.Direction. You can create your own vector and point variables: REAL ARRAY VecX[] = {1,0,0} REAL ARRAY VecY[] = {0,1,0} REAL ARRAY VecZ[] = {0,0,1} REAL ARRAY MVecZ[] = {0,0,-1} REAL ARRAY Orig[] = {0,0,0}
For more information, see the inbuilt Vectors and points functions (see page 62)
Comparing variables Comparing variables allows you to check information and defines the course of action to take when using IF (see page 49) and WHILE (see page 56) statements.
The result of a comparison is either true or false. When true the result is 1, when false the result is 0.
A simple comparison may consist of two variables with a relational operator between them: Relational operator Description
Symbol Text == EQ is equal to
!= NE is not equal to
< LT is less than

PowerMILL 2012 R2 User Guide Macros • 37
<= GE is less than or equal to
> GT is greater than
>= GE is greater than or equal to
You can use either the symbol or the text in a comparison.
For example, BOOL C = (A == B)
is the same as: BOOL C = (A EQ B)
C is assigned 1 (true) if A equals B and . If A doesn't equal B, then C is 0 (false).
The operators = and == are different.
The single equal operator, =, assigns the value on the right-hand side to the left-hand side.
The double equals operator, ==, compares two values for equality.
If you compare the values of two strings, you must use the correct capitalisation.
For example, if you want to check that the tool is an end mill, then you must use: Tool.Type == 'end_mill'
and not: Tool.Type == 'End_Mill
If you are unsure about the case of a string then you can use one of the inbuilt functions lcase() or ucase() to test against the lower case (see page 70) or upper case (see page 69) version of the string: lcase(Tool.Type) == 'end_mill' ucase(Tool.Type) == 'END_MILL'
For example, comparing variables: BOOL bigger = (Tool.Diameter+Thickness >=ReferenceToolpath.Tool.Diameter+ReferenceToolpath.Thickness)
gives a result of 1 (true) when the Tool.Diameter + Thickness is greater than or equal to the ReferenceToolpath.Tool.Diameter + ReferenceToolpath.Thickness and a result of 0 (false) otherwise.

38 • Macros PowerMILL 2012 R2 User Guide
Logical operators Logical operators let you to do more than one comparison at a time. There are four logical operators:
AND
OR
XOR
NOT
Remember the result of a comparison is either true or false. When true, the result is ; when false, the result is 0.
Using the logical operator AND The result is true (1) if all operands are true, otherwise the result is false (0). Operand 1 Operand 2 Operand 1 AND
Operand 2 true (1) true (1) true (1)
true (1) false (0) false (0)
false (0) true (1) false (0)
false (0) false (0) false (0)
Using the logical operator OR The result is true (1) if at least one operand is true. If all the operands are false (0) the result is false. Operand 1 Operand 2 Operand 1 OR
Operand 2 true (1) true (1) true (1)
true (1) false (0) true (1)
false (0) true (1) true (1)
false (0) false (0) false (0)
Using the logical operator XOR The result is true (1) if exactly one operand is true. If all the operands are false the result is false (0). If more than one operand is true the result is false (0). Operand 1 Operand 2 Operand 1 XOR
Operand 2 true (1) true (1) false (0)
true (1) false (0) true (1)

PowerMILL 2012 R2 User Guide Macros • 39
false (0) true (1) true (1)
false (0) false (0) false (0)
Using the logical operator NOT The result is the inverse of the input. Operand 1 NOT Operand 1 true (1) false (0)
false (0) true (1)
Advance variable options
Scratchpad variables It is possible to create and manipulate variables in the command line window. These are called scratchpad variables as you can use them to test the results of parameter evaluation without having to write a macro.
For example, to test some code, in the command line window type: STRING Test = Tool.Name DEACTIVATE TOOL ACTIVATE TOOL $Test
To clear the scratchpad, in the command line window type: RESET LOCALVARS
If you don't issue the RESET LOCALVARS command, the local variable, Test, remains defined until you exit from PowerMILL.
Using variables and parameters in macro commands You can substitute the value of a variable or parameter in a command wherever the command expects a number or a string. To do this, prefix the variable or parameter name with a $.
For example, to create a tool with a diameter that is half that of the active tool. // Calculate the new diameter and name of tool REAL HalfDiam = Tool.Diameter/2 STRING NewName = string(Tool.Type) + " D-" + string(HalfDiam)

40 • Macros PowerMILL 2012 R2 User Guide
// Create a new tool and make it the active one COPY TOOL ; ACTIVATE TOOL # // Now rename the new tool and edit its diameter RENAME TOOL ; $NewName EDIT TOOL $NewName DIAMETER $HalfDiam
This creates a tool with half the diameter.
Scope of variables A variable exists from the time it is declared until the end of the block of code within which it is declared. Blocks of code are macros and control structures (WHILE, DO - WHILE, SWITCH, IF-ELSEIF-ELSE, and FOREACH).
A variable, with a specific name, can only be defined once within any block of code.
For example, // Define a local variable 'Count' INT Count = 5 // Define a second local variable 'Count' INT Count = 2
Gives an error since Count is defined twice.
However, within an inner block of code you can define another variable with the same name as a variable (already defined) in an outer block: INT Count = 5 IF Count > 0 { // Define a new local variable 'Count' INT Count = 3 // Print 3 PRINT $Count
// The local Count is no longer defined } // Print 5 PRINT $Count
A variable defined within an inner block of code hides any variable declared in an outer block. This is also important if you use a name for a variable which matches one of PowerMILL’s parameters. For example, if the toolpath stepover is 5 and in your macro you have: // 'Hide' the global stepover by creating your own variable REAL Stepover = 2 // Print Stepover PRINT $Stepover

PowerMILL 2012 R2 User Guide Macros • 41
The value printed is 2 not 5, and the toolpath stepover value is unchanged. To access the current toolpath's stepover parameter you must use toolpath.Stepover. // 'Hide' the global stepover by creating your own variable REAL Stepover = 2 // Print 2 PRINT $Stepover // Print the value of the toolpath's stepover - which is 5 PRINT $toolpath.Stepover
As macro variables cease to exist at the end of a macro or block of code, you should not use a variable defined in a macro within a retained expression. You can use assignments, as the value is computed immediately. Don't use a macro variable in an EDIT PAR expression without EVAL as this causes an expression error when PowerMILL tries to evaluate it.
REAL Factor = 0.6 // The next two commands are OK as the expression is evaluated immediately. $Stepover = Tool.Diameter * Factor EDIT PAR "Stepover" EVAL "Tool.Diameter * Factor" // The next command isn't OK because the expression is retained. EDIT PAR "Stepover" "Tool.Diameter * Factor"
The Factor variable ceases to exist at the end of the macro, so Stepover will evaluate as an error.
Using expressions in macros An arithmetic expression is a list of variables and values with operators which define a value. Typical usage is in variable declarations and assignments. // Variable declarions REAL factor = 0.6 REAL value = Tolerance * factor // Assignments $Stepover = Tool.Diameter * factor $factor = 0.75
When using an assignment you MUST prefix the variable name with a $. So PowerMILL can disambiguate an assignment from other words in the macro command language.

42 • Macros PowerMILL 2012 R2 User Guide
In assignments, the expression is always evaluated and the resulting value assigned to the variable on the left of the = operand.
In addition to using expressions in calculations, you can use logical expressions to make decisions in macros. The decision making statements in PowerMILL are IF-ELSE_IF (see page 50), SWITCH (see page 52), WHILE (see page 56), and DO-WHILE (see page 57). These execute the commands within their code blocks if the result of an expression is true (1). For example: IF active(Tool.TipRadiused) { // Things to do if a tip radiused tool.
} IF active(Tool.TipRadiused) AND Tool.Diameter < 5 { // Things to do if a tip radiused tool and the diameter // is less than 5.
}
You can use any expression to decide whether or not a block of code will be performed.
Operators for integers and real numbers The standard arithmetical operators are available for integers and real numbers. Operator Description Examples + addition 3+5 evaluates to 8
- subtraction 5-3 evaluates to 2
* multiplication 5*3 evaluates to 15
/ division 6/2 evaluates to 3
% modulus. This is the remainder after two integers are divided
11%3 evaluates to 2
^ to the power of 2^3 is the same as 2*2*2 and evaluates to 8
For a complete list of operators, see the HTML page displayed when you select Help > Parameters > Reference > Functions.
Operators for strings The concatenation (+) operator is available for string.
For example "abc"+"xyz" evaluates to abcxyz.

PowerMILL 2012 R2 User Guide Macros • 43
You can use this to build strings from various parts, for example: MESSAGE "The Stepover value is: " + string(Stepover)
Operator precedence The order in which various parts of an expression are evaluated affects the result. The operator precedence unambiguously determines the order in which sub-expressions are evaluated.
Multiplication and division are performed before addition and subtraction.
For example, 3 * 4 +2 is the same as 2 + 3 * 4 and gives the answer 14.
Exponents and roots are performed before multiplication and addition.
For example, 3 + 5 ^ 2 is the same as 3 + 5 and gives the answer 28.
-3 ^ 2 is the same as -3 and gives the answer -9.
Use brackets (parentheses) to avoid confusion.
For example, 2 + 3 * 4 is the same as 2 + (3 * 4) and gives the answer 14.
Parentheses change the order of precedence as terms inside in parentheses are performed first.
For example, (2 + 3) * 4 gives the answer 20.
or, (3 + 5) ^2 is the same as (3 + 5) and gives the answer 64.
You must surround the arguments of a function with parentheses.
For example, y = sqrt(2), y = tan(x), y = sin(x + z).
Relational operators are performed after addition and subtraction.
For example, a+b >= c+d is the same as (a+b) >= (c+d).
Logical operators are performed after relational operators, though parentheses are often added for clarity.
For example:
5 == 2+3 OR 10 <= 3*3
is the same as:
(5 == (2+3)) OR (10 <= (3*3))
but is normally written as
(5 == 2+3) OR (10 <= 3*3).

44 • Macros PowerMILL 2012 R2 User Guide
Precedence Order Operation Description 1 () function call, operations
grouped in parentheses
2 [] operations grouped in square brackets
3 + - ! unary prefix (unary operations have only one operand, such as, !x, -y)
4 cm mm um ft in th
unit conversion
5 ^ exponents and roots
6 * / % multiplication, division, modulo
7 + - addition and subtraction
8 < <= > >= (LT, LE, GT, GE)
relational comparisons: less than, less than or equal, greater than, greater than or equal
9 == != (EQ, NE)
relational comparisons: equals, not equals
10 AND logical operator AND
11 NOT logical operator NOT
12 XOR logical operator XOR
13 OR logical operator OR
14 , separation of elements in a list
Examples of precedence: Expression Equivalent a * - 2 a * (- 2)
!x == 0 (!x) == 0
$a = -b + c * d – e $a = ((-b) + (c * d)) – e
$a = b + c % d – e $a = (b + (c % d)) – e
$x = y == z $x = (y == z)
$x = -t + q * r / c $x = ((-t) + ((q * r) / c))
$x = a % b * c + d $x = (((a % b) * c) + d)
$a = b <= c | d != e $a = ((b <= c) | (d != e))

PowerMILL 2012 R2 User Guide Macros • 45
$a = !b | c & d $a = ((!b) | (c & d))
$a = b mm * c in + d $a = (((b mm) * (c in)) + d)
Macro functions When you run a macro you can use arguments, such as the name of a toolpath, tool, or a tolerance. You must structure the macro to accept arguments by creating a FUNCTION called Main (see page 46) then specify the arguments and their type.
For example, a macro to polygonise a boundary to a specified tolerance is: FUNCTION Main(REAL tol) { EDIT BOUNDARY ; SMASH $tol
}
A macro to set the diameter of a named tool is: FUNCTION Main( STRING name REAL diam
) { EDIT TOOL $name DIAMETER $dia
}
To run these macros with arguments add the arguments in the correct order to the end of the MACRO command: MACRO MyBoundary.mac 0.5 MACRO MyTool.mac "ToolName" 6
If you use FUNCTION in your macro, then all commands must be within a function body. This means that you must have a FUNCTION Main, which is automatically called when the macro is run. FUNCTION CleanBoundary(string name) { REAL offset = 1 mm REAL diam = entity('boundary';name).Tool.Diameter // Delete segments smaller than tool diameter EDIT BOUNDARY $name SELECT AREA LT $diam DELETE BOUNDARY $name SELECTED //Offset outwards and inwards to smooth boundary EDIT BOUNDARY $name OFFSET $offset EDIT BOUNDARY $name OFFSET ${-offset}
} FUNCTION Main(string bound) { FOREACH bou IN folder(bound) { CALL CleanBoundary(bou.Name)
} }
46 • Macros PowerMILL 2012 R2 User Guide
Within a function, you can create and use variables that are local to the function, just as you can within a WHILE loop. However, a function can't access any variable that's defined elsewhere in the macro, unless that variable has been passed to the function as an argument.
In the CleanBoundary function, ${-offset} offset the boundary by a negative offset. When you want to substitute the value of an expression into a PowerMILL command rather than the value of a parameter, use the syntax ${expression}. The expression can contain any valid PowerMILL parameter expression including: inbuilt function calls; mathematical, logical, and comparison operators.
As this macro requires an argument (the boundary name) you must run this from the command window. To run Clean_Boundary.mac macro on the Cavity boundary you must type macro Clean_Boundary "Cavity" in the command line.
Main function If a macro has any functions:
It must have one, and only one, FUNCTION called Main.
The Main function must be the first function called.
Function names aren't case sensitive: MAIN, main, and MaIn all refer to the same function.
Running a macro where the Main function is called with either the wrong number of arguments or with types of arguments that don't match, causes an error. For example: MACRO MyTool.mac 6 "ToolName"
generates an error since the macro expects a string and then a number, but is given a number and then a string.
If you want to repeat a sequence of commands at different points within a macro, you can use a FUNCTION.
For example, if you want to remove any small islands that are smaller than the tool diameter and smooth out any minor kinks after a boundary calculation. One solution is to repeat the same commands after each boundary calculation: EDIT BOUNDARY ; SELECT AREA LT Boundary.Tool.Diameter DELETE BOUNDARY ; SELECTED EDIT BOUNDARY ; OFFSET "1 mm" EDIT BOUNDARY ; OFFSET "-1 mm"

PowerMILL 2012 R2 User Guide Macros • 47
This is fine if you have a macro that creates one boundary, but if it creates a number of boundaries you end up with a macro with excessive repetition. However by using a FUNCTION you can define the sequence once: FUNCTION CleanBoundary(string name) { REAL offset = 1 mm REAL diam = entity('boundary';name).Tool.Diameter // Delete segments smaller than tool diameter EDIT BOUNDARY $name SELECT AREA LT $diam DELETE BOUNDARY $name SELECTED //Offset outwards and inwards to smooth boundary EDIT BOUNDARY $name OFFSET $offset EDIT BOUNDARY $name OFFSET ${-offset}
}
Then call it whenever it is needed: FOREACH bou IN folder('boundary') { CALL CleanBoundary(bou.Name)
} CREATE BOUNDARY Shallow30 SHALLOW EDIT BOUNDARY Shallow30 CALCULATE CALL CleanBoundary('Shallow30')
Returning values from functions There are two types of arguments to FUNCTIONS:
Input variables ($ Input arguments). If a parameter is an input then any changes to the parameter inside the function are lost when the function returns. This is the default.
Output variables ($ Output arguments) retain their value after the function returns.
When you call a function, PowerMILL creates temporary copies of all the arguments to the function, these copies are removed when the function returns. However, if the macro contains an OUTPUT to an argument, then instead of creating a temporary copy of the variable, it creates an alias for the existing variable. Any changes that you make to the alias directly, change the actual variable.
In the example, the Test function has two arguments: aInput and aOutput. Within the Test function:
The argument aInput is a new temporary variable that only exists within the function, any changes to its value only affect the temporary, and are lost once the function ends.

48 • Macros PowerMILL 2012 R2 User Guide
The aOutput variable is an alias for the variable that was passed in the CALL command, any changes to its value are actually changing the value of the variable that was given in the CALL command.
FUNCTION Test(REAL aInput, OUTPUT REAL aOutput) { PRINT $aInput $aInput = 5 PRINT $aOutput $aOutput = 0 PRINT $aOutput
} FUNCTION Main() { REAL Par1 = 2 REAL Par2 = 1 CALL Test(Par1, Par2) // Prints 2 - value is unchanged PRINT $Par1 // Prints 0 - value has been changed PRINT $Par2
}
When the CALL command is executed in the MAIN function:
1 PowerMILL creates a new REAL variable called aInput. It is assigned the value of Par1, and passed into Test.
2 PowerMILL passes Par2 directly into Test where it is known as aOutput.
Sharing functions between macros You can share functions between macros by using the INCLUDE statement. You can put all your common functions in a file which you then INCLUDE within other macros. For example, if you put the CleanBoundary function into a file called common.inc you could rewrite the macro as: INCLUDE common.inc FUNCTION Main(input string bound) { FOREACH bou IN folder(bound) { CALL CleanBoundary(bou.Name)
} }
To call this macro from PowerMILL: // Clean all the boundaries MACRO Clean 'boundary' // Clean all the Roughing boundaries MACRO Clean 'boundary\Roughing'

PowerMILL 2012 R2 User Guide Macros • 49
IF statement The IF statement executes a series of commands when a certain condition is met.
The basic control structure is: IF <expression> { Commands A
} Commands B
If expression is true then Commands A are executed, followed by Commands B.
If expression is false, then only Commands B are executed.
For example, if you want to calculate a toolpath, but don't want to waste time re-calculating a toolpath that has already been calculated: // If the active toolpath hasn't been calculated do so now IF NOT Computed { EDIT TOOLPATH $TpName CALCULATE
}
You must enclose Commands A in braces, {}, and the braces must be positioned correctly. For example, the following command is NOT valid: IF (radius == 3) PRINT "Invalid radius"
To make this command valid, add the braces: IF (radius == 3) { PRINT "Invalid radius"
}
The first brace must be the last item on the line and on the same line as the IF.
The closing brace must be on a line by itself.

50 • Macros PowerMILL 2012 R2 User Guide
IF - ELSE statement The IF - ELSE statement executes a series of commands when a certain condition is met and a different series of commands otherwise.
The basic control structure is: IF <expression> { Commands A
} ELSE { Commands B
} Commands C
If expression is true, then Commands A are executed followed by Commands C.
If expression is false, then Commands B are executed followed by Commands C.
// Set tool axis lead/lean if tip radiused tool // Otherwise use the vertical tool axis. IF active(Tool.TipRadius) OR Tool.Type == "ball_nosed" { EDIT TOOLAXIS TYPE LEADLEAN EDIT TOOLAXIS LEAD "5" EDIT TOOLAXIS LEAN "5"
} ELSE { EDIT TOOLAXIS TYPE VERTICAL
}
IF - ELSEIF - ELSE statement The IF - ELSEIF - ELSE statement executes a series of commands when a certain condition is met, a different series of commands when the first condition isn't met and the second condition is met and a different series of commands when none of the conditions are met.
The basic control structure is:

PowerMILL 2012 R2 User Guide Macros • 51
IF <expression_1> { Commands A
} ELSEIF <expression_2> { Commands B
} ELSE { Commands C
} Commands D
If expression_1 is true, then Commands A are executed followed by Commands D.
If expression_1 is false and expression_2 is true, then Commands B are executed followed by Commands D.
If expression_1 is false and expression_2 is false, then Commands C are executed followed by Commands D.
ELSE is an optional statement. There may be any number of ELSEIF statements in a block but no more than one ELSE.
IF Tool.Type == "end_mill" OR Tool.Type == "ball_nosed" { $radius = Tool.Diameter/2
} ELSEIF active(Tool.TipRadius) { $radius = Tool.TipRadius
} ELSE { $radius = 0 PRINT "Invalid tool type"
}
This sets the variable radius to:
Half the tool diameter if the tool is an end mill or ball nosed tool.
The tip radius if the tool is a tip radiused tool.

52 • Macros PowerMILL 2012 R2 User Guide
Displays Invalid tool type if the tool is anything else.
SWITCH statement When you compare a variable with a number of possible values and each value determines a different outcome, it is advisable to use the SWITCH statement.
The SWITCH statement allows you to compare a variable against a list of possible values. This comparison determines which commands are executed.
The basic control structure is: SWITCH variable { CASE (constant_A) Commands A
CASE (constant_B) Commands B
DEFAULT Commands C
} Commands D
If condition_A is true then Commands A, B, C, and D are executed.
If condition_B is true then Commands B, C, and D are executed.
If condition_A and condition_B are false then Commands C, and D are executed.
When a match is found all the commands in the remaining CASE statements are executed. You can prevent this from happening by using a BREAK (see page 53) statement.

PowerMILL 2012 R2 User Guide Macros • 53
You can have any number of CASE statements, but at most one DEFAULT statement.
This example makes changes to the point distribution based on the tool axis type. There are three options:
1 3+2-axis toolpaths to have an output point distribution type of Tolerance and keep arcs and a lead in and lead out distance of 200.
2 3-axis toolpaths to have an output point distribution type of Tolerance and keep arcs.
3 5-axis toolpaths to have an output point distribution type of Redistribute.
Because the CASE 'direction' block of code doesn't have a BREAK statement the macro also executes the code in the 'vertical' block.
SWITCH ToolAxis.Type { CASE 'direction' EDIT TOOLPATH LEADS RETRACTDIST "200.0" EDIT TOOLPATH LEADS APPROACHDIST "200" // fall though to execute
CASE 'vertical' // Redistribute points to tolerance and keep arcs EDIT FILTER TYPE STRIP BREAK
DEFAULT // Redistribute points EDIT FILTER TYPE REDISTRIBUTE BREAK
}
BREAK statement in a SWITCH statement The BREAK statement exits the SWITCH statement.
The basic control structure is: SWITCH variable { CASE (constant_A) Commands A BREAK
CASE (constant_B) Commands B BREAK
DEFAULT Commands C
}

54 • Macros PowerMILL 2012 R2 User Guide
Commands D
If condition_A is true then Commands A are executed followed by Commands D.
Remember, if there is no break statements then commands A, B, C, and D are carried out.
If condition_B is true then Commands B are executed followed by Commands D.
If condition_A and condition_B are false then Commands C are executed followed by Commands D.
Repeating commands in macros If you want to repeat a set of commands a number of times, for example, creating a circle at the start of every line in the model, you can use loops.
For example, if you have two feature sets, Top and Bottom, which contain holes you want to drill from the top and bottom of the model respectively, use the macro: STRING Fset = 'Top' INT Count = 0 WHILE Count < 2 { ACTIVATE FEATURESET $Fset ACTIVATE WORKPLANE FROMENTITY FEATURESET $Fset IMPORT TEMPLATE ENTITY TOOLPATH "Drilling\Drilling.ptf" EDIT TOOLPATH $TpName CALCULATE $Fset = 'Bottom' $Count = Count + 1
}
PowerMILL 2012 R2 User Guide Macros • 55
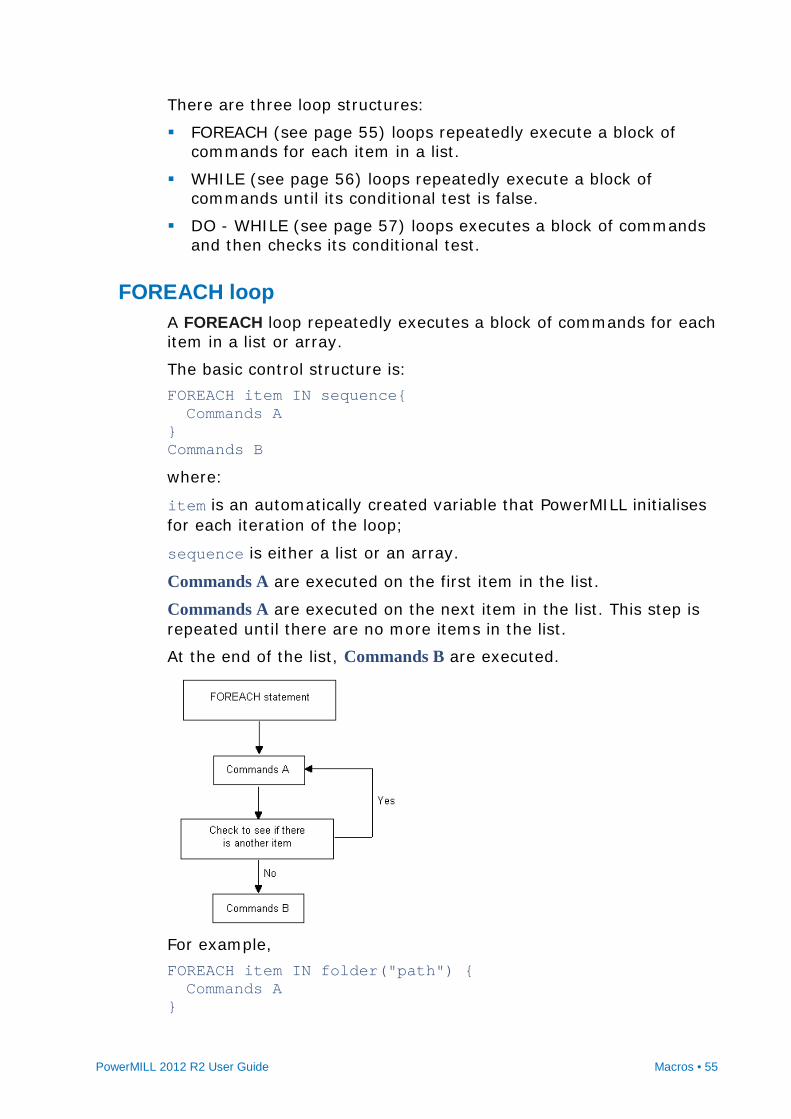
There are three loop structures:
FOREACH (see page 55) loops repeatedly execute a block of commands for each item in a list.
WHILE (see page 56) loops repeatedly execute a block of commands until its conditional test is false.
DO - WHILE (see page 57) loops executes a block of commands and then checks its conditional test.
FOREACH loop A FOREACH loop repeatedly executes a block of commands for each item in a list or array.
The basic control structure is: FOREACH item IN sequence{ Commands A
} Commands B
where:
item is an automatically created variable that PowerMILL initialises for each iteration of the loop;
sequence is either a list or an array.
Commands A are executed on the first item in the list.
Commands A are executed on the next item in the list. This step is repeated until there are no more items in the list.
At the end of the list, Commands B are executed.
For example, FOREACH item IN folder("path") { Commands A
}

56 • Macros PowerMILL 2012 R2 User Guide
Commands B
Where <path> is a folder in the explorer such as, Toolpath, Tool, Toolpath\Finishing.
Within FOREACH loops, you can:
Cancel the loop using the BREAK (see page 58) statement.
Jump directly to the next iteration using the CONTINUE (see page 58) statement.
You can't create your own list variables, there are some built in functions in PowerMILL that will return lists (see the parameter documentation for component, and folder).
You can use one of the inbuilt functions to get a list of entities, or you can use arrays to create a sequence of strings or numbers to iterate over. For example, use the inbuilt folder function to get a list of entities.
An example of using a FOREACH loop is to batch process tool holder profiles: FOREACH ent IN folder('Tool') { ACTIVATE TOOL $ent.Name EDIT TOOL ; UPDATE_TOOLPATHS_PROFILE
}
The loop variable ent is created by the loop and destroyed when the loop ends.
Another example is to renumber all the tools in a project: INT nmb = 20 FOREACH t IN folder('Tool') { $t.number.value = nmb $t.number.userdefined = 1 $nmb = nmb + 2
}
To get the most out of these macro features, you should familiarise yourself with the inbuilt parameter functions detailed in Help > Parameters > Reference.
WHILE loop A WHILE loop repeatedly executes a block of commands until its conditional test is false.
The basic control structure is: WHILE condition { Commands A
} Commands B

PowerMILL 2012 R2 User Guide Macros • 57
If condition is true, then Commands A are executed.
While condition remains true, then Commands A are executed.
When condition is false, Commands B are executed.
Within WHILE loops, you can:
Cancel the loop using the BREAK (see page 58) statement.
Jump directly to the next iteration using the CONTINUE (see page 58) statement.
DO - WHILE loop The DO - WHILE loop executes a block of commands and then performs its conditional test, whereas the WHILE loop checks its conditional test first to decide whether to execute its commands or not.
The basic control structure is: DO { Commands A
} WHILE condition Commands B
Commands A are executed.
While condition remains true, then Commands A are executed.
When condition is false, Commands B are executed.
Within DO - WHILE loops, you can:
Cancel the loop using the BREAK (see page 58) statement.

58 • Macros PowerMILL 2012 R2 User Guide
Jump directly to the next iteration using the CONTINUE (see page 58) statement.
CONTINUE statement The CONTINUE statement causes a jump to the conditional test of any one of the loop constructs WHILE, DO - WHILE, and FOR EACH in which it is encountered, and starts the next iteration, if any.
This example, calculates and offsets, all unlocked boundaries, outwards and inwards. FOREACH bou IN folder('Boundary') { IF locked(bou) { // This boundary is locked go get the next one CONTINUE
} REAL offset = 1 mm EDIT BOUNDARY $bou.Name CALCULATE EDIT BOUNDARY $bou.Name OFFSET $offset EDIT BOUNDARY $bou.Name OFFSET ${-offset} }
The CONTINUE statement enables the selection of the next boundary.
BREAK statement in a WHILE loop The BREAK statement exits the WHILE loop.
Nested constructs can require multiple breaks.

PowerMILL 2012 R2 User Guide Macros • 59
RETURN statement If a macro contains functions, the RETURN statement immediately exits the function. If the macro doesn't contain functions, the RETURN statement immediately terminates the current macro. This is useful if an error is detected and you don't want to continue with the remaining commands in the macro.
The basic control structure is: EDIT TOOLPATH $tp.Name CALCULATE IF NOT Computed { // terminate if toolpath didn't calculate RETURN
}
To immediately exit from a function: FUNCTION Calculate(STRING TpName) { IF NOT active(entity('toolpath',TpName).Tool.TipRadius) { // Error if toolpath does not use a tipradius tool PRINT "Toolpath does not have TipRadius tool" RETURN
} EDIT TOOLPATH ; CALCULATE
} FUNCTION Main() { FOREACH tp IN folder('Toolpath') { ACTIVATE TOOLPATH $tp.Name)
} }
Terminating macros
The command MACRO ABORT immediately terminates the current macro.
The command MACRO ABORT ALL terminates the all the macros that are currently running. If you call MACRO ABORT ALL from within a macro that has been called by another macro, then both macros are terminated.
Printing the value of an expression To print the value of a scalar expression or parameter use the syntax: PRINT = expression

60 • Macros PowerMILL 2012 R2 User Guide
For example, to print the answer to a simple arithmetic expression: PRINT = 2*5
When you run the macro, the command window displays the result, 10.
You can also apply an arithmetic expression to the value of a parameter. For example: EDIT TOOL ; DIAMETER 10 PRINT = Tool.Diameter * 0.6
When you run the macro, the command window displays the result, 6.
Constants PowerMILL has a small number of useful constant values that you can use in expressions and macros these include:
REAL PI = 3.141593
REAL E = 2.718282
BOOL TRUE = 1
BOOL FALSE = 0
STRING CRLF = newline
Use these values to make your macros more readable. For example, use CRLF constant to build up multi-line messages and prompts: STRING msg = "This is line one."+CRLF+"This is line two." MESSAGE INFO $msg
Displays the message: This is line one. This is line two.
Built-in functions This section details all the built-in functions that you can use in your macros.
General mathematical functions (see page 61).
Trigonometrical functions (see page 61).
Vector and point functions (see page 62).
Workplane functions (see page 64).
String functions (see page 64).

PowerMILL 2012 R2 User Guide Macros • 61
List creation functions (see page 72).
Path functions (see page 79) (Folder (see page 79), Directory (see page 80), Base (see page 80), and Project (see page 81) names).
Conditional functions (see page 81).
Evaluation functions (see page 82).
Type conversion functions (see page 83).
Parameter functions (see page 84).
Statistical functions (see page 85).
General mathematical functions The basic structure of the general mathematical functions are: Description of return value Function Exponential real exp( real a )
Natural logarithm real ln( real a )
Common (base 10) logarithm real log( real a )
Square root real sqrt( numeric a )
Absolute (positive value) real abs( numeric a )
Returns either -1, 0 or 1 depending on the sign of the value
real sign( numeric a )
Returns either 1 or 0 depending on whether the difference between a and b is less than or equal to tol
real compare( numeric a, numeric b, numeric tol )
Trigonometrical functions The basic structure of the trigonometrical functions are: Description of return value Function Trigonometric sine real sin( angle )
Trigonometric cosine real cos( angle )
Trigonometric tangent real tan( angle )
Trigonometric arcsine real asin( real a )
Trigonometric arccosine real acos( real a )
Trigonometric arctangent real atan( real a )
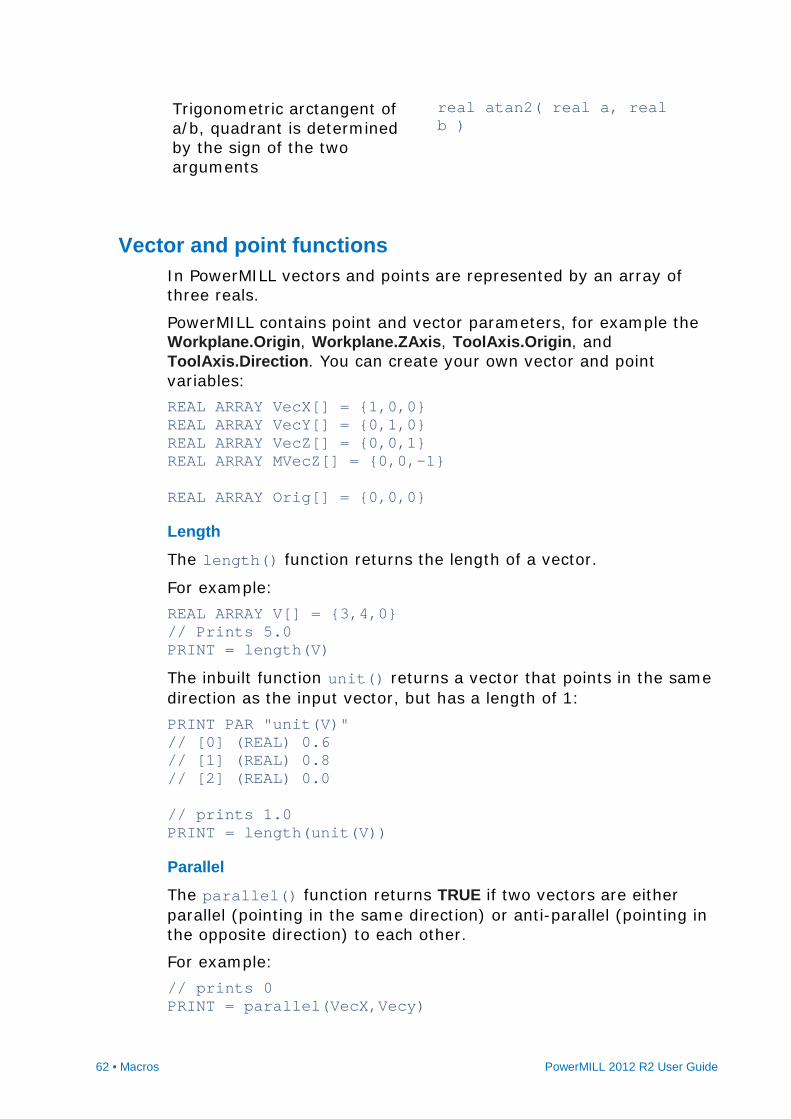
62 • Macros PowerMILL 2012 R2 User Guide
Trigonometric arctangent of a/b, quadrant is determined by the sign of the two arguments
real atan2( real a, real b )
Vector and point functions In PowerMILL vectors and points are represented by an array of three reals.
PowerMILL contains point and vector parameters, for example the Workplane.Origin, Workplane.ZAxis, ToolAxis.Origin, and ToolAxis.Direction. You can create your own vector and point variables: REAL ARRAY VecX[] = {1,0,0} REAL ARRAY VecY[] = {0,1,0} REAL ARRAY VecZ[] = {0,0,1} REAL ARRAY MVecZ[] = {0,0,-1} REAL ARRAY Orig[] = {0,0,0}
Length
The length() function returns the length of a vector.
For example: REAL ARRAY V[] = {3,4,0} // Prints 5.0 PRINT = length(V)
The inbuilt function unit() returns a vector that points in the same direction as the input vector, but has a length of 1: PRINT PAR "unit(V)" // [0] (REAL) 0.6 // [1] (REAL) 0.8 // [2] (REAL) 0.0 // prints 1.0 PRINT = length(unit(V))
Parallel
The parallel() function returns TRUE if two vectors are either parallel (pointing in the same direction) or anti-parallel (pointing in the opposite direction) to each other.
For example: // prints 0 PRINT = parallel(VecX,Vecy)
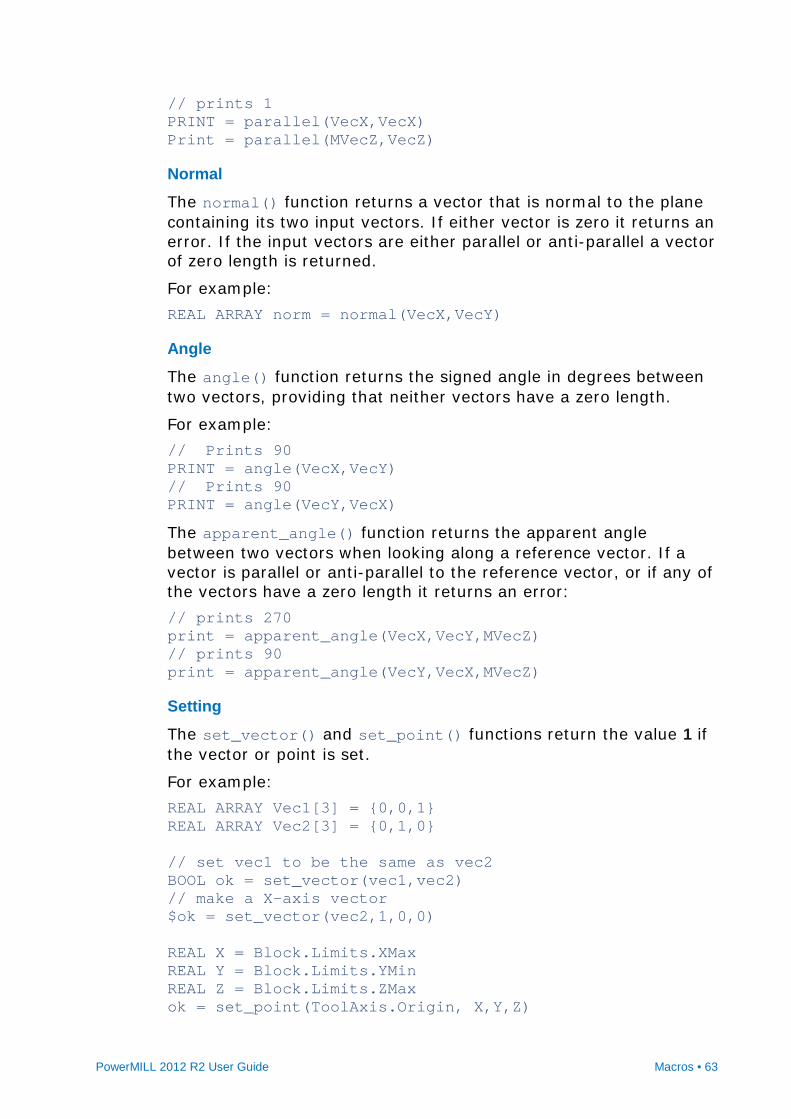
PowerMILL 2012 R2 User Guide Macros • 63
// prints 1 PRINT = parallel(VecX,VecX) Print = parallel(MVecZ,VecZ)
Normal
The normal() function returns a vector that is normal to the plane containing its two input vectors. If either vector is zero it returns an error. If the input vectors are either parallel or anti-parallel a vector of zero length is returned.
For example: REAL ARRAY norm = normal(VecX,VecY)
Angle
The angle() function returns the signed angle in degrees between two vectors, providing that neither vectors have a zero length.
For example: // Prints 90 PRINT = angle(VecX,VecY) // Prints 90 PRINT = angle(VecY,VecX)
The apparent_angle() function returns the apparent angle between two vectors when looking along a reference vector. If a vector is parallel or anti-parallel to the reference vector, or if any of the vectors have a zero length it returns an error: // prints 270 print = apparent_angle(VecX,VecY,MVecZ) // prints 90 print = apparent_angle(VecY,VecX,MVecZ)
Setting
The set_vector() and set_point() functions return the value 1 if the vector or point is set.
For example: REAL ARRAY Vec1[3] = {0,0,1} REAL ARRAY Vec2[3] = {0,1,0} // set vec1 to be the same as vec2 BOOL ok = set_vector(vec1,vec2) // make a X-axis vector $ok = set_vector(vec2,1,0,0) REAL X = Block.Limits.XMax REAL Y = Block.Limits.YMin REAL Z = Block.Limits.ZMax ok = set_point(ToolAxis.Origin, X,Y,Z)

64 • Macros PowerMILL 2012 R2 User Guide
Unit vector
The unit() function returns the unit vector equivalent of the given vector.
For example: REAL ARRAY V[3] = {3,4,5} PRINT PAR "unit(V)" BOOL ok = set_vector(V,0,0,6) PRINT PAR "unit(V)"
Workplane functions You can use the inbuilt function set_workplane() to define the origin and axis of a workplane entity. You can call the function:
with two workplanes, where the values from the second workplane are copied into the first: bool ok = set_workplane(Workplane,entity('workplane','3'))
which sets the active workplane to have the same values as workplane 3.
with a workplane, two vectors, and an origin: REAL ARRAY YAxis[] = {0,1,0} REAL ARRAY ZAxis[] = {0,0,1} REAL ARRAY Origin = {10,20,30} bool ok = set_workplane(entity('workplane','reference'), YAxis, Zaxis,Origin)
String functions PowerMILL parameters and variables can contain strings of characters. There are a number of inbuilt functions that you can use to test and manipulate strings.
The basic structure of string functions are: Description of return value Function Returns the number of characters in the string. For more information see Length function in a string (see page 66).
int length( string str )

PowerMILL 2012 R2 User Guide Macros • 65
Returns the position of the string target from the start of the string str, or -1 if the target string isn't found. If you use the optional argument start then scanning begins from that position in the string. For more information see Position function in a string (see page 67).
int position( string str, string target[, numeric start] )
Replaces all occurrences of the target string with a replacement string. The original string is unchanged. For more information see Replacing one string with another string (see page 68).
string replace( string str, string target, string replacement)
Returns part of the string. You can define where the substring starts and its length. The original string is unchanged. For more information see Substrings (see page 69).
string substring( string str, int start, int length)
Returns an upper case string. The original string is unchanged. For more information see Upper case function in a string (see page 69).
string ucase( string str)
Returns a lower case string. The original string is unchanged. For more information see Lower case function in a string (see page 70).
string lcase( string str)
Returns the string without any leading whitespace
string ltrim( string str)
Splits a string into a list of the strings, separated by whitespace
list tokens( string str)

66 • Macros PowerMILL 2012 R2 User Guide
The first character of a string is always at index 0. You can append (add) strings together use the + operator. For example: STRING One = "One" STRING Two = "Two" STRING Three = "Three" PRINT = One + ", " + Two + ", " + Three
When you run the macro, the command window displays the result, One, Two, Three.
Another way of achieving the same result is: STRING CountToThree = One + ", " + Two + ", " + Three PRINT = CountToThree
When you run the macro, the command window displays the result, One, Two, Three.
Converting a numeric value into a string The string function converts a numeric value into a string value.
The basic structure is: STRING string( numeric str )
This is useful when you want to append a number to a string. For example to name tools so they contain the tool's type and diameter use: CREATE TOOL ; BALLNOSED EDIT TOOL ; DIAMETER 5 STRING TName = string(Tool.Type) + " Diam: " + string(Tool.Diameter) RENAME TOOL ; $TName PRINT = Tool.Name
When you run the macro, PowerMILL creates a ball nosed tool with a diameter of 5 and gives the tool the name, ball_nosed Diam: 5.0.
The command window displays the result,ball_nosed Diam: 5.0.
Length function in a string The length function returns the number of characters in the string.
The basic structure is:

PowerMILL 2012 R2 User Guide Macros • 67
int length( string str )
For example: STRING One = "One" PRINT = length(One)
The command window displays the result, 3.
Another example: STRING One = "One" STRING Two = "Two" STRING CountToTwo = One + ", " + Two PRINT = length(CountToTwo)
The command window displays the result, 8.
Another way of producing the same result: PRINT = length(One + ", " + Two )
The command window displays the result, 8.
Position function in a string The position string returns the position of the string target from the start of the string str, or -1 if the target string isn't found.
If you use the optional argument start then scanning begins from that position in the string.
The basic structure is: int position( string str, string target [, numeric start] )
For example: PRINT = position("Scooby doo", "oo")
The command window displays the result, 2. PowerMILL finds the first instance of oo and works out what its position is (S is position 0, c position 1 and o position 2). position("Scooby doo", "oo", 4)
The command window displays the result, 8. PowerMILL finds the first instance of oo after position 4 and works out what its position is (b is position 4, y position 5, " "is position 7 and o position 8). position("Scooby doo", "aa")

68 • Macros PowerMILL 2012 R2 User Guide
The command window displays the result, -1 as PowerMILL can't find any instances of aa.
You can use this function to check whether a substring exists within another string. For example,if you have a part that contains a cavity and you machined it using various strategies with a coarse tolerance and each of these toolpaths has CAVITY in its name. You have toolpaths with names such as, CAVITY AreaClear, CAVITY flats. To recalculate those toolpath with a finer tolerance use the macro commands: // loop over all the toolpaths FOREACH tp IN folder('Toolpath') { // if toolpath has 'CAVITY' in its name IF position(tp.Name, "CAVITY") >= 0 { // Invalidate the toolpath INVALIDATE TOOLPATH $tp.Name $tp.Tolerance = tp.Tolerance/10
} } BATCH PROCESS
Replacing one string with another string The replace function replaces all occurrences of the target string with a replacement string. The original string is unchanged.
The basic structure is: string replace( string str, string target, string replacement)
For example: STRING NewName = replace("Scooby doo", "by", "ter")
PRINT = NewName
The command window displays the result, Scooter doo.
For example, whilst trying different values in the strategy dialogs you add DRAFT to the name each toolpath.
When you are satisfied with a particular toolpath you want to change DRAFT to FINAL. To save yourself from manually editing the toolpath name, you could use a macro to rename the active toolpath: FOREACH tp IN folder('Toolpath') { ACTIVATE TOOLPATH $tp.Name STRING NewName = replace(Name, 'DRAFT', 'FINAL') RENAME TOOLPATH ; $NewName

PowerMILL 2012 R2 User Guide Macros • 69
}
This macro renames the toolpaths to:
Any instance of DRAFT in the toolpath name is changed to FINAL. However, the macro is case sensitive, so instances of Draft are not changed.
Alternatively, you could write a macro to rename a toolpath name without activating the toolpath: FOREACH tp IN folder('Toolpath') { STRING NewName = replace(tp.Name, 'DRAFT', 'FINAL') RENAME TOOLPATH $tp.Name $NewName
}
Substrings The substring function returns part of the string. You can define where the substring starts and its length. The original string is unchanged.
The basic structure is: string substring( string str, int start, int length)
For example: PRINT = substring("Scooby doo", 2, 4)
The command window displays the result, ooby.
Upper case function in a string The upper case function converts the string to upper case. The original string is unchanged.
The basic structure is: string ucase( string str)
For example: PRINT = ucase("Scooby doo")
The command window displays the result, SCOOBY DOO.
In the Replace one string with another (see page 68) example instances of DRAFT are replaced with FINAL, but instances of Draft aren't.

70 • Macros PowerMILL 2012 R2 User Guide
The ucase statement replaces instances of Draft, draft, dRAft with DRAFT. The rest of the macro replaces DRAFT with FINAL. FOREACH tp IN folder('Toolpath') { // Get the upper case version of the name STRING UName = ucase(tp.Name) // check if the name contains 'DRAFT' if position(UName, 'DRAFT') >= 0 { // replace DRAFT with FINAL STRING NewName = replace(UName, 'DRAFT', 'FINAL') RENAME TOOLPATH $tp.Name $NewName }
}
This macro renames the toolpaths to:
Previously Draft_ConstZ wasn't renamed, but it is this time. All the toolpath names are now upper case.
Lower case function in a string The lower case function converts the string to lower case. The original string is unchanged.
The basic structure is: string lcase( string str)
For example: PRINT = lcase("SCOOBY DOO")
The command window displays the result, scooby doo.
In the Replace one string with another (see page 68) example instances of DRAFT are replaced with FINAL, but instances of Draft aren't.
In the Upper case function in a string (see page 69) example instances of Draft, draft, dRAft are replaced with DRAFT.
The lcase statement changes the upper case toolpath names to lower case. It replaces instances of Draft, draft, dRAft are replaced with draft. FOREACH tp IN folder('Toolpath') { // Get the upper case version of the name STRING UName = ucase(tp.Name) // check if the name contains 'DRAFT' if position(UName, 'DRAFT') >= 0 { // replace DRAFT with FINAL STRING NewName = replace(UName, 'DRAFT', 'FINAL') RENAME TOOLPATH $tp.Name $NewName

PowerMILL 2012 R2 User Guide Macros • 71
// Get the lower case version of the name STRING LName = lcase(tp.Name) RENAME TOOLPATH $tp.Name $LName }
}
This macro renames the toolpaths to:
All the toolpath names are now lower case
Whitespace in a string The ltrim() function removes any leading whitespace from a string. Use this to clean up user input before further processing. The original string is unchanged.
For example: STRING Original = " What's up Doc!" STRING Trimmed = ltrim(Original) print = Original print = Trimmed
Where:
print = Original displays " What's up Doc!" in the command window.
print = Trimmed displays "What's up Doc!" in the command window.
Splitting a string The tokens() function will split a string into a list of strings that were separated by the separator characters. By default the separator characters are spaces and tabs.
For example: STRING InputStr = "One Two Three" STRING LIST Tokens = tokens(InputStr) FOREACH Tok IN Tokens { PRINT = Tok
}
You can also give the tokens() function an optional extra argument that changes the separator character.
For example: STRING InputStr = "10:20:30:40" STRING LIST Tokens = tokens(InputStr,':')

72 • Macros PowerMILL 2012 R2 User Guide
FOREACH Tok IN Tokens { PRINT = Tok
}
List functions List functions control the content of a list or array.
The basic structure of list functions are: Description Function Returns the components (see page 72) of another object.
list components( entity entity )
Returns a list of all the entities in the folder (see page 73).
list folder( string folder )
Determines if the list has any content (see page 74).
is_empty()
Determines if the list contains a specific value (see page 74).
member()
Adding (see page 75) a list or array to another list or array
+
Removes duplicate (see page 75) items from a list.
remove_duplicates()
Creates a list by compiling the contents of two lists (can contain duplicate naming)
set_union()
Creates a list containing items that are present in two lists (see page 75).
intersection()
Creates a list by subtracting (see page 76) from the first list those items that are present in the second list.
subtract()
List components The inbuilt components function returns the components of another object.
Currently NC Program and Group entity parameters are supported.

PowerMILL 2012 R2 User Guide Macros • 73
The components function returns a list of all items regardless of type. You must check the type of the variable of each item, in the list.
The basic structure is: list components( entity entity )
For example if you want to batch process tool holder profiles for the tools in a group that contains toolpaths, boundaries, and tools: FOREACH ent IN components(entity('Group', '1')) { IF lcase(ent.RootType) == 'tool' { EDIT TOOL $ent.Name UPDATE_TOOLPATHS_PROFILE
} }
An example, to ensure that all the area clearance toolpaths in an NC program have flood coolant turned on and that mist is set for all the others: FOREACH item IN components(entity('ncprogram','')) { // only check nctoolpath items IF lcase(item.RootType) == 'nctoolpath' { // If the area clearance parameter is active then use flood IF active(entity('toolpath',item.Name).AreaClearance) { $item.Coolant.Value = "flood"
} else { $item.Coolant.Value = "mist"
} }
}
List folder The folder function returns a list of all entities within a folder, including those in subfolders.
The basic structure is: list folder( string folder )
The names of the root folders are:
MachineTool
NCProgram
Toolpath
Tool
Boundary
Pattern

74 • Macros PowerMILL 2012 R2 User Guide
Featureset
Workplane
Level
Model
StockModel
Group
The name of the folder is case sensitive, so you must use Tool and not tool.
You can use a FOREACH loop to process all of the entities within a folder. For example, to batch process tool holder profiles: FOREACH tool IN folder ('Tool'){ EDIT TOOL $tool.Name UPDATE_TOOLPATHS_PROFILE
}
An example, to batch process all the boundaries in your project: FOREACH bou IN folder('Boundary') { EDIT BOUNDARY $bou.Name CALCULATE
}
Empty list The is_empty() function queries a list to determine whether it is empty or not. REAL LIST MyList = {} IF is_empty(MyList) { PRINT "Empty List"
}
List member The member() function returns TRUE if the given value is one of the items in the list. For example, to check that a toolpath doesn't occur in more than one NC program, you can loop over all NCProgram and check that each toolpath is only seen once. Do this by building a list of toolpath names and checking that each time you add a name you haven't already seen it. // Create an empty list STRING List names = {} // Cycle through the NC programs FOREACH ncp IN folder('NCProgram') { // loop over the components in the nc prog FOREACH item IN components(ncp) { // Check that it is a toolpath IF item.RootType = 'nctoolpath' {

PowerMILL 2012 R2 User Guide Macros • 75
// Use MEMBER to check that we haven't seen this name before IF NOT member(names, item.Name) { bool ok = add_last(names, item.Name) } else { // We have already added this name STRING msg = "Toolpath: "+item.Name+crlf+" in more than one NCProgram" MESSAGE ERROR $msg MACRO ABORT }
} }
}
The is_empty() function queries a list to determine whether it is empty or not. REAL LIST MyList = {} IF is_empty(MyList) { PRINT "Empty List"
}
Adding lists The + function adds a list or array to another list or array. For example, you can add two lists together to get a list of all the tools used by the toolpaths and boundaries: STRING LIST UsedToolNames = ToolpathTools + BoundaryTools
Removing duplicate items in a list The remove_duplicates() function removes duplicate values. For example, a tool may be used in both a toolpath and a boundary, so the UsedToolNames list may contain duplicate values.
To remove the duplicate values: INT n = remove_duplicates(UsedToolNames)
The set_union() function returns a list containing the items from both sets, removing any duplicates. So you can create the UsedToolNames list using: STRING LIST UsedToolNames = set_union(ToolpathTools, BoundaryTools)
Intersecting items in lists The inbuilt function intersection() returns a list containing the items present in both lists or arrays. To obtain the names of the tools that are used in both toolpaths and boundaries use:

76 • Macros PowerMILL 2012 R2 User Guide
STRING LIST TP_Bound_Names = intersection(ToolpathTools, BoundaryTools)
Items present in one list, but not the other The inbuilt function subtract() returns the items that are in the first list, but not in the second list. STRING UnusedToolNames = subtract(AllToolNames, UsedToolNames)
Adding items to a list You can add items to the start or end of a list.
Adding items to the start of a list
The inbuilt function add_first(list, item) adds an item to the start of a list. It returns the number of items in the list after the addition.
For example, to add the name of a pattern to the start of a list: STRING LIST Patterns = {} FOREACH pat IN folder('Pattern') { // Add the name of the pattern to the start of the list int s = add_first(Patterns, pat.Name)
}
Adding items to the end of a list
The inbuilt function add_last(list, item) adds an item to the end of a list. It returns the number of items in the list after the addition.
For example, to add the name of a pattern to the end of a list: STRING LIST Patterns = {} FOREACH pat IN folder('Pattern') { // Add the name of the pattern to the end of the list int s = add_last(Patterns, pat.Name)
}
Removing items from a list You can remove items from the start or end of a list.
Removing items from the start of a list
The inbuilt function remove_first(list) removes an item from the start of a list. It returns the removed item.
For example, to print the names of patterns in a list: // Print the names of the Patterns in reverse order // Create a list of the pattern names STRING LIST Patterns = {} FOREACH pat IN folder('Pattern') {

PowerMILL 2012 R2 User Guide Macros • 77
// Add the name of the pattern to start of the list int s = add_first(Patterns, pat.Name)
} // Keep taking the first item from the list until // there are no more WHILE size(Patterns) > 0 { STRING name = remove_first(Patterns) PRINT $Name
}
If you have three patterns in the explorer:
The FOREACH loop adds each item to the start of the list. As the add_first command adds the next pattern to the start of the list. So you end up with a list {"Pattern_3","Pattern_2,"Pattern_1"}.
The WHILE loop takes the first item in the list, removes it from the list and pints it. This gives: Pattern_3 Pattern_2 Pattern_1
Removing items from the end of a list
The inbuilt function remove_last(list) removes an item to the end of a list. It returns the removed item.
For example, to print the names of patterns in a list: // Print the names of the Patterns in reverse order // Create a list of the pattern names STRING LIST Patterns = {} FOREACH pat IN folder('Pattern') { // Add the name of the pattern to end of the list int s = add_first(Patterns, pat.Name)
} // Keep taking the last item from the list until // there are no more WHILE size(Patterns) > 0 { STRING name = remove_last(Patterns) PRINT $Name
}
If you have the same three patterns in the explorer:

78 • Macros PowerMILL 2012 R2 User Guide
The FOREACH loop adds each item to the end of the list. As the add_last command adds the next pattern to the end of the list. So you end up with a list {"Pattern_1","Pattern_2,"Pattern_3"}.
The WHILE loop takes the last item in the list, removes it from the list and pints it. This gives: Pattern_3 Pattern_2 Pattern_1
To end up with the patterns in the same order as they are in the explorer either:
In the FOREACH loop use the add_last command and in the WHILE loop use the remove_first command; or
In the FOREACH loop use the add_first command and in the WHILE loop use the remove_last command.
Finding values in a list
The inbuilt function remove(list, value) returns true if the value is in the list and false if it isn't. If the value is in the list, it also removes the first instance of the value from the list.
For example, to print a list of tool diameters and the number of toolpaths using each tool: // Print a list the tool diameters and the // number of Toolpaths using each unique diameter. REAL LIST Diameters = {} FOREACH tp IN folder('Toolpath') { INT s = add_last(Diameters, tp.Tool.Diameter)
} // Create a list with just the unique diameters REAL LIST UniqueD = Diameters INT n = remove_duplicates(UniqueD) // Loop over the unique diameters FOREACH diam = UniqueD { // set a counter INT Count = 0 DO { $Count = Count + 1
} WHILE remove(Diameters, diam) STRING Msg = "There are "+Count+" toolpaths using "+diam+" tools" PRINT $msg
}

PowerMILL 2012 R2 User Guide Macros • 79
Path functions The path function returns part of pathname of the entity,
The basic structure of the path functions are: Description of return value Function The Folder name (see page 79) function returns the full folder name of the entity, or an empty string if the entity doesn't exist.
string pathname( entity ref )
The Folder name (see page 79) function can also be used to return the full folder name of the entity.
string pathname( string type, string name)
The Directory name (see page 80) function returns the directory prefix from the path.
string dirname( string path)
The Base name (see page 80) function returns the non-directory suffix from the path.
string basename( string path)
The Project name (see page 81) functions returns the pathname of the current project on disk.
project_pathname(bool basename)
Folder name The pathname function returns the full folder name of the entity, or,if the entity doesn't exist, an empty string.
The basic structure is: string pathname( entity ref )
Also, string pathname( string type, string name)
Returns the full folder name of the entity.
For example, if you have a BN 16.0 diam tool in a Ballnosed tool folder, then: pathname('tool', 'BN 16.0 diam')
returns the string Tool\Ballnosed tools\BN 16.0 diam.
If the entity doesn't exist it returns an empty string.

80 • Macros PowerMILL 2012 R2 User Guide
You can use this function in conjunction with the dirname() (see page 80) function to process all the toolpaths in the same folder as the active toolpath. STRING path = pathname('toolpath',Name) // check that there is an active toolpath IF path != '' { FOREACH tp IN folder(dirname(path)) { ACTIVATE TOOLPATH tp.Name EDIT TOOLPATH ; CALCULATE
} } ELSE { MESSAGE "There is no active toolpath" RETURN
}
Directory name The directory name function returns the directory prefix from the path.
The basic structure is: string dirname( string path)
For example you can use this to obtain the argument for the inbuilt folder() function. STRING flder = dirname(pathname('toolpath',Name))
Base name The base name function returns the non-directory suffix from the path.
The basic structure is: string basename( string path)
Usually basename(pathname('tool',tp.Name)) is the same as tp.Name, but you can use this in conjunction with dirname (see page 80) to split apart the folder names.
For example, suppose your toolpaths are split in folders:
Toolpath\Feature1\AreaClear
Toolpath\Feature1\Rest
Toolpath\Feature1\Finishing
Toolpath\Feature2\AreaClear
Toolpath\Feature2\Rest
Toolpath\Feature2\Finishing
You can rename all your toolpaths so that they contain the feature name and the area clearance, rest, or finishing indicator.
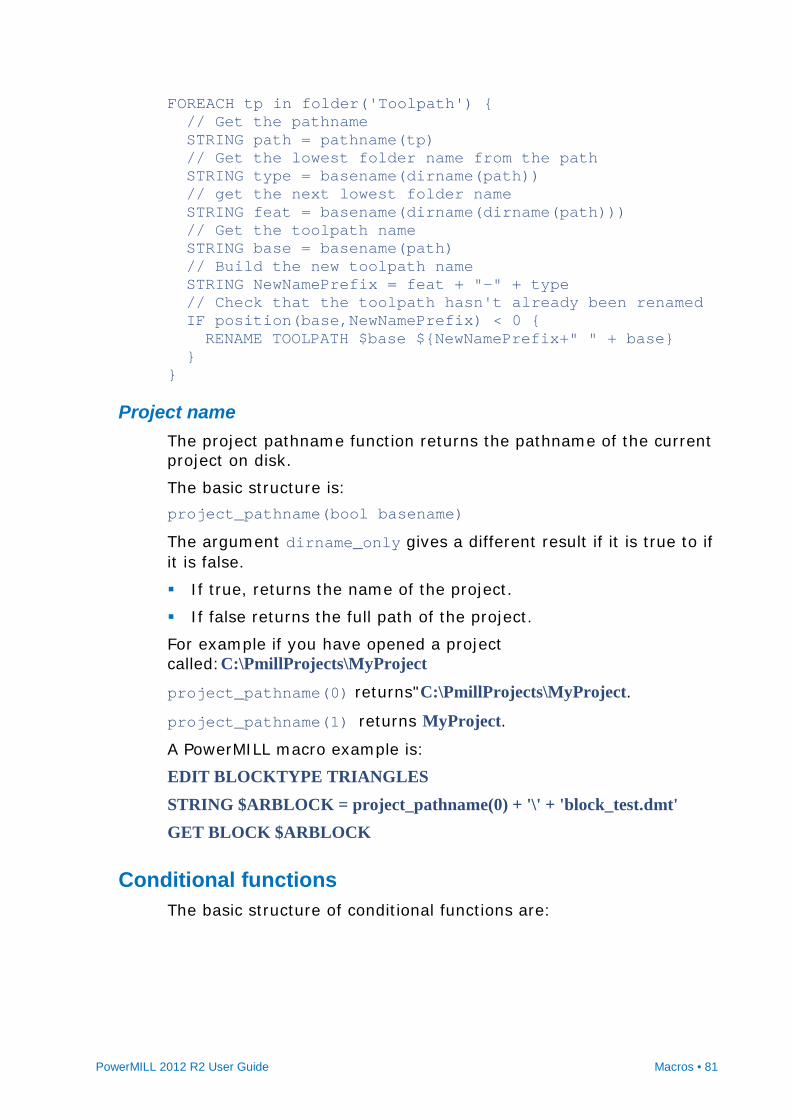
PowerMILL 2012 R2 User Guide Macros • 81
FOREACH tp in folder('Toolpath') { // Get the pathname STRING path = pathname(tp) // Get the lowest folder name from the path STRING type = basename(dirname(path)) // get the next lowest folder name STRING feat = basename(dirname(dirname(path))) // Get the toolpath name STRING base = basename(path) // Build the new toolpath name STRING NewNamePrefix = feat + "-" + type // Check that the toolpath hasn't already been renamed IF position(base,NewNamePrefix) < 0 { RENAME TOOLPATH $base ${NewNamePrefix+" " + base}
} }
Project name The project pathname function returns the pathname of the current project on disk.
The basic structure is: project_pathname(bool basename)
The argument dirname_only gives a different result if it is true to if it is false.
If true, returns the name of the project.
If false returns the full path of the project.
For example if you have opened a project called:C:\PmillProjects\MyProject project_pathname(0) returns"C:\PmillProjects\MyProject.
project_pathname(1) returns MyProject. A PowerMILL macro example is:
EDIT BLOCKTYPE TRIANGLES
STRING $ARBLOCK = project_pathname(0) + '\' + 'block_test.dmt' GET BLOCK $ARBLOCK
Conditional functions The basic structure of conditional functions are:

82 • Macros PowerMILL 2012 R2 User Guide
Description of return value Function Returns the value of expression 1 if the conditional expression is true, otherwise it returns the value of expression 2.
variant select( conditional-expression; expression1;expression2)
Both expressions must be of the same type.
This example obtains either the tool radius or its tip radius, if it has one.
You can use an IF block of code: REAL Radius = Tool.Diameter/2 IF active(Tool.TipRadius) { $Radius = Tool.TipRadius
}
Or you can use the inbuilt select function: REAL Radius = select(active(Tool.TipRadius), Tool.TipRadius, Tool.Diameter/2)
If you are assigning an expression to a parameter then you will always have to use the inbuilt select() function.
Within a macro you can use either method.
Evaluation functions The evaluation function evaluate a string argument as an expression.
For example: print = evaluate("5*5")
prints 25.
You can use evaluate to provide a different test at runtime.
This example provides a bubble sort for numeric values. By changing the comparison expression you can get it to sort in ascending or descending order. FUNCTION SortReals(STRING ComparisonExpr, OUTPUT REAL LIST List) { // Get number of items. INT Todo = size(List) // Set swapped flag before we start Bool swapped = 1 // Repeat for number of items
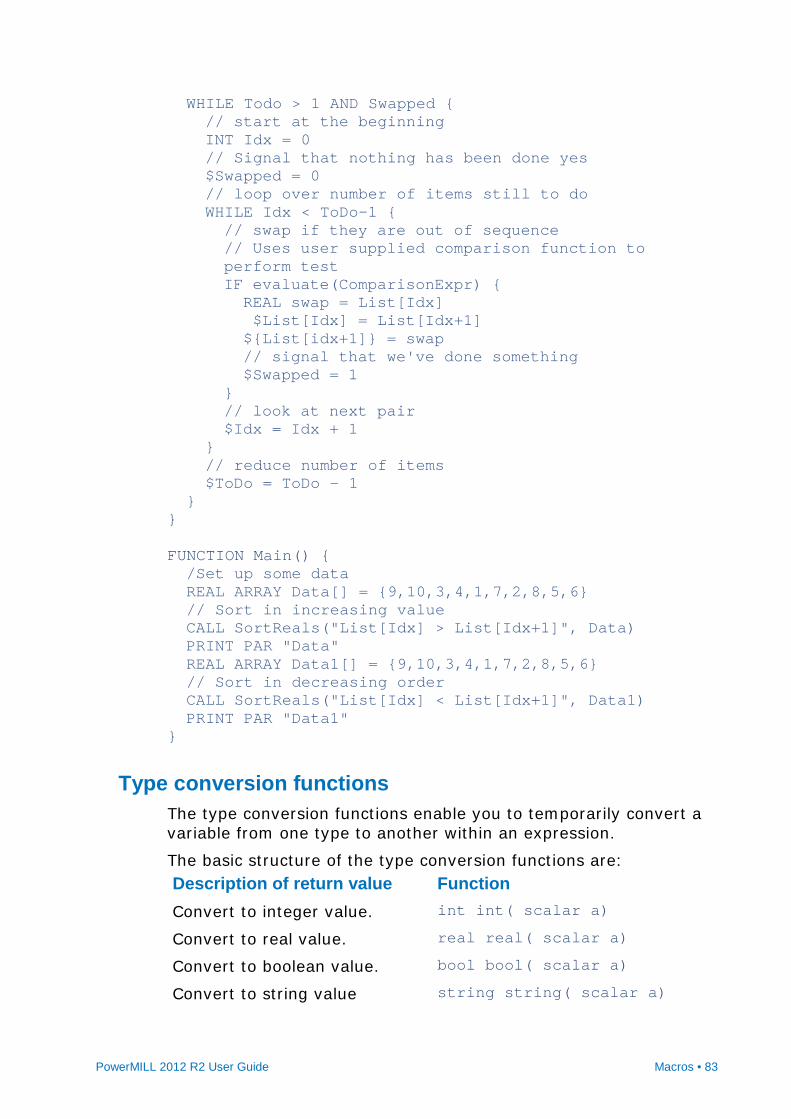
PowerMILL 2012 R2 User Guide Macros • 83
WHILE Todo > 1 AND Swapped { // start at the beginning INT Idx = 0 // Signal that nothing has been done yes $Swapped = 0 // loop over number of items still to do WHILE Idx < ToDo-1 { // swap if they are out of sequence // Uses user supplied comparison function to perform test IF evaluate(ComparisonExpr) { REAL swap = List[Idx] $List[Idx] = List[Idx+1] ${List[idx+1]} = swap // signal that we've done something $Swapped = 1 } // look at next pair $Idx = Idx + 1
} // reduce number of items $ToDo = ToDo - 1
} } FUNCTION Main() { /Set up some data REAL ARRAY Data[] = {9,10,3,4,1,7,2,8,5,6} // Sort in increasing value CALL SortReals("List[Idx] > List[Idx+1]", Data) PRINT PAR "Data" REAL ARRAY Data1[] = {9,10,3,4,1,7,2,8,5,6} // Sort in decreasing order CALL SortReals("List[Idx] < List[Idx+1]", Data1) PRINT PAR "Data1"
}
Type conversion functions The type conversion functions enable you to temporarily convert a variable from one type to another within an expression.
The basic structure of the type conversion functions are: Description of return value Function Convert to integer value. int int( scalar a)
Convert to real value. real real( scalar a)
Convert to boolean value. bool bool( scalar a)
Convert to string value string string( scalar a)

84 • Macros PowerMILL 2012 R2 User Guide
Normally you would use inbuilt string() conversion function to convert a number to a string when building up a message: STRING $Bottles = string(Number) + " green bottles ..."
In other cases, you may want convert a real number to an integer, or an integer to a real number: INT a = 2 INT b = 3 REAL z = 0 $z = a/b PRINT $z
This prints 0.0.
If you want the ratio then you have to convert either a or b to real within the assignment expression. INT a = 2 INT b = 3 REAL z = 0 $z = real(a)/b PRINT $z
This prints 0.666667.
Parameter functions All of the PowerMILL parameters have an active state which determines whether the parameter is relevant for a particular type of object or operation.
The basic structure of the parameter functions are: Description of return value Function Evaluates the active expression of par.
bool active( par )
Returns whether the parameter can be changed or not.
bool locked( par )
Returns the number of sub-parameters that par contains.
int size( par )
For example, the Boundary.Tool parameter is not active for a block or sketch type boundaries. You can test whether a parameter is active or not with the inbuilt active() function. This can be useful in calculations and decision making.
The basic control structure is:

PowerMILL 2012 R2 User Guide Macros • 85
IF active(….) { …
}
You can test whether a particular parameter is locked or not with the inbuilt locked() function. You can't normally edit a locked parameter because its entity is being used as a reference by another entity. If you try to edit a locked parameter with the EDIT PAR command, PowerMILL raises a query dialog asking for permission to make the change. You can suppress this message using the EDIT PAR NOQUERY command. The locked() function allows you to provide your own user messages and queries that are tailored to your application.
For example: IF locked(Tool.Diameter) { BOOL copy = 0 $copy = QUERY "The current tool has been used do you want to make a copy of it?" IF NOT copy { // cannot proceed further so get out RETURN
} COPY TOOL ;
} $Tool.Diameter = 5
The inbuilt size() function returns the number of immediate items in the parameter. You can use this to determine the number of toolpaths in a folder: PRINT = size(folder('Toolpath\Cavity'))
Statistical functions The statistical functions enable you to return the minimum and maximum values of any number of numeric arguments.
The basic structure of the statistical functions are: Description of return value Function Returns the largest value in a list of numbers.
real max( list numeric a )
Returns the smallest value in a list of numbers.
real min( list numeric a )
This example finds the maximum and minimum block height of the toolpaths in the active NC program. REAL maxz = -100000 REAM minz = abs(maxz)

86 • Macros PowerMILL 2012 R2 User Guide
FOREACH item IN components(entity('ncprogram','')) { IF item.RootType == 'nctoolpath' { $maxz = max(maxz,entity('toolpath',item.Name)) $minz - min(minz,entity('toolpath',item.Name))
} } MESSAGE "Min = " + string(minz) + ", max = " + string(maxz)
Entity based functions These functions work on specific entities. Command Description entity_exists() Returns true if the named entity
exists (see page 87). geometry_equal() Compares two tools, or two
workplanes for geometric equivalence.
new_entity_names() Returns the name (see page 87) assigned to the next entity.
set_workplane() Sets the vectors and origin of a workplane (see page 64).
segments() Returns the number of segments in a boundary or pattern.
limits() Returns the XYZ limits of an entity.
Equivalence
You can use the inbuilt function geometry_equal() to test whether two tools,or two workplanes are geometrically equivalent. For a tool the test is based on the cutting geometry of the tool.
Number of segments The inbuilt function segments() will return the number of segments in a pattern or boundary: IF segments(Pattern) == 0 { PRINT "The pattern is empty"
}
Limits
The inbuilt function limits() returns an array of six elements containing the XYZ limits of the given entity. The supported entities are: pattern, boundary, toolpath, feature set, or model. REAL ARRAY Lims[] = limits('model','MyModel')

PowerMILL 2012 R2 User Guide Macros • 87
The values in the array are : REAL MinX = Lims[0] REAL MaxX = Lims[1] REAL MinY = Lims[2] REAL MaxY = Lims[3] REAL MinZ = Lims[4] REAL MaxZ = Lims[5]
Does an entity exist? The inbuilt function entity_exists() returns true if the entity exists. You can call this function with:
an entity parameter such as entity_exists(Boundary), entity_exists(ReferenceTool), or entity_exists(entity('toolpath','')).
two parameters that specify the entity type and name such as entity_exists('tool','MyTool').
For example: IF entity_exists(Workplane) { PRINT "An active workplane exists"
} ELSE { PRINT "No active workplane using world coordinate system."
} IF NOT entity_exists(entity('toolpath','')) { PRINT "Please activate a toolpath and try again." MACRO ABORT ALL
}
New entity name The inbuilt function new_entity_name() returns the next name that PowerMILL gives to a new entity of the given type. You can supply an optional basename argument to obtain the name that powermill will use when creating a copy or clone of an entity.
This example shows you how to determine the name of a new entity. CREATE WORKPLANE 1 CREATE WORKPLANE 2 CREATE WORKPLANE 3 // Prints 4 PRINT = new_entity_name('workplane') DELETE WORKPLANE 2

88 • Macros PowerMILL 2012 R2 User Guide
// Prints 2 PRINT = new_entity_name('workplane') CREATE WORKPLANE ; // Prints 2_1 PRINT = new_entity_name('workplane', '2')
Organising your macros Recorded macros are listed in the explorer under the Macros node. This example shows you how to manage the macro paths.
1 From the Macros menu select Macro Paths.
Alternatively, from the Tools menu, select Customise Paths > Macro Paths.

PowerMILL 2012 R2 User Guide Macros • 89
The PowerMILL Paths dialog is displayed showing you all the default macro paths. PowerMILL automatically searches for macros located within these folders, and displays them in the explorer.
The period (.) indicates the path to the local folder (currently, the folder to which the project is saved).
The tilde ( ) indicates your Home directory.
2 To create a macro path, click , and use the Select Path dialog to select the desired location. The path is added to the top of the list.
3 To change the path order, select the path you want to move, and
use the and buttons to promote or demote the path.
4 Click Close.
5 To load the new paths into PowerMILL, expand the Macros node in the explorer.
Only the paths that contain at least one macro are shown.
For more information, see Displaying Macros in explorer.
Recording the pmuser macro The pmuser.mac is automatically run whenever you start PowerMILL providing you with your preferred settings.
1 From the Tools menu, select Reset Forms. This ensures that PowerMILL uses the default parameters in the dialogs.

90 • Macros PowerMILL 2012 R2 User Guide
2 From the Macros context menu, select Record.
3 Browse to pmill4 folder in your Home area. In the Select Record
Macro File dialog, enter pmuser in the File name field, and click Save.
If you are asked whether you want to overwrite the existing file, select Yes.
The macro icon changes to red to show recording is in progress.
All dialog options that you want to include in your macro must be selected during its recording. If an option already has the desired value, re-enter it.
4 Set up your preferences. For example:
a From the NC Programs menu, select Preferences.
b In the NC Preferences dialog, select a Machine Option File (for example, heid.opt).
c Click Open.
d Click Accept.
e Click on the Main toolbar to open the Rapid Move Heights dialog.
f Enter a Safe Z of 10 and Start Z of 5.
g Click Accept. 5 From the Macros context menu, select Stop to finish recording.

PowerMILL 2012 R2 User Guide Macros • 91
6 Expand the Macros node. The pmuser.mac macro is added under pmill4.
7 Close and then restart PowerMILL to check that the settings from
the pmuser macro are activated.
Recording a macro to set up NC preferences
This example records a macro that sets up NC preferences for Heid400 machine controllers.
1 From the Tools menu, select Reset Forms. This ensures that PowerMILL uses the default parameters in the dialogs.
2 From the Macros context menu, select Record.

92 • Macros PowerMILL 2012 R2 User Guide
3 Browse to pmill folder in your Home area in the Select Record Macro File dialog, enter h400_prefs in the File Name field, and click Save.
The macro icon changes to red to show recording is in progress.
All dialog options that you want to include in your macro must be selected during its recording. If an option already has the desired value, re-enter it.
4 From the NC Programs context menu, select Preferences.
5 In the NC Preferences dialog, select the Heid400.opt in the Machine Option File field on the Output tab.
6 Click the Toolpath tab, and select Always in the Tool Change field.
7 Click Accept. 8 From the Macros context menu, select Stop to finish recording.
Tips for programming macros This section gives tips to help you record macros.
Macros record any values you explicitly change in a dialog, but don't record the current default values. For example, if the default tolerance is 0.1 mm and you want a tolerance 0.1 mm, you must re-enter 0.1 in the tolerance field during recording. Otherwise PowerMILL will use whatever the current tolerance value, which isn't necessarily the value you want.
From the Tools menu, select Reset Forms. This ensures that PowerMILL uses the default parameters in the dialogs.
When debugging a macro it is important to have the macrofixer turned off. Use the command: UNSET MACROFIX
This ensures all syntax and macro errors are reported by PowerMILL directly. You can use SET MACROFIX to turn it back on.
If you get a syntax error in a loop (DO-WHILE, WHILE, FOREACH) or a conditional statements (IF-ELSEIF-ELSE, SWITCH) check you have a space before any opening braces ({). For a DO-WHILE loop make sure the closing brace (})has a space after it and before the WHILE keyword.
Your code blocks must have matching braces. They must have the same number of opening braces ({) as closing braces (}).

PowerMILL 2012 R2 User Guide Macros • 93
The ELSEIF keyword doesn't have a space between the IF and the ELSE.
If you encounter expression errors check you have balanced parentheses, and balanced quotes for strings.
Decimal points in numbers must use a full stop (.) and not a comma (,).
The variable on the left of the = sign in assignments must have a $ prefix. So: $myvar = 5
is correct, but: myvar = 5
is wrong as it is missing the $ prefix.
Local variables override PowerMILL parameters. If your macro contains: REAL Stepover = 10
then during the execution of the macro any use of Stepover will use the value 10 regardless of what the value specified in the user interface. Also the command: EDIT PAR "Stepover" "Tool.Diameter*0.6"
will change the value of this local Stepover variable NOT the PowerMILL Stepover parameter.

PowerMILL 2012 R2 User Guide Index • 95
A Adding items to a list • 32, 76 Adding lists • 75 Adding macro loops • 10 Adding macro variables • 9 Arguments in macros • 44
Function values • 46 Running macros with arguments • 11 Sharing functions • 48
Arrays • 29 Lists • 29 Points • 35 Using arrays • 24 Vectors • 35
B Base name • 80 Basic macro • 9
Adding macro loops • 10 Adding macro variables • 9 Decision making in macros • 13 Returning values from macros • 18 Running macros with arguments • 11 Using a FOREACH loop • 21 Using arrays • 24 Using functions in macros • 15
BREAK statement • 53, 58 Building a list • 34 Built-in functions • 60
C Calling from other macros • 4 Carriage returns in dialogs • 28 Comparing variables • 36, 37 Components
List components • 72 Compound macros • 4 Conditrional functions • 81 Constants • 60
Euler's number • 60 Pi • 60
Converting numerics to strings • 66 Creating macros • 1
Basic macro • 9 Creating variables (macros) • 25
D Decision making in macros • 13 Decisions in macros
BREAK statement • 53, 58 IF - ELSE statement • 49 IF - ELSEIF - ELSE statement • 50 IF command • 48 SWITCH statement • 51
Dialogs in macros • 26 Carriage returns in dialogs • 28
Directory name • 80 DO - WHILE loop • 57
Decision making in macros • 13
Index

96 • Index PowerMILL 2012 R2 User Guide
E Editing macros • 3 Empty list • 74 Enter values into macros • 26 Entities in macros • 28 Entity based functions • 86
Equivalence • 86 Limits • 86 New entity name • 87 Number of segments • 86 Workplane origin • 64
Equivalence • 86 Euler's number • 60 Evaluation functions • 82 Example of programming language • 8 Exiting a function • 59 Exponential • 61 Expressions in macros • 41
Order of operations • 42 Precedence • 42
F File name in macros • 29 Folder
List folder • 73 Folder name • 79 FOREACH loop • 55
Using a FOREACH loop • 21 Function values • 46 Functions in macros • 60
Arguments in macros • 44 Conditrional functions • 81 Entity based functions • 86 Evaluation functions • 82 Exiting a function • 59 Function values • 46 List components • 72 List folder • 73 List functons • 72 Main function • 45 Parameter functions • 84 Path functions • 79 Point functions • 62
Setting a point • 62 Returning function values • 46 Sharing functions • 48 Statistical functions • 85 STRING function • 64
Type conversion functions • 83 Using functions in macros • 15 Using the SWITCH statement • 17 Vector functions • 62
Angle between vectors • 62 Length of a vector • 62 Normal vectors • 62 Parallel vectors • 62 Point functions • 62 Setting a vector • 62 Unit vector • 62
I IF - ELSE statement • 49
Decision making in macros • 13 IF - ELSEIF - ELSE statement • 50 IF command • 48 Inputting values into macros • 26
Entities in macros • 28 File name in macros • 29
Intersecting items in lists • 75 Items in one list • 76
L Length of a string • 66 Limits • 86 List components • 72 List folder • 73 List functons • 72
Adding items to a list • 32, 76 Adding lists • 75 Empty list • 74 Findin values in a list • 76 Intersecting items in lists • 75 Items in one list • 76 List components • 72 List folder • 73 List member • 74 Removing duplicate items • 75 Removing items from a list • 32, 76
List member • 74 Lists • 29
Adding items to a list • 32, 76 Arrays • 29 Building a list • 34 Removing items from a list • 32, 76 Using lists • 31
Logarithm • 61

PowerMILL 2012 R2 User Guide Index • 97
Loops Adding macro loops • 10 Decision making in macros • 13 DO - WHILE loop • 57 FOREACH loop • 55 WHILE loop • 56
M Macro comments • 7 Macro statement • 6
Adding macro loops • 10 Arguments in macros • 44 BREAK statement • 53, 58 DO - WHILE loop • 57 FOREACH loop • 55 IF - ELSE statement • 49 IF - ELSEIF - ELSE statement • 50 IF command • 48 Macro statement • 6 RETURN statement • 59 SWITCH statement • 51 Using the SWITCH statement • 17 WHILE loop • 56
Macro statemenyts Adding macro loops • 10 Arguments in macros • 44 BREAK statement • 53, 58 DO - WHILE loop • 57 FOREACH loop • 55 IF - ELSE statement • 49 IF - ELSEIF - ELSE statement • 50 IF command • 48 Macro statement • 6 RETURN statement • 59 SWITCH statement • 51 Using a FOREACH loop • 21 Using the SWITCH statement • 17 WHILE loop • 56
Macros Calling from other macros • 4 Compound macros • 4 Creating macros • 1 Editing macros • 3 Expressions in macros • 41 Macro comments • 7 Macro statement • 6 NC preference macro • 91 pmuser macro • 4, 89 Recording macros • 2, 89, 91
Repeating commands in macros • 54 Running macros • 3 Setting paths • 88 Variables in macros • 25 Writing macros • 5
Main function • 45 Mathematical functions • 61
Exponential • 61 Logarithm • 61 Mathematical functions • 61 Natural logarithm • 61 Square root • 61
N Natural logarithm • 61 NC preference macro • 91 New entity name • 87 Number of segments • 86
O Operators • 41
Logical operators • 37 Relational operator • 36
Order of operations • 42
P Parameter functions • 84 Path functions • 79
Base name • 80 Directory name • 80 Folder name • 79 Path name • 79 Project name • 81
Path name • 79 Pi • 60 pmuser macro • 4, 89 Point functions • 62
Setting a point • 62 Position of a string • 67 Precedence • 42 Print
Print the values of an expression • 59 Programming language example • 8 Project name • 81

98 • Index PowerMILL 2012 R2 User Guide
R Recording macros • 2, 89, 91 Relational operator • 36 Removing duplicate items • 75 Removing items from a list • 32, 76 Repeating commands in macros • 54
BREAK statement • 53, 58 DO - WHILE loop • 57 FOREACH loop • 55 WHILE loop • 56
Replacing strings • 68 RETURN statement • 59 Returning function values • 46 Returning values from macros • 18 Running macros • 3 Running macros with arguments • 11
S Scratchpad variables • 38 Selecting a file name in macros • 29 Selecting entities in macros • 28 Setting paths • 88 Setting up your working directories • 88 Sharing functions • 48 Splitting a string • 71 Square root • 61 Statistical functions • 85 Stopping macros • 59 STRING function • 64
Converting numerics to strings • 66 Length of a string • 66 Position of a string • 67 Replacing strings • 68 Splitting a string • 71 Substrings • 67, 69 Upper case function • 69 Whitespace in a string • 71
Substrings • 67, 69 SWITCH statement • 51
Using the SWITCH statement • 17
T Tips for programming macros • 92 Trouble shooting macros • 92 Type conversion functions • 83
U Upper case function • 69 Using a FOREACH loop • 21 Using arrays • 24 Using functions in macros • 15 Using lists • 31 Using the SWITCH statement • 17 Using variables (macros) • 26
V Variable scope (macros) • 39 Variables in macros • 25
Adding macro variables • 9 Comparing variables • 36, 37 Creating variables (macros) • 25 Logical operators • 37 Operators • 41 Order of operations • 42 Precedence • 42 Relational operator • 36 Returning values from macros • 18 Scratchpad variables • 38 Using variables (macros) • 26 Variable scope (macros) • 39
Vector functions • 62 Angle between vectors • 62 Length of a vector • 62 Normal vectors • 62 Parallel vectors • 62 Point functions • 62 Setting a vector • 62 Unit vector • 62
W WHILE loop • 56 Whitespace in a string • 71 Workplane origin • 64 Writing macros • 5