preface - bret contreras · 2013-08-08 · vii preface b ecause you’re reading this book, i think...
TRANSCRIPT
vii
Preface
Because you’re reading this book, I think it’s safe to say that you’re interested in learning how to build strength and fitness through bodyweight training.
If so, that’s great! You’ve come to the right place.Over the past 20 years, I’ve never taken more than a few days off from
strength training. Although I’ve trained in hundreds of amazing gyms, studios, and facilities, on many occasions I’ve had to make do with what I had in my house, apartment, or hotel room. When I first started training with weights at the age of 15, I didn’t know what I was doing. I remember feeling awkward, uncomfortable, and uncoordinated with many of the exercises. As a matter of fact, I avoided most multijoint exercises because I didn’t feel them working the way I felt isolation exercises working. Looking back, I realize that I was a skinny weakling who possessed extremely inferior levels of core stability, single-leg stability, and motor control. I simply wandered around aimlessly without a plan, moving randomly from one exercise to another.
At first, I couldn’t perform push-ups so I didn’t bother trying them. In fact, I couldn’t perform a chin-up, dip, or inverted row, either. I suspect that had I attempted a bodyweight full squat my back would have rounded and my knees would have caved in (the melting-candle syndrome) because my glutes were incredibly weak and I had no knowledge of proper form. It took me five years to be able to perform a bodyweight chin-up and dip.
I’ve spent the past 20 years learning as much as I can possibly learn about the human body as it pertains to strength and conditioning. Had I known then what I know now, I could have accelerated my results by several years by sticking to a proper exercise progression system and program template. I venture to guess that I could have been performing chin-ups and dips within my first year of training had I possessed a sound understanding of form, exercise progression, and program design. I want to go back in time to help my younger, confused (but determined) self. I wish that the current me could mentor the former me and teach him the ropes.
Flash forward 20 years. I feel great, my joint health is outstanding, my strength levels are highly advanced, and my muscle control is superior. I’m now able to achieve an amazing workout using just my own body weight and simple house-hold furniture. I lean my back on couches in order to work my glutes. I hang on to tables and chairs to work my back and legs. And all I need is the ground to work my chest, shoulders, legs, and core.
I believe that all strength trainees should master their own body weight as a form of resistance before moving on to free weights and other training systems. Bodyweight exercises lay the foundation for future training success, and correct performance requires a precise blend of mobility, stability, and motor control. As you make progress and gain strength, it is possible to continue to push yourself
viii preface
Beginner Intermediate Intermediate/Advanced Advanced
E5716/Contreras/446039/FS/R1
1
2 3
4 1
2 3
41
2 3
4 1
2 3
4
through bodyweight training so you continue to challenge the muscles and increase your athleticism. But you need to learn the exercises and have a road map to help get you there.
Bodyweight Strength Training Anatomy was written for several categories of people:
• Beginners who need to learn the basics of bodyweight training. Every-one knows about push-ups and squats, but not everyone knows about hip thrusts, RKC planks, and inverted rows. These exercises should be staples of every strength enthusiast’s routine.
• Folks who want to be in great shape but don’t like attending gyms. If this describes you, then rest assured that you will always be able to receive an amazing workout no matter where you are.
• Fit exercisers who do a lot of traveling. Sure it’s nice to have access to hundreds of thousands of dollars of strength training equipment, but if you’re frequently on the road then you know that this option is not always feasible.
• All strength training enthusiasts. Regardless of whether you’re a week-end warrior, an athlete, a lifter, a coach, a trainer, or a therapist, if your line of work involves fitness then you need to understand bodyweight strength training. Strength training enthusiasts may have specific fitness goals, such as improving functional strength, gaining muscle, losing fat, or improving posture, and bodyweight training will help each of these people achieve those goals.
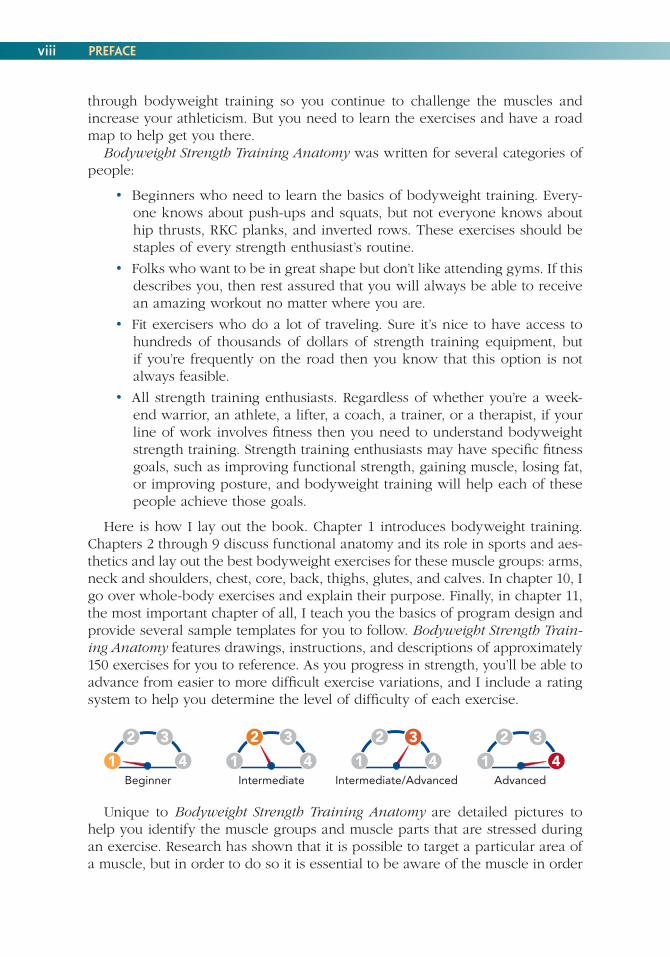
Here is how I lay out the book. Chapter 1 introduces bodyweight training. Chapters 2 through 9 discuss functional anatomy and its role in sports and aes-thetics and lay out the best bodyweight exercises for these muscle groups: arms, neck and shoulders, chest, core, back, thighs, glutes, and calves. In chapter 10, I go over whole-body exercises and explain their purpose. Finally, in chapter 11, the most important chapter of all, I teach you the basics of program design and provide several sample templates for you to follow. Bodyweight Strength Train-ing Anatomy features drawings, instructions, and descriptions of approximately 150 exercises for you to reference. As you progress in strength, you’ll be able to advance from easier to more difficult exercise variations, and I include a rating system to help you determine the level of difficulty of each exercise.
Unique to Bodyweight Strength Training Anatomy are detailed pictures to help you identify the muscle groups and muscle parts that are stressed during an exercise. Research has shown that it is possible to target a particular area of a muscle, but in order to do so it is essential to be aware of the muscle in order

ixpreface
Primary muscles Secondary muscles
E5716/Contreras/Key02/446040/JG/R1
to target that region while training. Primary and secondary muscles featured in each exercise are color coded within the anatomical illustrations that accompany the exercises to help you develop your mind–muscle connection.
After reading Bodyweight Strength Training Anatomy, you’ll possess a sound understanding of the muscle groups within the human body and will know plenty of exercises that train each movement pattern and muscle. You will know how to properly perform bodyweight exercises that are critical to future improvements. You will understand where to start and how to progress so you can develop proper flexibility and strength to keep advancing over time. You will know the important roles that core stability and gluteal strength play in fundamental movement, and you’ll understand how to design effective programs based on your uniqueness and preferences. Finally, you’ll dramatically increase your appreciation of bodyweight training, the most convenient form of strength training.
28
SH
OU
LD
ER
S
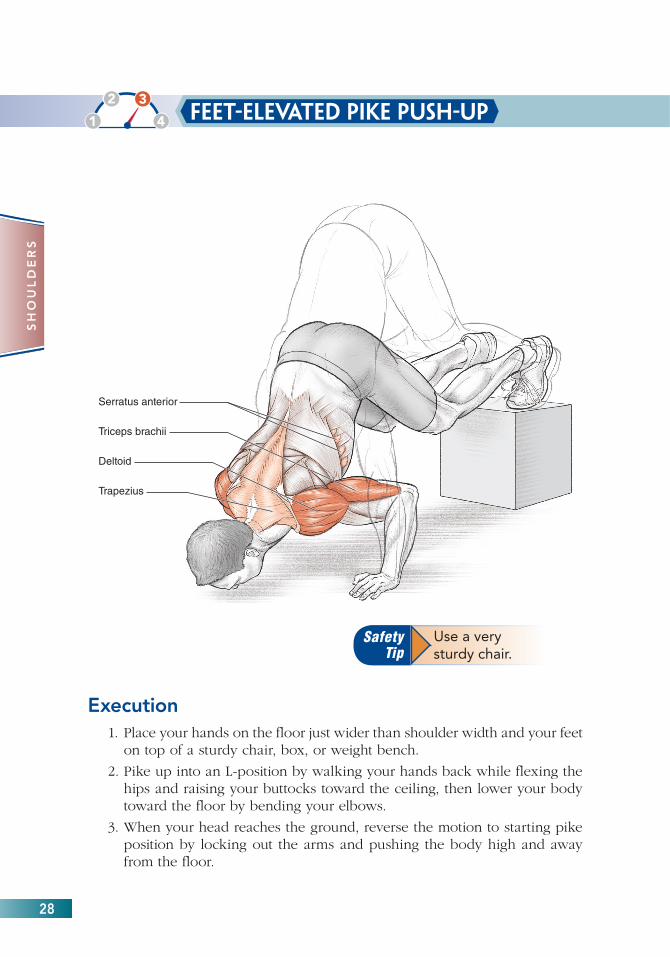
Feet-Elevated Pike Push-Up
Execution1. Place your hands on the floor just wider than shoulder width and your feet
on top of a sturdy chair, box, or weight bench.
2. Pike up into an L-position by walking your hands back while flexing the hips and raising your buttocks toward the ceiling, then lower your body toward the floor by bending your elbows.
3. When your head reaches the ground, reverse the motion to starting pike position by locking out the arms and pushing the body high and away from the floor.
E5716/Contreras/rate03/446043/FS/R1
1
2 3
4
Trapezius
Deltoid
Triceps brachii
Serratus anterior
E5716/Contreras/Fig. 3.6a/446062/JenG/R1
Use a very sturdy chair.
Safety Tip
98
BA
CK
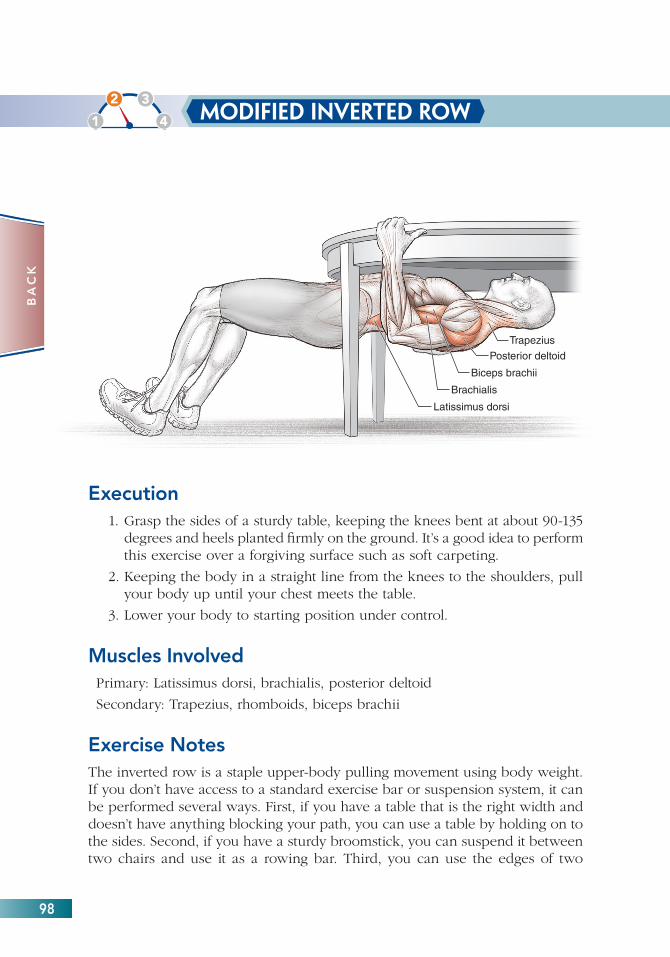
Modified Inverted Row
E5716/Contreras/rate02/446042/FS/R1
41
2 3
4
Execution1. Grasp the sides of a sturdy table, keeping the knees bent at about 90-135
degrees and heels planted firmly on the ground. It’s a good idea to perform this exercise over a forgiving surface such as soft carpeting.
2. Keeping the body in a straight line from the knees to the shoulders, pull your body up until your chest meets the table.
3. Lower your body to starting position under control.
Muscles InvolvedPrimary: Latissimus dorsi, brachialis, posterior deltoid
Secondary: Trapezius, rhomboids, biceps brachii
Exercise NotesThe inverted row is a staple upper-body pulling movement using body weight. If you don’t have access to a standard exercise bar or suspension system, it can be performed several ways. First, if you have a table that is the right width and doesn’t have anything blocking your path, you can use a table by holding on to the sides. Second, if you have a sturdy broomstick, you can suspend it between two chairs and use it as a rowing bar. Third, you can use the edges of two
Posterior deltoid
Biceps brachii
Brachialis
Latissimus dorsi
Trapezius
E5716/Contreras/Fig.6.6a/446150/JenG/R2
122
TH
IGH
S
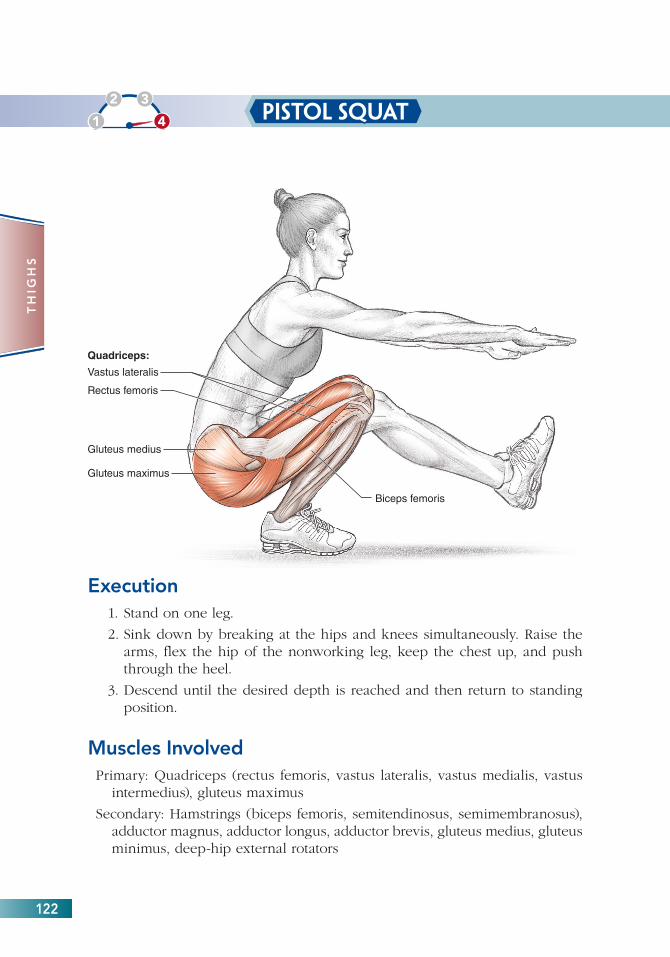
Pistol Squat
E5716/Contreras/rate04/446044/FS/R1
1
2 3
4
Rectus femoris
Gluteus medius
Gluteus maximus
Vastus lateralis
Biceps femoris
Quadriceps:
E5716/Contreras/Fig. 7.9a/446179/JenG/R1
Execution1. Stand on one leg.
2. Sink down by breaking at the hips and knees simultaneously. Raise the arms, flex the hip of the nonworking leg, keep the chest up, and push through the heel.
3. Descend until the desired depth is reached and then return to standing position.
Muscles InvolvedPrimary: Quadriceps (rectus femoris, vastus lateralis, vastus medialis, vastus
intermedius), gluteus maximus
Secondary: Hamstrings (biceps femoris, semitendinosus, semimembranosus), adductor magnus, adductor longus, adductor brevis, gluteus medius, gluteus minimus, deep-hip external rotators

148
GL
UT
ES
Shoulder-Elevated Hip Thrust
E5716/Contreras/rate01/446041/FS/R1
1
2 3
4
E5716/Contreras/Fig.8.2ai/446265/JenG/R1
Gluteus maximus
Bicepsfemoris
Gluteus medius
Vastus lateralis
Rectus femoris
Quadriceps:
Erector spinae
E5716/Contreras/Fig. 8.2aii/446266/JenG/R2
Starting position.
Execution1. Facing upward, place your upper back on top of a couch, sturdy chair, or
weight bench with your feet flat on the ground.
2. Place the hands on the ears and extend the hips by squeezing the glutes. Push through the heels and keep the lower back in a neutral position.
3. Rise as high as possible through the hips and then lower your hips to starting position.
Muscles InvolvedPrimary: Gluteus maximus

156
GL
UT
ES
Quadratus lumborum
Gluteus medius
Gluteus minimus
Gluteus maximus(upper portion)
E5716/Contreras/Fig. 8.6a/446275/JenG/R1
Side-Lying Hip Raise
E5716/Contreras/rate03/446043/FS/R1
1
2 3
4
Execution1. From a side-lying position, lift up onto the lower elbow and place the hand
of the other arm on the hip.
2. Making sure that the body is in a straight line from the shoulders to the knees, raise the body by simultaneously abducting the bottom and the top hips.
3. Lower yourself to starting position. Complete the desired number of repeti-tions and repeat on the other side.
Muscles InvolvedPrimary: Gluteus medius, gluteus minimus, upper gluteus maximus
Secondary: Internal oblique, external oblique, quadratus lumborum
Exercise NotesThe side-lying hip raise is an advanced movement that strengthens the upper glutes and core musculature. Keep a neutral hip position and avoid flexing forward at the hips. The bottom knee will always be bent, but the top knee can be bent (easier version) or straight (more difficult version), depending on the desired level of difficulty. Control the body through a full range of motion and avoid jerky movements. This exercise strengthens hip abduction, which is a critical joint action in sports.