prezi manual
DESCRIPTION
Manual for getting started with using Prezi softwareTRANSCRIPT

Note : The License for using Prezi as presentation editor can be bought only online from the Prezi website.
PREZI Manual
From : http://prezi.com/your/How to: upgrade, cancel account, handle unsuccessful paymentsby Zoltan Radnai Unsuccessful payment When you purchase a paid license, you can try it free for 30 days. Your card will NOT be charged until the trial period is over. If your card cannot be charged for some reason (it has expired, or there's not enough credit available on it), we will try to charge again in 5 days and then once again in another 5 days. You will receive a notification email after each attempt. If the payment is still unsuccessful, your account will be considered expired.This means:
1. You cannot create new prezis 2. You cannot edit existing prezis 3. You can log in to your account 4. You can view and download your prezis
Here is what you can do to fix an expired account:
1. Switch to the free Public account. Go to this page only if your account has been expired: http://prezi.com/profile/gopublic
2. Repeat your purchase: After three unsuccessful charge attempts, your account will be considered expired. To update your payment data (eg. use another credit card), go to your Settings page. Then you can renew your purchase on this page: http://prezi.com/profile/renew
Upgrading from a paid account Let's say you have chosen Prezi Enjoy account, and later you realize you want a Prezi Pro license that comes with the offline editor.
1. If you are still in the trial period for the Enjoy, simply upgrade to Pro. You will be charged by the price of the Pro account after the trial period expired (there are no extra free days for the new account).
2. If you have already been charged for the Enjoy account, you can still upgrade to Pro at any time. We will count in the time left from your Enjoy subscription proportionately. (For example: You have 9 months left on your Enjoy account subscription period. You upgrade to a Pro account. Since the price of Prezi Pro is approximately three times more than Prezi Enjoy, you can use your new Prezi Pro account for the next 3 months for free).
Canceling a paid accountYou can cancel your account on your Settings page at any time.
1. If you decide to cancel your paid account during the 30-day trial period, you will not be charged, and your account will expire. You can downgrade to the free Public account or upgrade at any time.
2. If you cancel your account during the recurring period (after you had been charged) you can still use your account until the end of your yearly subscription. You will not be charged again and your account will expire. You can downgrade to the free Public account or upgrade at any time.
Your Prezi accountby Adam Somlai-Fischer Since Prezi provides software as a service, you need to register on Prezi.com and create an account

before creating your first prezi.You have access to different licenses, depending on the type of account you need. Prezi Public account is free, while the Enjoy and Pro come with a yearly recurring payment system.By logging in to your Prezi account, you can access your online prezis from any browser. With a Prezi Pro account, you can install Prezi Desktop on up to 3 computers simultaneously. You can also share your prezis with others so they can work with you, or simply view your prezis online.
Prezi is an online tool. What does this mean?by Adam Somlai-Fischer Prezi is an application - an editor that lets you create prezi presentations. However, unlike many applications, Prezi can be used directly from an internet browser (e.g. Firefox, Internet Explorer, Chrome, Safari) without the need to install anything. Prezi can also be installed (we call this Prezi Desktop) so you can use it without internet access.We support both ways of working with Prezi, since there are many advantages.By using Prezi from an internet browser, you can:
1. Easily share your prezis for collaborating with others 2. Easily send your prezis and show them to non-Prezi users 3. Log in from any computer, access your prezis and work on them 4. Our licenses include the ability to export a Portable Prezi, which can be used without internet
access so you can safely hold your presentations anywhere
By using Prezi Desktop you can:
1. Work on your prezis without internet access 2. Quickly insert large media files - there is no limit to file size 3. Easily upload prezis to Prezi.com, so you can enjoy all the advantages listed above
Quickly Learn Preziby Adam Somlai-Fischer To quickly get up and running in Prezi, watch Prezi Academy Lesson 1 >You can also continue with the adjacent lessons once you have completed the first lesson.
Lesson 1:Step-by-Step Tutorial on Prezi Basicsby Angelie Agarwal For a step-by-step tutorial on how to use basic tools in Prezi, watch the video above and browse through the 6 steps below. In just a few minutes, you'll be set to create a stunning presentation!
01 Double click anywhere to write When you create a prezi, the canvas is your workspace. You can double-click anywhere on the canvas to add a text box to jot down your key ideas. As your ideas fill the canvas, you can drag it around to create more space.
02 Zoom in to develop your ideas Once you have added your ideas to the canvas as text, you can zoom in to these ideas to develop them and add more text. You can use the zoom buttons on the right side of the screen or scroll your mouse wheel to zoom in and out.
03 Use the zebra for structure and size Now, you can arrange your ideas and create hierarchy through size. When you click on one of the text boxes, you'll see the striped transformation zebra, which lets you move (center of the zebra), size and scale (inner ring of the zebra), and rotate objects of any kind (outer ring of the zebra).

04 Add images from the Insert menu When you're ready to add images, you can simply click Insert on the menu in the upper left, and click on the image you want to use. Once the image appears on the canvas, you can click on the image and use the zebra to move, size, or rotate it. Quick tip: before you get started, collect images you plan to use in your prezi and place them in a folder for easy access.
05 Create your storyline After you've added and arranged your text and images, it's time to add the storyline or path. Use the zoom buttons or mouse wheel to zoom out, as seeing the "big picture" can help you determine the right path for the ideas in your prezi. Click on Path, and add your storyline by clicking on the parts in the order in which you want to show them. If you want to change the order of your path, you can Delete All and start again or drag the unassigned path ball (that appears between path numbers) to the object you want to show.
06 Click 'Show' to present! Ready to present? To move into presentation mode, click on Show and step through your prezi with the arrow buttons or arrow keys. In Show, you can click to zoom in and out of your ideas at any point and press the arrows to get back to the path. Publish from Prezi.com with a click After you present, you can publish your prezi by clicking on it from prezi.com/my and checking the box marked Publish. On the Share tab, you can invite others to view or edit your prezi, and obtain an embed code to easily add the prezi to your blog.
Prezi Meetingby Zoltan Radnai You can now work together in real time on the same prezi! With Prezi Meeting, teams can collaborate live or simply present prezis with up to 10 people in a prezi at one time. Prezi Meeting is included in all license types.Open a prezi to edit•Click “Meeting” from the menu bar in the upper right corner of the screenNow you have two options:1.Select “Invite to edit” to generate a link that you can send to anyone. When your invited collaborators open the link, you will see their avatars. Text, images, and videos added to the prezi are visible to everyone, giving remote team members the sensation of being in the same creative space together. (When you are invited to co-edit a prezi you will enter the Prezi Meeting in Show mode upon clicking the link. To start co-editing the prezi, switch to Edit mode).2.Select “Start online presentation” to generate a link that you can send to anyone. When recipients open this link, they can watch as you present, but will not be able to edit the prezi. This link expires 10 minutes after you have closed the prezi and finished the session.
Here's how to navigate in Prezi Meeting:1.To follow an avatar: click an avatar and select "Take a look"2.To give a collaborator control of the prezi (you are currently the presenter): click on the avatar and select "Hand over presentation"3.To navigate on your own: click on the avatar and select "Explore freely"To add an extra dimension to the co-editing process, you can use communications tools such as Skype.
Known Issuesby David Udvardy
Editing a prezi1. You cannot add text to your prezi in Fullscreen when working from a browser 2. Keyboard shortcuts are limited when going fullscreen from a browser. Download your prezi to to
use all shortcuts in fullscreen mode.

3. Some prezi themes does not include all accented characters. The first two themes under the "colors" menu bubble are designed to accept all European typing.
4. Currently it is not possible to edit languages that have right-to-left scripts in Prezi 5. When uploading images, it could cause some trouble if the JPEG is a progressive type (the one
that comes in refining scans), is in CMYK color mode, or is a JPEG2000 type. Any other non-standard extensions can lead to malfunction, e.g. some photo management softwares write non-standard EXIF or IPTC tags in the image file.
6. The dimensions of an image shouldn't exceed 2880 by 2880 pixels. You may succeed in uploading a JPG larger than this, but that will cause many various problems while editing and presenting. (These limitations are coming from the Flash platform itself.)
7. SWF files created by Adobe Illustrator can only be added to the end of the path. 8. If you click on Send to back or Bring forward multiple times in a quick sequence, the object
moved may fade away completely. Reloading your prezi solves this issue. 9. URLs with other than HTTP protocol (eg. https://, ftp://, mailto:, etc.) doesn't get converted to links
in the editor. 10. For HTTP protocol links to become active, you need to save and refresh your prezi.
Playback of your prezi1. If you experience jerky motion while transitioning from one state to the next viewing your prezi, it
may be caused by creating all your content at too small zoom level. The soultion is to select everything in your prezi (zoom out with Ctrl+SPACEBAR to show everything, and SHIFT drag a selection rectangle around every element in your prezi), than scale it up using the transformation zebra.Please note, that scaling up from small zoom levels may slightly rearrange items in your prezi due to rounding errors in Flash.
2. A downloaded portable prezi crashes on Mac OS X using a non-English input language, if you hit any key together with the Ctrl key.
Prezi Desktop release notes and limitations1. Creating a prezi in the Prezi Desktop Editor with images that are not supported in the online editor
may be possible. If you upload such a prezi from Prezi Desktop, these images will not be visible online (a download bubble may show up instead).
2. Creating a prezi with PreziDesktop which is bigger (in megabytes) than your available online storage space is possible. However you will not be able to upload these prezis to your online account.
Prezi zoomed awayby Laszlo Laufer
The problemZooming away: When you open your prezi, it appears empty after loading.You click on the Home button on the zoom bar, and the prezi zooms out and some parts or all of your content disappears.Clogging:When you zoom in or out of the prezi, it gets “clogged” and does not zoom smoothly.
Quick solutionIf the problem appears for the first time, and you haven’t closed your prezi yet, try to undo your changes until you have found the last state without the clogged effect.
Step-by-step solution
It is highly recommended to read the description below to understand the nature of the problem before starting to work on the solution.

These are the steps that we follow to recover prezis that are posted at Community forum. We offer them here so you can save time by trying to recover your own prezi.
1. Click on the Home button of the zoom bar.2. Zoom out a little by clicking (-) on the zoom bar one time. Now all of your content is on the screen, but you probably don’t see every piece since some parts might be very small. 3. Make sure you are in "Write" mode. Press Shift and drag the mouse to create a rectangular area in the middle of your screen (which will appear to be empty). Release the mouse: if you see a Zebra after the selection, it means you have found content.4. First try to scale up (enlarge) the selection with the middle ring of the Zebra. If you succeed, you will see some parts of your content get bigger. Don’t unselect. Zoom out a little by clicking (-) on the zoom bar one time, and move the selection aside using the middle part of the Zebra.5. If you did not succeed with step 4 and you could not scale up the selection, you have to delete the selection. You will probably lose content, but this content cannot be recovered from your prezi.6. Now click again on the Home button of the zoom bar. In one corner, you will see the content you just enlarged, but there might be empty areas in other parts of your screen. Start looking for other hidden parts of your prezi by following steps 1, 2, 3, and 4 again.7. If you don’t find anything in the empty areas between the visible content or after clicking on the Home button on the zoom bar (and the visible content fits your screen) then you are done and have successfully recovered the prezi!
Understanding the problem
If undoing your changes does not solve the issue, please first read through the description of the problem and then follow the procedures described in the “Long solution” section.
Prezi is a zoomable space, where every text, image and object has a size besides a horizontal and vertical position on the canvas. When you enlarge, scale down or move an object these coordinates are recalculated. Unfortunately, there are technical limitations on how many digits these calculated numbers can have.
When a prezi reaches these technical limitations, it starts to behave erratically. This happens when the horizontal or vertical distance between two objects, or the size difference between the smallest and the largest object is too big. Since it is relatively easy to zoom deep into a prezi and place an object there, usually it is the size difference (and not the horizontal or vertical position) which is causing the problem.
Mathematical background

A good way to imagine the available space in a prezi is to imagine it as a glass box, rather then a flat surface. You would place some text on top of it, some at the bottom. Now, if you look into this box from above, the texts on top would appear larger, the texts on the bottom smaller.
The limits of this box (x, y, z) are the limits you have in Prezi. If you place objects outside of these, the problems described above will occur.
Prezi Editorby Adam Somlai-Fischer Prezi Editor is a program that lets you create prezi presentations, like the ones you can see on the Explore page. You can create prezis using Prezi.com from an Internet Browser, or using Prezi Desktop. Prezi editor is created with ease-of-use in mind and has a carefully selected and developed set of tools, which help you to develop and communicate your ideas. You can start using the prezi editor in minutes, you only need a free Prezi account. To check out the prezi editing experience, visit: http://prezi.com/learn/getting-started/
Editor interface elements
1. Zoomable Canvas. Place your texts, images, videos. Make them large or very small, and prezi will help you to navigate among them.2. Top Right Menu. Access Save, Help, Undo, Redo, Exit (takes you to Prezi.com/my)3. Bubble Menu. Find all the tools needed to create prezi presentations.4. Transformation Zebra. This simple unified and intuitive tool lets you easily manipulate objects on the zoomable canvas.5. Text Editor. Write and stylize your texts.6. Navigation Menu. Play back control your presentations.7. Zoom buttons. Zoom in and out.
Prezi Desktop (offline application)by Adam Somlai-Fischer While you can use Prezi.com from any computer with internet access, you can also download and install our software version of Prezi.com, the Prezi Desktop. By using Prezi Desktop, you can:
1. Work on your Prezis on the go, without internet access. 2. Quickly insert large media files - there is no limit to file size 3. Easily transfer prezis by using the *.pez file format

Here is a sample workflow: You can start creating your prezi on Prezi.com from any computer with internet access. Download the prezi as a *.pez file (prezi.com/your > click on the prezi > Download... > Open in
Prezi Desktop). Save the prezi document to your documents folder, and doubleclick to open it with Prezi Desktop. Edit it in Prezi Desktop online or offline, as you wish. Upload back to Prezi.com (File > Upload to Prezi.com...)
Prezi Desktop is built on Adobe AIR, and can be used on Windows, Mac and Linux computers. You will need administrator privileges to install Prezi Desktop.
Supported features and current limitations:1. Create, Edit and Show presentations offline from your laptop 2. You can download prezi files (with *.pez extension) from your online account, and open them in
Prezi Desktop 3. You can convert prezis created in earlier versions of Prezi Desktop to prezi files 4. The system requirements are the same as with Adobe AIR, read about it here 5. You can install and use the Prezi Desktop on 3 computers with one license
Here is a short video demonstration of Prezi Desktop:
Edit Mode / Show Modeby Adam Somlai-Fischer In prezi there are 2 key modes: Show mode, and Edit mode. And many things work rather differently in each.Edit mode:
1. is designed for creating, manipulating your prezi. There is a grid in the background. 2. Prezi starts up in Edit mode 3. Prezi doesn't zoom around when you click on objects, so you don't get lost while writing or moving
your objects 4. use the zoom buttons, or scroll your mouse to zoom
Show mode:1. is designed for presenting and for fast navigation to small / huge things 2. there is no grid, you get a clean look, and all the menus will auto-hide 3. You can click on objects to zoom to them, and click the background to zoom out
How to change between them
Default state of Prezi when it starts is edit mode. You can see the menu centered around the 'Zebra' icon and the label 'Write'. (For you convenience, Prezi stays in Edit mode while the menu is centered around Insert and Colors & Fonts.)
You can switch to show mode by clicking the grey 'Show' ball

Prezi is in 'Show' mode now, the menu is centered around 'Show'. To go back, click on the Blue edge of the parent menu at the top left of your screen.In Show mode, all menus hide automatically, so you can have a clean presentation screen. To bring them back, just approach the corner of your screen with your mouse.
Align objects with snapby Zoltan Radnai You can also adjust text to the size of other text boxes. It used to be harder to create a simple chart or align any objects with each other in Prezi. Now, as you rotate or move images, frames and text, they will automatically click into position with identical objects around. You can also adjust text to the size of other text boxes.
Print a preziby Zoltan Radnai
You can find the “Print” option on the upper right corner of your editor screen next to “Meeting”. In PreziDesktop, there is a "print" option in your window menu bar as well under “File”. Here is how to use print a prezi:1. Create a prezi2. Add a path to your prezi3. Click "Print" in the upper right corner of the editor window. Your prezi will now be converted to a PDF document, where every path step will be one document page. The exported PDF will also include an overview page of your whole prezi.Tips:- To avoid printing multiple pages of the same view, create a linear path for printing.- Please consider the environment before printing!
Navigate with a mouseby Adam Somlai-Fischer It is very easy to navigate with your mouse in prezi. For the best experience, we recommend a scroll mouse, or a trackpad where you can scroll.

Edit Mode This means that the top left 'Bubble' menu is centered around the Zebra icon, with the text 'Write. This is the default state when Prezi starts.
Drag the mouse Pan the canvas. (Drag means press and hold the button, while moving the mouse).If you don't see a Transformation Zebra, you can drag anywhere, even over objects. If you see the Transformation Zebra, you should not drag on the Zebra - since that will move, scale, rotate the selection instead.
Scroll the mouse Zoom around the mouse pointer. This means, that you can point to an object, scroll, and prezi will zoom to that object.Alternating zoom in/out while moving the mouse is a good way to navigate even without panning.
Press the (+) (-)Zoom buttons
The zoom buttons on the right will zoom in/out around the center of the screen.
Show Mode This means that the top left 'Bubble' menu is centered around the grey 'Show' circle. Click on 'Show to get there'
Click on Objects
Zoom in.Click on Texts, Images, Frames, and Prezi will zoom you to them. You will zoom, pan, rotate, so they look centered and are readable.
Click on the Background Zoom out.Clicking on the background starts smart zoom out. This means that prezi will look for the next largest enclosing Frame, and zoom, rotate up to it. If there are no more enclosing Frames, it will zoom to the overview.
Drag the mouse Pan the view
Scroll the mouse Zoom around the mouse pointer
Press the (+) (-)Zoom buttons
The zoom buttons on the right will zoom you in/out around the center of the screen
Presentation Pathby Adam Somlai-Fischer When presenting on a stage, it helps to have a main narrative in your prezi. With the Path tool, you can simply go through your presentation just by clicking Next.Create a Path
1. Zoom out until you can see multiple objects you want to show 2. Choose Path on the Bubble Menu 3. Click on your objects in the order you want to present them 4. Drag path numbered circles off to the background remove them 5. Drag the small path circles between two steps to insert an object 6. Drag the large numbered circle onto other objects to swap them into the Path 7. Choose Capture View to capture current view and add it to the path
Click Show in the Menu, and use the bottom right arrows to go through your PathThe Delete All button deletes the whole Path, and all the path steps. A good Path has overviews with Frames, details. You can depart any time, zoom out, respond to

audience, and resume the Path by clicking next. You can use the left and right arrows, or the left and right keyboard keys to navigate in the Path. You can also use a remote presenter.Hold down the 'next' button to choose automated timing. Hold down 'prev' button to jump to the start.
Color Wizardby Zoltan Radnai Color Wizard allows everyone to customize Prezi theme colors, and select a font set of choice from the wizard's font library. The wizard has a smart color selector system that suggests nice colors for different theme elements based on your initial selections. Alternatively, you can also create branded Prezi themes by adding your exact company colors to the wizard.Paying users (Pro, EduPro and Enjoy, EduEnjoy) can even add their logo to their custom theme.Related feature: design professionals can now create branded Prezi themes for free. The CSS code of prezi themes is now available for customizing in a standalone editor.Color Wizard and the CSS editor are accessible with all license types.
Group select objectsby Zoltan Radnai To group select objects in Prezi just hold the SHIFT key of your keyboard and the LEFT mouse button and drag a rectangle around objects you whish to select together. When you release the mouse and the keyboard, you will see the Zebra tool appearing over the entire selection. Now you can scale, move and rotate the selection the same way as you do with single selected objects.
Writing Textby Adam Somlai-Fischer Create text
1. Click anywhere to create text in Edit mode. 2. You can drag the blue icon with arrows on the right, to adjust the width of the text box. Please
note, that the width of the text box, not the actual text itself, will define the area of a text where prezi zooms to - so try to size your text boxes close to the actual texts.
3. There are no numeric text sizes in Prezi - simply use the Zebra tool to scale your texts to change the size.
4. To change between Title 1, Title 2 and Body fonts/colors, use the Font Style buttons below the text box. Note that one textbox can only have one font. Create multiple texts to mix colors/fonts. Look into the Colors & Fonts Bubble Menu for more font combinations (themes).
5. You can use the Text Format buttons to change text alignment or to make a bulleted list (Left, Center, Right, Justify) per line, if a line is selected. If no lines are selected, it affects the whole text box.

Edit Text
1. Double click on a text to edit it. If you see the Transformation Zebra on a text, just double click on it again.
2. You can use copy/paste to bring text over from other programs. 3. While editing a textbox, press ctrl+a to select all, ctrl+c to copy, ctrl+v to paste text. (use
Command on MAC).
Framesby Adam Somlai-Fischer
The best presentations use frames in Prezi to organize information in groups. For example, if you have a prezi about making dessert, you can organize the information in your presentation in two groups: dessert ideas and ingredients. Use frames to separate these two groups. When related information is grouped together, you can avoid excessive panning in your prezi - which often results in motion sickness for your audience.
1. Choose Frame in the Bubble Menu (top left) 2. Choose a Frame type 3. Start drawing a Frame around your objects 4. Hold down SHIFT while drawing to create 4:3, projector-friendly aspect ratios
You can choose 'Capture View' in the Path menu, to generate a frame that fills your actual view. This will add a path step as well.
Hidden frames
You can use hidden frames to organize your content without the added visual weight of the frames. This is ideal for highlighting details on a large image, or block of text. If you prefer to present your prezis without predefined paths, just define the large groups of content in your prezi, and let the hover feedback of an invisible frame guide you during presenting. Here you can watch a video on the different uses of hidden frames: New features in Prezi for Spring 2010.To select a frame with its content, SHIFT+drag a selection rectangle around it - now you can move and scale it as a group.

To get the general idea of frames in Prezi, watch the short video in Prezi Academy on Grouping and Layering.
Arrows, lines, markerby Adam Somlai-Fischer Choose Insert/Shapes to draw arrows, use a marker, or a pencil for sketching
1. Show relations between objects, ideas with Arrows 2. Highlight texts with a Marker. You need to move them behind the text for best effect. Use the (+)
menu on the Zebra, and choose 'Send Backwards'
3. Draw some sketches about your ideas with the Pencil
Web linksby Adam Somlai-Fischer You can insert web links into your prezi.
1. Double Click where you want the link to appear 2. Type the link starting with 'http://' (eg. http://prezi.com) 3. Save and reload the Prezi, and the links will activate. 4. Some characters break links for the moment. 5. To select a link, use Shift+drag, since you can't click on
it
6. To edit a link select it, then double-click on the Zebra
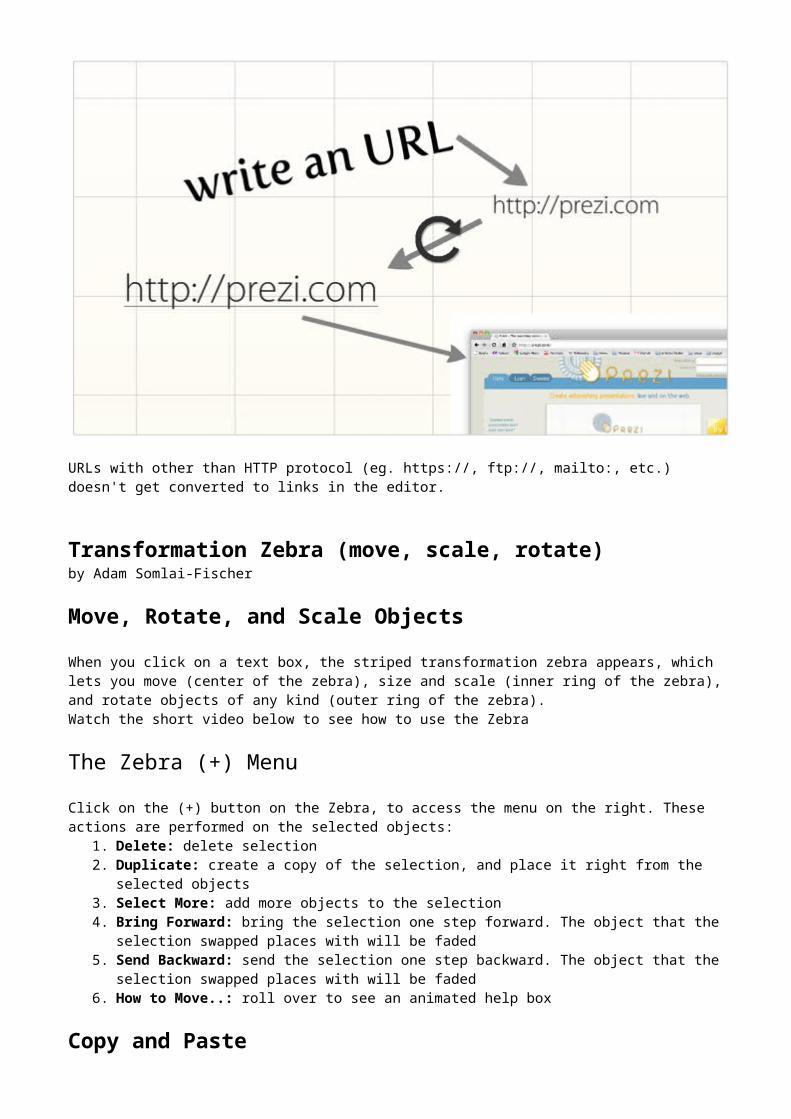
URLs with other than HTTP protocol (eg. https://, ftp://, mailto:, etc.) doesn't get converted to links in the editor.
Transformation Zebra (move, scale, rotate)by Adam Somlai-Fischer

Move, Rotate, and Scale Objects When you click on a text box, the striped transformation zebra appears, which lets you move (center of the zebra), size and scale (inner ring of the zebra), and rotate objects of any kind (outer ring of the zebra).Watch the short video below to see how to use the Zebra
The Zebra (+) Menu Click on the (+) button on the Zebra, to access the menu on the right. These actions are performed on the selected objects:
1. Delete: delete selection 2. Duplicate: create a copy of the selection, and place it right from the selected objects 3. Select More: add more objects to the selection 4. Bring Forward: bring the selection one step forward. The object that the selection swapped
places with will be faded 5. Send Backward: send the selection one step backward. The object that the selection swapped
places with will be faded 6. How to Move..: roll over to see an animated help box
Copy and Pasteby Adam Somlai-Fischer Duplicate an object:
1. Click on an object 2. Press Ctrl+D to duplicate it, or use the Zebra menu 3. Now move or resize it as you wish
To copy or duplicate multiple items, SHIFT+click or SHIFT+drag to select them.
Copy and Paste within a prezi
Use Ctrl+C to copy any object or piece of text to the server's clipboard and Ctrl+V to paste into the prezi.
Copy and Paste between prezis
You can also paste content copied in one prezi into another prezi. It doesn't matter if you close the original prezi or not, so you can have them both open in different browser windows, or first close the original prezi and open the second one you would like to paste into.
Copy and Paste between online prezis and prezis opened in Prezi Desktop
Copying from an online prezi to one opened in the Prezi Desktop application (or any other application) and vica versa is not supported. However, you can copy and paste raw text between prezi and other applications. To copy text from prezi double click on the text and select it, then use Ctrl+C or the right click menu to copy.Note to Mac users: Command+C and Command+V will not work, use Ctrl instead.
Undo and Redoby Adam Somlai-Fischer If something went wrong...Press CTRL+Z or Undo on the Top Right MenuPress CTRL+Y for Redo, if applicable, or press Redo on the upper-right menuUndo levels are saved as long as a prezi is open. If you close it, and reopen, you cannot access your undo steps.Please note that with a large prezi, one undo action can take several seconds to finish - so please wait for the changes to undo after you press the button

Theme selectionby Adam Somlai-Fischer You can select a theme when you create your new Prezi, and you can change it later from the bubble menu.
Click on Colors Click on any style bubble to apply it Wait for the fonts to download You can revert to the original theme one by clicking: 'Original Style'
File Size Limitationby Prezi Repair Pítőr The maximum upload size for files is 50 MB per file. In Prezi Desktop you can insert larger files into your prezi, but you won't be able to upload such a prezi to your online account.
Insert Imagesby Adam Somlai-Fischer Choose Insert/Load File, and select the image from your computer. Then use the Zebra to arrange it.
1. Supported formats are JPG, PNG and GIF. 2. The maximum size for images is 2880 by 2880 pixels. You may succeed in uploading a JPG
larger than this, but that will cause many various problems while editing and presenting. (These limitations are coming from the Flash platform itself.)
3. Progressive or CMYK JPEGs and the JPEG2000 format are not supported. 4. You can upload multiple files at a time - simply select more in the upload dialog. 5. You can press 'L' any time to start uploading an image. 6. Currently, Prezi zooms to images to fill the view with them - you cannot zoom them to 100% size.
To use an image as a background image, simply make it large, and press 'Send Backward' on the Zebra Menu.
Insert Videoby Zoltan Radnai You can insert the following video file formats to Prezi (online editor and PreziDesktop):FLV, F4V, AVI, MOV, WMV, F4V, MPG, MPEG, MP4, M4V, 3GP
How it works: Prezi has a built-in, standalone video player for these video formats. After uploading a video, you can control the playback using a navigation bar when presenting manually. You can

add videos directly to the path. In this case, videos will start automatically as you reach them in your presentation, and will stop as you move along on the path.How to insert:
1. Click Insert/Load file in the editor, or simply hit the 'L' keyboard shortcut. 2. Choose a video file from your computer 3. Insert the file into prezi, just as you insert any image file. Once the video is selected in Write
mode, you can use the Zebra tool to arrange it or simply drag and move with your mouse.
YouTube videos:
How it works: The Prezi editor includes a standalone navigation bar to control playback of YouTube videos. You can add YouTube videos directly to the path. In this case videos will start automatically as you reach them in your presentation, and will stop as you move along on the path.How to insert:
1. Click anywhere on the canvas to open a new textbox. 2. Paste the URL of a YouTube video to the textbox (this is not the YouTube embed code). 3. Hit OK on the text box. Once the video is selected in Write mode, you can use the Zebra tool to
arrange it, or simply drag and move with your mouse.
Notes: - F4V file is simply an FLV Flash video file that has been renamed to F4V. The F4V and FLV formats are MPEG-4 video formats defined by Adobe Systems.- File size limit for video uploads: for Public, Enjoy and EDU Enjoy users: 50 Megabytes. For Pro, EDU Pro users the only limit is their online storage space provided for their accounts.
Insert Soundby Adam Somlai-Fischer You can insert sound in prezis in FLV flash video or SWF flash format.Why do you need to insert sound in video format to prezis? Since Prezi doesn't currently have direct sound file support, you should convert sound files to FLV or SWF format to upload in Prezi. Please read the step-by-step description on how to do this, and when to choose which file format.1. FLV soundHow it works: Prezi has a standalone .flv video player that can also be used for adding sound files to your prezi.
1. Add it to the path to automatically start when it appears in the path. 2. Advance to the next path item to stop the video. 3. You can also navigate in the sound/video file using the flv player's navigation bar.
How to implement: To use the player for sound, first add video content to your sound file - the same way you upload music tracks to YouTube.
1. Import the sound file and an image as video content to a video editor software. (We recommend iMovie for Mac, and Windows Movie Maker for Windows computers).
2. Save the project in any video format the software offers. 3. Convert this video file to FLV using file format converter. We recommend a free online tool, called
Zamzar. 4. Once your video file has been converted to FLV format you can upload it to Prezi.
Short summary: Prezi eats sound in FLV format. Sound files cannot be converted to FLV, since it is a video format. Solution: convert your sound file to a video file. Then you can easily convert your video file to FLV.
2. SWF sound
How it works: Unlike FLV files,SWF files cannot be added to a standalone player inside Prezi. They appear as images do in your prezi. SWF files can be animations or still images, with or without sound. Once you upload them to Prezi, they will start to loop in continuous playback as long as the prezi is open.
How to implement: 1. Upload an SWF sound file like an image (Insert/Load File in the editor). Always add an image to
SWF sound or else your uploaded file will be invisible. 2. Select and manipulate it with the Zebra tool just as you would with other media files. 3. Note for developers: If you create swf files with code inside, you can have them start playing upon
clicking. However, they cannot be inserted to the path and you can't have them start to play upon zooming with the path.
Short summary: You can upload sound to Prezi in SWF format. There is no player for this inside Prezi -- SWF files work like images you upload. If you add sound to an SWF it will loop continously. You must add an image to the SWF, otherwise it will be invisible in the Prezi editor.
Check this example prezi with sound made by Gina Wilson-Burns!Kindergarten News on Prezi
Insert PDF, PowerPoint, Excelby Adam Somlai-Fischer Prezi eats PDF documents. PDF upload currently only works when editing a prezi online on Prezi.com; it does not work in the Desktop Editor version.
1. Save your PowerPoint or Excel as PDF 2. Choose Insert/Load File, and upload the PDF 3. Prezi places your pages into a grid if you have a multi page PDF
To convert your PowerPoint to PDF. You can use Zamzar, or the free CutePDF printer.
Insert Flash filesby Adam Somlai-Fischer SWF files are vector-based graphics or animations produced in Adobe Flash or Illustrator.They are not pixel-based, which means they will remain sharp no matter how much you zoom in on them - so they look great in Prezi.You can import them by clicking Insert/Load FileSWF files play in Prezi continuously. You can use flash animations, and also interactive flash files. Some interface elements might interfere with Prezi, so make sure you try. If you have ActionScript in your flash files you need to use AS3.It is best to use SWF files exported from Adobe Flash. Adobe Illustrator exports non standard SWF graphics, which causes some issues with the Path tool in Prezi.This Prezi Academy lesson gives a good overview how to use flash animations best in Prezi:http://prezi.com/learn/looping-and-zooming/ How to make SWF files in Flash:1. Create a drawing in Flash.2. Select your full drawing (shift+drag LMB), right-click and select "Convert to Symbol".3. Give your symbol a name and click OK.4. Right-click your symbol in the Library window (Window /Library) and click "Export SWF", then select an export path.5. Load this file into Prezi (If you'd like to make animated SWFs, please check the Flash help manual.)

Insert Complex Graphicsby Adam Somlai-Fischer We want to keep Prezi simple. So, if you need to create complex graphics with fine control over shapes, layers, etc, it's better to use a dedicated program like Illustrator or Inkspace. Then save as PDF, upload to Prezi, place Frames, and you can zoom around.
1. Convert to PDF or SWF 2. Choose Insert/Load File 3. Add Frames + Path for navigation
To hide the Frames, first put them into your Path, then choose the large graphics and choose Bring Forward from the Zebra Menu.Your path will still work. Here is an example: http://prezi.com/hicfb0kh81dq/
YouTube Videosby Adam Somlai-Fischer Just paste the YouTube URL as text and it will turn into a YouTube video.
Copy the URL of the YouTube page with the video you want to embed Start a new text box by double clicking in Edit mode Paste the URL into the text box. Press OK. The video should appear.
Please note that embedded YouTube videos will only work if you have an internet connection. This is also true for downloaded Portable Prezis and offline editing in the Prezi Desktop application - you need an internet connection.
Download a Portable Prezi for presentingby Adam Somlai-Fischer What is a Portable Prezi?
Portable prezi is an exported/downloaded version of your prezi presentation, which works without internet access, without a prezi account, and without Prezi Desktop.You can use it to present where you don't have access to the internet, or send to conference organizers. It contains a non-editable version of your prezi, and a player software for Windows and Mac.When you download a Portable Prezi pack, you can:
Present without an internet connection on a Mac or PC. Burn your prezi on CD/DVD. Distribute your prezi.
Please note that a portable prezi cannot be edited. Edit on Prezi.com, Prezi Desktop, and download/export again if you need to make changes.Note: Embedded YouTube videos can only be played when you are online.
Create a Portable Prezi
Using Prezi.com1. Go to Prezi.com/your 2. Click on your Prezi 3. Locate the toolbar on the right, and click Download 4. Choose Export to Portable prezi and click Download 5. You will receive a zip file. Save it. 6. Unzip, and start Prezi.exe (PC) or the Prezi file (Mac)

Using Prezi Desktop 3 or above1. Open your prezi 2. Click File > Export as portable prezi... 3. Give a file name and location 4. Unzip, and start Prezi.exe (PC) or the Prezi file (Mac)
Present from a browserby Adam Somlai-Fischer Browsers are not designed with dual screens, projectors, remote clickers in mind - they work well with Prezi, but there are some things to note:
1. The Prezi Fullscreen button from a browser will disable most keyboard shortcuts. You can use the browsers' built in Fullscreen mode instead (PC)
2. Make sure to go Fullscreen after you plug in the projector. Click 'Show' in the menu for presentation mode.
3. We usually resize browsers to "small" before plugging in the projector, as the resultion change might make it hard resize it later.
4. For advanced users: type 'm' to hide the menu, and use keyboard shortcuts to edit live on stage. Keep in mind that you can edit text in your prezi if you're in Fullscreen mode in a browser.
Plugging into a projectorby Adam Somlai-Fischer If using a projector to show your prezi, note that the screen resolution will change once the projector is plugged in. Therefore, it's best to resize your downloaded prezi or browser window before plugging in the projector. Once you have projected your prezi, click Fullscreen to maximize the viewing experience.You can also plan ahead while creating your prezi. Most laptops are wide screen, but most projectors use the 4:3 aspect ratio. Hold down shift while drawing a frame (bracket or rectangular) to keep the ratio at 4:3 - so you can see exactly how prezi will appear on a projector.
Smart Zoomingby David Udvardy Smart Zooming is a feature of Prezi. Smart Zooming works in Show mode, and helps you find your way around on the canvas. It has two uses, zoom on an object and smart zoom out.
Zoom on an object
When you click on an object in Show mode, Prezi finds the best possible view for that specific object: it will bring the object fully into view, center it, and rotate the view to match the rotation of the object. Watch it in action here, try to click on the different frames, texts and objects (start exploring the left circle):
Smart zoom out

Smart zoom out lets you zoom one step further away from your current view, if you have some nested frames. One step means the closest frame which is somewhat larger than the currently focused, and has some intersection (ie. crosses) with it. You can also try this in the prezi above, start in the right side circle.The last step of smart zooming out is always the overview of you complete prezi. There is a shortcut for this view also press CTRL + SPACEBAR on your keyboard to get there. This could be handy at a lot of occasions, for example at the end of your presentation you may want to prepare for questions by showing an overview of your prezi to your audience.Note that this feature doesn't need path at all, all the animation used for transitioning from one state to the other is a built in feature of Prezi. You will see, that with some experience, you will be able to use these features even during a live presentation, which will give you the advantage of moving away freely from your set route, and will let you react immediately to the audince's responses.
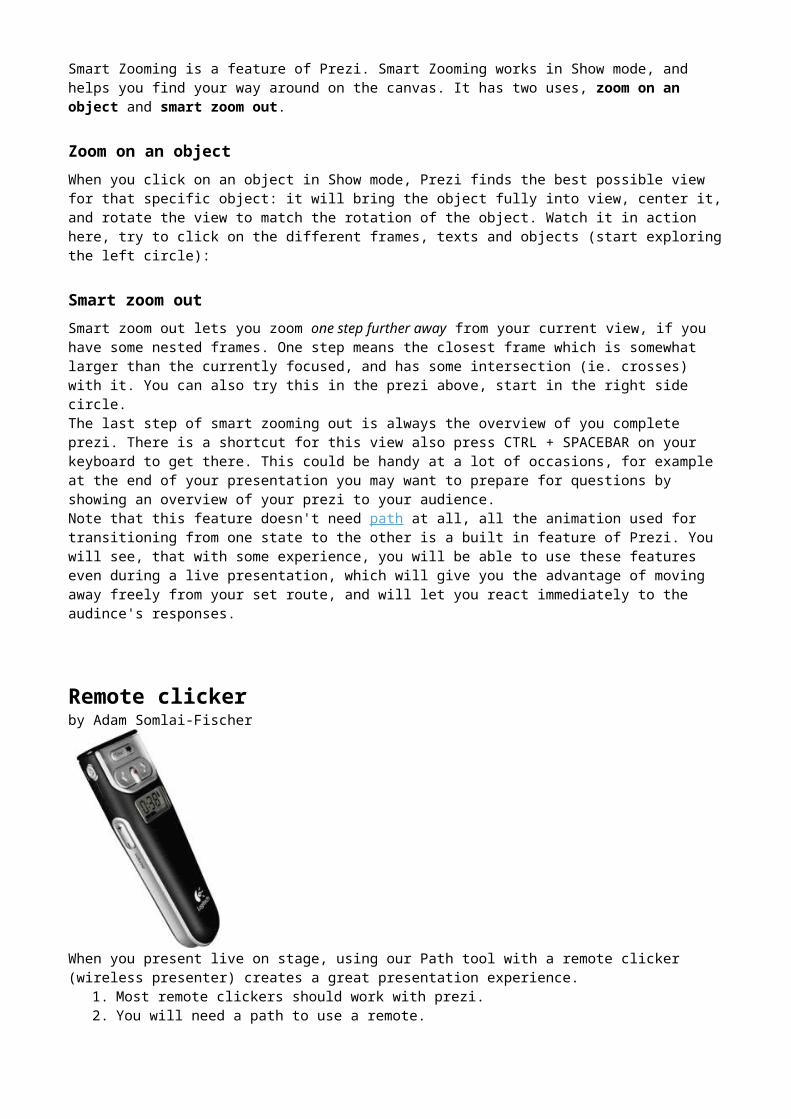
Remote clickerby Adam Somlai-Fischer
When you present live on stage, using our Path tool with a remote clicker (wireless presenter) creates a great presentation experience.
1. Most remote clickers should work with prezi. 2. You will need a path to use a remote. 3. If you set your online prezi to fullscreen using the Prezi's dedicated navigation bar button, remotes
will not work. 4. You can use your remote clicker to show online prezis in full screen if you set your browser
window to fullscreen view mode. Workaround suggested by Radelaide.
Prezi path can be advanced by the LEFT and RIGHT, and zoomed by UP and DOWN keys. If your remote is reconfigurable, set it up according to this:
1. Next path step: RIGHT key 2. Previous path step: LEFT key 3. Zoom in: UP key 4. Zoom out: DOWN key
Adding CTRL+SPACE (also Alt+Cmd+SPACE on a Mac) as a shortcut to zoom out to show everything can be also useful if your remote enables custom keys.Using a Microsoft Presenter 8000 mouse?Here is a user submitted hint how to set up the Microsoft Wireless Notebook Presenter 8000 mouse using its supplied IntelliPoint software.
Auto Play Preziby Adam Somlai-Fischer To make your Prezi autoplay, and loop:
Create a Path Go to Show mode Hold down the bottom right arrow button, and choose a timing interval

To stop, just press Next or Previous.
You can also autoplay prezis on Prezi.com. Here is how to do it:
Click the thumbnail of any prezi you have created or find in our public library Roll your mouse over "More" in the bottom navigation bar of the prezi window. From the drop down menu select "Autoplay".
Rename title and descriptionby David Udvardy Select a prezi on Prezi.com/your, and click on it. The Edit title option is right next to the title of your prezi. The option to change description is a bit further down, just below the privacy settings. Click Edit description to edit it, and Done when you are finished.
Save a copy (duplicate) and delete your preziby David Udvardy Select a prezi on Prezi.com/your, and click on it. Locate the right toolbar, and click on Save a copy to duplicate your prezi or Delete to permanently delete it.
When you click on Save a copy, a duplicate of the prezi will be saved as the first prezi on Your prezis page. To change the title of this prezi just follow the steps described here.
Invite others to collaborate

by Adam Somlai-Fischer Prezi works online, which makes it easy to collaborate with others. Send your prezis to collaborators for review, and allow them to add their ideas. To start, go to Prezi.com/your and click on your prezi.
Below your prezi are the privacy settings. Next to it is the list of Who can edit this prezi. To invite others to collaborate, click Invite editors. Send the link provided.
Changed your mind? To revoke the share link anytime, just click on Reset share link in the dialog box.Coeditors can freely edit, rename, share but cannot delete the prezi.
Reuseby David Udvardy Reuse is a unique term to Prezi.com. It allows you to share ideas more effectively and help others get started by letting them save an editable copy of your prezi. Reuse is the easiest way to share assets in the Prezi universe. By allowing reuse of your prezi, you can create templates, share assets, animations or sound effects you inserted into your prezi. Your original prezi will always remain untouched -- only its copies can be modified by others.To allow your prezis to be reused:prezi.com/your > click on the prezi > choose Public & allow copy below your prezi in the privacy settings

New prezis for users with Public license will be allowed for reuse by default.
Publish on Prezi.comby Adam Somlai-Fischer If your prezi is ready, and you would like to show it to the world, you can publish it on Prezi.com. This way it will be visible on Prezi.com to anyone, Google will index it, you can embed it, and people can comment on it. We recommend publishing, so that good ideas and good uses of prezi get shared.You can set privacy options below your prezi.
Under prezi.com/explore you will see the most popular published prezis. You can use the link you get here to show this prezi to your friends as well. Your other public prezis will be visible below your prezi.
Embeddingby Adam Somlai-Fischer You can embed your prezis in your blog or website. Embedded prezis can have a very simple navigation mode, so casual surfers can easily click through them. Make sure your title and description are valid and relevant.Embedding a prezi is done with a small piece of HTML code. You can get this code generated for you:
Click on your prezi on prezi.com/your Click the Embed link below your prezi Copy the code, and insert it in your website, blog, etc.

Note: If you embed a private prezi on a public site, it can be seen by anyone who can access that site.
Ipad Supportby Peter Halacsy Prezi for the iPad app v. 1.0.3 allows you to show prezis that were previously created on your computer. The app does not have editor features or VGA output support.Updates since version 1.0.2
1. Fixes that result less app crashes 2. Right and Center aligned texts appear as expected 3. Lines and arrows appear as expected 4. Clicking on the logo shows the version number 5. App stays active during long load processes 6. Less memory used during large image loading.
Known Issues/Limitations
The app does not have editor features. When you open a prezi for the first time on your iPad, it can take a while to load depending on the
size of your prezi. Even big prezis load super quick for the second run. App sometimes unexpectedly quits/crashes especially when opening large prezis and if lot of
applications are open. Video files, YouTube video embeds, PDF and SWF files does not work in the current version of
Prezi for the iPad. Highlights created in your prezis show up at random places on the canvas when opening a prezi
on the iPad. Links you have added to your Prezi on your computer will not work on your iPad in this version.
We are working on these issues and will release an update soon. Thank you for your patience!
Q: Can I upload .pdf files to the new version of PreziDesktop? A: No, this option is not currently available. You can upload your prezi, add the pdf's online, then download it again to your desktop editor and continue offline editing with the .pdf's in your prezi.Q: Is there a folder where my prezis are stored on my computer? (PreziDesktop3)A: - Yes, there is. The exact location of your stored prezi data depends on your operating system. Here are the locations by OS. Please note that [username] means the user with which you are logged in to your computer. You will find data about your currently open prezi, the available fonts, styles, and other data related to the behavior of the application.-Windows XP: C:\Documents and Settings\[username]\Application Data\com.prezi.PreziDesktop\Local Store\ -Windows Vista, Windows 7:C:\Users\[username]\AppData\Roaming\com.prezi.PreziDesktop\Local Store\ -Mac OSX: Users/[username]/Library/Preferences/com.prezi.PreziDesktop/Local Store/
Editor-related issues:Q: How can I add my own logo to a prezi?A: This feature comes with paid licenses only. 1. Click the "Colors & Fonts" bubble menu of the editor 2. Click "Theme Wizard"3. When the Theme Wizard pop up window is open, click the "Replace Logo" button4. Choose an image from your computer, and hit Enter.Your logo will be shown in the lower left corner of the Theme Wizard's previw window and your Prezi editor window as well. Note: The logo customization feature of the Theme Wizard comes with paid licenses only. PreziDesktop comes with the Pro account only. So, if you have an Enjoy license and a trial version of the PreziDesktop, you cannot customize your logo using the desktop editor. You can do it using the online editor though. If you decide to upgrade to the Pro license, the feature will be available in your PreziDesktop offline editor as well. Q: My YouTube videos disappear from downloaded prezisA: YouTube videos only work in online prezis. You embed these videos to your prezi, you don't upload them, so they are played back from YouTube.com -- not your computer. Once your prezi is offline, you don't have connection to YouTube.com anymore, so these prezis will not play back.Q: How can I select multiple objects in my prezi and scale/move/rotate them together? (Group selection) A: To group-select objects in Prezi just hold the SHIFT key of your keyboard and the LEFT mouse button and drag a rectangle around objects you whish to select together. When you release the mouse and the keyboard, you will see the Zebra tool appearing over the entire selection. Now you can scale, move and rotate the selection the same way as you do with single-selected objects. Check this video screencast to see how group selection works. Q: My prezi suddenly disappeared while I was typing something/after I have uploaded an image or video/when I reopened it after having saved and closed it.A: It is very likely that your prezi has zoomed away, but the content is still in the canvas - out of your focus. Please read this article for a step-by-step workaround: http://prezi.com/learn/zoomed-away-prezi/ Q: Help, everything I type is appearing upside down!A: This can happen when the prezi is too large. Please check the zoom meter on the right side of your screen, group-select your entire content (by holding shift and dragging a rectangle around your group of objects) and scale the entire prezi up or down until the zoom meter starts to move towards the center. It is also possible that your canvas is simply rotated by 180 degrees. Use keys 3 and 4 on your keyboard to rotate it back to right side up.Q: I cannot move/rotate/select/ objects in my prezi! (they are faded out!)A: Prezi has a feature called zoom-to-lock, which locks objects too far or too close to your view so you will not unintentionally move them up when you work on your canvas and drag/move/rotate objects on a different zoom level. Holding the Shift button unlocks all locked elements. Read more about this feature in our related blog post. http://blog.prezi.com/2010/10/14/new-editor-enhancements/Q: I have uploaded an image but all I see is a funny shaped yellow blob instead. I cannot delete it!A: These yellow blobs are placeholders of images which could not be uploaded. You can get rid of them by holding the Shift button, clicking them, and when you see the zebra tool over them, just hit the backspace key on your keyboard. After you have successfully deleted the placeholder, try to upload the image again. If you cannot upload any images there must be a network protection issue in the background. Please check your firewall/proxysettings and allow all communication with Prezi.com. Q: I have just realized that autosave froze: will I lose all my work from the last few hours?

A: The best solution when an online prezi autosave hangs is to group select your entire content, than copy/paste it to a new, empty prezi and save that one. Usually there is no problem with autosaving, but a local network glitch can cause this issue.