private public partnership project (ppp) large-scale...
TRANSCRIPT

Private Public Partnership Project (PPP)
Large-scale Integrated Project (IP)
D.3.4.2: FI-WARE User and Programmers Guide
Project acronym: FI-WARE
Project full title: Future Internet Core Platform
Contract No.: 285248
Strategic Objective: FI.ICT-2011.1.7 Technology foundation: Future Internet Core
Platform
Project Document Number: ICT-2011-FI-285248-WP3-D.3.4.2
Project Document Date: 2013-04-22
Deliverable Type and Security: Public
Author: FI-WARE Consortium
Contributors: FI-WARE Consortium

Future Internet Core Platform
D.3.4.2 FI-WARE User and Programmers Guide Page 2
1.1 Executive Summary
This document describes the usage of each Generic Enabler provided by the "Application
and Services Ecosystem and Delivery Framework" chapter. Due to the different nature of the
Apps and Services GEs, this document takes separate approaches for describing end user
facing and backend Generic Enablers. For the backend Generic Enablers Marketplace,
Repository, Registry, and Mediator, the necessary steps to develop a software application or
a user interface which makes use of the Generic Enablers backend functionality are
described. For the end user facing Application Mashup, Light Semantic Composition, Service
Mashup, and Service Composition GE a more tutorial-like approach was chosen to guide a
user through the process of using GE functionality.
EAB providing the GE "ServiceComposition" as software asset left the related work package
and can’t provide further support for the software and software related deliverables.
THALES contributed an optional component to the Mediator GE developed by TI. This
component provides low-level (not end user) facilities to the Mediator GE for automatically
solving certains dynamic service mediation issues. Only component binaries are provided at
this stage since its actual usage by the Mediator GE should be totally transparent to the end
user or developer and not to be consumed by a third party. We may however add some
information to User and Programmers guides in further releases, depending on the actual
level of integration achieved in the final versions of the Mediator GE.

Future Internet Core Platform
D.3.4.2 FI-WARE User and Programmers Guide Page 3
1.2 About This Document
This document comes along with the Software implementation of components, each release
of the document being referred to the corresponding Software release (as per D.x.2), to
provide documentation of the features offered by the components and interfaces to
users/adopters. Moreover, it explains the way they can be exploited in their developments.
1.3 Intended Audience
The document targets users as well as programmers of FI-WARE Generic Enablers.
1.4 Chapter Context
The Generic Enablers for the Apps Chapter together can be used to build the core
infrastructure for enabling a sustainable ecosystem of applications and services of future
internet application domains, which foster innovation as well as cross-fertilization. In
particular the Apps Generic Enablers supports unified description and publishing of services,
offering of services in a store, matching demand and offering via marketplace capabilities,
creating composed value added services and service networks, and monetization and
revenue sharing, all in a complementary and harmonized business framework.
The concept of the Generic Enabler implies that there can be several possible
implementations. There are various degrees of flexibility in the non-functional properties or
functional profile of the Generic Enabler description. For example the Mediator GE has 2
different implementations. Not every GE has a RESTful Web interface. Especially the
composition editors expose their functionality mainly through a User Interface. This case
requires the interface to be described in an abstract way (e.g. what a user can do) and
illustrated by screenshots of specific enabler implementations.
A couple of basic enablers are important to realize the vision of such a service business
framework which enables new business models in an agile and flexible way:
Repository - defines a standard way of publishing service description in the Web in a
scalable way.
Registry - serves as a common database layer for run-time configuration and defines
a common model and access interface.
Store - allows to offer services for consumers as well as developers of future internet
applications.
Marketplace - defines a standard way to access market places in order to find and
compare offerings from different stores and provides further functionality to foster the
market for future internet applications and services in a specific domain.
Revenue Sharing System - provides a common scheme and protocols for the
calculation and distribution of revenues according to the agreed business models.
Composition - to allow or to perform light semantic composition, furthermore
composition of existing services to value added composite services and applications,
which can be monetized in the Business Framework.
Mediator - enables the interoperability between future internet services and
applications and also allow to interface to existing enterprise systems.

Future Internet Core Platform
D.3.4.2 FI-WARE User and Programmers Guide Page 4
This set of self-contained enablers represents only an initial starting point for a future
business framework. It is expected that supplemental enablers (e.g. for contracting, quotation
...) will be developed outside the FI-WARE projects.
The Business Framework has been designed to inter operate with each other relying on
Linked USDL as common uniform description format for services, which does not only focus
on technical aspects of service but also covers business aspects as well as functional and
non-functional service attributes. Linked USDL itself is not a Generic Enabler, since it is a
data format and vocabulary specification. Nevertheless, it will be introduced as an Open
Specification, which is used by different enablers in their provided and consumed APIs.
The Applications and Services Generic Enablers are named according to their main
functionality. While the role names, introduced in the FI-WARE Vision (Aggregator, Gateway
...), are used to describe the stakeholders of the service ecosystem in an abstract way, the
enablers names now are referring to concrete software components.
The following diagram gives an example of how the Generic Enablers can be combined to
form a concrete architecture for a Service Business Framework.
More information about the Apps Chapter and FI-WARE in general can be found within the
following pages:
http://wiki.fi-ware.eu
Architecture_of_Applications_and_Services_Ecosystem_and_Delivery_Framework
Materializing_Applications/Services_Ecosystem_and_Delivery_Framework_in_FI-
WARE
1.5 Structure of this Document
The document is generated out of a set of documents provided in the public FI-WARE wiki.
For the current version of the documents, please visit the public wiki at http://wiki.fi-ware.eu/
The following resources were used to generate this document:
D.3.4.2_User_and_Programmers_Guide_front_page
Future Internet Core Platform
D.3.4.2 FI-WARE User and Programmers Guide Page 5
Repository - User and Programmer Guide
Marketplace - User and Programmer Guide
Registry - User and Programmer Guide
Application Mashup - Wirecloud - User and Programmer Guide
Service Mashup - Mashup Factory - User and Programmer Guide
Light Semantic Composition - User and Programmer Guide
Service Composition - User and Programmer Guide
Mediator - User and Programmer Guide
1.6 Typographical Conventions
Starting with October 2012 the FI-WARE project improved the quality and streamlined the
submission process for deliverables, generated out of the public and private FI-WARE wiki.
The project is currently working on the migration of as many deliverables as possible towards
the new system.
This document is rendered with semi-automatic scripts out of a MediaWiki system operated
by the FI-WARE consortium.
1.6.1 Links within this document
The links within this document point towards the wiki where the content was rendered from.
You can browse these links in order to find the "current" status of the particular content.
Due to technical reasons not all pages that are part of this document can be linked
document-local within the final document. For example, if an open specification references
and "links" an API specification within the page text, you will find this link firstly pointing to the
wiki, although the same content is usually integrated within the same submission as well.
1.6.2 Figures
Figures are mainly inserted within the wiki as the following one:
[[Image:....|size|alignment|Caption]]
Only if the wiki-page uses this format, the related caption is applied on the printed document.
As currently this format is not used consistently within the wiki, please understand that the
rendered pages have different caption layouts and different caption formats in general. Due
to technical reasons the caption can't be numbered automatically.
1.6.3 Sample software code
Sample API-calls may be inserted like the following one.
http://[SERVER_URL]?filter=name:Simth*&index=20&limit=10

Future Internet Core Platform
D.3.4.2 FI-WARE User and Programmers Guide Page 6
1.7 Acknowledgements
The current document has been elaborated using a number of collaborative tools, with the
participation of Working Package Leaders and Architects as well as those partners in their
teams they have decided to involve.
1.8 Keyword list
FI-WARE, PPP, Architecture Board, Steering Board, Roadmap, Reference Architecture,
Generic Enabler, Open Specifications, I2ND, Cloud, IoT, Data/Context Management,
Applications/Services Ecosystem, Delivery Framework , Security, Developers Community
and Tools , ICT, es.Internet, Latin American Platforms, Cloud Edge, Cloud Proxy.
1.9 Changes History
Release Major changes description Date Editor
v1 First Verion 2013-04-22 SAP
v2 Second Version of deliverable submission 2013-04-26 SAP
v3 preparation of submission 2013-05-16 SAP
1.10 Table of Contents
Contents 1.1 Executive Summary ............................................................................................. 2
1.2 About This Document .......................................................................................... 3
1.3 Intended Audience ............................................................................................... 3
1.4 Chapter Context .................................................................................................. 3
1.5 Structure of this Document ................................................................................... 4
1.6 Typographical Conventions .................................................................................. 5
1.6.1 Links within this document ............................................................................. 5
1.6.2 Figures ......................................................................................................... 5
1.6.3 Sample software code ................................................................................... 5
1.7 Acknowledgements .............................................................................................. 6
1.8 Keyword list ......................................................................................................... 6
1.9 Changes History .................................................................................................. 6
1.10 Table of Contents ................................................................................................ 6
2 Repository - User and Programmer Guide ................................................................... 9
2.1 Introduction ......................................................................................................... 9
2.2 User Guide .......................................................................................................... 9

Future Internet Core Platform
D.3.4.2 FI-WARE User and Programmers Guide Page 7
2.3 Programmers Guide............................................................................................. 9
2.3.1 Accessing the Repository with cURL .............................................................. 9
2.3.2 Accessing the Repository with Java ..............................................................11
2.3.3 Retrieving Meta Data information about a Resouce in different formats ..........13
3 Marketplace - User and Programmer Guide ................................................................24
3.1 Introduction ........................................................................................................24
3.2 User Guide .........................................................................................................24
3.3 Programmers Guide............................................................................................24
3.3.1 Accessing the Marketplace with cURL ..........................................................24
3.3.2 Accessing the Marketplace with Java ............................................................26
4 Registry - User and Programmer Guide ......................................................................28
4.1 Introduction ........................................................................................................28
4.2 User Guide .........................................................................................................28
4.3 Programmers Guide............................................................................................28
4.3.1 Accessing the Registry with cURL ................................................................28
5 Application Mashup - Wirecloud - User and Programmer Guide...................................32
5.1 Introduction ........................................................................................................32
5.2 User Guide .........................................................................................................32
5.2.1 Key Features ...............................................................................................32
5.2.2 Creating a new workspace ...........................................................................33
5.2.3 Browsing the Marketplace ............................................................................35
5.2.4 Building a new mashup ................................................................................38
5.2.5 Additional sources of information ..................................................................54
5.3 Programmer Guide .............................................................................................54
5.3.1 Widget development ....................................................................................54
6 Service Mashup - Mashup Factory - User and Programmer Guide...............................68
6.1 Introduction ........................................................................................................68
6.2 User Guide .........................................................................................................68
6.2.1 Deploying Your BPEL Process .....................................................................68
6.2.2 The Engine ..................................................................................................69
7 Light Semantic Composition - User and Programmer Guide ........................................70
7.1 Introduction ........................................................................................................70
7.2 User Guide .........................................................................................................70
7.2.1 Login to GE .................................................................................................70
7.2.2 Access to the Editor .....................................................................................71

Future Internet Core Platform
D.3.4.2 FI-WARE User and Programmers Guide Page 8
7.2.3 Composition Editor .......................................................................................73
7.2.4 Ontology Browser Widget .............................................................................74
7.2.5 Semantic Annotations Widget .......................................................................76
7.2.6 Services List Widget.....................................................................................77
7.2.7 Save the process .........................................................................................78
7.2.8 Generate BPMN 2.0 file ...............................................................................79
7.2.9 Limitations and recommendations.................................................................81
7.3 Programmer guide ..............................................................................................81
8 Service Composition - User and Programmer Guide ...................................................82
9 Mediator - User and Programmer Guide .....................................................................83
9.1 Introduction ........................................................................................................83
9.2 User Guide .........................................................................................................83
9.3 Programmer Guide .............................................................................................83
9.3.1 Camel Routes Handling ...............................................................................83
9.3.2 User Logs ....................................................................................................84
9.3.3 Examples ....................................................................................................85

Future Internet Core Platform
D.3.4.2 FI-WARE User and Programmers Guide Page 9
2 Repository - User and Programmer Guide You can find the content of this chapter as well in the wiki of fi-ware.
2.1 Introduction
This document describes the necessary steps to develop a software application or a user
interface which makes use of the Repository backend functionality. The Repository API is
based on REST principles and generally returns XML or JSON encoded responses. Since
REST is independent of a concrete programming language, you just have to know how to
make an HTTP request in the programming language of your choice.
2.2 User Guide
Since the Repository is a Generic Enabler which provides pure backend functionality to other
applications (e.g. Generic Enablers or end user facing applications), we do not distinguish
between the User and Programmers Guide. Please refer to the Programmers Guide section
for more information.
2.3 Programmers Guide
To give you a feeling of how the Repository works and how you can interact with the system
let us take a look at some examples, realized with the command line tool cURL and in Java.
'cURL' is a command which can be used to perform any kind of HTTP operation - and
therefore is also usable for the Repository. The library libcurl enables the integration in C
programs as well.
2.3.1 Accessing the Repository with cURL
2.3.1.1 Create an Offering with cURL
This example shows how to create a resource with the command line tool 'cURL':
Create a Resource and save it to a file named test.txt
Test Content
send the request to the server
curl -v -H "Content-Type: text/plain" -X PUT --data "@test.txt"
http://localhost:8080/FiwareRepository/v1/collectionA/collectionB/Re
sourceName
You should obtain the following message
* About to connect() to localhost port 8080 (#0)

Future Internet Core Platform
D.3.4.2 FI-WARE User and Programmers Guide Page 10
* Trying 127.0.0.1... connected
> PUT /FiwareRepository/v1/collectionA/collectionB/ResourceName
HTTP/1.1
> User-Agent: curl/7.23.1 (i386-pc-win32) libcurl/7.23.1 zlib/1.2.5
> Host: localhost:8080
> Accept: */*
> Content-Type: text/plain
> Content-Length: 202
>
* upload completely sent off: 202 out of 202 bytes
< HTTP/1.1 201 Created
< Server: Apache-Coyote/1.1
< Content-Length: 0
< Date: Wed, 11 Jul 2012 11:38:29 GMT
<
* Connection #0 to host lo
2.3.1.2 Delete a resource with cURL
send the request to the server
curl -v -X DELETE
http://localhost:8080/FiwareRepository/v1/collectionA/collectionB/Re
sourceName
You should obtain the following message
* About to connect() to localhost port 8080 (#0)
* Trying 127.0.0.1... connected
> DELETE /FiwareRepository/v1/collectionA/collectionB/ResourceName
HTTP/1.1
> User-Agent: curl/7.23.1 (i386-pc-win32) libcurl/7.23.1 zlib/1.2.5
> Host: localhost:8080
> Accept: */*
>
< HTTP/1.1 204 No Content
< Server: Apache-Coyote/1.1
< Date: Wed, 11 Jul 2012 12:13:26 GMT
<
* Connection #0 to host localhost left intact

Future Internet Core Platform
D.3.4.2 FI-WARE User and Programmers Guide Page 11
* Closing connection #0
In this case the HTTP DELETE operation is used. The Repository uses the Create Retrieve
Update Delete (CRUD) operations which map almost to the HTTP verbs PUT, GET, POST
and DELETE.
2.3.2 Accessing the Repository with Java
2.3.2.1 Create a Resource
The following functions demonstrates how you can upload a new resource, or update
an existing resource on the repository. repositoryURL is the base URL of the
Repository, resourceID is the path to the resource, file is the file you want to
upload as resource.
public Boolean insertResourceContent(String repositoryURL, String
resourceId, String file){
try {
HttpClient httpclient = new DefaultHttpClient();
HttpPost httppost = new
HttpPost(repositoryURL+resourceId);
MultipartEntity reqEntity = new MultipartEntity();
File f = new File(file);
FileBody bin = new FileBody(f);
StringBody mimeType = new StringBody(new
MimetypesFileTypeMap().getContentType(f));
StringBody comment = new StringBody(f.getName());
reqEntity.addPart("filename", comment);
reqEntity.addPart("mimeType", mimeType);
reqEntity.addPart("filedata", bin);
httppost.setEntity(reqEntity);
HttpResponse response;
response = httpclient.execute(httppost);
HttpEntity resEntity = response.getEntity();

Future Internet Core Platform
D.3.4.2 FI-WARE User and Programmers Guide Page 12
return true;
} catch (UnsupportedEncodingException e) {
e.printStackTrace();
} catch (ClientProtocolException e) {
e.printStackTrace();
} catch (IOException e) {
// TODO Auto-generated catch block
}
return false;
}
2.3.2.2 Delete a Resource
The following function demonstrates how you can delete a resource which is stored in
the Repository. repositoryURL is the base URL of the Repository, resourceID is
the path to the resource.
public Boolean deleteResource(String repositoryURL, String
resourceID){
try {
ClientRequest request = new
ClientRequest(repositoryURL+resourceID);
request.accept("application/xml");
ClientResponse<String> response =
request.delete(String.class);
ClientUtil.visualize(request, response, "Delete
Resource");
if(response.getStatus() == 200){
return true;
}
} catch (Exception e) {
e.printStackTrace();
}
return false;

Future Internet Core Platform
D.3.4.2 FI-WARE User and Programmers Guide Page 13
}
2.3.3 Retrieving Meta Data information about a Resouce in different formats
HTTP content negotiation allows the client to choose the appropriate data format for
retrieving meta information about a resource or a collection. Besides RDF, XML, TURTLE,
and JSON the Repository also supports human readable output formats using HTML
rendering ('text/html' accept header) including hyperlinked representation and formatted text.
2.3.3.1 HTML Representation
Request URL: http://[REPOSITORY_URL]/testCollection/
Accept Header: text/html, application/x-ms-application
Result:

Future Internet Core Platform
D.3.4.2 FI-WARE User and Programmers Guide Page 14
2.3.3.2 Test Representation
Request URL: http://[REPOSITORY_URL]/testCollection/
Accept Header: text/plain
Result:
Collection: testCollection
Creation Date: Thu Mar 21 10:46:39 CET 2013
Collections:
++++++++++++++++++++++++++++++++++++++++++++++++++++++++++++++++++++
+++++++
++ Collection Id + Creation Date
++
++++++++++++++++++++++++++++++++++++++++++++++++++++++++++++++++++++
+++++++
++ testCollection/collectionA + Thu Mar 21 10:47:53 CET 2013
++
++ testCollection/collectionB + Thu Mar 21 10:47:53 CET 2013
++
++ testCollection/ + Thu Mar 21 10:47:53 CET 2013
++
++++++++++++++++++++++++++++++++++++++++++++++++++++++++++++++++++++
+++++++
Resources:
++++++++++++++++++++++++++++++++++++++++++++++++++++++++++++++++++++
++++++++++++++++++++++++++++++++++++++++++++++++++++++++++++++++++++
+++++++++++++++++++++++
++ Resource Id + Creation Date
+ Modification Date + Filename + Mime
Type ++
++++++++++++++++++++++++++++++++++++++++++++++++++++++++++++++++++++
++++++++++++++++++++++++++++++++++++++++++++++++++++++++++++++++++++
+++++++++++++++++++++++
++ testCollection/testResource1 + Thu Mar 21 10:46:39 CET 2013
+ Thu Mar 21 10:46:39 CET 2013 + filename +
application/rdf+xml ++
++ testCollection/testResource2 + Thu Mar 21 10:47:53 CET 2013
+ Thu Mar 21 10:47:53 CET 2013 + filename +
plain/text ++

Future Internet Core Platform
D.3.4.2 FI-WARE User and Programmers Guide Page 15
++ testCollection/testResource3 + Thu Mar 21 10:47:53 CET 2013
+ Thu Mar 21 10:47:53 CET 2013 + filename +
text/turtle ++
++ testCollection/testResource4 + Thu Mar 21 10:47:53 CET 2013
+ Thu Mar 21 10:47:53 CET 2013 + filename +
application/rdf+xml ++
++++++++++++++++++++++++++++++++++++++++++++++++++++++++++++++++++++
++++++++++++++++++++++++++++++++++++++++++++++++++++++++++++++++++++
+++++++++++++++++++++++
2.3.3.3 JSON Representation
Request URL: http://[REPOSITORY_URL]/testCollection/
Accept Header: application/json
Result:
{
"resources": [
{
"name": "",
"content": null,
"collection": null,
"contentMimeType": "application\/rdf+xml",
"contentFileName": "filename",
"contentUrl": "",
"id": "testCollection\/testResource1",
"creationDate": 1363859199839,
"creator": "",
"modificationDate": 1363859199839
},
{
"name": "",
"content": null,
"collection": null,
"contentMimeType": "plain\/text",
"contentFileName": "filename",
"contentUrl": "",
"id": "testCollection\/testResource2",
"creationDate": 1363859273515,

Future Internet Core Platform
D.3.4.2 FI-WARE User and Programmers Guide Page 16
"creator": "",
"modificationDate": 1363859273515
},
{
"name": "",
"content": null,
"collection": null,
"contentMimeType": "text\/turtle",
"contentFileName": "filename",
"contentUrl": "",
"id": "testCollection\/testResource3",
"creationDate": 1363859273535,
"creator": "",
"modificationDate": 1363859273535
},
{
"name": "",
"content": null,
"collection": null,
"contentMimeType": "application\/rdf+xml",
"contentFileName": "filename",
"contentUrl": "",
"id": "testCollection\/testResource4",
"creationDate": 1363859273545,
"creator": "",
"modificationDate": 1363859273545
}
],
"collections": [
{
"resources": [
],
"collections": [
],
"id": "testCollection\/collectionA",

Future Internet Core Platform
D.3.4.2 FI-WARE User and Programmers Guide Page 17
"creationDate": 1363859273552,
"creator": "",
"modificationDate": null
},
{
"resources": [
],
"collections": [
],
"id": "testCollection\/collectionB",
"creationDate": 1363859273566,
"creator": "",
"modificationDate": null
},
{
"resources": [
],
"collections": [
],
"id": "testCollection\/",
"creationDate": 1363859273575,
"creator": "",
"modificationDate": null
}
],
"id": "testCollection",
"creationDate": 1363859199837,
"creator": "",
"modificationDate": null
}
2.3.3.4 RDF/XML Representation
Request URL: http://[REPOSITORY_URL]/testCollection/

Future Internet Core Platform
D.3.4.2 FI-WARE User and Programmers Guide Page 18
Accept Header: application/rdf+xml
Result:
<rdf:RDF
xmlns:rdf="http://www.w3.org/1999/02/22-rdf-syntax-ns#"
xmlns:j.0="http://purl.org/dc/terms/" >
<rdf:Description
rdf:about="http://localhost:7080/FiwareRepository/v1/testCollection"
>
<j.0:date>Thu Mar 21 10:46:39 CET 2013</j.0:date>
</rdf:Description>
<rdf:Description
rdf:about="http://localhost:7080/FiwareRepository/v1/testCollection#
collections/">
<rdf:_3
rdf:resource="http://localhost:7080/FiwareRepository/v1/testCollecti
on/"/>
<rdf:_2
rdf:resource="http://localhost:7080/FiwareRepository/v1/testCollecti
on/collectionB"/>
<rdf:_1
rdf:resource="http://localhost:7080/FiwareRepository/v1/testCollecti
on/collectionA"/>
<rdf:type rdf:resource="http://www.w3.org/1999/02/22-rdf-syntax-
ns#Bag"/>
</rdf:Description>
<rdf:Description
rdf:about="http://localhost:7080/FiwareRepository/v1/testCollection#
resources/">
<rdf:_4
rdf:resource="http://localhost:7080/FiwareRepository/v1/testCollecti
on/testResource4"/>
<rdf:_3
rdf:resource="http://localhost:7080/FiwareRepository/v1/testCollecti
on/testResource3"/>
<rdf:_2
rdf:resource="http://localhost:7080/FiwareRepository/v1/testCollecti
on/testResource2"/>
<rdf:_1
rdf:resource="http://localhost:7080/FiwareRepository/v1/testCollecti
on/testResource1"/>
<rdf:type rdf:resource="http://www.w3.org/1999/02/22-rdf-syntax-
ns#Bag"/>
</rdf:Description>

Future Internet Core Platform
D.3.4.2 FI-WARE User and Programmers Guide Page 19
</rdf:RDF>
2.3.3.5 Turtle Representation
Request URL: http://[REPOSITORY_URL]/testCollection/
Accept Header: text/turtle
Result:
<http://localhost:7080/FiwareRepository/v1/testCollection>
<http://purl.org/dc/terms/date>
"Thu Mar 21 10:46:39 CET 2013" .
<http://localhost:7080/FiwareRepository/v1/testCollection#collection
s/>
a <http://www.w3.org/1999/02/22-rdf-syntax-ns#Bag> ;
<http://www.w3.org/1999/02/22-rdf-syntax-ns#_1>
<http://localhost:7080/FiwareRepository/v1/testCollection/collection
A> ;
<http://www.w3.org/1999/02/22-rdf-syntax-ns#_2>
<http://localhost:7080/FiwareRepository/v1/testCollection/collection
B> ;
<http://www.w3.org/1999/02/22-rdf-syntax-ns#_3>
<http://localhost:7080/FiwareRepository/v1/testCollection/> .
<http://localhost:7080/FiwareRepository/v1/testCollection#resources/
>
a <http://www.w3.org/1999/02/22-rdf-syntax-ns#Bag> ;
<http://www.w3.org/1999/02/22-rdf-syntax-ns#_1>
<http://localhost:7080/FiwareRepository/v1/testCollection/testResour
ce1> ;
<http://www.w3.org/1999/02/22-rdf-syntax-ns#_2>
<http://localhost:7080/FiwareRepository/v1/testCollection/testResour
ce2> ;
<http://www.w3.org/1999/02/22-rdf-syntax-ns#_3>
Future Internet Core Platform
D.3.4.2 FI-WARE User and Programmers Guide Page 20
<http://localhost:7080/FiwareRepository/v1/testCollection/testResour
ce3> ;
<http://www.w3.org/1999/02/22-rdf-syntax-ns#_4>
<http://localhost:7080/FiwareRepository/v1/testCollection/testResour
ce4> .
2.3.3.6 N-Triple Representation
Request URL: http://[REPOSITORY_URL]/testCollection/
Accept Header: text/n3
Result:
<http://localhost:7080/FiwareRepository/v1/testCollection#collection
s/> <http://www.w3.org/1999/02/22-rdf-syntax-ns#_3>
<http://localhost:7080/FiwareRepository/v1/testCollection/> .
<http://localhost:7080/FiwareRepository/v1/testCollection#collection
s/> <http://www.w3.org/1999/02/22-rdf-syntax-ns#_2>
<http://localhost:7080/FiwareRepository/v1/testCollection/collection
B> .
<http://localhost:7080/FiwareRepository/v1/testCollection#collection
s/> <http://www.w3.org/1999/02/22-rdf-syntax-ns#_1>
<http://localhost:7080/FiwareRepository/v1/testCollection/collection
A> .
<http://localhost:7080/FiwareRepository/v1/testCollection#collection
s/> <http://www.w3.org/1999/02/22-rdf-syntax-ns#type>
<http://www.w3.org/1999/02/22-rdf-syntax-ns#Bag> .
<http://localhost:7080/FiwareRepository/v1/testCollection#resources/
> <http://www.w3.org/1999/02/22-rdf-syntax-ns#_4>
<http://localhost:7080/FiwareRepository/v1/testCollection/testResour
ce4> .
<http://localhost:7080/FiwareRepository/v1/testCollection#resources/
> <http://www.w3.org/1999/02/22-rdf-syntax-ns#_3>
<http://localhost:7080/FiwareRepository/v1/testCollection/testResour
ce3> .
<http://localhost:7080/FiwareRepository/v1/testCollection#resources/
> <http://www.w3.org/1999/02/22-rdf-syntax-ns#_2>
<http://localhost:7080/FiwareRepository/v1/testCollection/testResour
ce2> .
<http://localhost:7080/FiwareRepository/v1/testCollection#resources/
> <http://www.w3.org/1999/02/22-rdf-syntax-ns#_1>
<http://localhost:7080/FiwareRepository/v1/testCollection/testResour
ce1> .

Future Internet Core Platform
D.3.4.2 FI-WARE User and Programmers Guide Page 21
<http://localhost:7080/FiwareRepository/v1/testCollection#resources/
> <http://www.w3.org/1999/02/22-rdf-syntax-ns#type>
<http://www.w3.org/1999/02/22-rdf-syntax-ns#Bag> .
<http://localhost:7080/FiwareRepository/v1/testCollection>
<http://purl.org/dc/terms/date> "Thu Mar 21 10:46:39 CET 2013" .
2.3.3.7 XML Representation
Request URL: http://[REPOSITORY_URL]/testCollection/
Accept Header: application/xml
Result:
<?xml version="1.0" encoding="UTF-8" standalone="yes"?>
<collection id="testCollection"
xmlns:atom="http://www.w3.org/2005/Atom">
<creationDate>2013-03-21T10:46:39.837+01:00</creationDate>
<creator/>
<collections>
<collections id="testCollection/collectionA">
<creationDate>2013-03-
21T10:47:53.552+01:00</creationDate>
<creator/>
<collections/>
<resources/>
</collections>
<collections id="testCollection/collectionB">
<creationDate>2013-03-
21T10:47:53.566+01:00</creationDate>
<creator/>
<collections/>
<resources/>
</collections>
<collections id="testCollection/">
<creationDate>2013-03-
21T10:47:53.575+01:00</creationDate>
<creator/>
<collections/>
<resources/>
</collections>

Future Internet Core Platform
D.3.4.2 FI-WARE User and Programmers Guide Page 22
</collections>
<resources>
<resources id="testCollection/testResource1">
<creationDate>2013-03-
21T10:46:39.839+01:00</creationDate>
<creator/>
<modificationDate>2013-03-
21T10:46:39.839+01:00</modificationDate>
<contentFileName>filename</contentFileName>
<contentMimeType>application/rdf+xml</contentMimeType>
<contentUrl/>
<name/>
</resources>
<resources id="testCollection/testResource2">
<creationDate>2013-03-
21T10:47:53.515+01:00</creationDate>
<creator/>
<modificationDate>2013-03-
21T10:47:53.515+01:00</modificationDate>
<contentFileName>filename</contentFileName>
<contentMimeType>plain/text</contentMimeType>
<contentUrl/>
<name/>
</resources>
<resources id="testCollection/testResource3">
<creationDate>2013-03-
21T10:47:53.535+01:00</creationDate>
<creator/>
<modificationDate>2013-03-
21T10:47:53.535+01:00</modificationDate>
<contentFileName>filename</contentFileName>
<contentMimeType>text/turtle</contentMimeType>
<contentUrl/>
<name/>
</resources>
<resources id="testCollection/testResource4">
<creationDate>2013-03-
21T10:47:53.545+01:00</creationDate>
<creator/>

Future Internet Core Platform
D.3.4.2 FI-WARE User and Programmers Guide Page 23
<modificationDate>2013-03-
21T10:47:53.545+01:00</modificationDate>
<contentFileName>filename</contentFileName>
<contentMimeType>application/rdf+xml</contentMimeType>
<contentUrl/>
<name/>
</resources>
</resources>
</collection>

Future Internet Core Platform
D.3.4.2 FI-WARE User and Programmers Guide Page 24
3 Marketplace - User and Programmer Guide You can find the content of this chapter as well in the wiki of fi-ware.
3.1 Introduction
This document describes the necessary steps to develop a software application or a user
interface which makes use of the marketplace backend functionality. The Marketplace API is
based on REST principles and generally returns XML or JSON encoded responses. Since
REST is independent of a concrete programming language, you just have to know how to
make an HTTP request in the programming language of your choice. You must authenticated
all your requests to the Marketplace API with username and password.
3.2 User Guide
Since the Marketplace is a Generic Enabler which provides pure backend functionality to
other applications (e.g. Generic Enablers or end user facing applications), we do not
distinguish between the User and Programmers Guide. Please refer to the Programmers
Guide section for more information.
3.3 Programmers Guide
To give you a feeling of how the Marketplace works and how you can interact with the
system let us take a look at some examples, realized with the command line tool cURL and
in Java. 'cURL' is a command which can be used to perform any kind of HTTP operation -
and therefore is also usable for the Marketplace. The library libcurl enables the integration in
C programs as well.
3.3.1 Accessing the Marketplace with cURL
3.3.1.1 Create an offering with cURL
This example shows how to create an offering with the command line tool 'cURL':
Create a message body and save it to a file named messageBody.xml
<?xml version="1.0" encoding="UTF-8" standalone="yes"?>
<resource name="myService">
<url>[URL_TO_RESOURCE]</url>
</resource>
send the request to the server
curl -v -H "Content-Type: application/xml" -X PUT --data
"@messageBody.xml" -u "demo:demo"

Future Internet Core Platform
D.3.4.2 FI-WARE User and Programmers Guide Page 25
http://[SERVER_URL]/FiwareMarketplace/v1/offering/store/[STORE_NAME]
/offering
You should obtain the following message
* About to connect() to localhost port 8080 (#0)
* Trying 127.0.0.1... connected
* Server auth using Basic with user 'demo'
> PUT /FiwareMarketplace/v1/offering/store/testStoreAB/offering
HTTP/1.1
> Authorization: Basic ZGVtbzpkZW1v
> User-Agent: curl/7.23.1 (i386-pc-win32) libcurl/7.23.1 zlib/1.2.5
> Host: [SERVER_URL]
> Accept: */*
> Content-Type: application/xml
> Content-Length: 202
>
* upload completely sent off: 202 out of 202 bytes
< HTTP/1.1 201 Created
< Server: Apache-Coyote/1.1
< Set-Cookie: JSESSIONID=0677F2F6E8CC6276D3CE59382CDBF887;
Path=/FiwareMarketplace
< Content-Length: 0
< Date: Wed, 11 Jul 2012 09:49:27 GMT
<
* Connection #0 to host localhost left intact
* Closing connection #0
In this case the HTTP PUT operation is used. The Marketplace uses the Create Retrieve
Update Delete (CRUD) operations which map almost to the HTTP verbs PUT, GET, POST
and DELETE.
3.3.1.2 Full Text Search cURL
This examples demonstrates how to perform a full text search for offerings.
Send a search request to the server:
curl -v -H "Content-Type: application/xml" -X GET -u "demo:demo"
http://[SERVER_URL]/FiwareMarketplace/v1/search/offerings/fulltext/t
est
You should obtain a result body similar to the result shown below:

Future Internet Core Platform
D.3.4.2 FI-WARE User and Programmers Guide Page 26
<?xml version="1.0" encoding="UTF-8" standalone="yes"?>
<searchresults>
<searchresult>
<matches>
<match>
<literal>Test Service</literal>
<luceneScore>1.0</luceneScore>
<text>Test Text</text>
</match>
</matches>
<service name="TestService">
...
</searchresult>
</searchresults>
3.3.2 Accessing the Marketplace with Java
3.3.2.1 Create Client Request with username and password
You need a client request object to perform operations on the marketplace. For that
you have to authenticate yourself against the Marketplace using username and
password:
String user = "USERNAME";
String password = "PASSWORD";
String endpoint = "SERVER_URL"
URI uri=null;
try {
uri = new URI(uriString);
} catch (URISyntaxException e1) {
e1.printStackTrace();
}

Future Internet Core Platform
D.3.4.2 FI-WARE User and Programmers Guide Page 27
Credentials credentials = new UsernamePasswordCredentials(user,
pwd);
HttpClient httpClient = new HttpClient();
httpClient.getState().setCredentials(AuthScope.ANY, credentials);
httpClient.getParams().setAuthenticationPreemptive(true);
ClientExecutor clientExecutor = new
ApacheHttpClientExecutor(httpClient);
ClientRequestFactory fac = new ClientRequestFactory(clientExecutor,
uri);
ClientRequest request =
fac.createRequest(endpoint+"/offering/store/"+storeName+"/offering")
;
Now you can can perform different operations on the defined endpoint. In this
example the HTTP PUT operation is used.
3.3.2.2 Create a Resource
request.body("application/xml", input);
ClientResponse<String> response;
response = request.put(String.class);
if(response.getStatus() == 201){
return true;
}
According to the REST design principles, you can also use request.post(...),
request.get(), request.delete() on an endpoint to update, get or delete
resources.

Future Internet Core Platform
D.3.4.2 FI-WARE User and Programmers Guide Page 28
4 Registry - User and Programmer Guide You can find the content of this chapter as well in the wiki of fi-ware.
4.1 Introduction
This document describes the necessary steps to develop a software application or a user
interface which makes use of the Registry back-end functionality. The Registry API is based
on REST principles and generally accepts and returns JSON encoded messages. Since
REST is independent from a concrete programming language, you just have to know how to
make an HTTP request in the programming language of your choice.
4.2 User Guide
Since the Registry is a Generic Enabler which provides pure backend functionality to other
applications (e.g. Generic Enablers or end user facing applications), we do not distinguish
between the User and Programmers Guide. Please refer to the Programmers Guide section
for more information.
4.3 Programmers Guide
To give a feeling of how the Registry works and how to interact with the system lets take a
look at some examples, realized with the command line tool cURL and in Java. 'cURL' is a
command which can be used to perform any kind of HTTP operation - and therefore is also
usable for the Registry. The library 'libcurl' can be integrated in C programs as well.
4.3.1 Accessing the Registry with cURL
4.3.1.1 Create a registry entry with cURL
This example shows how to create a registry entry with the command line tool 'cURL':
Create a Resource and save it to a file named test.json
{ "type" : "Person",
"firstName" : "Joe",
"lastName" : "Random",
}
send the request to the server
curl -v -H "Content-Type: application/json" -X PUT --data
"@test.json" http://localhost:5000/registry/de/acme/Joe%20Random
You should obtain the following result

Future Internet Core Platform
D.3.4.2 FI-WARE User and Programmers Guide Page 29
* About to connect() to localhost port 5000(#0)
* Trying 127.0.0.1... connected
> PUT /registry/de/acme/Joe%20Random HTTP/1.1
> User-Agent: curl/7.23.1 (i386-pc-win32) libcurl/7.23.1 zlib/1.2.5
> Host: localhost:5000
> Accept: */*
> Content-Type: application/json
> Content-Length: 81
>
* upload completely sent off: 81 out of 81 bytes
< HTTP/1.1 201 Created
< Content-Length: 0
< Date: Wed, 11 Jul 2012 11:38:29 GMT
<
4.3.1.2 Get a registry entry with cURL
$ curl -v -X GET http://localhost:5000/registry/de/acme/Joe%20Random
Yields the following output:
* About to connect() to localhost port 5000 (#0)
* Trying 127.0.0.1... connected
> GET /de/acme/Joe%20Random HTTP/1.1
> User-Agent: curl/7.22.0 (x86_64-pc-linux-gnu) libcurl/7.22.0
OpenSSL/1.0.1 zlib/1.2.3.4 libidn/1.23 librtmp/2.3
> Host: localhost:5000
> Accept: */*
>
< HTTP/1.1 200 OK
< X-Powered-By: Express
< Last-Modified: Invalid Date
< Content-Type: application/json; charset=utf-8
< Content-Length: 67
< Set-Cookie:
connect.sid=I0InZoT3cPRjNTaFoWkhloHy.bsnQXxyu9V5zTwA4leMkMGMa3IniYPB
Wcnwm4b4HZbA; path=/; expires=Thu, 04 Oct 2012 13:29:25 GMT;
httpOnly
< Date: Thu, 04 Oct 2012 09:29:25 GMT

Future Internet Core Platform
D.3.4.2 FI-WARE User and Programmers Guide Page 30
< Connection: keep-alive
<
* Connection #0 to host localhost left intact
* Closing connection #0
{"firstName":"Joe","lastName":"Random","DEN":"/de/acme/Joe%20Random"
}
4.3.1.3 Get all registry entries of a common basename
$ curl -v -X GET http://localhost:5000/registry/de/acme/
Suppos there are multiple entries with the same basename it yields the following output:
* About to connect() to localhost port 5000 (#0)
* Trying 127.0.0.1...
* connected
* Connected to localhost (127.0.0.1) port 5000 (#0)
> GET /registry/de/acme/ HTTP/1.1
> User-Agent: curl/7.27.0
> Host: localhost:5000
> Accept: */*
>
* additional stuff not fine transfer.c:1037: 0 0
* HTTP 1.1 or later with persistent connection, pipelining supported
< HTTP/1.1 200 OK
< X-Powered-By: Express
< Set-Cookie:
connect.sid=s%3ABqhIdLh3D3h12qvJQUgPSAuC.0vhJIoh%2BtOlmc7EH797e3obob
uek98VUDaVCHywBvOM; Path=/; HttpOnly
< Connection: keep-alive
< Transfer-Encoding: chunked
<
* Connection #0 to host localhost left intact
[{"type":"Person","firstName":"Joe","lastName":"Random","DEN":"/regi
stry/de/acme/Joe"},{"type":"Person","firstName":"Joe","lastName":"Ra
ndom","DEN":"/registry/de/acme/Joe%20Random"},{"type":"Person","firs
tName":"Foo","lastName":"Bar","DEN":"/registry/de/acme/Foo%20Bar"}]*
Closing connection #0

Future Internet Core Platform
D.3.4.2 FI-WARE User and Programmers Guide Page 31
4.3.1.4 Delete a registry entry with cURL
Sending the request to the server
curl -v -X DELETE
http://localhost:5000/registry/de/acme/Joe%20Random
You should obtain the following result:
* About to connect() to localhost port 5000 (#0)
* Trying 127.0.0.1... connected
> DELETE /registry/de/acme/Joe%20Random HTTP/1.1
> User-Agent: curl/7.23.1 (i386-pc-win32) libcurl/7.23.1 zlib/1.2.5
> Host: localhost:5000
> Accept: */*
>
< HTTP/1.1 204 No Content
< Date: Wed, 11 Jul 2012 12:13:26 GMT
<
In this case the HTTP DELETE operation is used. The Registry uses the Create Retrieve
Update Delete (CRUD) operations which map almost to the HTTP verbs PUT, GET, POST
and DELETE.

Future Internet Core Platform
D.3.4.2 FI-WARE User and Programmers Guide Page 32
5 Application Mashup - Wirecloud - User and Programmer Guide
You can find the content of this chapter as well in the wiki of fi-ware.
5.1 Introduction
This page contains the User and Programmer Guide for the Wirecloud Mashup Platform, a
reference implementation of the Application Mashup Generic Enabler based on an Open
Source project, Wirecloud. The corresponding online documentation is continuously updated
and improved, and provides the most appropriate source to get the most up to date
information on instalation and administration.
5.2 User Guide
Web mashups integrate heterogeneous data, application logic, and UI components
(widgets/gadgets) sourced from the Web to create new coherent and value-adding
composite applications.
Web mashups are targeted at leveraging the "long tail" of the Web of Services by exploiting
rapid development, DIY, and shareability. They typically serve a specific situational (i.e.
immediate, short-lived, customized, specific) need, frequently with high potential for reuse. Is
this "situational" character which preclude them to be offered as 'off-the-self' functionality by
solution providers.
Web mashups can be manually developed using conventional web programming
technologies (e.g. see http://programmableweb.com). But this approach fails to take full
advantage of the approach. Mashup tools and platforms like WireCloud aim at development
paradigms that do not require programming skills and, hence, address end users, thus
leveraging the long tail of the Web of Services.
WireCloud builds on cutting-edge end-user development, RIA and semantic technologies to
offer a next-generation end-user centred mashup platform aimed at leveraging the long tail of
the Internet of Services.
5.2.1 Key Features
Wirecloud helps end users to innovate through experimentation by choosing the best suited
widgets and prefab mashups (a.k.a. mashup-lets) for your devised mashup from a vast, ever-
growing distributed catalogue.
WireCloud offers its main features through two integrated tools:
1. The wiring editor, which allows you to easily connect widgets in a mashup to create
a full-fledged dashboard with RIA functionality
2. The piping editor, which allows you to easily connect widgets to back-end services
or data sources through an extendable set of operators, including filters, aggregators,
adapters, etc.
Besides, WireCloud allows you to easily share your newly created mashup with other
colleagues and users. Comment it, tag it and rate it to foster discoverability and shareability.
Wirecloud helps to build a strong community by commenting, tagging and rating others'

Future Internet Core Platform
D.3.4.2 FI-WARE User and Programmers Guide Page 33
widgets, operators and mashups. The platform will also do its best to complement your
contribution.
5.2.2 Creating a new workspace
Mashups in Wirecloud are built in the context of workspaces. A workspace consists of the
set of widgets and operators that can be mashed-up, even spanning multiple tabs. Widgets
and operators in a workspace can share data though data flow- or event-based mechanisms.
The workspace in use is shown in the upper-left border of the screen, concatenated to the
WireCloud logo. It resembles the well-known REST nomenclature. For example, the
following screenshot shows a workspace named “GeoWidgets”, pertaining the user “admin”
and running in the Conwet Lab’s instance of WireCloud, i.e. it is named
WireCloud/admin/GeoWidgets (the WireCloud logo is part of the workspace’s name).
To create a new workspace, select the “Editor” view in the menu shown at the upper-right
corner of the window (when selected, the tag of an option is larger than the rest):
The default “Empty Workspace” is then shown, and you can click on it to expand the
dropdown menu for workspaces:
Once expanded, the menu shows a list of the most recently used workspaces (see
MyContacts, IssueTrouble and Empty Workspace in the figure below) that allows you to
quickly access them, followed by a list of options:
1. “Rename” allows you to change the name of the current workspace,
2. “Settings” allows you to change the settings of the current workspace,

Future Internet Core Platform
D.3.4.2 FI-WARE User and Programmers Guide Page 34
3. “Remove” allows you to delete the current workspace,
4. “New workspace” allows you to create a new workspace,
5. “Publish” allows you to export the current workspace to a catalogue.
If you want to create a new workspace named “GeoWidgets”, choose “New workspace” in
the dropdown menu:
A dialog will pop up requiring a name for the new workspace. Type the desired name and
click the accept button. The name should not contain spaces or other special characters:
Once accepted, the name of the new workspace is shown in the upper-left corner of the
window:
Future Internet Core Platform
D.3.4.2 FI-WARE User and Programmers Guide Page 35
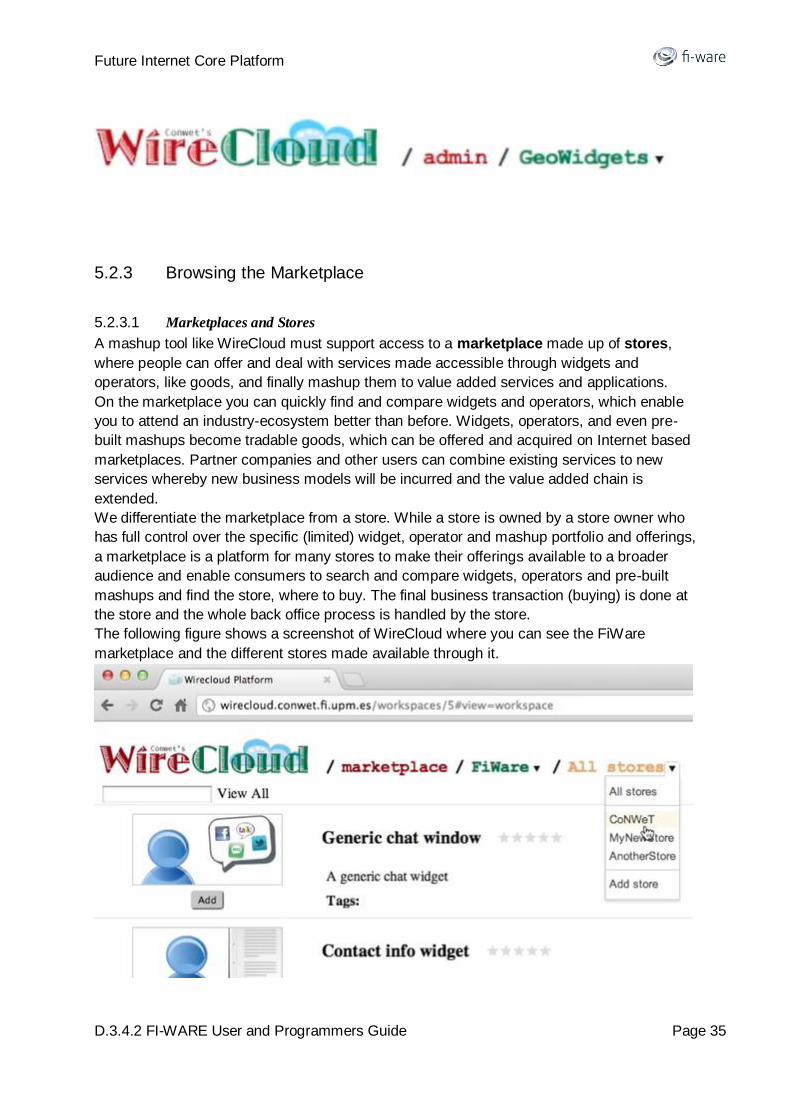
5.2.3 Browsing the Marketplace
5.2.3.1 Marketplaces and Stores
A mashup tool like WireCloud must support access to a marketplace made up of stores,
where people can offer and deal with services made accessible through widgets and
operators, like goods, and finally mashup them to value added services and applications.
On the marketplace you can quickly find and compare widgets and operators, which enable
you to attend an industry-ecosystem better than before. Widgets, operators, and even pre-
built mashups become tradable goods, which can be offered and acquired on Internet based
marketplaces. Partner companies and other users can combine existing services to new
services whereby new business models will be incurred and the value added chain is
extended.
We differentiate the marketplace from a store. While a store is owned by a store owner who
has full control over the specific (limited) widget, operator and mashup portfolio and offerings,
a marketplace is a platform for many stores to make their offerings available to a broader
audience and enable consumers to search and compare widgets, operators and pre-built
mashups and find the store, where to buy. The final business transaction (buying) is done at
the store and the whole back office process is handled by the store.
The following figure shows a screenshot of WireCloud where you can see the FiWare
marketplace and the different stores made available through it.

Future Internet Core Platform
D.3.4.2 FI-WARE User and Programmers Guide Page 36
5.2.3.2 Choosing an available marketplace
When looking for an offer of widgets, operators and mashup-lets, you first need to choose a
marketplace. Use the dropdown menu shown in the workspace path for this purpose.
As you can see in the previous screenshot, the menu allows you to choose among the most
recently accessed marketplace, to add a new marketplace (you only need to provide its URL)
and to delete a previously accessed one.
WireCloud offers a built-in local marketplace, which allows you to search the local catalogue
of available widgets and operators. The following figure shows a screenshot of the local
catalogue of widgets made available in a given instance of WireCloud.
If you are a widget developer with brand new widgets to share, or you just have downloaded
a Wirecloud-compliant widget from anywhere, you can easily upload your new widgets to the
built-in local catalogue through the "upload" option in the dropdown menu.

Future Internet Core Platform
D.3.4.2 FI-WARE User and Programmers Guide Page 37
5.2.3.3 Choosing an available store
Stores in WireCloud are associated to a specific marketplace. Therefore, to surf a store you
first need to choose the marketplace that publishes it. In the following figure, the user uses
the dropdown menu to choose FiWare’s marketplace:
Once in the FiWare marketplace, the store dropdown menu shows all its available stores
(CoNWeT, MyNewStore and AnotherStore). You can add a new one by providing its URL.
The following figure shows the options available in the stores dropdown menu:
Last, but not least, you can also surf the entire marketplace and see the global offer at a
glace by choosing “All stores”. The following figure shows the entire offer of widgets available
in the FiWare marketplace:

Future Internet Core Platform
D.3.4.2 FI-WARE User and Programmers Guide Page 38
5.2.4 Building a new mashup
Following the steps described above, go to the Editor view:
And create a new workspace:
Name it “GeoWidgets” and accept:

Future Internet Core Platform
D.3.4.2 FI-WARE User and Programmers Guide Page 39
The name of the new workspace will be shown in the upper-left corner of the window:
Go then to the Marketplace to choose among the widgets available in the catalogue those
you want to use in your mashup:
To ensure that you find the required widgets for this example mashup, go to the built-in Local
marketplace:
You will then be presented with a catalogue of widgets that includes the ones used in this
example:

Future Internet Core Platform
D.3.4.2 FI-WARE User and Programmers Guide Page 40
Look for the Web Map Service widget and add it to your workspace (use the Add button):
The tool automatically changes to the Edit view and presents the selected widget in the
design canvas. Now you can move and resize it until you obtain the desired layout:
Return to the Marketplace view and add a second “Web Map Service” and a “GeoRSS
Reader”. After rearranging them you will be presented with the following view, which shows
you the three widgets in the default tab. You can see the tabs used in your workspace at the
footer bar, and you can create new tabs to better organize the distribution of the widgets in

Future Internet Core Platform
D.3.4.2 FI-WARE User and Programmers Guide Page 41
your mashup. For example, if you want to create an information dashboard for monitoring the
VMs you have deployed in the cloud, you would want to organize the information into
different tabs: one per VM.
5.2.4.1 Changing the settings of a widget
Once you have added the desired widgets to your mashup and you have placed and resized
them to configure the information dashboard of your choice, you can change their settings.
To do so, go to the upper-right corner of the widget and click the properties icon as shown in
the following screen shot
You will then be presented with a dropdown menu with four different options.
The "Reload" option will reload the widget just in case of need (reloading the whole
Wirecloud is not always needed)

Future Internet Core Platform
D.3.4.2 FI-WARE User and Programmers Guide Page 42
The "Full Dragboard" option will maximize the selected widget, so it will take up the full
canvas area.
If you click on the "Extract from grid" option, the widget will be lifted up from the canvas,
allowing you to site it wherever you want on the canvas, even on top of other widgets.
Finally, click on the settings and you will be prompted with a customized dialog for the
settings of the widget. In this example, the GeoRSS Reader should be provided with a URL
for the desired feed, such as http://feeds.reuters.com/reuters/worldNews.
After configuring the settings, the widget will start reading from the chosen feed and will show
a list of news. By clicking on each item of news you will see the text of it.

Future Internet Core Platform
D.3.4.2 FI-WARE User and Programmers Guide Page 43
At this time, you have created a mashup of two different maps, each with its own layer (street
view, satellite view, etc.), and a GeoRSS Reader where you can choose items from the list of
news. The result is the same as you can achieve using other widget platforms like iGoogle:
Each widget is isolated and cannot respond to data flows or events coming from the rest of
widgets in the mashup.
Imagine now that you want the position and the zoom in each map to get automatically
synchronized, so that, when you change the position or the zoom in one of them, the other
one repositions and/or resizes automatically. Moreover, if you want to place in the map the
location where the GeoRSS Reader's item of news refers to, WireCloud allows you to
achieve this behavior by means of the concept of wiring.
5.2.4.2 Wiring the widgets
Once you have chosen the desired widgets, you can wire them to enable their
intercommunication and to achieve coordinated behaviour. Widgets in WireCloud are
capable of sending and/or receiving events and data through well-identified ports called
Slots. When you connect two compatible slots, the second one (i.e. the input or target slot)

Future Internet Core Platform
D.3.4.2 FI-WARE User and Programmers Guide Page 44
prepares to receive data flows and/or events coming from the first one (i.e. the output or
source slot).
To wire the widgets in your mashup go to the Wiring view of the tool:
You will then be presented with the set of widgets (and operators, as we will see later) you
have previously chosen from the catalogue. Simply drag one of them at a time and drop it on
the editor canvas:
Once you have (some of) the widgets in the canvas you want to wire, click on one output slot
in one widget and drag the icon to the input slot of your choice in a second widget. The tool
automatically connects them and starts the communication instantly.

Future Internet Core Platform
D.3.4.2 FI-WARE User and Programmers Guide Page 45
If you return to the “Edit” window, you will see that the two map widgets are now
automatically synchronized in size and positioning. You can use the one of your choice to
move to a new location. The other one will automatically. This is very useful when you use
different base layers (e.g. Google Map and Open Street Map) in each map.
Continue wiring the rest of the widgets in your mashup following your intuition and the
documentation and contextual help offered by each widget. For example, it appears to be
intuitive to connect the Location info output slot in the GeoRSS Reader with the
corresponding input slot in each Web Map Service widget with the purpose of reading the
news local to the region you are displaying in the map:

Future Internet Core Platform
D.3.4.2 FI-WARE User and Programmers Guide Page 46
Once you have wired the widgets, you can return to the Editor view and see the results. In
this case, the maps will automatically reposition whenever you choose news to present it in
the context of the place it refers to:
Return now to the Wiring view of the tool and complete the mashup wiring the widgets as
shown in the following figure:

Future Internet Core Platform
D.3.4.2 FI-WARE User and Programmers Guide Page 47
The difficulty perceived in that wiring is not inherent to the wiring itself, but to the widgets
being used and, in the end, to the geospatial services domain. At least a basic knowledge of
the WMS standard and of concepts such as Nomenclator and Feature is required to fully
understand the rest of the example, but it is provided for the sake of completeness and to the
full and to better show the true potential of the wiring concept.
Again in the Marketplace view, add a WMS-Nomenclator-GeoRSS and a GetFeatureInfo
widget. The first one serves the purpose of accessing WMS Services and providing the maps
with information about features. The second one will be used to show information about
features to the user.

Future Internet Core Platform
D.3.4.2 FI-WARE User and Programmers Guide Page 48
In particular, we want to show land value information (catastro in spanish), so we need to
select that service in the WMS Nomenclator GeoRSS widget:
Because we have connected the WMS Nomenclator GeoRSS widget to the Web Map
Service widget, the information about the selected service will be made instantly accessible
to the latter. Then, once the "catastro" service is selected in the WMS Nomenclator GeoRSS

Future Internet Core Platform
D.3.4.2 FI-WARE User and Programmers Guide Page 49
widget, you can proceed and configure the Web map Service to use that WMS service and
set it as the base layer for the map:
The following figure shows a screen shot of the full-fledged mapping mashup. When the user
shows the “Santiago Bernabeu” in the rightmost map, the leftmost map automatically shows
the land value information about that famous building and, if you click on that building in the
leftmost map, the GetFeatureinfo widget shows the land value reference for the property,
which in turn links to a web page with more detailed information.
Now, the two maps are synchronized in size and positioning, and the GetFeatureInfo widget
shows the land value reference of the property selected in the map located to the far left. You

Future Internet Core Platform
D.3.4.2 FI-WARE User and Programmers Guide Page 50
can now easily follow the land value reference link to check out the property value and other
data.
5.2.4.3 Piping operators
To show the use of operators, we will propose the creation of a new mashup: its purpose is
to provide the user with a tool to easily surf her contacts, taken from any service or
application capable of providing a list of vcards, choose one of them and use one of the
available communication channels to establish or continue a conversation with her. The
following figure shows an example of such mashup. The user has chosen one of her
contacts obtained from her GMail/Google account and has initiated a conversation with him
through Twitter.
To create this mashup, you need to go to the Edit view and create a new workspace with the
name "MyContacts".

Future Internet Core Platform
D.3.4.2 FI-WARE User and Programmers Guide Page 51
Next, enter the Marketplace view, choose the FiWare marketplace and view the widgets that
have been made available through all its stores.

Future Internet Core Platform
D.3.4.2 FI-WARE User and Programmers Guide Page 52
After adding a Generic chat window widget, a Contact info widget and a Contact list widget,
return to the Edit view and rearrange the three new widgets. The result will be as shown in
the next figure:
Bearing in mind that the three widgets remain disconnected, it is easy to understand the
reason why two of them show warnings like "Contact info needed. Have you wired the
widget?" or "Add Contacts".
Then, go to the Wiring view, drag each of the three widgets you want to wire and drop them
in the editor's canvas as shown in the following figure. You will also need an operator to help
you pick your contacts from your GMail/Google account and pass them to the Contact List
widget.

Future Internet Core Platform
D.3.4.2 FI-WARE User and Programmers Guide Page 53
As you can see, using operators is as easy as using widgets. They are provided with input
and output slots too, and you can wire them the same way you wire widgets. After having
wired the three widgets, and having provided the Contact list widgets with an appropriate
source of information, the widgets in the Editor view will show the functionality shown in the
next figure:
As you can see, the Contact List widget is now populated with your personal contacts, which
come from your GMail/Google account, and the Contact info widget automatically shows the
contact info for every contact you choose in the contact list. Nevertheless, you still have not
wired the Generic chat window with the target communication channel.
Return to the Wiring view and add a Send Tweet operator to the canvas. The following figure
shows how to wire it to the Generic chat windows in order to make each text you introduce in
the chat window appear in your contact's twitter account.
The result can be seen in the Editor view
Future Internet Core Platform
D.3.4.2 FI-WARE User and Programmers Guide Page 54
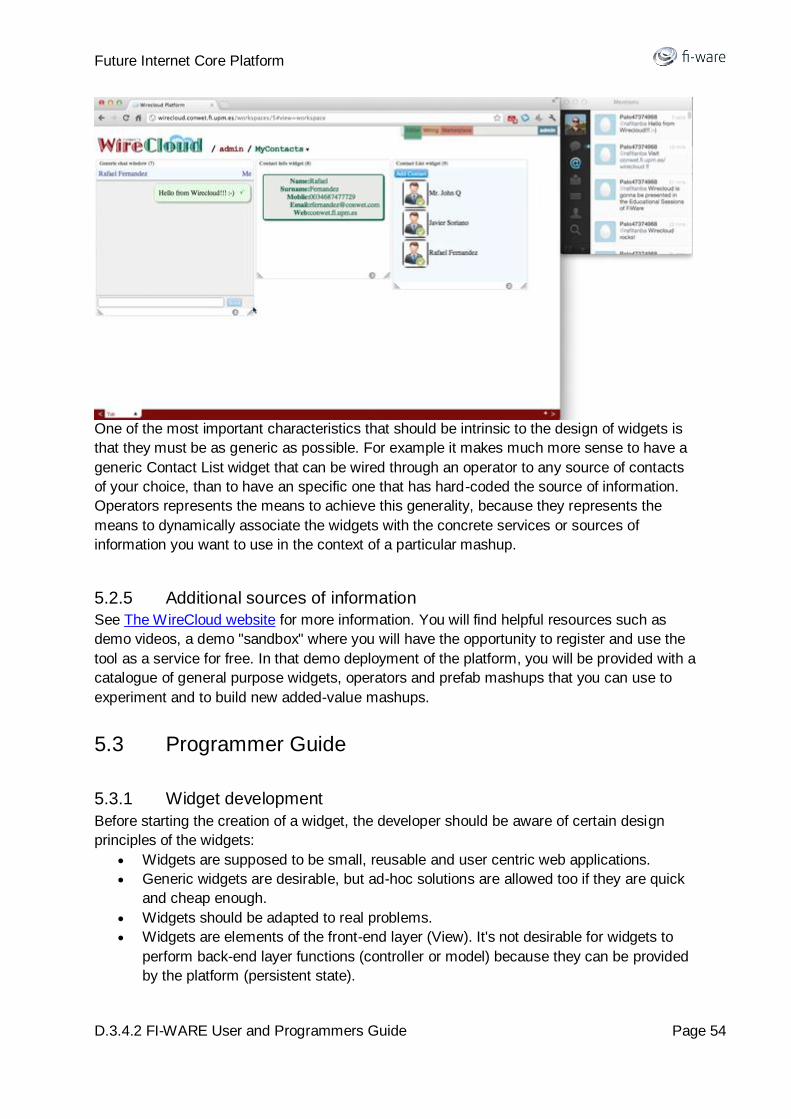
One of the most important characteristics that should be intrinsic to the design of widgets is
that they must be as generic as possible. For example it makes much more sense to have a
generic Contact List widget that can be wired through an operator to any source of contacts
of your choice, than to have an specific one that has hard-coded the source of information.
Operators represents the means to achieve this generality, because they represents the
means to dynamically associate the widgets with the concrete services or sources of
information you want to use in the context of a particular mashup.
5.2.5 Additional sources of information
See The WireCloud website for more information. You will find helpful resources such as
demo videos, a demo "sandbox" where you will have the opportunity to register and use the
tool as a service for free. In that demo deployment of the platform, you will be provided with a
catalogue of general purpose widgets, operators and prefab mashups that you can use to
experiment and to build new added-value mashups.
5.3 Programmer Guide
5.3.1 Widget development
Before starting the creation of a widget, the developer should be aware of certain design
principles of the widgets:
Widgets are supposed to be small, reusable and user centric web applications.
Generic widgets are desirable, but ad-hoc solutions are allowed too if they are quick
and cheap enough.
Widgets should be adapted to real problems.
Widgets are elements of the front-end layer (View). It's not desirable for widgets to
perform back-end layer functions (controller or model) because they can be provided
by the platform (persistent state).

Future Internet Core Platform
D.3.4.2 FI-WARE User and Programmers Guide Page 55
During the development of widgets any technology accepted by web browsers
(XHTML, JavaScript, SVG, Flash, applets ....) can be used.
Widgets are formed by three different components:
Template, which is a declarative description of the widget, and represents its main
entry point. This file contains, among other things, references to the rest of resources
of a widget.
Code, composed of HTML, JavaScript and CSS files containing the definition and the
behaviour of the widget.
Static resources, such as images, documentation and other static resources.
5.3.1.1 Javascript API
The Widget Javascript API allow Widgets to access the functionalities offered by the Mashup
Execution Engine like widget interconnection, state persistence, access to the cross-
domain proxy, ...
MashupPlatform.http
buildProxyURL
builds a URL suitable for working around the cross-domain problem. It is usually handled
using the wirecloud proxy but it also can be handled using the access control request
headers if the browser has support for them. If all the needed requirements are meet, this
function will return a URL without using the proxy.
MashupPlatform.http.buildProxyURL(url, options)
url is the target URL.
options is an object with request options (see the request options section for more
details).
makeRequest
sends a HTTP request.
MashupPlatform.http.makeRequest(url, options)
url is the URL to which to send the request.
options is an object with a list of request options (see the request options section for
more details).
request options
General options:
asynchronous (Boolean; default true): Determines whether XMLHttpRequest is
used asynchronously or not. Synchronous usage is strongly discouraged — it halts all
script execution for the duration of the request and blocks the browser UI.
contentType (String; default application/x-www-form-urlencoded): The Content-
type header for your request. Change this header if you want to send data in another
format (like XML).
encoding (String; default UTF-8): The encoding for the contents of your request. It is
best left as-is, but should weird encoding issues arise, you may have to tweak this.

Future Internet Core Platform
D.3.4.2 FI-WARE User and Programmers Guide Page 56
method (String; default POST): The HTTP method to use for the request. The other
common possibility is GET. Abiding by Rails conventions, Prototype also reacts to
other HTTP verbs (such as put and delete) by submitting via post and adding an extra
_method parameter with the originally-requested method.
parameters (Object): The parameters for the request, which will be encoded into the
URL for a get method, or into the request body for the other methods.
postBody (String): Specific contents for the request body on a post method. If it is
not provided, the contents of the parameters option will be used instead.
requestHeaders (Object): A set of key-value pairs, with properties representing
header names.
forceProxy (Boolean; default false): Sends the request through the proxy
regardless of the other options passed.
context (Object; default null) is the value to be passed as the this parameter to the
callbacks.
Callback options:
onSuccess: Invoked when a request completes and its status code belongs in the
2xy family. This is skipped if a code-specific callback is defined (e.g., on200), and
happens before onComplete.
onFailure: Invoked when a request completes and its status code exists but is not in
the 2xy family. This is skipped if a code-specific callback is defined (e.g. on403), and
happens before onComplete.
onXYZ (with XYZ representing any HTTP status code): Invoked just after the
response is complete if the status code is the exact code used in the callback name.
Prevents execution of onSuccess and onFailure. Happens before onComplete.
onException: Triggered whenever an XHR error arises. Has a custom signature: the
first argument is the requester (i.e. an Ajax.Request instance), and the second is the
exception object.
onComplete: Triggered at the very end of a request's life-cycle, after the request
completes, status-specific callbacks are called, and possible automatic behaviors are
processed. Guaranteed to run regardless of what happened during the request.
MashupPlatform.wiring
pushEvent
sends an event through the wiring.
MashupPlatform.wiring.pushEvent(outputName, data)
outputName is the name of the output endpoint as defined in the WDL.
data is the content of the event.
registerCallback
registers a callback for a given input endpoint. If the given endpoint already has registered a
callback, it will be replaced by the new one.
MashupPlatform.wiring.registerCallback(inputName, callback)
inputName is name of the input endpoint as defined in the WDL.
callback is the callback function to use when an event reaches the given input
endpoint.
Future Internet Core Platform
D.3.4.2 FI-WARE User and Programmers Guide Page 57
MashupPlatform.prefs
get
Retrieves the value of a preference.
MashupPlatform.prefs.get(key)
key is the preference to fetch.
registerCallback
Registers a callback for listening preference changes.
MashupPlatform.prefs.registerCallback(callback)
callback is the callback function that will be called when the preferences of the
widget changes.
set
Sets the value of a preference.
MashupPlatform.prefs.set(key, value)
key is the identifier of the preference.
value is the new value to use for the preference.
MashupPlatform.widget
getVariable
returns a widget variable by its name.
MashupPlatform.widget.getVariable(name)
name is the name of the variable to retreive.
drawAttention
makes Wirecloud notify that the widget needs user's attention.
MashupPlatform.widget.drawAttention()
id
returns the widget id.
MashupPlatform.widget.id
log
writes a message into the wirecloud's log console.
MashupPlatform.widget.log(msg, level)
msg is the text of the message to log.
level is an optional parameter with the level to uses for logging the message. (By
default: info).
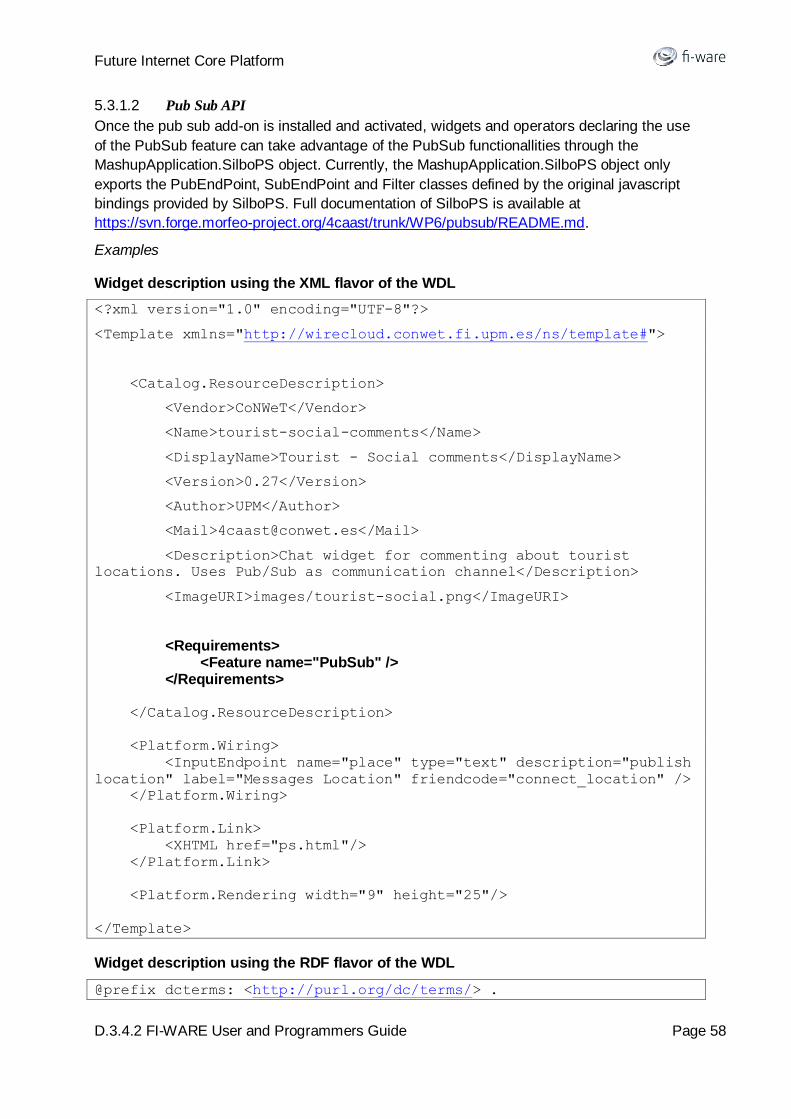
Future Internet Core Platform
D.3.4.2 FI-WARE User and Programmers Guide Page 58
5.3.1.2 Pub Sub API
Once the pub sub add-on is installed and activated, widgets and operators declaring the use
of the PubSub feature can take advantage of the PubSub functionallities through the
MashupApplication.SilboPS object. Currently, the MashupApplication.SilboPS object only
exports the PubEndPoint, SubEndPoint and Filter classes defined by the original javascript
bindings provided by SilboPS. Full documentation of SilboPS is available at
https://svn.forge.morfeo-project.org/4caast/trunk/WP6/pubsub/README.md.
Examples
Widget description using the XML flavor of the WDL
<?xml version="1.0" encoding="UTF-8"?>
<Template xmlns="http://wirecloud.conwet.fi.upm.es/ns/template#">
<Catalog.ResourceDescription>
<Vendor>CoNWeT</Vendor>
<Name>tourist-social-comments</Name>
<DisplayName>Tourist - Social comments</DisplayName>
<Version>0.27</Version>
<Author>UPM</Author>
<Mail>[email protected]</Mail>
<Description>Chat widget for commenting about tourist
locations. Uses Pub/Sub as communication channel</Description>
<ImageURI>images/tourist-social.png</ImageURI>
<Requirements> <Feature name="PubSub" /> </Requirements>
</Catalog.ResourceDescription>
<Platform.Wiring>
<InputEndpoint name="place" type="text" description="publish
location" label="Messages Location" friendcode="connect_location" />
</Platform.Wiring>
<Platform.Link>
<XHTML href="ps.html"/>
</Platform.Link>
<Platform.Rendering width="9" height="25"/>
</Template>
Widget description using the RDF flavor of the WDL
@prefix dcterms: <http://purl.org/dc/terms/> .
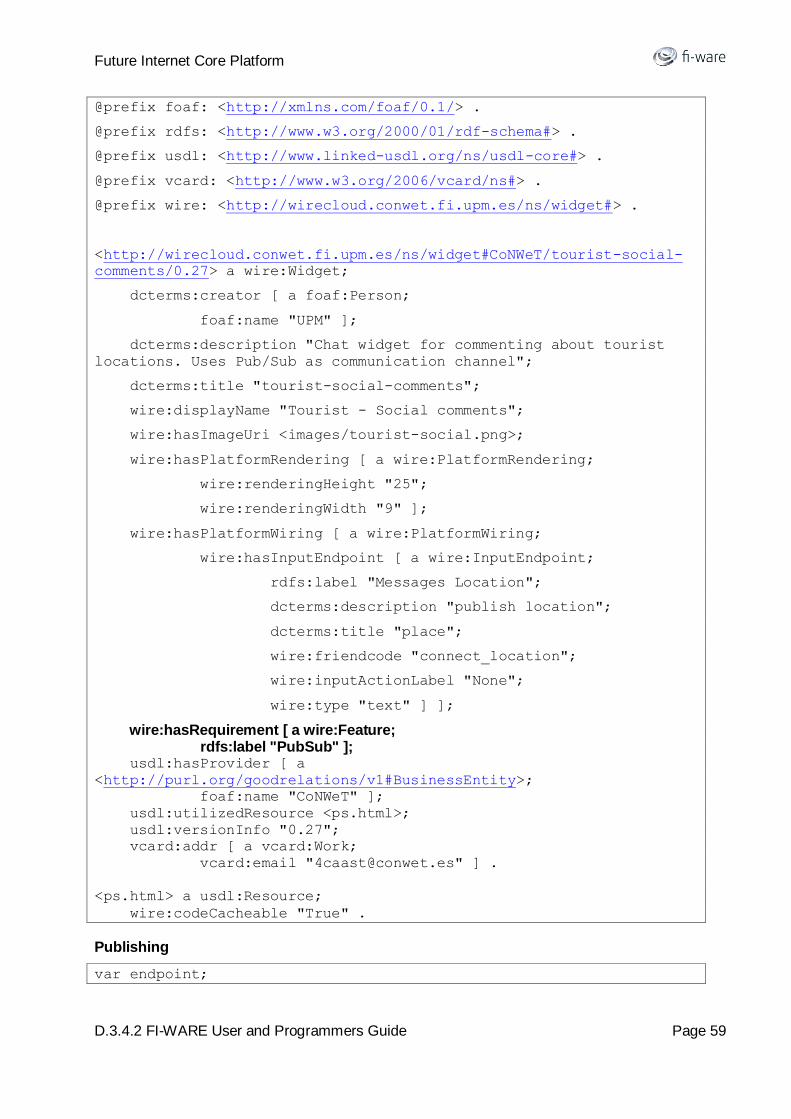
Future Internet Core Platform
D.3.4.2 FI-WARE User and Programmers Guide Page 59
@prefix foaf: <http://xmlns.com/foaf/0.1/> .
@prefix rdfs: <http://www.w3.org/2000/01/rdf-schema#> .
@prefix usdl: <http://www.linked-usdl.org/ns/usdl-core#> .
@prefix vcard: <http://www.w3.org/2006/vcard/ns#> .
@prefix wire: <http://wirecloud.conwet.fi.upm.es/ns/widget#> .
<http://wirecloud.conwet.fi.upm.es/ns/widget#CoNWeT/tourist-social-
comments/0.27> a wire:Widget;
dcterms:creator [ a foaf:Person;
foaf:name "UPM" ];
dcterms:description "Chat widget for commenting about tourist
locations. Uses Pub/Sub as communication channel";
dcterms:title "tourist-social-comments";
wire:displayName "Tourist - Social comments";
wire:hasImageUri <images/tourist-social.png>;
wire:hasPlatformRendering [ a wire:PlatformRendering;
wire:renderingHeight "25";
wire:renderingWidth "9" ];
wire:hasPlatformWiring [ a wire:PlatformWiring;
wire:hasInputEndpoint [ a wire:InputEndpoint;
rdfs:label "Messages Location";
dcterms:description "publish location";
dcterms:title "place";
wire:friendcode "connect_location";
wire:inputActionLabel "None";
wire:type "text" ] ];
wire:hasRequirement [ a wire:Feature; rdfs:label "PubSub" ]; usdl:hasProvider [ a
<http://purl.org/goodrelations/v1#BusinessEntity>;
foaf:name "CoNWeT" ];
usdl:utilizedResource <ps.html>;
usdl:versionInfo "0.27";
vcard:addr [ a vcard:Work;
vcard:email "[email protected]" ] .
<ps.html> a usdl:Resource;
wire:codeCacheable "True" .
Publishing
var endpoint;
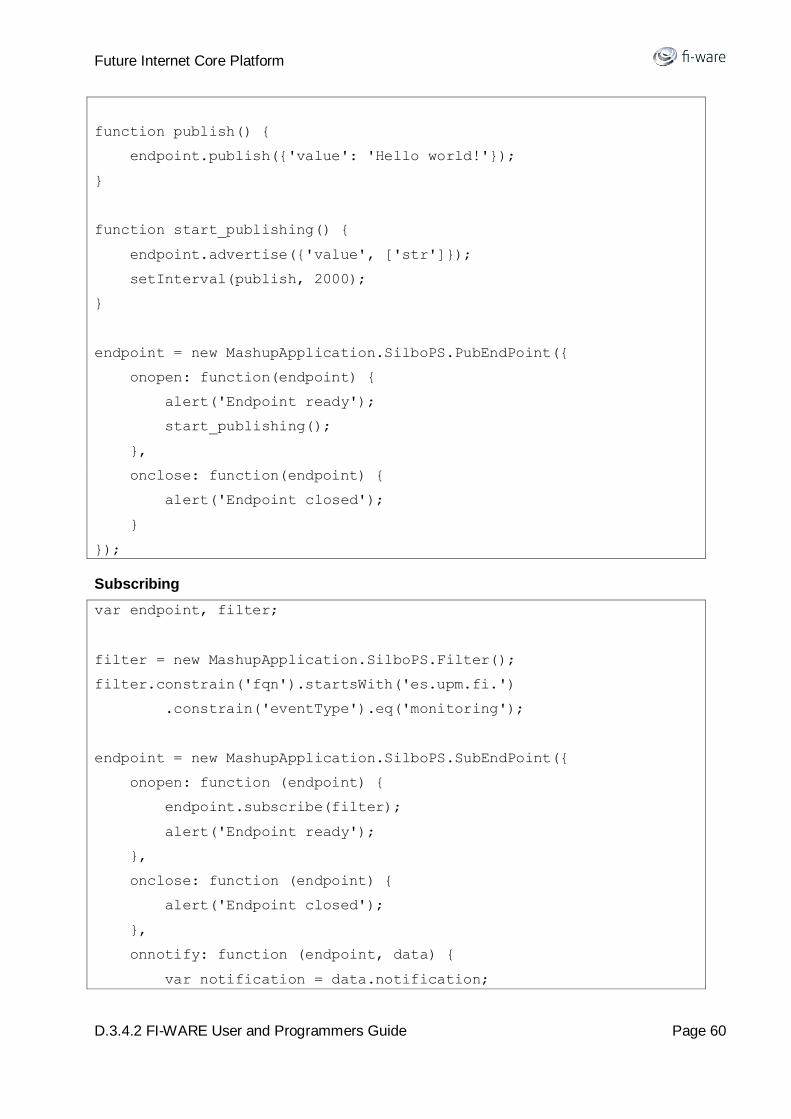
Future Internet Core Platform
D.3.4.2 FI-WARE User and Programmers Guide Page 60
function publish() {
endpoint.publish({'value': 'Hello world!'});
}
function start_publishing() {
endpoint.advertise({'value', ['str']});
setInterval(publish, 2000);
}
endpoint = new MashupApplication.SilboPS.PubEndPoint({
onopen: function(endpoint) {
alert('Endpoint ready');
start_publishing();
},
onclose: function(endpoint) {
alert('Endpoint closed');
}
});
Subscribing
var endpoint, filter;
filter = new MashupApplication.SilboPS.Filter();
filter.constrain('fqn').startsWith('es.upm.fi.')
.constrain('eventType').eq('monitoring');
endpoint = new MashupApplication.SilboPS.SubEndPoint({
onopen: function (endpoint) {
endpoint.subscribe(filter);
alert('Endpoint ready');
},
onclose: function (endpoint) {
alert('Endpoint closed');
},
onnotify: function (endpoint, data) {
var notification = data.notification;
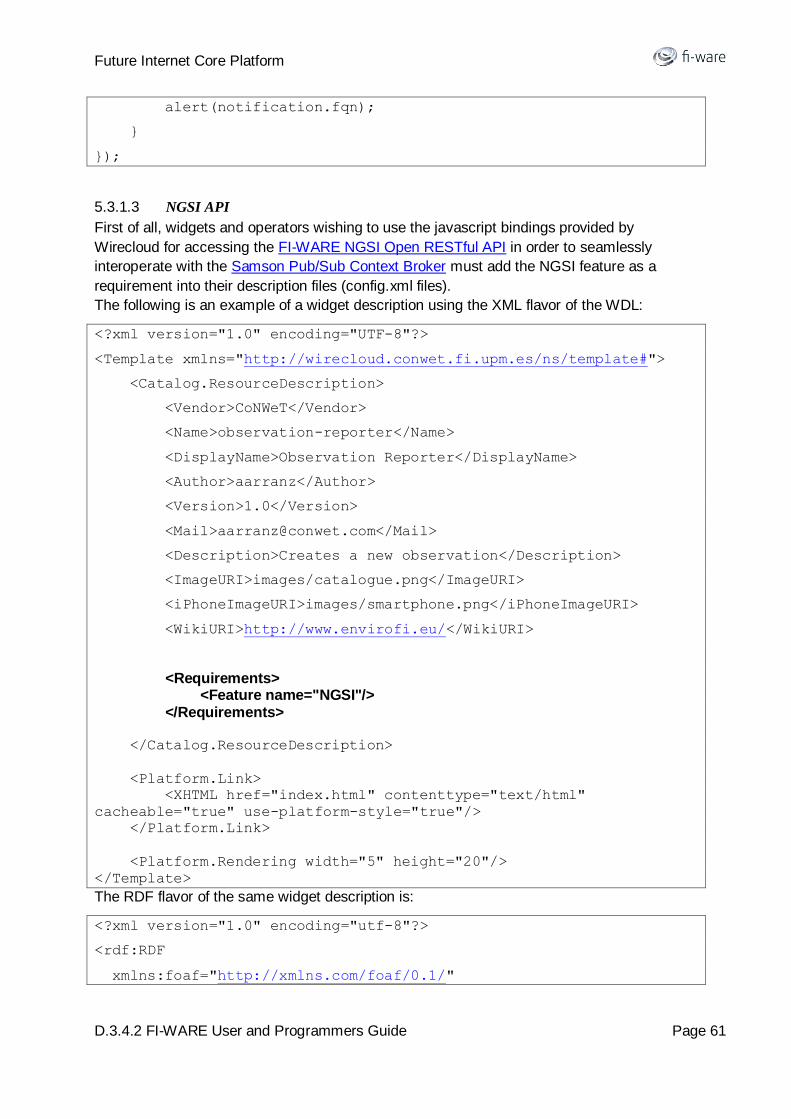
Future Internet Core Platform
D.3.4.2 FI-WARE User and Programmers Guide Page 61
alert(notification.fqn);
}
});
5.3.1.3 NGSI API
First of all, widgets and operators wishing to use the javascript bindings provided by
Wirecloud for accessing the FI-WARE NGSI Open RESTful API in order to seamlessly
interoperate with the Samson Pub/Sub Context Broker must add the NGSI feature as a
requirement into their description files (config.xml files).
The following is an example of a widget description using the XML flavor of the WDL:
<?xml version="1.0" encoding="UTF-8"?>
<Template xmlns="http://wirecloud.conwet.fi.upm.es/ns/template#">
<Catalog.ResourceDescription>
<Vendor>CoNWeT</Vendor>
<Name>observation-reporter</Name>
<DisplayName>Observation Reporter</DisplayName>
<Author>aarranz</Author>
<Version>1.0</Version>
<Mail>[email protected]</Mail>
<Description>Creates a new observation</Description>
<ImageURI>images/catalogue.png</ImageURI>
<iPhoneImageURI>images/smartphone.png</iPhoneImageURI>
<WikiURI>http://www.envirofi.eu/</WikiURI>
<Requirements> <Feature name="NGSI"/> </Requirements>
</Catalog.ResourceDescription>
<Platform.Link>
<XHTML href="index.html" contenttype="text/html"
cacheable="true" use-platform-style="true"/>
</Platform.Link>
<Platform.Rendering width="5" height="20"/>
</Template>
The RDF flavor of the same widget description is:
<?xml version="1.0" encoding="utf-8"?>
<rdf:RDF
xmlns:foaf="http://xmlns.com/foaf/0.1/"

Future Internet Core Platform
D.3.4.2 FI-WARE User and Programmers Guide Page 62
xmlns:wire="http://wirecloud.conwet.fi.upm.es/ns/widget#"
xmlns:rdfs="http://www.w3.org/2000/01/rdf-schema#"
xmlns:usdl="http://www.linked-usdl.org/ns/usdl-core#"
xmlns:rdf="http://www.w3.org/1999/02/22-rdf-syntax-ns#"
xmlns:ns1="http://purl.org/goodrelations/v1#"
xmlns:dcterms="http://purl.org/dc/terms/"
xmlns:vcard="http://www.w3.org/2006/vcard/ns#"
>
<wire:Widget
rdf:about="http://wirecloud.conwet.fi.upm.es/ns/widget#CoNWeT/observ
ation-reporter/1.0">
<vcard:addr>
<vcard:Work rdf:nodeID="Nb17ce611aa2645e488515f86eb855e53">
<vcard:email>[email protected]</vcard:email>
</vcard:Work>
</vcard:addr>
<usdl:utilizedResource>
<usdl:Resource rdf:about="index.html">
<wire:codeCacheable>True</wire:codeCacheable>
</usdl:Resource>
</usdl:utilizedResource>
<wire:hasPlatformWiring>
<wire:PlatformWiring
rdf:nodeID="Neecb97db81ed40859b8c04e935a9a9cc"/>
</wire:hasPlatformWiring>
<wire:displayName>Observation Reporter</wire:displayName>
<wire:hasiPhoneImageUri rdf:resource="images/smartphone.png"/>
<usdl:versionInfo>1.0</usdl:versionInfo>
<usdl:hasProvider>
<ns1:BusinessEntity
rdf:nodeID="N9a6bf56577c741ac806997a80281afff">
<foaf:name>CoNWeT</foaf:name>
</ns1:BusinessEntity>
</usdl:hasProvider>
<wire:hasImageUri rdf:resource="images/catalogue.png"/>
<wire:hasPlatformRendering>
<wire:PlatformRendering
rdf:nodeID="N713e5ea11dce4750a592c754c748def7">

Future Internet Core Platform
D.3.4.2 FI-WARE User and Programmers Guide Page 63
<wire:renderingHeight>20</wire:renderingHeight>
<wire:renderingWidth>5</wire:renderingWidth>
</wire:PlatformRendering>
</wire:hasPlatformRendering>
<wire:hasRequirement> <wire:Feature rdf:nodeID="N3cb336bd9b6243ecbf345c80442498f9"> <rdfs:label>NGSI</rdfs:label> </wire:Feature> </wire:hasRequirement> <dcterms:title>observation-reporter</dcterms:title>
<dcterms:description>Creates a new
observation</dcterms:description>
<dcterms:creator>
<foaf:Person rdf:nodeID="Ndb72cb5a7f3844b29b72f304baaa14a7">
<foaf:name>aarranz</foaf:name>
</foaf:Person>
</dcterms:creator>
</wire:Widget>
</rdf:RDF>
Once the NGSI feature is added to the widget/operator description file, widgets and
operators will have access to the NGSI javascript object that conforms the core of the API.
See the Publish/Subscribe Context Broker - SAMSON Broker - User and Programmer Guide
for more details on the operations that can be invoked using the RESTful API. That guide
can be used for reference as each of the Pub/Sub Context Broker operations have an
equivalent operation in the javascript bindings.
What follows exemplifies the use of this API for updating an entity.
var connection = new NGSI.Connection('<url of the Samson Pub/Sub
Context Broker instance>');
connection.updateAttributes([{
entity: {
id: 'iss8',
type: 'Issue'
},
attributes:[{
name: 'technician',
contextValue: 'tech1'
}]
}], {
onSuccess: function () {
// notify success
},
onFailure: function () {
// show error

Future Internet Core Platform
D.3.4.2 FI-WARE User and Programmers Guide Page 64
}
});
Data types used by the library The Entity type is used to reference entities. This type is defined as an object
composed of the following fields:
o id is a string with the id of the entity. Some times you will be able to use
patterns in this field.
o isPattern is a boolean indicating whether the id field contains a pattern. This
field is optional.
o type is the type of the entity. This field is optional.
The Attribute type is used to reference attributes. This type is defined as an object
composed of the following fields:
o name is the name of the attribute.
o type is the type of the Attribute. This field is optional.
The Duration type is used to describe time intervals and defined as a string following
the format defined at http://books.xmlschemata.org/relaxng/ch19-77073.html.
The Condition type is used to declare the condition that will trigger notifications. This
type is defined as an object composed of the following fields:
o type is an String containing 'ONTIMEINTERVAL' or 'ONCHANGE'.
o values is an Array of String. The meaning of this field depends on the value
of the type field:
'ONTIMEINTERVAL': exactly one value SHALL be present and SHALL
represent the time interval between notifications (using the Duration
type.
'ONCHANGE': this element SHALL contain the name(s) of the Context
Attributes to be monitored for changes.
The AttributeValue type is used to assign values to attributes. This type is defined as
an object composed of the following fields:
o name is the name of the attribute.
o type is the type of the attribute. This field is optional.
o contextValue is the value to assign to the attribute.
The AttributeUpdate type is used to describe a context update. This type is defined
as an object composed of the following fields:
o entity is the entity affected by the update. Type: Entity.
o attributes is the new values for the attributes of the entity. Type:
AttributeValue.
The AttributeDeletion type is used to describe the deletion of attributes from an
entity. This type is defined as an object composed of the following fields:
o entity is the entity affected by the update. Type:Entity.
o attributes is the new values for the attributes of the entity. Type:Attribute.
NGSI.Connection A new NGSI.Connection can be instantiated using the following constructor:
NGSI.Connection(url[, option])
url is the url of the Samson Pub/Sub Context Broker instance.

Future Internet Core Platform
D.3.4.2 FI-WARE User and Programmers Guide Page 65
options is an object with extra options. This parameter may be null if no extra option
is needed. Current supported options are:
o ngsi_proxy is the url of the NGSI proxy used for subscriptions.
All the methods of NGSI.Connection supports an options parameter. This parameter is
used, among other things, to pass callbacks functions. This parameter is a JavaScript object
containing pairs of key value options. Moreover, all the method of NGSI.Connection support
at least the following callbacks:
onSuccess is called when the request finishes successfully. The parameters passed
to this callback depends on the invoked method.
onFailure is called when the request finish with errors.
onComplete is called when the request finish regardless of whether the request is
successful or not.
createRegistration
Register context information (entities and attributes) in the NGSI server.
createRegistration(entities, attributes, duration,
providingApplication, options)
entities is the list of Entities that are going to be registered.
attributes is a list of the Attributes that are going to be assigned to the previous list
of entities.
duration is the Duration for this registration.
providingApplication is the URI of the application to which this registration belongs
to.
The onSuccess callback will receive an object with the following fields:
registrationId is the final assigned id. This id can be used in the updateRegistration
and cancelRegistration methods.
duration is the final assigned duration for this registration.
updateRegistration
Updates a particular registration.
createRegistration(regId, entities, attributes, duration,
providingApplication[, options])
regId is the id of the registration to update.
entities is the list of Entities that its going to replace the previous established one.
attributes is a list of the Attributes that are going to be assigned to the provided list
of entities.
duration is the new Duration for the registration identified by regId.
providingApplication is the new value for the providingApplication property of the
registration.
The onSuccess callback will receive an object with the following fields:
registrationId is the id of the registration.
duration is the final assigned duration for this registration.
cancelRegistration

Future Internet Core Platform
D.3.4.2 FI-WARE User and Programmers Guide Page 66
Cancels or deletes a particular registration.
cancelRegistration(regId[, options])
regId is the id of the registration to cancel.
discoverAvailability
Discover context information registrations in the NGSI server.
discoverAvailability(entities, attributeNames, options)
entities is the list of Entities that are going to be queried.
attributeNames is the list of attribute names that are going to be queried. This
parameter is optional and thus null is a valid value.
query
Query for context information.
query(entities, attributeNames[, options])
entities is the list of Entities to query.
attributeNames is the list of attribute names to query.
updateAttributes
Update context information.
addAttributes(update[, options])
update a list of AttributeUpdates.
addAttributes
Add attributes to entities.
addAttributes(toAdd[, options])
toAdd a list of AttributeUpdates.
deleteAttributes
Delete attributes form entities.
deleteAttributes(toDelete[, options])
toDelete a list of AttributeDeletion.
createSubscription
Subscribe to changes in the context information.
createSubscription(entities, attributeNames, duration, throttling,
conditions[, options])
entities is the list of Entities to query in this subscription.
attributeNames is the list of attribute names to query in this subscription.
duration is the Duration of this subscription.
throttling is the proposed minimum interval between notifications. This value must be
provided using the Duration type. null is also valid.

Future Internet Core Platform
D.3.4.2 FI-WARE User and Programmers Guide Page 67
conditions is a list of Conditions that will trigger queries using the provided
information and their subsequent notifications to the onNotify callback.
This method, supports a new type of callback: onNotify. This callback is required and can be
either an URL or a function. In the later case, the NGSI Connection must be created using a
NGSI proxy and will be called every time a notification comes from the NGSI server.
The first parameter of a onNotify callback function will be an object with the response data.
updateSubscription
Update context subscription.
updateSubscription(subId, entities, attributeNames, duration,
throttling, conditions[, options])
subId is the id of the context subscription to cancel.
entities is the list of Entities to query in this subscription.
attributeNames is the list of attribute names to query in this subscription.
duration is the Duration of this subscription.
throttling is the proposed minimum interval between notifications. This value must be
provided using the Duration type. null is also valid.
conditions is a list of Conditions that will trigger queries using the provided
information and their subsequent notifications to the onNotify callback.
cancelSubscription
Cancels or deletes context subscription.
cancelSubscription (subId[, options])
subId is the id of the context subscription to cancel.

Future Internet Core Platform
D.3.4.2 FI-WARE User and Programmers Guide Page 68
6 Service Mashup - Mashup Factory - User and Programmer Guide
You can find the content of this chapter as well in the wiki of fi-ware.
6.1 Introduction
The Composition Engine used by Mashup Factory is a 3rd party BPEL engine that is no
longer available to the public. The following description was extracted from the 3rd party
BPEL engine userguide. This documentation was provided by www.activebpel.org. There is
no responsibilty about correctness by Mashup Factory.
6.2 User Guide
The User Guide for the Service Mashup implementation provided by the Mashup Factory can
be found at[1].
A general description of Mashup Factory can be found[2].
The remainder of the document describes how to deploy a BPEL process so the ActiveBPEL
engine can execute it.
To deploy a BPEL process, you must create and install a deployment archive containing your
BPEL process files. To do this, you will use the jar utility, which means you will need a Java
SDK.
Any version of the JDK should work. BPEL processes deployment has been tested using the
1.4.1 SDK.
6.2.1 Deploying Your BPEL Process
Deploying a BPEL process involves creating a deployment archive file (a JAR with an
extension of ".bpr") and copying that to your servlet container. To create this archive, you
need to organize your files into a particular directory structure, create one or two
configuration files, and then create an archive from that directory.
Create a directory for your deployment files; we'll name it mybpel in this example. Create the
subdirectories
* bpel
* META-INF
* wsdl
* partners (optional)
The WSDL catalog (wsdlCatalog.xml) file, partner definition (.pdef) files, and process
deployment descriptor (.pdd) files are described in "ActiveBPEL Engine File Formats"
(file_formats.txt).
As an example, let's say you have one BPEL file my_process.bpel and two WSDL files
service1.wsdl and service2.wsdl. Your directory structure would look something like this:
mybpel
META-INF

Future Internet Core Platform
D.3.4.2 FI-WARE User and Programmers Guide Page 69
wsdlCatalog.xml
bpel
my_process.bpl
my_process.pdd
wsdl
service1.wsdl
service2.wsdl
The partners directory is not necessary unless you have .pdef files.
Using this directory structure, create the archive and copy it to your servlet container. Here's
how you would deploy your BPEL process to Tomcat (remove "partners" from the jar
command if you don't have a partners directory):
Windows:
C:\> cd mybpel
C:\mybpel> jar cf mybpel.bpr *.pdd META-INF bpel partners wsdl
C:\> cp mybpel.bpr $CATALINA_HOME/bpr
Unix:
% cd mybpel
% jar cf mybpel.bpr *.pdd META-INF bpel partners wsdl
% cp mybpel.bpr $CATALINA_HOME/bpr
It is fine for more than one .bpel file or .pdd file to live in the same .bpr deployment archive.
Your WSDL files could live anywhere, even on another machine. Packaging them inside the
.pdd lets the BPEL engine get to them quicker.
6.2.2 The Engine
If the ActiveBPEL engine is running, soon after you deploy your BPEL process the
ActiveBPEL engine will notice the .bpr file and read it. Your BPEL process is ready to use.
See "Starting the ActiveBPEL Engine" in install_engine.txt for instructions on starting and
stopping the engine.
"Engine Status Information" in install_engine.txt describes how to view the runtime status of
Web services, the engine, and BPEL processes.

Future Internet Core Platform
D.3.4.2 FI-WARE User and Programmers Guide Page 70
7 Light Semantic Composition - User and Programmer Guide
You can find the content of this chapter as well in the wiki of fi-ware.
7.1 Introduction
This documentation is related to the Light Semantic Composer which main target is to
facilitate the design process of a Service Composition aided by semantics.
7.2 User Guide
The purpose is to provide the getting-started guide for helping readers to get familiarized with
the tools explaining the main functionality and providing some screenshots that will guide the
process.
The scope of the document is to provide the functionalities regarding the Lightweight
Semantic Composer and therefore how to get a service composition aided by this
components. Afterwards, how to deploy and execute it in the Activiti engine. To get more
information about the rest of functionalities on the editor and the engine, please visit the
Activiti website to enter into detail: http://www.activiti.org/userguide
7.2.1 Login to GE
You can access to the Lightweight Semantic Composition GE that is integrated with the
Activiti engine through the URL http://<host>:8080/ActivitiCompelExplorer2
There are three users to access to the integrated environment:

Future Internet Core Platform
D.3.4.2 FI-WARE User and Programmers Guide Page 71
kermit/kermit --> Role: admin
gonzo/gonzo --> Role: manager
fozzie/fozzie --> Role: user
After login, you enter in the application and, depending of the associated role, you can see
the allowed functionalities in your Dashboard:
In the main view there are the Requests that are associated to you or your group (see the
Activiti documentation).
7.2.2 Access to the Editor
Clicking on the Process-->Model Workspace, you can access to the Editor.

Future Internet Core Platform
D.3.4.2 FI-WARE User and Programmers Guide Page 72
We can create, import, edit (existing one), copy and delete a model. When we create a “New
model”, you have to introduce the name since the diagram will be stored in the database.

Future Internet Core Platform
D.3.4.2 FI-WARE User and Programmers Guide Page 73
When you create a new diagram or edit existing one, you enter in the Lightweight Semantic
Composition Editor that is formed by four widgets: Composition Editor, Ontology Browser,
Semantic Annotations and Service List. Each of these widgets shows an individual behavior
but all of them are related one to each other.
In one screen you can access to all the widgets exposed by the formed description.
7.2.3 Composition Editor
It is the main tool and will drive the composition of services. Dragging and Dropping elements
from the palette, the user can design the Service Composition based on the standard
notation BPMN2.0. Through this notation, it is possible to interconnect any kind of service
that can be aggregated into our composition following the work flow designed by the user. It
is important to note that the aim of this tool is at providing the elements to create the flow in
the composition.
We can drag and drop components from the pallet in the left side to the editor panel.
We can also add properties to each of the components selecting them with the panel
in the right side.

Future Internet Core Platform
D.3.4.2 FI-WARE User and Programmers Guide Page 74
For the rest of functionalities, please access to the Activiti documentation.
7.2.4 Ontology Browser Widget
Once the user has designed the composition as a set of service tasks[1] connected through
a common workflow, the next step is to bind each of these individual tasks with some
external service that will actually implement it. This task binding is performed on behalf of the
user by a backend semantic matchmaking algorithm which matches composition tasks with
real available services. This matching approach requires that the user describes each
composition task using light semantic annotations selected from concepts of some domain
specific vocabularies or ontologies.
Once the user select a domain specific ontology, the user can define the nature of each of
the tasks that participates in the composition, and latter on the application will suggest to the
user real services that semantically matches with the description in order to obtain the
desired result.
[1] In BPMN a task is a single unit of work that a process consists of. A service task is a task
executed by invoking an external service
Click on the combo "Select Ontolgy" abd select the ontology
Click on the button "Load" to see the ontology as a tree

Future Internet Core Platform
D.3.4.2 FI-WARE User and Programmers Guide Page 75
The next step after designing the composite flow and selecting the ontology is to describe
each task by attaching to it annotations that refer to concepts taken from the selected
ontology. Every task will be defined by annotations such as Functional Requirements, Input,
Output and Non Functional Requirements. Once the ontology is loaded and the task is
selected in the composition, we can select one concept from the ontology and assign its
value to one out of the former four features of the task through the combo box provided by
the widget.
Select one concept on the Ontology
Scroll down in the widget to the bottom
Select in the combo "Annotation Type" the desired type of annotation on the selected
item
Click in the button "Add" to add the concept to the annotation.

Future Internet Core Platform
D.3.4.2 FI-WARE User and Programmers Guide Page 76
7.2.5 Semantic Annotations Widget
The functionality of this widget is to show the current annotations attached to each task. The
user can browse through the task to check how the values of the annotations showed by this
widget changes as the user selects another task in the composition.
Select an item on the design pallet
Scroll up and down through the widget to see all the Concepts assotiated to the
Annotations on the selected item
On the other hand, once the user has finished annotating a task the button “search” will
display in the following widget the services that the tool is able to semantically match with the
described task. This action is in real time, since if the user changes one of the annotations
and makes again the search the new results will be showed by the Services List Widget.
Select an item on the design pallet
Scroll down to the bottom to reach the button "Search"

Future Internet Core Platform
D.3.4.2 FI-WARE User and Programmers Guide Page 77
7.2.6 Services List Widget
This widget has two main functionalities. The first one is to show the list of services that
semantically matches with the annotations made by the user in the selected task. The name
of the service, the operation and the link to the description of the service will be shown in a
table mode. The second functionality is related to the selection of one the services that
comes from the services list. Only one service will be executed by the task, so it is the user
who decides with a selective combo which of the candidate services will be bound to the
task.
Select an item on the design pallet
Make all the annotations on the item following the above instructions
Select one of the listed services and click on "Bind" to associate the item to a
concrete service

Future Internet Core Platform
D.3.4.2 FI-WARE User and Programmers Guide Page 78
7.2.7 Save the process
When you have finished the design of your process, you can save it, clicking on the icon .
You have to confirm or change the data.
Now, you can close the Editor, clicking on the icon If you try to close the editor without to
save the changes, the Editor detects it and asks you to confirm.

Future Internet Core Platform
D.3.4.2 FI-WARE User and Programmers Guide Page 79
The process has been stored in the database, so you can modify it again, maintaining all the
annotation and binding (remember to click on the annotated task).
7.2.8 Generate BPMN 2.0 file
You can also generate a BPMN2.0 file compliant with the associated services that you have
bound in the Editor. This functionality introduces all the standard tags in the generated file,
binding the WS indicated in the process (through the associated WSDL).
Go to the Model Action --> Export Model Compel.

Future Internet Core Platform
D.3.4.2 FI-WARE User and Programmers Guide Page 80
The application generates the executable file with all the binding task description.
Future Internet Core Platform
D.3.4.2 FI-WARE User and Programmers Guide Page 81
You can download or open it. In the file, the application has introduced the references of the
Web Services.
7.2.9 Limitations and recommendations
The development roadmap for this GE implementation considers important changes in the
Light Semantic Composition Editor UI, in particular with regards to the semantic widgets and
the integration with other GE implementations (Marketplace, Repository), whereby new
versions of this document will detail those changes.
7.3 Programmer guide
Since the Light Semantic Composition is a Generic Enabler which provides mainly (UI)
frontend functionality to different roles (e.g. business analysts and services integrators), we
do not distinguish between the User and Programmers Guide. Please refer to the User Guide
section for more information.

Future Internet Core Platform
D.3.4.2 FI-WARE User and Programmers Guide Page 82
8 Service Composition - User and Programmer Guide
You can find the content of this chapter as well in the wiki of fi-ware.
Disclaimer:
The partner providing this component as software asset left the related work package and
can’t provide further support for the software and software related deliverables.
The Ericsson Composition Engine (ECE) User and Programmer Guide can be found at
https://forge.fi-ware.eu/docman/view.php/7/1593/ECE_Advanced_Composition_User_Guide-
19817-CXP9040086_21Uen-G.pdf. Users that register to use the ECE automatically get a
link to the user guide.

Future Internet Core Platform
D.3.4.2 FI-WARE User and Programmers Guide Page 83
9 Mediator - User and Programmer Guide You can find the content of this chapter as well in the wiki of fi-ware.
9.1 Introduction
The Mediator it is based on the open source packages WSO2 ESB and Apache Camel.
Moreover it includes custom TI code and custom virtual proxy configuration specifically
developed for FIWARE. The current version of the Mediator does not provide remote API so
the creation of mediation services can be only performed using WSO2 ESB funcionalities of
the Mediator and its custom pages for coding Apache Routes through Java classes, detailed
below (or any other open source tools focused on coding Apache Camel routes through Java
classes). For these reasons the relevant User and Programming Guide, for the current
release of the Mediator, are those related to the open source packages which the Mediator is
based on.
1. Apache Synapse Virtual proxy
2. Apache Camel routes
9.2 User Guide
The user and programmer guide of the two open source technologies mentioned in the
Introduction can be found respectively at:
wso2-esb 4.0.0. User Guide http://wso2.org/project/esb/java/4.0.0/docs/user_guide.html
Apache-camel 2.7.0 Manual http://camel.apache.org/manual/camel-manual-2.7.0.pdf
For further aspect of this component, please refer to the section "Programmer Guide"
9.3 Programmer Guide
9.3.1 Camel Routes Handling
Mediator Web GUI has pages dedicated to Apache Camel Routes coding and handling.
These pages allows to
view currently deployed Mediator Apache Routes
view an Apache Route code in Java and in XML
edit an Apache Route Java code (selecting "Full Java" and then "edit")
add an Apache Route to the Mediator, uploading an archive file. The archive (e.g.:
routeName.zip) must structured as:
o jar libraries in the root folder;
o a directory (the name is the route name) in the root folder;
o source java files and resources, inside the preceding folder, with package
structure.
o example image:

Future Internet Core Platform
D.3.4.2 FI-WARE User and Programmers Guide Page 84
9.3.2 User Logs
In the Monitoring tab, the User Logs custom entry shows a page with additional log
informations:
Requests per User
Requests per User/Service
Last Requests
To log this information for a WSO2 proxy service you have to add the custom
LoggingMediator at the start of the inSequence of the proxy service. Usage example:
<inSequence>
<class
name="it.telecomitalia.ictlab.logging.mediator.LoggingMediator">
<property name="otherInfoXpath">
<otherInfoXpath />
</property>
<property name="dbConnection">
<dbConnection>
<url>jdbc:h2:repository/database/WSO2CARBON_DB</url>
<username>wso2carbon</username>
<password>wso2carbon</password>
<driver>org.h2.Driver</driver>
</dbConnection>
</property>
</class>
[...]

Future Internet Core Platform
D.3.4.2 FI-WARE User and Programmers Guide Page 85
9.3.3 Examples
In the following we describe examples of the Mediation Services definition via WSO2 ESB
and Apache Camel, written following the above guides.
9.3.3.1 WSO2 ESB
Example 1: Protocol Transformation TCP2HTTP
<proxy xmlns="http://ws.apache.org/ns/synapse"
name="TCPServiceExample" transports="tcp" startOnLoad="true">
<target>
<endpoint>
<address uri="http://<ServiceExample url>" />
</endpoint>
<outSequence>
<send />
</outSequence>
</target>
</proxy>
Example 2: WS-Security
Virtual proxy configuration that adds WS-Security to the unsecured target service
"ServiceExample"
<proxy xmlns="http://ws.apache.org/ns/synapse"
name="SecuredServiceExampleProxy" transports="https"
startOnLoad="true">
<target>
<inSequence>
<header xmlns:wsse="http://docs.oasis-
open.org/wss/2004/01/oasis-200401-wss-wssecurity-secext-1.0.xsd"
name="wsse:Security" action="remove" />
</inSequence>
<endpoint>
<address uri="http://<ServiceExample URL>" />
</endpoint>
<outSequence>
<send />
</outSequence>
</target>
<enableSec />

Future Internet Core Platform
D.3.4.2 FI-WARE User and Programmers Guide Page 86
<policy key="conf:/repository/axis2/service-
groups/SecuredServiceExampleProxy/services/SecuredServiceExampleProx
y/policies/UTOverTransport" />
</proxy>
Example 2.1
The above example separating endpoint and proxy definition and adding validation, log, wsdl
published handling.
Endpoint definition:
<endpoint xmlns="http://ws.apache.org/ns/synapse"
name="posAdapter">
<address uri="http://polaris.cselt.it:9763/services/PosAdapter" >
<suspendOnFailure>
<errorCodes>101504</errorCodes>
<initialDuration>1000</initialDuration>
<progressionFactor>1.0</progressionFactor>
<maximumDuration>30000</maximumDuration>
</suspendOnFailure>
<markForSuspension>
<errorCodes>101504</errorCodes>
<retriesBeforeSuspension>5000</retriesBeforeSuspension>
<retryDelay>5000</retryDelay>
</markForSuspension>
<timeout>
<duration>180000</duration>
<responseAction>discard</responseAction>
</timeout>
</address>
</endpoint>
Proxy Service definition:
<proxy xmlns="http://ws.apache.org/ns/synapse"
name="PosAdapterProxy" transports="https" statistics="enable"
trace="enable" startOnLoad="true">
<target endpoint="posAdapter">
<inSequence>
<class
name="it.telecomitalia.ictlab.logging.mediator.LoggingMediator">
<property name="otherInfoXpath">
<otherInfoXpath />
Future Internet Core Platform
D.3.4.2 FI-WARE User and Programmers Guide Page 87
</property>
<property name="dbConnection">
<dbConnection>
<url>jdbc:h2:repository/database/WSO2CARBON_DB</url>
<username>wso2carbon</username>
<password>wso2carbon</password>
<driver>org.h2.Driver</driver>
</dbConnection>
</property>
</class>
<log level="full" />
<validate>
<schema
key="gov:/schemas/it/telecomitalia/ictlab/posadapterschema/PosAdapte
rSchema.xsd" />
<resource
location="../ictcommondatamodelschema/ICTCommonDataModelSchema.xsd"
key="gov:/schemas/it/telecomitalia/ictlab/ictcommondatamodelschema/I
CTCommonDataModelSchema.xsd" />
<on-fail>
<sequence
key="conf:/repository/synapse/default/sequences/validationFaultSeque
nce" />
</on-fail>
</validate>
<header xmlns:wsse="http://docs.oasis-
open.org/wss/2004/01/oasis-200401-wss-wssecurity-secext-1.0.xsd"
name="wsse:Security" action="remove" />
</inSequence>
<outSequence>
<log level="full" />
<validate>
<schema
key="gov:/schemas/it/telecomitalia/ictlab/posadapterschema/PosAdapte
rSchema.xsd" />
<resource
location="../ictcommondatamodelschema/ICTCommonDataModelSchema.xsd"
key="gov:/schemas/it/telecomitalia/ictlab/ictcommondatamodelschema/I
CTCommonDataModelSchema.xsd" />
<on-fail>

Future Internet Core Platform
D.3.4.2 FI-WARE User and Programmers Guide Page 88
<sequence
key="conf:/repository/synapse/default/sequences/validationLogSequenc
e" />
</on-fail>
</validate>
<send />
</outSequence>
</target>
<publishWSDL
key="gov:/wsdls/it/telecomitalia/ictlab/posadapter/_2009_11/posAdapt
er.wsdl">
<resource
location="../../../../../../schemas/it/telecomitalia/ictlab/ictcommo
ndatamodelschema/ICTCommonDataModelSchema.xsd"
key="gov:/schemas/it/telecomitalia/ictlab/ictcommondatamodelschema/I
CTCommonDataModelSchema.xsd" />
<resource
location="../../../../../../schemas/it/telecomitalia/ictlab/posadapt
erschema/PosAdapterSchema.xsd"
key="gov:/schemas/it/telecomitalia/ictlab/posadapterschema/PosAdapte
rSchema.xsd" />
<resource
location="../ictcommondatamodelschema/ICTCommonDataModelSchema.xsd"
key="gov:/schemas/it/telecomitalia/ictlab/ictcommondatamodelschema/I
CTCommonDataModelSchema.xsd" />
</publishWSDL>
<enableSec />
<policy key="conf:/repository/axis2/service-
groups/PosAdapterProxy/services/PosAdapterProxy/policies/UTOverTrans
port" />
</proxy>
Example 3: Custom Java Mediator
In order to use custom mediation task inside a mediation service you have to use the custom
built-in mediator in the proxy service configuration, for example:
<class
name="it.telecomitalia.fiware.mediator.irrigation.IrrigationMediatio
nTask" />
The java class shall extends the abstract class:
org.apache.synapse.mediators.AbstractMediator and override the method public Boolean
mediate(MessageContext context)
To get an example of custom mediator see the webinar folder into the fiware svn repository:
https://forge.fi-ware.eu/scmrepos/svn/apps/trunk/mediator-usecase/webinar-usecase-201211
Example 4: data transformations
To use a xslt transformation
To use xquery language

Future Internet Core Platform
D.3.4.2 FI-WARE User and Programmers Guide Page 89
To use the xpath built in capability in order to manipulate the message
To use a custom java mediator - see Example 3
Mediation Service Example
<proxy xmlns="http://ws.apache.org/ns/synapse"
name="company4WeatherMonitorAndReact" transports="http"
statistics="disable" trace="disable" startOnLoad="true">
<target endpoint="mailAdapter">
<inSequence>
<log level="full" />
<class
name="it.telecomitalia.fiware.mediator.irrigation.IrrigationMediatio
nTask" />
<log level="full" />
<xslt
key="gov:/transformations/fiwareCreateMailForWeatherEvent.xslt">
<property name="mailRecipient"
value="[target_email_address]" />
</xslt>
<log level="full" />
</inSequence>
<outSequence>
<log level="full" />
<send />
</outSequence>
</target>
</proxy>
In this case the service mediator performs a xslt transformation, apply a custom mediation
task written in java code and send the transformed message to a mail service.
Example 4.1: XSLT transformation
The XSLT mediation capability applies the specified XSLT transformation to the selected
element of the current message payload. The source attribute specifies which element to be
selected to apply the given XSLT transformation. In the case where the source element is not
specified, it uses the first child of the soap body as the selected element. Optionally
parameters could be passed into the transformations through the 'property' elements. These
properties are corresponding to the XSL parameters and can be accessed during
transformation by <xsl:param name="{the name of the property}" />.
Finally, the 'resource' element can be used to resolve XSLT imports and includes from the
repository. You can upload XSLT files on the Registry with the "Add Resource" functionality
of the Registry. Syntax
<xslt key="string" [source="xpath"]>
<property name="string" (value="literal" | expression="xpath")/>*

Future Internet Core Platform
D.3.4.2 FI-WARE User and Programmers Guide Page 90
<resource location="string" key="string"/>*
</xslt>
Key : The registry key to refer the xslt. This supports static and dynamic keys.
Source: Specify in which part of message (specified in xpath) the xslt should be
applied. Default is the SOAP body of the message.
Properties of the XSLT mediator: Manage the properties which would be referred
from the xslt in transformation (using get-property(prop-name) xpath extension
function).
o Property Name: Name of the property.
o Property Type: Whether it is a static value or an xpath expression.
o Value/ Expression: The static value or the xpath expression.
o NSEditor: Specify the namespaces that are used in the xpath expression.
Example 4.2: XQuery mediation capability
The XQuery mediation capability can be used to perform an XQuery transformation. The 'key'
attribute specifies the registry key for looking up XQuery script that going to be used for
define transformation. You can upload XSLT files on the Registry with the "Add Resource"
functionality of the Registry. The optional 'target' attribute specifies the node of the SOAP
message that should be transformed. In case where the target value is not specified, then
the first child of the SOAP body is selected. The 'variable' elements define a variable that
could be bound to the dynamic context of the XQuery engine in order to access those
variables during the XQuery script invocation .
In the variable definition, it is possible to specify just a literal value, or an XPath expression
over the payload, or even specify a registry key or a registry key combined with an XPath
expression that selects the value of the variable. Using key attribute of the variable, it is
possible to bind an XML document located in the registry so that in the transformation that
too can be used. The name of the variable corresponds to the name of variable declaration in
the XQuery script. The type of the variable must be a valid type defined by the JSR-000225
(XQJ API).
Supported Types
XQItemType.XQBASETYPE_INT -> INT
XQItemType.XQBASETYPE_INTEGER -> INTEGER
XQItemType.XQBASETYPE_BOOLEAN -> BOOLEAN
XQItemType.XQBASETYPE_BYTE - > BYTE
XQItemType.XQBASETYPE_DOUBLE -> DOUBLE
XQItemType.XQBASETYPE_SHORT -> SHORT
XQItemType.XQBASETYPE_LONG -> LONG
XQItemType.XQBASETYPE_FLOAT -> FLOAT
XQItemType.XQBASETYPE_STRING -> STRING
XQItemType.XQITEMKIND_DOCUMENT -> DOCUMENT
XQItemType.XQITEMKIND_DOCUMENT_ELEMENT -> DOCUMENT_ELEMENT
XQItemType.XQITEMKIND_ELEMENT -> ELEMENT
Syntax

Future Internet Core Platform
D.3.4.2 FI-WARE User and Programmers Guide Page 91
<xquery key="string" [target="xpath"]>
<variable name="string" type="string" [key="string"]
[expression="xpath"] [value="string"]/>?
</xquery>
Key: The key that represent the xquery transformation.
Target: (optional) Specify the node of the message that should be transformed using
an xpath expression. ( default to the first child of the SOAP body ) The namespace
prefixes used in the expression can be defined by clicking the namespaces link in
front of the 'Target' input field.
Variables for the XQuery Mediator: Defines values/expressions that could be bound
to the dynamic context of the XQuery engine in order to access those variables
through the XQuery script.
o Variable Type: The 'type' of the variable must be a valid type defined by the
JSR-000225 (XQJ API). The supported types are defined in the Supported
Types section
o Variable Name: The name of the variable should correspond to the name of
variable declaration in the XQuery script.
o Value Type: Whether the value of the variable is a static value or an
expession.
o Value/Expression: Static value or the expression.
o Registry Key: Key, if the value is retrieved from the registry.
o NSEditor: Defines the namespaces for the prefixes used in the xpath query.
Examples
<xquery key="xquery\example.xq">
<variable name="payload" type="ELEMENT"/>
</xquery>
In the above configuration, XQuery script is in the registry and that script can be picked by
key xquery\example.xq. There is a one variable name payload and type as ELEMENT. As
there is no expression in the variable definitions, default value - the first child of SOAP Body
is used as the value of variable payload. Within XQuery script, you can access this variable
by defining declare variable $payload as document-node() external; . Refer sample 390 and
391 for more information.
<variable name="commission" type="ELEMENT"
key="misc/commission.xml"></variable>
A variable definitions that pick a XML resource from the registry using key
misc/commission.xml and bind in to XQuery Runtime so that it can be accessed with in
XQuery script. Refer sample 391 for more information.
<variable name="price" type="DOUBLE"
expression="self::node()//m0:return/m0:last/child::text()"
xmlns:m0="http://services.samples/xsd"/>
A variable whose value is calculated from current message SOAP Payload using an
expression. Here, value is a type of double.

Future Internet Core Platform
D.3.4.2 FI-WARE User and Programmers Guide Page 92
Example 4.3: Enrich mediation capability
Enrich mediation capability can process a message based on a given source configuration
and then perform the specified action on the message by using the target configuration. It
basically gets an OMElement using the configuration specified in the source and then modify
the message by putting it on the current message using the configuration in the target.
Syntax
<enrich>
<!source [clone=true|false]
[type=custom|envelope|body|property|inline] xpath="" property="" />
<target [action=replace|child|sibiling]
[type=custom|envelope|body|property|inline] xpath="" property="" />
</enrich>
You have the following configuration under the Enrich mediation capability.
Source Configuration
o Clone : By setting the clone configuration, the message can be cloned or else
use as a reference during the enriching. The default value for clone is false.
True/False
o Type : Specifies that the type that the mediator use from the original message
to enrich the modified message that pass through the mediator.
o Custom : Custom XPath value If there are any namespaces involved in the
XPath expression, you can specify it in the Namespace Editor.
Envelope : Envelope of the original message will be used for enriching.
Body : Body of the original message will be used for enriching.
Property : Specifies a property.
Inline : Specifies an inline XML value
Target Configuration
o Action : By specifying the action type the relevant action can be applied to
outgoing message.
Replace : Replace the xml message based on the target type specified
on the target configuration.
Child : Adding as a child of specified target type.
Sibling : Adding as a sibling of specified target type.
o Type : Specifies that the type of enriching the outgoing message.
Custom : Custom XPath value. If there are any namespaces involved
in the XPath expression, you can specify it in the Namespace Editor as
in the Source Configuration.
Envelope : Envelope of the original message will be used for enriching.
Body : Body of the original message will be used for enriching.
Property : Specifies a property.
Example
<enrich>
<!source clone="false" type="envelope" xpath="" property="" />
<target action="replace" type="body" xpath="" property="" />

Future Internet Core Platform
D.3.4.2 FI-WARE User and Programmers Guide Page 93
</enrich>
Example 5: Throttling
You can add throttling to a Service, allowing or denying service access to specified IPs only
or limiting max request calls to the Service in a unit of time (this should facilitate the smooth
operation of Web services)
Follow the instructions below to add throttling to a service.
1. Sign in. Enter your user name and password to log on to the ESB Management Console.
2. Click on "Main" in the left menu to access the "Manage" menu.
3. In the "Manage" menu, click on "List" under "Web Services."
4. The "Deployed Services" page appears.
5. Select the service for which you want to enable throttling. The "Service Dashboard" page
(for that service) appears.
6. In the "Quality of Service Configuration" panel, click "Access Throttling."
7. The "Throttling Configuration" page appears.
8. In the "Enable Throttling" list, select "Yes" from the drop-down menu.
9. The existing throttle configuration appears in the wizard.
10. Click "Add New Entry."
To enter new parameters or modify existing parameters, select "Allow" in the "Access"
column.
11. Specify the parameters of a service.
Parameters for Throttling Configuration:
Range - The IP address range or the domain is restricted from accessing the service.
Requests from such clients will be restricted based on the specified values.
Type - This indicates the type of Range. It can be IP or DOMAIN. It should be IP if the
range is given as a single IP address or a range of IP addresses (for example,
10.100.1.30-10.100.1.60). It should be DOMAIN if the range is given as as a domain
(for example, *.wso2.com). If you specify configurations types of both IP and
DOMAIN, first priority will be given to DOMAIN level configurations.
Access
o Allow - Means that no restriction is applied for that range and all requests are
allowed to go in as they come in.
o Deny - Means that access is completely denied for that range.
o Control - If the Access is set to Allow or Deny then Maximum Request Count,
Unit Time and Prohibit Time Period parameters are not necessary and the
said fields are deactivated. If it is Control, then the specified constraints are
applied for that particular range.
Maximum Request Count (MRC) - If Access is set to Control, it will be the maximum
number of requests that are served within the time interval specified by the Unit Time
parameter.
Unit Time (UT) - The time period in milliseconds during which the maximum requests
served. This is the number specified by the Maximum Request Count. The throttle
starts counting the number of units from the moment it is enabled and the number of
requests served within that period.
Prohibit Time Period (PTP) - If the maximum request count is achieved before the unit
time, this is the period during which no more requests are allowed to go in. By setting
this value, the unit time slot is altered.

Future Internet Core Platform
D.3.4.2 FI-WARE User and Programmers Guide Page 94
Control Access example:
MRC = 50, UT = 50000, PTP = 5000
If 50 requests are arrived within 35000ms (35s) in a particular time
period, no more requests are taken in for another 5000ms (5s = PTP).
This time, the UT is altered to 35000ms + 5000ms = 40000ms (40s)
12. Click "Finish." Throttling will be engaged for that particular service.
Functions of Buttons:
Finish - Click "Finish" to submit the current data. When finished, your throttle
configuration will be applied and the page will be redirected to the previous page.
Reset - Click "Reset" to load the last submitted configuration.
Default - Click "Default" to load the default throttle configuration. If you want to submit
those data, you have to click Finish.
Clear - Click "Clear" to clear all the text boxes in the user interface.
Cancel - Click "Cancel" to go to the "Service Dashboard" page.
Example 6: Load balancing
A Load balanced endpoint distributes the messages (load) arriving at it among a set of listed
endpoints by evaluating the load balancing policy and any other relevant parameters. Policy
attribute of the load balance element specifies the load balance policy (algorithm) to be used
for selecting the target endpoint. Currently only the roundRobin policy is supported. failover
attribute determines if the next endpoint should be selected once the currently selected
endpoint has failed, and defaults to true. The set of endpoints among which the load is
distributed can be listed under the 'loadBalance' element.
The optional 'session' element makes the endpoint a session affinity based load balancing
endpoint. If it is specified, sessions are bound to endpoints in the first message and all
successive messages for those sessions are directed to their associated endpoints.
Currently there are two types of sessions supported in SAL endpoints. Namely HTTP
transport based session which identifies the sessions based on http cookies and the client
session which identifies the session by looking at a SOAP header sent by the client with the
QName '{http://ws.apache.org/ns/synapse}ClientID'.
<session type="http|simpleClientSession"/>?
<loadBalance [policy="roundRobin"]>
<endpoint .../>+
</loadBalance>
9.3.3.2 Apache Camel
An alternative way to develop data transformation and more in general mediation service is
through Apache Camel Routex. In this case you can leverage the data transformers provided
by Camel. Camel Route example:
public class PosRestMediator extends RouteBuilder {
private String POS_SERVICE_ENDPOINT =
"http://polaris.cselt.it:9763/PosServiceRest";
Future Internet Core Platform
D.3.4.2 FI-WARE User and Programmers Guide Page 95
private String POS_SERVICE_SCHEMA = "posServiceRestSchema.xsd";
@Override
public void configure() throws Exception {
//Register custom XSLTUriResolver in Spring Application
Context (registry)
SpringCamelContext camelContext =
(SpringCamelContext)getContext();
XmlWebApplicationContext context =
(XmlWebApplicationContext)camelContext.getApplicationContext();
DefaultListableBeanFactory beanFactory =
(DefaultListableBeanFactory) context.getBeanFactory();
try {
beanFactory.registerSingleton("XsltURIResolver", new
XsltURIResolver());
} catch (Exception e) {
e.printStackTrace();
}
//PosService
from("servlet:///posService?matchOnUriPrefix=true")
.streamCaching()
.to("log:logger")
.to("direct:validatePosService")
.choice()
.when(new AuthPredicate("PosService"))
.process(new DbLogProcessor())
.removeHeader("Authorization")
.to(POS_SERVICE_ENDPOINT +
"/rest?bridgeEndpoint=true&throwExceptionOnFailure=false")
.to("log:logger")
.to("direct:validatePosService")
.to("log:logger")
.otherwise()
.to("direct:return401_3")
.end();
//WADL
from("servlet:///posService/wadl")

Future Internet Core Platform
D.3.4.2 FI-WARE User and Programmers Guide Page 96
.to(POS_SERVICE_ENDPOINT +
"/rest/application.wadl?bridgeEndpoint=true")
.setHeader("importSchema", new
ConstantExpression(POS_SERVICE_SCHEMA))
.process(new BaseUrlProcessor("camelServices/posService"))
.to("xslt:wadl.xsl");
//Schema import
from("servlet:///posService/" + POS_SERVICE_SCHEMA)
.to(POS_SERVICE_ENDPOINT + "/" + POS_SERVICE_SCHEMA
+"?bridgeEndpoint=true")
.setHeader("Content-Type", new
ConstantExpression("application/xml"));
//HTML docs
from("servlet:///posService/doc")
.to(POS_SERVICE_ENDPOINT +
"/rest/application.wadl?bridgeEndpoint=true")
.setHeader("importSchema", new
ConstantExpression(POS_SERVICE_SCHEMA))
.process(new BaseUrlProcessor("camelServices/posService"))
.to("xslt:wadl.xsl")
.to("xslt:wadl_documentation.xsl?transformerFactoryClass=net.sf.saxo
n.TransformerImpl&uriResolver=XsltURIResolver");
//PosService XSD validation
from("direct:validatePosService")
.choice()
.when(header("Content-
Type").isEqualTo("application/xml"))
.to("log:validationLogger")
.to("validator:" + POS_SERVICE_ENDPOINT + "/" +
POS_SERVICE_SCHEMA)
.to("log:validationLogger")
.end();
//Prepare 401 unauthorized response

Future Internet Core Platform
D.3.4.2 FI-WARE User and Programmers Guide Page 97
from("direct:return401_3")
.setHeader(Exchange.HTTP_RESPONSE_CODE, new
ConstantExpression("401"))
.setHeader("WWW-Authenticate", new ConstantExpression("Basic
realm=\"WSO2\""))
.setBody(new ConstantExpression(""))
.removeHeader("Authorization");
}
}