progress artix data services getting started · pdf fileworks, objectstore, openedge, orbix,...
TRANSCRIPT

Progress® Artix® Data Services
Getting StartedVersion 3.9, May 2009

© 2009 Progress Software Corporation and/or its affiliates or subsidiaries. All rights reserved.
These materials and all Progress® software products are copyrighted and all rights are reserved by Progress Software Corporation and/or its affiliates or subsidiaries. The infor-mation in these materials is subject to change without notice, and Progress Software Corporation and/or its affiliates or subsidiaries assume no responsibility for any errors that may appear therein. The references in these materials to specific platforms sup-ported are subject to change.
Actional, Actional (and design), Allegrix, Allegrix (and design), Apama, Apama (and Design), Artix, Business Empowerment, DataDirect (and design), DataDirect Connect, DataDirect Connect64, DataDirect Technologies, DataDirect XML Converters, DataDirect XQuery, DataXtend, Dynamic Routing Architecture, EasyAsk, EdgeXtend, Empowerment Center, Fathom, IntelliStream, IONA, IONA (and design), Mindreef, Neon, Neon New Era of Net-works, ObjectStore, OpenEdge, Orbix, PeerDirect, Persistence, POSSENET, Powered by Progress, PowerTier, Progress, Progress DataXtend, Progress Dynamics, Progress Business Empowerment, Progress Empowerment Center, Progress Empowerment Program, Progress OpenEdge, Progress Profiles, Progress Results, Progress Soft-ware Developers Network, Progress Sonic, ProVision, PS Select, SequeLink, Shadow, ShadowDirect, Shadow Interface, Shadow Web Interface, SOAPscope, SOAPStation, Sonic, Sonic ESB, SonicMQ, Sonic Orchestration Server, Sonic Software (and design), SonicSynergy, SpeedScript, Stylus Studio, Technical Empowerment, Web-Speed, Xcalia (and design), and Your Software, Our Technology-Experience the Connection are registered trade-marks of Progress Software Corporation or one of its affiliates or subsidiaries in the U.S. and/or other countries.AccelEvent, Apama Dashboard Studio, Apama Event Manager, Apama Event Modeler, Apama Event Store, Apama Risk Firewall, AppsAlive, AppServer, ASPen, ASP-in-a-Box, BusinessEdge, Cache-Forward, DataDirect Spy, DataDirect SupportLink, FUSE, FUSE Mediation Router, FUSE Message Broker, FUSE Services Framework, Future Proof, Ghost Agents, GVAC, High Performance Integration, Looking Glass, ObjectCache, ObjectStore Inspector, ObjectStore Performance Expert, OpenAccess, Orbacus, Pantero, POSSE, ProDataSet, Progress ESP Event Manager, Progress ESP Event Modeler, Progress Event Engine, Progress RFID, PSE Pro, SectorAlliance, SeeThinkAct, SmartBrowser, SmartComponent, SmartDataBrowser, SmartDataObjects, SmartDataView, Smart-Dialog, SmartFolder, SmartFrame, SmartObjects, SmartPanel, SmartQuery, SmartViewer, SmartWindow, Sonic Business Integration Suite, Sonic Process Manager, Sonic Collaboration Server, Sonic Continuous Availability Architecture, Sonic Database Service, Sonic Workbench, Sonic XML Server, StormGlass, The Brains Behind BAM, WebClient, Who Makes Progress, and Your World. Your SOA. are trademarks or service marks of Progress Soft-ware Corporation or one of its affiliates or subsidiaries in the U.S. and other countries.
Java and all Java-based marks are trademarks or registered trademarks of Sun Microsystems, Inc. in the U.S. and other countries.Any other trademarks contained herein are the property of their respective owners.
Updated: May 20, 2009

Contents
Preface 5Chapter 1 Creating Projects 7Before You Begin 8
Starting ADS Designer 9Downloading Sample Getting Started Data 10
Creating a Project 11
Chapter 2 Creating Data Models 13Creating a Data Model from a Text File 14
Creating a Transactions Data Model from Transactions.txt 15Creating a Customers Data Model from Customers.txt 24
Creating a Data Model from an XML Schema 30Creating a Data Model from a Set of XML Documents 34Creating a Data Model from a Database 38Creating a Data Model Manually 44
Creating an Accounts Data Model Manually 45Creating a Customers Data Model Manually 55
Adding Validation Rules 63Adding Validation Rules for Accounts Data Model 64Adding Validation Rules for Transactions Data Model 69
Chapter 3 Creating Transformations 73Creating a Simple Transformation 74
Starting to Create a Transformation 75Creating a Local Transformation 78Testing the Local Transformation in Your Main Transformation 81Creating a Filter 83Testing the Filter in Your Main Transformation 85
Making Your Transformation More Complex 87Before You Continue 88Adding More Input Models to Your Main Transformation 90Adding Local Transformations 92
3
CONTENTS
Adding Functions 95Adding Nested Local Transformations 100Adding Hash Tables 108Adding Filters 112Adding Java Methods 118Adding Introspect Functions 122
Chapter 4 Creating a Simple Java Application 125Generating Java Code 126
Setting Compile Options 127Building the Code 131Finding the Generated Code 134Sample Generated Code 136
Writing the Application 142Compiling and Running the Application 149
Chapter 5 Overview of Ant Tasks 155
4

PrefaceWhat This Book CoversThis book is intended to help you get started quickly with Progress Artix Data Services. It walks you through the various tasks that you can perform in the ADS Designer.
Who Should Read This BookThis book is intended for Artix Data Services users who want to quickly become familiar with, and learn how to use, Artix Data Services.
PrerequisitesSee the Artix Data Services Installation Guide for a full list of supported platforms and other prerequisites to using Artix Data Services.
How This Book Is StructuredThis book contains the following chapters:
• Chapter 1, “Creating Projects” describes how to create projects using the ADS Designer.
• Chapter 2, “Creating Data Models” describes how to create data models in the ADS Designer from various different sources. It also describes how to validate data models to ensure that they can successfully parse valid data.
• Chapter 3, “Creating Transformations” describes how to create transformations in the ADS Designer that allow you to map various elements in one or more input data models to various elements in an output data model. It also describes how to run your transformations to ensure that they are valid.
5

PREFACE
• Chapter 4, “Creating a Simple Java Application” describes how to generate Java code from the sample data models and transformations you created in earlier chapters. It also shows how you create and run a simple Java application that uses the generated code to perform various tasks.
• Chapter 5, “Overview of Ant Tasks” gives you an overview of the Artix Data Services Ant tasks that are packaged within the artix-ds-designerXXX.jar file. These enable deployment and exports to be automated. This is useful where the building of Artix Data Services generated components is to be included within an overall project build, without any requirement to manually deploy the components from within the ADS Designer.
The Artix Data Services Documentation LibraryFor information on the organization of the Artix Data Services documentation library and the document conventions used, see the Library Overview.
6

CHAPTER 1
Creating ProjectsIn Artix Data Services, projects are used to store the data models, transformations and other working files for the various tasks you perform. Creating a project is, therefore, a prerequisite before you can perform any other task in Artix Data Services.
In this chapter This chapter discusses the following topics:
Before You Begin page 8
Creating a Project page 11
7
CHAPTER 1 | Creating Projects
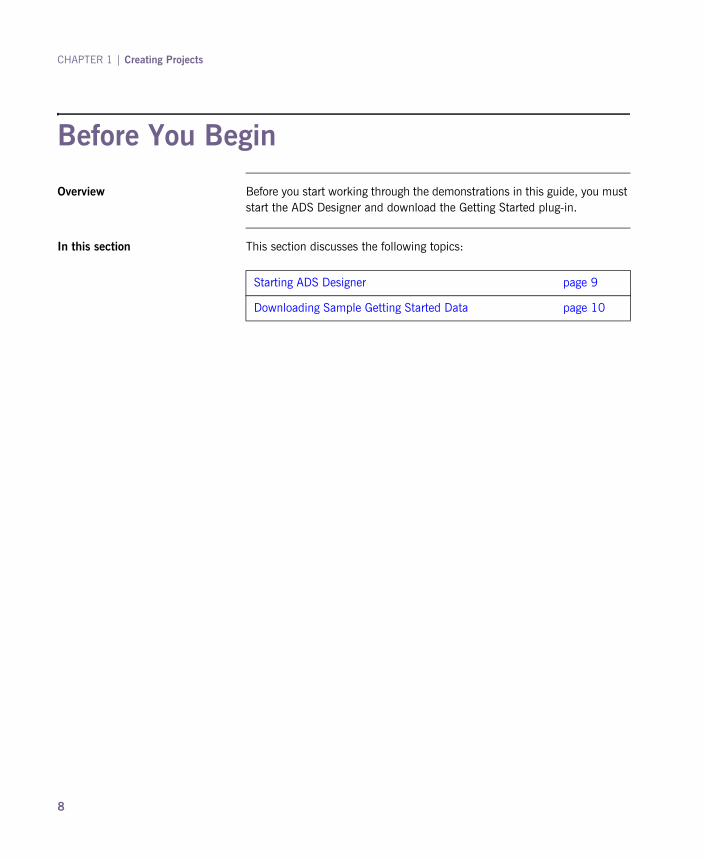
Before You Begin
Overview Before you start working through the demonstrations in this guide, you must start the ADS Designer and download the Getting Started plug-in.
In this section This section discusses the following topics:
Starting ADS Designer page 9
Downloading Sample Getting Started Data page 10
8

Before You Begin
Starting ADS Designer
Starting on Windows To start the ADS Designer on Windows, do any one of the following:
• From the Windows Start menu, select:
(All) Programs > Progress > Artix Data Services > ADS Designer
• Click the icon on your Windows desktop.
• Use Windows Explorer to navigate to your Artix Data Services installation directory and double-click the artix-ds-designer.exe file.
Starting on UNIX To start the ADS Designer on UNIX:
• Run the artix-ds-designer.sh command from your Artix Data Services installation directory.
9
CHAPTER 1 | Creating Projects
Downloading Sample Getting Started Data
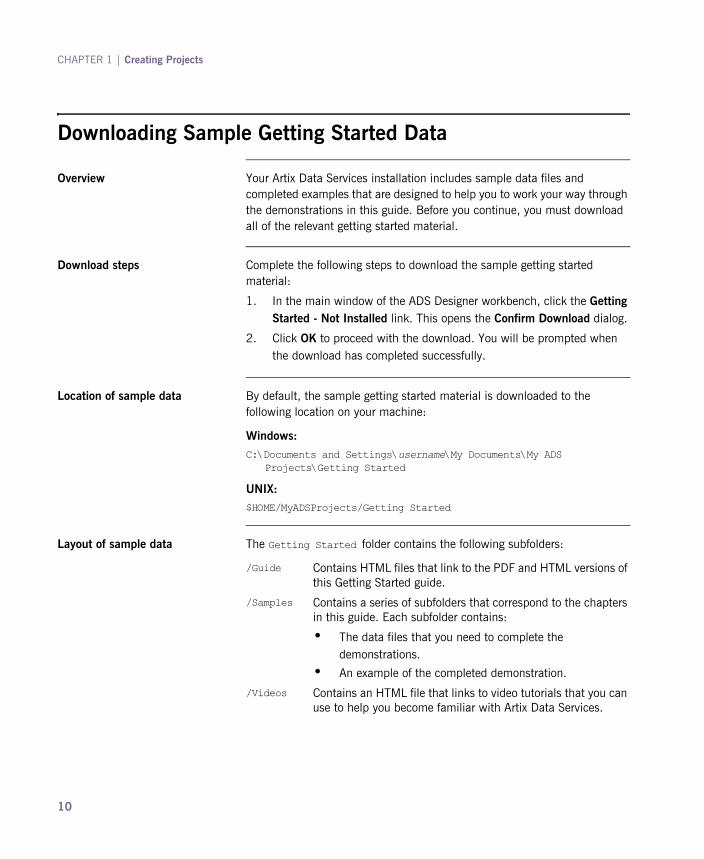
Overview Your Artix Data Services installation includes sample data files and completed examples that are designed to help you to work your way through the demonstrations in this guide. Before you continue, you must download all of the relevant getting started material.
Download steps Complete the following steps to download the sample getting started material:
1. In the main window of the ADS Designer workbench, click the Getting Started - Not Installed link. This opens the Confirm Download dialog.
2. Click OK to proceed with the download. You will be prompted when the download has completed successfully.
Location of sample data By default, the sample getting started material is downloaded to the following location on your machine:
Windows:C:\Documents and Settings\username\My Documents\My ADS
Projects\Getting Started
UNIX:$HOME/MyADSProjects/Getting Started
Layout of sample data The Getting Started folder contains the following subfolders:
/Guide Contains HTML files that link to the PDF and HTML versions of this Getting Started guide.
/Samples Contains a series of subfolders that correspond to the chapters in this guide. Each subfolder contains:
• The data files that you need to complete the demonstrations.
• An example of the completed demonstration.
/Videos Contains an HTML file that links to video tutorials that you can use to help you become familiar with Artix Data Services.
10
Creating a Project
Creating a Project
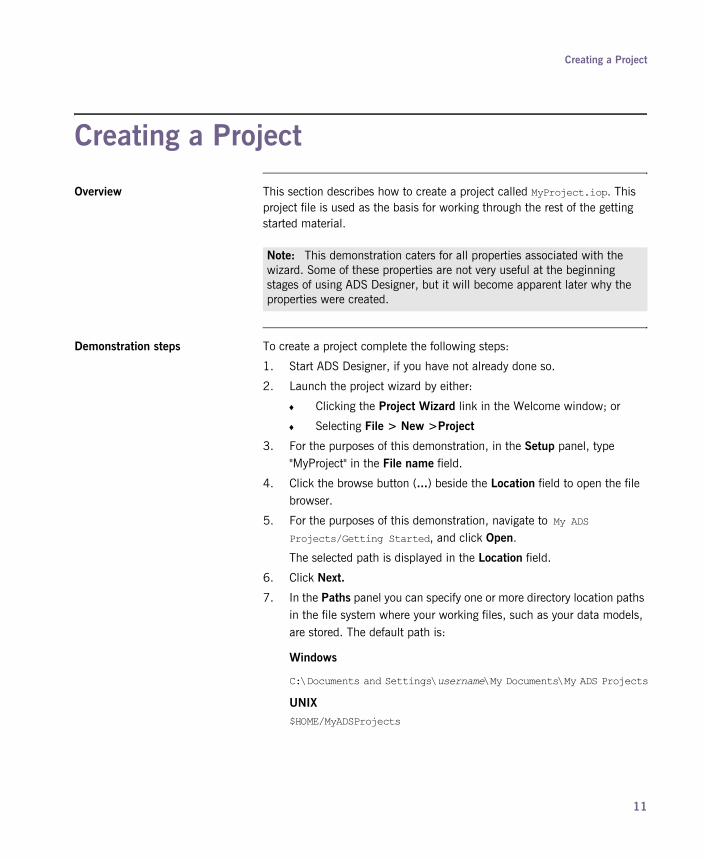
Overview This section describes how to create a project called MyProject.iop. This project file is used as the basis for working through the rest of the getting started material.
Demonstration steps To create a project complete the following steps:
1. Start ADS Designer, if you have not already done so.
2. Launch the project wizard by either:
♦ Clicking the Project Wizard link in the Welcome window; or
♦ Selecting File > New >Project
3. For the purposes of this demonstration, in the Setup panel, type "MyProject" in the File name field.
4. Click the browse button (...) beside the Location field to open the file browser.
5. For the purposes of this demonstration, navigate to My ADS Projects/Getting Started, and click Open.
The selected path is displayed in the Location field.
6. Click Next.
7. In the Paths panel you can specify one or more directory location paths in the file system where your working files, such as your data models, are stored. The default path is:
Windows
C:\Documents and Settings\username\My Documents\My ADS Projects
UNIX$HOME/MyADSProjects
Note: This demonstration caters for all properties associated with the wizard. Some of these properties are not very useful at the beginning stages of using ADS Designer, but it will become apparent later why the properties were created.
11
CHAPTER 1 | Creating Projects
The alias represents the name by which the full path is represented within ADS Designer.
8. You can add other paths by clicking the icon. For the purposes of this demonstration:
i. Click the icon.
ii. In the Select dialog, notice that the My ADS Projects/Getting Started directory is already highlighted.
iii. Click Select.
The selected path is automatically added to the Path column, and the corresponding value in the Alias column is displayed as Getting Started.
9. Click Finish. If you are prompted to open the project in a new frame, click Yes. (This prompt only appears if you have already created another project.)
The new project is displayed in the Project window along with the various paths you added for the project.
Advanced optional panels The Project Wizard includes an Advanced button that allows you to display or hide optional panels within the wizard. For the purposes of this demonstration, you do not need to change any of the settings in these advanced optional panels. The panels are:
• The Project Properties panel. These properties allow you to determine how your project file is stored and accessed.
• The Profile Settings panel. These settings allow you to determine characteristics and behavior of deployed Java code in terms of code style, versioning and the location into which generated code is deployed.
• The Aliases panel. This panel allows you to set up various preferred aliases that enable you to choose between seeing different sets of names for the same components within your data models.
For more information on the these panels, click on a field to view context-sensitive help, which appears at the bottom of each panel.
12
CHAPTER 2
Creating Data ModelsData models, or data object definition (.dod) files, are organized within projects and can consist of various different types of data components, including simple and complex types. They are used to represent real-world data. From data models, you can generate Java code that can be used to parse, validate and transform conformant data. Data models generally consist of about 10 or more different types of data component. For the purposes of illustration, however, this chapter focuses specifically on four components—simple data types, complex types, elements and enumerations.
In this chapter This chapter discusses the following topics:
Creating a Data Model from a Text File page 14
Creating a Data Model from an XML Schema page 30
Creating a Data Model from a Set of XML Documents page 34
Creating a Data Model from a Database page 38
Creating a Data Model Manually page 44
Adding Validation Rules page 63
13
CHAPTER 2 | Creating Data Models
Creating a Data Model from a Text File
Overview This section describes how to create a data model by importing a text file.
In this section This section discusses the following topics:
Creating a Transactions Data Model from Transactions.txt page 15
Creating a Customers Data Model from Customers.txt page 24
14

Creating a Data Model from a Text File
Creating a Transactions Data Model from Transactions.txt
Overview This subsection demonstrates how to create a Transactions data model by importing a Transactions.txt file. It shows you how to:
• Use the Text File Import Wizard to import a text file and set properties for the fields associated with a model.
• Use the Properties window to add Target Namespace details.
• Compare the model to the text file that you imported.
• Test the model’s accuracy by parsing a valid text file through it.
Creating a data model Complete the following steps to create your data model:
1. In the Project window of the workbench, ensure that MyProject.iop is opened. If you need to open it, select File > Open Project from the menu bar.
2. In the project tree:
i. Navigate to My ADS Projects/Getting Started/Samples/B - Creating Data Models/1 - From a Text File
ii. Right-click the From a Text File folder and select Import > Import Text File. This opens the Text File Import Wizard.
3. In the Import File panel:
i. Navigate to My ADS Projects/Getting Started/Samples/B - Creating Data Models/1 - From a Text File
ii. Select the Transactions.txt file.
iii. Click Next.
4. In the Target Directory panel, accept the default folder From a Text File as the location where you want the data model to be stored and click Next.
Note: This sample data model is based on the Transactions.txt file that is supplied in the Getting Started/Samples/B - Creating Data Models/1 - From a Text File folder of your Artix Data Services Getting Started material.
15
CHAPTER 2 | Creating Data Models
5. In the Profiles panel:
i. Accept the Default setting.
ii. Notice the Advanced button in the Steps section on the left-hand side of the panel. Alternately clicking the Advanced button displays and hides optional steps in the list of steps.
iii. Click Advanced to hide the optional steps. They are not relevant in this demonstration.
iv. Click Next.
6. In the Model Name & Target Namespace panel:
i. Notice how the model name defaults to the name of the file that is being imported.
ii. Leave the target namespace for now. You can specify it at a later stage.
iii. Click Next.
7. In the Record Types panel:
i. In the Name column:
ii. Click the Type column for Row Count and select Fixed Length.
iii. Click Next.
8. In the Header panel, notice:
i. Notice that the wizard has automatically picked up that the Header record is a delimited format type.
ii. Notice too how the delimiter is set as a comma (do not adjust this).
iii. Click the various columns in the Preview table and notice how the values in the Selected Column Name and Selected Column Data Type fields change accordingly. In this case, the selected column data type is always String, because these are header values.
a. Double-click on Row 1, type "Customer Details" and press Enter.
b. Double-click on Row 2, type "Row Count" and press Enter. Notice how steps 9 and 10 in the left-hand pane change from Row 1 and Row 2 to Customer Details and Row Count respectively.
16
Creating a Data Model from a Text File
iv. Click Next.
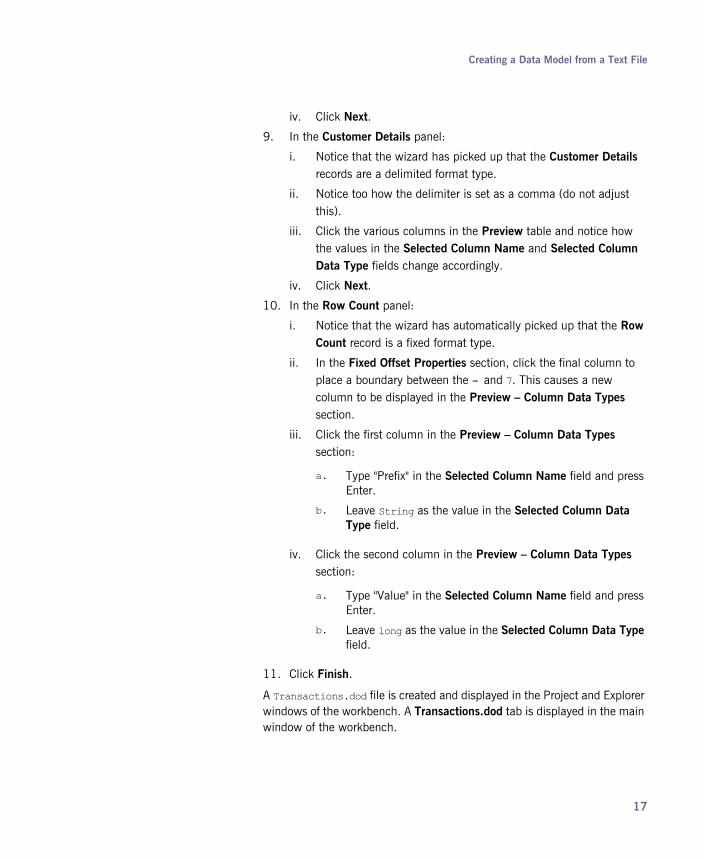
9. In the Customer Details panel:
i. Notice that the wizard has picked up that the Customer Details records are a delimited format type.
ii. Notice too how the delimiter is set as a comma (do not adjust this).
iii. Click the various columns in the Preview table and notice how the values in the Selected Column Name and Selected Column Data Type fields change accordingly.
iv. Click Next.
10. In the Row Count panel:
i. Notice that the wizard has automatically picked up that the Row Count record is a fixed format type.
ii. In the Fixed Offset Properties section, click the final column to place a boundary between the = and 7. This causes a new column to be displayed in the Preview – Column Data Types section.
iii. Click the first column in the Preview – Column Data Types section:
iv. Click the second column in the Preview – Column Data Types section:
11. Click Finish.
A Transactions.dod file is created and displayed in the Project and Explorer windows of the workbench. A Transactions.dod tab is displayed in the main window of the workbench.
a. Type "Prefix" in the Selected Column Name field and press Enter.
b. Leave String as the value in the Selected Column Data Type field.
a. Type "Value" in the Selected Column Name field and press Enter.
b. Leave long as the value in the Selected Column Data Type field.
17

CHAPTER 2 | Creating Data Models
In the Messages window, an Importing Text File tab is opened to indicate that the import has been successful.
Adding Target Namespace details You could have added the target namespace details when you were running the Text File Import Wizard in the previous section. This section simply demonstrates how you can add properties using the Properties window.
1. Click the Transactions.dod file in the Explorer window. The properties for the data model are displayed in the Properties window.
2. In the General section of the Properties window, set the value for Target Namespace to: http://www.progress.com/ArtixDataServices/GettingStarted/
Transaction
3. Select File > Save All from the menu bar, or click the icon on the toolbar, to save the data model.
Comparing your model to the file that you imported
To compare the data model with the Transactions.txt file that you imported, complete the following steps:
1. In the Explorer window, under the Transactions.dod file, expand the File node.
2. Double-click the Transactions complex type (marked with a symbol).
3. In the Transactions tab, which opened within the Transactions.dod tab, in the main window of the workbench, expand the Header, Customer Details, and Row Count elements to view the contents.
4. Compare the details displayed with those in the Transactions.txt file that you imported.
Setting up a validation rule Set up a validation rule that determines whether the value of the Row Count record is equal to the number of Customer Details records. If it is not, a validation error should be raised.
18

Creating a Data Model from a Text File
Complete the following steps to set up the validation rule:
1. Right-click Transactions.dod in the Explorer window and select New > Validation Rule. This opens the New Validation Rule dialog.
2. In the New Validation Rule dialog, type "rowCheckRule" in the text box and click OK.
This opens a rowCheckRule tab within the Transactions.dod tab in the main window of the workbench, with a default type of XPath. In this case, the rule is entered in the left hand pane of the tab and XPath syntax is displayed in the right hand pane
3. Add the XPath syntax for Value as follows:
i. Click the Transactions tab to open it
ii. Expand Row Count.
iii. Right-click Value in the Component column and select Copy XPath.
iv. Click the rowCheckRule tab to reopen it.
v. Click in the shaded text area in the left hand pane in the tab, and select Edit>Paste from the menu bar.
This copies the XPath syntax for the Value element to the XPath rule.
4. Position the cursor at the end of the XPath rule before adding the next part of the rule.
5. Scroll down in the right-hand pane and double-click the != (Not Equal) operator to select it. This adds != to the XPath rule in the left-hand pane. This enables the validation rule to check if the Value element does not equal the number of Customer Details records.
6. Position the cursor at the end of the XPath rule before adding the next part of the rule.
7. Specify that, in this case, we are dealing with a number count, by scrolling up in the right-hand pane and double-clicking the number count(node-set) function. This adds count() to the XPath rule in the left-hand pane.
Note: Creating a validation rule directly under the .dod file itself means that it is a global validation rule rather than being tied specifically to any one particular element within the data model.
19

CHAPTER 2 | Creating Data Models
8. Specify that we want to count the number of Customer Details records, as follows:
i. Click the Transactions tab to reopen it.
ii. Right-click Customer Details in the Component column, and select Copy XPath from the context menu.
iii. Click the rowCheckRule tab to reopen it.
iv. Click within the parentheses for the count() function in the left-hand pane, and select Edit > Paste from the menu bar. This copies the XPath syntax for the Customer Details element to the XPath rule.
9. In the Error Message pane, type "Invalid row count".
10. Uncheck the Ignore Document Node check box, to enable the imported XPath syntax to be read successfully.
11. Select File > Save All from the menu bar, or click the icon on the toolbar, to save the validation rule and update the data model.
Applying the validation rule to the data model
Complete the following steps to apply the validation rule to the data model:
1. Click the Transactions tab to reopen it in the main window of the workbench.
2. In the Type column, click Transactions. This displays the properties for the Transactions complex type in the Properties window.
3. In the Properties window:
i. Scroll down to the Validation section.
ii. Click the field beside Validation Rules.
4. In the validation rules dialog, click the icon.
5. In the Add Validation Rule dialog:
i. Expand the Local node.
ii. Select the rowCheckRule global validation rule.
iii. Click OK.
Note: The XPath rule should now look as follows:/Transactions/RowCount/Value!=count(Transactions/CustomerDetails)
20

Creating a Data Model from a Text File
6. In the validation rules dialog:
i. Notice that the rowCheckRule validation rule has been added to the list of rules.
ii. Click OK.
The Validation Rules field in the Properties window now displays 1.
7. Select File > Save All from the menu bar, or click the icon on the toolbar, to save the data model.
Testing the accuracy of your data model
To ensure that your data model is accurate, try parsing some real-world data. You can do this using a feature of the ADS Designer called the Run Wizard, which allows you to read data into a model and create Java class instances of that model. In this case, you can read the supplied Transactions.txt file into your Transactions data model, as follows:
1. Ensure that the Transactions.dod file is open in the Explorer window.
2. Expand the File node.
3. Right-click the Transactions element (marked with a symbol) and select Run Component.
4. In the Run Wizard dialog, notice that:
i. The Name field defaults to the name of the selected component; in this case, Transactions.
ii. The Target field defaults to the path location of the selected component.
iii. The Build Before Running check box is checked by default.
iv. Accept all of the default values and click Run.
5. In the resulting dialog box, which prompts you to load the data you want to parse, click the icon.
Note: Make sure you right-click the Transactions element in this case rather than the Transactions complex type. This has repercussions for the code that Artix Data Services generates for the model, as described further in “Creating a Simple Java Application” on page 125.
21

CHAPTER 2 | Creating Data Models
6. A Transactions tab opens within the Transactions.dod tab. This tab shows the structure of the deployed object based on your data model. Notice:
i. That because you have not yet loaded any data into the object, it is displayed in its empty state with a red X.
ii. In the Messages window, an empty Run Transactions tab has been created.
7. In the Transactions tab, click the (Load) icon.
8. In the Select Input File/Directory dialog:
i. Navigate to the Getting Started/Samples/B - Creating Data Models/1 - From a Text File folder.
ii. Select Transactions.txt.
iii. Click Open.
9. In the Confirm dialog, click Yes.
Artix Data Services creates instances of the model based on your data. A green tick appears beside the Transactions node in the Transactions tab to indicate that parsing has been successful. Expand the Transactions node to view a Header record, seven CustomerDetails records, and a RowCount record. In addition, the Run Transactions tab in the Messages window displays a message indicating that parsing has been successful.
Checking the validation rule Complete the following steps to test the validation rule that you created in “Setting up a validation rule” on page 18:
1. Click the icon at the bottom of the workbench to open the Validation window. No validation errors are currently being reported. This is because the value of RowCount matches the number of CustomerDetails records loaded (that is, 7).
2. In the Transactions tab:
i. Expand the RowCount node.
ii. Change the value for the Value row to, for example, 5.
3. Click anywhere else in the tab and a validation error is automatically reported in the Validation window.
22

Creating a Data Model from a Text File
4. Expand the validation error and it displays the Invalid row count error message that you created in Step 9 of “Setting up a validation rule” on page 18.
5. In the Transactions tab:
i. Change the value for Value back to 7.
ii. Click anywhere else in the tab and the validation error that was reported in the Validation window automatically disappears.
The validation rule that you set up is working. It raises a validation error only when expected.
23

CHAPTER 2 | Creating Data Models
Creating a Customers Data Model from Customers.txt
Overview This subsection demonstrates how to create a Customers data model by importing a Customers.txt file. In the Text File Import Wizard, you can set properties for the fields associated with a model instead of doing so in the Properties window outside the wizard. After creating the model, you can test its accuracy by parsing a valid text file through it.
Steps Complete the following steps to create your data model:
1. In the Project window of the workbench, ensure that MyProject.iop is opened. If you need to open it, you select File > Open Project from the menu bar.
2. In the project tree:
i. Navigate to My ADS Projects/Getting Started/Samples/B - Creating Data Models/1 - From a Text File
ii. Right-click the From a Text File folder and select Import > Import Text File. This opens the Text File Import Wizard.
3. In the Import File panel:
i. Navigate to My ADS Projects/Getting Started/Samples/B - Creating Data Models/1 - From a Text File and select the Customers.txt file.
ii. Click Next.
4. In the Target Directory panel, accept the default folder From a Text File as the location where you want the data model to be stored and click Next.
Note: You can skip this section if you are going to follow the instructions in “Creating a Customers Data Model Manually” on page 55.
Note: This sample data model is based on the Customers.txt file that is supplied within the Getting Started/Samples/B - Creating Data Models/1 - From a Text File folder of your Artix Data Services Getting Started material.
24

Creating a Data Model from a Text File
5. In the Profiles panel:
i. Accept the Default setting.
ii. Notice the Advanced button in the Steps section on the left-hand side of the panel. Alternately clicking the Advanced button displays and hides optional steps in the list of steps.
iii. Click Advanced to hide the optional steps. They are not relevant in this demonstration.
iv. Click Next.
6. In the Model Name & Target Namespace panel:
i. Notice how the model name defaults to the name of the file that is being imported.
ii. Under Target Namespace, enter:
iii. Click Next.
7. In the Record Types panel:
i. In the Name column, double-click on Row, type "Customer" and press Enter.
Notice how step 6 in the left-hand pane automatically changes from Row to Customer.
ii. Click the Type column and select Fixed Length.
iii. Click Next.
8. In the Customer panel, specify the syntax properties associated with each record type in your sample data. In this demonstration, this information is stored in the Customers.xls file that is supplied within the Getting Started/Samples/B - Creating Data Models/1 - From
http://www.progress.com/ArtixDataServices/GettingStarted/Customer
25

CHAPTER 2 | Creating Data Models
a Text File folder of your Artix Data Services Getting Started material. Notice, for example, that in the Customers.xls file, the length for Customer Number is 6. Therefore:
i. In the Fixed Offset Properties section, click column 6 to place a boundary between columns 5 and 6. This causes a new column to be displayed in the Preview – Column Data Types section.
i. Click the first column in the Preview – Column Data Types section and:
9. According to the data in the Customers.xls file, the length for Customer Acronym is 12. Therefore:
i. In the Fixed Offset Properties section, click column 18 to place a boundary between columns 17 and 18. This causes a new column, to be displayed in the Preview - Column Data Types section.
ii. Click the second column in the Preview - Column Data Types section and:
10. Repeat step 9 in a similar fashion for the remaining fields, which are summarized in the following table:
a. Type "Customer Number" in the Selected Column Name field and press Enter.
b. Leave String as the value in the Selected Column Data Type field.
a. Type "Customer Acronym" in the Selected Column Name field and press Enter.
b. Accept String as the value in the Selected Column Data Type field.
Column Name Column Data Type
Start Column
End Column
Customer Number String 0 5
Customer Acronym String 6 17
Address Line 1 String 18 67
26

Creating a Data Model from a Text File
11. Click Finish.
A Customers.dod file is created and displayed in the Project and Explorer windows of the workbench. A Transactions.dod tab is displayed in the main window of the workbench.
In the Messages window, an Importing Text File tab is opened to indicate that the import has been successful.
12. In the Explorer window, expand the File node, right-click the Customers complex type (marked with a symbol), select Rename, and rename it to "Customers File".
Address Line 2 String 68 117
Address Line 3 String 118 167
Address Line 4 String 168 217
Address Line 5 String 218 267
Post Zip Code String 268 275
Telephone Number String 276 295
Email Address String 296 345
BIC String 346 356
Fax Number String 357 376
Telex Number String 377 396
Country of Residence String 397 398
Fedwire Code String 399 407
Chips Participant Code String 408 411
Chips UID String 412 417
Sort Code String 418 423
Bankleitzhal Code String 424 431
Column Name Column Data Type
Start Column
End Column
27
CHAPTER 2 | Creating Data Models
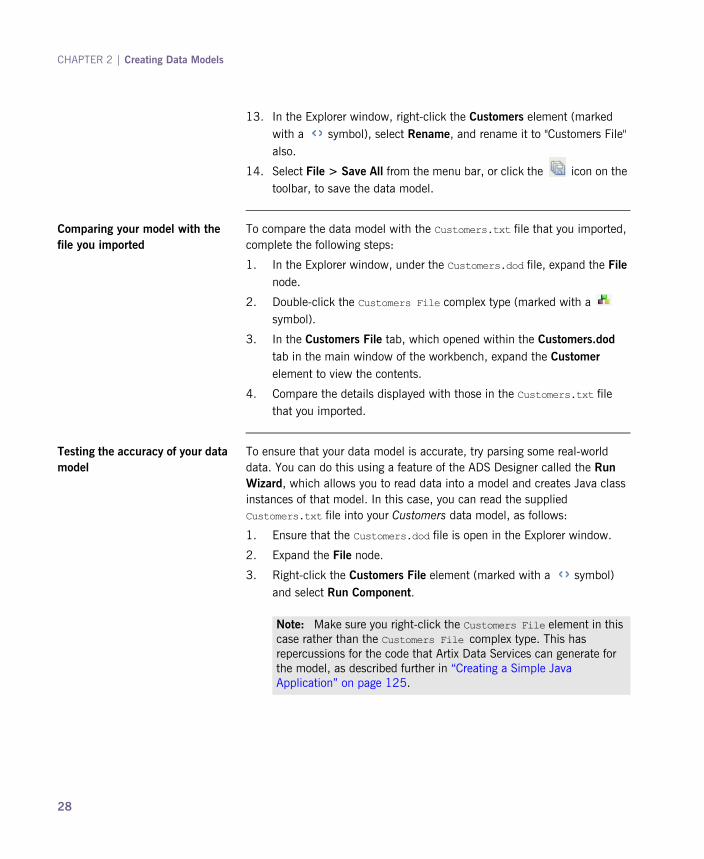
13. In the Explorer window, right-click the Customers element (marked with a symbol), select Rename, and rename it to "Customers File" also.
14. Select File > Save All from the menu bar, or click the icon on the toolbar, to save the data model.
Comparing your model with the file you imported
To compare the data model with the Customers.txt file that you imported, complete the following steps:
1. In the Explorer window, under the Customers.dod file, expand the File node.
2. Double-click the Customers File complex type (marked with a symbol).
3. In the Customers File tab, which opened within the Customers.dod tab in the main window of the workbench, expand the Customer element to view the contents.
4. Compare the details displayed with those in the Customers.txt file that you imported.
Testing the accuracy of your data model
To ensure that your data model is accurate, try parsing some real-world data. You can do this using a feature of the ADS Designer called the Run Wizard, which allows you to read data into a model and creates Java class instances of that model. In this case, you can read the supplied Customers.txt file into your Customers data model, as follows:
1. Ensure that the Customers.dod file is open in the Explorer window.
2. Expand the File node.
3. Right-click the Customers File element (marked with a symbol) and select Run Component.
Note: Make sure you right-click the Customers File element in this case rather than the Customers File complex type. This has repercussions for the code that Artix Data Services can generate for the model, as described further in “Creating a Simple Java Application” on page 125.
28

Creating a Data Model from a Text File
4. In the Run Wizard, notice that;
i. The Name field defaults to the name of the selected component.
ii. The Target field defaults to the path location of the selected component.
iii. The Build Before Running check box is checked by default.
5. Accept all the default values and click Run.
6. In the resulting dialog box, which prompts you to load the data you want to parse, click the icon.
7. A Customers File tab opens within the Customers.dod tab. This tab shows the structure of the deployed object based on your data model. Notice:
i. That because you have not yet loaded any data into the object, it is displayed in its empty state with a red X.
ii. In the Messages window, an empty Run Customers File tab has been created.
8. In the Customers File tab, click the (Load) icon.
9. In the Select Input File/Directory dialog:
i. Navigate to the Getting Started/Samples/B - Creating Data Models/1 - From a Text File folder.
ii. Select Customers.txt.
iii. Click Open.
10. In the Confirm dialog, click Yes.
Artix Data Services creates instances of the model based on your data. A green tick appears beside the CustomersFile node in the Customers File tab to indicate that parsing has been successful. Expand the CustomersFile node in the main window to view all the records in the file.
In addition, the Run Customers File tab in the Messages window displays a message indicating that parsing has been successful.
29
CHAPTER 2 | Creating Data Models
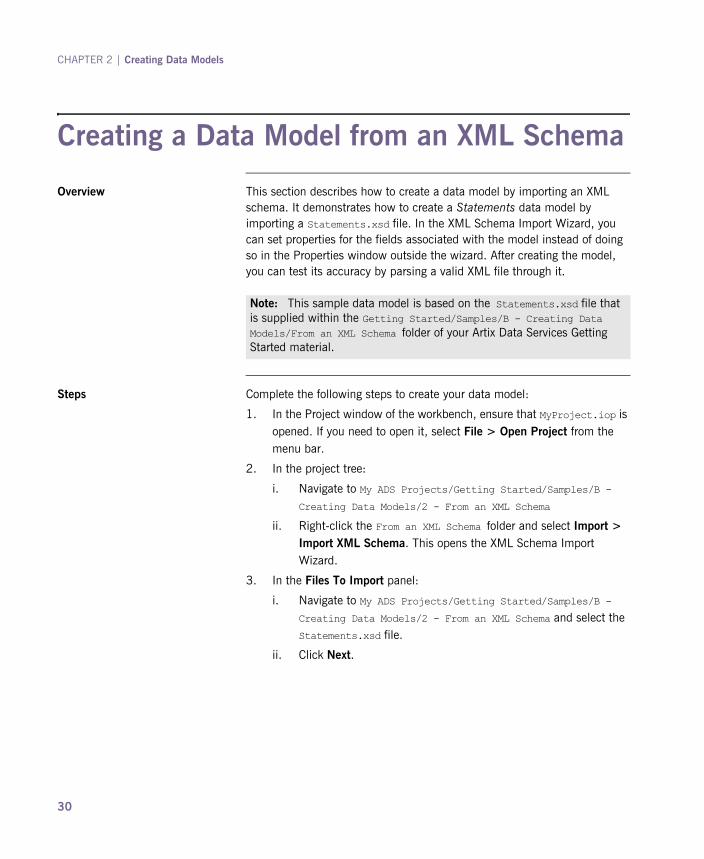
Creating a Data Model from an XML Schema
Overview This section describes how to create a data model by importing an XML schema. It demonstrates how to create a Statements data model by importing a Statements.xsd file. In the XML Schema Import Wizard, you can set properties for the fields associated with the model instead of doing so in the Properties window outside the wizard. After creating the model, you can test its accuracy by parsing a valid XML file through it.
Steps Complete the following steps to create your data model:
1. In the Project window of the workbench, ensure that MyProject.iop is opened. If you need to open it, select File > Open Project from the menu bar.
2. In the project tree:
i. Navigate to My ADS Projects/Getting Started/Samples/B - Creating Data Models/2 - From an XML Schema
ii. Right-click the From an XML Schema folder and select Import > Import XML Schema. This opens the XML Schema Import Wizard.
3. In the Files To Import panel:
i. Navigate to My ADS Projects/Getting Started/Samples/B - Creating Data Models/2 - From an XML Schema and select the Statements.xsd file.
ii. Click Next.
Note: This sample data model is based on the Statements.xsd file that is supplied within the Getting Started/Samples/B - Creating Data Models/From an XML Schema folder of your Artix Data Services Getting Started material.
30
Creating a Data Model from an XML Schema
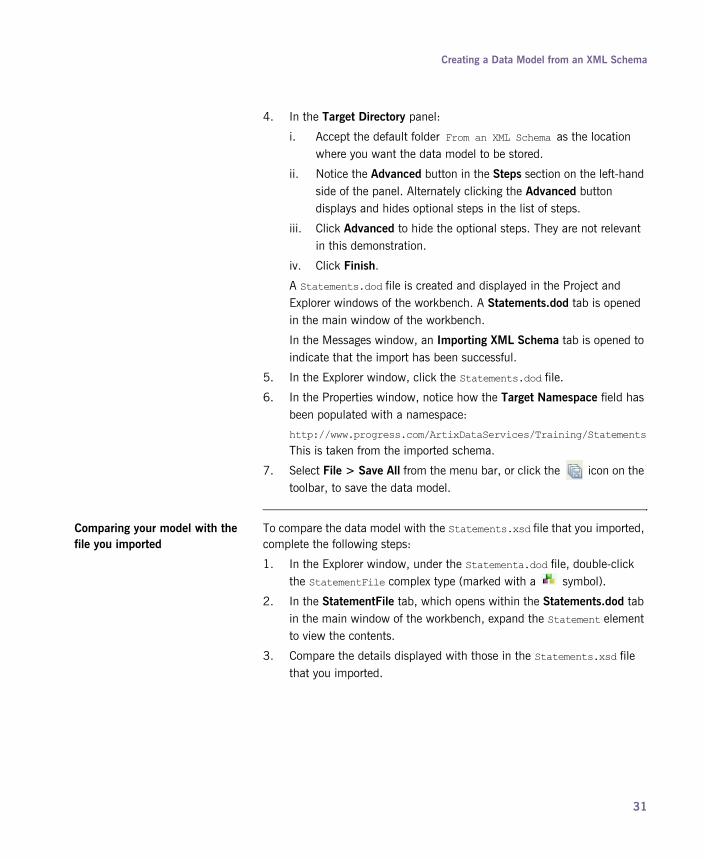
4. In the Target Directory panel:
i. Accept the default folder From an XML Schema as the location where you want the data model to be stored.
ii. Notice the Advanced button in the Steps section on the left-hand side of the panel. Alternately clicking the Advanced button displays and hides optional steps in the list of steps.
iii. Click Advanced to hide the optional steps. They are not relevant in this demonstration.
iv. Click Finish.
A Statements.dod file is created and displayed in the Project and Explorer windows of the workbench. A Statements.dod tab is opened in the main window of the workbench.
In the Messages window, an Importing XML Schema tab is opened to indicate that the import has been successful.
5. In the Explorer window, click the Statements.dod file.
6. In the Properties window, notice how the Target Namespace field has been populated with a namespace:
http://www.progress.com/ArtixDataServices/Training/Statements
This is taken from the imported schema.
7. Select File > Save All from the menu bar, or click the icon on the toolbar, to save the data model.
Comparing your model with the file you imported
To compare the data model with the Statements.xsd file that you imported, complete the following steps:
1. In the Explorer window, under the Statementa.dod file, double-click the StatementFile complex type (marked with a symbol).
2. In the StatementFile tab, which opens within the Statements.dod tab in the main window of the workbench, expand the Statement element to view the contents.
3. Compare the details displayed with those in the Statements.xsd file that you imported.
31
CHAPTER 2 | Creating Data Models
Testing the accuracy of your data model
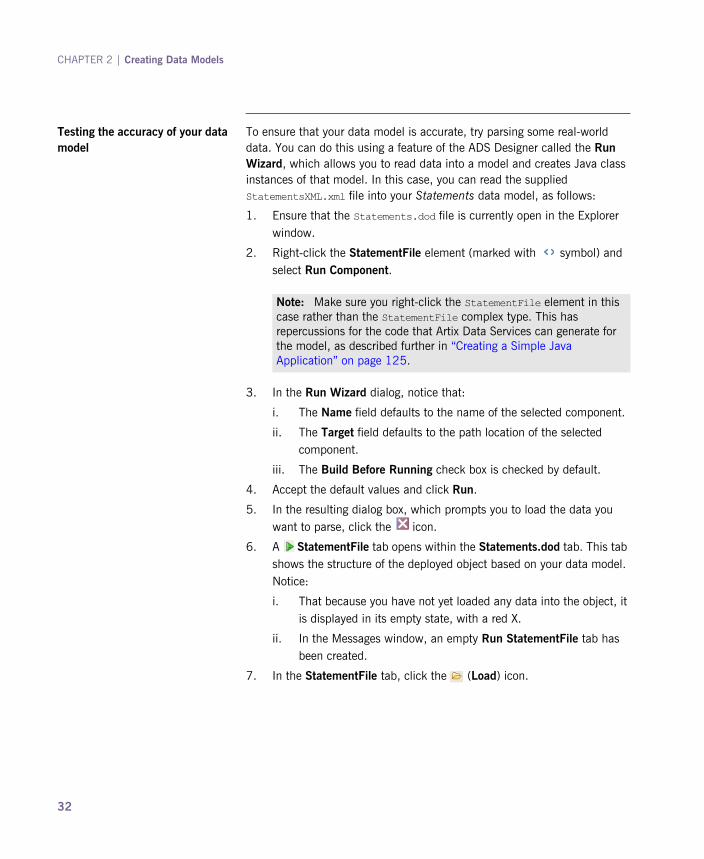
To ensure that your data model is accurate, try parsing some real-world data. You can do this using a feature of the ADS Designer called the Run Wizard, which allows you to read data into a model and creates Java class instances of that model. In this case, you can read the supplied StatementsXML.xml file into your Statements data model, as follows:
1. Ensure that the Statements.dod file is currently open in the Explorer window.
2. Right-click the StatementFile element (marked with symbol) and select Run Component.
3. In the Run Wizard dialog, notice that:
i. The Name field defaults to the name of the selected component.
ii. The Target field defaults to the path location of the selected component.
iii. The Build Before Running check box is checked by default.
4. Accept the default values and click Run.
5. In the resulting dialog box, which prompts you to load the data you want to parse, click the icon.
6. A StatementFile tab opens within the Statements.dod tab. This tab shows the structure of the deployed object based on your data model. Notice:
i. That because you have not yet loaded any data into the object, it is displayed in its empty state, with a red X.
ii. In the Messages window, an empty Run StatementFile tab has been created.
7. In the StatementFile tab, click the (Load) icon.
Note: Make sure you right-click the StatementFile element in this case rather than the StatementFile complex type. This has repercussions for the code that Artix Data Services can generate for the model, as described further in “Creating a Simple Java Application” on page 125.
32

Creating a Data Model from an XML Schema
8. In the Select Input File/Directory dialog:
i. Navigate to the Getting Started/Samples/B - Creating Data Models/2. From an XML Schema folder.
ii. Select the StatementsXML.xml file.
iii. Click Open.
9. In the Confirm dialog, click Yes.
There are no parsing errors. Artix Data Services creates instances of the model, based on your data. A green tick appears beside the StatementFile node in the StatementFile tab to indicate that parsing has been successful. Expand the StatementFile node to view all of the records in the file.
33
CHAPTER 2 | Creating Data Models
Creating a Data Model from a Set of XML Documents
Overview This section demonstrates how to create an AccountsXML data model by importing an AccountsXML.xml file. In the XML Instance(s) Import Wizard, you can set properties for the fields associated with a model instead of doing so in the Properties window outside the wizard. After creating the model, you can test its accuracy by parsing a valid XML file through it.
Steps Complete the following steps to create your data model:
1. In the Project window of the workbench, ensure that MyProject.iop is opened. If you need to open it, select File > Open Project from the menu bar.
2. In the project tree:
i. Navigate to My ADS Projects/Getting Started/Samples/B - Creating Data Models/3 - From Other Sources
ii. Right-click the From Other Sources folder and select Import > Import XML Instance(s). This opens the XML Instance(s) Import Wizard.
3. In the File To Import panel:
i. Navigate to My ADS Projects/Getting Started/Samples/B - Creating Data Models/3 - From Other Sources
ii. Select the AccountsXML.xml file.
iii. Click Next.
Note: This sample data model is based on the AccountsXML.xml file that is supplied within the Getting Started/Samples/B - Creating Data Models/3 - From Other Sources folder of your Artix Data Services Getting Started material.
34
Creating a Data Model from a Set of XML Documents
4. In the Target Directory panel
i. Accept the default folder From Other Sources as the location where you want the data model to be stored.
ii. Notice the Advanced button in the Steps section on the left-hand side of the panel. Alternately clicking the Advanced button displays and hides optional steps in the list of steps.
iii. Click Advanced to hide the optional steps. They are not relevant in this demonstration.
iv. Click Finish.
An AccountsXML.dod file is created and displayed in the Project and Explorer windows of the workbench. A AccountsXML.dod tab is opened in the main window of the workbench.
In the Messages window, an Importing XML... tab is opened to indicate that the import has been successful.
5. Select File > Save All from the menu bar, or click the icon on the toolbar, to save the data model.
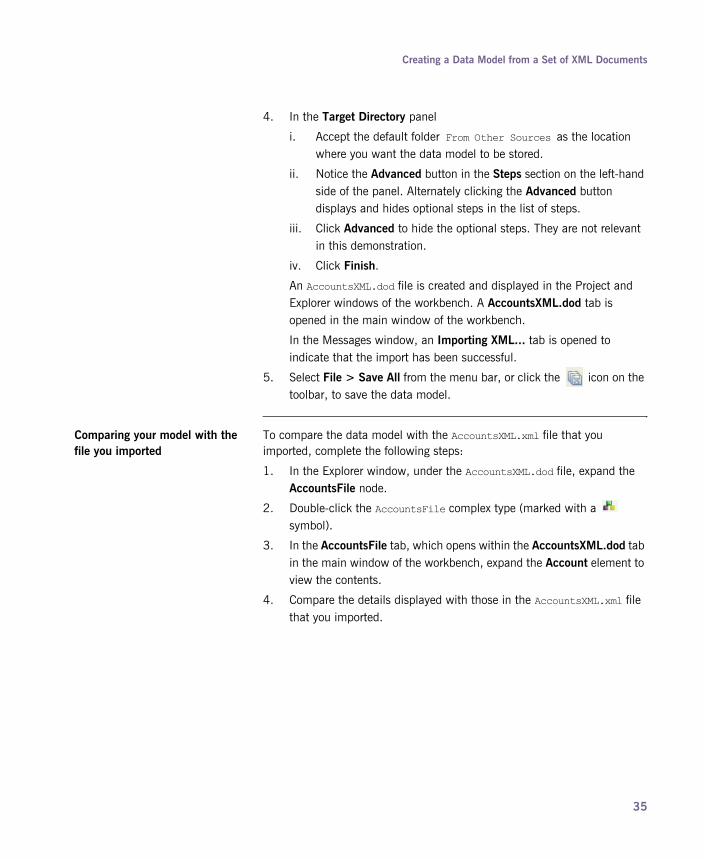
Comparing your model with the file you imported
To compare the data model with the AccountsXML.xml file that you imported, complete the following steps:
1. In the Explorer window, under the AccountsXML.dod file, expand the AccountsFile node.
2. Double-click the AccountsFile complex type (marked with a symbol).
3. In the AccountsFile tab, which opens within the AccountsXML.dod tab in the main window of the workbench, expand the Account element to view the contents.
4. Compare the details displayed with those in the AccountsXML.xml file that you imported.
35

CHAPTER 2 | Creating Data Models
Testing the accuracy of your data model
To ensure that your data model is accurate, try parsing some real-world data. You can do this using a feature of ADS Designer called the Run Wizard, which allows you to read data into a model and creates Java class instances of that model. In this case, you can read the supplied AccountsXML.xml file into your AccountsXML data model, as follows:
1. Ensure that the AccountsXML.dod file is open in the Explorer window.
2. Right-click the AccountsFile element (marked with a symbol) and select Run Component.
3. In the Run Wizard dialog, notice that:
i. The Name field defaults to the name of the selected component; in the case, AccountsFile.
ii. The Target field defaults to the path location of the selected component.
iii. The Build Before Running check box is checked by default.
iv. Accept all of the default values and click Run.
4. In the resulting dialog, which prompts you to load the data that you want to parse, click the icon.
5. An AccountsFile tab opens within the AccountsXML.dod tab. This tab shows the structure of the deployed object based on your data model. Notice:
i. That because you have not yet loaded any data into the object, it is displayed in its empty state with a red X.
ii. In the Messages window, an empty Run AccountsFile tab has been created.
6. In the AccountsFile tab, click the (Load) icon.
Note: Make sure you right-click the AccountsFile element in this case rather than the AccountsFile complex type. This has repercussions for the code that Artix Data Services generates for the model, as described further in “Creating a Simple Java Application” on page 125.
36
Creating a Data Model from a Set of XML Documents
7. In the Select Input File / Directory dialog:
i. Navigate to the Getting Started/Samples/B - Creating Data Models/3 - From Other Sources folder.
ii. Select AccountsXML.xml.
iii. Click Open.
8. In the Confirm dialog, click Yes.
There are no parsing errors. Artix Data Services creates instances of the model, based on your data. A green tick appears beside the AccountsFile node in the AccountsFile tab to indicate that parsing has been successful. Expand the AccountsFile node to view all of the records in the file.
In addition, the Run AccountsFile tab in the Messages window displays a message indicating that parsing has been successful.
37
CHAPTER 2 | Creating Data Models
Creating a Data Model from a Database
Overview This subsection demonstrates how to create a data model by importing a MySQL database called adsubs (Artix Data Services Universal Banking System). After creating the model, you can test its validity by parsing valid database entries through it.
Prerequisites Before you proceed with this demonstration, you must:
1. Have MySQL and MySQL Connector/J 5.0 or higher installed and configured on your machine. You can download these products from the following website:
♦ http://dev.mysql.com/downloads/
2. If you have not already done so, add the JDBC driver classpath to the ADS Designer Hibernate options as follows:
i. Start the ADS Designer.
ii. Select Edit > Preferences
iii. In the Preferences dialog, select Hibernate.
iv. In the Hibernate pane, click JDBC Class Path.
v. In the Edit Application Classpath dialog, click the icon and navigate to and select the mysql-connector-java-x.x.x-bin.jar file (where x.x.x represents the version number) in your MySQL Connector/J folder.
vi. Click OK.
vii. In the Warning dialog that tells you to restart the application, click OK.
viii. Restart the ADS Designer for the classpath settings to take affect.
3. Artix Data Services includes an ADSUBS_SQL.txt file that contains the SQL needed to create the database and its constituent tables. It is located in the Getting Started/Samples/B - Creating Data
38
Creating a Data Model from a Database
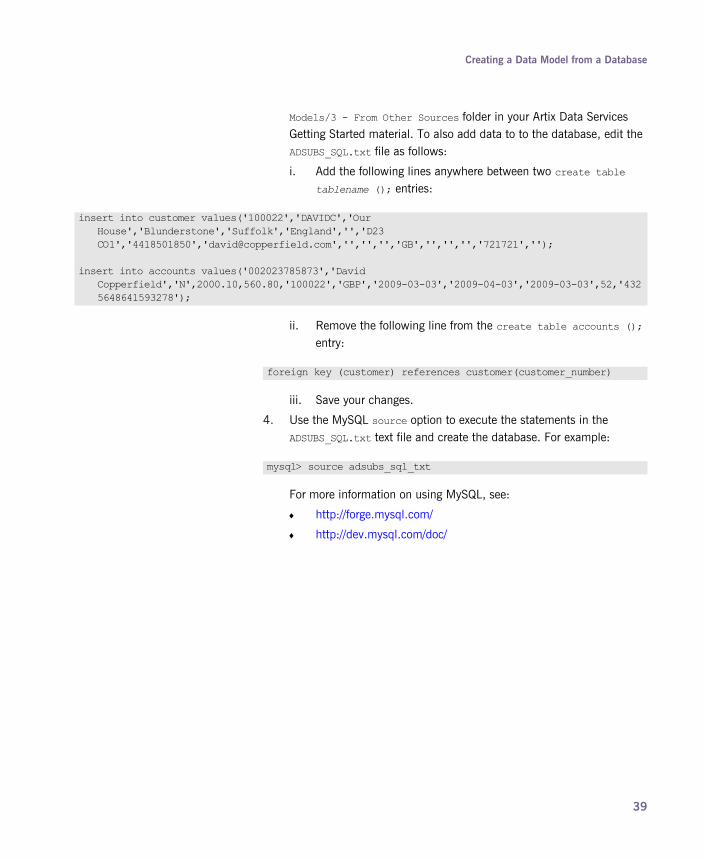
Models/3 - From Other Sources folder in your Artix Data Services Getting Started material. To also add data to to the database, edit the ADSUBS_SQL.txt file as follows:
i. Add the following lines anywhere between two create table tablename (); entries:
ii. Remove the following line from the create table accounts (); entry:
iii. Save your changes.
4. Use the MySQL source option to execute the statements in the ADSUBS_SQL.txt text file and create the database. For example:
For more information on using MySQL, see:
♦ http://forge.mysql.com/
♦ http://dev.mysql.com/doc/
insert into customer values('100022','DAVIDC','Our House','Blunderstone','Suffolk','England','','D23 CO1','4418501850','[email protected]','','','','GB','','','','721721','');
insert into accounts values('002023785873','David Copperfield','N',2000.10,560.80,'100022','GBP','2009-03-03','2009-04-03','2009-03-03',52,'4325648641593278');
foreign key (customer) references customer(customer_number)
mysql> source adsubs_sql_txt
39

CHAPTER 2 | Creating Data Models
Steps After you have used MySQL to create the adsubs database, complete the following steps to create your data model:
1. In the Project window of the workbench, ensure that MyProject.iop is opened. If you need to open it, selecting File > Open Project from the menu bar.
2. In the project tree:
i. Navigate to My ADS Projects/Getting Started/Samples/B - Creating Data Models/3 - From Other Sources
ii. Right-click the From Other Sources folder and select Import > Import Database. This opens the Import Database Wizard.
3. In the Target Directory panel, accept the default folder From Other Sources as the location where you want the data model to be stored and click Next.
4. In the Connection Properties panel:
i. In the Model Name field: type "ADSUBS".
ii. In the Target Namespace field, type http://www.progress.com/ArtixDataServices/GettingStarted
/ADSUBS
iii. In the Database Dialect field, select MySQL from the drop-down menu. This indicates the type of database from which you want to import.
iv. Notice that the JDBC Driver Class Name field is automatically populated with com.mysql.jdbc.Driver.
v. In the Database URL field, update the URL with the name of your database; that is, jdbc:mysql://localhost:3306/adsubs
vi. In the Username field, type a valid user name for connecting to the database.
Note: The default port for MySQL is 3306. If you are using an alternative port, replace 3306 in the preceding URL with whatever port your installation of MySQL is using.
Note: If you do not have a specific username for accessing MySQL, type root as the username for this demonstration.
40
Creating a Data Model from a Database
vii. In the Password field, if your MySQL server requires a password, enter the password.
viii. Add the MySQL Connector/J mysql-connector-java-x.x.x-bin.jar file to your classpath:
ix. Click Next.
5. In the Import Type panel, notice how the Automatic table detection check box is checked by default and click Next.
6. In the Table Selection panel, which lists all of the possible tables in your database that can be imported, notice that:
i. All of the tables in the database are selected for import by default.
ii. The Import related tables check box and the Child only button are both selected by default. (Do not adjust these settings.)
iii. Click Next.
7. In the Import Options panel:
i. Notice the various default selections and values on this panel. (Do not adjust these.)
ii. Click Next.
8. In the Types Mapping panel, click Next repeatedly to display each of your database tables in turn. In each case, all of the fields and their types and the primary keys are displayed. You can change the types at this stage or you can wait until later.
9. Click Finish.
An ADSUBS.dod file is created and displayed in the Project and Explorer windows of the workbench. Each imported table is created as a complex type.
a. Click Edit Classpath.
b. Click the icon and navigate to and select the mysql-connector-java-x.x.x-bin.jar file (where x.x.x represents the version number) in your MySQL Connector/J folder. This adds the .jar file to the classpath.
Note: Some characters such as "/", "(" and ")" are incompatible with the ADS Designer. If some of your fields have such characters in them, the ADS Designer prompts you to change the name.
41

CHAPTER 2 | Creating Data Models
In the messages window, an Importing database tab is opened to indicate that the import has been successful.
10. Select File > Save All from the menu bar, or click the icon on the toolbar, to save the data model.
Comparing your model with the file you imported
To compare the data model with the ADSUBS_SQL.txt file that you imported, complete the following steps:
1. In the Explorer window, under the ADSUBS.dod file, double-click each complex type in turn to open it in its own tab.
2. Compare the details displayed in each tab with those in the ADSUBS_SQL.txt file that you imported.
Testing the accuracy of your data model
To ensure that your data model is accurate, test if it can parse some real-world data. You can do this using a feature of the ADS Designer called the Run Wizard, which allows you to read data into a model and creates Java class instances of that model. In this case, you can read the contents of the adsubs database into your ADSUBS data model.
1. Ensure that the ADSUBS.dod is currently open in the Explorer window.
2. Right-click the accounts element type and select Run Component.
3. In the Run Wizard dialog, notice that:
i. The Name field defaults to the name of the selected component; in the case, accounts.
ii. The Target field defaults to the path location of the selected component.
iii. The Build Before Running check box is checked by default.
iv. Accept all of the default values and click Run.
4. In the resulting dialog, which prompts you to load the data that you want to parse, click the icon.
5. An accounts tab opens within the ADSUBS.dod tab. This tab shows the structure of the deployed object based on your data model. Notice:
i. That because you have not yet loaded any data into the object, it is displayed in its empty state with a red X.
ii. In the Messages window, an empty Run accounts tab has been created.
42

Creating a Data Model from a Database
6. Click the (Advanced) icon in the accounts tab.
7. In the Advanced dialog:
i. Ensure that the Input icon is selected.
ii. In the Format field, select (Database) from the drop-down menu.
iii. In the Confirm dialog, click Yes.
iv. In the JDBC Driver Class Name field, type "com.mysql.jdbc.Driver".
v. In the Database URL field, type "jdbc:mysql://localhost:3306/adsubs".
vi. In the Username field, type a valid user name for connecting to the database.
vii. In the Password field, type a password if there is one.
viii. Click OK.
8. In the Database Load Params dialog:
i. In the Select By field, ensure that SQL Query is selected.
ii. Type the following SQL query in the textbox:
iii. Click OK.
A green tick appears beside the accounts node in the accounts tab to indicate that parsing has been successful. Expand the accounts node to view all of the records and data.
Note: If you are using an alternative port, replace 3306 in the preceding URL with whatever port your installation of MySQL is using.
Note: For the purposes of connecting to a MySQL database, you might need to type a user name of root.
SELECT * FROM accounts;
43

CHAPTER 2 | Creating Data Models
Creating a Data Model Manually
Overview This section describes how to manually create two different data models—one called Accounts, and another called Customer.
In this section This section discusses the following topics:
Creating an Accounts Data Model Manually page 45
Creating a Customers Data Model Manually page 55
44

Creating a Data Model Manually
Creating an Accounts Data Model Manually
Overview This subsection demonstrates how to:
• Manually create an Accounts data model. The data model is built from simple types into complex types. Each simple type has its own properties, such as minimum and maximum lengths, that are specified accordingly. The model contains two complex types—one that represents an individual account record (called Account) and another that represents a series of account records (called Accounts File).
• Deploy the Accounts model and test its accuracy by parsing a valid text file through it.
Creating the empty data model Complete the following steps to create your empty data model:
1. In the Project window of the workbench, ensure that MyProject.iop is opened. If you need to open it, select File > Open Project from the menu bar.
2. In the project tree:
i. Navigate to My ADS Projects/Getting Started/Samples/B - Creating Data Models/4 - Manually
ii. Right-click the Manually folder and select New > Data Model. This opens the New Data Model Wizard.
3. In the Setup panel:
i. Ensure that the Create new empty data model button is selected.
ii. In the Data Model name field, type "Accounts".
Note: This sample data model is based on the information in the Accounts.xls file that is supplied within the Getting Started/Samples/B - Creating Data Models/4 - Manually folder of your Artix Data Services Getting Started material.
Note: Some types, such as dates, also require validation. However, validation rules are outside the scope of this particular demonstration.
45
CHAPTER 2 | Creating Data Models
iii. In the Namespace field, type:
iv. In the Location field, accept the default location.
v. Click Finish.
An Accounts.dod file is created and displayed in the Project and Explorer windows of the workbench. An Accounts.dod tab opens in the main window of the workbench.
Creating an AccountNumber type Now that you have created an empty data model, start creating data types for it. First, create an AccountNumber type as follows:
1. In the Explorer window, right-click the Accounts.dod file and select New > Atomic Simple Type from the context menu. This opens the Atomic Simple Type Wizard.
2. In the Type Name panel:
i. In the Type name field, enter "AccountNumber".
ii. Click Next.
3. In the Base Type panel:
i. Select String.
ii. Click Next.
4. In the Type Properties panel, click Finish.
In the Explorer window, click AccountNumber, which has been added under Accounts.dod. This opens the properties for the type in the Properties window.
5. In the Properties window, scroll down to the Validation section and set the value for both Min Length and Max Length to 12.
http://www.progress.com/ArtixDataServices/GettingStarted/Account
46

Creating a Data Model Manually
Creating other simple types Repeat steps 1-5 to create the data types shown in Table 1. Simply substitute the name of the data type that you are creating for AccountNumber each time it appears in the steps.
Creating OpeningBalance and ClosingBalance types
Create an OpeningBalance type as follows:
1. In the Explorer window, right-click on Accounts.dod and select New > Atomic Simple Type from the context menu. This opens the Atomic Simple Type Wizard.
2. In the Type Name panel:
i. In the Type name field, enter "OpeningBalance".
ii. Click Next.
3. In the Base Type panel:
i. Expand the Built-in > Numeric.
ii. Click decimal.
iii. Click Next.
4. In the Type Properties panel, click Finish.
OpeningBalance is displayed under Accounts.dod in the Explorer window.
5. In the Properties window, scroll down to the Validation section and set the values for Min Total Digits and Max Total Digits to 1 and 16 respectively.
Repeat steps 1–4 to create a ClosingBalance type. Simply substitute ClosingBalance for OpeningBalance each time it appears in the steps.
Table 1: Manually Creating Data Types
Simple Type Base Data Type Min Length Max Length
AccountName String 20 20
Blocked String 1 1
Customer String 6 6
Currency String 3 3
CardNumber String 16 16
47

CHAPTER 2 | Creating Data Models
Creating OpeningBalanceDate, ClosingBalanceDate and LastStatementDate types
Create an OpeningBalanceDate type as follows:
1. In the Explorer window, right-click on Accounts.dod and select New > Atomic Simple Type from the context menu. This opens the Atomic Simple Type Wizard.
2. In the Type Name panel:
i. In the Type name field, enter "OpeningBalanceDate".
ii. Click Next.
3. In the Base Type panel:
i. Select Generic date.
ii. Click Next.
4. In the Type Properties panel, click Finish.
OpeningBalanceDate is displayed under Accounts.dod in the Explorer window.
Repeat steps 1–4 to create a ClosingBalanceDate and LastStatementDate type respectively. Simply substitute the name of the data type that you are creating for OpeningBalanceDate each time it appears in the steps.
Creating a LastStatementNo type Next create a LastStatementNo type as follows:
1. In the Explorer window, right-click on Accounts.dod and select New > Atomic Simple Type from the context menu. This opens the Atomic Simple Type Wizard.
2. In the Type Name panel:
i. In the Type name field, enter "LastStatementNo".
ii. Click Next.
3. In the Base Type panel:
i. Select int.
ii. Click Next.
4. In the Type Properties panel, click Finish.
LastStatementNo is displayed under Accounts.dod in the Explorer window.
5. In the Properties window, scroll down to the Validation section and set the values for both Min Total Digits and Max Total Digits to 12.
48

Creating a Data Model Manually
Creating an Account complex type Next create an Account complex type that will represent one account record whose fields are based on all of the simple types you have already created:
1. In the Explorer window, right-click on Accounts.dod and select New > Complex Type from the context menu.
2. In the New Complex Type dialog:
i. Type "Account" in the text box.
ii. Click OK.
The Account complex type is displayed under Accounts.dod in the Explorer window. An Account tab is opened within the Accounts.dod tab in the main window of the workbench.
3. Select all of the simple types displayed under Accounts.dod in the Explorer window and drag and drop them into the Account complex type in the main window of the workbench.
4. Click the Account complex type in the Explorer window to display its properties in the Properties window.
5. The account records are based on data in a fixed-format text file called Accounts.txt. The record format needs to be specified as a property of the Account complex type. In the Properties window, scroll down to the Presentation section and set the value for Format Type to Fixed.
6. Each record in the Accounts.txt file ends with a CRLF (carriage return line feed). This needs to be set as another property of the Account complex type, so that the data model will know to look for the CRLF at the end of each record it comes across in the text file. In the Properties window, click in the text area beside the Terminator field and click the
icon in the field.
7. In the Insert Character dialog:
i. Select CR and click Insert.
ii. Select LF and click Insert.
iii. Click OK.
This causes <CR><LF> and 0D0A to be displayed as the value for Terminator.
8. Select File > Save All from the menu bar, or click the icon on the toolbar, to save the data model.
49

CHAPTER 2 | Creating Data Models
Creating an Accounts File complex type
Next create an Accounts File complex type that can consist of multiple instances of the Account complex type (that is, it can contain multiple account records):
1. In the Explorer window, right-click on Accounts.dod and select New > Complex Type from the context menu.
2. In the New Complex Type dialog:
i. Type "Accounts File" in the text box.
ii. Click OK.
The Accounts File complex type is displayed under Accounts.dod in the Explorer window. An Accounts File tab is also opened within the Accounts.dod tab in the main window of the workbench.
3. Click the Account complex type in the Explorer window, and drag and drop it over to the Accounts File complex type in the main window of the workbench.
4. The cardinality value determines how many instances of the Account complex type the Accounts File complex type can contain. This is set to 1 by default. The Accounts File needs to be able to contain one or more Account records. To update the cardinality:
i. In the Component column, right-click the Account simple type
ii. Select Cardinality > 1..*.
5. Select File > Save All from the menu bar, or click the icon on the toolbar, to save the data model.
Creating an Accounts File element To enable the model to be used in code, you must also create an element for the Accounts File complex type:
1. Select the Account tab to open it.
2. In the Explorer window, right-click on Accounts.dod and select New > Element from the context menu.
3. In the New Element dialog:
i. Type "Accounts File" in the text box
ii. Click OK.
50
Creating a Data Model Manually
4. In the Select Type dialog:
i. Expand Local.
ii. Click the Accounts File complex type
iii. Click OK.
5. In the dialog box that prompts you to open the type for the element, click Yes.
The Accounts File element is displayed under Accounts.dod in the Explorer window.
6. Select File > Save All from the menu bar, or click the icon on the toolbar, to save the data model.
You have now finished building the framework of your Accounts data model. It consists of:
• An Accounts File complex type and element that can represent your accounts file.
• An Account complex type that can represent each record in your accounts file.
• Various simple types that can represent the various fields in each account record.
Testing the accuracy of your data model
To ensure that your data model is accurate, try parsing some real-world data. For example, you can read the supplied Accounts.txt file into your Accounts data model:
1. Ensure that the Accounts.dod file is currently open in the Explorer window.
2. Right-click the Accounts File element (marked with the symbol) in the Explorer window and select Run Component.
Note: Make sure you right-click the Accounts File element in this case rather than the Accounts File complex type. This will have repercussions for the code that Artix Data Services can generate for the model, as described further in “Creating a Simple Java Application” on page 125.
51
CHAPTER 2 | Creating Data Models
3. In the Run Wizard dialog, notice that:
i. The Name field defaults to the name of the selected component; in the case, Accounts File.
ii. The Target field defaults to the path location of the selected component.
iii. The Build Before Running check box is checked by default.
iv. Accept all of the default values and click Run.
4. In the resulting dialog, which prompts you to load the data that you want to parse, click the icon.
5. An Accounts File tab opens within the Accounts.dod tab. This tab shows the structure of the deployed object based on your data model. Notice:
i. That because you have not yet loaded any data into the object, it is displayed in its empty state with a red X.
ii. In the Messages window, an empty Run Accounts File tab has been created.
6. In the Accounts File tab, click the (Load) icon.
7. In the Select Input File/Directory dialog:
i. Navigate to the Getting Started/Samples/B - Creating Data Models/4 - Manually folder.
ii. Select Accounts.txt.
iii. Click Open.
8. In the Confirm dialog, click Yes.
In the case of this demonstration, a dialog box opens indicating that there is a parsing error. The error is displayed in the Run Accounts File tab in the Messages window and shows that there is a problem with the OpeningBalance type.
Fixing parsing errors relating to balance amounts
Parsing errors are an indication that a data model is not completely accurate. The Accounts.txt file expects the opening balance amount to consist of 14 integer digits and 2 fraction digits, but these have not been set as properties of the OpeningBalance type in the data model.
52

Creating a Data Model Manually
Complete the following steps to fix the parsing error:
1. Click OpeningBalance in the Explorer window.
2. In the Properties window:
i. Scroll down to the Presentation/Advanced section.
ii. In the Decimal Separator field, type ".". The value . [2e] is displayed.
iii. Scroll down to the Validation section.
iv. Set the values for Min Integer Digits and Max Integer Digits to 1 and 14 respectively.
v. Set the value for Min Fraction Digits and Max Fraction Digits to 0 and 2 respectively.
3. Click the (Reload Active Run Configuration) icon on the toolbar to reload the Accounts.txt file into the updated model.
A dialog box opens indicating that there is another parsing error. The error is also displayed in the Run Accounts File tab in the Messages window. The Accounts.txt file expects the closing balance amount to consist of 14 integer digits and 2 fraction digits, but these have not been set as properties of the ClosingBalance type in the data model.
4. Click ClosingBalance in the Explorer window and repeat steps 2 and 3 above.
Again, a dialog box opens indicating that there is a parsing error.
Fixing parsing errors relating to dates
The Accounts.txt file expects OpeningBalanceDate, ClosingBalanceDate and LastStatementDate to each have a format of yyMMdd. This has not been set in the data model. Complete the following steps for each of the date elements to set the date format:
1. Click the date element, for example, OpeningBalanceDate, in the Explorer window.
2. In the Properties window:
i. Scroll down to the Presentation section.
ii. Click the Date Format field.
iii. In the date format dialog, click the icon.
53
CHAPTER 2 | Creating Data Models
iv. In the Insert Character dialog, in the Char column, double-click y twice, followed by M twice, and d twice. The Pattern field on the Insert Character dialog should display yyMMdd.
v. Click OK. The Pattern field in the date format dialog should display yyMMdd.
vi. Click OK.
vii. The Date Format field in the Properties window displays yyMMdd.
When you have set the date format property for all of the date elements, click the (Reload Active Run Configuration) icon to reload the Accounts.txt file into the updated model. The data model is finally accurate and all parsing errors have been fixed. Artix Data Services creates instances of the model, based on your data. A green tick appears beside AccountsFile in the Accounts File tab to indicate that parsing has been successful. The Run AccountsFile tab in the Messages window also displays a message that parsing has been successful. You can now expand the AccountsFile node in the main window to view all of the records in the file.
54

Creating a Data Model Manually
Creating a Customers Data Model Manually
Overview This subsection demonstrates how to manually create a Customers data model. The data model is built up from simple types into complex types. The model contains two complex types—one that represents an individual customer record (called Customer) and another that represents a list of customer records (called Customers File). It then shows how to deploy the Customers data model and test its accuracy by parsing a valid text file through it.
Creating the empty data model Follow these steps to start creating your data model:
1. In the Project window of the workbench, ensure that MyProject.iop is opened. If you need to open it, select File > Open Project from the menu bar.
2. In the project tree:
i. Navigate to My ADS Projects/Getting Started/Samples/B - Creating Data Models/4 - Manually
ii. Right-click the Manually folder and select New > Data Model. This opens the New Data Model Wizard.
3. In the Setup panel:
i. Ensure that the Create new empty data model button is selected.
ii. In the Data Model name field, type "Customers".
Note: An alternative way of creating the Customers data model is to import its contents from the Customers.txt file. You can skip this section if you have already followed the instructions in “Creating a Data Model from a Text File” on page 14.
Note: The information on which this data model is based is contained in the Customers.xls file that is supplied within the Getting Started/Samples/B - Creating Data Models/4 - Manually folder of your Artix Data Services Getting Started material.
Note: Some types, such as dates, also require validation. However, validation rules are outside the scope of this particular demonstration.
55

CHAPTER 2 | Creating Data Models
iii. In the Namespace field, type:
iv. In the Location field, accept the default location.
v. Click Finish.
A Customers.dod file is created and displayed in the Project and Explorer windows of the workbench. An Customers.dod tab opens in the main window of the workbench.
Creating a Customer Number type Now that you have created an empty data model, start creating data types for it. First, create a Customer Number type as follows:
1. In the Explorer window, right-click the Customers.dod file and select New > Atomic Simple Type from the context menu. This opens the Atomic Simple Type Wizard.
2. In the Type Name panel:
i. In the Type name field, enter "Customer Number".
ii. Click Next.
3. In the Base Type panel:
i. Select String.
ii. Click Next.
4. In the Type Properties panel, click Finish.
In the Explorer window, click Customer Number, which has been added under Customers.dod.
5. In the Properties window, scroll down to the Validation section and set the value for both Min Length and Max Length to 6.
http://www.progress.com/ArtixDataServices/GettingStarted/Customer
56

Creating a Data Model Manually
Creating other simple types Repeat steps 1-5 to create the data types shown in Table 2. Simply substitute the name of the data type that you are creating for Customer Number each time it appears in the steps.
Creating an Address complex type Next create an Address complex type that will be able to hold multiple address lines, as follows:
1. In the Explorer window, right-click on Customers.dod and select New > Complex Type from the context menu.
2. In the New Complex Type dialog:
i. Type "Address" in the text box.
ii. Click OK.
Table 2: Manually Creating Other Simple Types
SimpleType
Base Data Type
Min
Length
Max Length
Customer Acronym String 12 12
Address Line String 0 50
Post Zip Code String 8 8
Telephone Number String 20 20
Email Address String 50 50
BIC String 11 11
FAX Number String 20 20
Telex Number String 0 20
Country Of Residence String 0 2
Fedwire Code String 0 9
Chips Participant Code String 0 4
Chips UID String 0 4
Sort Code String 0 6
Bankleitzhal Code String 0 8
57

CHAPTER 2 | Creating Data Models
The Address complex type is displayed under Customers.dod in the Explorer window. An Account tab opens within the Accounts.dod tab in the main window of the workbench.
3. Click the Address Line type in the Explorer window and drag and drop it over to the Address complex type in the main window of the workbench.
4. The address needs to contain five address lines. To update the cardinality:
i. In the Component column, right-click the Address Line.
ii. Select Cardinality > n.
iii. Type "5".
iv. Click OK.
Creating a Customer complex type Next create a Customer complex type that will represent one customer record whose fields are based on all of the simple types you have already created:
1. In the Explorer window, right-click on Customers.dod and select New > Complex Type from the context menu.
2. In the New Complex Type dialog:
i. Type "Customer" in the text box.
ii. Click OK.
The Customer complex type is displayed under Customers.dod in the Explorer window. A Customer tab opens within the Accounts.dod tab in the main window of the workbench.
3. Click the icon in the dialog box that prompts you that you can add components to the complex type.
4. Select all of the simple types, except Address Line, displayed under Customers.dod in the Explorer window, and drag and drop them to the Customer complex type in the main window of the workbench.
Note: The Address complex type is already set up to pull in the Address Line type with a cardinality of 5.
58

Creating a Data Model Manually
5. The customer records are based on data in a fixed-format text file called Customers.txt. You need to specify the record format as a property of the Customer complex type:
i. Click the Customer complex type in the Explorer window.
ii. In the Properties window:
6. Each record in the Customers.txt file ends with a CRLF (carriage return line feed). You need to set this as another property of the Customer complex type. In the Properties window:
i. Click in the text area beside the Terminator field.
ii. Click the icon.
iii. In the Insert Character dialog:
<CR><LF> and 0D0A are displayed as the value for Terminator.
7. Select File > Save All from the menu bar, or click the icon on the toolbar, to save the data model.
Creating a Customers File complex type
Next create a Customers File complex type that can consist of multiple instances of the Customer complex type (that is, it can contain multiple customer records) as follows:
1. In the Explorer window, right-click on Customers.dod and select New > Complex Type from the context menu.
2. In the New Complex Type dialog:
i. Type "Customers File" in the text box.
ii. Click OK.
The Customers File complex type is displayed under Customers.dod in the Explorer window. A Customers File tab opens within the Customers.dod tab in the main window of the workbench.
a. Scroll down to the Presentation section.
b. Set the value for Format Type to Fixed.
a. Select CR and click Insert.
b. Select LF and click Insert.
c. Click OK.
59

CHAPTER 2 | Creating Data Models
3. Click the Customer complex type in the Explorer window, and drag and drop it over to the Customers File complex type in the main window of the workbench.
4. The cardinality value determines how many instances of the Customer complex type the Customers File complex type can contain. This is set to 1 by default. The Customers File needs to be able to contain one or more Customer records. To update the cardinality:
i. In the Component column, right-click the Customer simple type
ii. Select Cardinality > 1..*.
5. Select File > Save All from the menu bar, or click the icon on the toolbar, to save the data model.
Creating a Customers File element To enable the model to be subsequently used in code, you must also create an element for the Customers File complex type as follows:
1. In the Explorer window, right-click on Customers.dod and select New > Element from the context menu.
2. In the New Element dialog:
i. Type "Customers File" in the text box.
ii. Click OK.
3. In the Select Type dialog:
i. Expand Local.
ii. Click the Customers File complex type.
iii. Click OK.
4. In the dialog box prompting you to open the type for the element, click Yes. The Customers File element is displayed under Customers.dod in the Explorer window.
5. Select File > Save All from the menu bar, or click the icon on the toolbar, to save the data model.
At this point, you have finished establishing the framework of your Customers data model. It now consists of:
• A Customers File complex type and element that can represent your customers file.
• A Customer complex type that can represent each record in your customers file.
60

Creating a Data Model Manually
• Various simple types that can represent the various fields in each customer record.
Testing the accuracy of your data model
You need to ensure that your data model is accurate by checking to see if it can parse some real-world data. You can do this using a feature of the Designer called the Run Wizard, which allows you to read data into a model and creates Java class instances of that model. In this case, you can read the supplied Customers.txt file into your Customers data model, as follows:
1. Ensure that the Customers.dod file is open in the Explorer window.
2. Right-click the Customers File element (marked with the symbol) in the Explorer window and select Run Component.
3. In the Run Wizard dialog:
i. The Name field defaults to the name of the selected component; in the case, Customers File.
ii. The Target field defaults to the path location of the selected component.
iii. The Build Before Running check box is checked by default.
iv. Accept all of the default values and click Run.
4. In the resulting dialog, which prompts you to load the data that you want to parse, click the icon.
5. An Customers File tab opens within the Customers.dod tab. This tab shows the structure of the deployed object based on your data model. Notice:
i. That because you have not yet loaded any data into the object, it is displayed in its empty state with a red X.
ii. In the Messages window, an empty Run Customers File tab has been created.
6. In the Customers File tab, click the (Load) icon.
Note: Make sure you right-click the Customers File element in this case rather than the Customers File complex type. This will have repercussions for the code that Artix Data Services can generate for the model, as described further in “Creating a Simple Java Application” on page 125.
61

CHAPTER 2 | Creating Data Models
7. In the Select Input File/Directory dialog:
i. Navigate to the Getting Started/Samples/B - Creating Data Models/4 - Manually folder.
ii. Select Customers.txt.
iii. Click Open.
8. In the Confirm dialog, click Yes.
There are no parsing errors. Artix Data Services creates instances of the model based on your data. A green tick appears beside CustomersFile in the Customers File tab to indicate that parsing has been successful. You may now expand the CustomersFile node in the main window to view all the records in the file.
62

Adding Validation Rules
Adding Validation Rules
Overview Data types such as dates, or elements with a type of double, must be validated to enable them to work in ADS Designer. Validation is commonly performed in the Properties window. Some properties have lists (that is, enumerations) associated with them, which are defined in the Properties window. Elements with a type of double require integer and fraction composition to be specified. This demonstration shows how to set up such validation rules for the Accounts and Transactions data models.
In this section This section discusses the following topics:
Adding Validation Rules for Accounts Data Model page 64
Adding Validation Rules for Transactions Data Model page 69
63
CHAPTER 2 | Creating Data Models
Adding Validation Rules for Accounts Data Model
Overview This subsection demonstrates how to set up validation rules for the Accounts data model.
Opening the Accounts.dod file Complete the following steps to open the Accounts.dod file (if it is not already open):
1. In the Project window of the workbench, ensure that MyProject.iop is opened. If you need to open it, select File > Open Project from the menu bar.
2. Navigate to the My ADS Projects/Getting Started/Samples/B - Creating Data Models/4 - Manually folder.
3. Right-click the Accounts.dod file and select Open Selected.
The Accounts.dod file opens in the Explorer window of the workbench. The Accounts.dod tab opens in the main window of the workbench.
Adding validation rules for Blocked type
Complete the following steps to add validation rules for the Blocked type:
1. Click Blocked in the Explorer window.
2. In the Properties window:
i. Scroll down to the Validation section.
ii. Click in the Enumeration field.
iii. Click the icon.
3. In the Select Component dialog, click Enumeration.
4. In the New Enumeration dialog:
i. Type "Blocked" as the name of the enumeration.
ii. Click OK.
5. In the Blocked tab within the Accounts.dod tab, click the icon.
Note: The validation values assigned in this demonstration are based on the values specified in the Accounts_validation.xls file that is supplied within the Getting Started/Samples/B - Creating Data Models/5 - Adding Validation Rules folder of your Artix Data Services Getting Started material.
64

Adding Validation Rules
6. In the New Enumeration Value dialog:
i. Type "Y".
ii. Click OK.
A new row is added to the Blocked tab, with Y as its displayed value.
7. Click the icon again.
8. In the New Enumeration Value dialog:
i. Type "N"
ii. Click OK.
A new row is added to the Blocked tab, with N as its displayed value.
9. Double-click the Name column of the N row, type "No" and press Enter.
10. Double-click the Name column of the Y row, type "Yes" and press Enter.
11. Select File > Save All from the menu bar, or click the icon on the toolbar, to save the data model.
Adding validation rules forCardNumber type
Complete the following steps to add validation rules for the CardNumber type:
1. Click CardNumber in the Explorer window.
2. In the Properties window:
i. Scroll down to the Validation section
ii. Click in the Pattern field.
iii. Select Java Regex from the drop down list.
iv. Click the icon to the right of the field.
3. In the Insert Character dialog:
i. Select the following pattern or type it manually in the Pattern field on the Insert Character dialog:
[0-9]{4}[0-9]{4}[0-9]{4}[0-9]{4}
ii. Click OK.
The pattern is displayed in the Properties window.
4. Select File > Save All from the menu bar, or click the icon on the toolbar, to save the data model.
65

CHAPTER 2 | Creating Data Models
Verifying that validation is correct To ensure that all validation is correct:
1. In the Explorer window, right-click Accounts.dod and select Verify Component(s).
This opens a Verification tab in the Messages window and the last line should read "Verification passed".
2. Select File > Save All from the menu bar, or click the icon on the toolbar, to save the data model.
Validating your data model Complete the following steps to validate your data model:
1. Ensure that the Accounts.dod is open in the Explorer window.
2. Right-click the Accounts File element (marked with the symbol) and select Run Component.
3. In the Run Wizard dialog:
i. The Name field defaults to the name of the selected component; in the case, Accounts File.
ii. The Target field defaults to the path location of the selected component.
iii. The Build Before Running check box is checked by default.
iv. Accept all of the default values and click Run.
4. In the resulting dialog, which prompts you to load the data that you want to parse, click the icon.
An Accounts File tab opens within the Accounts.dod tab. This tab shows the structure of the deployed object based on your data model.
Note: Make sure you right-click the Accounts File element in this case rather than the Accounts File complex type. This will have repercussions for the code that Artix Data Services can generate for the model, as described further in “Creating a Simple Java Application” on page 125.
66

Adding Validation Rules
Notice:
i. Because you have not yet loaded any data into the object, it is displayed in its empty state with a red X.
ii. In the Messages window, an empty Run Accounts File tab has been created.
5. In the Accounts File tab, click the (Load) icon.
6. In the Select Input File/Directory dialog:
i. Navigate to the Getting Started/Samples/B - Creating Data Models/4 - Manually folder.
ii. Select Accounts.txt.
iii. Click Open.
7. In the Confirm dialog, click Yes.
There are no parsing errors. Artix Data Services creates instances of the model based on your data. A green tick appears beside AccountsFile in the Accounts File tab to indicate that parsing has been successful. You may now expand the AccountsFile node in the main window to view all the records in the file.
Loading invalid data Try loading some invalid data for the Blocked type, to see what happens.
1. In the Accounts File tab, click the (Load) icon.
2. In the Select Input File/Directory dialog:
i. Navigate to the Getting Started/Samples/B - Creating Data Models/5 - Adding Validation Rules folder.
ii. Select Accounts_invalid.txt.
iii. Click Open.
3. Click OK on the Note dialog that prompts you that files in subdirectories will be parsed by default.
4. Click Yes on the Confirm dialog is displayed prompting you that changing the URI will allow your data to be overwritten.
5. Notice how the first Account record is marked with a red X. Expand it and you will see that the Blocked element is also marked in red. This is because the Blocked type is only meant to accept a value of Y or N, but it is currently displaying an invalid value of A for the first record.
67
CHAPTER 2 | Creating Data Models
6. Click the Validation tab at the bottom of the workbench to open the Validation window. A validation failure is reported against the Blocked element.
7. Make the format of one of the CardNumber elements invalid, as follows:
i. Expand an Account record.
ii. Click the value for its constituent CardNumber.
iii. Click the down arrow that is displayed in the CardNumber field.
iv. In the Multiline textual value dialog, insert a hyphen after every fourth digit, as follows: 4325-6486-3757-2678
v. Click OK.
vi. Click anywhere in the workbench and notice that the CardNumber element and its parent Account component are marked in red with an X.
The Validation window reports additional validation errors against the CardNumber element.
8. Now try loading valid data again, as follows:
i. Click the (Load) icon.
ii. In the Select Input File/Directory dialog:
♦ Navigate to the Getting Started/Samples/B - Creating Data Models/4 - Manually folder.
♦ Select Accounts.txt file.
♦ Click Open.
All Account records are displayed as valid again.
This proves that the validation rules for the Blocked and CardNumber types are working, because validation failures are reported against invalid data.
68
Adding Validation Rules
Adding Validation Rules for Transactions Data Model
Overview Xpath is predominantly used to apply validation rules to data models. This subsection demonstrates how to use Xpath to set up a rule to validate the Commission field in the Transactions data model.
Opening the Transactions.dod file Complete the following steps to open the Transactions.dod file (if it is not already open):
1. In the Project window, ensure that MyProject.iop is opened. If you need to open it, select File > Open Project from the menu bar.
2. Navigate to the My ADS Projects/Getting Started/Samples/B - Creating Data Models/1 - From a Text File folder.
3. Right-click the Transactions.dod file and select Open Selected. This opens the Transactions.dod file in the Explorer window and the Transactions.dod tab in the main window of the workbench.
Adding a rule for Commission type Creating a validation rule directly under the .dod file means that it is a global validation rule. It is not tied specifically to any one particular element within the data model and can be reused. To create a global validation rule, complete the following steps:
1. Right-click Transactions.dod in the Explorer window and select New > Validation Rule.
2. In the New Validation Rule dialog:
i. Type "Commission Check" in the text box.
ii. Click OK.
A Commission Check tab opens within the Transactions.dod tab, with a default type of XPath. The rule is entered in the left hand pane of the tab and XPath syntax is displayed in the right hand pane.
3. Create a rule that determines whether the value of commission is greater than the product of 0.02 and the value of amount:
i. Click in the shaded area at the top of the left-hand pane in the main window.
ii. Type "Commission > 0.08 * Amount" as the XPath rule.
69
CHAPTER 2 | Creating Data Models
4. If the validation rule is true, the data model should throw an error. Type "Commission Error" in the Error Message pane.
5. Select File > Save All from the menu bar, or click the icon on the toolbar, to save the data model.
6. In the Explorer window, expand File and double-click the Transactions complex type. This opens the Transactions complex type in the main window of the workbench.
7. Because the node names used in the Xpath rule do not refer to the parent node in any way, the rule must be applied directly to the Customer Details complex type, so that the model can interpret the validation rule correctly. In the Type column, click Customer Details. This displays the properties for the Customer Details type in the Properties window.
8. In the Properties window:
i. Scroll down to the Validation section
ii. Click the field beside Validation Rules. This opens a validation rules dialog.
9. In the validation rules dialog, click the icon.
10. In the Add Validation Rule dialog, apply the global Commission Check validation rule to the Customer Details type as follows:
i. Expand Local.
ii. Select the Commision Check global validation rule.
iii. Click OK.
This adds Commission Check to the validation rules dialog.
iv. Click OK.
The Validation Rules field in the Properties window now displays 1.
11. Select File > Save All from the menu bar, or click the icon on the toolbar, to save the data model.
70

Adding Validation Rules
Validating your data model Complete the following steps to validate your data model:
1. Ensure that the Transactions.dod is open in the Explorer window.
2. Expand File.
3. Right-click the Transactions element type and select Run Component.
4. In the Run Wizard dialog:
i. The Name field defaults to the name of the selected component; in the case, Transactions.
ii. The Target field defaults to the path location of the selected component.
iii. The Build Before Running check box is checked by default.
iv. Accept all of the default values and click Run.
5. In the resulting dialog, which prompts you to load the data that you want to parse, click the icon.
6. A Transactions tab opens within the Transactions.dod tab. This tab shows the structure of the deployed object based on your data model.
Notice:
i. Because you have not yet loaded any data into the object, it is displayed in its empty state with a red X.
ii. In the Messages window, an empty Run transactions tab has been created.
7. In the Transactions tab, click the (Load) icon.
8. In the Select Input File/Directory dialog:
i. Navigate to the Getting Started/Samples/B - Creating Data Models/1 - From a Text file folder.
ii. Select Transactions.txt.
iii. Click Open.
9. In the Confirm dialog, click Yes.
Note: Make sure you right-click the Transactions element rather than the Transactions complex type. This has repercussions for the code that Artix Data Services generates for the model, as described further in “Creating a Simple Java Application” on page 125.
71
CHAPTER 2 | Creating Data Models
There are no parsing errors. Artix Data Services creates instances of the model based on your data. A green tick appears beside Transactions in the Transactions tab to indicate that parsing has been successful. You may now expand the Transactions node in the main window to view all the records in the file.
Loading invalid data Try loading some invalid data to see what happens:
1. In the Transactions tab, click the (Load) icon.
2. In the Select Input File dialog:
i. Navigate to the Getting Started/Samples/B - Creating Data Models/5 - Adding Validation Rules folder.
ii. Select Transactions_invalid.txt.
iii. Click Open.
3. Click Yes on the Confirm dialog.
4. Notice that one of the Customer Details records now shows a red (invalid) X.
5. Expand the Customer Details record that is marked with a red (invalid) X.
6. Check the value of Amount and the value of Commission. Notice how Amount is -500.4 and Commission is 8.
7. Click the Validation tab at the bottom of the workbench to open the Validation window.
8. Expand the node beside the component name in the Validation window to view the invalid records. Notice how "Commission Error" is displayed as the error message in each case.
The Commission Check validation rule is working and validation failures are being correctly reported against records where the value of Commission is greater than the value of Amount * 0.08.
72

CHAPTER 3
Creating TransformationsThis chapter shows how to create transformations in the ADS Designer. Transformations are created within projects and consist of at least two data models that represent input and output data. They allow users to map elements in the input model to elements in the output model for the purposes of transforming your data in some way. A transformation can consist of multiple input and output models. This chapter first describes how to create a simple transformation and then describes how to make it more complex by adding various types of component.
In this chapter This chapter discusses the following topics:
Creating a Simple Transformation page 74
Making Your Transformation More Complex page 87
73

CHAPTER 3 | Creating Transformations
Creating a Simple Transformation
Overview This section is designed to get you started with creating a simple transformation called StatGen.tfd. The transformation will contain one input model called Transactions and one output model called Statements. Its purpose is to read in a series of Customer Details records and to produce statement lines for various customers. After creating the simple transformation, you can run it in the Run Wizard to test its validity and generate Java class instances from it.
In this section This section discusses the following topics:
Note: A completed version of this transformation is supplied in the Getting Started/Samples/C - Creating Transformations/1 - Simple Transformation/Completed Transformation folder.
Starting to Create a Transformation page 75
Creating a Local Transformation page 78
Testing the Local Transformation in Your Main Transformation page 81
Creating a Filter page 83
Testing the Filter in Your Main Transformation page 85
74

Creating a Simple Transformation
Starting to Create a Transformation
Steps Complete the following steps to start creating a transformation:
1. In the Project view of the workbench, ensure that MyProject.iop is opened. If you need to open it, select File > Open Project from the menu bar.
2. In the project tree:
i. Navigate to My ADS Projects/Getting Started/Samples/C - Creating Transformations/1 - Simple Transformation
ii. Right-click the Simple Transformation folder and select New > Transform. This opens the New Transform wizard.
3. In the Setup panel:
i. Type "StatGen" in the Transform name field.
ii. Accept the default location in the Location field.
iii. Click the Advanced button to display some optional panels.
iv. Click Next.
4. In the Select New Input Data Type panel, which allows you to add the data model that you want to use as input for the transformation, select the Transactions data model as follows:
i. Click the icon.
ii. In the Select New Input Data Model dialog:
iii. In the Select New Input Type dialog:
a. Navigate to My ADS Projects/Getting Started/Samples/C - Creating Transformations.
b. Select Transactions.dod.
c. Click OK.
a. Expand Local.
b. Expand File.
c. Select the Transactions complex type.
d. Click OK.
75
CHAPTER 3 | Creating Transformations
The Transactions data model (that is, the Transactions.dod file) is added to the Select New Input Data Type panel.
5. Click Next.
6. In the Select New Output Data Type panel, which allows you to add the data model that you want to use as output for the transformation, select the Statements data model as follows:
i. Click the icon.
ii. In the Select New Output Data Model dialog:
iii. In the Select New Output Type dialog:
The Statements data model (that is, the statements.dod file) is now added to the Select New Output Data Type panel.
7. Click Finish.
StatGen.tfd is created and displayed in the Project and Explorer views of the workbench. A StatGen.tfd tab opens in the main view of the workbench. Notice how the Transactions complex type is displayed along with its Header, Customer Details and Row Count elements in the Inputs section of the MAIN tab. Notice also how the StatementFile complex type is displayed along with its Statement element in the Outputs section of the MAIN tab.
a. Navigate to My ADS Projects/Getting Started/Samples/C - Creating Transformations.
b. Select Statements.dod.
c. Click OK.
a. Expand Local.
b. Expand the StatementFile complex type.
c. Click OK.
76

Creating a Simple Transformation
Adding Target Namespace details To add target namespace details to your transformation:
1. Click the StatGen.tfd file in the Explorer window. The properties for the transformation are displayed in the Properties window.
2. In the General section of the Properties window, set the value for Target Namespace to: http://www.progress.com/ArtixDataServices/GettingStarted/
Transform
3. Select File > Save All from the menu bar, or click the icon on the toolbar, to save the data model.
77
CHAPTER 3 | Creating Transformations
Creating a Local Transformation
Overview A transformation is made functional by adding functions to it. This is done by creating a local transformation that is contained within the main transformation. The local transformation represents an individual operation and encapsulates functionality that can be reused within the main transformation, to cause an iterative loop effect. Therefore, elements with a cardinality of more than 1 (that is, elements of which there can be multiple instances) must be mapped within a local transformation so that they can be handled correctly. Local transformations work in exactly the same way as other transformations. This section describes how to add a local transformation called Record to StmtLine within your main StatGen transformation.
Adding a local transformation Complete the following steps to add a local transformation within your main transformation:
1. Expand Statement in the Outputs section to display its three sub-elements.
2. Click Customer Details in the Inputs section to highlight it.
3. Click Customer Details again and drag and drop it to the StmtLine in the Outputs section.
4. The following warning is displayed:
5. Click OK.
This creates a Customer Details To StmtLine local transformation and opens it in a new tab (with a icon beside its name) within the
The translation requires a mapping between two different complex types. Would you like to create a local transform and proceed with the mapping?
78

Creating a Simple Transformation
StatGen.tfd tab. The new local transformation has Customer Details as its input parameter and StatementLine as its output parameter.
Mapping input "Name" to output "PostingNarrative"
In this example, you want the name in each Customer Details record to be displayed as a posting narrative in your output statements. You, therefore, need to map Name in your input model to PostingNarrative in your output model. To do this:
1. Click the Record to StmtLine tab to reopen it.
2. In the Inputs section, select Name and drag and drop it to PostingNarrative in the Outputs section.
An arrow appears and goes from Name to PostingNarrative. This arrow indicates that there is a mapping between these two elements.
Mapping input "Amount" to output "TxAmount"
In this case, you also want the amount in each Customer Details record to be displayed as a transaction amount in your output statements. You therefore need to map Amount in your input model to TxAmount in your output model. To do this:
1. In the Inputs section, click Amount and drag and drop it to TxAmount in the Outputs section.
2. The following message appears:
This message indicates that you cannot set up a straightforward mapping between Amount and TxAmount because they are not of the same type—one is a double and the other is a float.
Note: For the purposes of this example, rename the local transformation to Record to StmtLine. To do this, click the MAIN tab, right-click the local transformation in the ALL section, select Rename. Type "Record to StmtLine" and click OK. The new name is automatically reflected in the local transformation and its corresponding tab.
The translation requires a narrowing of the valid range of numbers. Would you like to create a CAST function and proceed with the mapping?
Note: The reason why you could set up a direct mapping between Name and PostingNarrative is because they are both strings.
79
CHAPTER 3 | Creating Transformations
3. Click OK.
A CAST function that forces a compatible mapping between the Amount double type and the TxAmount float type is created. It is displayed in the ALL section of the Record to StmtLine tab. Amount is connected to Arg1 in the CAST function, and Result in the CAST function connected to TxAmount.
4. Select File > Save All from the menu bar, or click the icon on the toolbar, to save the transformation.
80
Creating a Simple Transformation
Testing the Local Transformation in Your Main Transformation
Overview Now that you have set up a local transformation and its associated functions and mappings, you can check to see how it has made your main transformation more functional.
Running the transformation Complete the following steps to run the transformation and view its results:
1. Click the MAIN tab. Notice that:
♦ The Record to StmtLine local transformation is displayed in the ALL section.
♦ Customer Details in the Inputs section is connected to Customer Details in the local transformation.
♦ StatementLine in the local transformation is connected to StmtLine in the Outputs section.
2. In the Explorer window, right-click StatGen.tfd and select Run Component.
3. In the Run Wizard dialog:
i. The Name field defaults to the name of the selected component.
ii. The Target field defaults to the path location of the selected transformation.
iii. The Build Before Running check box is checked by default.
4. Accept all the default values and click Run.
5. In the resulting dialog box, which prompts you to load the data you want to parse, click the icon.
6. A StatGen tab opens within the StatGen.tfd tab. This tab will show the results of running your transformation. Notice:
i. That because you have not yet loaded any data into the object, it is displayed in its empty state with a red X.
ii. In the Messages window, an empty Run StatGen tab has been created.
7. Click the (Load) icon in the Inputs section.
81

CHAPTER 3 | Creating Transformations
8. In the Select Input File/Directory dialog:
i. Navigate to the Getting Started/Samples/C - Creating Transformations folder.
ii. Select Transactions.txt.
iii. Click Open.
iv. In the Confirm dialog, click Yes.
This loads the relevant data records into your input model.
9. Expand Transactions in the Inputs section to view the various Customer Details records that form your input. Notice how an arrow is mapped from each CustomerDetails record to Customer Details in the Record to StmtLine local transformation.
10. Click the (Perform Transformation) icon on the toolbar.
This sets up a connection between StatementLine in the Record to StmtLine local transformation and the output model. Relevant data from the input model is automatically loaded in the output model.
In this case, expand StatementFile and Statement and you will see seven StmtLine records corresponding to the seven CustomerDetails records in the Inputs section.
11. Expand each StmtLine record and you will see that it includes values for TxAmount and PostingNarrative. This proves that your local transformation is working correctly. It has produced the expected results.
Note: The errors being reported in the Outputs section are validation errors. These are due to the fact that various other mandatory elements (that is, elements with a cardinality of 1) within StatementFile are not currently being mapped. Ignore these validation errors for the purposes of this demonstration.
82

Creating a Simple Transformation
Creating a Filter
Overview Suppose that you want to produce statement lines for only one particular customer rather than all customers. In this case, you can add a filter to your transformation to filter out any Customer Details records that you are not interested in. For the purposes of this example, let’s assume that you now only want to produce statement lines for the customer Mr. Scrooge.
Starting to create a filter Complete the following steps to start creating a filter within your main transformation:
1. Click the Design tab.
2. Click the MAIN tab to reopen the transformation.
3. Click the arrow that is between the Inputs section and the local transformation, to highlight it.
4. Right-click the highlighted arrow and select Add Filter from the context menu. This opens a Filter Customer Details tab for the filter (with a
icon beside its name) within the StatGen.tfd tab.
Notice how the Inputs section of the filter tab is populated with the relevant input type. Notice also how it is automatically mapped to the Value pane in the Outputs section.
5. Rename the filter to JustScrooge as follows:
i. Click the MAIN tab.
ii. Right-click the filter in the ALL section and select Rename.
iii. Type "JustScrooge" and click OK.
The new name is automatically reflected in the filter and its corresponding tab.
Note: The Outputs section for a filter is divided into a Condition pane and a Value pane. The purpose of these is demonstrated in the rest of this section. You cannot add output models to filters.
83

CHAPTER 3 | Creating Transformations
Adding the EQUALS function to your filter
You now need to specify the logic of the filter that you want to implement. For this example, use a logic function called EQUALS. Complete the following steps to add the EQUALS function to your filter:
1. Click the JustScrooge tab to reopen it.
2. In the ALL section, right-click and select New > Function.
3. In the New Function dialog:
i. Expand Logic.
ii. Select EQUALS.
iii. Click OK.
The EQUALS function is now displayed in the ALL section.
4. Connect Name in the Inputs section to Arg1 in the EQUALS function.
An arrow goes from Name to Arg1, and Arg1 is now displayed in black.
5. Right-click Arg2 in the EQUALS function and select Set Constant Value from the context menu.
6. In the Set Constant Value dialog:
i. Type "Mr Scrooge" in the text box.
ii. Click OK.
Mr Scrooge is now displayed in the ALL section as a constant value for Arg2.
7. Connect Result in the EQUALS function to boolean in the Condition part of the Outputs section.
An arrow goes from Result to boolean, and Result is now displayed in black.
8. Select File > Save All from the menu bar, or click the icon on the toolbar.
84
Creating a Simple Transformation
Testing the Filter in Your Main Transformation
Overview Now that you have set up a filter and its associated functions and mappings, you can check to see what difference it makes to your transformation.
Mapping main inputs and outputs When you set up a filter, it is displayed in the ALL section of your main transformation. Click the MAIN tab and you will see that the JustScrooge filter is displayed in the ALL section, with Customer Details as its input parameter and Value as its output parameter.
Notice how Customer Details in the Inputs section now maps to Customer Details in the JustScrooge filter. Notice also how Value in the JustScrooge filter maps to Customer Details in the Record to StmtLine local transformation.
Running the transformation You can now run your transformation to see the results that the new filter produces. To do this:
1. Right-click StatGen.tfd in the Explorer window and select Run Component.
2. In the Run Wizard dialog:
i. The Name field automatically defaults to the name of the selected component; in this case, StatGen.
ii. The Target field defaults to the path location of the selected transformation.
iii. The Build Before Running check box is checked by default.
iv. Accept all of the default values and click Run.
A StatGen tab opens within the StatGen.tfd tab. This tab shows the results of running your transformation. The relevant data records are automatically reloaded into your input model.
Note: You can move components around and change their position in the ALL section if you want. Simply click the name of a component in the ALL section and drag your mouse while holding the left mouse key. The component moves position accordingly.
85

CHAPTER 3 | Creating Transformations
3. Expand Transactions in the Inputs section to view the various Customer Details records that form your input. Notice how an arrow goes from each CustomerDetails record to Customer Details in the JustScrooge filter.
4. Relevant data from the input model is automatically loaded in the output model:
i. Expand StatementFile and Statement. Notice that there is only two StmtLine records.
ii. Expand each StmtLine record and you will see that they are based on the two CustomerDetails records for Mr Scrooge. No StmtLine records have been produced for any other customer. This proves that your newly added filter is working correctly. It has produced the expected results.
You have now successfully created a simple transformation that includes both a local transformation and a filter with associated functions and mappings. The next section looks at how you can make your transformation more complex by adding more models and components to it.
Note: Again, the errors being reported in the Outputs section are validation errors due to the fact that various other mandatory elements (that is, elements with a cardinality of 1) within StatementFile are not currently being mapped to. Ignore these validation errors for the purposes of this demonstration.
86

Making Your Transformation More Complex
Making Your Transformation More Complex
Overview This section expands on what you learned in the previous section. It shows how you can make your transformation more complex by adding various other components to it.
In this section This section discusses the following topics:
Before You Continue page 88
Adding More Input Models to Your Main Transformation page 90
Adding Local Transformations page 92
Adding Functions page 95
Adding Nested Local Transformations page 100
Adding Hash Tables page 108
Adding Filters page 112
Adding Java Methods page 118
Adding Introspect Functions page 122
87
CHAPTER 3 | Creating Transformations
Before You Continue
Overview Some of the features and components in the simple transformation that you created in the previous section, “Creating a Simple Transformation” on page 74, are not relevant to the more complex example. To make your transformation suitable for continuing with the complex example, you need to make various adjustments to the transformation. These modifications are a good way of showing you how you can modify a transformation.
Delete the JustScrooge filter The JustScrooge filter is not a relevant feature of the more complex demonstration. Delete the JustScrooge filter as follows:
1. Click the Design tab.
2. Click the MAIN tab.
3. Right-click the JustScrooge filter and select Delete.
4. In the Confirm Delete dialog, click OK.
5. In the Confirm Component Delete dialog, click Yes.
The filter and its associated mappings are deleted from the MAIN tab.
Delete the CAST function The CAST function is not a relevant feature of the Record to StmtLine local transformation in the more complex demonstration. Delete the CAST function from the Record to StmtLine local transformation as follows:
1. Click the Record to StmtLine tab.
2. Right-click the CAST function and select Delete.
3. In the Confirm Delete dialog, click OK.
The function and its associated mappings are deleted from the Record to StmtLine tab.
Note: Notice how Customer Details in the Record to StmtLine local transformation is now displayed in red, because you have removed its corresponding input mapping.
88

Making Your Transformation More Complex
Delete the mapping between Name and PostingNarrative
The mapping between Name and PostingNarrative is not a relevant feature of the Record to StmtLine local transformation in the more complex demonstration. Delete the mapping between Name and PostingNarrative from the Record to StmtLine local transformation as follows:
1. Click the Record to StmtLine tab.
2. Right-click the mapping between Name and PostingNarrative, and select Delete.
3. In the Confirm Delete dialog, click OK.
The connection between Name and PostingNarrative is deleted from the Record to StmtLine tab.
89
CHAPTER 3 | Creating Transformations
Adding More Input Models to Your Main Transformation
Overview The main StatGen transformation already contains one input model called Transactions. Making it more complex by adding two more input models—Customers and Accounts.
Steps Complete the following steps to add the additional input models:
1. Click the MAIN tab.
2. In the Inputs section, click the (Global Input) icon.
3. In the Select New Input Data Model dialog:
i. Navigate to My ADS Projects/Getting Started/Samples/C - Creating Transformations.
ii. Select Customers.dod and click OK.
4. In the Select New Input Type dialog:
i. Expand Local.
ii. Select the Customers File complex type, and click OK.
The Customers data model is now added as part of your input for the transformation, and the Customers File complex type is displayed along with its Customer element in the Inputs section of the MAIN tab.
5. In the Inputs section, click the (Global Input) icon.
6. In the Select New Input Data Model dialog:
i. Navigate to My ADS Projects/Getting Started/Samples/C - Creating Transformations.
ii. Select Accounts.dod and click OK.
7. In the Select New Input Type dialog:
i. Expand Local.
ii. Select the Accounts File complex type, and click OK.
Note: Before you continue, ensure that you have created all data models as instructured in chapter 2 of this guide.
90
Making Your Transformation More Complex
The Accounts data model is added as part of your input for the transformation, and the Accounts File complex type is displayed along with its Account element in the Inputs section of the MAIN tab.
8. Select File > Save All from the menu bar, or click the icon on the toolbar, to save the transformation.
You now have three input models and one output model in your transformation. As it stands, however, the transformation is not very functional. The next step is to add a new local transformation to it.
91
CHAPTER 3 | Creating Transformations
Adding Local Transformations
Overview The simple demonstration has already shown you how to create a local transformation called Record to StmtLine. For the purposes of this more complex demonstration, you now need to create another local transformation called AccountTxns to Statement.
Automatically adding the new local transformation
Complete the following steps to add a local transformation within your main transformation:
1. Click the MAIN tab.
2. Connect Account (under Accounts File) in the Inputs section to Statement in the Outputs section.
A Warning dialog displays the following text:
3. Click OK to create the local transformation.
This creates an Account To Statement local transformation which is automatically opened in a new tab (with a icon beside its name) within the StatGen.tfd tab. The local transformation has Account as its input parameter and Statement as its output parameter.
The translation requires a mapping between two different complex types. Would you like to create a local transform and proceed with the mapping?
Note: For the purposes of this example, rename the local transformation to AccountTxns to Statement. To do this, click the MAIN tab, right-click the Account To Statement local transformation in the ALL section, select Rename, type "AccountTxns to Statement" and click OK. The new name is automatically reflected in the local transformation and its corresponding tab.
92

Making Your Transformation More Complex
Adding more input models to the new local transformation
Add two more input models to the AccountTxns to Statement local transformation as follows:
1. Click the AccountTxns to Statement tab to open it.
2. In the Inputs section, click the (Local Input) icon (Alternatively, right-click in the ALL section and select New > Local Input.)
3. In the Add input dialog, select Transactions and click OK.
4. In the Select New Input Path dialog, select Transactions and click OK. This displays the Transactions complex type along with its Header, Customer Details and Row Count elements in the Inputs section of the AccountTxns to Statement tab.
5. In the Inputs section, click the (Local Input) icon.
6. In the Add input dialog, select Customers File and click OK.
7. In the Select New Input Path dialog, select Customers File and click OK. This displays the Customers File complex type along with its Customer element in the Inputs section of the AccountTxns to Statement tab.
Setting up main mappings to the new local transformation
When a local transformation contains only one input and output model, the ADS Designer automatically handles the mapping between inputs and outputs for you in the MAIN tab. However, when you add additional input or output models to a local transformation, you must manually set up the additional mappings. For the purposes of this example:
1. Click the MAIN tab.
2. Connect Transactions in the Inputs section to Transactions in the AccountTxns to Statement local transformation. This displays a second arrow going from the Inputs section to the new local transformation, and Transactions in the local transformation is displayed in black.
Note: Function parameters are displayed in red to warn you that they have no associated mapping. When you establish a mapping for a function parameter, it is then displayed in black.
93
CHAPTER 3 | Creating Transformations
3. Connect Customers File in the Inputs section to Customers File in the AccountTxns to Statement local transformation. This displays a third arrow going from the Inputs section to the local transformation, and Customers File in the local transformation is now displayed in black.
4. Select File > Save > Save Tab As.
5. In the Save dialog:
i. Click StatGen.tfd to populate it in the File name field.
ii. Navigate to the My ADS Projects/Getting Started/Samples/C - Creating Transformations folder and double-click 2 - Adding Local Transformations.
iii. Click Save.
This saves the updated transformation into the 2 - Adding Local Transformations folder.
At this point, your transformation is not very functional. You need to add some functions to it. See “Adding Functions” on page 95 for more details.
94
Making Your Transformation More Complex
Adding Functions
Overview Transformations are built up from functions that are chained together to convert one or more values from the input model to a node in the output model. The elements in an input model are translated to that of the output model. These elements are not always compatible and must therefore be cast or modified by the use of functions to ensure compatibility.
The purpose of this demonstration is to show how you can use NOW and CONVERTDATE functions to determine the statement date node in the output model. In this demonstration, the CONVERTDATE function is used to translate the generic date that is derived from the NOW function to the ISO8601 statement date node in the output model.
Starting to create functions Complete the following steps to start creating functions within your existing transformation:
1. In the Project view of the workbench, ensure that MyProject.iop is opened. If you need to open it, select File > Open Project from the menu bar.
2. In the project tree:
i. Navigate to My ADS Projects/Getting Started/Samples/C - Creating Transformations/2 - Adding Local Transformations
ii. Right-click the StatGen.tfd file and select Open Selected.
This opens the StatGen.tfd transformation in the main view of the workbench.
Note: The transformation created in this section is only partially complete, so the transformed statement will be invalid. However, you should look out for the stmtDate node, which uses the function at this stage.
Note: Before you continue, ensure that you have completed the instructions in “Adding Local Transformations” on page 92.
95

CHAPTER 3 | Creating Transformations
Mapping input "OpeningBalance" to output "StartBalance"
In this case, you want the opening balance in each Account record to be displayed as a start balance in your output statements. You therefore need to map OpeningBalance in your Account input model to StartBalance in your output model. To do this:
1. Click the AccountTxns to Statement tab.
2. Try to connect OpeningBalance (under Account) in the Inputs section to StartBalance (under Hdr) in the Outputs section. In this case, you receive the following message:
This message indicates that you cannot set up a straightforward mapping between OpeningBalance and StartBalance because they are not of the same type—one is a decimal and the other is a float.
3. Click OK to indicate that you want a CAST function to be created to force a compatible mapping between OpeningBalance and StartBalance.
The CAST function is automatically displayed in the ALL section of the AccountTxns to Statement tab, with OpeningBalance in the Inputs section connected to Arg1 in the CAST function, and Result in the CAST function connected to StartBalance in the Outputs section.
Mapping input "ClosingBalance" to output "EndBalance"
You also want the closing balance in each Account record to be displayed as an end balance in your output statements. You therefore need to map ClosingBalance in your Account input model to EndBalance in your output model. To do this:
1. Click the AccountTxns to Statement tab.
2. Try to connect ClosingBalance (under Account) in the Inputs section to EndBalance (under Tlr) in the Outputs section. In this case, you receive the following message:
The translation requires a narrowing of the valid range of numbers. Would you like to create a CAST function and proceed with the mapping?
The translation requires a narrowing of the valid range of numbers. Would you like to create a CAST function and proceed with the mapping?
96

Making Your Transformation More Complex
This message indicates that you cannot set up a straightforward mapping between ClosingBalance and EndBalance because they are not of the same type—one is a decimal and the other is a float.
3. Click OK.
The CAST function is displayed in the ALL section of the AccountTxns to Statement tab, with ClosingBalance in the Inputs section connected to Arg1 in the CAST function, and Result in the CAST function connected to EndBalance in the Outputs section.
Creating NOW and CONVERTDATE functions
Next create an operation to assign the current date to the statement date. Start by creating a date function called NOW as follows:
1. Click the AccountTxns to Statement tab.
2. In the ALL section, right-click and select New > Function.
3. In the New Function dialog:
i. Expand Date & Time.
ii. Select NOW.
iii. Click OK.
The NOW function is displayed in the ALL section.
4. Try to connect Result in the NOW function to StmtDate in the Outputs section. The following message is displayed:
This message indicates that the NOW function returns a Generic date that is incompatible with the StmtDate type.
5. Click OK to indicate that you want the CONVERTDATE function to be automatically created.
The CONVERTDATE function is created and displays in the ALL section of the AccountTxns to Statement tab, with Result in the NOW function connected to Arg1 in the CONVERTDATE function, and Result in the CONVERTDATE function connected to StmtDate in the Outputs section.
The translation requires a change to the type of date. Would you like to create a CONVERTDATE function and proceed with the mapping?
Note: In this case, the StmtDate is an ISO8601 type of date.
97
CHAPTER 3 | Creating Transformations
This ensures that the correct ISO8601 type is returned as the statement date.
Creating the ADD function Next create an operation that maps the LastStatementNo in the Account input model to the StmtNo in the Statement output model, and increments it by 1 in the process. Start by creating a mathematical function called ADD, which has the LastStatementNo as its first argument and a constant value of 1 as its second argument:
1. Click the AccountTxns to Statement tab.
2. In the ALL section, right-click and select New > Function.
3. In the New Function dialog:
i. Expand Math.
ii. Expand Arithmetic
iii. Select ADD and click OK.
The ADD function is displayed in the ALL section.
4. Connect LastStatementNo in the Account input model to Arg1 in the ADD function.
5. Right-click Arg2 in the ADD function and select Set Constant Value.
6. In the Set Constant Value dialog, type "1" as the constant value and click OK. This sets Arg2 to a value of 1.
7. Try to connect Result in the ADD function to StmtNo in the Statement output model. This raises the following error:
This message indicates that the ADD function returns a number type that is incompatible with the StmtNo, and is prompting you to automatically create a CAST function that converts the number derived from the ADD function to the correct type.
8. Click OK.
The translation requires a narrowing of the valid range of numbers. Would you like to create a CAST function and proceed with the mapping?
Note: In this case, the StmtNo is an integer type.
98
Making Your Transformation More Complex
A CAST function is created and displayed it in the ALL section of the AccountTxns to Statement tab, with Result in the ADD function connected to Arg1 in the CAST function, and Result in the CAST function connected to StmtNo in the Outputs section.
This ensures that the correct integer type is returned as the statement number.
9. Select File > Save > Save Tab As.
10. In the Save dialog:
i. Click StatGen.tfd to populate it in the File name field.
ii. Navigate to the My ADS Projects/Getting Started/Samples/C - Creating Transformations folder.
iii. Double-click 3 - Adding Functions.
iv. Click Save.
This saves the updated transformation into the 3 - Adding Functions folder.
You have now added various functions and mappings to successfully output the starting balance, ending balance, statement date and statement number. However, the transformation still needs further updating. Two more local transformations need to be created, this time within the AccountTxns to Statement local transformation. See “Adding Nested Local Transformations” on page 100 for more details.
99

CHAPTER 3 | Creating Transformations
Adding Nested Local Transformations
Overview You can nest components within other components. For example, you can nest one or more local transformations within another local transformation. In this demonstration, you need to add two more local transformations called Populate NameAndAddress and Record to StmtLine to the existing AccountTxns to Statement local transformation.
Moving the "Record to StmtLine" local transformation
Complete the following steps to move the Record to StmtLine local transformation under AccountTxns to Statement.
1. In the Project view of the workbench, ensure that MyProject.iop is opened. If you need to open it, select File > Open Project from the menu bar.
2. In the project tree:
i. Navigate to the My ADS Projects/Getting Started/Samples/C - Creating Transformations/3 - Adding Functions folder.
ii. Right-click the StatGen.tfd file and selected Open Selected.
The StatGen.tfd transformation in the main view of the workbench.
3. Click the MAIN tab.
4. In the ALL section, right-click the Record to StmtLine local transformation and select Delete.
5. In the Confirm Delete dialog, click OK.
6. In the Confirm Component Delete dialog, click No.
7. Click the AccountTxns to Statement tab to open it.
8. Right-click in the ALL section and select New > Transform Reference.
Note: Remember, you have already created a Record to StmtLine local transformation as part of the simple demonstration. This now needs to be moved, so that it becomes a nested local transformation under AccountTxns to Statement.
Note: Before you continue, ensure that you have completed the instructions in “Adding Functions” on page 95.
100
Making Your Transformation More Complex
9. In the New Transform Reference dialog:
i. Expand My ADS Projects/Getting Started/Samples/C - Creating Transformations/3 - Adding Functions
ii. Click StatGen.tfd.
iii. Click OK.
10. In the Select Component dialog, select Record to StmtLine and click OK.
This adds the Record to StmtLine local transformation to the AccountTxns to Statement tab.
Adding SIZE and DIVIDE functions within "AccountTxns to Statement"
Now that the Record to StmtLine local transformation has been moved, add functions that will allow the output from Record to StmtLine to be mapped to the StmtPage in the Statement output model. This means that we can take a series of individual records and use them as a collection to determine an overall count of the records.
In this case, a SIZE function is used to take the output from Record to StmtLine and return the size of the input list. Then a DIVIDE function takes the size of the input list and divides it by 10, to output the correct value for Statement Page (that is, there is 10 statement records per page). To achieve this, complete the following steps:
1. Click the AccountTxns to Statement tab.
2. In the ALL section, right-click and select New > Function.
3. In the New Function dialog:
i. Expand Collections.
ii. Select SIZE.
iii. Click OK.
The SIZE function is displayed in the ALL section.
4. In the ALL section, right-click and select New > Function.
5. In the New Function dialog:
i. Expand Math.
ii. Expand Arithmetic.
iii. Select DIVIDE and click OK.
The DIVIDE function is displayed in the ALL section.
101

CHAPTER 3 | Creating Transformations
6. Connect StatementLine in the Record to StmtLine local transformation to Arg1 in the SIZE function.
7. Connect Result in the SIZE function to Arg1 in the DIVIDE function.
8. Right-click Arg2 in the DIVIDE function and select Set Constant Value from the context menu.
9. In the Set Constant Value dialog, type "10" in the text box and click OK.
10 is now displayed in the ALL section as a constant value for Arg2 in DIVIDE.
10. Expand Hdr in the Statement output model.
11. Try to connect Result in the DIVIDE function to StmtPage in the Statement output model. This raises the following error:
This message indicates that the DIVIDE function returns a number type that is incompatible with the StmtPage, and is prompting you to create a CAST function that will convert the number derived from the DIVIDE function to the correct type.
12. Click OK to indicate that you want the CAST function to be automatically created.
The CAST function is created and displayed in the ALL section of the AccountTxns to Statement tab, with Result in the DIVIDE function connected to Arg1 in the CAST function, and Result in the CAST function connected to StmtPage in the Outputs section.
This ensures that the correct integer type is returned as the statement page.
The translation requires a narrowing of the valid range of numbers. Would you like to create a CAST function and proceed with the mapping?
Note: In this case, the StmtPage is an integer type.
102
Making Your Transformation More Complex
Adding functions within "Record to StmtLine"
Complete the following steps to add functions within the Record to StmtLine local transformation:
1. Click the Record to StmtLine tab to open it.
2. In the ALL section, right-click and select New > Function.
3. In the New Function dialog:
i. Expand Date & Time.
ii. Select CONVERTDATE
iii. Click OK.
4. In the Select Return Type dialog:
i. Expand Date & Time.
ii. Select ISO8601 date.
iii. Click OK.
The CONVERTDATE function is displayed in the ALL section of the Record to StmtLine tab.
5. Connect Transaction Date in the Inputs section to Arg1 in the CONVERTDATE function. This displays an arrow going from Transaction Date to Arg1, and Arg1 is displayed in black.
6. Connect Result in the CONVERTDATE function to both PostingDate and ValueDate in the Outputs section. This displays arrows going from Result to both PostingDate and ValueDate, and Result is now displayed in black.
7. In the ALL section of the Record to StmtLine tab, right-click and select New > Function.
8. In the New Function dialog:
i. Expand Logic.
ii. Select GREATERTHAN
iii. Click OK.
The GREATERTHAN function is now displayed in the ALL section of the Record to StmtLine tab.
9. Connect Amount in the Inputs section to Arg1 in the GREATERTHAN function. This displays an arrow going from Amount to Arg1, and Arg1 is now displayed in black.
103
CHAPTER 3 | Creating Transformations
10. Right-click Arg2 in the GREATERTHAN function and select Set Constant Value from the context menu.
11. In the Set Constant Value dialog, type "0" in the text box and click OK. 0 is now displayed in the ALL section as a constant value for Arg2.
12. In the ALL section of the Record to StmtLine tab, right-click and select New > Function.
13. In the New Function dialog, expand Logic, select IF and click OK.
14. In the Select Return Type dialog, you can choose the type you want the IF function to return, expand Text, select String and click OK.
The IF function is now displayed in the ALL section of the Record to StmtLine tab and is set to return a string type.
15. Connect Result in the GREATERTHAN function to Condition in the IF function. This displays an arrow going from Result to Condition, and Condition is now displayed in black.
16. Right-click WhenTrue in the IF function and select Set Constant Value from the context menu.
17. In the Set Constant Value dialog, type "DR" in the text box and click OK. DR is now displayed in the ALL section as a constant value for WhenTrue.
18. Right-click WhenFalse in the IF function and select Set Constant Value from the context menu.
19. In the Set Constant Value dialog, type "CR" in the text box and click OK. CR is now displayed in the ALL section as a constant value for WhenFalse.
20. Connect Result in the IF function to DrCr in the Outputs section. This displays an arrow going from Result to DrCr, and Result is now displayed in black.
21. Connect Amount in the Inputs section to TxAmount in the Outputs section. This automatically prompts you to set up a CAST function between the two types. Click OK to add the CAST function.
22. Connect Currency in the Inputs section to the Ccy attribute of TxAmount in the Outputs section. This displays an arrow going from Currency to Ccy.
23. Click the AccountTxns to Statement tab to open it.
104
Making Your Transformation More Complex
24. Connect Customer Details (under Transactions) in the Inputs section to Customer Details in the Record to StmtLine local transformation.
25. Connect StatementLine in the Record to StmtLine local transformation to StmtLine in the Outputs section.
Creating a "Populate NameAndAddress" local transformation
Complete the following steps to create a Populate NameAndAddress local transformation under AccountTxns to Statement:
1. Click the AccountTxns to Statement tab.
2. In the ALL section, right-click and select New > Local Transform.
3. In the New Local Transform dialog, type "Populate NameAndAddress" in the text box and click OK. A Populate NameAndAddress tab (with a
icon beside its name) opens within the StatGen.tfd tab.
4. In the Inputs section of the Populate NameAndAddress tab, click the (Local Input) icon.
5. In the Add Input dialog, select Customers File and click OK.
6. In the Select New Input Path dialog, select Customer and click OK. This displays the Customer complex type and its elements in the Inputs section of the Populate NameAndAddress tab.
7. In the Outputs section of the Populate NameAndAddress tab, click the (Local Output) icon.
8. In the Select New Output Path dialog:
i. Expand Hdr.
ii. Select NameAddress.
iii. Click OK.
This displays the PostalAddress1 complex type and its elements in the Outputs section of the Populate NameAndAddress tab.
Adding functions within "Populate NameAndAddress"
Complete the following steps to add functions to the "Populate NameAndAddress" local transformation:
1. Click the Populate NameAndAddress tab.
2. In the ALL section, right-click and select New > Function.
105
CHAPTER 3 | Creating Transformations
3. In the New Function dialog:
i. Expand Collections.
ii. Select UNION.
iii. Click OK.
The UNION function is displayed in the ALL section of the Populate NameAndAddress tab.
4. Connect Customer Acronym in the Inputs section to Arg1 in the UNION function. This displays an arrow going from Customer Acronym to Arg1, and Arg1 is displayed in black.
5. Expand Address in the Inputs section and connect its constituent AddressLine to Arg2 in the UNION function.
6. In the ALL section of the Populate NameAndAddress tab, right-click and select New > Function.
7. In the New Function dialog:
i. Expand Collections.
ii. Select SUBLIST.
iii. Click OK.
The SUBLIST function is now displayed in the ALL section of the Populate NameAndAddress tab.
8. Connect Result in the UNION function to List in the SUBLIST function. This displays an arrow going from Result to List, and both parameters are now displayed in black.
9. Right-click BeginIndex in the SUBLIST function and select Set Constant Value from the context menu.
10. In the Set Constant Value dialog, type "0" in the text box and click OK. 0 is now displayed in the ALL section as a constant value for BeginIndex.
11. Right-click EndIndex in the SUBLIST function and select Set Constant Value from the context menu.
12. In the Set Constant Value dialog, type "5" in the text box and click OK. 5 is now displayed in the ALL section as a constant value for EndIndex.
13. Connect Result in the SUBLIST function to AdrLine in the Outputs section. This displays an arrow going from Result to AdrLine, and Result is now displayed in black.
106

Making Your Transformation More Complex
14. Connect Country Of Residence in the Inputs section to Ctry in the Outputs section.
15. Click the AccountTxns to Statement tab to open it.
16. Connect Customer (under Customers File) in the Inputs section to Customer in the Populate NameAndAddress local transformation.
17. Connect PostalAddress1 in the Populate NameAndAddress local transformation to NameAddress in the Outputs section.
18. Select File > Save > Save Tab As.
19. In the Save dialog:
i. Click StatGen.tfd to populate it in the File name field.
ii. Navigate to the My ADS Projects/Getting Started/Samples/C - Creating Transformations folder.
iii. Double-click 4 - Adding Nested Local Transformations.
iv. Click Save.
This saves the updated transformation into the 4 - Adding Nested Local Transformations folder.
Next, let’s look at adding a hash table to the transformation. See “Adding Hash Tables” on page 108 for more details.
107

CHAPTER 3 | Creating Transformations
Adding Hash Tables
Overview The hashtable function allows you to create a hash table of values that can be referenced by the transformation code. This is useful in cases where you want an input string value (for example, "USD") to act as key to an output string (for example, "US Dollar"). The hash table operates as a simple set of one-to-one mappings. At deployment time, this structure is created as java.util.hashtable.
This demonstration shows how you can use a currency hash table to assign names and values to different currencies. After you create the transformation, you deploy it and test its validity using the Run Wizard.
Creating a hash table in a transformation
Complete the following steps to create a hash table in a transformation:
1. In the Project view of the workbench, ensure that MyProject.iop is opened. If you need to open it, select File > Open Project from the menu bar.
2. In the project tree:
i. Navigate to the My ADS Projects/Getting Started/Samples/C - Creating Transformations/4 - Adding Nested Local
Transformations folder
ii. Right-click the StatGen.tfd file and select Open Selected.
The StatGen.tfd transformation opens in the main view of the workbench.
3. Click the AccountTxns to Statement tab.
4. In the ALL section, right-click and select New > Hashtable.
5. In the Hashtable dialog:
Note: The transformation created in this section is only partially complete, so the transformed statement will be invalid. However, you should look out for the currency node which uses the hash table at this stage.
Note: Before you continue, ensure that you have completed the instructions in “Adding Nested Local Transformations” on page 100.
108

Making Your Transformation More Complex
6. Type "Currencies" in the Name field.
7. Add the four currencies codes and their names as shown in the table below by clicking to add each row:
The hash table now contains four rows of data.
8. Click OK.
The Currencies hash table is displayed in the ALL section with an invalid Arg 1 and Result.
9. Specify the mappings between the input and output models as follows:
i. Connect Currency in the Account input model to Arg 1 of the Currencies hash table.
ii. Connect Result in the Currencies hash table to Ccy of Startbalance (under the Hdr element) and Ccy of EndBalance (under the Tlr element) in the Statement output model. This displays arrows going from Result to Ccy of both StartBalance and EndBalance.
10. Select File > Save > Save Tab As.
11. In the Save dialog:
i. Click StatGen.tfd to populate it in the File name field.
ii. Navigate to the My ADS Projects/Getting Started/Samples/C - Creating Transformations folder.
iii. Double-click 5 - Adding Hash Tables.
iv. Click Save.
This saves the updated transformation into the 5 - Adding Hash Tables folder.
Input Output
EUR Euro
GBP British Pound
JPY Japenese Yen
USD US Dollar
109

CHAPTER 3 | Creating Transformations
Running the transformation Now try running your transformation to see the effect of the hash table on the results produced. To do this:
1. Right-click StatGen.tfd in the Explorer window and select Run Component.
2. In the Run Wizard dialog:
i. The Name field automatically defaults to the name of the selected component; in this case, StatGen.
ii. The Target field defaults to the path location of the selected transformation.
iii. The Build Before Running check box is checked by default.
iv. Accept all of the default values and click Run.
3. In the resulting dialog box, which prompts you to load the data you want to parse, click the icon.
4. A StatGen tab opens within the StatGen.tfd tab. This tab will show the results of running your transformation. Notice:
i. That because you have not yet loaded any data into the object, it is displayed in its empty state with a red X.
ii. In the Messages window, an empty Run StatGen tab has been created.
5. In the Transactions input tab, click the (Load) icon.
6. In the Select Input File/Directory dialog:
i. Navigate to the Getting Started/Samples/C - Creating Transformations folder.
ii. Select Transactions.txt.
iii. Click Open.
iv. In the Confirm dialog, click Yes.
This loads the relevant data records into your input model.
7. Repeat steps 5 and 6 for the CustomersFile and AccountsFile tabs, and load the Customers.txt file and Accounts.txt file respectively.
8. For the first record listed in the Outputs section, expand Statement, then expand Hdr, StartBalance, and click Ccy. For the same record, also expand Tlr, EndBalance, and click Ccy.
110

Making Your Transformation More Complex
9. Select the AccountsFile tab in the Inputs section and expand the first Account. In this case, notice how the GBP in the Inputs section maps to two instances of British Pound in the Outputs section.
10. For the second record listed in the Outputs section, expand Statement, then expand Hdr, StartBalance, and click Ccy. For the same record, also expand Tlr, EndBalance, and click Ccy.
11. Select the AccountsFile tab in the Inputs section and expand the second Account. In this case, notice how the USD in the Inputs section maps to two instances of US Dollar in the Outputs section.
12. Click the Design tab to reopen it.
13. Select File > Save > Save Tab As.
14. In the Save dialog:
i. Click StatGen.tfd to populate it in the File name field.
ii. Navigate to the My ADS Projects/Getting Started/Samples/C - Creating Transformations folder.
iii. Double-click 5 - Adding Hash Tables.
iv. Click Save.
This saves the updated transformation into the 5 - Adding Hash Tables folder.
You have now added a hash table to successfully output the currency name of input currency codes. However, the transformation still needs further updating. Next, let’s add a filter that will allow records to be extracted in the transaction file, using the credit card numbers that match the credit card numbers in the accounts file. See “Adding Filters” on page 112 for more details.
111

CHAPTER 3 | Creating Transformations
Adding Filters
Overview Filters are used to create mappings for recurring elements, so that only a subset of a group of recurring elements is returned as part of the transformation. A filter first examines the two fields on which a comparison is based, discard the differences between them, perform the comparison, and return a subset that contains the matching records. The filter does this recursively. In Artix Data Services filters, the Inputs section expects a data model on which the filter logic can operate. The Outputs section is divided in two—the top section is the boolean logic, which must be true, and the bottom section specifies what the output should be.
This section describes how you create two different filters within the AccountTxns to Statement local transformation. First you create a SameAccount filter to get the records in the transaction file that match the credit card numbers in the accounts file. (The credit card format is different between the accounts file and the transaction file, so it needs to be modified before a comparison is made.) Then you create FindCustomerRecord filter to find the records.
Creating the SameAccount filter Complete the following steps to create the SameAccount filter:
Complete the following steps to create a hash table in a transformation:
1. In the Project view of the workbench, ensure that MyProject.iop is opened. If you need to open it, select File > Open Project from the menu bar.
2. In the project tree:
i. Navigate to the My ADS Projects/Getting Started/Samples/C - Creating Transformations/5 - Adding Hash Tables folder
ii. Right-click the StatGen.tfd file and select Open Selected.
Note: The transformation created in this section is only partially complete, so the transformed statement will be invalid.
Note: Before you continue, ensure that you have completed the instructions in “Adding Hash Tables” on page 108.
112

Making Your Transformation More Complex
The StatGen.tfd transformation opens in the main view of the workbench.
3. Click the AccountTxns to Statement tab.
4. Click the arrow that is between Customer Details (under Transactions) in the Inputs section and Customer Details in the Record to StmtLine local transformation. This highlights the arrow.
5. Right-click the highlighted arrow and select Add Filter from the context menu. This opens a Filter Customer Details tab for the filter (with a
icon beside its name) within the AccountTxns to Statement tab.
Notice how the Inputs section of the filter tab is automatically populated with the Customer Details input type. Notice also how it is automatically mapped to the Value pane in the Outputs section.
6. Rename the filter to SameAccount as follows:
i. Click the AcountTxns to Statement tab.
ii. Right-click the Filter Customer Details filter in the ALL section, select Rename.
iii. Type "SameAccount".
iv. Click OK.
The new name is automatically reflected in the filter and its corresponding tab.
7. Select the Accounts input model. It contains the second element to be involved in the comparison.
i. Open the SameAccount tab.
ii. Click the (Local Input) icon.
iii. In the Add input dialog, select Account and click OK.
The Account complex type displays in the Inputs section of the SameAccount filter.
Adding a REPLACEALL function to the SameAccount filter
In the Transactions model, the card numbers include hyphens between the numbers. In the Accounts model, the card numbers do not include any hyphens or spaces. Because the card numbers are represented differently
Note: Customer Details will be the first input element to be involved in the comparison.
113

CHAPTER 3 | Creating Transformations
between the two models, the elements need to be stripped of anything but numbers so that it is possible to successfully compare them and continue filtering records. To do this, use a text function called REPLACEALL. Complete the following steps to create the REPLACEALL function:
1. Click the SameAccount tab.
2. In the ALL section, right-click and select New > Function.
3. In the New Function dialog, expand Text, select REPLACEALL and click OK.
4. Connect Card Number in the Customer Details input model to String in the REPLACEALL function. This displays an arrow going from Card Number to String.
5. The next step is to set as a constant value what it is you want to be replaced, which in this case is a hyphen. Right-click Regex of REPLACEALL and select Set Constant Value.
6. In the Set Constant Value dialog, type " "-" " and click OK. This causes "-" to be dispayed for Regex.
7. The next step is to set as a constant value what it is you want to replace the hyphen with, which in this case is an empty string. Right-click Replacement of REPLACEALL and select Set Constant Value.
8. In the Set Constant Value dialog, type " "" " and click OK. This causes "" to be displayed for Replacement.
Adding an EQUALS function to the SameAccount filter
Now that the format of the comparable elements has been made to match, you can proceed with enabling the comparison. To do this, use a logic function called EQUALS. Complete the following steps to create the EQUALS function:
1. In the ALL section, right-click and select New > Function.
2. In the New Function dialog, expand Logic, select EQUALS and click OK. The EQUALS function is displayed in the ALL section.
3. Connect Result in the REPLACEALL function to Arg1 in the EQUALS function.
4. Connect CardNumber in the Account input model to Arg2 in the EQUALS function.
114

Making Your Transformation More Complex
5. The result of the EQUALS function is the condition on which the filter is based. Connect Result in the EQUALS function to the boolean element in the Condition output pane.
If the condition is met, that transaction record will be stored in the any element of Value Output. Notice how Customer Details in the Inputs section is already automatically mapped to the any element in the Value output pane. Do not adjust this.
Completing mappings for the SameAccount filter
You are almost finished creating the filter. In the AccountTxns to Statement local transformation, Customer Details (under Transactions) in the Inputs section is already automatically mapped to Customer Details in the SameAccount filter. Similarly, Value in the SameAccount filter is already automatically mapped to Customer Details in the Record to StmtLine local transformation.
To complete the filter mappings:
1. Connect Account in the Inputs section to Account in the SameAccount filter.
Creating the FindCustomerRecord filter
Follow these steps to create the FindCustomerRecord filter:
1. Click the AccountTxns to Statement tab.
2. Click the arrow that is between Customer (under Customers File) in the Inputs section and Customer in the Populate NameAndAddress local transformation. This highlights the arrow.
3. Right-click the highlighted arrow and select Add Filter from the context menu. This opens a Filter Customer tab for the filter (with a icon beside its name) within the AccountTxns to Statement tab.
Notice how the Inputs section of the filter tab is automatically populated with the Customer input type. Notice also how it is automatically mapped to the Value pane in the Outputs section.
Note: The SameAccount filter represents an individual statement line in the statement model.
Note: Customer is the first input element to be involved in the comparison.
115

CHAPTER 3 | Creating Transformations
4. Rename the filter to FindCustomerRecord as follows:
i. Click the AcountTxns to Statement tab.
ii. Rght-click the Filter Customer filter in the ALL section and select Rename.
iii. Type "FindCustomerRecord" and click OK.
The new name is automatically reflected in the filter and its corresponding tab.
5. Now select the Accounts input model. It contains the second element to be involved in the comparison.
i. Open the FindCustomerRecord tab.
ii. Click the (Local Input) icon.
iii. In the Add input dialog, select Account and click OK.
The Account complex type is displayed in the Inputs section of the FindCustomerRecord filter.
Adding an EQUALS function to the FindCustomerRecord filter
To enable the comparison between the two input models, use a logic function called EQUALS. Complete the following steps to create the EQUALS function:
1. In the ALL section, right-click and select New > Function.
2. In the New Function dialog, expand Logic, select EQUALS and click OK. The EQUALS function is displayed in the ALL section.
3. Connect Customer Number in the Customer input model to Arg1 in the EQUALS function.
4. Connect Customer in the Account input model to Arg2 in the EQUALS function.
5. The result of the EQUALS function is the condition on which the filter is based. Connect Result in the EQUALS function to the boolean element in the Condition output pane.
If the condition is met, that customer record will be stored in the any element of Value output. Notice how Customer in the Inputs section is already automatically mapped to the any element in the Value output pane. Do not adjust this.
116

Making Your Transformation More Complex
Completing mappings for the FindCustomerRecord filter
You are almost finished creating the filter. In the AccountTxns to Statement local transformation, Customer (under Customers File) in the Inputs section is already automatically mapped to Customer in the FindCustomerRecord filter. Similarly, Value in the FindCustomerRecord filter is already automatically mapped to Customer in the Populate NameAndAddress local transformation.
To complete the filter mappings:
1. Connect Account in the Inputs section to Account in the FindCustomerRecord filter.
2. Select File > Save > Save Tab As.
3. In the Save dialog:
i. Click StatGen.tfd to populate it in the File name field.
ii. Navigate to the My ADS Projects/Getting Started/Samples/C - Creating Transformations folder.
iii. Double-click 6 - Adding Filters.
iv. Click Save.
This saves the updated transformation into the 6 - Adding Filters folder.
117
CHAPTER 3 | Creating Transformations
Adding Java Methods
Overview Java methods can be used to write new methods that will be embedded in the class representing the transformation in deployment time.
The purpose of this demonstration is to show you how to use a Java method to look up a transaction from a vendor and assign it to a vendorID. The input parameter type is defined as long, because the vendor ID that is passed in is of type long. The return type is a string, so that it can be displayed as such in the output model.
Steps Complete the following steps to use Java methods in a transformation:
1. In the Project view of the workbench, ensure that MyProject.iop is opened. If you need to open it, select File > Open Project from the menu bar.
2. In the project tree:
i. Navigate to the My ADS Projects/Getting Started/Samples/C - Creating Transformations/6 - Adding Filters folder.
ii. Right-click the StatGen.tfd file and select Open Selected.
This opens the StatGen.tfd transformation in the main view of the workbench.
3. Click the Record to StmtLine tab.
4. Right-click in the ALL section of the Record to StmtLine local transformation and select New > Java Method.
5. In the Java Method dialog:
i. Click the Signature tab.
ii. Type "CreateNarrative" in the Method Name field.
Note: The transformation created in this section is only partially complete, so the transformed statement will be invalid.
Note: Before you continue, ensure that you have completed the instructions in “Adding Filters” on page 112.
118
Making Your Transformation More Complex
iii. In the Parameters section, click the icon to add a new parameter row.
iv. Type "vendorID" in the Name column.
v. Click anyType in the Type column.
6. In the Select Argument Type dialog:
i. Expand Numeric.
ii. Select long.
iii. Click OK.
iv. In the Return Type section, click Select.
7. In the Select Return Type dialog:
i. Expand Text, select String and click OK.
8. In the Java Method dialog, click the Code tab.
9. In the Code tab, the method declaration is displayed. Complete it as follows:
i. In the main text box area, beside 1, type return "Transaction from vendor:"+vendorID;
ii. Click OK.
The CreateNarrative method is displayed in the ALL section of the Record to StmtLine tab.
10. Connect Vendor ID in the Customer Details input model to vendorID in the CreateNarrative method.
11. Connect Result in the CreateNarrative method to PostingNarrative under the StatementLine element in the Statement output model.
12. Select File > Save> Save Tab As.
13. In the Save dialog:
i. Navigate to the My ADS Projects/Getting Started/Samples/C - Creating Transformations/7 - Adding Java Methods folder.
ii. Click Save to save your changes to the StatGen.tfd file.
119

CHAPTER 3 | Creating Transformations
Running the transformation Now run your transformation to see the effect of the Java method on the results:
1. Right-click StatGen.tfd in the Explorer window and select Run Component.
2. In the Run Wizard dialog:
i. The Name field defaults to the name of the slected component; in this case, StatGen.
ii. The Target field defaults to the path location of the selected transformation.
iii. The Build Before Running check box is checked by default.
iv. Accept all the default values and click Run.
3. In the resulting dialog box, which prompts you to load the data you want to parse, click the icon.
4. A StatGen tab opens within the StatGen.tfd tab. This tab will show the results of running your transformation. Notice:
i. That because you have not yet loaded any data into the object, it is displayed in its empty state with a red X.
ii. In the Messages window, an empty Run StatGen tab has been created.
5. In the Transactions input tab, click the (Load) icon.
6. In the Select Input File/Directory dialog:
i. Navigate to the Getting Started/Samples/C - Creating Transformations folder.
ii. Select Transactions.txt.
iii. Click Open.
iv. In the Confirm dialog, click Yes.
This loads the relevant data records into your input model.
7. Repeat steps 5 and 6 for the CustomersFile and AccountsFile tabs, and load the Customers.txt file and Accounts.txt file respectively.
An invalid StatementFile is displayed in the output section. (It is invalid because some of the mandatory elements have not been mapped at this stage.)
120

Making Your Transformation More Complex
8. Expand Statement and then expand StmtLine for one or all records available. PostingNarrative should be displayed for that record.
121
CHAPTER 3 | Creating Transformations
Adding Introspect Functions
Overview This section describes how to use introspect functions in transformations. Introspect functions return a value of the part of a complex type value that you can then map to an output data model.
The purpose of this demonstration is to show you how you can use an introspect function to extract country of residence from the Customer model, and concatenate it with an account number to identify the location of a customers account.
Steps Complete the following steps to use introspect functions in a transformation:
1. In the Project view of the workbench, ensure that MyProject.iop is opened. If you need to open it, select File > Open Project from the menu bar.
2. In the project tree:
i. Navigate to the My ADS Projects/Getting Started/Samples/C - Creating Transformations/7 - Adding Java Methods folder.
ii. Right-click the StatGen.tfd file and select Open Selected.
This opens the StatGen.tfd transformation in the main view of the workbench.
3. Click the AccountTxns to Statement tab. (Click the Design tab first if you cannot see the AccountTxns to Statement tab.)
Note: The transformation created in this section is complete, so the transformed statement will be valid. Look out for the Account node which uses the introspect function at this stage.
Note: Before you continue, ensure that you have completed the instructions in “Adding Java Methods” on page 118.
122

Making Your Transformation More Complex
4. Right-click in the ALL section and select New > Introspector.
The Introspect function is displayed in the ALL section, with Arg1 as its input and Result as its output.
5. Connect Value in the FindCustomerRecord filter to Arg 1 in the Introspect function.
6. Double-click on Arg 1 of Introspect.
7. In the Select Path dialog, select the Customer complex type and click OK. This displays Customer as Arg 1 of the Introspect function.
8. Double-click on Result of Introspect.
9. In the Select Path dialog, select the Country Of Residence element and click OK. Country Of Residence is now displayed as Result of the Introspect function.
10. Right-click in the ALL section and select New > Function.
11. In the New Function dialog, expand Text, select CONCAT, and click OK. The CONCAT function is displayed in the ALL section.
12. Connect Country Of Residence in the Introspect function to Arg 1 in the CONCAT function.
13. Connect AccountNumber in the Account input model to Arg 2 in the CONCAT function.
14. Connect Result in the CONCAT function to Account (under Hdr) in the Statement output model.
15. Select File > Save > Save Tab As.
16. In the Save dialog:
i. Click StatGen.tfd to populate it in the File name field.
ii. Navigate to the My ADS Projects/Getting Started/Samples/C - Creating Transformations folder.
iii. Double-click 8 - Adding Introspect Functions.
iv. Click Save.
Note: If you have not disabled tool tips, a tool tip is displayed at this point. It will prompt you to first map the input type of the introspect function and then double-click on it to specify the return type, which will enable you to map its output.
123
CHAPTER 3 | Creating Transformations
This saves the updated transformation into the 8 - Adding Introspect Functions folder.
Running the transformation Now try running your transformation to see the effect of the introspect function on the results:
1. Right-click StatGen.tfd in the Explorer window and select Run Component.
2. In the Run Wizard dialog, accept all the default values and click Run.
3. In the resulting dialog box, which prompts you to load the data you want to parse, click the icon.
4. A StatGen tab opens within the StatGen.tfd tab. This tab will show the results of running your transformation. Notice:
i. That because you have not yet loaded any data into the object, it is displayed in its empty state with a red X.
ii. In the Messages window, an empty Run StatGen tab has been created.
5. In the Transactions input tab, click the (Load) icon.
6. In the Select Input File/Directory dialog:
i. Navigate to the Getting Started/Samples/C - Creating Transformations folder.
ii. Select Transactions.txt.
iii. Click Open.
iv. In the Confirm dialog, click Yes.
This loads the relevant data records into your input model.
7. Repeat steps 5 and 6 for the CustomersFile and AccountsFile tabs, and load the Customers.txt file and Accounts.txt file respectively.
8. Expand Statement and then expand Hdr for one or all records available. Notice how Account is now different from what it was before. It now has a 2-character country of residence code at the start.
124

CHAPTER 4
Creating a Simple Java ApplicationThis chapter demonstrates how to use Artix Data Services to generate Java code from the sample data models and transformations you have created in earlier chapters. It then shows how to create and subsequently run a simple Java application that uses the generated code to perform various tasks.
In this chapter This chapter discusses the following topics:
Generating Java Code page 126
Writing the Application page 142
Compiling and Running the Application page 149
125
CHAPTER 4 | Creating a Simple Java Application
Generating Java Code
Overview This section describes how to use Artix Data Services to generate Java code from the sample data models and transformations you have set up. You have already generated Java code for these sample models and transformations without possibly realizing it. This section takes a closer look at how code is generated in Artix Data Services.
In this section This section discusses the following topics:
Setting Compile Options page 127
Building the Code page 131
Finding the Generated Code page 134
Sample Generated Code page 136
126

Generating Java Code
Setting Compile Options
Overview Each Artix Data Services project has at least one (default) profile. Profile settings (that is, compile options) are sets of parameters that are used to control various aspects of the code that Artix Data Services generates from the data models and transformations relating to a particular project.
Setting up multiple profiles for a project
You can set up multiple different profiles for the same project. In this case, each profile can contain a different range of settings.
If you want to set up multiple profiles for a project:
1. Ensure that project (.iop) is open in the Project window.
2. Open the Project Properties dialog in any of the following ways:
♦ Select Edit > Project Properties from the menu bar.
♦ Right-click the project (.iop) file in the Project window and select Project Properties from the context menu.
3. Click the Profiles icon.
4. In the Profiles panel:
i. Click the icon
ii. Specify the new profile name.
iii. Click OK.
Repeat these steps to set up as many profiles as you want for a particular project.
Editing a particular profile To edit the settings for a particular profile:
1. Ensure the relevant project is open in the Project window.
2. Open the Profile Settings panel in any of the following ways:
♦ If the Project Properties wizard is currently open, click the Profiles icon, click the relevant profile in the list, and then click Open.
♦ Select Edit> Profile Settings from the menu bar and select the profile that you want to edit from the drop-down menu.
127
CHAPTER 4 | Creating a Simple Java Application
♦ Right-click the project (.iop) file in the Project window, select Profile Settings from the context menu and select the profile that you want to edit from the drop-down list.
3. Edit the profile settings as appropriate. See “Profile settings” for more details.
Profile settings The Artix Data Services user guide (online help) provides full details of all of the available profile settings. The main profile settings that relate to code generation are:
Profile Setting Details
Directory This allows you to specify the path to the default deployment directory where you want generated code to be stored. The default path is your_default_projects_folder/Deployments. (Your default projects folder is determined during the installation process.) For example:
WindowsC:\Documents and Settings\username\My Documents\My ADS Projects\Deployments
UNIX$HOME/MyADSProjects/Deployments
You can specify an alternative directory path if you want. For more details see “Finding the Generated Code” on page 134.
Deploy Referenced Files
This indicates whether the data models associated with a transformation should automatically be deployed with it.
This setting is enabled by default.
Clean This indicates whether the directory for your generated source code should be automatically cleaned before code generation starts.
This setting is disabled by default.
128
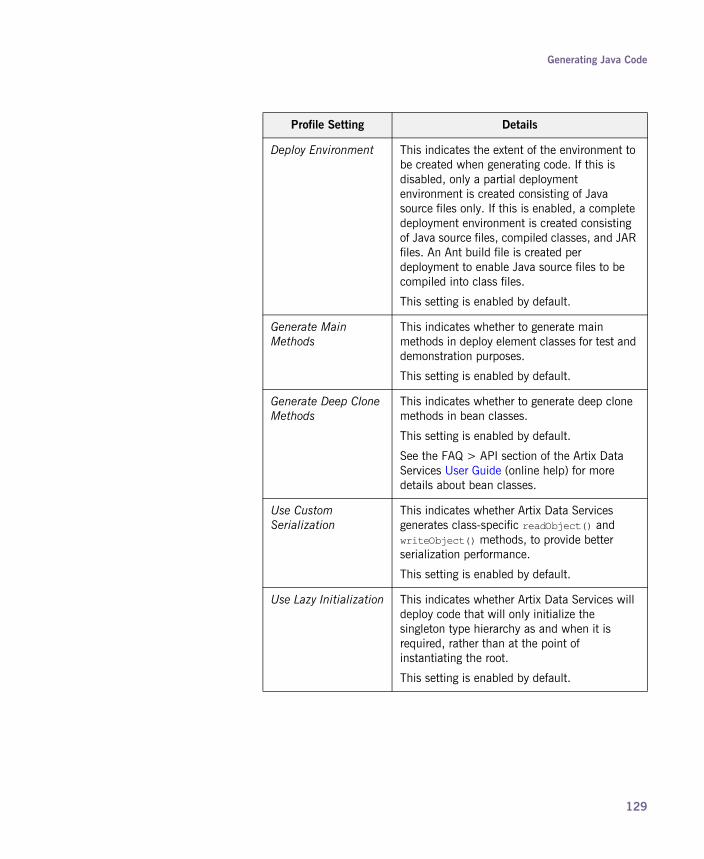
Generating Java Code
Deploy Environment This indicates the extent of the environment to be created when generating code. If this is disabled, only a partial deployment environment is created consisting of Java source files only. If this is enabled, a complete deployment environment is created consisting of Java source files, compiled classes, and JAR files. An Ant build file is created per deployment to enable Java source files to be compiled into class files.
This setting is enabled by default.
Generate Main Methods
This indicates whether to generate main methods in deploy element classes for test and demonstration purposes.
This setting is enabled by default.
Generate Deep Clone Methods
This indicates whether to generate deep clone methods in bean classes.
This setting is enabled by default.
See the FAQ > API section of the Artix Data Services User Guide (online help) for more details about bean classes.
Use Custom Serialization
This indicates whether Artix Data Services generates class-specific readObject() and writeObject() methods, to provide better serialization performance.
This setting is enabled by default.
Use Lazy Initialization This indicates whether Artix Data Services will deploy code that will only initialize the singleton type hierarchy as and when it is required, rather than at the point of instantiating the root.
This setting is enabled by default.
Profile Setting Details
129

CHAPTER 4 | Creating a Simple Java Application
Generate Bean Class This indicates whether to generate specialized subclasses of the API class ComplexDataObject. These subclasses provide type-safe get and set methods with return values and arguments respectively, corresponding to the appropriate child element types.
This setting is enabled by default.
See the FAQ > API section of the Artix Data Services User Guide (online help) for more details about bean classes.
Maximum Memory Size
This specifies the maximum size of the memory used for the underlying virtual machine (VM) in Ant build files.
The default is set to 512 MB.
Profile Setting Details
130
Generating Java Code
Building the Code
Overview After you have set up the profile settings you want to work with, you can use Artix Data Services to build (generate) the Java code for your data models and transformations. You can choose to build code for a data model while parsing the model or without parsing it. Similarly, you can choose to build code for a transformation while running the transformation or without running it.
Generating code for a model while parsing the model
To build code for a data model while parsing the model:
1. Ensure the relevant model is open (displayed) in the Explorer window.
2. Open the Run Wizard dialog in either of the following ways:
♦ Right-click the model component (element) that you want to parse in the Explorer window and select Run Component from the context menu.
♦ Click the model component (element) that you want to parse in the Explorer window and select Deploy > Run Component from the menu bar.
3. In the Run Wizard dialog:
i. The selected component (element) name is automatically displayed in the Name field.
ii. If you have more than one profile set up for the project, select the profile you want to use in the Profile field.
iii. Ensure the Build Before Running check box is checked.
Note: This subsection is included for the purposes of illustration. If you have followed the instructions in the earlier chapters of this guide, you have already built Java code while parsing the sample models and running the sample transformation.
Note: It is very important that you right-click the element (marked with the symbol) rather than the complex type. Otherwise Artix Data Services will not be able to generate a complextypeElement class, which is necessary to allow your model to be used in code.
131
CHAPTER 4 | Creating a Simple Java Application
iv. Click Run.
The progress of the build is shown at the bottom of the screen.
Generating code for a model without parsing the model
To build code for a data model without parsing the model:
1. Ensure the relevant model is open (displayed) in the Explorer window.
2. Do either of the following:
♦ Right-click the model (.dod) file that you want to build and select Build Component(s) from the context menu.
♦ Click the model (.dod) file that you want to build and select Deploy > Build Component(s) from the menu bar.
3. If you have more than one profile set up for the project, a dialog prompts you to select the profile you want to use. Select the relevant profile and click OK.
A Building tab is created in the Messages window and displays details of the build.
Generating code for a transform while running the transform
To build code for a transformation while running the transformation:
1. Ensure the relevant transformation is open (displayed) in the Explorer window.
2. Open the Run Wizard dialog in either of the following ways:
♦ Right-click the transformation (.tfd) file in the Explorer window and select Run Component from the context menu.
♦ Click the transformation (.tfd) file in the Explorer window and select Deploy > Run Component from the menu bar.
3. In the Run Wizard dialog:
i. The selected transformation name is automatically displayed in the Name field.
ii. If you have more than one profile set up for the project, select the profile you want to use in the Profile field.
iii. Ensure the Build Before Running check box is checked
iv. Click Run.
The progress of the build is shown at the bottom of the screen.
132
Generating Java Code
Generating code for a transform without running the transform
To build code for a transformation without running the transformation:
1. Ensure the relevant transformation is open (displayed) in the Explorer window.
2. Do either of the following:
♦ Right-click the transformation (.tfd) file in the Explorer window and select Build Component(s) from the context menu.
♦ Click the transformation (.tfd) file in the Explorer window and select Deploy > Build Component(s) from the menu bar.
3. If you have more than one profile set up for the project, a dialog prompts you to select the profile you want to use. Select the relevant profile.
4. Click OK.
A Building tab opens in the Messages window and shows details of the build.
Build files and the Ant Build window
When you build code for a data model or transformation, a corresponding XML-based build file is generated and stored in your default deployment directory. The Ant Build window in the ADS Designer contains details of each generated build file, to allow you to perform various build tasks (that is, to run various Ant targets). See the Artix Data Services User Guide (online help) for more details on the Ant Build window.
Building partial versus full deployments
For the purposes of the demonstrations in this guide, a full deployment environment (that is, Java source files, compiled classes and JAR file) is built for each sample model and transformation. The Deploy Environment profile setting determines whether only a partial (Java source files only) or full deployment environment is built. The Deploy Environment setting is enabled by default, to build a full deployment environment.
Note: Enabling the Deploy Environment setting does not automatically build Javadoc. If you want to use the ADS Designer to build Javadoc, you must do so via the Ant Build window.
133

CHAPTER 4 | Creating a Simple Java Application
Finding the Generated Code
Overview This subsection describes how to find the generated code for your data models and transformations. The full path to the generated code for a particular model or transformation can be broken down as follows:
• Default deployment directory
• Source and build subfolders
• Model or transformation-specific subfolders
Default deployment directory As discussed in “Profile settings” on page 128, the default deployment directory for your generated code is determined by the Directory profile setting. The default path is your_default_projects_folder/Deployments. (Your default projects folder is determined during the installation process.) For example:
WindowsC:\Documents and Settings\username\My Documents\My ADS Projects\
Deployments
UNIX$HOME/MyADSProjects/Deployments
Source and build subfolders The Java source files, compiled classes and JAR files for all your models and transformations can be found in the following subdirectories of your default deployment directory:
Model or transformation-specific subfolders
The Java source files and compiled classes for a particular model or transformation are stored under further subdirectories that are derived from the namespace for that model or transformation.
/src/java This contains generated Java source files.
/build/classes This contains compiled classes.
/build/libs This contains JAR files.
Note: The namespace for a model or transformation is specified via the Target Namespace property in the Properties window.
134

Generating Java Code
For example, the following is the namespace and corresponding subfolder path for each of the sample models and transformations in this guide:
So, for example, the Java source files for the Accounts data model can be found under your default_deployment_directory/src/java/com/progress/artixdataservi
ces/gettingstarted/account. Similarly, the compiled classes for the Statements data model can be found under your default_deployment_directory/build/classes/com/progress/artixdata
services/training/statements.
JAR and build filenames All JAR and build filenames are also derived from the namespace for the corresponding model or transformation. For example, the JAR filename for the Accounts data model is under your default_deployment_directory/build/libs and is called com.progress.artixdataservices.gettingstarted.account.jar. Similarly, the build file for the Accounts data model is in your default deployment directory and is called build-com.progress.artixdataservices.gettingstarted.account.xml.
Model/Transformation
Namespace Subfolder Path
Accounts.dod http://www.progress.com/ArtixDataServices/GettingStarted/Account
/com/progress/artixdataservices/gettingstarted/account
Transactions.dod http://www.progress.com/ArtixDataServices/GettingStarted/Transaction
/com/progress/artixdataservices/gettingstarted/transaction
Customers.dod http://www.progress.com/ArtixDataServices/GettingStarted/Customer
/com/progress/artixdataservices/gettingstarted/customer
Statements.dod http://www.progress.com/ArtixDataServices/Training/Statements
/com/progress/artixdataservices/training/statements
StatGen.tfd http://www.progress.com/ArtixDataServices/GettingStarted/Transform
/com/progress/artixdataservices/gettingstarted/transform
135

CHAPTER 4 | Creating a Simple Java Application
Sample Generated Code
Overview This subsection provides a listing of the compiled Java classes that are built for the sample models and transformation in this demonstration.
Compiled classes for Accounts data model
The compiled classes for the sample Accounts data model can be found in default_deployment_directory/build/classes/com/progress/artixdata
services/gettingstarted/account. The compiled classes can be described as follows:
• The AccountsFile class contains constructors for creating objects of the AccountsFile complex type. It also contains methods for adding and removing Account child elements.
• The AccountsFileClass class gets an instance of an AccountsFile object and initializes it.
• The AccountsFileElement class contains constructors for creating instances of AccountsFile objects. It also contains a method for reading in a file, parsing and validating it, and printing the results to standard output.
• The Account class contains constructors for creating objects of the Account complex type. It also contains methods for adding and removing its various child elements.
• The AccountClass class gets an instance of an Account object and initializes it.
• The AccountsDataModel class gets an instance of the Accounts data model and initializes it.
• Each of the remaining classes represent a particular simple type and gets an instance of an object of that type and initializes it.
136

Generating Java Code
Compiled classes for Customers data model
The compiled classes for the sample Customers data model can be found under default_deployment_directory/build/classes/com/progress/artixdata
services/
gettingstarted/customer. The compiled classes can be described as follows:
• The CustomersFile class contains constructors for creating objects of the CustomersFile complex type. It also contains methods for adding and removing Customer child elements.
• The CustomersFileClass class gets an instance of a CustomersFile object and initializes it.
• The CustomersFileElement class contains constructors for creating instances of CustomersFile objects. It also contains a method for reading in a file, parsing and validating it, and printing the results to standard output.
• The Customer class contains constructors for creating objects of the Customer complex type. It also contains methods for adding and removing its various child elements.
• The CustomerClass class gets an instance of a Customer object and initializes it.
• The Address class contains constructors for creating objects of the Address complex type. It also contains methods for adding and removing its various child elements.
• The AddressClass class gets an instance of an Address object and initializes it.
• The CustomersDataModel class gets an instance of the Customers data model and initializes it.
• Each of the remaining classes pertains to a particular simple type and gets an instance of an object of that type and initializes it.
137

CHAPTER 4 | Creating a Simple Java Application
Compiled classes for Transactions data model
The compiled classes for the sample Transactions data model can be found under default_deployment_directory/build/classes/com/progress/artixdata
services/gettingstarted/transaction. The compiled classes can be described as follows:
• The Transactions class contains constructors for creating objects of the Transactions complex type. It also contains methods for adding and removing header, customer details, and row count child elements.
• The TransactionsClass class gets an instance of a Transactions object and initializes it.
• The TransactionsElement class contains constructors for creating instances of Transactions objects. It also contains a method for reading in a file, parsing and validating it, and printing the results to standard output.
• The Header class contains constructors for creating objects of the Header complex type. It also contains methods for adding and removing its various child elements.
• The HeaderClass class gets an instance of a Header object and initializes it.
• The CustomerDetails class contains constructors for creating objects of the CustomerDetails complex type. It also contains methods for adding and removing its various child elements.
• The CustomerDetailsClass class gets an instance of a CustomerDetails object and initializes it.
• The RowCount class contains constructors for creating objects of the RowCount complex type. It also contains methods for adding and removing its various child elements.
• The RowCountClass class gets an instance of a RowCount object and initializes it.
• The TransactionsDataModel class gets an instance of the Transactions data model and initializes it.
• Each of the remaining classes represents a particular simple type and gets an instance of an object of that type and initializes it.
138

Generating Java Code
Compiled classes for Statements data model
The compiled classes for the sample Statements data model can be found under default_deployment_directory/build/classes/com/progress/artixdata
services/training/statements. The compiled classes can be described as follows:
• The StatementFile class contains constructors for creating objects of the StatementFile complex type. It also contains methods for adding and removing Statement child elements.
• The StatementFileClass class gets an instance of a StatementFile object and initializes it.
• The StatementFileElement class contains constructors for creating instances of StatementFile objects. It also contains a method for reading in a file, parsing and validating it, and printing the results to standard output.
• The Statement class contains constructors for creating objects of the Statement complex type. It also contains methods for adding and removing header, statement line, and trailer child elements.
• The StatementClass class gets an instance of a Statement object and initializes it.
• The StatementElement class contains constructors for creating instances of Statement objects. It also contains a method for reading in a file, parsing and validating it, and printing the results to standard output.
• The Header class contains constructors for creating objects of the Header complex type. It also contains methods for adding and removing its various child elements.
• The HeaderClass class gets an instance of a Header object and initializes it.
• The StatementLine class contains constructors for creating objects of the StatementLine complex type. It also contains methods for adding and removing its various child elements.
• The StatementLineClass class gets an instance of a StatementLine object and initializes it.
139
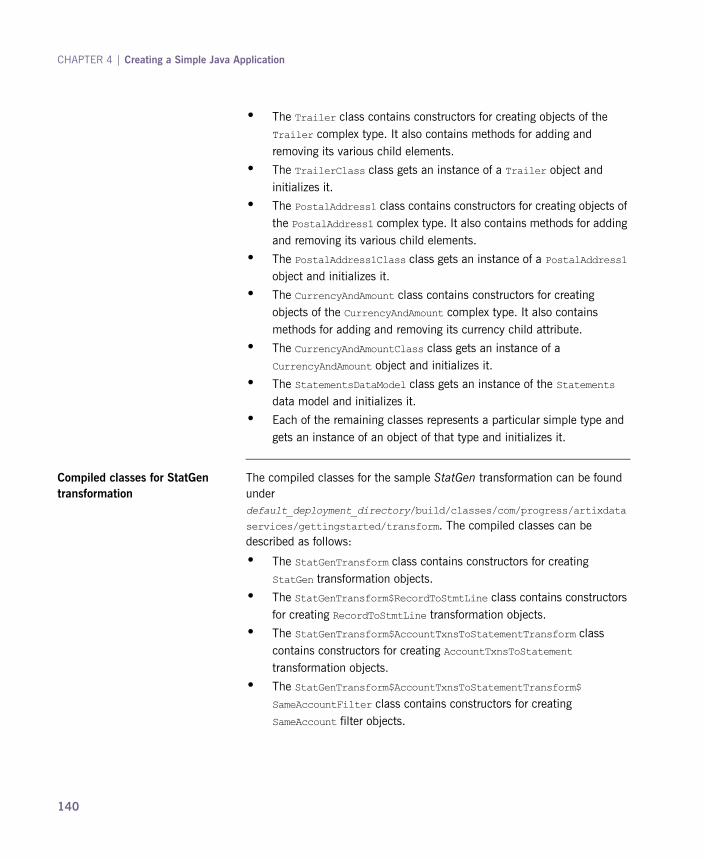
CHAPTER 4 | Creating a Simple Java Application
• The Trailer class contains constructors for creating objects of the Trailer complex type. It also contains methods for adding and removing its various child elements.
• The TrailerClass class gets an instance of a Trailer object and initializes it.
• The PostalAddress1 class contains constructors for creating objects of the PostalAddress1 complex type. It also contains methods for adding and removing its various child elements.
• The PostalAddress1Class class gets an instance of a PostalAddress1 object and initializes it.
• The CurrencyAndAmount class contains constructors for creating objects of the CurrencyAndAmount complex type. It also contains methods for adding and removing its currency child attribute.
• The CurrencyAndAmountClass class gets an instance of a CurrencyAndAmount object and initializes it.
• The StatementsDataModel class gets an instance of the Statements data model and initializes it.
• Each of the remaining classes represents a particular simple type and gets an instance of an object of that type and initializes it.
Compiled classes for StatGen transformation
The compiled classes for the sample StatGen transformation can be found under default_deployment_directory/build/classes/com/progress/artixdata
services/gettingstarted/transform. The compiled classes can be described as follows:
• The StatGenTransform class contains constructors for creating StatGen transformation objects.
• The StatGenTransform$RecordToStmtLine class contains constructors for creating RecordToStmtLine transformation objects.
• The StatGenTransform$AccountTxnsToStatementTransform class contains constructors for creating AccountTxnsToStatement transformation objects.
• The StatGenTransform$AccountTxnsToStatementTransform$SameAccountFilter class contains constructors for creating SameAccount filter objects.
140
Generating Java Code
• The StatGenTransform$AccountTxnsToStatementTransform$FindCustomerRecordFilter class contains constructors for creating FindCustomerRecord filter objects.
• The StatGenTransform$AccountTxnsToStatementTransform$PopulateNameAndAddresTransform class contains constructors for creating PopulateNameAndAddress transformation objects.
141

CHAPTER 4 | Creating a Simple Java Application
Writing the Application
Overview This section shows how to create a simple Java application that uses the sample code generated in the preceding section.
The simple application The simple application created in this section does the following:
• It reads data from various input files and parses that data into complex data objects based on the Transactions, Customers and Accounts input models respectively.
• It validates the data loaded into the complex data objects against the validation rules set up for the corresponding input models.
• It transforms the data from the structure based on the Accounts, Customers and Transactions input models to the structure based on the Statements output model, using the StatGen transformation.
• It converts the presentation of data from the input (textual) format into TagValuePair format.
• It uses an XPath query to retrieve transaction amount data from complex data objects based on the Statements output model.
• It uses Camel to take a text file as input and marshal the data back out to the file system in XML format.
Prerequisities to writing the code Before you write the application:
1. Copy the sample Transactions.txt from Getting Started\Samples\B - Creating Data Models\1 - From a Text File to your default_deployment_directory/build/classes folder.
2. Create a folder called D - Creating Simple Application in the following directory of your Artix Data Services installation:
your_default_projects_folder/Getting Started/Samples/
142

Writing the Application
Writing the application Use the following code to write an application called ADSDemo.java and save it in the D - Creating Simple Application folder that you just created. Note that in the Camel code block you must ensure that the code is pointing to the directory into which you just saved the Transactions.txt file.
package com.progress.artixdataservices.gettingstarted;
// Start of Artix Data Services API library (artix-ds-api-3.9.0.jar) import statementsimport biz.c24.io.api.presentation.*;import biz.c24.io.api.data.ComplexDataObject;import biz.c24.io.api.data.ValidationManager;import biz.c24.io.api.data.IOContext;import biz.c24.io.api.data.IOXPathFactory;import biz.c24.io.api.transform.Transform;// End of Artix Data Services API library import statements
// Start of standard Java class import statementsimport java.io.FileReader;import java.util.Iterator;import java.util.List;// End of standard Java class import statements
// Start of generated classes import statementsimport com.progress.artixdataservices.gettingstarted.transform.StatGenTransform;import com.progress.artixdataservices.gettingstarted.transaction.TransactionsElement;import com.progress.artixdataservices.gettingstarted.transaction.Transactions;import com.progress.artixdataservices.gettingstarted.transaction.CustomerDetails;import com.progress.artixdataservices.gettingstarted.account.AccountsFileElement;import com.progress.artixdataservices.gettingstarted.account.AccountsFile;import com.progress.artixdataservices.gettingstarted.customer.CustomersFileElement;import com.progress.artixdataservices.gettingstarted.customer.CustomersFile;import com.progress.artixdataservices.training.statements.StatementFile;// End of generated classes import statements
// Start of Camel core (camel-core-1.4.2.0-fuse.jar) import statementsimport org.apache.camel.builder.RouteBuilder;import org.apache.camel.impl.DefaultCamelContext;import org.apache.camel.CamelContext;import org.apache.camel.Processor;import org.apache.camel.Exchange;import org.apache.camel.model.dataformat.ArtixDSContentType;// End of Camel core import statements
public class ADSDemo { public static void main(String[] args) throws Exception {
143

CHAPTER 4 | Creating a Simple Java Application
// PARSING FileReader r1 = new FileReader("Transactions.txt"); TextualSource src1 = new TextualSource(r1); Transactions transactionsObject = (Transactions) src1.readObject(TransactionsElement.getInstance()); r1.close(); for (CustomerDetails customer : transactionsObject.getCustomerDetails()) System.out.println("Processing transaction against: "+customer.getNameElement());
FileReader r2 = new FileReader("Customers.txt"); TextualSource src2 = new TextualSource(r2); CustomersFile customersObject = (CustomersFile) src2.readObject(CustomersFileElement.getInstance()); r2.close();
FileReader r3 = new FileReader("Accounts.txt"); TextualSource src3 = new TextualSource(r3); AccountsFile accountsObject = (AccountsFile) src3.readObject(AccountsFileElement.getInstance()); r3.close();
// VALIDATION ValidationManager vm = new ValidationManager(); vm.validateByException(transactionsObject); vm.validateByException(customersObject); vm.validateByException(accountsObject);
// TRANSFORMATION Transform transform = new StatGenTransform();
Object[][] input = new Object[][] { {transactionsObject}, {customersObject}, {accountsObject}}; Object[][] output = transform.transform(input);
StatementFile statementsObject = (StatementFile) output[0][0]; System.out.println("Produced "+statementsObject.getStatement().length+" statements");
// WRITE OUT Sink snk = new TagValuePairSink(System.out); snk.writeObject(statementsObject);
// XPATH List l = IOXPathFactory.getInstance ("/Statement/StmtLine/TxAmount").getList(statementsObject);
144

Writing the Application
Explaining the PARSING code For the purposes of parsing the input Transactions.txt file the code does the following:
1. Creates a FileReader object, r1, that is initialized with the input Transactions.txt file.
2. Creates an Artix Data Services TextualSource object, src1, that is initialized with the r1 object.
3. Declares a transactionsobject variable of the Transactions class type. Initialize it with a Transactions type object that is created by casting the result of a call to the getInstance() method of the TransactionsElement class via a call to the readObject() method on
for (Iterator it = l.iterator(); it.hasNext();) { IOContext ioc = (IOContext) it.next(); System.out.println("CREDIT: "+ioc.getInstance().toString()); }
// CAMEL CamelContext context = new DefaultCamelContext(); context.addRoutes(new RouteBuilder(){ public void configure() throws Exception { from("file://C:/Documents and Settings/username/My Documents/My ADS
Projects/Deployments/build/classes/Transactions.txt?noop=true"). unmarshal().artixDS(TransactionsElement.class, ArtixDSContentType.Text). process(new Processor() { public void process(Exchange exchange) throws Exception { Transactions txs = (Transactions) exchange.getIn().getBody(); System.out.println("Camel is processing: "+ txs.getCustomerDetails().length+ " customer details!"); //Stop the Camel route so it doesn't wait for the file to be changed exchange.getContext().stop(); } }). marshal().artixDS(ArtixDSContentType.Xml). to("file://C:/MyOutputFile.xml?autoCreate=false"); } }); context.start(); }}
145

CHAPTER 4 | Creating a Simple Java Application
the src1 object. In other words, declares a variable that can hold object instances of the records in the Transactions.txt file that is being read in.
4. Declares a customer variable of the CustomerDetails class type, and call the getCustomerDetails() method on the transactionsObject variable, to retrieve each record in the transactions file. Then for each record, call System.out.println to print out the name of the customer pertaining to that record, which is determined by calling the getNameElement() method on the customer variable.
Explaining the VALIDATION code For the purposes of validating the input data the code does the following:
1. Creates an Artix Data Services ValidationManager object, vm.
2. Calls the validateByException() method on the vm object repeatedly, passing it the transactions file, customers file and accounts file objects respectively.
Explaining the TRANSFORMATION code
For the purposes of transforming the data from the structure based on the input models to the structure based on the Statements output model, the code does the following:
1. Creates a transformation object, transform, based on the sample StatGen transformation.
2. Creates an array of arrays type object, input, that is initialized with the transactions file, customers file and accounts file objects respectively.
3. Declares an array of arrays type variable, output. Initializes it with the result of a call to the transform() method on the transform object. The transform() method takes the input object as its input. In other words, declares a variable that can hold the result of the transformation.
4. Declares a statementsObject variable of the StatementFile class type. Initializes it with a StatementFile type object that is created by casting the output variable. In other words, declares a variable that can hold object instances of the transformation results.
Note: Steps 1–3 are repeated in a similar manner for the Customers and Accounts models.
146

Writing the Application
5. Calls System.out.println to print out the number of statement records in the statements file, which is determined by calling getStatement().length on the statementsObject object.
Explaining the WRITE OUT code For the purposes of converting the presentation of data from the input (textual) format into TagValuePair format, the code does the following:
1. Creates an Artix Data Services TagValuePairSink object, snk, and initialize it with the PrintStream object System.out.
2. Calls the writeObject() method on the snk object and passes it the statementsObject object.
Explaining the XPATH code For the purposes of using an XPath query to retrieve transaction amount data from complex data objects based on the Statements output model, the code does the following:
1. Declares a List type variable, 1. Initializes it with the result of a call to the getList() method which takes the result of a call to the getInstance() method of the IOXPathFactory class. The getinstance() method takes the XPath query syntax as its input and the getList() method takes the statementsObject variable as its input. In other words, declares a variable that can hold the list of results from applying the specified XPath query to each statements record.
2. Declares an Iterator type variable, it, and initializes it with a call to the iterator() method on the 1 variable. Then calls the hasNext() method on the it variable. In other words, declares a variable that can hold the results of iterating through the items in the list of XPath query results.
3. Declares an IOContext type variable, ioc. Initializes it with an IOContext type object that is created by casting the result of a call to the next() function on the it variable. In other words, declares a variable that can hold the next item in the list of XPath query results.
4. Then for each item in the list of XPath query results, calls System.out.println to print out its details, which are determined by calling the toString() method on the result of a call to the getInstance() method on the ioc variable.
147

CHAPTER 4 | Creating a Simple Java Application
Explaining the CAMEL code The Camel code takes a text file as input and marshals the data back out to the file system in XML format as follows:
1. Reads from the Transactions.txt file.
2. Unmarshals that data to create a TransactionElement object.
3. Runs some code on that object using the process() method, passing a Processor object created inline.
4. The Processor object prints out the number of CustomerDetails contained in the Transactions object.
5. Marshals the data to create a MyOutputFile.xml file that represents the customer details in XML format.
Note: You must specify in the code where you have stored the Transactions.txt file.
148

Compiling and Running the Application
Compiling and Running the Application
Overview This section describes how to compile and run the simple Java application. It also provides an overview of the sample output it produces.
Prerequisites to compiling Before you compile the application, ensure that all of the following are included on your CLASSPATH:
• product_installation_directory/lib/artix-ds-api-3.9.0.jar• product_installation_directory/lib/log4j-1.2.14.jar• product_installation_directory/lib/saxon-9.0.jar• product_installation_directory/lib/xercesImpl-2.9.1.jar• product_installation_directory/lib/camel/
camel-core-1.4.2.0-fuse.jar• product_installation_directory/lib/camel/
camel-artixds-1.4.2.0-fuse.jar• product_installation_directory/lib/commons-logging-1.1.1.jar• default_deployment_directory/build/libs/
com.progress.artixdataservices.gettingstarted.account.jar• default_deployment_directory/build/libs/
com.progress.artixdataservices.gettingstarted.customer.jar• default_deployment_directory/build/libs/
com.progress.artixdataservices.gettingstarted.transaction.jar• default_deployment_directory/build/libs/
com.progress.artixdataservices.training.statements.jar
Note: default_deployment_directory represents the default deployment directory in which the code for your sample models and transformations is stored. The default path is your_default_projects_folder/Deployments. If you selected the default project location you installed Artix Data Services, then default_deployment_directory is:
WindowsC:\Documents and Settings\username\My Documents\My ADS Projects\Deployments
UNIX$HOME/MyADSProjects/Deployments
149

CHAPTER 4 | Creating a Simple Java Application
• default_deployment_directory/build/libs/com.progress.artixdataservices.gettingstarted.transform.jar
Compiling the application To compile the application:
1. Open a command prompt.
2. Navigate to the directory where you saved the ADSDemo.java file. If you used the default location, it is located in:
3. Set JAVA_HOME to point to the JDK that ships with Artix Data Services as follows:
4. Set PATH to ensure the correct JDK is being used:
5. Run the following command:
Prerequisites to running the application
Before you run the simple application ensure that:
• The ADSDemo.class, ADSDemo$1.class, and ADSDemo$1$1.class files are all located in your default_deployment_directory/build/classes/com/progress/
artixdataservices/gettingstarted folder.
• You copy the sample Customers.txt and Accounts.txt files to your default_deployment_directory/build/classes folder.
♦ Customers.txt can be found in the following directory: Getting Started\Samples\B - Creating Data Models\1 - From a Text
File
♦ Accounts.txt can be found in the following directory: Getting Started\Samples\B - Creating Data Models\4 - Manually
your_default_projects_folder/Getting Started/Samples/D - Creating Simple Application
set JAVA_HOME=%ADS_HOME%\jdk
set PATH=%JAVA_HOME%\bin;%PATH%
javac -d "default_deployment_directory\build\classes" ADSDemo.java
150

Compiling and Running the Application
Running the application To run the application:
1. Open a command prompt.
2. Navigate to the default_deployment_directory/build/classes directory.
3. Run the following command:
Sample output The following is an overview of the sample output from the application:
java -classpath ".;%CLASSPATH%" com.progress.artixdataservices.gettingstarted.ADSDemo
Processing transaction against: Oliver TwistProcessing transaction against: Uriah HeepProcessing transaction against: Mr ScroogeProcessing transaction against: Charles DickensProcessing transaction against: Uriah HeepProcessing transaction against: Mr ScroogeProcessing transaction against: Oliver TwistProduced 4 statementsStatementFile: Statement: Hdr: NameAddress: AdrLine: OTWIST AdrLine: Flat 135A AdrLine: Wapping High Street AdrLine: London AdrLine: E1 4TY Ctry: GB StmtDate: 2009-05-15+01:00 StmtNo: 48 StmtPage: 0 Account: GB002023785892 StartBalance: @Ccy: British Pound1200.78 StmtLine: PostingDate: 2006-09-26+01:00 ValueDate: 2006-09-26+01:00 DrCr: DR TxAmount: @Ccy: GBP100.0 PostingNarrative: Transaction from vendor:14988603 StmtLine: PostingDate: 2006-02-23Z
151

CHAPTER 4 | Creating a Simple Java Application
ValueDate: 2006-02-23Z DrCr: DR TxAmount: @Ccy: GBP50.0 PostingNarrative: Transaction from vendor:14119663 Tlr: EndBalance: @Ccy: British Pound570.78 Statement: Hdr: NameAddress: AdrLine: UHEEP AdrLine: 30 AdrLine: Borough High Street AdrLine: London AdrLine: SE1 1XU Ctry: US StmtDate: 2009-05-15+01:00 StmtNo: 23 StmtPage: 0 Account: US230023744892 StartBalance: @Ccy: US Dollar2187.5 StmtLine: PostingDate: 2006-12-21Z ValueDate: 2006-12-21Z DrCr: DR TxAmount: @Ccy: USD258.0 PostingNarrative: Transaction from vendor:15688632 StmtLine: PostingDate: 2006-02-22Z ValueDate: 2006-02-22Z DrCr: DR TxAmount: @Ccy: USD250.0 PostingNarrative: Transaction from vendor:14988103 Tlr: EndBalance: @Ccy: US Dollar2670.26 Statement: Hdr: NameAddress: AdrLine: MRSCRROGE AdrLine: 325 AdrLine: Kennington Park Lane AdrLine: London
152
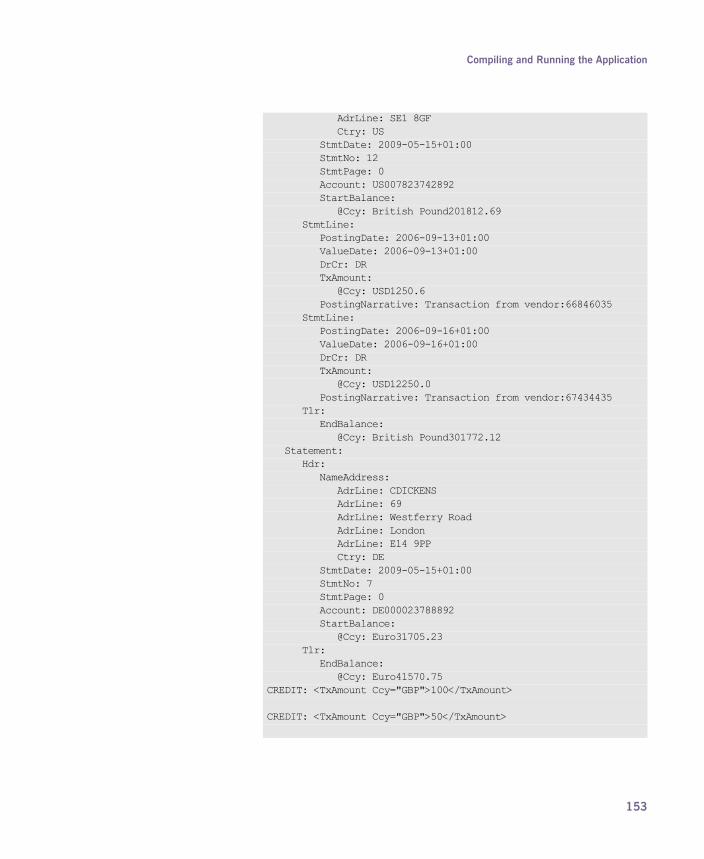
Compiling and Running the Application
AdrLine: SE1 8GF Ctry: US StmtDate: 2009-05-15+01:00 StmtNo: 12 StmtPage: 0 Account: US007823742892 StartBalance: @Ccy: British Pound201812.69 StmtLine: PostingDate: 2006-09-13+01:00 ValueDate: 2006-09-13+01:00 DrCr: DR TxAmount: @Ccy: USD1250.6 PostingNarrative: Transaction from vendor:66846035 StmtLine: PostingDate: 2006-09-16+01:00 ValueDate: 2006-09-16+01:00 DrCr: DR TxAmount: @Ccy: USD12250.0 PostingNarrative: Transaction from vendor:67434435 Tlr: EndBalance: @Ccy: British Pound301772.12 Statement: Hdr: NameAddress: AdrLine: CDICKENS AdrLine: 69 AdrLine: Westferry Road AdrLine: London AdrLine: E14 9PP Ctry: DE StmtDate: 2009-05-15+01:00 StmtNo: 7 StmtPage: 0 Account: DE000023788892 StartBalance: @Ccy: Euro31705.23 Tlr: EndBalance: @Ccy: Euro41570.75CREDIT: <TxAmount Ccy="GBP">100</TxAmount>
CREDIT: <TxAmount Ccy="GBP">50</TxAmount>
153

CHAPTER 4 | Creating a Simple Java Application
CREDIT: <TxAmount Ccy="USD">258</TxAmount>
CREDIT: <TxAmount Ccy="USD">250</TxAmount>
CREDIT: <TxAmount Ccy="USD">1250.6</TxAmount>
CREDIT: <TxAmount Ccy="USD">12250</TxAmount>
Camel is processing: 7 customer details!
154

CHAPTER 5
Overview of Ant TasksA number of Apache Ant (http://ant.apache.org/) tasks specific to Artix Data Services are packaged within the artix-ds-designerXXX.jar file. These enable deployment and exports to be automated with an Ant script. This is useful where the building of Artix Data Services generated components is included within overall project builds, without any requirement to manually deploy the components from within the ADS Designer.
In this chapter This chapter discusses the following topics:
Using the supplied Ant tasks page 156
Deployment page 156
Deployments directory page 156
155
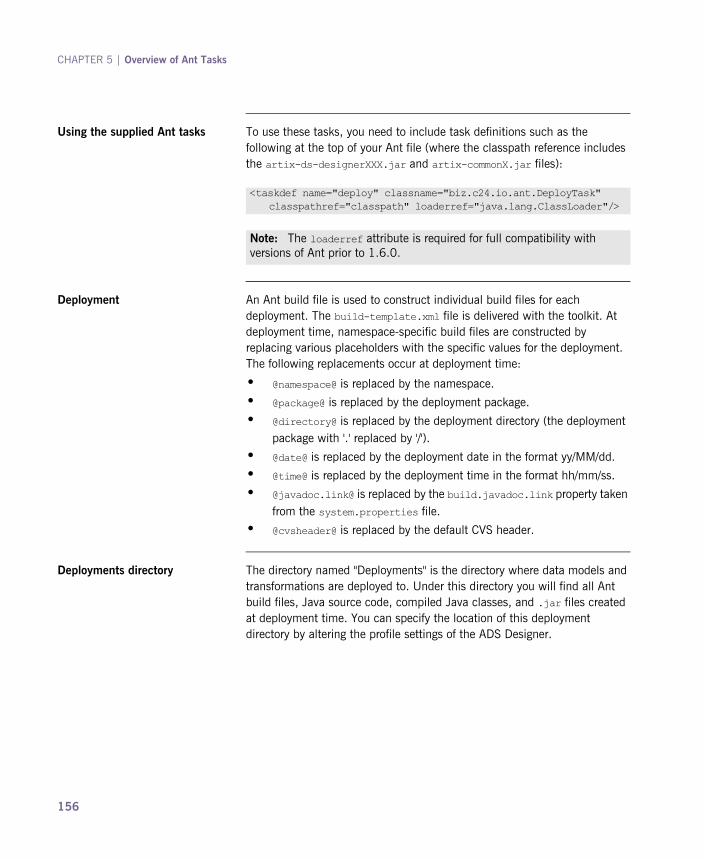
CHAPTER 5 | Overview of Ant Tasks
Using the supplied Ant tasks To use these tasks, you need to include task definitions such as the following at the top of your Ant file (where the classpath reference includes the artix-ds-designerXXX.jar and artix-commonX.jar files):
Deployment An Ant build file is used to construct individual build files for each deployment. The build-template.xml file is delivered with the toolkit. At deployment time, namespace-specific build files are constructed by replacing various placeholders with the specific values for the deployment. The following replacements occur at deployment time:
• @namespace@ is replaced by the namespace.
• @package@ is replaced by the deployment package.
• @directory@ is replaced by the deployment directory (the deployment package with '.' replaced by '/').
• @date@ is replaced by the deployment date in the format yy/MM/dd.
• @time@ is replaced by the deployment time in the format hh/mm/ss.
• @javadoc.link@ is replaced by the build.javadoc.link property taken from the system.properties file.
• @cvsheader@ is replaced by the default CVS header.
Deployments directory The directory named "Deployments" is the directory where data models and transformations are deployed to. Under this directory you will find all Ant build files, Java source code, compiled Java classes, and .jar files created at deployment time. You can specify the location of this deployment directory by altering the profile settings of the ADS Designer.
<taskdef name="deploy" classname="biz.c24.io.ant.DeployTask" classpathref="classpath" loaderref="java.lang.ClassLoader"/>
Note: The loaderref attribute is required for full compatibility with versions of Ant prior to 1.6.0.
156