progress openedge 11.6.4 upgrade guide...progress openedge 11.6.4 upgrade guide this document is for...
TRANSCRIPT

Progress OpenEdge 11.6.4 Upgrade Guide
This document is for the purposes of upgrading from OpenEdge 10.2B SP8 to OpenEdge 11.6.4 on the same server. This document is not to be used for a server
move, there is separate documentation for that purpose.
NOTE: You must be on at least FIMS version 14.65 to upgrade to Progress 11.6.4. If you are not, you will need to upgrade FIMS first.
If Progress is doing your upgrade for you, you will need to be available in order to provide a username and password for FIMS to them so that they can verify the FIMS version that you are on and also verify whether or not complex passwords are enabled before proceeding.
You will need to upgrade the FIMS database server and any terminal or remote desktops servers as well if you have Progress installed on them. We have separate instructions for upgrading Progress on Terminal\remote desktop servers in the following article:
https://kb.blackbaud.com/articles/Article/121344
Should you experience any issues during the process and require assistance, you can contact support here: http://goto.blackbaud.com
See also the following article on Progress 11 upgrade issues that can occur:
https://kb.blackbaud.com/articles/Article/188444
Finally, see the notes at the end of this document.
NOTE: Make sure all users are logged out of FIMS. The safest step is to actually un-share the NPO folder so that users cannot log in and then re-share after all steps are done.
1. Check and verify whether or not you have Complex passwords enabled as you will need to know that for the last part of the upgrade.
Overview
FIMS Support
Part 1: Back up Existing Databases and Found.st Files. Verify if Complex Passwords are Enabled
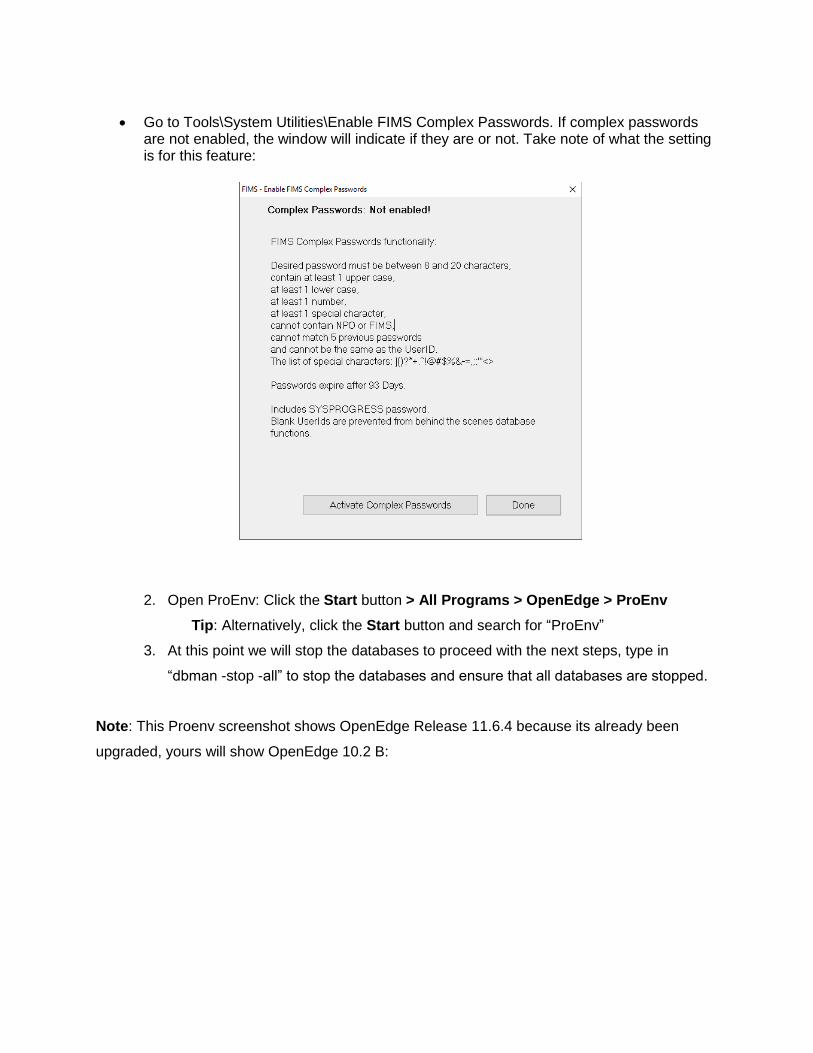
• Go to Tools\System Utilities\Enable FIMS Complex Passwords. If complex passwords are not enabled, the window will indicate if they are or not. Take note of what the setting is for this feature:
2. Open ProEnv: Click the Start button > All Programs > OpenEdge > ProEnv
Tip: Alternatively, click the Start button and search for “ProEnv”
3. At this point we will stop the databases to proceed with the next steps, type in
“dbman -stop -all” to stop the databases and ensure that all databases are stopped.
Note: This Proenv screenshot shows OpenEdge Release 11.6.4 because its already been
upgraded, yours will show OpenEdge 10.2 B:
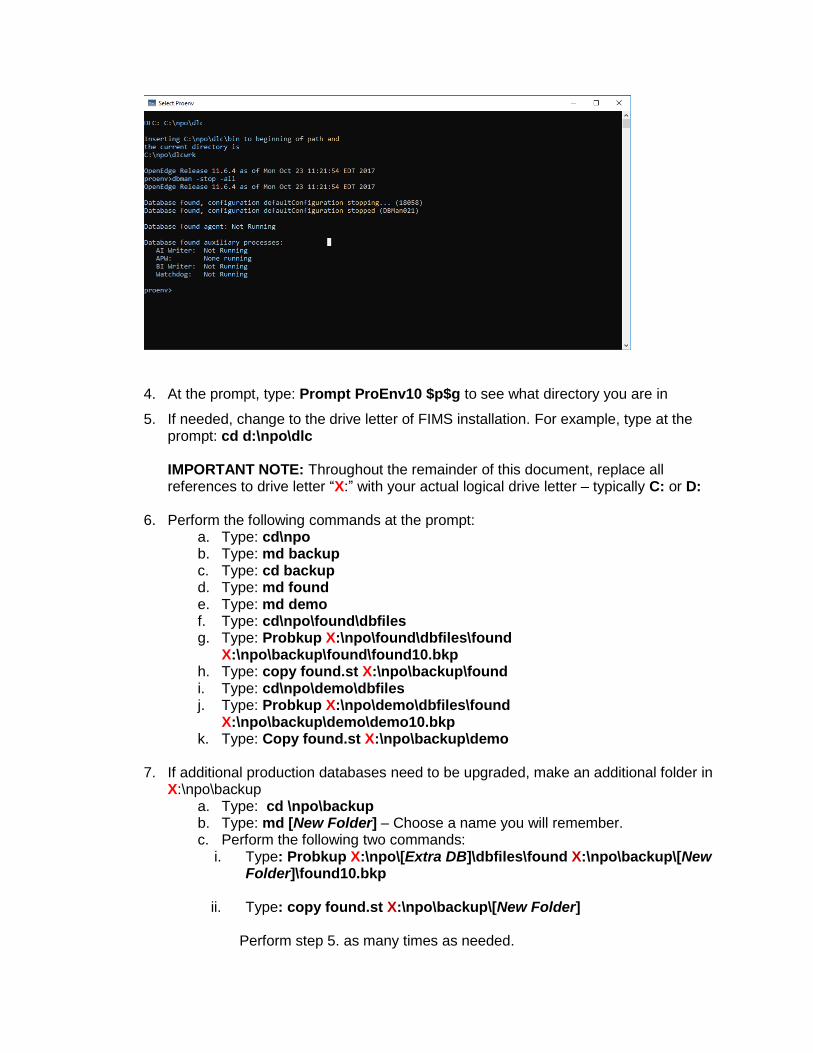
4. At the prompt, type: Prompt ProEnv10 $p$g to see what directory you are in
5. If needed, change to the drive letter of FIMS installation. For example, type at the prompt: cd d:\npo\dlc IMPORTANT NOTE: Throughout the remainder of this document, replace all references to drive letter “X:” with your actual logical drive letter – typically C: or D:
6. Perform the following commands at the prompt: a. Type: cd\npo b. Type: md backup c. Type: cd backup d. Type: md found e. Type: md demo f. Type: cd\npo\found\dbfiles g. Type: Probkup X:\npo\found\dbfiles\found
X:\npo\backup\found\found10.bkp h. Type: copy found.st X:\npo\backup\found i. Type: cd\npo\demo\dbfiles j. Type: Probkup X:\npo\demo\dbfiles\found
X:\npo\backup\demo\demo10.bkp k. Type: Copy found.st X:\npo\backup\demo
7. If additional production databases need to be upgraded, make an additional folder in
X:\npo\backup a. Type: cd \npo\backup b. Type: md [New Folder] – Choose a name you will remember. c. Perform the following two commands:
i. Type: Probkup X:\npo\[Extra DB]\dbfiles\found X:\npo\backup\[New Folder]\found10.bkp
ii. Type: copy found.st X:\npo\backup\[New Folder]
Perform step 5. as many times as needed.
1. Save the conmgr.properties file.
• In ProEnv, type the following and then press
enter to run:
Copy X:\npo\dlc\properties\conmgr.properties
X:\npo\backup
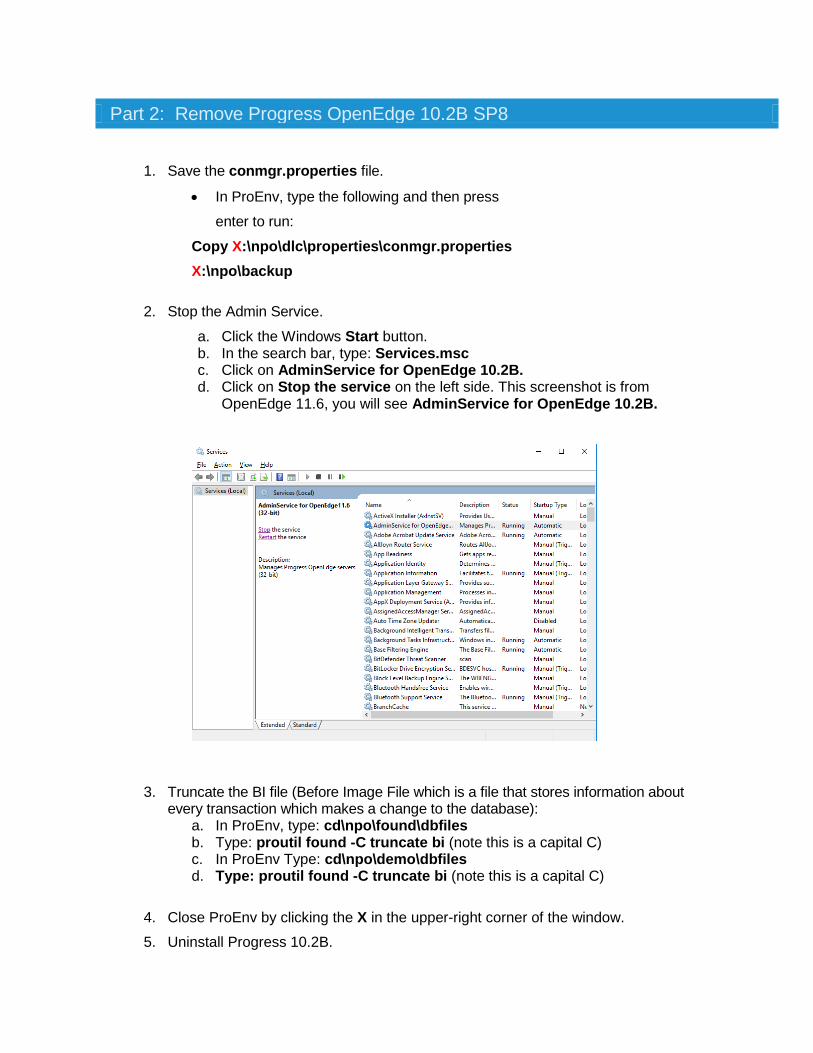
2. Stop the Admin Service.
a. Click the Windows Start button. b. In the search bar, type: Services.msc c. Click on AdminService for OpenEdge 10.2B. d. Click on Stop the service on the left side. This screenshot is from
OpenEdge 11.6, you will see AdminService for OpenEdge 10.2B.
3. Truncate the BI file (Before Image File which is a file that stores information about every transaction which makes a change to the database):
a. In ProEnv, type: cd\npo\found\dbfiles b. Type: proutil found -C truncate bi (note this is a capital C) c. In ProEnv Type: cd\npo\demo\dbfiles d. Type: proutil found -C truncate bi (note this is a capital C)
4. Close ProEnv by clicking the X in the upper-right corner of the window.
5. Uninstall Progress 10.2B.
Part 2: Remove Progress OpenEdge 10.2B SP8
NOTE: If you use FIMS CRM you must un-install Progress 11 after un-installing Progress 10. FIMS CRM does use some Progress 11 components which are in a separate directory from Progress 10 that runs FIMS, so that will need to be un-installed first then you will do a fresh Progress 11 installation for use with both FIMS and FIMS CRM.
a. Click the Windows Start button.
b. In the search bar, type: appwiz.cpl
c. Double Click to open the appwiz.cpl file which will open the Control
Panel\Programs\Programs and Features window
d. Select OpenEdge 10.2B from the list in Programs and Features
e. Click Uninstall
f. Follow the prompts to completely remove OpenEdge 10.2B from the server
Repeat the same steps above for OpenEdge 11 if you use FIMS CRM
1. Unzip PROGRESS_OE_11.6_WIN_32.zip into a temporary folder. You can
create a folder on the desktop of your server called 11.6 and use that as the
destination folder to up-zip the 11.6 installation files. The 64bit installation of
Progress 11 is not supported for use with FIMS at this time.
2. Navigate to that folder, locate and run Setup.exe.
3. Enter the Serial Number/Control Codes or load the license file:
Part 3: Install Progress OpenEdge Version 11.6
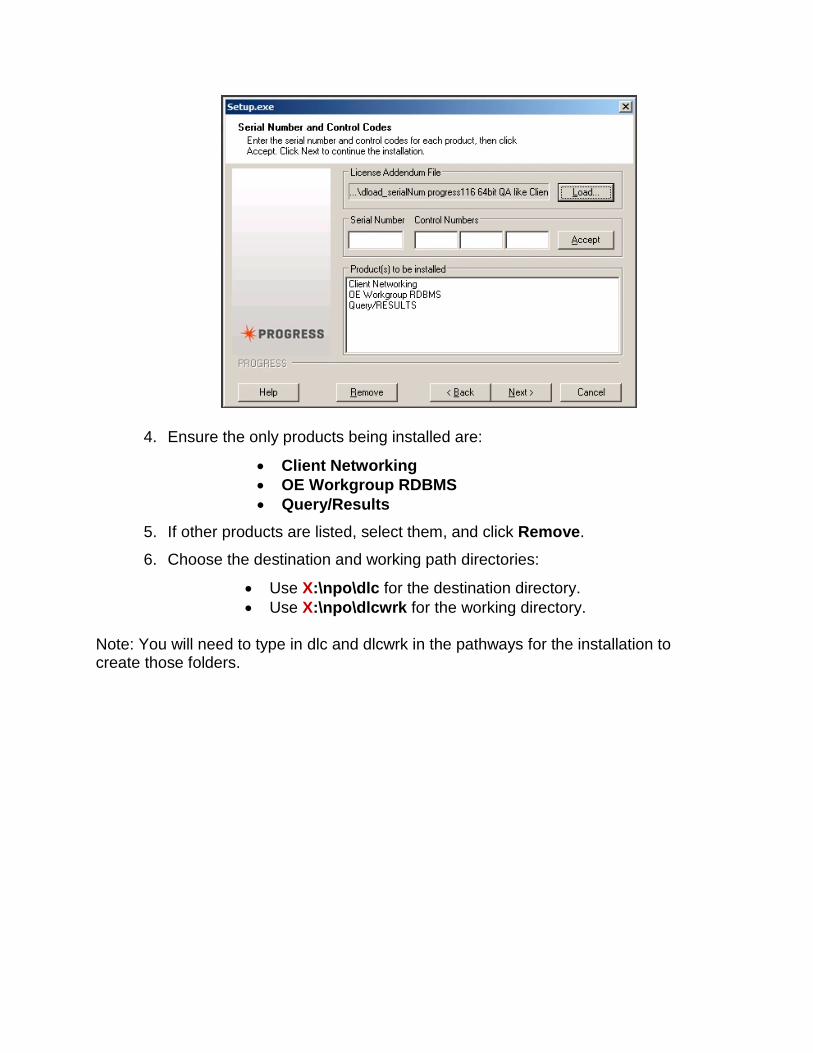
4. Ensure the only products being installed are:
• Client Networking
• OE Workgroup RDBMS
• Query/Results
5. If other products are listed, select them, and click Remove.
6. Choose the destination and working path directories:
• Use X:\npo\dlc for the destination directory.
• Use X:\npo\dlcwrk for the working directory. Note: You will need to type in dlc and dlcwrk in the pathways for the installation to create those folders.
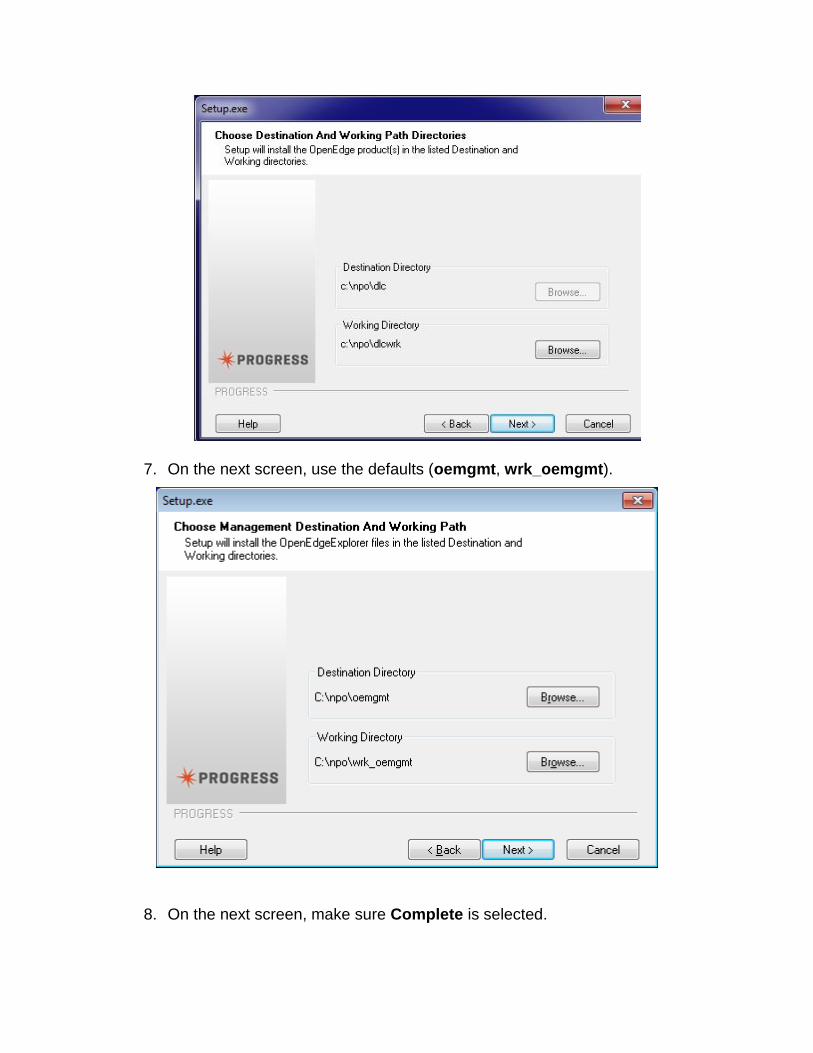
7. On the next screen, use the defaults (oemgmt, wrk_oemgmt).
8. On the next screen, make sure Complete is selected.
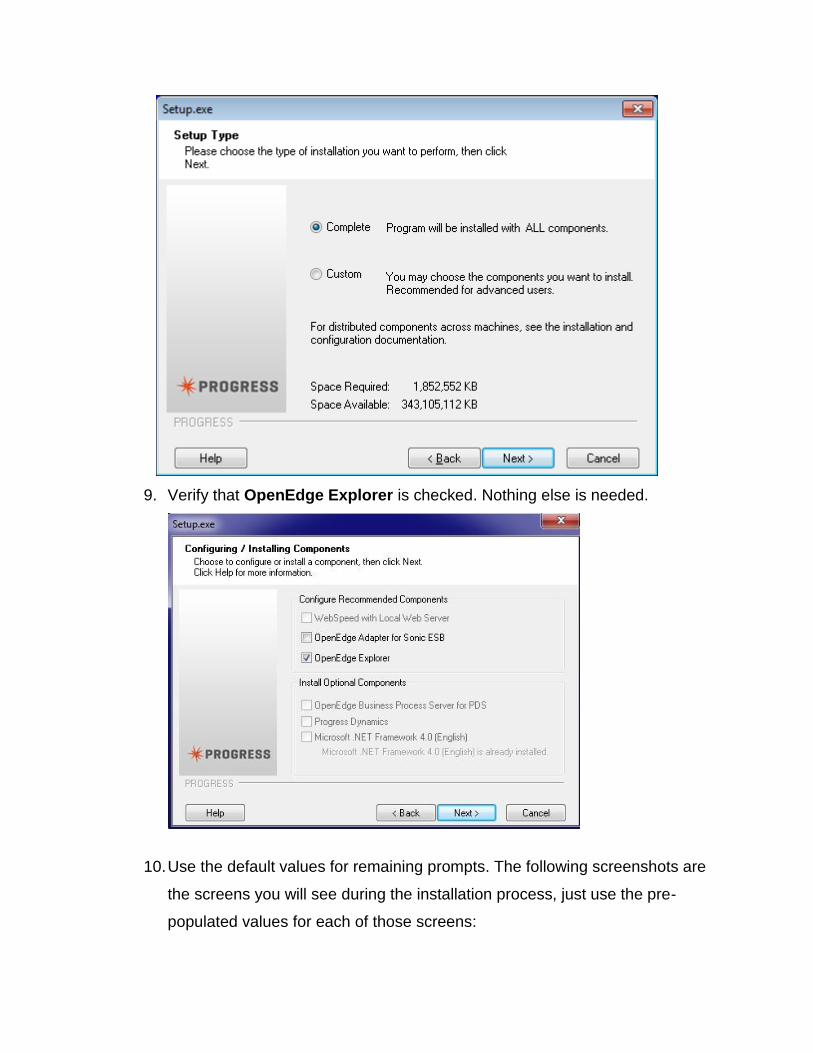
9. Verify that OpenEdge Explorer is checked. Nothing else is needed.
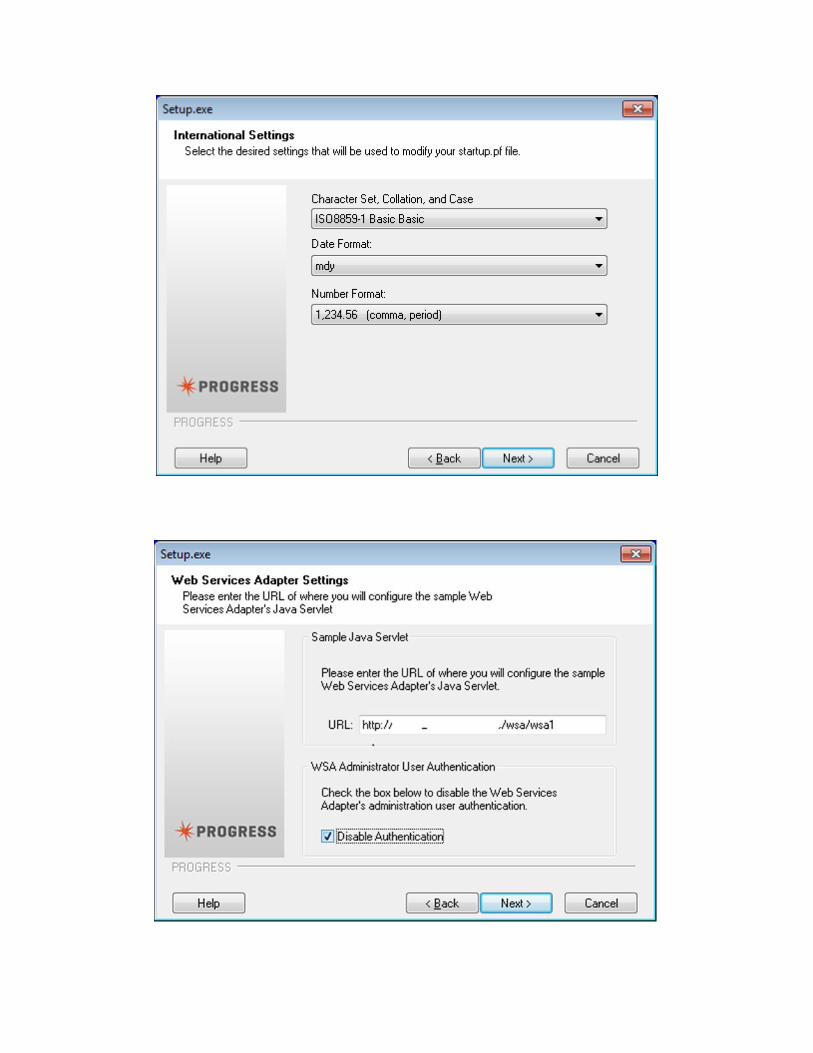
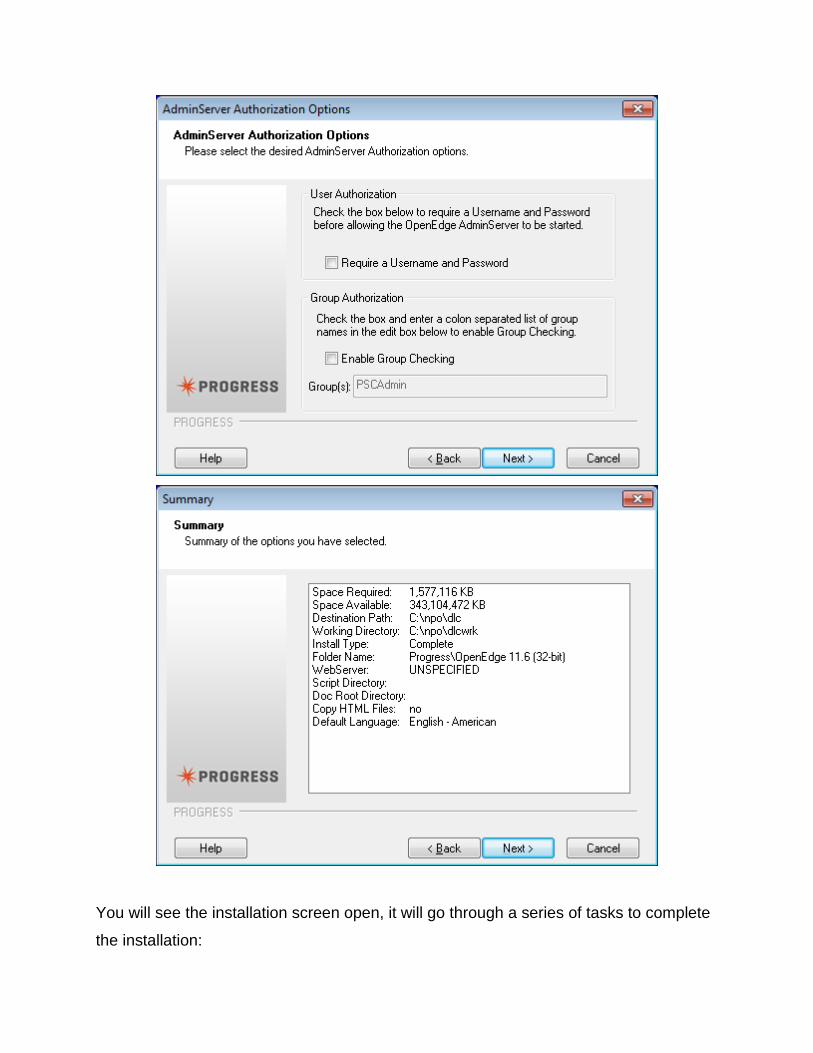
10. Use the default values for remaining prompts. The following screenshots are
the screens you will see during the installation process, just use the pre-
populated values for each of those screens:
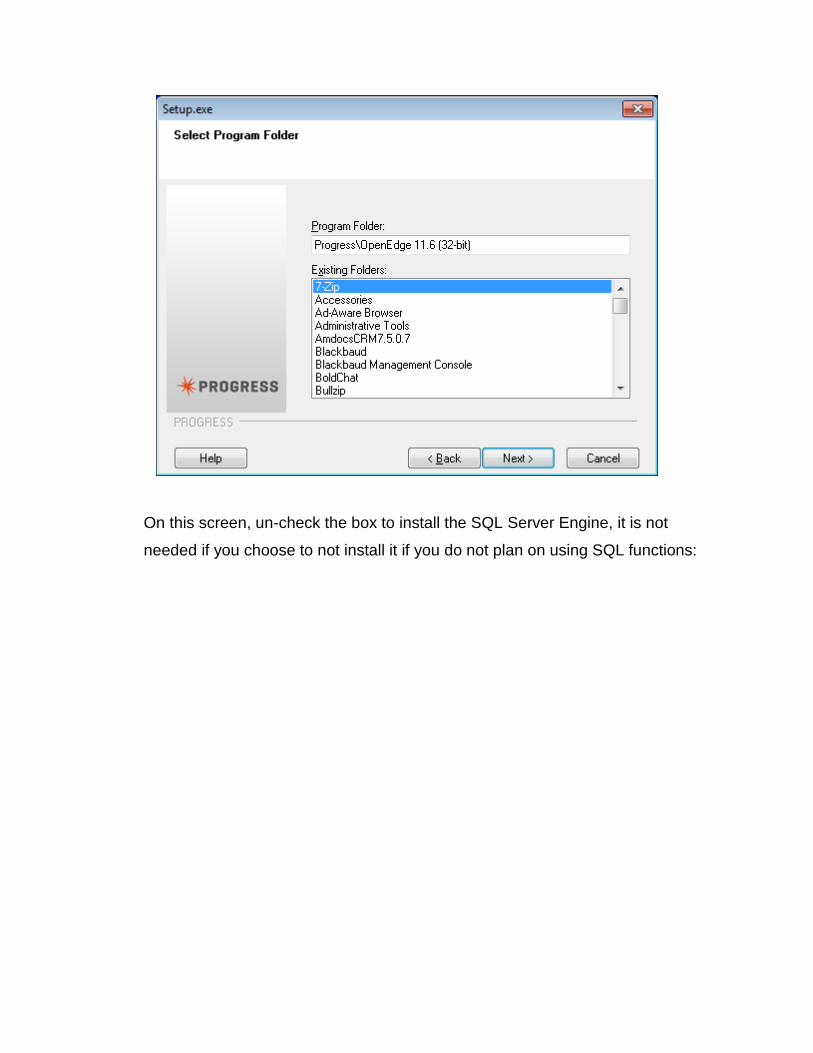
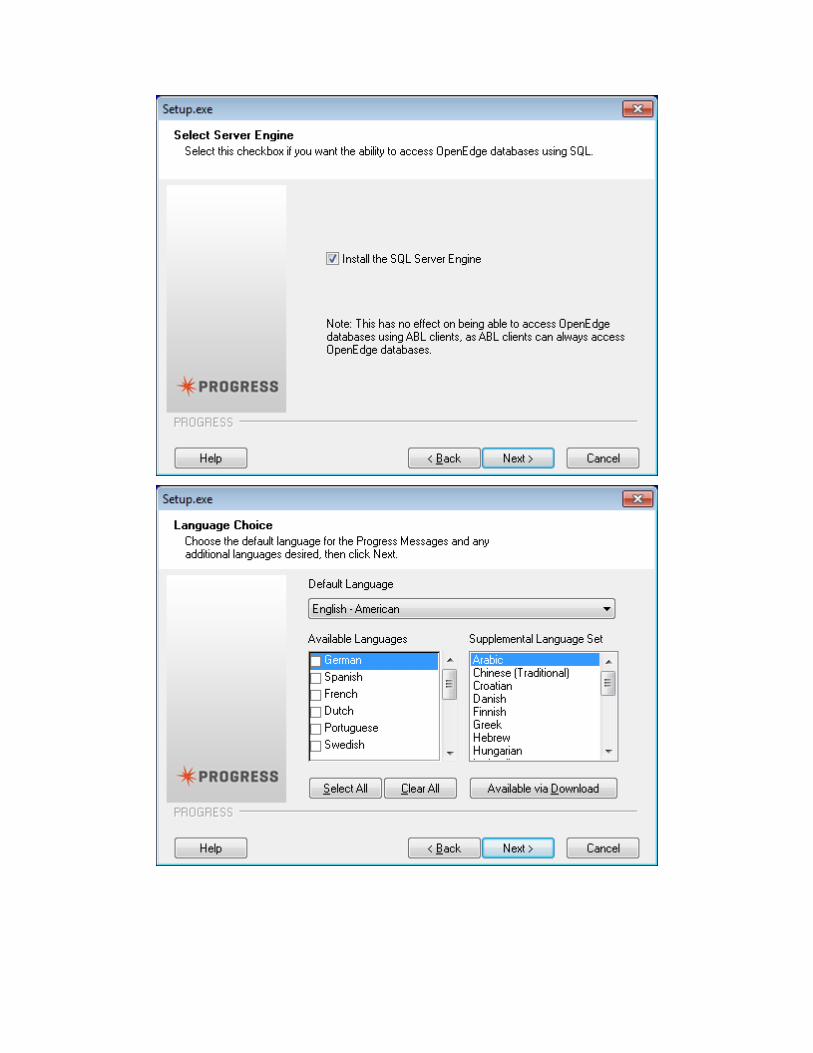
On this screen, un-check the box to install the SQL Server Engine, it is not
needed if you choose to not install it if you do not plan on using SQL functions:
You will see the installation screen open, it will go through a series of tasks to complete
the installation:
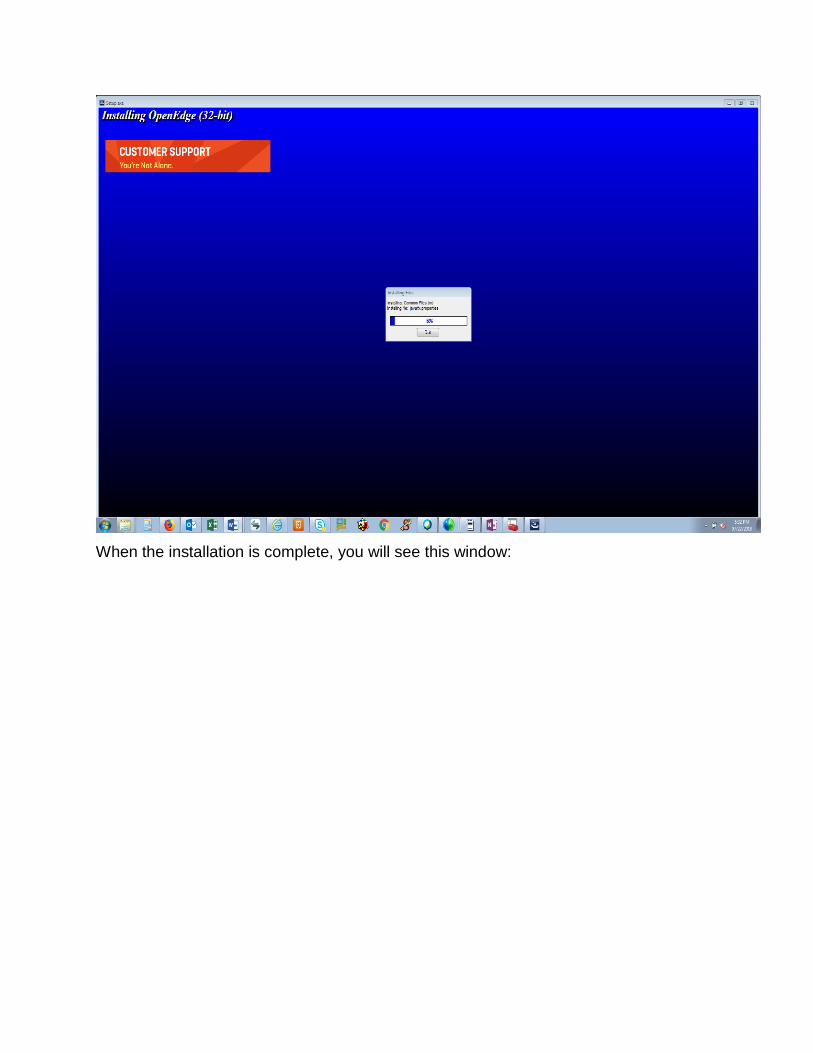
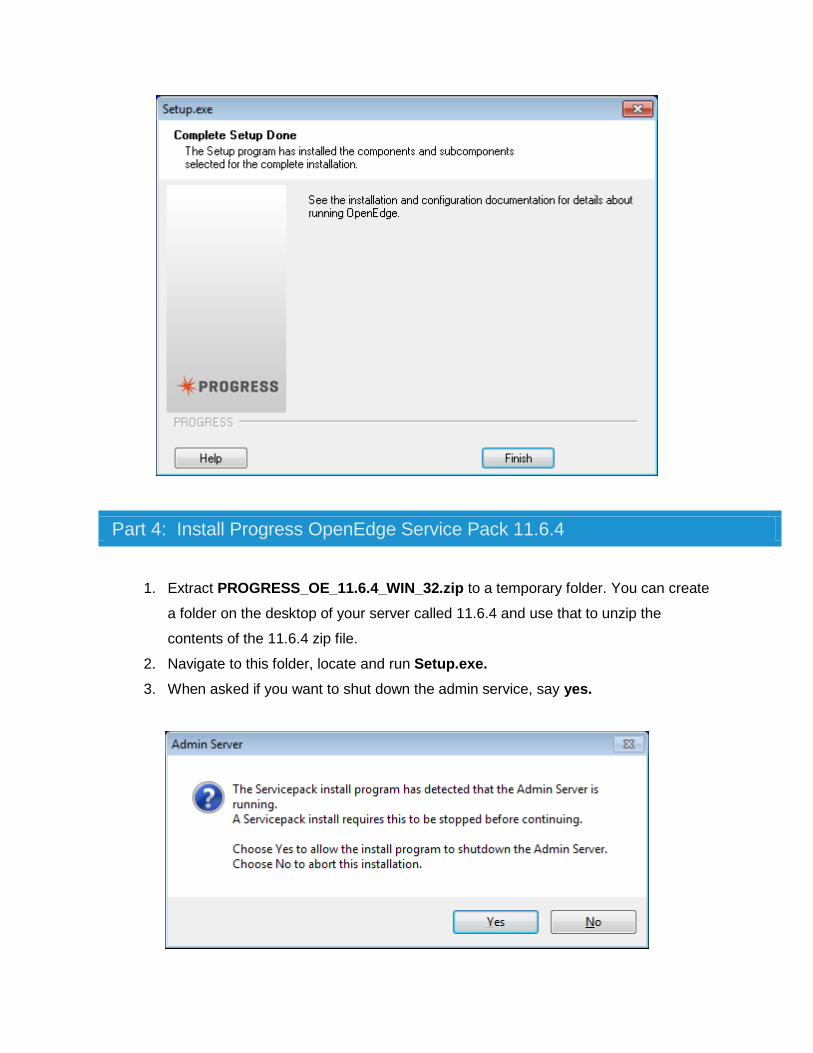
When the installation is complete, you will see this window:
1. Extract PROGRESS_OE_11.6.4_WIN_32.zip to a temporary folder. You can create
a folder on the desktop of your server called 11.6.4 and use that to unzip the
contents of the 11.6.4 zip file.
2. Navigate to this folder, locate and run Setup.exe.
3. When asked if you want to shut down the admin service, say yes.
Part 4: Install Progress OpenEdge Service Pack 11.6.4
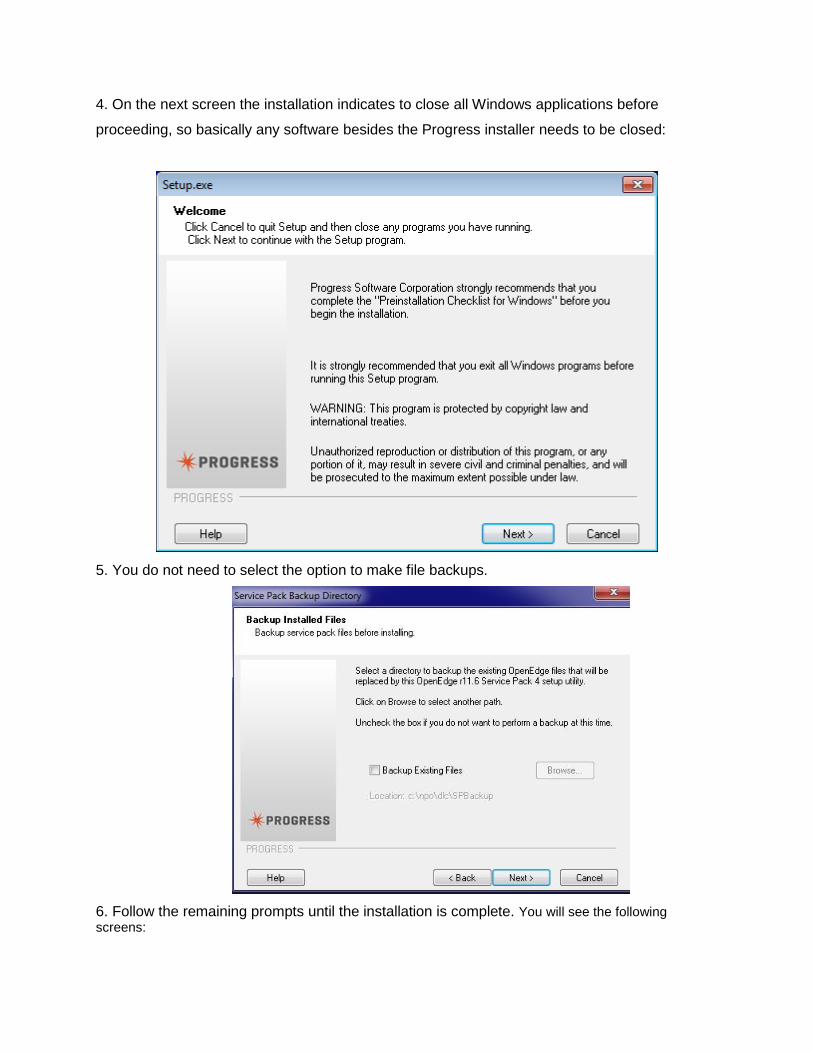
4. On the next screen the installation indicates to close all Windows applications before
proceeding, so basically any software besides the Progress installer needs to be closed:
5. You do not need to select the option to make file backups.
6. Follow the remaining prompts until the installation is complete. You will see the following screens:
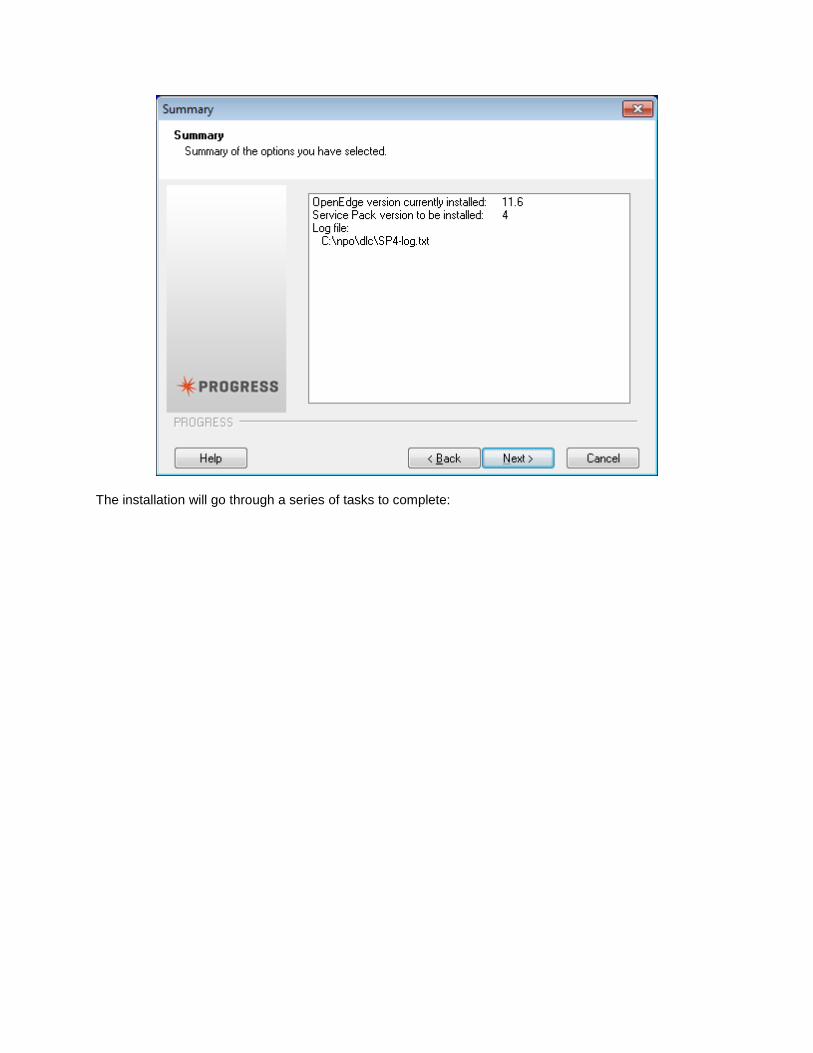
The installation will go through a series of tasks to complete:
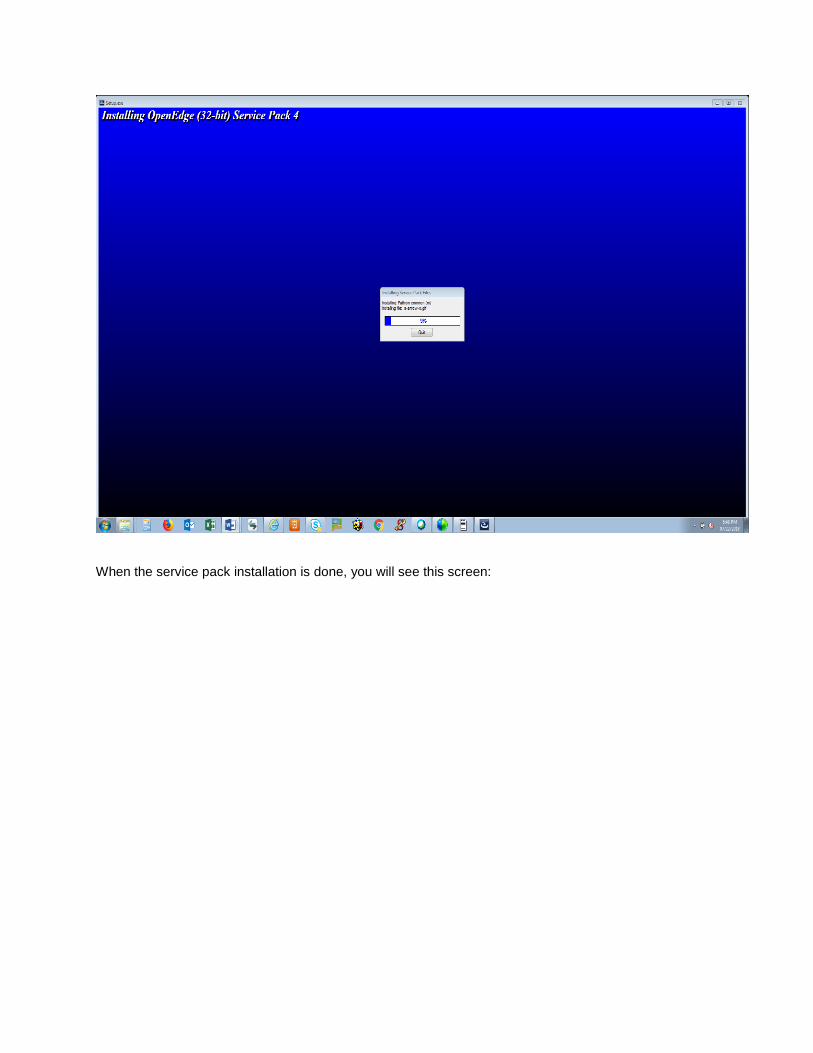
When the service pack installation is done, you will see this screen:

Part 5: Copy Backup Data to New Installation and Convert to the New Version
1. Replace conmgr.properties from X:\npo\backup to X:\npo\dlc\properties
a. Navigate to X:\npo\backup
b. Locate the file conmgr.properties.
c. Right-click on the file and choose Copy.
d. Navigate to X:\npo\dlc\Properties
e. Right-click in a blank area in the folder and choose Paste.
f. When asked if you would like to overwrite the file, chose yes, or Copy and
Replace.
2. Run the new ProEnv.
a. Click the Start button > Progress > ProEnv
Tip: Alternatively, click the Start button and search for “ProEnv.”
b. Type: Prompt ProEnv11 $p$g
3. Convert each database to Progress 11
a. Remaining in ProEnv, type: cd\npo\found\dbfiles
b. Type: proutil found -C conv1011 (Note this is a capital C)
c. Type: y when prompted about whether you backed up your database
d. Type: probkup X:\npo\found\dbfiles\found
X:\npo\backup\found\found11.bkp
e. Type: cd\npo\demo\dbfiles
f. Type: proutil found -C conv1011 (Note this is a capital C)
g. Type: y when prompted about whether you backed up your database
h. Type: probkup X:\npo\demo\dbfiles\found
X:\npo\backup\demo\found11.bkp
i. Perform steps a through d again for any additional databases that may have
been backed up in Part 1.
4. Delete X:\npo\found\fims\gui\images.pl
a. Navigate to X:\npo\found\fims\gui
b. Locate the file images.pl.

c. Right-click on the file, and choose Delete.
Note: If you get the error ‘Use proutil to truncate bi file before conversion. (1286)’ while trying
to convert the database please see the following:
https://kb.blackbaud.com/articles/Article/189433
Part 6: Post Installation Server Tasks
1. Start the 11.6 AdminService and set it to automatic
2. Start all of the databases
• Open ProEnv: Click the Start button > All Programs > OpenEdge > ProEnv
Tip: Alternatively, click the Start button and search for “ProEnv”. The new
Progress 11.6.4. Proenv will look like this:
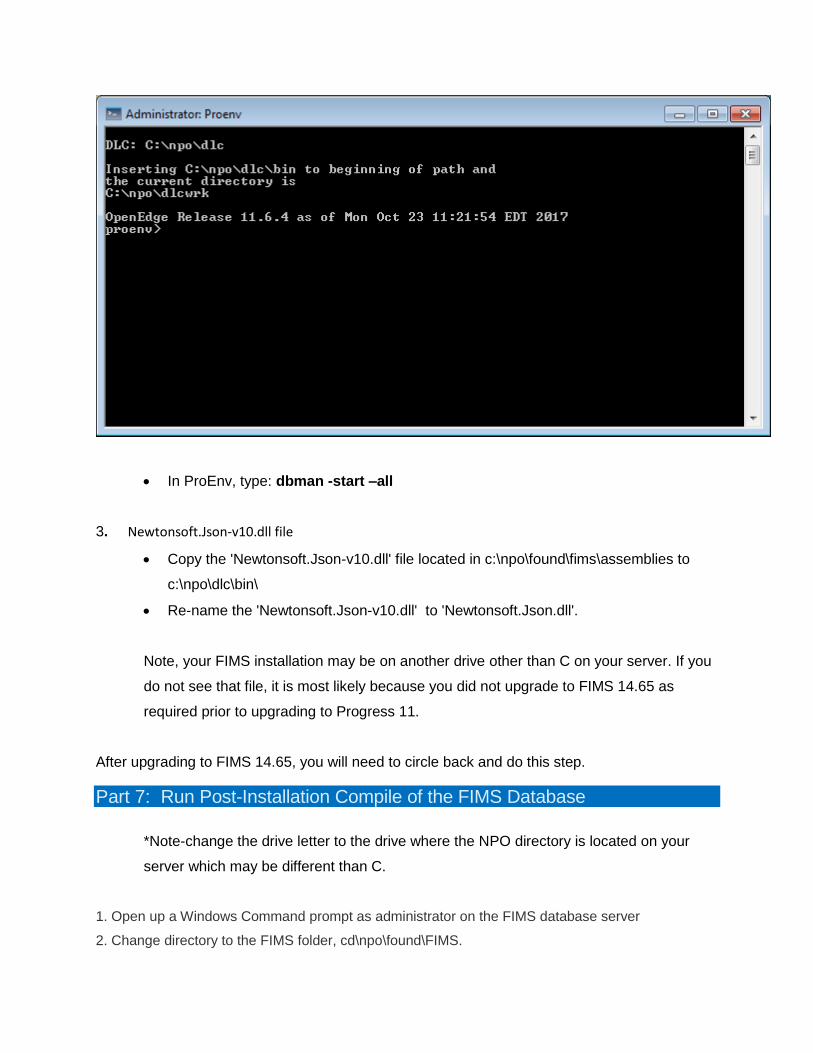
• In ProEnv, type: dbman -start –all
3. Newtonsoft.Json-v10.dll file
• Copy the 'Newtonsoft.Json-v10.dll' file located in c:\npo\found\fims\assemblies to
c:\npo\dlc\bin\
• Re-name the 'Newtonsoft.Json-v10.dll' to 'Newtonsoft.Json.dll'.
Note, your FIMS installation may be on another drive other than C on your server. If you
do not see that file, it is most likely because you did not upgrade to FIMS 14.65 as
required prior to upgrading to Progress 11.
After upgrading to FIMS 14.65, you will need to circle back and do this step.
Part 7: Run Post-Installation Compile of the FIMS Database
*Note-change the drive letter to the drive where the NPO directory is located on your
server which may be different than C.
1. Open up a Windows Command prompt as administrator on the FIMS database server
2. Change directory to the FIMS folder, cd\npo\found\FIMS.
**If the NPO directory is on a different drive other than the Windows C drive, you may have to do
some different steps to get to npo\found\fims, see the following:
https://www.digitalcitizen.life/command-prompt-how-use-basic-commands
3. Run “del *.r /s” (Do not forget to type the . before the r. Please review command to make sure it
is typed exactly as written before hitting enter of course without the double quotes and the word run)
Notes:
If you do not have complex passwords enabled, then do steps 4 and 5.
If you have complex passwords enabled, then you will need to run steps 6 and 7 and be sure to enter in a userid and password that has rights to audit security:
If you do not have complex passwords enabled:
*Note you will need to change the drive letter to the drive where the NPO directory is located on your server which may be different than C.
4. Run "C:\npo\dlc\bin\prowin32.exe c:\npo\found\dbfiles\found -H localhost -S 2500 -ini
..\configfiles\fimsnt.ini -assemblies ..\assemblies -p gui\tools\update\UpdateSchemaAndCompile.p -s
2560 -inp 32000 -param fcompile^^.\gui\tools\update\fcompile.w"
5. Run "C:\npo\dlc\bin\prowin32.exe c:\npo\found\dbfiles\found -H localhost -S 2500 -ini
..\configfiles\fimsnt.ini -assemblies ..\assemblies -p gui\tools\update\UpdateSchemaAndCompile.p -s
2560 -inp 32000 -rx -param fcompile^^.\gui,.\custom,.\sf,.\odbc,.\gam"
If you do have Complex Passwords Enabled:
6. Run "C:\npo\dlc\bin\prowin32.exe c:\npo\found\dbfiles\found -H localhost -S 2500 -ini ..\configfiles\fimsnt.ini -assemblies ..\assemblies -p gui\tools\update\UpdateSchemaAndCompile.p -s
2560 -inp 32000 -param fcompile^^.\gui\tools\update\fcompile.w -U <clientuserid> -P
<clientpassword>”
7. Run "C:\npo\dlc\bin\prowin32.exe c:\npo\found\dbfiles\found -H localhost -S 2500 -ini ..\configfiles\fimsnt.ini -assemblies ..\assemblies -p gui\tools\update\UpdateSchemaAndCompile.p -s 2560 -inp 32000 -param upfims^^compile -U <clientuserid> -P <clientpassword>”
This completes the Progress 11.6.4 upgrade. Please see the post-installation notes on the following page:
Post Installation Notes: Note for FIMS CRM Customers If you use FIMS CRM, you will need to update the scheduled task and FIMS settings for the FIMS to FIMS CRM sync on your server by doing the steps in the following article: https://kb.blackbaud.com/articles/Article/116086 Note for DonorCentral v4 Customers In addition to upgrading to Progress 11.6.4 and upgrading FIMS to 14.65, please also remove the ‘eadvisor.i’ file and compile the database as outlined in the following article: https://kb.blackbaud.com/articles/Article/117586 Notes on Workstations
• After upgrading Progress, be sure that you un-install Netsetup from the workstation and then re-install it. See the following article for those steps. DO NOT run these steps on a terminal server or remote desktop server, this is just for new workstations. See step #4:
https://kb.blackbaud.com/articles/Article/24468
• You may also get errors on the workstation after the upgrade, please see the following: https://kb.blackbaud.com/articles/Article/26213
• You may experience the issue where the contact type field is missing the drop down or that the X in the title module does not appear, please see the following:
https://kb.blackbaud.com/articles/Article/121268 https://kb.blackbaud.com/articles/Article/189614 https://kb.blackbaud.com/articles/Article/189619
Terminal Server\Remote Desktop Server If you have Progress installed on your TS or RDS server then Progress will need to be upgraded there as well. Please see the following guide for upgrading to Progress 11 on your TS or RDS server: https://kb.blackbaud.com/articles/Article/121344 Fieldmaker Be sure to re-commit Fieldmaker after the upgrade, see the following: https://kb.blackbaud.com/articles/Article/110602 Crystal Reports You may notice some issues with Crystal after upgrading to Progress 11, please see the following and create a support case if the knowledge base article below does not resolve the issue: How to set up Crystal Reports after Upgrading to Progress 11: https://kb.blackbaud.com/articles/Article/187641