project reflection workshop - plugging the leaks :: home sample invitation letter that can be...
TRANSCRIPT

Project Reflection Workshop

Project Reflection Workshop
Project Reflection Workshop 2006 2Church Urban Fund, Church House, Great Smith Street, London SW1P 3NZChurch Urban Fund is a registered charity, number 297483 A company limited by guarantee, number 2138994
Published 2006 by Church Urban Fund, Copyright © The Church Urban Fund
nef is an independent think-and-do tank that inspires and demonstrates real economic well-being. It was founded in 1986 by the
leaders of The Other Economic Summit (TOES) which forced issues such as international debt onto the agenda of the G7 and G8
summits. Through its work, nef aims to improve quality of life by promoting innovative solutions that challenge mainstream thinking
on economic, environmental and social issues.
nef works in partnership and puts people and the planet first. The organisation is unique in combining rigorous analysis and policy
debate with practical solutions on the ground, often run and designed with the help of local people. One of its key areas is in the
development of new ways for measuring progress towards increased well-being and environmental sustainability.
nef works with all sections of society in the UK and internationally – civil society, government, individuals, businesses and academia
- to create more understanding and strategies for change.

Introduction
This project evaluation and assessment tool has been
developed with the help of nef (new economics foundation).
It takes the form of a workshop designed to encourage better
quality participation for people who have been involved in
or affected by the activities and actions of a project. By
structuring a process of reflection and creating the opportunity
to share learning, the aim of this workshop is to create greater
ownership of the decision-making process which, it is hoped,
will contribute to a project’s sustainability.
To get the most out of the exercise, the list of people invited
to take part should include a range of project ‘stakeholders’
(people affected by the project or who affect it) such as project
beneficiaries, workers and volunteers. It uses an interactive
poster incorporating a Timeline (for Looking Back) to review
what the project has achieved and a Planning Template
(Looking Forward) to identify future activity and targets.1
This note has been designed as a guide for project managers on
how to prepare and run the Project Reflection Workshop and is
divided into two parts with an Appendix.
Part 1 describes what needs to be done to arrange the workshop and the preparation needed to make it run smoothly.
Part 2 sets out the step-by-step instructions for using the Poster in a workshop with a group of people. There are six numbered stages in the instructions. These refer to the numbers in circles reproduced on the Poster. The instructions are to be read and understood by the Workshop Leader in advance, and used as a guide during the workshop.
The Appendix contains:
1. A sample Invitation Letter that can be adapted to encourage people to come along to the workshop.
2. An Agenda sheet, to be printed out for participants to read, outlining what will happen in the workshop and the main discussion questions.
3. The four sheets that make up the Poster itself. (Section 6 of Part 1 ‘Assembling the Poster and the materials’ suggests how to reproduce the four A4 sheets onto four flipchart- sized pieces of paper.)
4. A Workshop Recording Sheet to note down the important points made during the workshop for informing people who were not able to attend.
Project Reflection Workshop 2006 31 It is based on a tool called ‘Look Back Move Forward’ developed by nef and the Shell Better Britain campaign designed for project self-evaluation.

Part 1: Background and preparation
Project Reflection Workshop 2006 4
1.1 Who should attend?
First of all, ask yourself which groups of people can affect or have been affected by the project’s activities. Make a rough list, and
then think about specific people who you think would be able to contribute to telling the project’s story. If you have a rich mix of
perspectives attending the workshop, the more comprehensive your story will be and therefore the opportunity for learning will be
greater.
The workshop works best with between 6 and 12 people taking part. Any more may make a useful conversation difficult to manage. To
get the maximum benefit from the exercise the attendance list of participants could be made up of up to two or three members of the
following groups of people:
• Project manager, leader or champion – So that they can hear what the project has been like from other people’s points of view,
and so that volunteers and staff can have the opportunity to appreciate some of the management issues.
• Active participants – These could be project workers or volunteers without whose work the project would not have happened.
• Beneficiaries – People who may have benefited from the project either as participants, or as users or recipients of the services
provided.
• Members of the wider community – People from different age-groups or backgrounds who have not taken part directly in the
project’s activities, but who may be affected by what the project is trying to achieve.
In addition, the workshop provides the opportunity to re-connect with people who are not currently involved with the project, but who
have been involved at one time or another. You could also aim to involve people who you would call ‘critical friends’ of the project
– people not directly connected and whose views may be critical, but whose opinion or advice you value.

Project Reflection Workshop 2006 5
1.2 How to describe the Workshop
Before inviting participants, make sure that you have read through the step-by-step instructions for running the workshop. We have prepared a sample draft of an Invitation Letter that summarises what the workshop is about. This is reproduced as part of the Appendix.
The box below outlines how you might describe what happens during the workshop to someone who is hearing about it for the first time. You could use this description as the basis for an agenda for the meeting.
You could describe the Continuation Funding Workshop as ‘telling a story in three parts’:
1. The first part (Stages 1 and 2) is about understanding the broad context for the project being discussed, as well as the different perspectives that people in the room will be bringing to that discussion.
2. The second part (Stages 3, 4 and 5) is where each participant tells the story of their experience of the project in terms of their perceived high points and low points that happened as it unfolded. These are recorded on different coloured sticky labels (representing the different perspectives) and added to the timeline. All the highs and lows are compared, then discussed so that the bigger picture of the project emerges. Then the changes that have been noticed as a result of the project, and the learning coming from how the project worked, are explored in the light of the story represented by the sticky labels. You could call this part the ‘looking back’ aspect of the tool.
3. The third part (Stage 6) is the ‘looking ahead’ bit of the tool where the implications (and planning) for future work are discussed and potential indicators of success are recorded.
To summarise: Parts 1 and 2 are concerned with what we’ve done and what we’ve learned, and should take up half the meeting. Part 3 is concerned with what we are going to do next, and should take up the other half. At some point schedule in a break for
comfort and refreshments.
Part 1: Background and preparation

Project Reflection Workshop 2006 6
Part 1: Background and preparation
1.3 Who runs the session?
Whoever leads the session needs to have a little knowledge and experience of facilitation or chairing meetings. We suggest that one of the following three possibilities is considered as the criterion for choosing a workshop leader:
• The Project Manager – In some cases it may be appropriate for the workshop to be lead by the project manager who is able to bring detailed knowledge of how the project has been run. However, there is a danger that they are unable to be objective.
• A Complete Outsider – If possible try and find someone to lead the workshop who isn’t directly involved with the project. This could be an advantage in terms of bringing an objective view of any findings, and providing an outsider’s perspective on how the project worked.
• A Critical Friend – This could be someone who knows the project and some of the participants, and may even be affected by the activities, but who is not central to the running of the project. They should be someone whose advice and opinion is valued, and
who can ask helpful questions.

1.4 Role of the workshop leader
What to do:
• Read through (and understand) the instructions well in advance of the workshop.
• Before the workshop begins put the Poster on a firm flat surface (wall or table) so that everybody in the meeting can see it and can write and stick things on it.
• Make people feel welcome and comfortable at the workshop, and make sure everyone understands what the meeting is about.
• Hand out and ‘walk through’ the agenda for the workshop and agree a finishing time.
• Follow the instructions closely in order to guide people through the Poster during the workshop.
How to do it:
• Encourage people to tell their own stories from their own experience and record them in their own words.
• Keep people on track and on time.
• Look out for and highlight common ground and connections.
• Look out for and manage conflict (see point 5 below).
Project Reflection Workshop 2006 7
Part 1: Background and preparation

1.5 Managing conflict
The Poster session requires little formal knowledge of facilitation. However, some projects may have highlighted or been characterised by difficult issues between different groups or individuals involved, and so some thought may be needed beforehand by the project manager and the workshop leader as to how best to manage these relationships in a workshop environment.
Often it is preferable to manage conflict rather than to try and avoid it. One way to do this is to start the workshop by writing up and agreeing a set of Ground Rules as to how the discussion will be managed and to act as a reminder to everyone of the point of the session. The Rules can help to externalise any potential conflict, and allow difficult yet important issues to be dealt with without them becoming personal.
As an example of a set of Ground Rules, here are some of the Guidelines to a Good Conversation taken from Democs2, a nef tool for participative democracy.
We are all equal – one person, one voice as well as one person, one vote.
Your view matters – especially if you are the only one who holds it, because no one else will say it.
Speak your truth – but there may not be time for the whole truth: see that everyone has a fair chance to speak.
Listeners are as important as speakers – work at listening well and allow others to finish before you speak.
Seek to understand – rather than to persuade.
Seek the wisdom of the group – together we have far more knowledge and wisdom than any of us can have alone. You can always learn from others however far apart you appear to be.
Look for common ground – this is the way forward.
2 For more on Democs and nef’s work on other tools for participatory democracy visit http://www.neweconomics.org/gen/democs.aspx
Project Reflection Workshop 2006 8
Part 1: Background and preparation

1.6 Assembling the Poster and the materials
The Poster (reproduced in the Appendix) consists of four separate sheets. It needs to be assembled so that each sheet is reproduced on an A1-sized (‘flipchart’) piece of paper. This can be done easily by taking the electronic version of the poster to a high street printing shop that can print it out on this large format. For black and white this may cost around £5.00 per sheet. For a colour version this will cost more.
A4
A1
A1Flipchart
size
Alternatively, you can print out the four separate sheets onto A4 paper and use the ‘Multi-page Enlarge’ option that can sometimes be found on more sophisticated photocopier machines. This can be set to reproduce an original A4 image on 4 x A3 sheets which, when stuck together make the equivalent of an A1 flipchart. (See the diagram below)
Of course, the simplest way (if not the quickest) is to copy out the sheets by hand onto four A1-sized flipchart sheets.
In addition to the poster, you will need to obtain some sets of sticky labels (the ones with the special glue that allows them to be attached and re-attached) in five contrasting colours, along with some marker pens - at least one for each participant. If different coloured sticky labels are difficult to obtain, then make sure that you have plenty of plain ones and at least five different colours of pens.
A3A3
A3A3
Project Reflection Workshop 2006 9
Name of project:
1
3
4 high
time line => => => => => => time line => => => => => => time line => =>
projectstart date
low
Part 1: Background and preparation
Name of project:
1
3
4 high
time line => => => => => => time line => => => => => => time line => =>
projectstart date
low
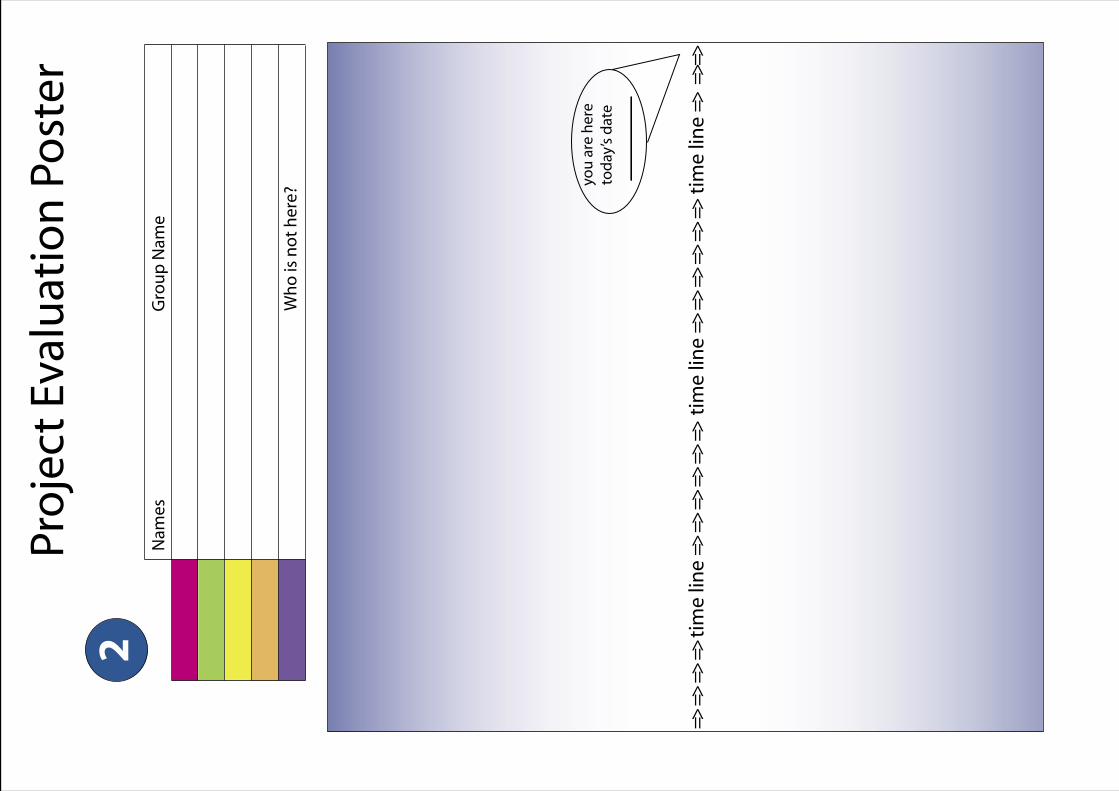
Project Evaluation Poster
Names Group Name
2
3 => => => => time line => => => => => => time line => => => => => => time line => =>=>
you are heretoday’s date
Who is not here?
5
3
What have we learned?
IMPACTS
LEARNING
6
3
Moving Forward
1. What do we want to achieve next? 2. What do we need to do to achieve it?
3. How does what we intend to do bring about what we want to achieve?
4. We know we have succeeded when...
Name of project:
1
3
4 high
time line => => => => => => time line => => => => => => time line => =>
projectstart date
low

1.7 Checklist for running the Continuation Funding Workshop
Here is a checklist of all the things you need to do and obtain in order to run the workshop.
• Choose and invite participants who have taken part or who may have benefited from the project. Aim to have 12 people attending the workshop.
• Invite someone to take the role of Workshop Leader, and send these instructions to them well in advance so that they can prepare.
• Arrange a suitable venue for the workshop (including refreshments for a half-time break).
• Prepare the four sheets of the poster and obtain sticky labels and coloured pens and tape, drawing pins or Blutack for attaching the poster to a wall or board.
• Decide who will transfer the information from the Poster onto the Workshop Recording Sheet at the end of the workshop, and make sure they are ready to do so as soon as possible after the workshop finishes while it is fresh in their mind.
Project Reflection Workshop 2006 10
Part 1: Background and preparation

Project Reflection Workshop 2006 11
Introductions (expected time 5-10 minutes)
(Note: We have added an estimated time to each stage to help you plan your time. The whole workshop should take between 2 and 3_
hours including a break.)
Part 2: Instructions for running the workshop
Why are we here?
Explain why you have come together and what you hope to achieve.
What will happen?
Explain what will happen: how long it will take and how you are going to
fill in the Poster together.
How long will it take?
Agree the time at which you will finish. Explain roughly how long you
have for each stage and ask someone in the group to keep an eye on the
time.
Introduce yourselves
Introduce yourselves if need be. If some people don’t know each other
very well, you can ask them to say more about themselves than who they
are and where they come from. Questions they could answer include:
• where they live
• what they like about living there
• their involvement with the project
• what they hope to get from the meeting
(Note: Even if you know everyone in the room, they might not know each other.)

Project Reflection Workshop 2006 12
It might be that you want to discuss the whole lifetime of the project, or maybe just a part of it.
Agree among the group what project title to put at the top of the poster and then write it in under ‘Name of Project’ by the number ‘1’. Use a project name that everyone who is present knows the project by.
Part 2: Instructions for running the workshop
Stage One: Name of project and attendance (expected time 5 minutes)

Project Reflection Workshop 2006 13
Part 2: Instructions for running the workshop
Look at the Key at the top of the second sheet of the poster (number ‘2’). There is a table with five rows of boxes, four of which have been left blank. Assign a different coloured sticky label to each of the shaded boxes on the left hand side of the table. If you are not using different coloured sticky labels, denote each shaded box with a different coloured marker pen.
If there are four people or fewer at the meeting:
Ask each person to write his or her name (and their position or role if they belong to an organisation related to the project) in one of the boxes of the left-hand column entitled: Names.
People don’t necessarily have to write anything in the column Group Name. Don’t divide into groups but give each individual a different-coloured pad of sticky labels (or a different coloured marker pen) and then go to the: ‘Who is not here?’ step in this stage.
If there are more than four people at the meeting:
Ask everyone to divide into no more than four equally sized groups. As a rule, people should go in the same group if they have something in common in relation to the project.
For example, you might want to divide up into three groups made up of project leaders, paid workers, volunteers and local residents.
Once you have agreed how to divide up, ask each group to write down their group name (if they have chosen one) in one of the boxes labelled Group Name on the right-hand column of the Key. Then ask each person to write his or her full name in the ‘Names’ box in the left-hand column.
You can now go to: ‘Who is not here?’
Who is not here?
The last group of the Key is labelled ‘Who is not here?’ Ask everybody if there are groups or individuals not present at the meeting who may have a perspective different from those that are already represented. Agree on the most important groups or individuals (not more than three) and write their names in the space next to this box. If you have some way of representing their opinions at the meeting, remember to include these (this may include a written note, notes from a prior telephone conversation or someone representing the opinions of the absent party). Be careful not to misrepresent absent people and do make a note that they were not actually present at the meeting.
(Note: Don’t get bogged down in this section! If there aren’t obvious groups, then just
divide yourselves as equally as possible.)
Stage Two: Signing in (expected time 10-15 minutes)

Project Reflection Workshop 2006 14
Part 2: Instructions for running the workshop
Stage Three: Calibrate the timeline (expected time 5-10 minutes)
Today’s date
Enter today’s date in the box labelled ‘You Are Here’ at the right-hand end of the timeline on the second sheet of the poster.
Starting date
Agree the start date of the part of the project that you want to focus on and enter that at the beginning of the timeline.
(Note: If you are in any doubt, you could go back to the original funding
proposal or a project plan if you have one available.)
Between Starting and Today’s date
Mark the timeline with some years and/or months so that you can record events in the right order.
Stage Four: Highs and Lows (expected time 25-35 minutes)
Divide up into the groups that you have decided on in Stage 2. Each group must have a different coloured set of sticky labels corresponding to their colour on the Key, and a pen. (Use different coloured pens if using same-coloured sticky labels.)
Agreeing Highs and Lows
Ask each group to discuss and agree among themselves what were, for them, the three or four highest and three or four lowest points of the project. Allow people about half of the time that you have made available for Stage 4 for this discussion.
Then ask them to write a short description of each High and each Low on a separate label. For each write a short title (eg ‘Our First Summer Fête’) and a brief explanation of why you’ve chosen it (eg ‘A real sense of excitement amongst the project participants’), along with the date and then label it ‘HIGH’ or ‘LOW’, so that it looks something like this example.

Church Urban Fund
Name of project:
1
3
4 high
time line => => => => => => time line => => => => => => time line => =>
projectstart date
high
Project Evaluation Poster
=> => => => time line => => => => => => time line => => => => => => time line =>=> =>
you are heretoday’s date
Names Group Name
2
Who is not here?
September 2004Being thanked by a parent - shows that we are making a positive difference
HIGH
July 2004Our first Summer Fair - a real sense of excite-ment amongst the project participants
HIGH
Project Reflection Workshop 2006 15
Part 2: Instructions for running the workshop
Attaching sticky labels to the Timeline
Once they have chosen and described their Highs and Lows, invite people to attach them at the appropriate dates along the timeline. Highs go above the timeline and lows below. The further away from the timeline, the more extreme the high or low was.
If the high or low represents a recurring event or theme (eg ‘Being Thanked by a Parent – shows that we are making a positive difference’.) then attach the sticky label at the first date that it happened, and use a marker pen to draw a dotted arrow along the poster to show that it was ‘on-going’.
Inevitably this stage will be chaotic, as everyone is trying to get at the poster at once, and people will disagree about when things happened. As long as it doesn’t come to blows, this often provides an opportunity for a healthy and lively discussion about people’s own experience of the project!
Once this is done, step back and, if necessary, ask people to talk through their Highs and Lows to clarify the stories behind each of their labels. Then decide as a group if there are any potential Highs or Lows for those people or groups you noted in the ‘Who is not here?’ box, and attach corresponding sticky labels to the poster as well.

Allow the rest of the time you have made available for Stage 4 for all this. Note that this is the part of the workshop that people find the most enjoyable (they will have warmed up by now!) and people may want to carry on for longer. If this is the case, you may have to consider extending the workshop beyond the agreed finishing time.
What happens next?
Once you have completed the Timeline, you could then just have a discussion about what you’ve learnt and what happens next based on the experiences described on the labels.
The following notes accompanying Stage 5 (Connections, Impacts and Learning) and Stage 6 (Moving Forward) of the poster will act as a more detailed guide for holding this discussion. Whether or not you undertake these last two stages of the workshop, for your group to have got the most out of taking part we recommend that you hold enough of a discussion to be able to complete the sections under the summary headings set out in the Workshop Recording Sheet.
Stage Five: Connections, Impacts and Learning (expected time 15-20 minutes)
Connections
Now the whole group has a look at the poster and discusses the overall picture. Can you see any connections between different highs and lows. For example:
• Where someone’s High was another person’s Low;
• Where lots of people agree on a particular High or Low;
• Where a high or low point has led directly or indirectly to subsequent highs and lows.
Use a marker pen to link them up with arrows.
Impacts and Learning
Once you have done this, use the spaces on the Evaluation Poster to write down what you as a group notice as the Impacts and Learning from the project.
When we talk of Impacts we are asking you to consider the changes that have come about as a result of something that has been happening in the project. For example, as a result of
Project Reflection Workshop 2006 16
Part 2: Instructions for running the workshop
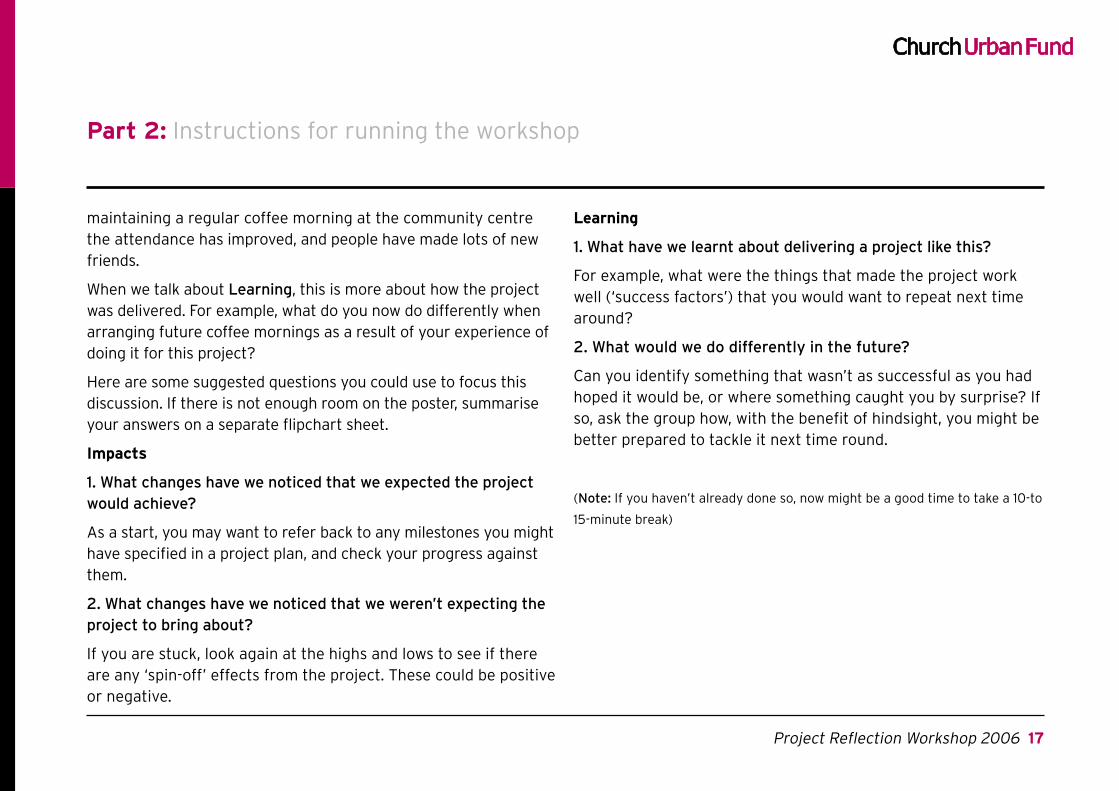
maintaining a regular coffee morning at the community centre the attendance has improved, and people have made lots of new friends.
When we talk about Learning, this is more about how the project was delivered. For example, what do you now do differently when arranging future coffee mornings as a result of your experience of doing it for this project?
Here are some suggested questions you could use to focus this discussion. If there is not enough room on the poster, summarise your answers on a separate flipchart sheet.
Impacts
1. What changes have we noticed that we expected the project would achieve?
As a start, you may want to refer back to any milestones you might have specified in a project plan, and check your progress against them.
2. What changes have we noticed that we weren’t expecting the project to bring about?
If you are stuck, look again at the highs and lows to see if there are any ‘spin-off’ effects from the project. These could be positive or negative.
Learning
1. What have we learnt about delivering a project like this?
For example, what were the things that made the project work well (‘success factors’) that you would want to repeat next time around?
2. What would we do differently in the future?
Can you identify something that wasn’t as successful as you had hoped it would be, or where something caught you by surprise? If so, ask the group how, with the benefit of hindsight, you might be better prepared to tackle it next time round.
(Note: If you haven’t already done so, now might be a good time to take a 10-to
15-minute break)
Project Reflection Workshop 2006 17
Part 2: Instructions for running the workshop

Stage Six: Moving Forward (expected time 35-45 minutes)
You have thought about highs and lows, and you have highlighted some lessons.
Now it is time to take a look into the future. Ask the whole group to discuss
the following four points and complete the Planning Table on the far right-hand side of the Poster:
1. What do we want to achieve next?
Think about the specific goals that you would like to achieve in the next twelve months and then the longer-term aims beyond that. Maybe you want to change the direction of the project, or develop the next one.
2. What do we need to do in order to achieve it?
Once you have clarified your specific goals and longer-term aims, think carefully which actions will be necessary in order to achieve them. You will probably also want to think about who could take responsibility for particular actions and deadlines.
3. How does what we intend to do bring about what we want to achieve?
This is a way to test some of the assumptions you have made about the link between what you are doing and the change you hope to bring about. For every action and activity planned as part of the project, think carefully how it contributes to each specific goal and how each goal in turn contributes to the longer-term aims of the project. The acid test for each goal is to ask yourselves ‘So what?’ or ‘Why is it important that we achieve this?’
4. So that we know we have succeeded…
Ask yourselves ‘How will we know when a specific goal or a longer-term aim has been achieved?’ Think of three things that you will be able to see for yourself, and three possible questions that you could ask a member of the local community to find out from them if the project has been a success.
You have now completed the Poster. Well done!
Project Reflection Workshop 2006 18
Part 2: Instructions for running the workshop

Project Reflection Workshop 2006 19
Part 2: Instructions for running the workshop
Why not try another Timeline?
As a rounding-off exercise and if people are comfortable with the idea, draw another Timeline onto a fresh sheet of flipchart paper. By plotting a line that looks into the future, you can use it as a planning tool. Just as you did when you looked back over the project, write in your specific goals, key events or achievements above the timeline (as potential ‘high’ points), and any potential barriers and mistakes you intend to avoid below (potential ‘lows’). In this way you can begin to tell the story of the project’s future.
Feeding back
When the meeting is over, we recommend that you immediately take a few moments to transfer the information from the poster onto the Poster Workshop Recording Sheet (reproduced in Appendix 4).
The completed Workshop Recording Sheet summarises what happened in the meeting for yourself as well as being a useful
way of telling other people who were not able to attend.

Project Reflection Workshop 2006 20
Dear ________
RE: Anytown Community Project – Project Reflection Workshop
As chair of the ACP Steering committee I’d like to invite you to join us for an evaluation workshop at the Anytown Village Hall from 6.00pm to 8.30pm on Tuesday 10th July 2006.
As part of our plan to take stock of what we have achieved and to think about how to obtain further funding, we would like to do a review of how the project is going, looking in particular at the previous xxx years’ work.
By carrying out an evaluation of what we have done, we believe there is a good story to tell about what we have achieved, and what we could do better in the future. To do this it is important to hear from residents in this neighbourhood who have been involved or who have benefited from the project. We would like to hear from you about what your experience has been of this project, whether it has made a difference to your life here, and what you would like to see it achieve in the future.
Often this sort of exercise is carried out by sending around questionnaires to be filled in and returned, but we would like to make it more of a conversation, which is why we are inviting you to come along and tell us in person.
The workshop will be a little different from the usual meeting, as we will be using an interactive poster to guide our discussion and to record our comments. Essentially the first bit of the workshop will be looking back over what has happened during the lifetime of the project, and after we have had a break and some refreshments the second part will be a chance to look forward, and begin to plan what needs to happen next. We will explain more on the night.
In the meantime, if you are able to spare the time to join us for what should be a fun exercise, then we would be delighted to see you. If you can make it, please can you reply to me at the number or address above and describe any special dietary or other requirements you may need in order to enjoy the evening fully?
I look forward to hearing from you,
Yours sincerely,
Etc.
Appendix 1: Sample invitation Letter

Project Reflection Workshop 2006 21
Continuation Funding Workshop
Getting Started (30 minutes)
Welcome and Introductions
• Why are we here?
• What will happen today?
• Who is here?
Stage 1
• Labelling the Poster
Stage 2
• Signing In
Looking Back (60 minutes)
Stage 3
• Introducing the Timeline
Stage 4
• The High points and Low points: What for you was the highest point (eg the best moment) of the project and what was the lowest point (eg the worst moment)?
Stage 5
• Impacts of the Project:
- What connections do we notice between the various highs and lows?
- What changes have we noticed that we expected the project would achieve?
- What changes have we noticed that we weren’t expecting the project to bring about?
• Learning from the Project:
- What have we learnt about delivering a project like this?
- What would we do differently in the future?
Moving Forward (60 minutes)
Stage 6
• What do we want to do next?
• What do we need to do to achieve it?
• How does what we intend to do bring about what we want to achieve?
• How will we know we have succeeded?
Appendix 2: An Agenda sheet for workshop participants

Project Reflection Workshop 2006 22
Appendix 3: The Poster
Name of project:
1
3
4 high
time line => => => => => => time line => => => => => => time line => =>
projectstart date
low
Project Evaluation Poster
Names Group Name
2
3 => => => => time line => => => => => => time line => => => => => => time line => =>=>
you are heretoday’s date
Who is not here?
5
3
What have we learned?
IMPACTS
LEARNING
6
3
Moving Forward
1. What do we want to achieve next? 2. What do we need to do to achieve it?
3. How does what we intend to do bring about what we want to achieve?
4. We know we have succeeded when...

Nam
e o
f pro
ject
:
1 34h
igh
tim
e lin
e =>
=>
=> =
> =>
=>
tim
e lin
e =>
=>
=> =
> =>
=>
tim
e lin
e =>
=>
pro
ject
star
t dat
e
low
Pro
ject
Eva
luat
ion
Po
ster
Nam
es
G
rou
p N
ame
2 3 =
> =>
=>
=> t
ime
line
=> =
> =>
=>
=> =
> t
ime
line
=> =
> =>
=>
=> =
> ti
me
line
=> =
>=>
you
are
her
eto
day
’s d
ate
Wh
o is
no
t h
ere?

5 3
Wh
at h
ave
we
lear
ned
?
IMPA
CTS
LEA
RNIN
G

6 3
Mov
ing
Fo
rwar
d
1. W
hat
do
we
wan
t to
ach
ieve
nex
t?2.
Wh
at d
o w
e n
eed
to d
o to
ach
ieve
it?
3. H
ow
do
es w
hat
we
inte
nd
to
do
bri
ng
ab
ou
t w
hat
we
wan
t to
ach
ieve
?
4. W
e kn
ow
we
hav
e su
ccee
ded
wh
en...

Project Reflection Workshop 2006 27
Appendix 4: Workshop Recording Sheet
Church Urban Fund Project Reflection Workshop
Name of the project
Date of poster workshop
Name of the facilitator
Who took part – Participants and their contact details
Chosen starting date of the project timeline
IMPACTS
What changes have we noticed that we expected the project would achieve?

Project Reflection Workshop 2006 28
Appendix 4: Workshop Recording Sheet (continued)
IMPACTS
What changes have we noticed that we weren’t expecting the project to bring about?
LEARNING
What have we learned and what would we do differently next time?
Project Reflection Workshop 2006 29
Appendix 4: Workshop Recording Sheet (continued)
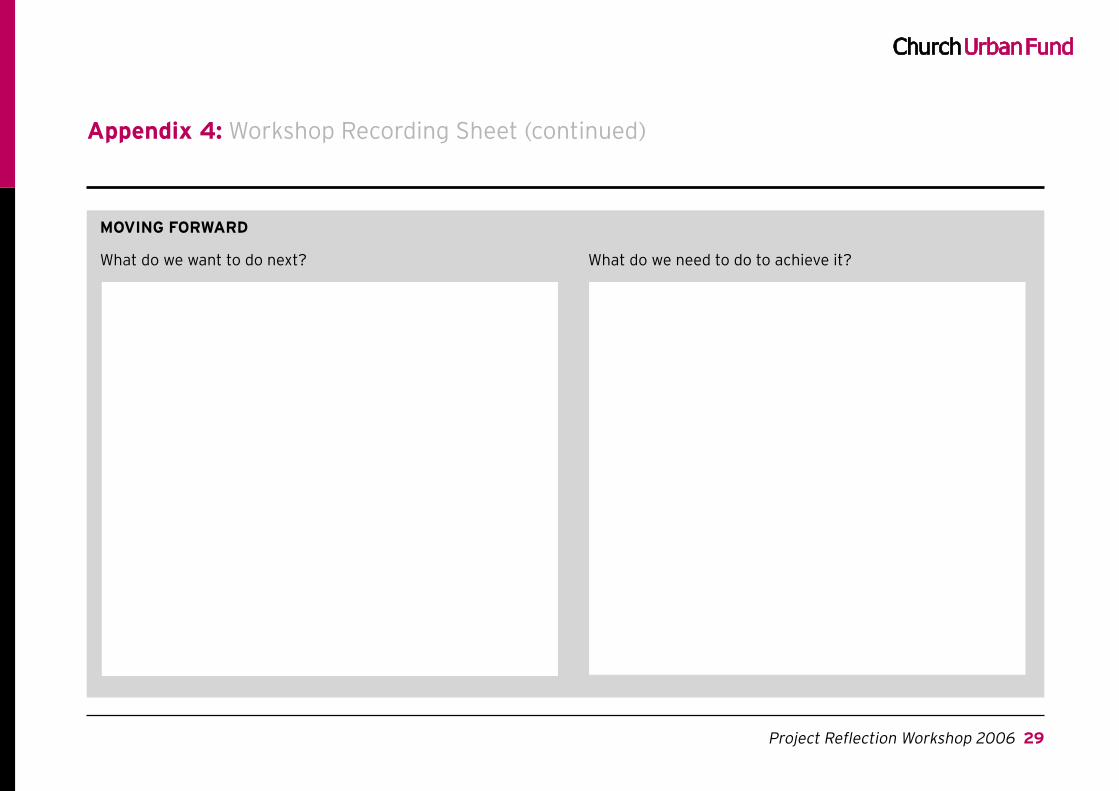
MOVING FORWARD
What do we want to do next?
What do we need to do to achieve it?
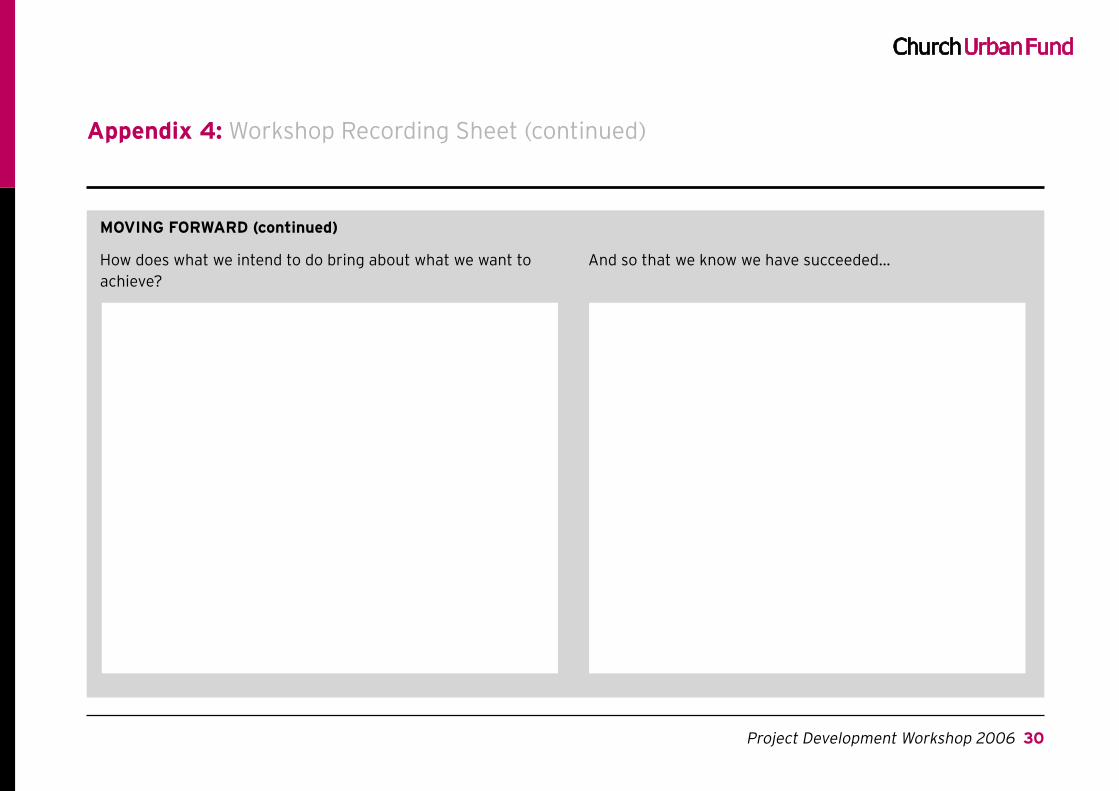
MOVING FORWARD (continued)
How does what we intend to do bring about what we want to achieve?
And so that we know we have succeeded...
Appendix 4: Workshop Recording Sheet (continued)
Project Development Workshop 2006 30