pv-cam viewer app installation guide - stuntcams€¦ · 2 next, start the app pv cam viewer, and...
TRANSCRIPT
®
PV-Cam ViewerApp Store/Google PlayInstallation Quick Guide
Available on theApp Store
Getit onGoogle play
1
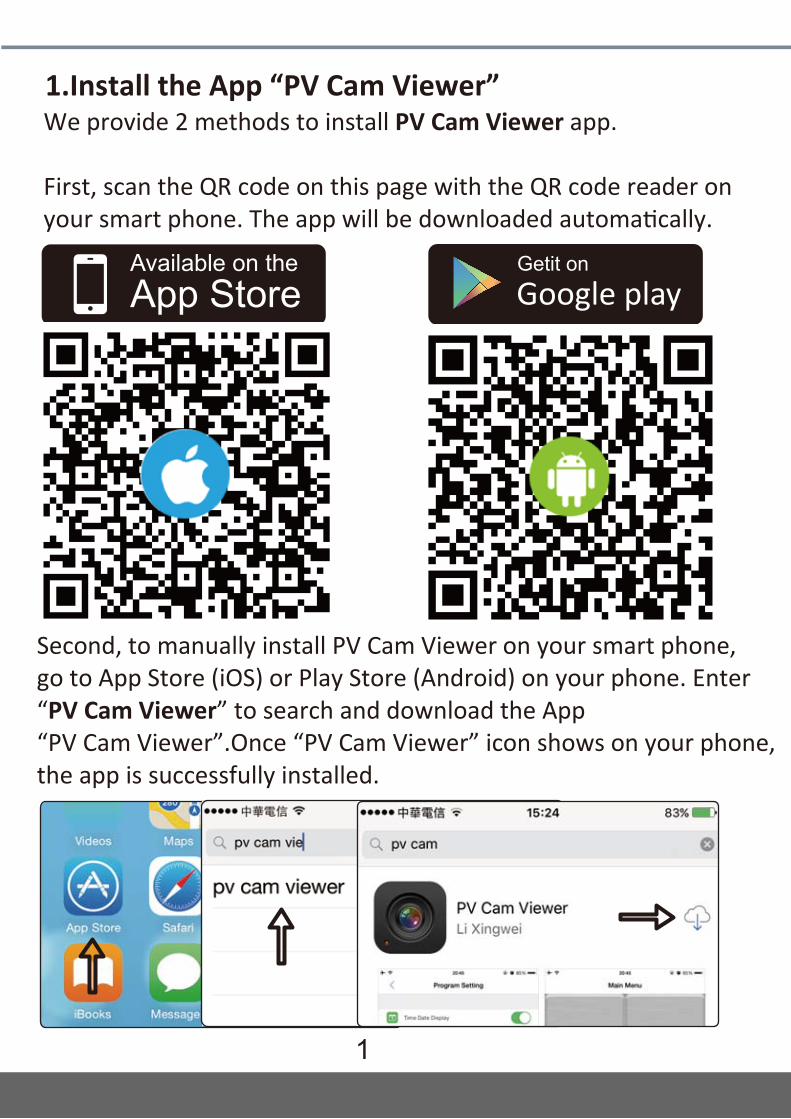
1.Install the App “PV Cam Viewer” We provide 2 methods to install PV Cam Viewer app. First, scan the QR code on this page with the QR code reader on your smart phone. The app will be downloaded automatically.
Second, to manually install PV Cam Viewer on your smart phone, go to App Store (iOS) or Play Store (Android) on your phone. Enter “PV Cam Viewer” to search and download the App “PV Cam Viewer”.Once “PV Cam Viewer” icon shows on your phone, the app is successfully installed.
2
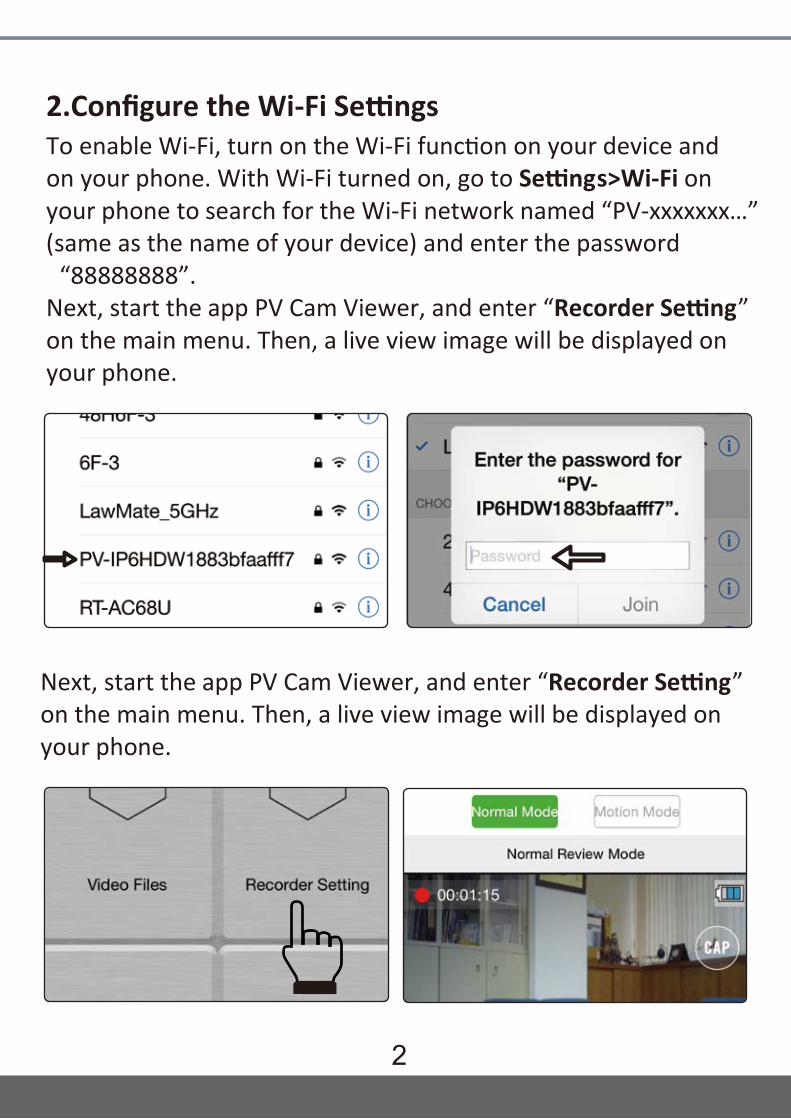
Next, start the app PV Cam Viewer, and enter “Recorder Setting” on the main menu. Then, a live view image will be displayed on your phone.
2.Configure the Wi-Fi Settings To enable Wi-Fi, turn on the Wi-Fi function on your device and on your phone. With Wi-Fi turned on, go to Settings>Wi-Fi on your phone to search for the Wi-Fi network named “PV-xxxxxxx…” (same as the name of your device) and enter the password “88888888”. Next, start the app PV Cam Viewer, and enter “Recorder Setting” on the main menu. Then, a live view image will be displayed on your phone.
3
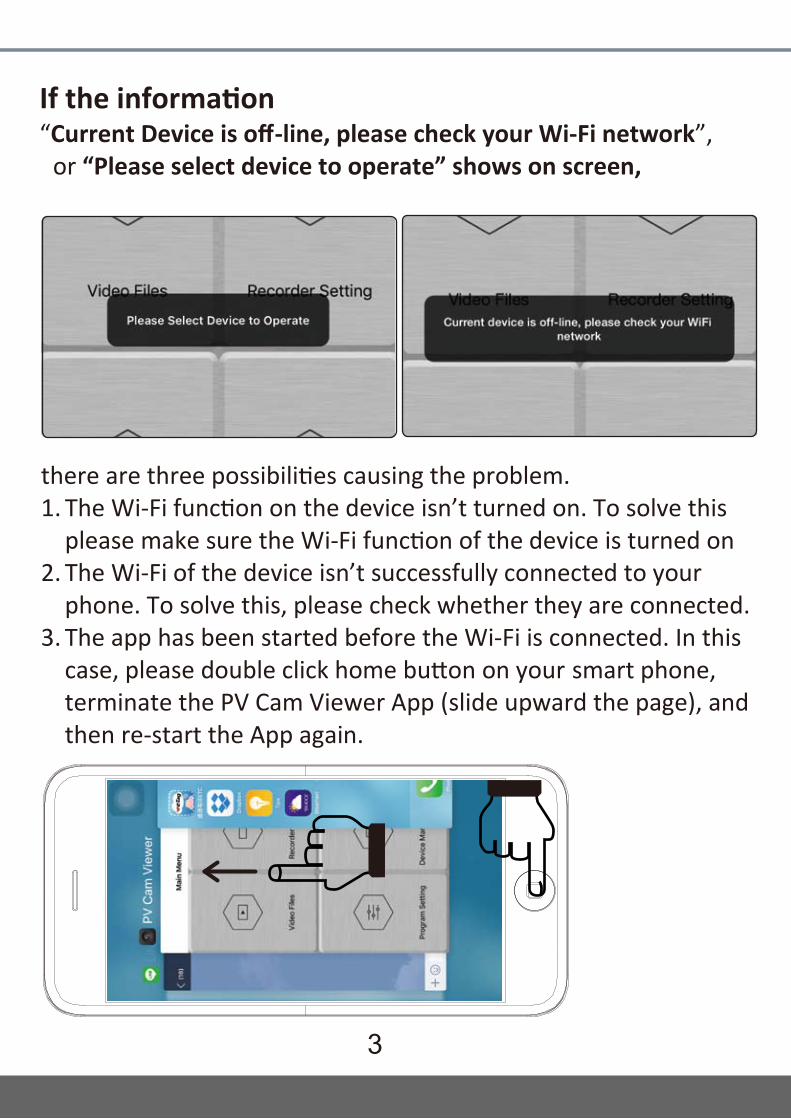
If the information “Current Device is off-line, please check your Wi-Fi network”, or “Please select device to operate” shows on screen,
there are three possibilities causing the problem. 1. The Wi-Fi function on the device isn’t turned on. To solve this
please make sure the Wi-Fi function of the device is turned on 2. The Wi-Fi of the device isn’t successfully connected to your
phone. To solve this, please check whether they are connected. 3. The app has been started before the Wi-Fi is connected. In this
case, please double click home button on your smart phone, terminate the PV Cam Viewer App (slide upward the page), and then re-start the App again.
4
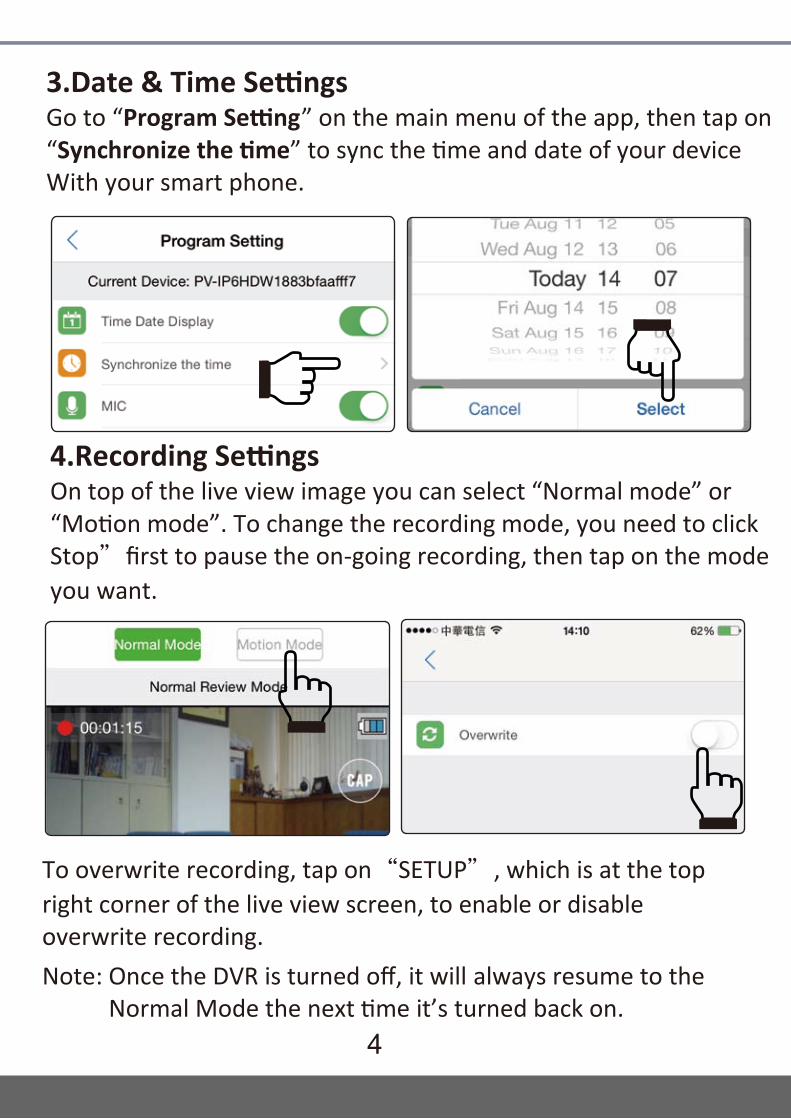
To overwrite recording, tap on“SETUP", which is at the top right corner of the live view screen, to enable or disable overwrite recording. Note: Once the DVR is turned off, it will always resume to the
Normal Mode the next time it’s turned back on.
3.Date & Time Settings Go to “Program Setting” on the main menu of the app, then tap on “Synchronize the time” to sync the time and date of your device With your smart phone.
4.Recording Settings On top of the live view image you can select “Normal mode” or “Motion mode”. To change the recording mode, you need to click Stop"first to pause the on-going recording, then tap on the mode you want.
5
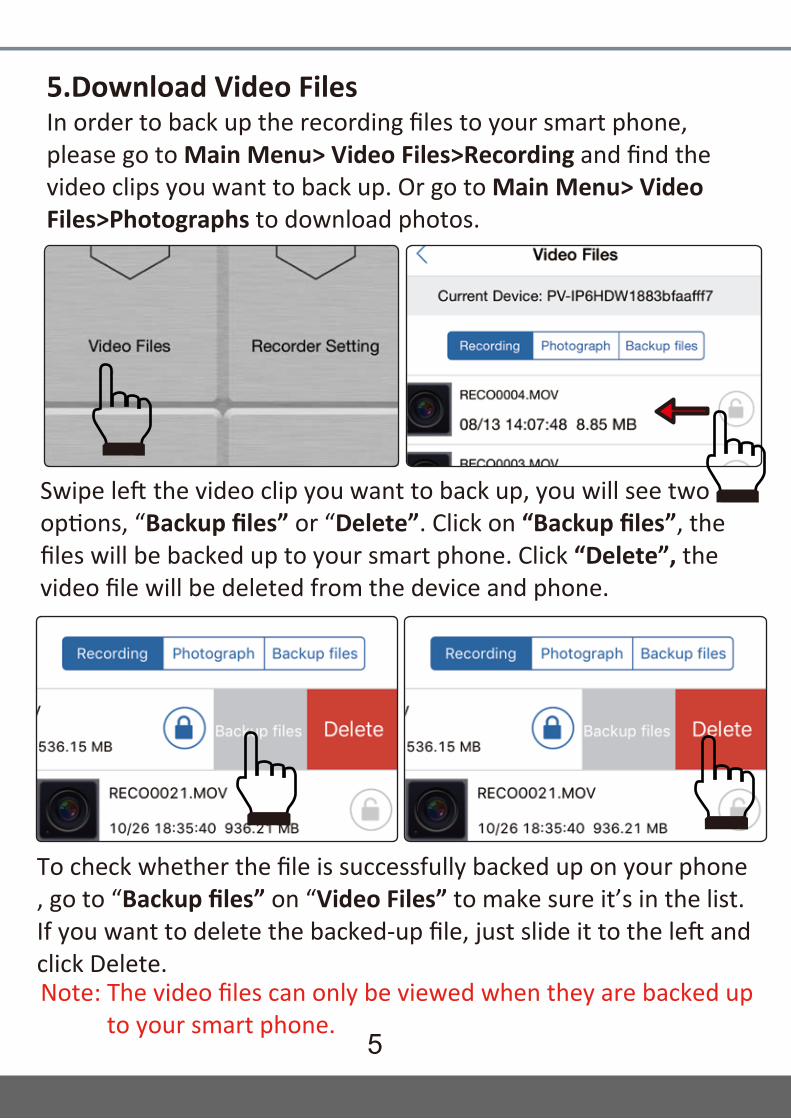
5.Download Video Files In order to back up the recording files to your smart phone, please go to Main Menu> Video Files>Recording and find the video clips you want to back up. Or go to Main Menu> Video Files>Photographs to download photos.
Swipe left the video clip you want to back up, you will see two options, “Backup files” or “Delete”. Click on “Backup files”, the files will be backed up to your smart phone. Click “Delete”, the video file will be deleted from the device and phone.
To check whether the file is successfully backed up on your phone , go to “Backup files” on “Video Files” to make sure it’s in the list. If you want to delete the backed-up file, just slide it to the left and click Delete. Note: The video files can only be viewed when they are backed up
to your smart phone.
6
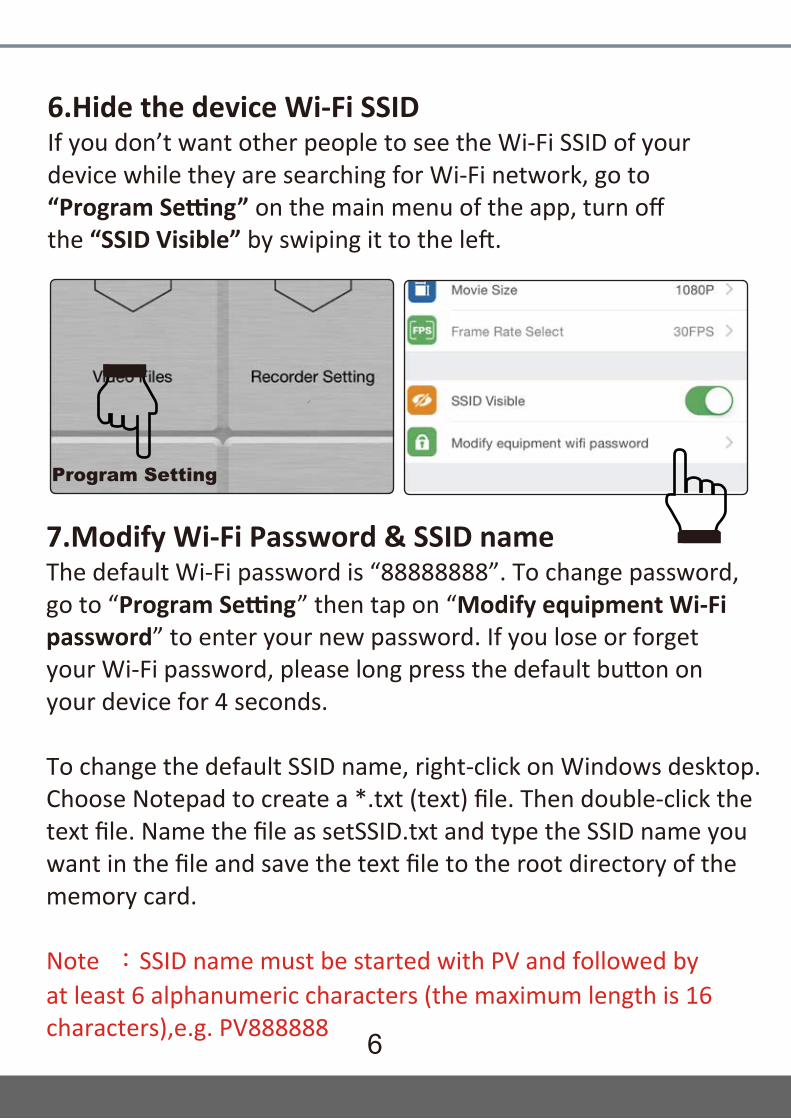
6.Hide the device Wi-Fi SSID If you don’t want other people to see the Wi-Fi SSID of your device while they are searching for Wi-Fi network, go to “Program Setting” on the main menu of the app, turn off the “SSID Visible” by swiping it to the left.
7.Modify Wi-Fi Password & SSID name The default Wi-Fi password is “88888888”. To change password, go to “Program Setting” then tap on “Modify equipment Wi-Fi password” to enter your new password. If you lose or forget your Wi-Fi password, please long press the default button on your device for 4 seconds. To change the default SSID name, right-click on Windows desktop. Choose Notepad to create a *.txt (text) file. Then double-click the text file. Name the file as setSSID.txt and type the SSID name you want in the file and save the text file to the root directory of the memory card. Note :SSID name must be started with PV and followed by at least 6 alphanumeric characters (the maximum length is 16 characters),e.g. PV888888
Program Setting
7
4
GB
Lock
Adapter
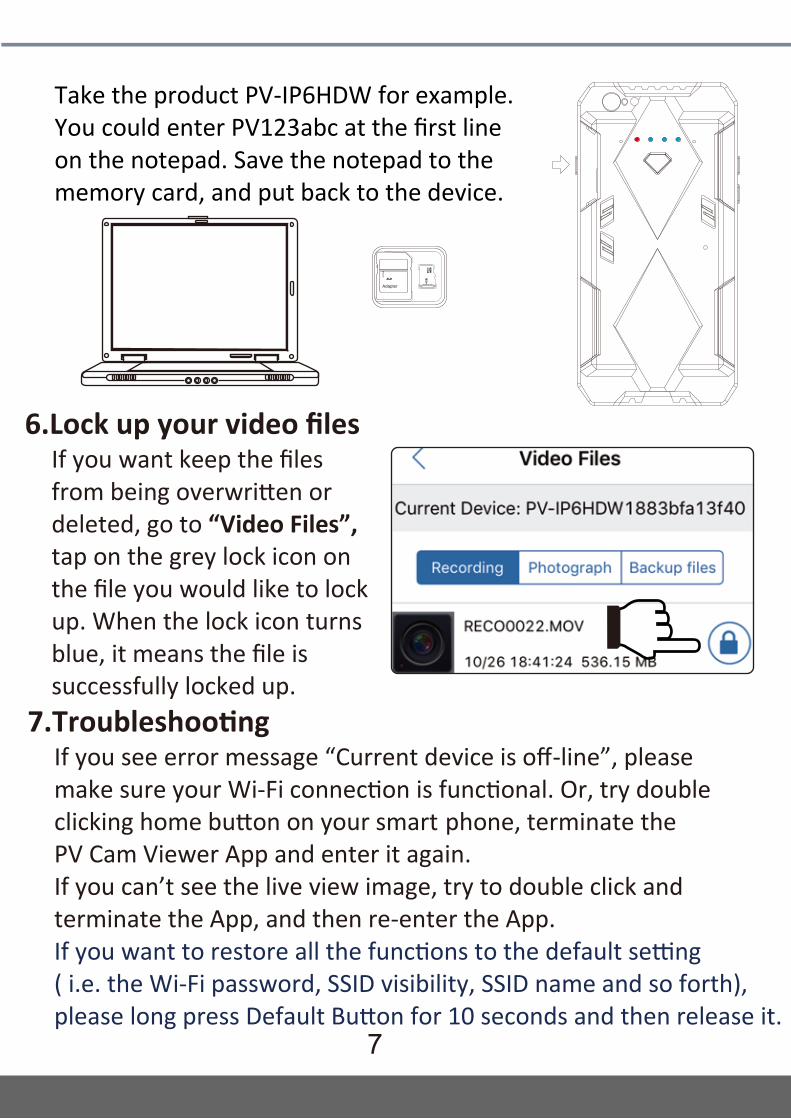
Take the product PV-IP6HDW for example. You could enter PV123abc at the first line on the notepad. Save the notepad to the memory card, and put back to the device.
7.Troubleshooting If you see error message “Current device is off-line”, please make sure your Wi-Fi connection is functional. Or, try double clicking home button on your smart phone, terminate the PV Cam Viewer App and enter it again. If you can’t see the live view image, try to double click and terminate the App, and then re-enter the App. If you want to restore all the functions to the default setting ( i.e. the Wi-Fi password, SSID visibility, SSID name and so forth), please long press Default Button for 10 seconds and then release it.
6.Lock up your video files If you want keep the files from being overwritten or deleted, go to “Video Files”, tap on the grey lock icon on the file you would like to lock up. When the lock icon turns blue, it means the file is successfully locked up.