pyobjc cocoa bindings tutorial author
TRANSCRIPT
PyObjC Cocoa Bindings Tutorial
Author
Bob IppolitoLast Modified
April 4, 2004

Introduction
This is a step-by-step tutorial of how to create a simple Cocoa Bindingsenabled "/etc/passwd" viewer application with PyObjC.
To begin, you will need:• Mac OS X 10.3 with Xcode installed• PyObjC from CVS (or newer than 1.1b1)• Moderate Python experience
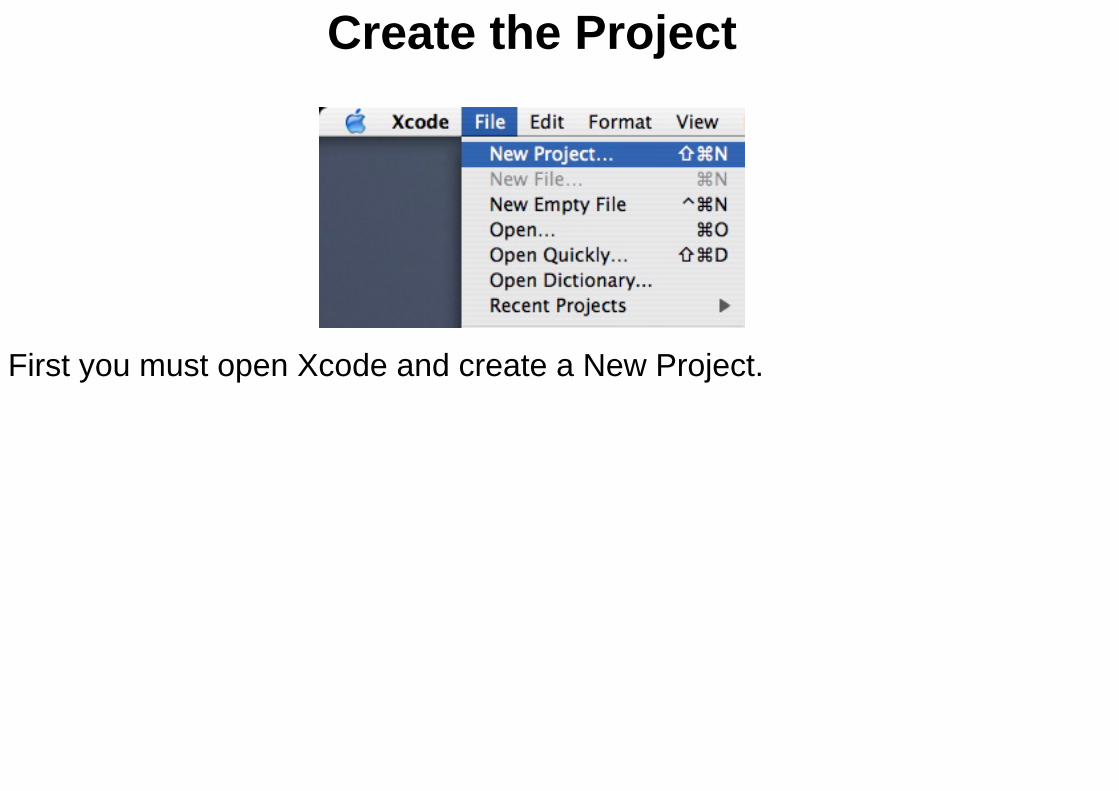
Create the Project
First you must open Xcode and create a New Project.

Cocoa-Python Application
Choose the Cocoa-Python Application template from the Xcode Assistant.

Name Your Project
Choose a name and location for your PyObjC project.

Open the Nib File
Open the MainMenu.nib file. This is the GUI of your application, and youwill edit it with the Interface Builder application.

Open the Window
Double-click the Window object in the Instances tab of your nib document.This is the main window of your application, and will open immediately onlaunch.

Instantiate a NSTableView
From the Cocoa-Data section of the Palette (cmd-/ if not already open),instantiate a NSTableView by dragging it to your window. TheNSTableView is the columnar data browsing widget in the upper-left handcorner of the Palette.

Adjust the Size of the NSTableView
Select the newly instantiated NSTableView by clicking it from the mainwindow. Drag the sizers so that the NSTableView instance fills up the fullview of the window.

Change the Resizing Behavior
Select the NSTableView instance and open the Info panel (cmd-shift-I, orTools > Show Info from the menu). Choose the Size section (cmd-3) andclick on the horizontal and vertical bars inside the inner box. This willallow the NSTableView instance to grow and shrink automatically with thewindow.

Change the Resizing Behavior (Screenshot)

Create an NSArrayController
From the Cocoa-Controllers section of the Palette, drag anNSArrayController to your nib document (not the main window). TheNSArrayController is the rightmost object in the palette, and is easilydistinguished because it has multiple cubes.
Bind the NSArrayController
From your nib document, click on the newly instantiatedNSArrayController and then open the Info panel. Choose the Bindingssection (cmd-4), and click on contentArray. Bind to File's Owner(NSApplication) and use delegate.passwords as the Model Key Path.

Bind the NSArrayController (Screenshot)

Edit the Columns of Your Table
Select the NSTableView instance by double-clicking it, then click on oneof the column headers to select it. Click on the header again, or go to theInfo panel to change the displayed name of each column. For now, nameone of the columns Short Name and the other UID.

Bind Your Table Columns
Select the Short Name table column and open the Bindings section of theInfo panel. Click on value and bind to the name Model Key Path of theNSArrayController. Do the same for the UID column, but use a Model KeyPath of uid.
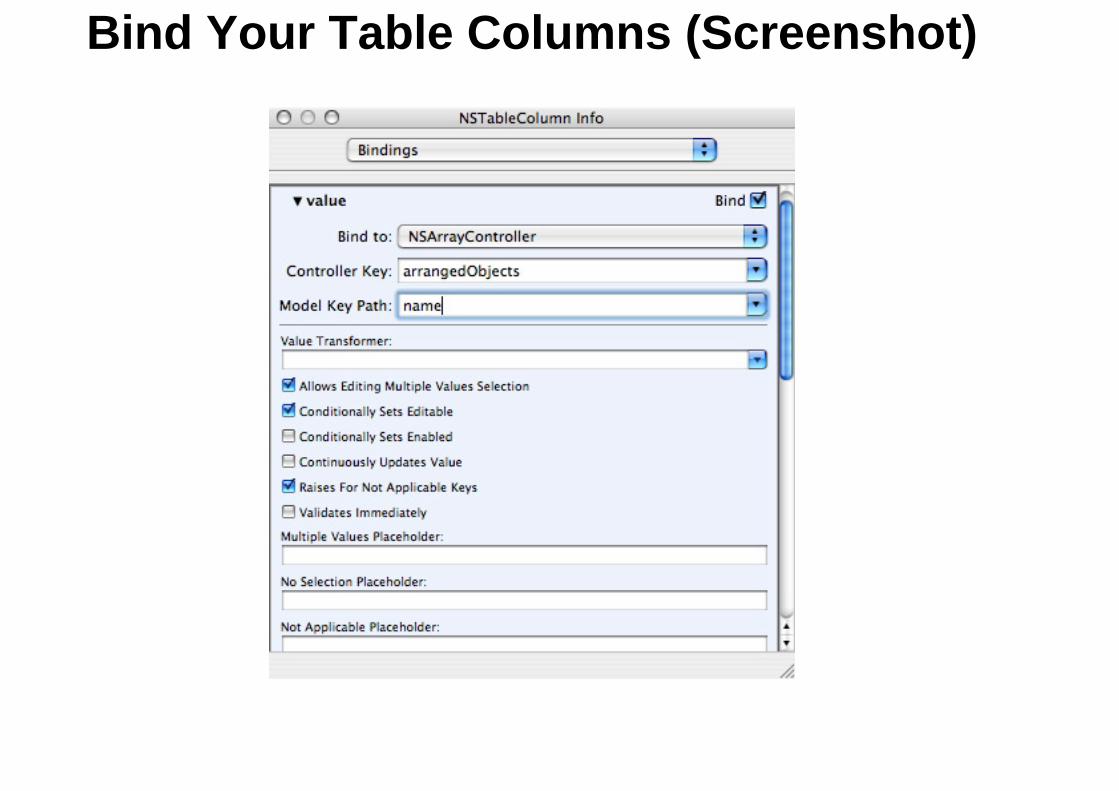
Bind Your Table Columns (Screenshot)

Write the Code
Go back to Xcode and modify your application delegate class such that ithas a method named passwords that returns a list of dicts. Each dict inthe list must have the keys 'name' and 'uid', but may have other keys.

Run Your Application
You now have a complete minimal application that uses Cocoa Bindings.From Xcode, you can run it using cmd-R or by clicking the "Build and Go"button in the toolbar. For more Interface Builder practice, you should addmore columns to the NSTableView and bind them to the other keys inyour dictionaries.