qq - how do i manage voice data controller
TRANSCRIPT
Your Red Box system may look different to the one used in this document.© Red Box Recorders Limited 2018. All rights reserved.
Page 1
How Do I Manage Voice Data Controller
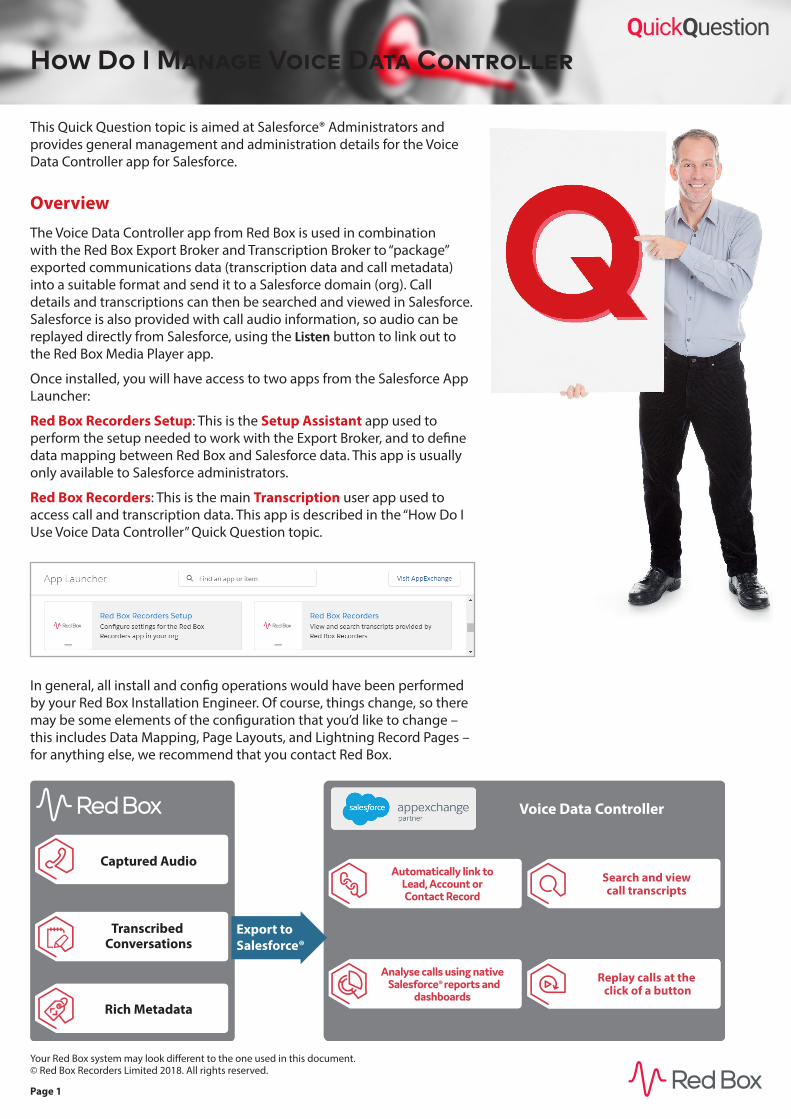
This Quick Question topic is aimed at Salesforce® Administrators and provides general management and administration details for the Voice Data Controller app for Salesforce.
OverviewThe Voice Data Controller app from Red Box is used in combination with the Red Box Export Broker and Transcription Broker to “package” exported communications data (transcription data and call metadata) into a suitable format and send it to a Salesforce domain (org). Call details and transcriptions can then be searched and viewed in Salesforce. Salesforce is also provided with call audio information, so audio can be replayed directly from Salesforce, using the Listen button to link out to the Red Box Media Player app.
Once installed, you will have access to two apps from the Salesforce App Launcher:
Red Box Recorders Setup: This is the Setup Assistant app used to perform the setup needed to work with the Export Broker, and to define data mapping between Red Box and Salesforce data. This app is usually only available to Salesforce administrators.
Red Box Recorders: This is the main Transcription user app used to access call and transcription data. This app is described in the “How Do I Use Voice Data Controller” Quick Question topic.
In general, all install and config operations would have been performed by your Red Box Installation Engineer. Of course, things change, so there may be some elements of the configuration that you’d like to change – this includes Data Mapping, Page Layouts, and Lightning Record Pages – for anything else, we recommend that you contact Red Box.
Transcribed Conversations
Rich Metadata
Captured Audio
®
Voice Data Controller
Export to Salesforce®
Search and viewcall transcripts
Replay calls at the click of a button

© Red Box Recorders Limited 2018. All rights reserved.
Page 2
Setup AssistantThe Red Box Setup Assistant has two main config sections:
System Connections: Used to configure the authentication/authorisation connections between the Export Broker and Salesforce. This will have been configured during installation and shouldn’t need to be updated. However, if the authentication/authorisation loop is “broken” somehow (for example, the Voice Data Controller app is reinstalled) this setup will need to be performed again in order to re-establish the loop. Due to the processes involved, Red Box currently recommends that this is only performed by an Install or Support Engineer (from Red Box or an authorised Partner).
Data Mapping: Data Mapping allows you to manage field mapping between Red Box data and Salesforce. Again, this should have been configured during installation, but you may want to update the mapping to meet your changing needs. See “Data Mapping” below.
Data Mapping
To update the data mapping configuration:
1. Login to Salesforce as an administrator and open the App Launcher.
2. Select the Red Box Setup app (the Setup Assistant) and click Edit in Data Mapping.
3. The Transcript Data Mapping step allows you to define what Red Box metadata fields are mapped to which Salesforce fields. You can add, delete, and edit field mappings as needed. Available fields are listed in “Red Box Metadata Fields” on page 4. When all required metadata is mapped, click Continue. Note that changes to this data map will only be applied to new data sent to Salesforce.
4. The Metadata Fields Data Mapping step allows you to define how Red Box call and transcript data will be associated with Salesforce Accounts, Contacts, Leads, and Users in the customer’s org.
The extension field will relate calls and transcripts with Salesforce Users with the same extension. By default, this field is mapped to the Red Box extension field but can be changed if needed.
The other three fields will relate calls and transcripts with Accounts, Contacts, and Leads. Note that although the fields are editable (for legacy support purposes), all changes are ignored as the fields are now automatically populated depending on call direction and data availability – see “Call Data Mapping” on page 3.
5. Once the fields are mapped as needed, click Continue. Note that changes to this data map will only be applied to new data sent to Salesforce.

© Red Box Recorders Limited 2018. All rights reserved.
Page 3
Call Data Mapping
As stated, the callerNumber, calledNumber, and otherParty fields will relate calls and transcripts with Salesforce Accounts, Contacts, and Leads. These fields are automatically populated depending on call direction and data availability:
Call Direction Call Direction Metadata
Incoming calledNumber Local
callerNumber Remote
Outgoing calledNumber Remote
callerNumber Local
The priority indicates the order in which a particular field is chosen. If the field is not present, the next priority field is checked, until data is found. If no data is found, nothing is populated in Salesforce.
“Local” metadata is taken from the following actual metadata fields:
Priority Metadata Field
1 extension
2 channelName
3 console
4 agentId
5 traderId
6 number
7 IPAddress
“Remote” metadata is taken from the following actual metadata fields
Priority Metadata Field
1 otherParty
2 number
3 IPAddress

© Red Box Recorders Limited 2018. All rights reserved.
Page 4
Red Box Metadata Fields
Red Box Metadata Field Description
agentId Agent ID associated with the call.
agentName Agent Name associated with the call.
annotationReference Annotation field name.
annotationText Annotation field content.
calledDigits Actual digits called.
calledName Name associated with the called number.
calledNumber Called number.
callerName Name associated with the caller.
callerNumber Caller number.
callIdentification Identification data associated with the call.
callingDigits Actual digits of the calling device.
callingIPAddress IP Address of the calling device.
callingName Name associated with the calling device.
callingNumber Number of the calling device.
callReference Reference of the call.
channelId Channel ID of the recorded device.
channelName Channel name of the recorded device.
conferenceId Unique conference call identifier.
dialledDigits Actual digits dialled.
digitalSignature Unique digital signature of the Red Box recording.
direction Call direction.
dnisDigits Actual numbers dialled - Dialled Number Identification Service (DNIS).
duration Call duration.
endDateTime Call end date and time.
extension Extension defined for the recordable.
extensionName Name associated with the extension (recordable device).
externalCallId Call identifier (provided by the external telephony system).
externalId External ID data (provided by the external telephony system).
externalStartDateTime Call start date and time (provided by the external telephony system).
imSearchableText Concatenated IM text.
mediaType Media type associated with the recording.
nasCallId Call identifier associated with the NAS.
otherParty Name or ID of the other party on the call. For conference calls the other party will be “Conference Call”.
otherPartyName Name of the other party on the call.
sipCallId Unique call identifier (generated by the telephony system).
sipCallingPartyFirstName SIP calling party first name.
sipCallingPartyLastName SIP calling party last name.
sipFromAddress SIP From address.
sipToAddress SIP To address.
smsText SMS text as recorded.
StartDateTime Call start date and time.

© Red Box Recorders Limited 2018. All rights reserved.
Page 5
Set Up Page Layouts Page Layouts are the main display for record pages in Salesforce Classic, but they also control a part of the display for Salesforce Lightning. Page Layouts are assigned to user profiles, so depending on the profiles you set for Salesforce users, they may see different page layouts for a selected object.
Setting up and assigning page layouts is completely dependent on your requirements:
• You can use the Red Box “pre-packaged” page layouts and assign those as needed – see “Packaged Page Layouts – Accounts, Contacts, Leads, and Transcripts” on page 6.
• If you want to use your own page layouts, you can use the Red Box page layout elements and integrate those into your designs – see “Customised Page Layouts” on page 7.
• Setting up the User Page Layout is different to the other objects. Here, you simply need to add the Salesforce Extension field to user profile page layouts – this allows call and transcription data to be associated with Salesforce users – see “User Profile Page Layouts” on page 8. This should have already been done for you, but is included here for reference.
If you need more information on Page Layouts in Salesforce, refer to the relevant Salesforce documentation: Page Layouts - Salesforce Help & Training

© Red Box Recorders Limited 2018. All rights reserved.
Page 6
Packaged Page Layouts – Accounts, Contacts, Leads, and Transcripts
The following steps will guide you through assigning the packaged Red Box page layouts for the System Administrator and Standard User profiles, but ideally you’ll want to assign these page layouts to the correct user profiles that fit your user base.
Also, these examples will go through assigning page layouts for use with Salesforce Lightning (using the Red Box Recorders <Object> Layout page layouts) or page layouts for use with Salesforce Classic (using the Red Box Recorders <Object> Layout (Classic) page layouts). You can only select Lightning or Classic layouts for a user profile. Note that if you want to set up a user profile to make use of the Voice Data Controller app in both environments (although not recommended), then we suggest you assign the (Classic) page layouts.
You need to assign Red Box page layouts for Accounts, Contacts, Leads, and Transcripts. The process is the same for each, so perform these steps for each object type.
To assign Red Box page layouts for Accounts, Contacts, Leads, and Transcripts:
1. Login to Salesforce as an administrator, go to Setup > Object Manager, and select Account, Contact, Lead, or Transcript, as needed.
2. Click Page Layouts in the side menu and then click the Page Layout Assignment button.
3. Click Edit Assignment and highlight the Standard User and System Administrator profiles. In the Page Layout to Use drop-down menu, select which Red Box page layout to use – Red Box Recorders Layout for Salesforce Lightning, or Red Box Recorders Layout (Classic) for Salesforce Classic. Remember, if you’re planning to use both Salesforce environments with a user profile, then select the Classic page layout. Click Save to apply the changes.
4. Repeat steps 1 to 3 for each object (Setup > Object Manager > Account, Contact, Lead, and Transcript).
© Red Box Recorders Limited 2018. All rights reserved.
Page 7
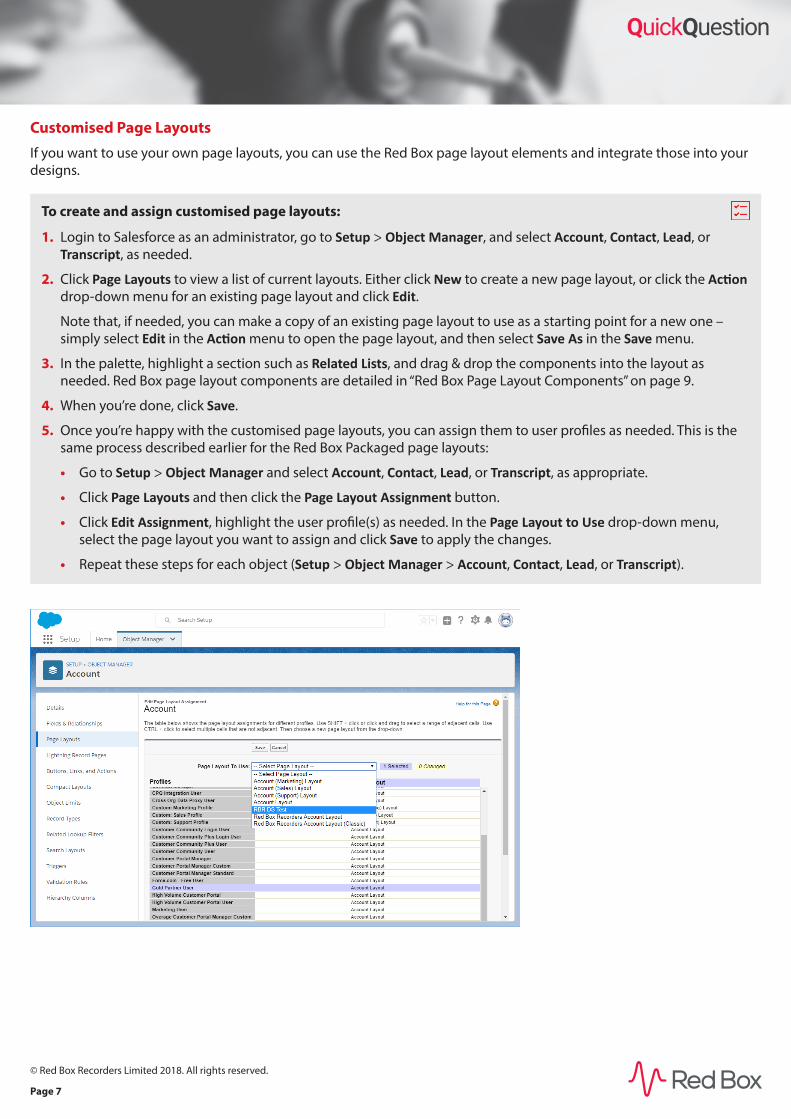
Customised Page Layouts
If you want to use your own page layouts, you can use the Red Box page layout elements and integrate those into your designs.
To create and assign customised page layouts:
1. Login to Salesforce as an administrator, go to Setup > Object Manager, and select Account, Contact, Lead, or Transcript, as needed.
2. Click Page Layouts to view a list of current layouts. Either click New to create a new page layout, or click the Action drop-down menu for an existing page layout and click Edit.
Note that, if needed, you can make a copy of an existing page layout to use as a starting point for a new one – simply select Edit in the Action menu to open the page layout, and then select Save As in the Save menu.
3. In the palette, highlight a section such as Related Lists, and drag & drop the components into the layout as needed. Red Box page layout components are detailed in “Red Box Page Layout Components” on page 9.
4. When you’re done, click Save.
5. Once you’re happy with the customised page layouts, you can assign them to user profiles as needed. This is the same process described earlier for the Red Box Packaged page layouts:
• Go to Setup > Object Manager and select Account, Contact, Lead, or Transcript, as appropriate.
• Click Page Layouts and then click the Page Layout Assignment button.
• Click Edit Assignment, highlight the user profile(s) as needed. In the Page Layout to Use drop-down menu, select the page layout you want to assign and click Save to apply the changes.
• Repeat these steps for each object (Setup > Object Manager > Account, Contact, Lead, or Transcript).

© Red Box Recorders Limited 2018. All rights reserved.
Page 8
User Profile Page Layouts
Setting up the User Page Layout is different to the other objects. Here, you simply need to add the Salesforce Extension field to user profile page layouts – this allows call and transcription data to be associated with users. As stated previously, this should have already been done for you, but we’ve covered the process here for your reference.
To add the Extension field to user profile page layouts:
1. Login to Salesforce as an administrator, go to Setup > Object Manager > User
2. Click User Profile Page Layouts and then click User Profile Layout
3. In the palette, under Fields, drag the Extension field into the page layout and click Save
Note that the Red Box Transcripts component is also available under Related Lists, and userTranscripts is available under Visualforce Pages. These optional Red Box components are detailed in “Red Box Page Layout Components” on page 9.
© Red Box Recorders Limited 2018. All rights reserved.
Page 9
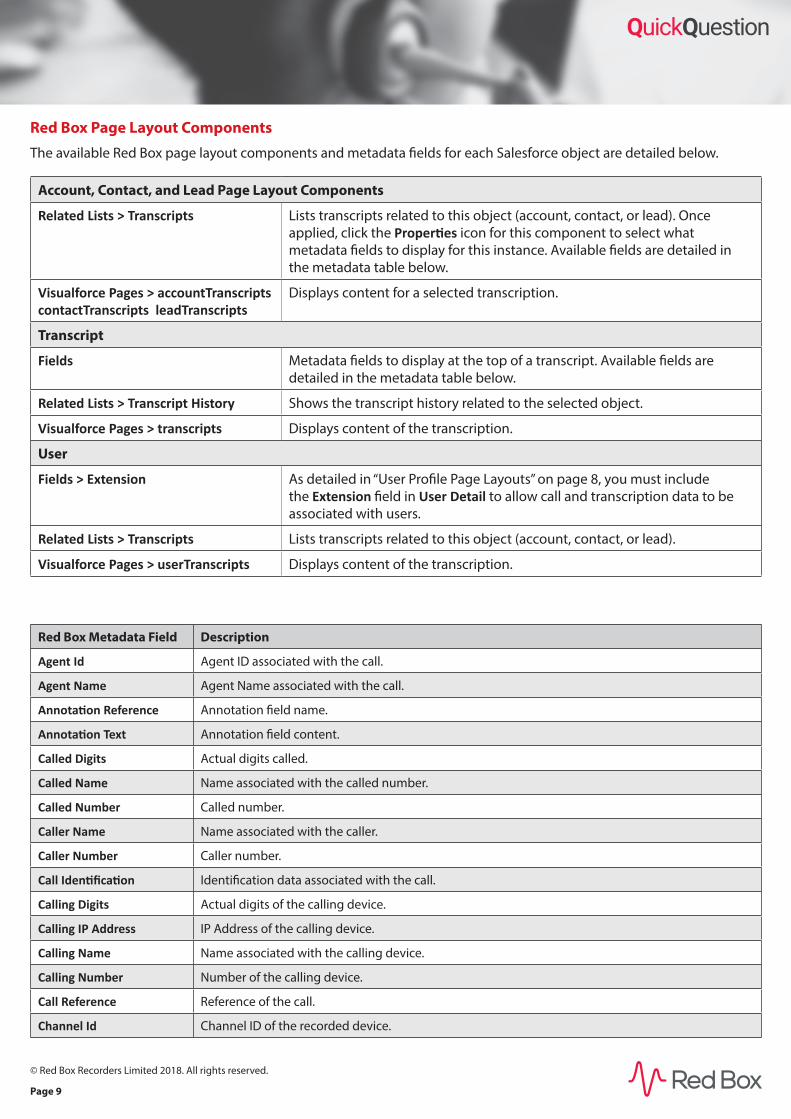
Red Box Page Layout Components
The available Red Box page layout components and metadata fields for each Salesforce object are detailed below.
Account, Contact, and Lead Page Layout Components
Related Lists > Transcripts Lists transcripts related to this object (account, contact, or lead). Once applied, click the Properties icon for this component to select what metadata fields to display for this instance. Available fields are detailed in the metadata table below.
Visualforce Pages > accountTranscripts contactTranscripts leadTranscripts
Displays content for a selected transcription.
Transcript
Fields Metadata fields to display at the top of a transcript. Available fields are detailed in the metadata table below.
Related Lists > Transcript History Shows the transcript history related to the selected object.
Visualforce Pages > transcripts Displays content of the transcription.
User
Fields > Extension As detailed in “User Profile Page Layouts” on page 8, you must include the Extension field in User Detail to allow call and transcription data to be associated with users.
Related Lists > Transcripts Lists transcripts related to this object (account, contact, or lead).
Visualforce Pages > userTranscripts Displays content of the transcription.
Red Box Metadata Field Description
Agent Id Agent ID associated with the call.
Agent Name Agent Name associated with the call.
Annotation Reference Annotation field name.
Annotation Text Annotation field content.
Called Digits Actual digits called.
Called Name Name associated with the called number.
Called Number Called number.
Caller Name Name associated with the caller.
Caller Number Caller number.
Call Identification Identification data associated with the call.
Calling Digits Actual digits of the calling device.
Calling IP Address IP Address of the calling device.
Calling Name Name associated with the calling device.
Calling Number Number of the calling device.
Call Reference Reference of the call.
Channel Id Channel ID of the recorded device.
© Red Box Recorders Limited 2018. All rights reserved.
Page 10
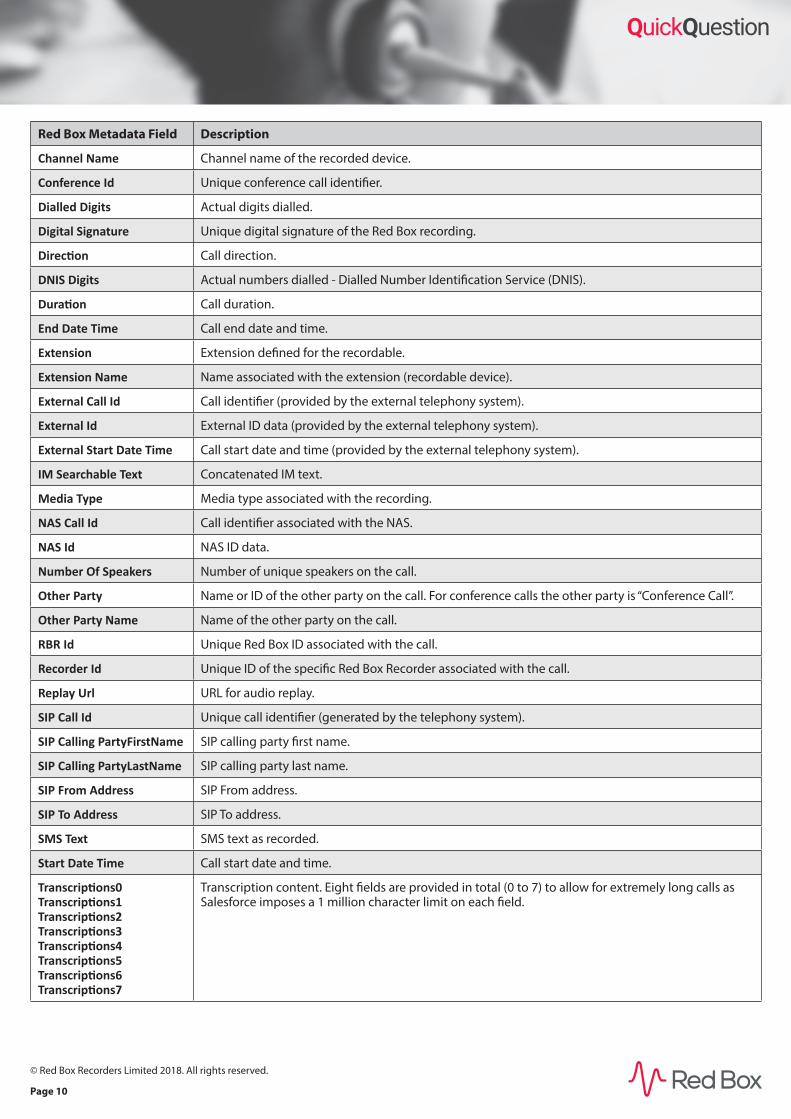
Red Box Metadata Field Description
Channel Name Channel name of the recorded device.
Conference Id Unique conference call identifier.
Dialled Digits Actual digits dialled.
Digital Signature Unique digital signature of the Red Box recording.
Direction Call direction.
DNIS Digits Actual numbers dialled - Dialled Number Identification Service (DNIS).
Duration Call duration.
End Date Time Call end date and time.
Extension Extension defined for the recordable.
Extension Name Name associated with the extension (recordable device).
External Call Id Call identifier (provided by the external telephony system).
External Id External ID data (provided by the external telephony system).
External Start Date Time Call start date and time (provided by the external telephony system).
IM Searchable Text Concatenated IM text.
Media Type Media type associated with the recording.
NAS Call Id Call identifier associated with the NAS.
NAS Id NAS ID data.
Number Of Speakers Number of unique speakers on the call.
Other Party Name or ID of the other party on the call. For conference calls the other party is “Conference Call”.
Other Party Name Name of the other party on the call.
RBR Id Unique Red Box ID associated with the call.
Recorder Id Unique ID of the specific Red Box Recorder associated with the call.
Replay Url URL for audio replay.
SIP Call Id Unique call identifier (generated by the telephony system).
SIP Calling PartyFirstName SIP calling party first name.
SIP Calling PartyLastName SIP calling party last name.
SIP From Address SIP From address.
SIP To Address SIP To address.
SMS Text SMS text as recorded.
Start Date Time Call start date and time.
Transcriptions0 Transcriptions1 Transcriptions2 Transcriptions3 Transcriptions4 Transcriptions5 Transcriptions6 Transcriptions7
Transcription content. Eight fields are provided in total (0 to 7) to allow for extremely long calls as Salesforce imposes a 1 million character limit on each field.

RBRQQ1054 V1.2
All product, service, and company names are the trademarks or registered trademarks of their respective owners.Salesforce, Sales Cloud, and others are trademarks of salesforce.com, inc., and are used here with permission.© Red Box Recorders Limited 2018. All rights reserved.
Page 11
www.redboxvoice.com
+44 (0)115 937 7100
Set Up Lightning Record PagesThis step is only required if you’re using Salesforce Lightning. Lightning Record Pages operate in a different way than Page Layouts. While Page Layouts are profile-based, Lightning Record Pages offer more flexibility, as they can be assigned as app default views, or org default views.
The following steps are the recommended Lightning Record Page assignments for each object. You can further customise record page views depending on your needs, but this section will only cover setting the pages up as either an App Default or an Org Default.
Also, just like the Page Layouts, you can use customised layouts – see “Customised Record Page Layouts” below.
If you need more information on saving and activating Lightning Record Pages, refer to the relevant Salesforce documentation: Activate Lightning Experience Record Pages - Salesforce Help & Training
Accounts, Contacts, Leads, Users, Transcripts
To assign Lightning Record Pages:
1. Login to Salesforce as an administrator, go to Setup > Object Manager, and select Account, Contact, Lead, User, or Transcript, as needed.
2. Click Lightning Record Pages and click Red Box Recorders <Object> Page Layout
3. In the Lightning page detail click View, and then in the Lightning App Builder click Activation.
4. For Accounts, Contacts, and Leads, click on the App Default tab, then click Assign as App Default. Tick the Red Box Recorders checkbox, then click Next, and finally, click Save
5. For Users and Transcripts, click on the Org Default tab, then click Assign as Org Default and click Save.
Customised Record Page Layouts
If you want to use customised Lightning Record Pages, you can make use of the Red Box Lightning components and integrate those into your own layouts.
To create/edit customised Lightning Record Pages:
1. Login to Salesforce as an administrator, go to Setup > Object Manager, and select Account, Contact, Lead, User, or Transcript as needed, and finally click Lightning Record Pages
2. To create a new Record Page, click New. To use an existing one, click the record page name and click Edit or Clone as needed. The available Red Box Lightning Components are transcripts (view transcript content) and searchTranscription (search transcripts).
3. Once you’re happy with your layouts, you’ll need to assign them as detailed above.
Navigation BarTwo additional options (Transcripts and Transcript Search) are also available via the main Salesforce Nav Bar. Use these to list, search, and view transcriptions – provide access to your users as needed.