rain garden handbook - louisville msd · 2017-03-20 · 3. planning your rain garden surface size...
TRANSCRIPT

RAIN GARDENHANDBOOK
6 SIMPLE STEPSFOR A SUCCESSFUL RAIN GARDEN:
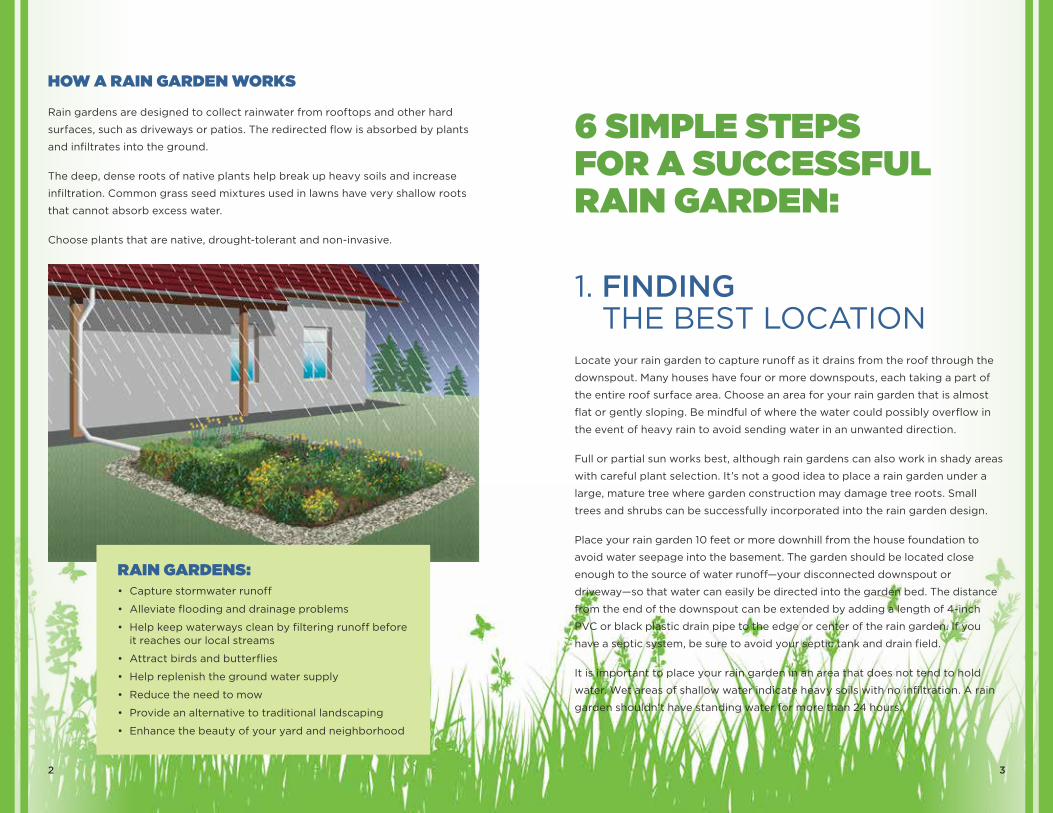
HOW A RAIN GARDEN WORKS
Rain gardens are designed to collect rainwater from rooftops and other hard
surfaces, such as driveways or patios. The redirected flow is absorbed by plants
and infiltrates into the ground.
The deep, dense roots of native plants help break up heavy soils and increase
infiltration. Common grass seed mixtures used in lawns have very shallow roots
that cannot absorb excess water.
Choose plants that are native, drought-tolerant and non-invasive.
1. FINDING THE BEST LOCATION
Locate your rain garden to capture runoff as it drains from the roof through the
downspout. Many houses have four or more downspouts, each taking a part of
the entire roof surface area. Choose an area for your rain garden that is almost
flat or gently sloping. Be mindful of where the water could possibly overflow in
the event of heavy rain to avoid sending water in an unwanted direction.
Full or partial sun works best, although rain gardens can also work in shady areas
with careful plant selection. It’s not a good idea to place a rain garden under a
large, mature tree where garden construction may damage tree roots. Small
trees and shrubs can be successfully incorporated into the rain garden design.
Place your rain garden 10 feet or more downhill from the house foundation to
avoid water seepage into the basement. The garden should be located close
enough to the source of water runoff—your disconnected downspout or
driveway—so that water can easily be directed into the garden bed. The distance
from the end of the downspout can be extended by adding a length of 4-inch
PVC or black plastic drain pipe to the edge or center of the rain garden. If you
have a septic system, be sure to avoid your septic tank and drain field.
It is important to place your rain garden in an area that does not tend to hold
water. Wet areas of shallow water indicate heavy soils with no infiltration. A rain
garden shouldn’t have standing water for more than 24 hours.
2 3
RAIN GARDENS:• Capture stormwater runoff
• Alleviate flooding and drainage problems
• Help keep waterways clean by filtering runoff before it reaches our local streams
• Attract birds and butterflies
• Help replenish the ground water supply
• Reduce the need to mow
• Provide an alternative to traditional landscaping
• Enhance the beauty of your yard and neighborhood

2. EVALUATING YOUR SOIL
Soil texture determines how well water soaks through the soil. Soil is composed
of three mineral particles—sand, silt and clay (often referred to as “the texture”).
When soil is made up of a high percentage of clay, stormwater will not soak in.
Clay soil sticks together and is light in color.
Ribbon Test
For a quick way to determine your soil’s texture, grab a small
handful of moist soil. Begin pressing the soil between your
thumb and index finger to make a ribbon. Soil with a high
clay content will form a ribbon longer than 2 inches.
Percolation Test
Determine if your location will provide adequate infiltration,
or water absorption, by performing a percolation test. It is best
to perform the test when soil is relatively dry to get an accurate percolation rate.
1. Dig a hole the size
of a coffee can and
insert a ruler.
2. Fill the hole with
water and mark the
level on the ruler.
3. Wait four hours
and mark the water
level again.
To determine the daily (24-hour) percolation, multiply the number of inches
drained in four hours by six.
For example, if the water drains 2 inches in 4 hours, it will drain 12 inches in 24
hours (2 x 6 = 12). In that case, you would dig your garden 12 inches deeper
than the surrounding soil, so it can drain completely in 24 hours.
Dense, compacted soils — or soils with high clay content — will need to be
amended to ensure proper drainage. To improve water infiltration, mix in some
sand and a lot of organic material, such as compost or peat moss, to increase
the total volume by 50 percent. If needed, you can have your soil tested by the
Jefferson County Extension Service (http://ces.ca.uky.edu/jefferson).
4 5
USEFUL TOOLS TO HAVE(OR BORROW)• Garden hose with spray nozzle
• Rake
• Tape measure or yard stick
• Trowel
• Shovel
Makes the job easier:
• Garden tiller
• Wheelbarrow
If needed to redirect downspout water:
• PVC or black plastic pipe (4-inch diameter)
3. PLANNING YOUR RAIN GARDEN
Surface Size
Choose the size and shape that is best for your yard, budget and ability
to manage. A small rain garden can handle a variety of rain events, even
though it may not capture 100 percent of the runoff from your roof.
Depth
Most residential rain gardens will be about 6 to 12 inches deep. If the water
in your test hole from Step 2 has not drained within the 24-hour period, it is
probably best to select another location, or amend the soil to a depth of 18
inches. If space is limited, the depth may be increased and area decreased to
provide the same amount of capture volume.
4. CHOOSING YOUR PLANTS
Native plants attract pollinators that support our
local biodiversity. Many butterflies depend on
native plants to sustain them on their
migration journey.
Once established, native plants require little
maintenance and have the ability to withstand
droughts and other extreme weather conditions.
Non-native plants are acceptable if they
are not invasive. There are plenty of
non-native, non-invasive perennial
species that do well in rain gardens.
Hostas and Oakleaf Hydrangeas are
good examples.
For a detailed list and photos of
Kentucky native plants, grasses, shrubs and
trees suitable for your rain garden, consult the
Rain Garden Plant List at LouisvilleMSD.org/
GreenMSD. There, you will also find additional
resources, schedules of workshops and other
events. Page 8, of this guide, has a list of plants
that are ideal for the beginning gardener.
6 7
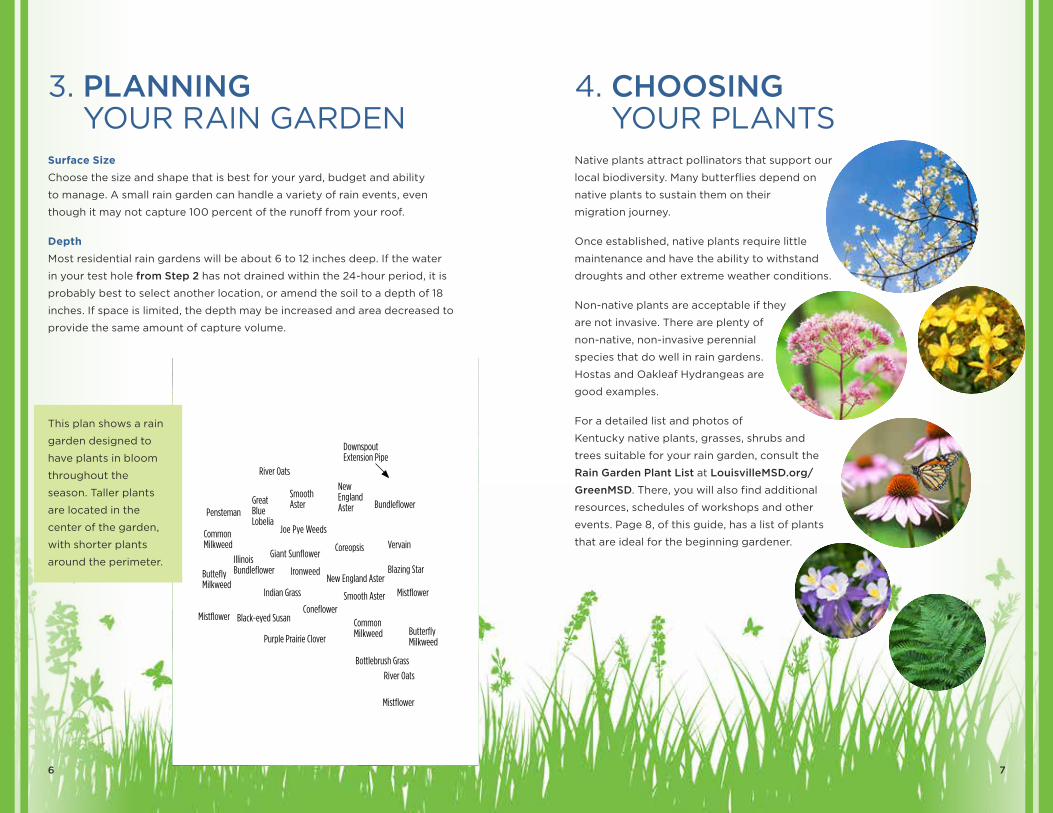
Roof
River Oats
River Oats
PenstemanGreat Blue Lobelia
New England Aster
New England Aster
Common Milkweed
Common Milkweed
Buttefly Milkweed
Butterfly Milkweed
Bottlebrush Grass
Illinois Bundleflower
Purple Prairie Clover
Mulched Path
DownspoutExtension Pipe
Black-eyed Susan
Smooth Aster
Smooth Aster
Joe Pye Weeds
Giant Sunflower
Ironweed
Bundleflower
Coreopsis Vervain
Blazing Star
Mistflower
Mistflower
MistflowerIndian Grass
Coneflower
This plan shows a rain
garden designed to
have plants in bloom
throughout the
season. Taller plants
are located in the
center of the garden,
with shorter plants
around the perimeter.

5. PREPARING & PLANTING THE GARDEN BED
Preparing the Garden
Prior to digging, use a garden hose to outline the edges of the garden. If building
the rain garden in an existing lawn, digging is made easier by killing the grass first
or removing grass with a sod cutter, which can be rented.
The deeper the rain garden, the more stormwater it will capture and infiltrate. The
average for most residential gardens is 6 to 12 inches. Dig a level depression, and if
the soil is compacted, mix in compost while tilling the bed to about a foot deep to
loosen the soil. Grade the garden so that water will spread out over a large area.
In the first year, you may want to cut a notch at the bottom, or downside, of the
garden to let rain water flow out so that the bed will not fill to the top and drown
young plants before they have been able to establish root systems for infiltration.
Planting the Garden
Once you’ve decided on the plan, lay out the plants per your design approximately
one foot apart. Keep the plants in containers until you are ready to put them in
the ground to prevent the roots from drying out.
For a shrub or tree, dig the hole twice as wide as the root ball or container and deep
enough to keep the crown of the plant level with the existing grade, just as it was in
the container. Fill the hole and tamp around the roots to avoid air pockets.
Apply mulch or stone to the garden surface after planting.
ALWAYS CALL BEFORE YOU DIG!
Call 800.752.6007 to identify buried utility lines that
may be in the way of the shovel or tiller.
8 9
PLANTING IDEAS
BLOOMING BLOOMPERIOD COLOR COMMON NAME SPECIES NAME HEIGHT SUN/SHADE
GRASSES/SEDGES/RUSHES
Summer Fox Sedge Carex vulpinoidea 2 - 3' full/part sun
Soft Rush Juncus effusus 3' full sun
Prairie Dropseed Sporobolus heterolepis 2 - 4' full sun
SMALL TREES/SHRUBS
Spring Serviceberry Amelanchier laevis 25' full/part sun
Pawpaw Asimina triloba 12 - 20' shade/part sun
Winterberry Ilex verticillata 10 - 12' full/part sun
Blackhaw Viburnum Viburnum prunifolium 10 - 15' shade/full sun
FERNS
Late Summer/Fall Christmas Fern Plystichum acrostichoides 2' shade
WILDFLOWERS (FORBS)
Spring Wild Ginger Asarum canadense 4 - 8" shade
Spring/Summer Blue False Indigo Baptisia australis 3 - 4' full/part sun
Celandine Poppy Stylophorum diphyllum 2' shade
Ohio Spiderwort Tradescantia ohiensis 2 - 4' full/part sun
Early Summer Phlox Phlox paniculata 2 - 3' full/part sun
Soloman’s Seal Polygonatum biflorum 1 - 3' shade
Summer Swamp Milkweed Asclepias incarnata 3 - 6' full sun
Pale Purple Coneflower Echinacea pallida 3 - 4' full/part sun
Foxglove Beardtongue Penstemon digitalis 2 - 4' full/part sun
Late Summer/Fall New England Aster Aster novae-angliae 3 - 5' full/part sun
Blue Lobelia Lobelia siphilitica 1 - 4' full/part sun
Black-eyed Susan Rudbeckia hirta 1 - 3' full/part sun
GETTING RID OF GRASS
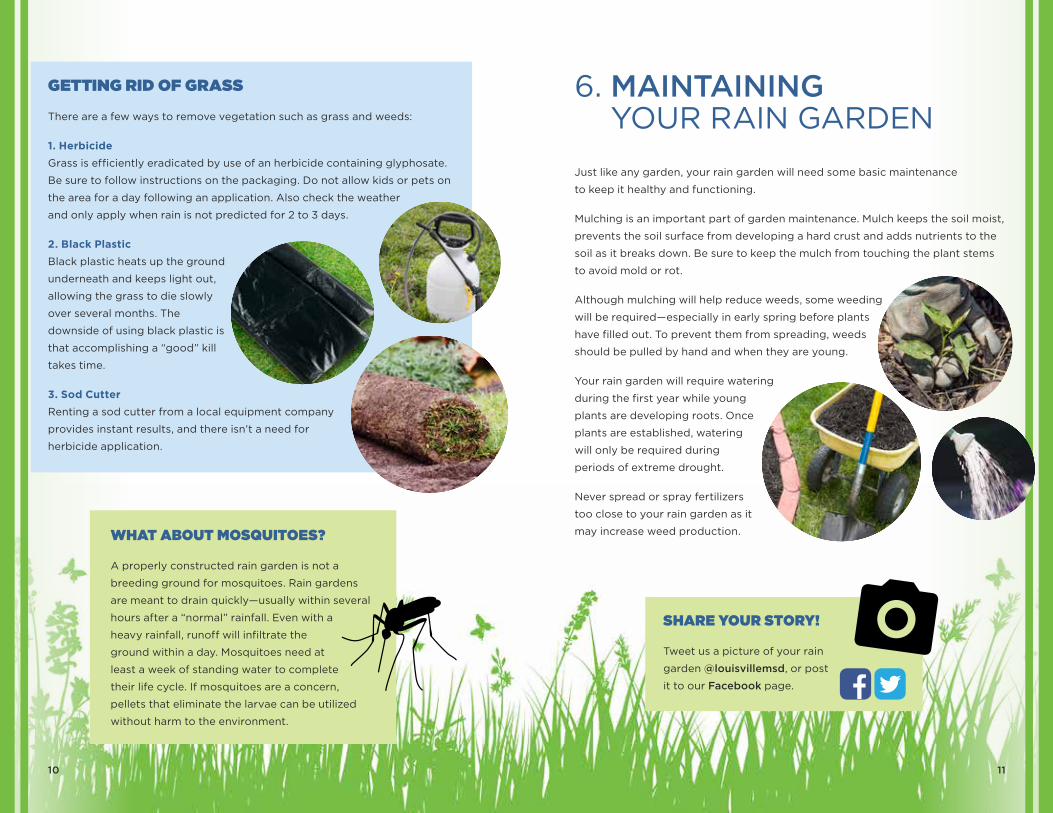
There are a few ways to remove vegetation such as grass and weeds:
1. Herbicide
Grass is efficiently eradicated by use of an herbicide containing glyphosate.
Be sure to follow instructions on the packaging. Do not allow kids or pets on
the area for a day following an application. Also check the weather
and only apply when rain is not predicted for 2 to 3 days.
2. Black Plastic
Black plastic heats up the ground
underneath and keeps light out,
allowing the grass to die slowly
over several months. The
downside of using black plastic is
that accomplishing a “good” kill
takes time.
3. Sod Cutter
Renting a sod cutter from a local equipment company
provides instant results, and there isn’t a need for
herbicide application.
6. MAINTAINING YOUR RAIN GARDEN
Just like any garden, your rain garden will need some basic maintenance
to keep it healthy and functioning.
Mulching is an important part of garden maintenance. Mulch keeps the soil moist,
prevents the soil surface from developing a hard crust and adds nutrients to the
soil as it breaks down. Be sure to keep the mulch from touching the plant stems
to avoid mold or rot.
Although mulching will help reduce weeds, some weeding
will be required—especially in early spring before plants
have filled out. To prevent them from spreading, weeds
should be pulled by hand and when they are young.
Your rain garden will require watering
during the first year while young
plants are developing roots. Once
plants are established, watering
will only be required during
periods of extreme drought.
Never spread or spray fertilizers
too close to your rain garden as it
may increase weed production.WHAT ABOUT MOSQUITOES?
A properly constructed rain garden is not a
breeding ground for mosquitoes. Rain gardens
are meant to drain quickly—usually within several
hours after a “normal” rainfall. Even with a
heavy rainfall, runoff will infiltrate the
ground within a day. Mosquitoes need at
least a week of standing water to complete
their life cycle. If mosquitoes are a concern,
pellets that eliminate the larvae can be utilized
without harm to the environment.
10 11
SHARE YOUR STORY!
Tweet us a picture of your rain
garden @louisvillemsd, or post
it to our Facebook page.

700 West Liberty Street
Louisville, KY 40203-1911
502.587.0603
louisvillemsd.org
A How-To Guide For Building Your Own Rain Garden 4th Edition©2017 Louisville MSD
2,000/03-2017