rain garden rock stabilization guide july 2015
TRANSCRIPT
Rain Garden Rock Stabilization GuideThis guide has been put together by members of the Feldman’s Neighborhood to accompany the curb cuts and basins that were recently created along our section of 4th Ave.
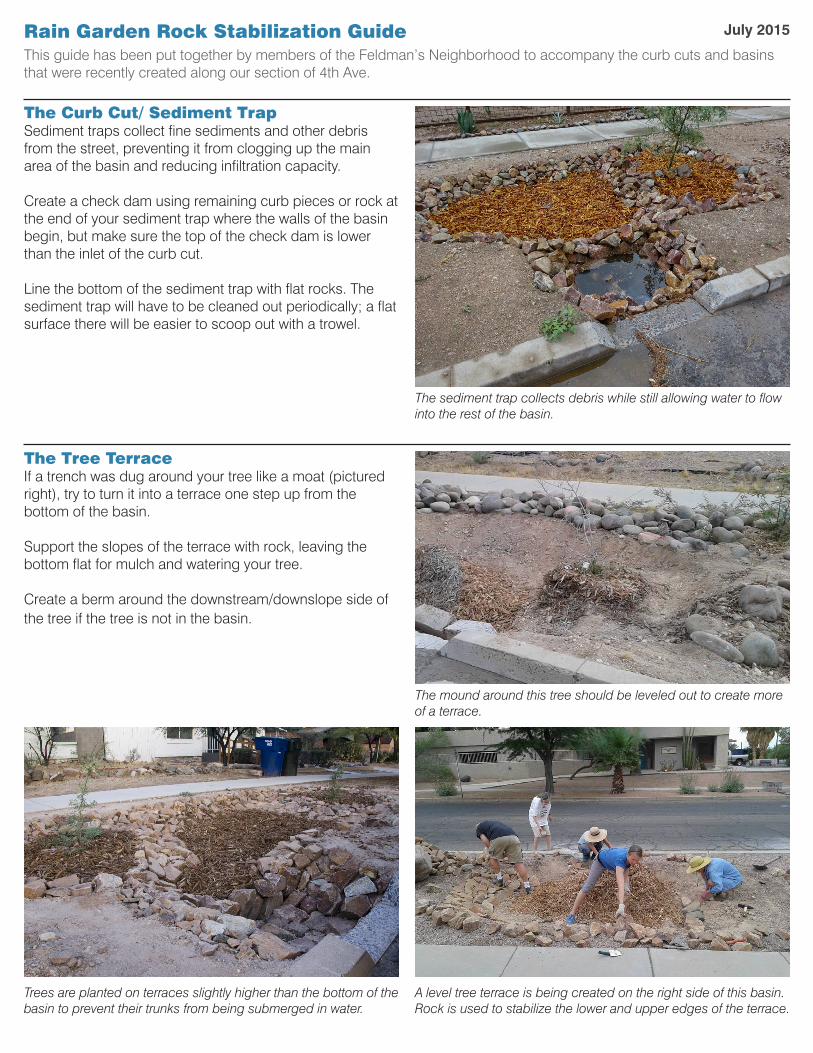
The Tree TerraceIf a trench was dug around your tree like a moat (pictured right), try to turn it into a terrace one step up from the bottom of the basin.
Support the slopes of the terrace with rock, leaving the bottom flat for mulch and watering your tree.
Create a berm around the downstream/downslope side of the tree if the tree is not in the basin.
The Curb Cut/ Sediment TrapSediment traps collect fine sediments and other debris from the street, preventing it from clogging up the main area of the basin and reducing infiltration capacity.
Create a check dam using remaining curb pieces or rock at the end of your sediment trap where the walls of the basin begin, but make sure the top of the check dam is lower than the inlet of the curb cut.
Line the bottom of the sediment trap with flat rocks. The sediment trap will have to be cleaned out periodically; a flat surface there will be easier to scoop out with a trowel.
Trees are planted on terraces slightly higher than the bottom of the basin to prevent their trunks from being submerged in water.
A level tree terrace is being created on the right side of this basin. Rock is used to stabilize the lower and upper edges of the terrace.
The mound around this tree should be leveled out to create more of a terrace.
The sediment trap collects debris while still allowing water to flow into the rest of the basin.
July 2015
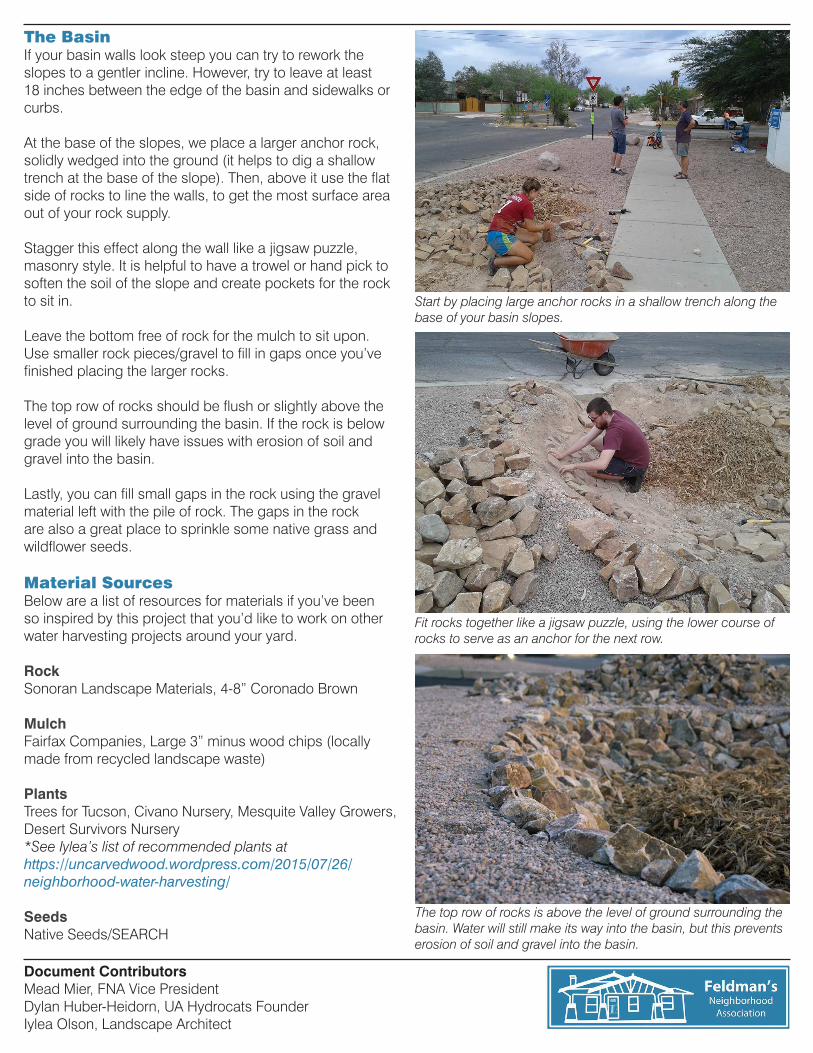
The BasinIf your basin walls look steep you can try to rework the slopes to a gentler incline. However, try to leave at least 18 inches between the edge of the basin and sidewalks or curbs.
At the base of the slopes, we place a larger anchor rock, solidly wedged into the ground (it helps to dig a shallow trench at the base of the slope). Then, above it use the flat side of rocks to line the walls, to get the most surface area out of your rock supply.
Stagger this effect along the wall like a jigsaw puzzle, masonry style. It is helpful to have a trowel or hand pick to soften the soil of the slope and create pockets for the rock to sit in.
Leave the bottom free of rock for the mulch to sit upon. Use smaller rock pieces/gravel to fill in gaps once you’ve finished placing the larger rocks.
The top row of rocks should be flush or slightly above the level of ground surrounding the basin. If the rock is below grade you will likely have issues with erosion of soil and gravel into the basin.
Lastly, you can fill small gaps in the rock using the gravel material left with the pile of rock. The gaps in the rock are also a great place to sprinkle some native grass and wildflower seeds.
Material SourcesBelow are a list of resources for materials if you’ve been so inspired by this project that you’d like to work on other water harvesting projects around your yard.
RockSonoran Landscape Materials, 4-8” Coronado Brown
MulchFairfax Companies, Large 3” minus wood chips (locally made from recycled landscape waste)
PlantsTrees for Tucson, Civano Nursery, Mesquite Valley Growers, Desert Survivors Nursery*See Iylea’s list of recommended plants at https://uncarvedwood.wordpress.com/2015/07/26/neighborhood-water-harvesting/
SeedsNative Seeds/SEARCH
Document ContributorsMead Mier, FNA Vice PresidentDylan Huber-Heidorn, UA Hydrocats FounderIylea Olson, Landscape Architect
The top row of rocks is above the level of ground surrounding the basin. Water will still make its way into the basin, but this prevents erosion of soil and gravel into the basin.
Fit rocks together like a jigsaw puzzle, using the lower course of rocks to serve as an anchor for the next row.
Start by placing large anchor rocks in a shallow trench along the base of your basin slopes.