replacing the fuse on a bose wave music · pdf filereplacing the fuse on a bose wave radio/cd...
TRANSCRIPT
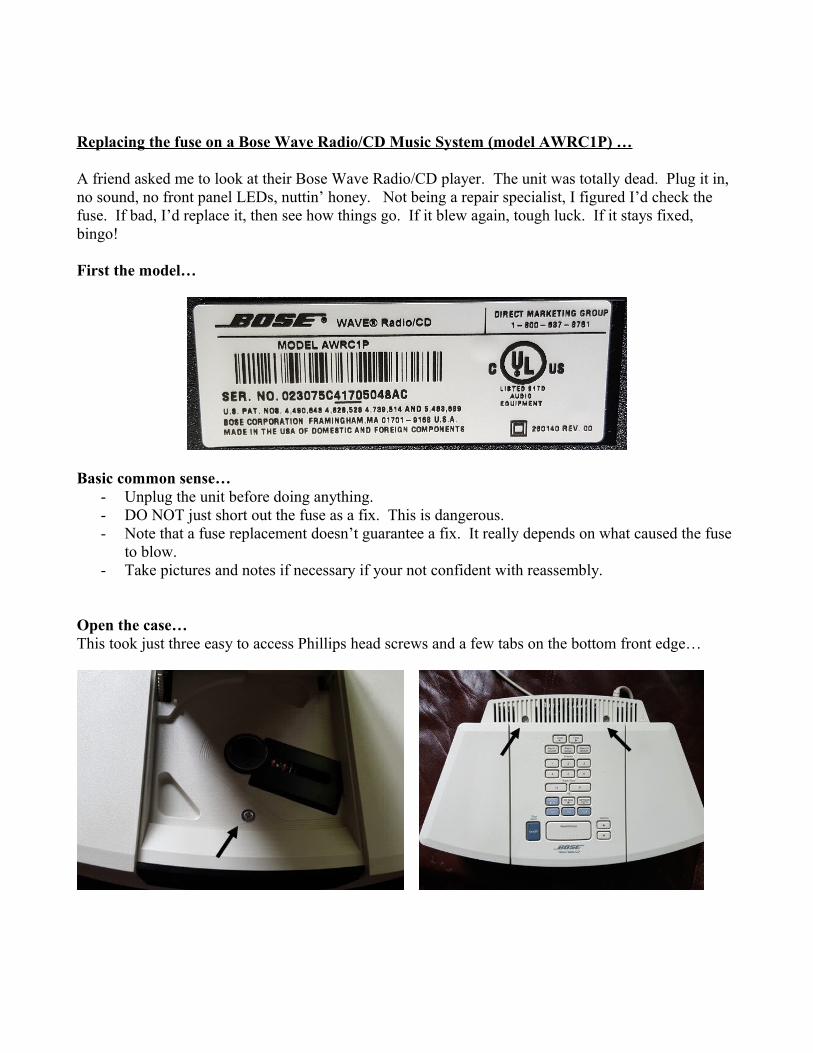
Replacing the fuse on a Bose Wave Radio/CD Music System (model AWRC1P) …
A friend asked me to look at their Bose Wave Radio/CD player. The unit was totally dead. Plug it in, no sound, no front panel LEDs, nuttin’ honey. Not being a repair specialist, I figured I’d check the fuse. If bad, I’d replace it, then see how things go. If it blew again, tough luck. If it stays fixed, bingo!
First the model…
Basic common sense…- Unplug the unit before doing anything.- DO NOT just short out the fuse as a fix. This is dangerous.- Note that a fuse replacement doesn’t guarantee a fix. It really depends on what caused the fuse
to blow.- Take pictures and notes if necessary if your not confident with reassembly.
Open the case…This took just three easy to access Phillips head screws and a few tabs on the bottom front edge…

With the cover removed, looking in from the back, the fuse is on the left back corner near the power cord…
To see it cleanly you need to remove the transformer with the three screws shown above. You may also want to remove the connectors to totally separate it from the main circuit board. With the transformer removed, the fuse is in clear sight.
You can do a preliminary check of the fuse if you have an ohm meter. With it still in-circuit (POWER OFF!), put the meter probes across the fuse. If it doesn’t read zero ohms chances are very good that your fuse is blown. Even though this is an in-circuit test, a short (the fuse itself) is hard to hide.

Next step is to remove the plastic speaker enclosure. Three more screws shown below and that should then allow you to gently lift off the large black plastic housing. There are two red/black wire connectors that you’ll want to remove also; just make note on which one goes where.
With the housing removed you have full access to the circuit board…
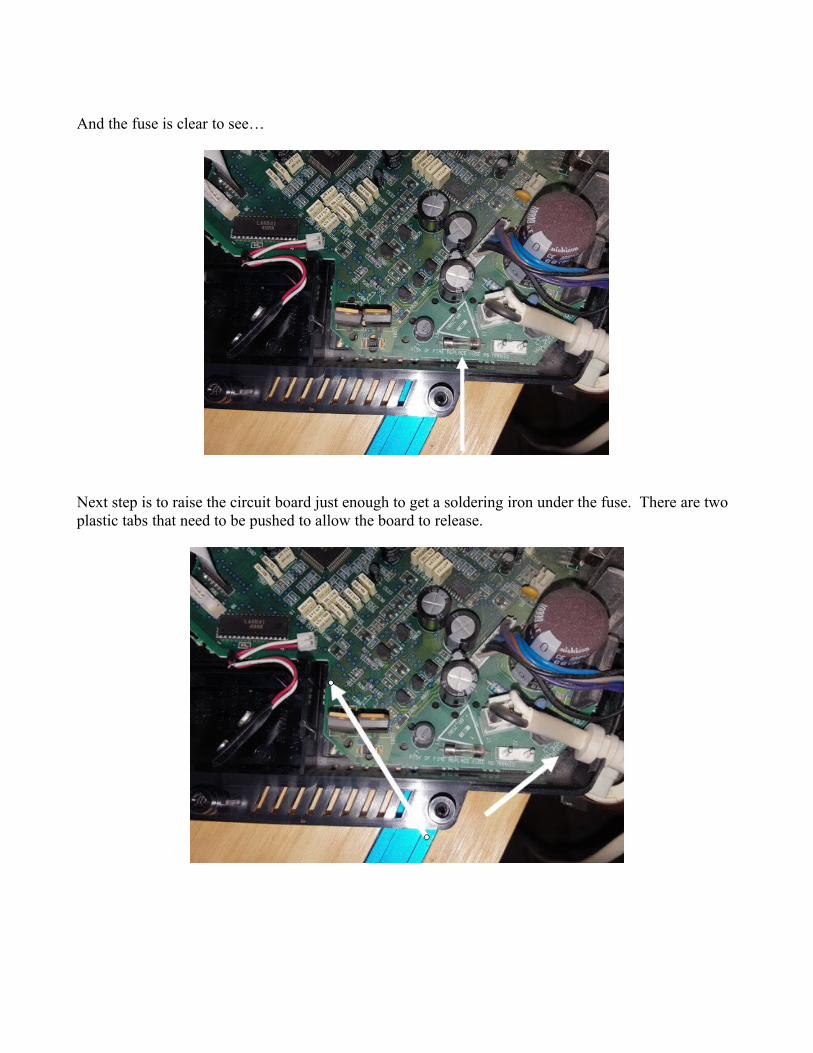
And the fuse is clear to see…
Next step is to raise the circuit board just enough to get a soldering iron under the fuse. There are two plastic tabs that need to be pushed to allow the board to release.

I chose not to remove the board entirely although that would have made the soldering a little easier.You should be able to gently raise the board enough to get under the fuse for soldering and replacement…
I put a plastic screwdriver handle under the circuit board to hold it up while soldering.
Fortunately, in my case, after replacing the fuse the unit was good to go. That’s not always gonna be the case.
Hope this helps.