rhel os upgrade - cisco · 3 cisco prime central rhel operating system upgrade guide preface...
TRANSCRIPT

Cisco Prime Central RHEL Operating System Upgrade GuideFebruary 26, 2018
Cisco Systems, Inc.www.cisco.com
Cisco has more than 200 offices worldwide. Addresses, phone numbers, and fax numbers are listed on the Cisco website at www.cisco.com/go/offices.
Text Part Number:

THE SPECIFICATIONS AND INFORMATION REGARDING THE PRODUCTS IN THIS MANUAL ARE SUBJECT TO CHANGE WITHOUT NOTICE. ALL STATEMENTS, INFORMATION, AND RECOMMENDATIONS IN THIS MANUAL ARE BELIEVED TO BE ACCURATE BUT ARE PRESENTED WITHOUT WARRANTY OF ANY KIND, EXPRESS OR IMPLIED. USERS MUST TAKE FULL RESPONSIBILITY FOR THEIR APPLICATION OF ANY PRODUCTS.
THE SOFTWARE LICENSE AND LIMITED WARRANTY FOR THE ACCOMPANYING PRODUCT ARE SET FORTH IN THE INFORMATION PACKET THAT SHIPPED WITH THE PRODUCT AND ARE INCORPORATED HEREIN BY THIS REFERENCE. IF YOU ARE UNABLE TO LOCATE THE SOFTWARE LICENSE OR LIMITED WARRANTY, CONTACT YOUR CISCO REPRESENTATIVE FOR A COPY.
The Cisco implementation of TCP header compression is an adaptation of a program developed by the University of California, Berkeley (UCB) as part of UCB’s public domain version of the UNIX operating system. All rights reserved. Copyright © 1981, Regents of the University of California.
Cisco Systems, Inc.www.cisco.com
Cisco has more than 200 offices worldwide. Addresses, phone numbers, and fax numbers are listed on the Cisco website at www.cisco.com/go/offices.
Text Part Number:

NOTWITHSTANDING ANY OTHER WARRANTY HEREIN, ALL DOCUMENT FILES AND SOFTWARE OF THESE SUPPLIERS ARE PROVIDED “AS IS” WITH ALL FAULTS. CISCO AND THE ABOVE-NAMED SUPPLIERS DISCLAIM ALL WARRANTIES, EXPRESSED OR IMPLIED, INCLUDING, WITHOUT LIMITATION, THOSE OF MERCHANTABILITY, FITNESS FOR A PARTICULAR PURPOSE AND NONINFRINGEMENT OR ARISING FROM A COURSE OF DEALING, USAGE, OR TRADE PRACTICE.
IN NO EVENT SHALL CISCO OR ITS SUPPLIERS BE LIABLE FOR ANY INDIRECT, SPECIAL, CONSEQUENTIAL, OR INCIDENTAL DAMAGES, INCLUDING, WITHOUT LIMITATION, LOST PROFITS OR LOSS OR DAMAGE TO DATA ARISING OUT OF THE USE OR INABILITY TO USE THIS MANUAL, EVEN IF CISCO OR ITS SUPPLIERS HAVE BEEN ADVISED OF THE POSSIBILITY OF SUCH DAMAGES.
Cisco Systems, Inc.www.cisco.com
Cisco has more than 200 offices worldwide. Addresses, phone numbers, and fax numbers are listed on the Cisco website at www.cisco.com/go/offices.
Text Part Number:

Cisco and the Cisco logo are trademarks or registered trademarks of Cisco and/or its affiliates in the U.S. and other countries. To view a list of Cisco trademarks, go to this URL: www.cisco.com/go/trademarks. Third-party trademarks mentioned are the property of their respective owners. The use of the word partner does not imply a partnership relationship between Cisco and any other company. (1110R)
Any Internet Protocol (IP) addresses and phone numbers used in this document are not intended to be actual addresses and phone numbers. Any examples, command display output, network topology diagrams, and other figures included in the document are shown for illustrative purposes only. Any use of actual IP addresses or phone numbers in illustrative content is unintentional and coincidental.
© 2011-2018 Cisco Systems, Inc. All rights reserved.
C O N T E N T S
Introduction 3
C H A P T E R 1 Prerequisites 1-1
Install RHEL 6.5, 6.7 or 6.8 1-1
Upgrading from RHEL 5.8 to 6.5 in Prime Central Disaster Recovery Configuration 1-2
Prepare OS Upgrade 1-2
Upgrading from RHEL 5.8 or 6.5 to 6.7 in Prime Central Disaster Recovery Configuration 1-4
Upgrading from RHEL 5.8 to 6.8 in Prime Central Disaster Recovery Configuration 1-7
Prepare OS Upgrade 1-7
Upgrading from RHEL 6.5 or 6.7 to 6.8 in Prime Central Disaster Recovery Configuration 1-9
Post-Installation Configurations 1-12
C H A P T E R 2 Prerequisites 2-1
Install RHEL 6.5, 6.7, or, 6.8 2-1
Upgrading from RHEL 5.8 to 6.5 in a Prime Central Standalone Setup 2-2
Prepare OS Upgrade 2-2
Upgrade from RHEL 5.8 or 6.5 to 6.7 in Prime Central Standalone Setup 2-4
Upgrading from RHEL 5.8 to 6.8 in a Prime Central Standalone Setup 2-6
Prepare OS Upgrade 2-6
Upgrade from RHEL 6.5 or 6.7 to 6.8 in Prime Central Standalone Setup 2-8
Post-Installation Configurations 2-10
C H A P T E R 3 Prerequisites 3-1
Install RHEL 6.5, 6.7, or 6.8 3-1
Upgrading from RHEL 5.8 to 6.5 in Prime Central High Availability Configuration 3-2
Prepare OS Upgrade 3-2
Upgrading from RHEL 5.8 or 6.5 to 6.7 in Prime Central High Availability Configuration 3-4
Upgrading from RHEL 6.5 or 6.7 to 6.8 in Prime Central High Availability Configuration 3-5
Post-Installation Configurations 3-6
1Cisco Prime Central RHEL Operating System Upgrade Guide

R E V I E W D R A F T — C I S C O C O N F I D E N T I A L
Contents
C H A P T E R 4 Installing RHEL 4-1
C H A P T E R 5 Troubleshooting OS Upgrade 5-1
2Cisco Prime Central RHEL Operating System Upgrade Guide

Preface
IntroductionThe Operating System (OS) upgrade procedure supports Prime Central 2.0 customers to perform upgrade of Operating System from RHEL 5.8, 6.5, 6.7, or 6.8. This upgrade procedure is supported in all the three configurations:
• Local HA
• Geo HA(DR)
• Standalone
Prerequisites
The prerequisites for the OS upgrade procedure are as follows:
• Verify the following check points before starting with the upgrade procedure:
– Ensure to have all the user passwords used for installation or upgrade of Prime Central version 2.0.
– Download .iso files for RHEL 6.5 or RHEL 6.7 or RHEL 6.8 from Red Hat website.
– Download OSUpgradeScripts.tar from the below link, which will be used in subsequent sections:
https://software.cisco.com/download/release.html?i=!y&mdfid=286306701&softwareid=284406574&release=1.5.1.2&os=
– Ensure that an additional secondary storage space is available to backup of Prime Central data before starting with the RHEL 6.5 installation.
• Archive all the backups that are taken as part of OS upgrade procedure on a separate secondary storage out of the server. Archiving of backups is required as the data will be erased after RHEL 6.5 re-installation.
• Take the snapshot of the server as there is no support for rollback to RHEL 5.8 with Prime Central 2.0.
3Cisco Prime Central RHEL Operating System Upgrade Guide

4Cisco Prime Central RHEL Operating System Upgrade Guide
Cisco Prime C
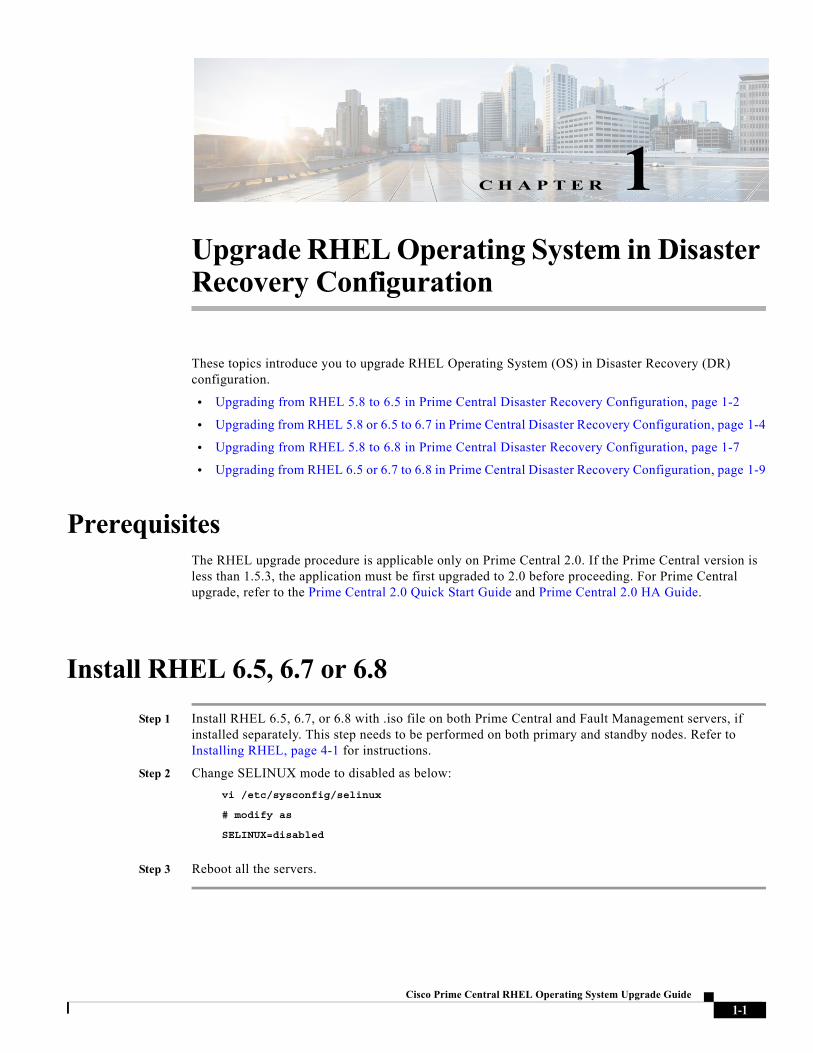
C H A P T E R 1
Upgrade RHEL Operating System in Disaster Recovery ConfigurationThese topics introduce you to upgrade RHEL Operating System (OS) in Disaster Recovery (DR) configuration.
• Upgrading from RHEL 5.8 to 6.5 in Prime Central Disaster Recovery Configuration, page 1-2
• Upgrading from RHEL 5.8 or 6.5 to 6.7 in Prime Central Disaster Recovery Configuration, page 1-4
• Upgrading from RHEL 5.8 to 6.8 in Prime Central Disaster Recovery Configuration, page 1-7
• Upgrading from RHEL 6.5 or 6.7 to 6.8 in Prime Central Disaster Recovery Configuration, page 1-9
PrerequisitesThe RHEL upgrade procedure is applicable only on Prime Central 2.0. If the Prime Central version is less than 1.5.3, the application must be first upgraded to 2.0 before proceeding. For Prime Central upgrade, refer to the Prime Central 2.0 Quick Start Guide and Prime Central 2.0 HA Guide.
Install RHEL 6.5, 6.7 or 6.8
Step 1 Install RHEL 6.5, 6.7, or 6.8 with .iso file on both Prime Central and Fault Management servers, if installed separately. This step needs to be performed on both primary and standby nodes. Refer to Installing RHEL, page 4-1 for instructions.
Step 2 Change SELINUX mode to disabled as below:
vi /etc/sysconfig/selinux
# modify as
SELINUX=disabled
Step 3 Reboot all the servers.
1-1entral RHEL Operating System Upgrade Guide

Chapter 1 Upgrade RHEL Operating System in Disaster Recovery Configuration Upgrading from RHEL 5.8 to 6.5 in Prime Central Disaster Recovery Configuration
Upgrading from RHEL 5.8 to 6.5 in Prime Central Disaster Recovery Configuration
Complete the following procedures explained in each topics to upgrade from RHEL 5.8 to 6.5 in DR:
Prepare OS Upgrade
Step 1 Stop application monitoring, data replication monitoring and file synchronization.
a. Log in to the active server as a root user.
b. Enter the following commands:
# cd primeusr-home-directory/local/scripts/
# appmonctl stop
c. Log in to the inactive server as a root user. Enter the following command:
# dbmonctl stop
d. Log in to the active server as a primeusr.
e. Enter the following command:
# filesyncctl stop
Step 2 Uninstall Prime Central Fault Management 2.0 from the Standby server. For more information about uninstalling process, refer to Cisco Prime Central 2.0 Quick Start Guide.
Step 3 Uninstall Prime Central 2.0 from the Standby server. For more information about uninstalling process, refer to Cisco Prime Central 2.0 Quick Start Guide.
Step 4 Log in to Primary server to take a full backup of oracle database:
su - primeusr emdbctl --backup
Step 5 Execute the following script to stop the Prime Central and Fault Management Services.This script needs to be executed on both Prime Central and Fault Management servers if installed separately.
a. Copy and execute primeServices.sh from OSUpgradeScripts.tar to “/root” directory in Fault Management and Prime Central servers:
./primeServices.sh stop
b. Execute the following command as root user on Fault Management server to remove Fault Management Status cron entry:
crontab -u primeusr -l | grep -v 'FMStatusCron.csh' | crontab -u primeusr -
Step 6 Export the database schemas to a dump file:
a. Copy database_export_import.sh from OSUpgradeScripts.tar to ORACLE USER HOME
Example:
cp /root/OSUpgradeScripts/database_export_import.sh /export/home/oracle/
b. Change permissions of database_export_import.sh
chown [oracle user:oracle group] [path to script]
1-2Cisco Prime Central RHEL Operating System Upgrade Guide

Chapter 1 Upgrade RHEL Operating System in Disaster Recovery Configuration Upgrading from RHEL 5.8 to 6.5 in Prime Central Disaster Recovery Configuration
chmod 755 [path to script]
Example:
chown oracle:dba /export/home/oracle/database_export_import.sh
chmod 755 /export/home/oracle/database_export_import.sh
c. Execute the scripts by following the steps in sequence:
su - [oracle-user] ./database_export_import.sh "export" "schema" "[folder-name]"
"[oracle-user]"
Example:
su - oracle ./database_export_import.sh "export" "schema" "PCDBExportSchema" "oracle"
Note At the end of the operation, folder-name given as input for the above command (like PCDBExportSchema in the above example) should be created in the oracle user home directory. The folder should contain below files:prime_dump_schemas.dmpprime_export.parprime_export_schemas.log
d. Check the log: “prime_export_schemas.log” for any errors before proceeding to Step 7.
Step 7 Take a backup of the folder given as input for Step 6 (like PCDBExportSchema)
Note Make sure that the above backup folder is copied outside the server onto the separate disk storage.
Step 8 Execute the following step on Primary PC server to stop database services. This is to ensure that no operations are permitted during OS upgrade process.
su - primeusr
emdbctl –stop
Step 9 Execute the following steps in sequence to take the backup of Prime Central and Fault Management application, which is required to restore application after OS upgrade:
a. Copy backupPrimeCentral.sh from OSUpgradeScripts.tar to “/root” directory.
This script needs to be executed on Prime Central and Fault Management servers if installed separately.
b. Execute the following scripts:
./backupPrimeCentral.sh “backup_folder_full_path”
Example:
./backupPrimeCentral.sh “/root/PCBACKUP20” (On Prime central Server)
./backupPrimeCentral.sh “/root/FMBACKUP20” (On Fault Management Server)
1-3Cisco Prime Central RHEL Operating System Upgrade Guide
OL-31019-01

Chapter 1 Upgrade RHEL Operating System in Disaster Recovery Configuration Upgrading from RHEL 5.8 or 6.5 to 6.7 in Prime Central Disaster Recovery Configuration
Note Take a backup of these folders (both Prime Central and Fault Management) created in Step 7 through Step 9 onto the separate disk storage. This is mandatory as the server will be re-installed with RHEL 6.5, formatted and all the data will be erased from the server.
Upgrading from RHEL 5.8 or 6.5 to 6.7 in Prime Central Disaster Recovery Configuration
Note Follow the procedure mentioned in this section only if you want to continue the upgrade from RHEL 6.5 to 6.7. Both active and inactive machines should be upgraded to 6.7 using the RHEL inline upgrade procedure. Always perform inline upgrade procedural steps on the inactive machine (except where mentioned active).
Step 1 Take a backup of Prime Central Oracle database:
su - primeusr
emdbctl --backup
Step 2 Take a DE Backup from the Fault Management server:
su - primeusr
cd .acsi_primeusr/bin
setenv
./de_backupdb -bfile [backupfile_full_path]
Example:./de_backupdb -bfile ~/debackup_28Sep2016
Step 3 Take a backup of the following Fault Management database folders:
• FM-install-folder/tiov2Components/TCRComponent/cognos/contentstore
• FM-install-folder/omnibus/db/NCOMS
Example: su - primeusr cp -rf $NCHOME/omnibus/db/NCOMS ~/ cp -rf $NCHOME/tipv2Components/TCRComponent/cognos/contentstore ~/
Step 4 Stop application monitoring, data replication monitoring, and file synchronization:
a. Log in to the active server as a root user.
b. Enter the following commands:
# cd primeusr-home-directory/local/scripts/
# appmonctl stop
c. Log in to the inactive server as a root user.
1-4Cisco Prime Central RHEL Operating System Upgrade Guide

Chapter 1 Upgrade RHEL Operating System in Disaster Recovery Configuration Upgrading from RHEL 5.8 or 6.5 to 6.7 in Prime Central Disaster Recovery Configuration
d. Enter the following command:
# dbmonctl stop
e. Log in to the active server as a primeusr.
f. Enter the following command:
# filesyncctl stop
Step 5 Execute the following sql query as a sys user to stop database sync between active and inactive machine:
su - oracle
sqlplus / as sysdba
ALTER DATABASE STOP LOGICAL STANDBY APPLY;
Step 6 Disable automatic restart of services.
On Prime Central Server:
rm -f /etc/rc.d/rc2.d/S95restartpc
rm -f /etc/rc.d/rc3.d/S95restartpc
rm -f /etc/rc.d/rc4.d/S95restartpc
rm -f /etc/rc.d/rc5.d/S95restartpc
mv /etc/rc.d/init.d/restartpc /etc/rc.d/init.d/disable_restartpc
On Fault Management Server:
chkconfig primefm off
mv /etc/rc.d/init.d/primefm /etc/rc.d/init.d/disable_primefm
On Database Server:
setenforce 0 >& /dev/null; cd /etc/init.d ; /sbin/chkconfig --del dbora
unlink "/etc/init.d/dbora";
Step 7 Execute the following script to stop the Prime Central and Fault Management services.
This script needs to be executed on Prime Central and Fault Management servers if installed separately.
a. Copy primeServices.sh from OSUpgradeScripts.tar to “/root” directory:
./primeServices.sh stop
Step 8 Stop prime central database services:
su - primeusr emdbctl --stop
Step 9 Perform the inline upgrade on the inactive machine from RHEL 6.5 to 6.7. See the Red Hat documentation for instructions.
Note Make sure that you perform inline upgrade only. Fresh installation of RHEL 6.7 is not supported and you may loose complete data.
Step 10 Start Prime Central database services:
su - primeusr
1-5Cisco Prime Central RHEL Operating System Upgrade Guide
OL-31019-01

Chapter 1 Upgrade RHEL Operating System in Disaster Recovery Configuration Upgrading from RHEL 5.8 or 6.5 to 6.7 in Prime Central Disaster Recovery Configuration
emdbctl --start
Step 11 Execute below sql query as a sys user to start database sync between active and inactive:
su - oracle
sqlplus / as sysdba
ALTER DATABASE START LOGICAL STANDBY APPLY IMMEDIATE;
Step 12 Start nco_pad process on Fault Management server as a root user:
cd FM-install-folder/omnibus/bin ./nco_pad
Step 13 Start application monitoring, data replication monitoring, and file synchronization:
a. Log in to the active server as the root user.
b. Enter the following commands:
# cd primeusr-home-directory/local/scripts/# appmonctl start
c. Log in to the inactive server as root user.
d. Enter the following command:
# dbmonctl start
e. Log in to the active server as the user primeusr.
f. Enter the following command:
# filesyncctl start
Note Wait for 5 to 10 minutes before proceeding to the next step as file sync takes time to complete.
Step 14 Perform switchover of Prime Central, Fault Management, and all Domain Managers integrated to the setup to make the current inactive machine as active. Refer to the Prime Central HA guide for instructions.
Step 15 Restore backup of Fault Management database folder (taken in Step3)
• Stop the Fault Management service:
su - primeusr fmctl stop
• FM-install-folder/tipv2Components/TCRComponent/cognos/contentstore/cm
Example:
mv $NCHOME/tipv2Components/TCRComponent/cognos/contentstore/cm
$NCHOME/tipv2Components/TCRComponent/cognos/contentstore/old_cm
mv $NCHOME/tipv2Components/TCRComponent/cognos/contentstore/old_cm ~/
cp -rf ~/contentstore/cm $NCHOME/tipv2Components/TCRComponent/cognos/contentstore/
• Change ownership to the directory:
Ex: chown primeusr:ncoadmin –R
$NCHOME/tipv2Components/TCRComponent/cognos/contentstore/cm
1-6Cisco Prime Central RHEL Operating System Upgrade Guide
Chapter 1 Upgrade RHEL Operating System in Disaster Recovery Configuration Upgrading from RHEL 5.8 to 6.8 in Prime Central Disaster Recovery Configuration
• Start the Fault Management service:
su - primeusrfmctl start
Step 16 Enable automatic restart of service:
• Log in to the Active Prime Central server (after switch over in Step 14).
• Execute the following commands:
cd pc-install-folder/local/scripts/embedded_oracle/PostDB
perl auto_start_stop_db.pl $oratab $oracle_sid $oracle_home $oracle_user
mv /etc/rc.d/init.d/disable_restartpc /etc/rc.d/init.d/restartpc
cd /etc/rc.d/init.d
chmod 755 restartpc
ln -s ../init.d/restartpc /etc/rc.d/rc2.d/S95restartpc.
Upgrading from RHEL 5.8 to 6.8 in Prime Central Disaster Recovery Configuration
Complete the following procedures explained in each topics to upgrade from RHEL 5.8 to 6.8 in DR:
Prepare OS Upgrade
Step 1 Stop application monitoring, data replication monitoring and file synchronization.
a. Log in to the active server as a root user.
b. Enter the following commands:
# cd primeusr-home-directory/local/scripts/
# appmonctl stop
c. Log in to the inactive server as a root user. Enter the following command:
# dbmonctl stop
d. Log in to the active server as a primeusr.
e. Enter the following command:
# filesyncctl stop
Step 2 Uninstall Prime Central Fault Management 2.0 from the Standby server. For more information about uninstalling process, refer to Cisco Prime Central 2.0 Quick Start Guide.
Step 3 Uninstall Prime Central 2.0 from the Standby server. For more information about uninstalling process, refer to Cisco Prime Central 2.0 Quick Start Guide.
Step 4 Log in to Primary server to take a full backup of oracle database:
su - primeusr
1-7Cisco Prime Central RHEL Operating System Upgrade Guide
OL-31019-01
Chapter 1 Upgrade RHEL Operating System in Disaster Recovery Configuration Upgrading from RHEL 5.8 to 6.8 in Prime Central Disaster Recovery Configuration
emdbctl --backup
Step 5 Execute the following script to stop the Prime Central and Fault Management Services.This script needs to be executed on both Prime Central and Fault Management servers if installed separately.
a. Copy and execute primeServices.sh from OSUpgradeScripts.tar to “/root” directory in Fault Management and Prime Central servers:
./primeServices.sh stop
b. Execute the following command as root user on Fault Management server to remove Fault Management Status cron entry:
crontab -u primeusr -l | grep -v 'FMStatusCron.csh' | crontab -u primeusr -
Step 6 Export the database schemas to a dump file:
a. Copy database_export_import.sh from OSUpgradeScripts.tar to ORACLE USER HOME
Example:
cp /root/OSUpgradeScripts/database_export_import.sh /export/home/oracle/
b. Change permissions of database_export_import.sh
chown [oracle user:oracle group] [path to script]
chmod 755 [path to script]
Example:
chown oracle:dba /export/home/oracle/database_export_import.sh
chmod 755 /export/home/oracle/database_export_import.sh
c. Execute the scripts by following the steps in sequence:
su - [oracle-user] ./database_export_import.sh "export" "schema" "[folder-name]"
"[oracle-user]"
Example:
su - oracle ./database_export_import.sh "export" "schema" "PCDBExportSchema" "oracle"
Note At the end of the operation, folder-name given as input for the above command (like PCDBExportSchema in the above example) should be created in the oracle user home directory. The folder should contain below files:prime_dump_schemas.dmpprime_export.parprime_export_schemas.log
d. Check the log: “prime_export_schemas.log” for any errors before proceeding to Step 7.
Step 7 Take a backup of the folder given as input for Step 6 (like PCDBExportSchema)
Note Make sure that the above backup folder is copied outside the server onto the separate disk storage.
1-8Cisco Prime Central RHEL Operating System Upgrade Guide

Chapter 1 Upgrade RHEL Operating System in Disaster Recovery Configuration Upgrading from RHEL 6.5 or 6.7 to 6.8 in Prime Central Disaster Recovery Configuration
Step 8 Execute the following step on Primary PC server to stop database services. This is to ensure that no operations are permitted during OS upgrade process.
su - primeusr
emdbctl –stop
Step 9 Execute the following steps in sequence to take the backup of Prime Central and Fault Management application, which is required to restore application after OS upgrade:
a. Copy backupPrimeCentral.sh from OSUpgradeScripts.tar to “/root” directory.
This script needs to be executed on Prime Central and Fault Management servers if installed separately.
b. Execute the following scripts:
./backupPrimeCentral.sh “backup_folder_full_path”
Example:
./backupPrimeCentral.sh “/root/PCBACKUP20” (On Prime central Server)
./backupPrimeCentral.sh “/root/FMBACKUP20” (On Fault Management Server)
Note Take a backup of these folders (both Prime Central and Fault Management) created in Step 7 through Step 9 onto the separate disk storage. This is mandatory as the server will be re-installed with RHEL 6.8, formatted and all the data will be erased from the server.
Upgrading from RHEL 6.5 or 6.7 to 6.8 in Prime Central Disaster Recovery Configuration
Note Follow the procedure mentioned in this section only if you want to continue the upgrade from RHEL 6.5 or 6.7 to 6.8. Both active and inactive machines should be upgraded to 6.8 using the RHEL inline upgrade procedure. Always perform inline upgrade procedural steps on the inactive machine (except where mentioned active).
Step 1 Take a backup of Prime Central Oracle database:
su - primeusr
emdbctl --backup
Step 2 Take a DE Backup from the Fault Management server:
su - primeusr
cd .acsi_primeusr/bin
setenv
./de_backupdb -bfile [backupfile_full_path]
Example:./de_backupdb -bfile ~/debackup_28Sep2016
1-9Cisco Prime Central RHEL Operating System Upgrade Guide
OL-31019-01
Chapter 1 Upgrade RHEL Operating System in Disaster Recovery Configuration Upgrading from RHEL 6.5 or 6.7 to 6.8 in Prime Central Disaster Recovery Configuration
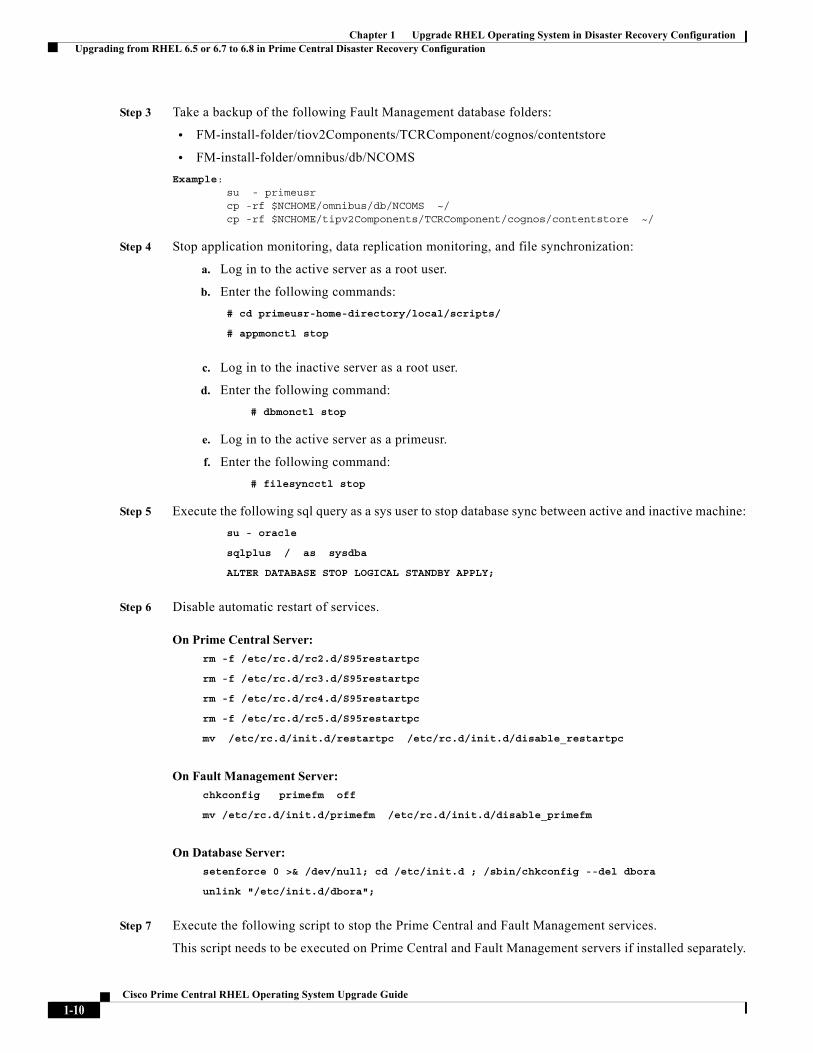
Step 3 Take a backup of the following Fault Management database folders:
• FM-install-folder/tiov2Components/TCRComponent/cognos/contentstore
• FM-install-folder/omnibus/db/NCOMS
Example: su - primeusr cp -rf $NCHOME/omnibus/db/NCOMS ~/ cp -rf $NCHOME/tipv2Components/TCRComponent/cognos/contentstore ~/
Step 4 Stop application monitoring, data replication monitoring, and file synchronization:
a. Log in to the active server as a root user.
b. Enter the following commands:
# cd primeusr-home-directory/local/scripts/
# appmonctl stop
c. Log in to the inactive server as a root user.
d. Enter the following command:
# dbmonctl stop
e. Log in to the active server as a primeusr.
f. Enter the following command:
# filesyncctl stop
Step 5 Execute the following sql query as a sys user to stop database sync between active and inactive machine:
su - oracle
sqlplus / as sysdba
ALTER DATABASE STOP LOGICAL STANDBY APPLY;
Step 6 Disable automatic restart of services.
On Prime Central Server:
rm -f /etc/rc.d/rc2.d/S95restartpc
rm -f /etc/rc.d/rc3.d/S95restartpc
rm -f /etc/rc.d/rc4.d/S95restartpc
rm -f /etc/rc.d/rc5.d/S95restartpc
mv /etc/rc.d/init.d/restartpc /etc/rc.d/init.d/disable_restartpc
On Fault Management Server:
chkconfig primefm off
mv /etc/rc.d/init.d/primefm /etc/rc.d/init.d/disable_primefm
On Database Server:
setenforce 0 >& /dev/null; cd /etc/init.d ; /sbin/chkconfig --del dbora
unlink "/etc/init.d/dbora";
Step 7 Execute the following script to stop the Prime Central and Fault Management services.
This script needs to be executed on Prime Central and Fault Management servers if installed separately.
1-10Cisco Prime Central RHEL Operating System Upgrade Guide
Chapter 1 Upgrade RHEL Operating System in Disaster Recovery Configuration Upgrading from RHEL 6.5 or 6.7 to 6.8 in Prime Central Disaster Recovery Configuration
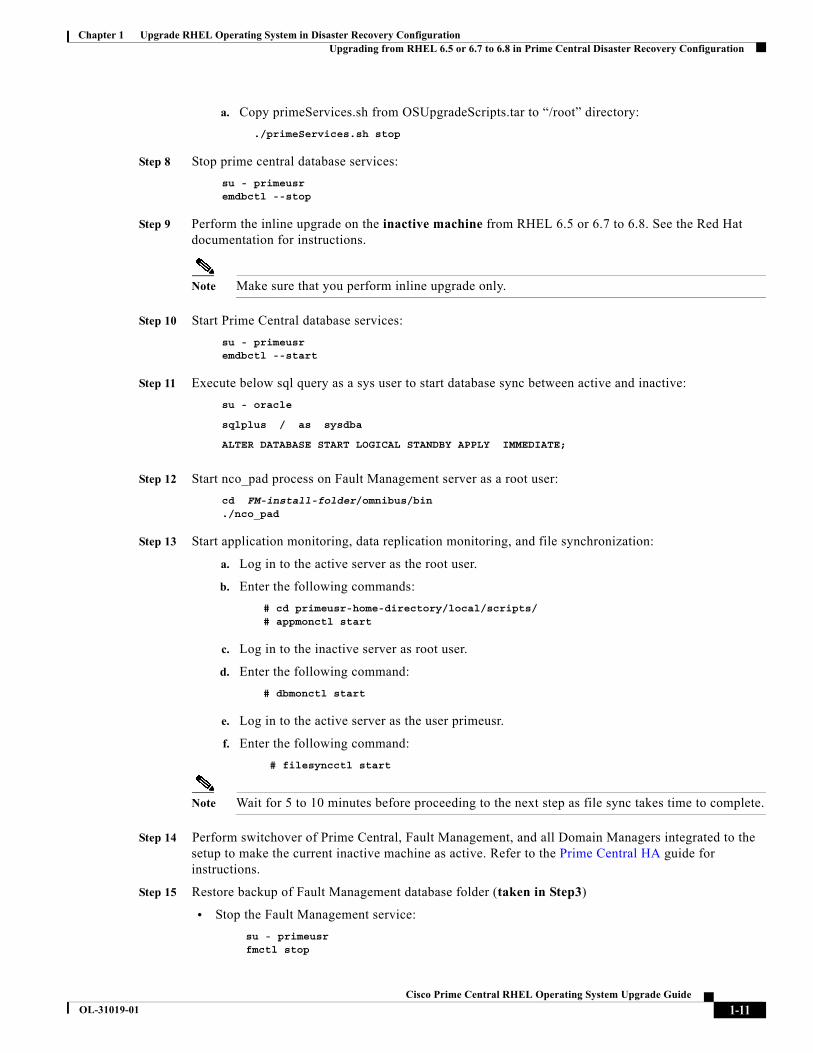
a. Copy primeServices.sh from OSUpgradeScripts.tar to “/root” directory:
./primeServices.sh stop
Step 8 Stop prime central database services:
su - primeusr emdbctl --stop
Step 9 Perform the inline upgrade on the inactive machine from RHEL 6.5 or 6.7 to 6.8. See the Red Hat documentation for instructions.
Note Make sure that you perform inline upgrade only.
Step 10 Start Prime Central database services:
su - primeusr emdbctl --start
Step 11 Execute below sql query as a sys user to start database sync between active and inactive:
su - oracle
sqlplus / as sysdba
ALTER DATABASE START LOGICAL STANDBY APPLY IMMEDIATE;
Step 12 Start nco_pad process on Fault Management server as a root user:
cd FM-install-folder/omnibus/bin ./nco_pad
Step 13 Start application monitoring, data replication monitoring, and file synchronization:
a. Log in to the active server as the root user.
b. Enter the following commands:
# cd primeusr-home-directory/local/scripts/# appmonctl start
c. Log in to the inactive server as root user.
d. Enter the following command:
# dbmonctl start
e. Log in to the active server as the user primeusr.
f. Enter the following command:
# filesyncctl start
Note Wait for 5 to 10 minutes before proceeding to the next step as file sync takes time to complete.
Step 14 Perform switchover of Prime Central, Fault Management, and all Domain Managers integrated to the setup to make the current inactive machine as active. Refer to the Prime Central HA guide for instructions.
Step 15 Restore backup of Fault Management database folder (taken in Step3)
• Stop the Fault Management service:
su - primeusr fmctl stop
1-11Cisco Prime Central RHEL Operating System Upgrade Guide
OL-31019-01

Chapter 1 Upgrade RHEL Operating System in Disaster Recovery Configuration Post-Installation Configurations
• FM-install-folder/tipv2Components/TCRComponent/cognos/contentstore/cm
Example:
mv $NCHOME/tipv2Components/TCRComponent/cognos/contentstore/cm
$NCHOME/tipv2Components/TCRComponent/cognos/contentstore/old_cm
mv $NCHOME/tipv2Components/TCRComponent/cognos/contentstore/old_cm ~/
cp -rf ~/contentstore/cm $NCHOME/tipv2Components/TCRComponent/cognos/contentstore/
• Change ownership to the directory:
Ex: chown primeusr:ncoadmin –R
$NCHOME/tipv2Components/TCRComponent/cognos/contentstore/cm
• Start the Fault Management service:
su - primeusrfmctl start
Step 16 Enable automatic restart of service:
• Log in to the Active Prime Central server (after switch over in Step 14).
• Execute the following commands:
cd pc-install-folder/local/scripts/embedded_oracle/PostDB
perl auto_start_stop_db.pl $oratab $oracle_sid $oracle_home $oracle_user
mv /etc/rc.d/init.d/disable_restartpc /etc/rc.d/init.d/restartpc
cd /etc/rc.d/init.d
chmod 755 restartpc
ln -s ../init.d/restartpc /etc/rc.d/rc2.d/S95restartpc
Post-Installation Configurations
Step 1 Install Prime Central and Fault Management applications on Primary server alone with version 2.0 and RHEL 6.5, 6.7, or 6.8 with the same old configuration (that existed before OS upgrade).
Refer to the Prime Central 2.0 documentation for instructions.
Note After executing Step 1, make sure that Prime Central and Fault Management applications with version 2.0 are installed, up and running properly in DR mode before proceeding to step 2.
Step 2 Execute the following script in sequence to stop the Prime Central and Fault Management Services.
This script needs to be executed on Prime Central and Fault Management servers if installed separately.
a. Copy primeServices.sh from OSUpgradeScripts.tar to “/root” directory:
./primeServices.sh stop
1-12Cisco Prime Central RHEL Operating System Upgrade Guide
Chapter 1 Upgrade RHEL Operating System in Disaster Recovery Configuration Post-Installation Configurations
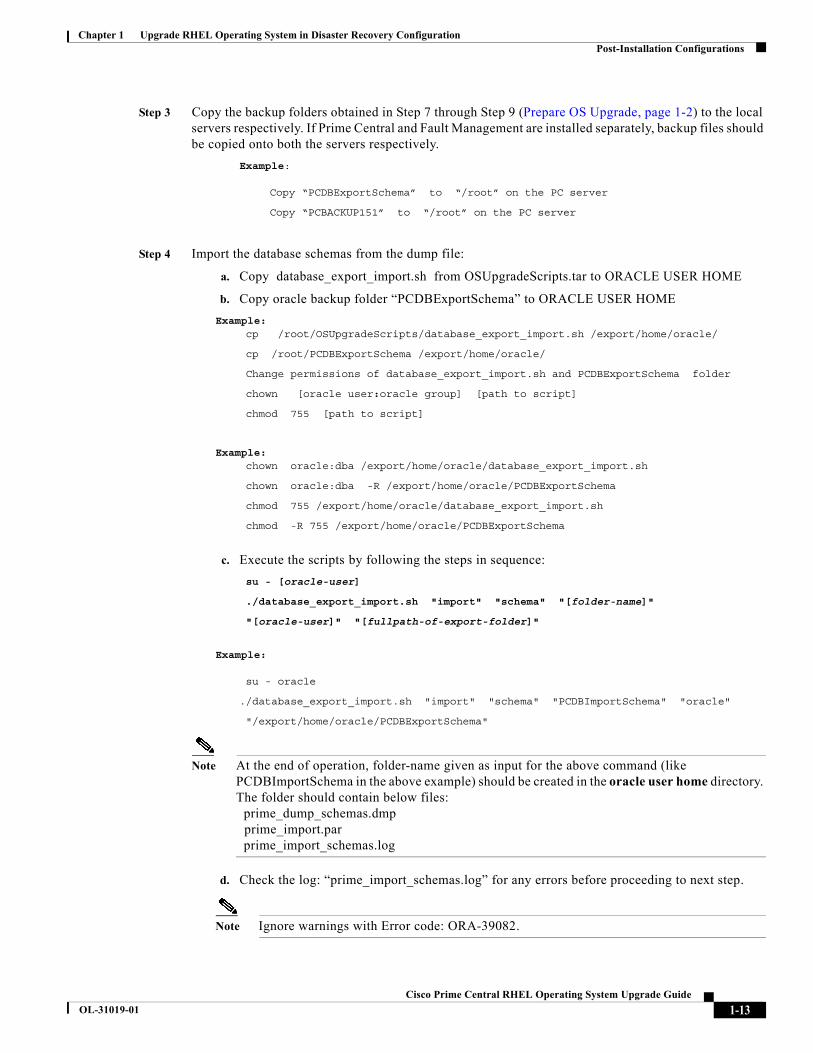
Step 3 Copy the backup folders obtained in Step 7 through Step 9 (Prepare OS Upgrade, page 1-2) to the local servers respectively. If Prime Central and Fault Management are installed separately, backup files should be copied onto both the servers respectively.
Example:
Copy “PCDBExportSchema” to “/root” on the PC server
Copy “PCBACKUP151” to “/root” on the PC server
Step 4 Import the database schemas from the dump file:
a. Copy database_export_import.sh from OSUpgradeScripts.tar to ORACLE USER HOME
b. Copy oracle backup folder “PCDBExportSchema” to ORACLE USER HOME
Example: cp /root/OSUpgradeScripts/database_export_import.sh /export/home/oracle/
cp /root/PCDBExportSchema /export/home/oracle/
Change permissions of database_export_import.sh and PCDBExportSchema folder
chown [oracle user:oracle group] [path to script]
chmod 755 [path to script]
Example: chown oracle:dba /export/home/oracle/database_export_import.sh
chown oracle:dba -R /export/home/oracle/PCDBExportSchema
chmod 755 /export/home/oracle/database_export_import.sh
chmod -R 755 /export/home/oracle/PCDBExportSchema
c. Execute the scripts by following the steps in sequence:
su - [oracle-user]
./database_export_import.sh "import" "schema" "[folder-name]"
"[oracle-user]" "[fullpath-of-export-folder]"
Example:
su - oracle
./database_export_import.sh "import" "schema" "PCDBImportSchema" "oracle"
"/export/home/oracle/PCDBExportSchema"
Note At the end of operation, folder-name given as input for the above command (like PCDBImportSchema in the above example) should be created in the oracle user home directory. The folder should contain below files: prime_dump_schemas.dmp prime_import.par prime_import_schemas.log
d. Check the log: “prime_import_schemas.log” for any errors before proceeding to next step.
Note Ignore warnings with Error code: ORA-39082.
1-13Cisco Prime Central RHEL Operating System Upgrade Guide
OL-31019-01
Chapter 1 Upgrade RHEL Operating System in Disaster Recovery Configuration Post-Installation Configurations
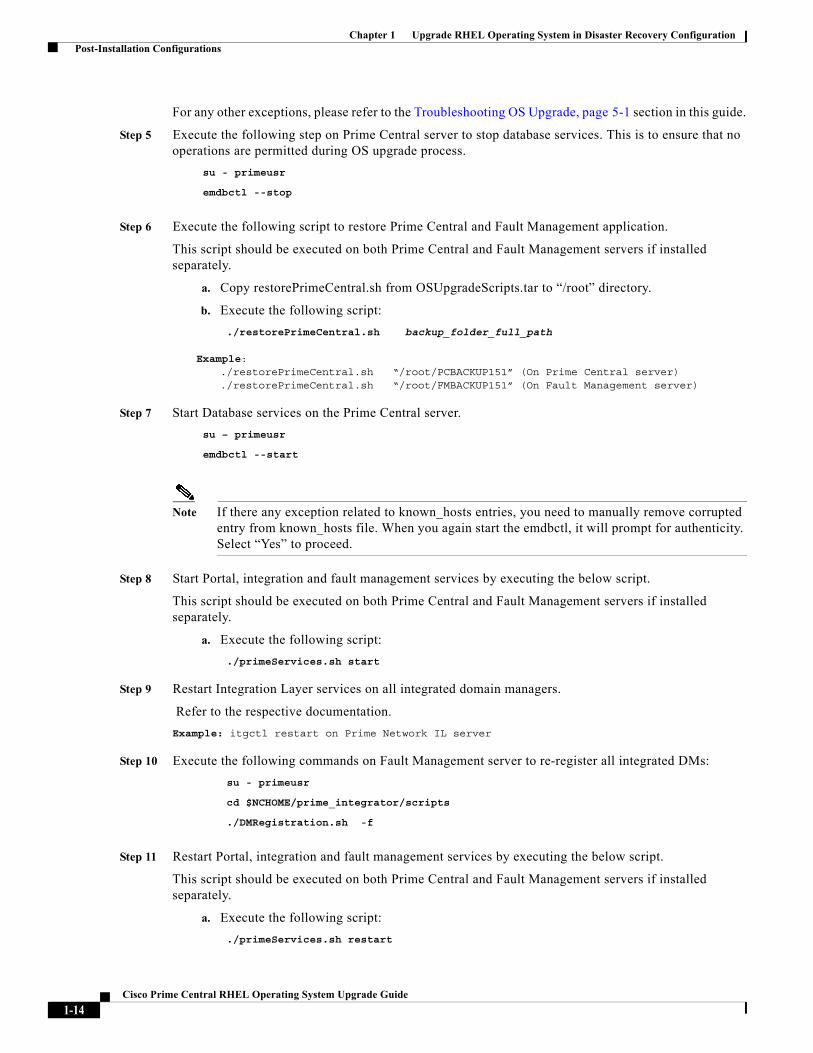
For any other exceptions, please refer to the Troubleshooting OS Upgrade, page 5-1 section in this guide.
Step 5 Execute the following step on Prime Central server to stop database services. This is to ensure that no operations are permitted during OS upgrade process.
su - primeusr
emdbctl --stop
Step 6 Execute the following script to restore Prime Central and Fault Management application.
This script should be executed on both Prime Central and Fault Management servers if installed separately.
a. Copy restorePrimeCentral.sh from OSUpgradeScripts.tar to “/root” directory.
b. Execute the following script:
./restorePrimeCentral.sh backup_folder_full_path
Example:./restorePrimeCentral.sh “/root/PCBACKUP151” (On Prime Central server)./restorePrimeCentral.sh “/root/FMBACKUP151” (On Fault Management server)
Step 7 Start Database services on the Prime Central server.
su – primeusr
emdbctl --start
Note If there any exception related to known_hosts entries, you need to manually remove corrupted entry from known_hosts file. When you again start the emdbctl, it will prompt for authenticity. Select “Yes” to proceed.
Step 8 Start Portal, integration and fault management services by executing the below script.
This script should be executed on both Prime Central and Fault Management servers if installed separately.
a. Execute the following script:
./primeServices.sh start
Step 9 Restart Integration Layer services on all integrated domain managers.
Refer to the respective documentation.
Example: itgctl restart on Prime Network IL server
Step 10 Execute the following commands on Fault Management server to re-register all integrated DMs:
su - primeusr
cd $NCHOME/prime_integrator/scripts
./DMRegistration.sh -f
Step 11 Restart Portal, integration and fault management services by executing the below script.
This script should be executed on both Prime Central and Fault Management servers if installed separately.
a. Execute the following script:
./primeServices.sh restart
1-14Cisco Prime Central RHEL Operating System Upgrade Guide

Chapter 1 Upgrade RHEL Operating System in Disaster Recovery Configuration Post-Installation Configurations
Step 12 Perform Disaster Recovery setup of Prime Central 2.0 on the Standby server. Refer the Configuring Prime Central for Geographical Disaster Recovery section for setup instructions.
Step 13 Perform Disaster Recovery setup of Prime Central Fault Management 2.0 on the Standby server. Refer the Configuring Prime Central Fault Management for Geographical Disaster Recovery section for setup instructions.
Step 14 Configure Fault Management to send 3GPP alarm notifications to Northbound Interface:
fmctl configimpact <centraladmin pwd> fmctl restart
Example:fmctl configimpact Prime123fmctl restart
1-15Cisco Prime Central RHEL Operating System Upgrade Guide
OL-31019-01

Chapter 1 Upgrade RHEL Operating System in Disaster Recovery Configuration Post-Installation Configurations
1-16Cisco Prime Central RHEL Operating System Upgrade Guide

Cisco Prime
C H A P T E R 2
Upgrade RHEL Operating System in Standalone Servers
These topics introduce you to upgrade RHEL Operating System (OS) in a standalone setup. You can upgrade the RHEL OS in single server and dual server environments.
• Upgrading from RHEL 5.8 to 6.5 in a Prime Central Standalone Setup, page 2-2
• Upgrade from RHEL 5.8 or 6.5 to 6.7 in Prime Central Standalone Setup, page 2-4
• Upgrading from RHEL 5.8 to 6.8 in a Prime Central Standalone Setup, page 2-6
• Upgrade from RHEL 6.5 or 6.7 to 6.8 in Prime Central Standalone Setup, page 2-8
PrerequisitesThe RHEL upgrade procedure is applicable only on Prime Central 2.0. If the Prime Central version is less than 1.5.3, the application must be first upgraded to 2.0 before proceeding. For Prime Central upgrade, please refer to the Prime Central 2.0 Quick Start Guide and Prime Central 2.0 HA Guide.
Install RHEL 6.5, 6.7, or, 6.8
Step 1 Install RHEL 6.5, 6.7, or 6.8 with .iso file on both Prime Central and Fault Management servers if installed separately. For more information, see Installing RHEL, page 4-1 for instructions.
Step 2 Change SELINUX mode to disabled as below:
vi /etc/sysconfig/selinux
# modify as
SELINUX=disabled
Step 3 Reboot all the servers.
2-1Central Upgrade RHEL Operating System Guide

Chapter 2 Upgrade RHEL Operating System in Standalone Servers Upgrading from RHEL 5.8 to 6.5 in a Prime Central Standalone Setup
Upgrading from RHEL 5.8 to 6.5 in a Prime Central Standalone Setup
Complete the following procedures explained in each topics to upgrade RHEL 5.8 to 6.5, 6.7, or 6.8 in a standalone setup:
Prepare OS Upgrade
Step 1 Take a full backup of oracle database on the server where Prime Central is installed:
su - primeusr
emdbctl --backup
Step 2 Execute the following script to stop the Prime Central and Fault Management Services:
a. Copy and execute primeServices.sh from OSUpgradeScripts.tar to “/root” directory in Fault Management and Prime Central servers.
This script should be executed on both Prime Central and Fault Management servers if installed separately.
./primeServices.sh stop
b. Execute the below command as root user on Fault Management Server to remove Fault Management Status cron entry:
crontab -u primeusr -l | grep -v 'FMStatusCron.csh' | crontab -u primeusr –
Step 3 Export the database schemas to a dump file:
Note This step needs to be executed on the server where Prime Central Database is installed.
a. Copy database_export_import.sh from OSUpgradeScripts.tar to ORACLE USER HOME.
Example:
cp /root/OSUpgradeScripts/database_export_import.sh /export/home/oracle/
b. Change permissions of database_export_import.sh:
chown [oracle user:oracle group] [path to script]
chmod 755 [path to script]
Example:
chown oracle:dba /export/home/oracle/database_export_import.sh
chmod 755 /export/home/oracle/database_export_import.sh
c. Execute the scripts by following the steps in sequence:
su - [oracle-user]
./database_export_import.sh "export" "schema" "[folder-name]"
"[oracle-user]"
2-2Cisco Prime Central RHEL Operating System Upgrade Guide

Chapter 2 Upgrade RHEL Operating System in Standalone Servers Upgrading from RHEL 5.8 to 6.5 in a Prime Central Standalone Setup
Example:
su - oracle
./database_export_import.sh "export" "schema" "PCDBExporSchema" "oracle"
Note At the end of the operation, a folder-name given as input for the above command (like PCDBExportSchema in the above example) should be created in the oracle user home directory. The folder should contain below files:prime_dump_schemas.dmpprime_export.parprime_export_schemas.log
d. Check the log: “prime_export_schemas.log” for any errors before proceeding to the next step.
Step 4 Take a backup of the folder given as input for Step 6 (like PCDBExportSchema).
Note Make sure that the above backup folder is copied outside the server onto the separate disk storage.
Step 5 Execute the below step on the Prime Central server to stop database services to ensure that no operations are permitted during OS upgrade process:
su - primeusr
emdbctl --stop
Step 6 Execute the following steps in sequence to take the backup of Prime Central application, which is required to restore application after OS upgrade:
This script needs to be executed on Prime Central and Fault Management servers if installed separately
a. Copy backupPrimeCentral.sh from OSUpgradeScripts.tar to “/root” directory.
b. Execute the following script:
./backupPrimeCentral.sh <backup_folder_full_path>
Example:
./backupPrimeCentral.sh "/root/PCBACKUP151" (On Prime Central Server) ./backupPrimeCentral.sh "/root/FMBACKUP151" (On Fault Management Server)
Note Take a backup of these folders (both Prime Central and Fault Management) created in Step 4 through Step 6 onto the separate disk storage. This is mandatory as the server will be re-installed with RHEL 6.5, formatted and all the data will be erased from the server.
2-3Cisco Prime Central RHEL Operating System Upgrade Guide
Chapter 2 Upgrade RHEL Operating System in Standalone Servers Upgrade from RHEL 5.8 or 6.5 to 6.7 in Prime Central Standalone Setup
Upgrade from RHEL 5.8 or 6.5 to 6.7 in Prime Central Standalone Setup
Note Follow the procedure mentioned in this section only if you want to continue the upgrade from RHEL 5.8 or 6.5 to 6.7. All machines should be upgraded to 6.7 using the RHEL inline upgrade procedure.
Step 1 Take a backup of PC Oracle database:
su - primeusr
emdbctl --backup
Step 2 Take a DE Backup from the Fault Management server:
su - primeusr
cd .acsi_primeusr/bin
setenv
./de_backupdb -bfile <backupfile_full_path>
Example:
./de_backupdb -bfile ~/debackup_28Sep2016
Step 3 Take a backup of below Fault Management database folders:
• FM-install-folder/tipv2Components/TCRComponent/cognos/contenstore
• FM-install-folder/omnibus/db/NCOMS
Example:
cp -rf $NCHOME/omnibus/db/NCOMS /opt/
cp -rf $NCHOME/tipv2Components/TCRComponent/cognos/contentstore /opt/
Step 4 Disable automatic restart of services.
On Prime Central Server:
rm -f /etc/rc.d/rc2.d/S95restartpc
rm -f /etc/rc.d/rc3.d/S95restartpc
rm -f /etc/rc.d/rc4.d/S95restartpc
rm -f /etc/rc.d/rc5.d/S95restartpc
mv /etc/rc.d/init.d/restartpc /etc/rc.d/init.d/disable_restartpc
On Fault Management Server:
chkconfig primefm off
mv /etc/rc.d/init.d/primefm /etc/rc.d/init.d/disable_primefm
On Database Server:
setenforce 0 >& /dev/null; cd /etc/init.d ; /sbin/chkconfig --del dbora
unlink "/etc/init.d/dbora";
2-4Cisco Prime Central RHEL Operating System Upgrade Guide

Chapter 2 Upgrade RHEL Operating System in Standalone Servers Upgrade from RHEL 5.8 or 6.5 to 6.7 in Prime Central Standalone Setup
Step 5 Execute the following script to stop the Prime Central and Fault Management Services:
This script needs to be executed on Prime Central and Fault Management servers if installed separately.
• Copy primeServices.sh from OSUpgradeScripts.tar to “/root” directory:
./primeServices.sh stop
Step 6 Stop the Prime Central database service:
su - primeusr
emdbctl --stop
Step 7 Perform the inline upgrade of Prime Central and Fault Management servers (if installed separately) from RHEL 5.8 or 6.5 to 6.7. For more instructions, see the Red Hat documentation.
Note Make sure that you perform inline upgrade only. Fresh installation of RHEL 6.7 is not supported and you may lose complete data.
Step 8 Start the Prime Central database service:
su - primeusr
emdbctl -–start
Step 9 Start nco_pad process on Fault Management Server as a root user.
cd FM-install-folder/omnibus/bin
./nco_pad
Step 10 Execute the following script to start the Prime Central and Fault Management Services:
This script needs to be executed on Prime Central and Fault Management servers if installed separately.
./primeServices.sh “start”
Step 11 Enable automatic restart of services:
a. Log in to the Prime Central server.
b. Execute the following commands:
cd pc-install-folder/local/scripts/embedded_oracle/PostDB
perl auto_start_stop_db.pl $oratab $oracle_sid $oracle_home $oracle_user
Example:
perl auto_start_stop_db.pl "/etc/oratab" "primedb"
"/export/home/oracle/product/12.1.0/db_1" "oracle"
mv /etc/rc.d/init.d/disable_restartpc /etc/rc.d/init.d/restartpc
cd /etc/rc.d/init.d
chmod 755 restartpc
ln -s ../init.d/restartpc /etc/rc.d/rc2.d/S95restartpc
ln -s ../init.d/restartpc /etc/rc.d/rc3.d/S95restartpc
ln -s ../init.d/restartpc /etc/rc.d/rc4.d/S95restartpc
ln -s ../init.d/restartpc /etc/rc.d/rc5.d/S95restartpc
2-5Cisco Prime Central RHEL Operating System Upgrade Guide

Chapter 2 Upgrade RHEL Operating System in Standalone Servers Upgrading from RHEL 5.8 to 6.8 in a Prime Central Standalone Setup
c. Log in to the Fault Management server.
d. Execute the following commands:
mv /etc/rc.d/init.d/disable_primefm /etc/rc.d/init.d/primefm
chkconfig --add primefm
chkconfig --level 2345 primefm on
Upgrading from RHEL 5.8 to 6.8 in a Prime Central Standalone Setup
Complete the following procedures explained in each topics to upgrade RHEL 5.8 to 6.8 in a standalone setup:
Prepare OS Upgrade
Step 1 Take a full backup of oracle database on the server where Prime Central is installed:
su - primeusr
emdbctl --backup
Step 2 Execute the following script to stop the Prime Central and Fault Management Services:
a. Copy and execute primeServices.sh from OSUpgradeScripts.tar to “/root” directory in Fault Management and Prime Central servers.
This script should be executed on both Prime Central and Fault Management servers if installed separately.
./primeServices.sh stop
b. Execute the below command as root user on Fault Management Server to remove Fault Management Status cron entry:
crontab -u primeusr -l | grep -v 'FMStatusCron.csh' | crontab -u primeusr –
Step 3 Export the database schemas to a dump file:
Note This step needs to be executed on the server where Prime Central Database is installed.
a. Copy database_export_import.sh from OSUpgradeScripts.tar to ORACLE USER HOME.
Example:
cp /root/OSUpgradeScripts/database_export_import.sh /export/home/oracle/
b. Change permissions of database_export_import.sh:
chown [oracle user:oracle group] [path to script]
chmod 755 [path to script]
Example:
2-6Cisco Prime Central RHEL Operating System Upgrade Guide

Chapter 2 Upgrade RHEL Operating System in Standalone Servers Upgrading from RHEL 5.8 to 6.8 in a Prime Central Standalone Setup
chown oracle:dba /export/home/oracle/database_export_import.sh
chmod 755 /export/home/oracle/database_export_import.sh
c. Execute the scripts by following the steps in sequence:
su - [oracle-user]
./database_export_import.sh "export" "schema" "[folder-name]"
"[oracle-user]"
Example:
su - oracle
./database_export_import.sh "export" "schema" "PCDBExporSchema" "oracle"
Note At the end of the operation, a folder-name given as input for the above command (like PCDBExportSchema in the above example) should be created in the oracle user home directory. The folder should contain below files:prime_dump_schemas.dmpprime_export.parprime_export_schemas.log
d. Check the log: “prime_export_schemas.log” for any errors before proceeding to the next step.
Step 4 Take a backup of the folder given as input for Step 6 (like PCDBExportSchema).
Note Make sure that the above backup folder is copied outside the server onto the separate disk storage.
Step 5 Execute the below step on the Prime Central server to stop database services to ensure that no operations are permitted during OS upgrade process:
su - primeusr
emdbctl --stop
Step 6 Execute the following steps in sequence to take the backup of Prime Central application, which is required to restore application after OS upgrade:
This script needs to be executed on Prime Central and Fault Management servers if installed separately
a. Copy backupPrimeCentral.sh from OSUpgradeScripts.tar to “/root” directory.
b. Execute the following script:
./backupPrimeCentral.sh <backup_folder_full_path>
Example:
./backupPrimeCentral.sh "/root/PCBACKUP151" (On Prime Central Server) ./backupPrimeCentral.sh "/root/FMBACKUP151" (On Fault Management Server)
2-7Cisco Prime Central RHEL Operating System Upgrade Guide

Chapter 2 Upgrade RHEL Operating System in Standalone Servers Upgrade from RHEL 6.5 or 6.7 to 6.8 in Prime Central Standalone Setup
Note Take a backup of these folders (both Prime Central and Fault Management) created in Step 4 through Step 6 onto the separate disk storage. This is mandatory as the server will be re-installed with RHEL 6.8, formatted and all the data will be erased from the server.
Upgrade from RHEL 6.5 or 6.7 to 6.8 in Prime Central Standalone Setup
Note Follow the procedure mentioned in this section only if you want to continue the upgrade from RHEL 6.5 or 6.7 to 6.8. All machines should be upgraded to 6.8 using the RHEL inline upgrade procedure.
Step 1 Take a backup of PC Oracle database:
su - primeusr
emdbctl --backup
Step 2 Take a DE Backup from the Fault Management server:
su - primeusr
cd .acsi_primeusr/bin
setenv
./de_backupdb -bfile <backupfile_full_path>
Example:
./de_backupdb -bfile ~/debackup_28Sep2016
Step 3 Take a backup of below Fault Management database folders:
• FM-install-folder/tipv2Components/TCRComponent/cognos/contenstore
• FM-install-folder/omnibus/db/NCOMS
Example:
cp -rf $NCHOME/omnibus/db/NCOMS /opt/
cp -rf $NCHOME/tipv2Components/TCRComponent/cognos/contentstore /opt/
Step 4 Disable automatic restart of services.
On Prime Central Server:
rm -f /etc/rc.d/rc2.d/S95restartpc
rm -f /etc/rc.d/rc3.d/S95restartpc
rm -f /etc/rc.d/rc4.d/S95restartpc
rm -f /etc/rc.d/rc5.d/S95restartpc
mv /etc/rc.d/init.d/restartpc /etc/rc.d/init.d/disable_restartpc
2-8Cisco Prime Central RHEL Operating System Upgrade Guide
Chapter 2 Upgrade RHEL Operating System in Standalone Servers Upgrade from RHEL 6.5 or 6.7 to 6.8 in Prime Central Standalone Setup
On Fault Management Server:
chkconfig primefm off
mv /etc/rc.d/init.d/primefm /etc/rc.d/init.d/disable_primefm
On Database Server:
setenforce 0 >& /dev/null; cd /etc/init.d ; /sbin/chkconfig --del dbora
unlink "/etc/init.d/dbora";
Step 5 Execute the following script to stop the Prime Central and Fault Management Services:
This script needs to be executed on Prime Central and Fault Management servers if installed separately.
• Copy primeServices.sh from OSUpgradeScripts.tar to “/root” directory:
./primeServices.sh stop
Step 6 Stop the Prime Central database service:
su - primeusr
emdbctl --stop
Step 7 Perform the inline upgrade of Prime Central and Fault Management servers (if installed separately) from RHEL 6.5 or 6.7 to 6.8. For more instructions, see the Red Hat documentation.
Note Make sure that you perform inline upgrade only.
Step 8 Start the Prime Central database service:
su - primeusr
emdbctl -–start
Step 9 Start nco_pad process on Fault Management Server as a root user.
cd FM-install-folder/omnibus/bin
./nco_pad
Step 10 Execute the following script to start the Prime Central and Fault Management Services:
This script needs to be executed on Prime Central and Fault Management servers if installed separately.
./primeServices.sh “start”
Step 11 Enable automatic restart of services:
a. Log in to the Prime Central server.
b. Execute the following commands:
cd pc-install-folder/local/scripts/embedded_oracle/PostDB
perl auto_start_stop_db.pl $oratab $oracle_sid $oracle_home $oracle_user
Example:
perl auto_start_stop_db.pl "/etc/oratab" "primedb"
"/export/home/oracle/product/12.1.0/db_1" "oracle"
mv /etc/rc.d/init.d/disable_restartpc /etc/rc.d/init.d/restartpc
cd /etc/rc.d/init.d
2-9Cisco Prime Central RHEL Operating System Upgrade Guide

Chapter 2 Upgrade RHEL Operating System in Standalone Servers Post-Installation Configurations
chmod 755 restartpc
ln -s ../init.d/restartpc /etc/rc.d/rc2.d/S95restartpc
ln -s ../init.d/restartpc /etc/rc.d/rc3.d/S95restartpc
ln -s ../init.d/restartpc /etc/rc.d/rc4.d/S95restartpc
ln -s ../init.d/restartpc /etc/rc.d/rc5.d/S95restartpc
c. Log in to the Fault Management server.
d. Execute the following commands:
mv /etc/rc.d/init.d/disable_primefm /etc/rc.d/init.d/primefm
chkconfig --add primefm
chkconfig --level 2345 primefm on
Post-Installation Configurations
Step 1 Install Prime Central and Fault Management applications with version 2.0 on the RHEL 6.5, or 6.7, or 6.8 machines with the same old configuration (that existed before OS upgrade). Refer to the Prime Central 2.0 documentation for instructions.
Note After executing Step 1, make sure that Prime Central and Fault Management applications with version 2.0 are installed, up and running properly before proceeding to Step 2.
Step 2 Execute the following script to stop Prime Central and Fault Management Services. This script needs to be executed on Prime Central and Fault Management servers if installed separately.
./primeServices.sh stop
Step 3 Copy the backup folders obtained in Step 4 and Step 6 (Prepare OS Upgrade, page 2-6) to the local servers respectively. If Prime Central and Fault Management is installed separately, backup files should be copied on both the servers.
Example:
Copy “PCDBExportSchema” to “/root” on the PC server
Copy “PCBACKUP151” to “/root” on the PC server
Step 4 Import the database schemas from the dump file. This step needs to be executed on the server where Prime Central Database is installed.
a. Copy database_export_import.sh from OSUpgradeScripts.tar to ORACLE USER HOME
b. Copy oracle backup folder “PCDBExportSchema” to ORACLE USER HOME
Example:
cp /root/OSUpgradeScripts/database_export_import.sh /export/home/oracle/
cp /root/PCDBExportSchema /export/home/oracle/
Change permissions of database_export_import.sh and PCDBExportSchema folder
chown [oracle user:oracle group] [path to script]
2-10Cisco Prime Central RHEL Operating System Upgrade Guide

Chapter 2 Upgrade RHEL Operating System in Standalone Servers Post-Installation Configurations
chmod 755 [path to script]
Example:
chown oracle:dba /export/home/oracle/database_export_import.sh
chown oracle:dba -R /export/home/oracle/PCDBExportSchema
chmod 755 /export/home/oracle/database_export_import.sh
chmod -R 755 /export/home/oracle/PCDBExportSchema
c. Execute the scripts by following steps in sequence:
su - [oracle-user]
./database_export_import.sh "import" "schema" "[folder-name]" "[oracle-user]
Example:
su - oracle
./database_export_import.sh "import" "schema" "PCDBImportSchema" "oracle"
"/export/home/oracle/PCDBExportSchema"
Note At the end of operation, a folder-name given as input for the above command (like PCDBImportSchema in the above example) should be created in the oracle user home directory. The folder should contain below files:prime_dump_schemas.dmpprime_import.parprime_import_schemas.log
d. Check the log: “prime_import_schemas.log” for any errors before proceeding to Step 5.
Note Ignore warnings with Error code: ORA-39082.
Step 5 Execute the following step on Prime Central server to stop database services to ensure that no operations are permitted during OS upgrade process:
su - primeusr
emdbctl --stop
Step 6 Execute the following script to restore Prime Central and Fault Management applications.
This script should be executed on both Prime Central and Fault Management servers if installed separately.
a. Copy restorePrimeCentral.sh from OSUpgradeScripts.tar to “/root” directory.
b. Execute the following script:
./restorePrimeCentral.sh <backup_folder_full_path>
Example:
./restorePrimeCentral.sh “/root/PCBACKUP151” (On Prime Central Server)
./restorePrimeCentral.sh “/root/FMBACKUP151” (On Fault management Server)
2-11Cisco Prime Central RHEL Operating System Upgrade Guide

Chapter 2 Upgrade RHEL Operating System in Standalone Servers Post-Installation Configurations
Step 7 Start Database services on the Prime Central server.
su – primeusr
emdbctl --start
Note If there are any exception related to known_hosts entries, you need to manually remove corrupted entry from known_hosts file. When you again start the emdbctl, it will prompt for authenticity. Select “Yes” to proceed.
Step 8 Start Portal, integration, and fault management services by executing the below script:
This script should be executed on both Prime Central and Fault Management servers if installed separately.
a. Execute the following script:
./primeServices.sh start
Step 9 Restart Integration Layer services on all integrated domain managers. Refer to the respective documentation.
Example: itgctl restart on Prime Network IL server
Step 10 Execute the following command on Fault Management server to re-register all integrated DMs:
su - primeusr
cd $NCHOME/prime_integrator/scripts
./DMRegistration.sh -f
Step 11 Restart Portal, integration and fault management services by executing below script:
This script should be executed on both Prime Central and Fault Management servers if installed separately.
a. Execute the following script:
./primeServices.sh restart
Step 12 Configure Fault Management to send 3GPP alarm notifications to Northbound Interface:
fmctl configimpact <centraladmin pwd>
fmctl restart
Example:
fmctl configimpact Prime123
fmctl restart
2-12Cisco Prime Central RHEL Operating System Upgrade Guide

Cisco Prime C
C H A P T E R 3
Upgrade RHEL Operating System in High Availability ConfigurationThese topics introduce you to upgrade RHEL Operating System (OS) in Prime Central High Availability (HA) Configuration:
• Upgrading from RHEL 5.8 to 6.5 in Prime Central High Availability Configuration, page 3-2
• Upgrading from RHEL 5.8 or 6.5 to 6.7 in Prime Central High Availability Configuration, page 3-4
• Upgrading from RHEL 6.5 or 6.7 to 6.8 in Prime Central High Availability Configuration, page 3-5
PrerequisitesThe RHEL upgrade procedure is applicable only on Prime Central 2.0. If the Prime Central version is less than 2.0, the application must be first upgraded to 2.0 before proceeding. For Prime Central upgrade, refer to the Prime Central 2.0 Quick Start Guide and Prime Central 2.0 HA Guide.
Install RHEL 6.5, 6.7, or 6.8
Step 1 Install RHEL 6.5, 6.7, or 6.8 with .iso file on both Prime Central and Fault Management cluster nodes.
For more information, refer to Installing RHEL, page 4-1.
Step 2 Change the SELINUX mode to disabled as shown below:
vi /etc/sysconfig/selinux
# modify as
SELINUX=disabled
Step 3 Reboot all the servers.
3-1entral RHEL Operating System Upgrade Guide

Chapter 3 Upgrade RHEL Operating System in High Availability Configuration Upgrading from RHEL 5.8 to 6.5 in Prime Central High Availability Configuration
Upgrading from RHEL 5.8 to 6.5 in Prime Central High Availability Configuration
Complete the following procedures explained in each topics to upgrade from RHEL 5.8 to 6.5 in HA:
Prepare OS Upgrade
Step 1 Take a full backup of oracle database on the server where Prime Central is installed.
Execute the following commands:
su - primeusr
emdbctl --backup
Step 2 Freeze both Prime Central and Fault Management cluster services.
Execute the following command:
clusvcadm -Z [cluster-service-name]
Example:
clusvcadm -Z PrimePCService (On Prime Central server)
clusvcadm -Z PrimeFMService (On Fault Management server)
Step 3 Execute the following steps in sequence to stop the Prime Central or Fault Management Services:
a. Copy primeServices.sh from OSUpgradeScripts.tar to “/root” directory into the active Prime Central and Fault management cluster nodes and execute the commands:
chmod +x /root/primeServices.sh
./primeServices.sh stop
b. Execute the following command on active Fault Management cluster node to remove Fault Management Status cron entry:
crontab -u primeusr -l | grep -v 'FMStatusCron.csh' | crontab -u primeusr -
Step 4 Export the database schemas to a dump file:
a. Copy database_export_import.sh from OSUpgradeScripts.tar to ORACLE USER HOME.
Example:
cp /root/OSUpgradeScripts/database_export_import.sh /opt/pc/oracle/
b. Change permissions of database_export_import.sh:
chown [oracle user:oracle group] [path to script]
chmod 755 [path to script]
Example:
chown oracle:dba /opt/pc/oracle/database_export_import.sh
chmod 755 /opt/pc/oracle/database_export_import.sh
3-2Cisco Prime Central RHEL Operating System Upgrade Guide

Chapter 3 Upgrade RHEL Operating System in High Availability Configuration Upgrading from RHEL 5.8 to 6.5 in Prime Central High Availability Configuration
c. Execute the script by following the steps in sequence:
su - [oracle-user]
./database_export_import.sh "export" "schema" "[folder-name]" "[oracle-user]"
Example:
su - oracle
./database_export_import.sh "export" "schema" "PCDBExportSchema" "oracle"
Note At the end of the operation, folder-name given as input for the above command (like PCDBExportSchema in the above example) should be created in the oracle user home directory. The folder should contain below files:prime_dump_schemas.dmpprime_export.parprime_export_schemas.log
d. Check the log: “prime_export_schemas.log” for any errors before proceeding to Step 5.
Step 5 Take a backup of the folder given as input for Step 4 (like PCDBExportSchema).
Note Make sure that the above backup folder is copied outside the server onto the separate disk storage.
Step 6 Execute the following step on Prime Central server to stop database services to ensure that no operations are permitted during OS upgrade process.
su - primeusr
emdbctl --stop
Step 7 Execute the following steps in sequence to take the backup of Prime Central application, which is required to restore application after OS upgrade:
On the Prime Central Cluster:
• Copy backupPrimeCentral.sh from OSUpgradeScripts.tar to “/root” directory. Execute it as below:
./backupPrimeCentral.sh backup_folder_full_path
Example:
./backupPrimeCentral.sh “/root/PCBACKUP151”
On the Fault Management Cluster:
• Copy backupPrimeCentral.sh from OSUpgradeScripts.tar to “/root” directory. Execute it as below:
./backupPrimeCentral.sh backup_folder_full_path
Example:
./backupPrimeCentral.sh “/root/FMBACKUP151”
3-3Cisco Prime Central RHEL Operating System Upgrade Guide
Chapter 3 Upgrade RHEL Operating System in High Availability Configuration Upgrading from RHEL 5.8 or 6.5 to 6.7 in Prime Central High Availability Configuration
Note Take a backup of these folders (both Prime Central and Fault Management) that are created in Step 5 through step 7 onto the separate disk storage. This is mandatory as the server will be re-installed with RHEL 6.5, and all the data will be erased from the server.
Step 8 Unfreeze both Prime Central and Fault Management cluster services by executing the following command:
clusvcadm -U <Service name>
Example:
clusvcadm -U PrimePCService (On Prime Central server)
clusvcadm -U PrimeFMService (On Fault Management server)
Step 9 Disable both the Prime Central and Fault Management cluster services:
clusvcadm -d <Service name>
Example:
clusvcadm -d PrimePCService (On Prime Central server)
clusvcadm -d PrimeFMService (On Fault Management server)
Step 10 Remove or detach the shared storage from both Prime Central and Fault Management clusters. See the Red Hat documentation for instructions.
Note Though it is optional to remove or detach the shared storage before installing RHEL 6.5, it is recommended to avoid any issues with the shared storage configurations and to save the data inside shared storage (if exists).
Upgrading from RHEL 5.8 or 6.5 to 6.7 in Prime Central High Availability Configuration
Note Follow the procedure mentioned in this section only if you want to continue the upgrade from RHEL 5.8 or 6.5 to 6.7.
Step 1 Take a backup of Prime Central Oracle database:
su - primeusremdbctl --backup
Step 2 Take a DE Backup from Fault Management server:
su - primeusr
cd .acsi_primeusr/bin
setenv
./de_backupdb -bfile [backupfile_full_path]
3-4Cisco Prime Central RHEL Operating System Upgrade Guide
Chapter 3 Upgrade RHEL Operating System in High Availability Configuration Upgrading from RHEL 6.5 or 6.7 to 6.8 in Prime Central High Availability Configuration
Example:
./de_backupdb -bfile ~/debackup_28Sep2016
Step 3 Take a backup of the following Fault Management database folders:
• FM-install-folder/tipv2Components/TCRComponent/cognos/contentstore
• FM-install-folder/omnibus/db/NCOMS
Example:
su - primeusr cp -rf $NCHOME/omnibus/db/NCOMS ~/ cp -rf $NCHOME/tipv2Components/TCRComponent/cognos/contentstore ~/
Step 4 Disable Prime Central and Fault Management cluster:
clusvcadm -d [cluster-service-name]
Example:
clusvcadm -d PrimePCService
clusvcadm -d PrimeFMservice
Step 5 Perform inline upgrade of all the cluster nodes from RHEL 5.8 or 6.5 to 6.7. See the Red Hat documentation for instructions.
Note Make sure that you perform only inline upgrade. Fresh installation of RHEL 6.7 is not supported and you may loose complete data.
Step 6 Enable Prime Central and Fault Management cluster:
clusvcadm -e [cluster-service-name]
Example:
clusvcadm -e PrimePCService
clusvcadm -e PrimeFMservice
Upgrading from RHEL 6.5 or 6.7 to 6.8 in Prime Central High Availability Configuration
Note Follow the procedure mentioned in this section only if you want to continue the upgrade from RHEL 6.5 or 6.7 to 6.8.
Step 1 Take a backup of Prime Central Oracle database:su - primeusr
emdbctl --backup
Step 2 Take a DE Backup from Fault Management server:
su - primeusr
3-5Cisco Prime Central RHEL Operating System Upgrade Guide

Chapter 3 Upgrade RHEL Operating System in High Availability Configuration Post-Installation Configurations
cd .acsi_primeusr/bin
setenv
./de_backupdb -bfile [backupfile_full_path]
Example:
./de_backupdb -bfile ~/debackup_28Sep2016
Step 3 Take a backup of the following Fault Management database folders:
• FM-install-folder/tipv2Components/TCRComponent/cognos/contentstore
• FM-install-folder/omnibus/db/NCOMS
Example:
su - primeusr cp -rf $NCHOME/omnibus/db/NCOMS ~/ cp -rf $NCHOME/tipv2Components/TCRComponent/cognos/contentstore ~/
Step 4 Disable Prime Central and Fault Management cluster:
clusvcadm -d [cluster-service-name]
Example:
clusvcadm -d PrimePCService
clusvcadm -d PrimeFMservice
Step 5 Perform inline upgrade of all the cluster nodes from RHEL 6.5 or 6.7 to 6.8. See the Red Hat documentation for instructions.
Note Make sure that you perform only inline upgrade.
Step 6 Enable Prime Central and Fault Management cluster:
clusvcadm -e [cluster-service-name]
Example:
clusvcadm -e PrimePCService
clusvcadm -e PrimeFMservice
Post-Installation Configurations
Step 1 Attach the same shared storage to the Prime Central and Fault Management clusters respectively, which was detached in Step 10 (refer to the, Prepare OS Upgrade, page 3-2 procedure). See the Red Hat documentation for instructions.
Step 2 Install Prime Central and Fault Management applications with the version 2.0 on RHEL 6.5 machines with the configuration that existed before the OS upgrade. Provide the same passwords that were used during previous installation.
For more information, refer to the Prime Central 2.0 HA documentation for instructions.
3-6Cisco Prime Central RHEL Operating System Upgrade Guide

Chapter 3 Upgrade RHEL Operating System in High Availability Configuration Post-Installation Configurations
Note After executing Step 2, make sure that Prime Central and Fault Management applications with version 2.0 are installed, up and running with the cluster before proceeding to Step 3.
Step 3 Freeze both the Prime Central and Fault Management cluster services by executing the following command:
clusvcadm -Z [cluster-service-name]
Example:
clusvcadm -Z PrimePCService (On Prime Central cluster)
clusvcadm -Z PrimeFMService (On Fault Management cluster)
Step 4 Execute the following steps in sequence to stop the Prime Central and Fault Management Services:
a. Copy primeServices.sh from OSUpgradeScripts.tar to “/root” directory into active Fault Management cluster node.
./primeServices.sh stop
b. Copy primeServices.sh from OSUpgradeScripts.tar to “/root” directory into active Prime Central cluster node.
./primeServices.sh stop
Step 5 Copy the backup folders obtained in Step 5 through Step 7 (Prepare OS Upgrade, page 3-2) to the local servers respectively.
Example:
Copy “PCDBExportSchema” to /root on the Active PC server
Copy “PCBACKUP151” to /root on the Active PC server
Copy “FMBACKUP151” to /root on the Active FM server
Step 6 Import the database schemas from the dump file:
a. Copy database_export_import.sh from OSUpgradeScripts.tar to ORACLE USER HOME
Copy oracle backup folder “PCDBExportSchema” to ORACLE USER HOME
Example:
cp /root/OSUpgradeScripts/database_export_import.sh /opt/pc/oracle/
cp /root/PCDBExportSchema /opt/pc/oracle/
b. Change permissions of database_export_import.sh and PCDBExportSchema folder:
chown [oracle user:<oracle group] [path to script]
chmod 755 [path to script]
Example:
chown oracle:dba /opt/pc/oracle/database_export_import.sh
chown oracle:dba -R /opt/pc/oracle/PCDBExportSchema
chmod 755 /opt/pc/oracle/database_export_import.sh
chmod -R 755 /opt/pc/oracle/PCDBExportSchema
3-7Cisco Prime Central RHEL Operating System Upgrade Guide
Chapter 3 Upgrade RHEL Operating System in High Availability Configuration Post-Installation Configurations
c. Execute the scripts by following the steps in sequence:
su - [oracle-user]
./database_export_import.sh "import" "schema"
"[folder-name]""[oracle-user]" "[fullpath-of-export-folder]"
Example:
su - oracle
./database_export_import.sh "import" "schema" "PCDBImportSchema" "oracle"
"/opt/pc/oracle/PCDBExportSchema"
Note At the end of the operation, folder-name given as input for the above command (like PCDBImportSchema in the above example) should be created in the oracle user home directory. The folder should contain below files:prime_dump_schemas.dumpprime_import.parprime_import_schemas.log
d. Check the log: “prime_import_schemas.log” for any errors before proceeding to Step 7.
Note Ignore warnings with Error code: ORA-39082.
e. For any other exceptions, refer to the Troubleshooting OS Upgrade section in this guide.
Step 7 Execute the following step on Prime Central server to stop database services to ensure that no operations are permitted during OS upgrade process.
su - primeusr
emdbctl --stop
Step 8 Execute the restore script to restore Prime Central and Fault Management application.
This script should be executed on both Prime Central and Fault Management cluster nodes.
a. Copy restorePrimeCentral.sh from OSUpgradeScripts.tar to “/root” directory.
b. Execute the following script:
./restorePrimeCentral.sh backup_folder_full_path
Example: ./restorePrimeCentral.sh “/root/PCBACKUP151” (On Prime Central server)
./restorePrimeCentral.sh “/root/FMBACKUP151” (On Fault Management server)
Step 9 Start Database services on the Prime Central node.
su – primeusr
emdbctl --start
Note If there are any exception related to known_host entries, you need to manually remove corrupted entry from known_hosts file. When you again start the emdbctl, it will prompt for authenticity. Select “Yes” to proceed.
3-8Cisco Prime Central RHEL Operating System Upgrade Guide

Chapter 3 Upgrade RHEL Operating System in High Availability Configuration Post-Installation Configurations
Step 10 Start Portal, integration and fault management services by executing the below script.
This script should be executed on both Prime Central and Fault Management cluster nodes.
a. Execute the following script:
./primeServices.sh start
Step 11 Restart Integration Layer services on all integrated domain managers. Refer to the respective documentation.
Example: itgctl restart on Prime Network IL server
Step 12 Execute the following commands on Fault Management node to re-register all integrated DMs:
su - primeusr
cd $NCHOME/prime_integrator/scripts
./DMRegistration.sh -f
Step 13 Restart Portal, integration and fault management services by executing the below script:
This script should be executed on both Prime Central and Fault Management cluster nodes.
a. Execute the following script:
./primeServices.sh restart
Step 14 Configure Fault Management to send 3GPP alarm notifications to Northbound Interface:
fmctl configimpact <centraladmin pwd> fmctl restart
Example:fmctl configimpact Prime123fmctl restart
3-9Cisco Prime Central RHEL Operating System Upgrade Guide

Chapter 3 Upgrade RHEL Operating System in High Availability Configuration Post-Installation Configurations
3-10Cisco Prime Central RHEL Operating System Upgrade Guide
Cisco Prime C
C H A P T E R 4
Install RHELTo install RHEL 6.5, 6.7, and 6.8 see the Red Hat documentation for instructions. Complete the following steps in parallel on all the nodes.
Installing RHEL
Step 1 Verify that the following options are checked:
• Virtualization – Virtualization Tools
• High Availability – High Availability (Applicable only for HA configuration]
• Desktops – General Purpose Desktop
• Desktops – X Window System
Step 2 Create local directories named /rhel and /cdrom-<RHEL version>.
Step 3 Copy the .iso file that was used for the node installation to the /rhel directory.
Step 4 Mount the /rhel .iso file to /cdrom-<RHEL version>. For example,
# cd /rhel
# mount -t iso9660 -o loop /rhel/rhel-server-6.5-x86_64-dvd.iso /cdrom-6.5
Note To permanently mount the drive, update the /etc/fstab file. For more information, see Mounting File Systems Automatically with etc/fstab.
Step 5 Create a file named /etc/yum.repos.d/local.repo. Use UNIX format and be sure there are no spaces before lines.
Step 6 Save the newly created file in local.repo, as follows:
[local]
name=Red Hat Enterprise Linux $releasever - $basearch - Local
baseurl=file:///cdrom-<RHEL version>/Server enabled=1
gpgcheck=0
gpgkey=file:///etc/pki/rpm-gpg/RPM-GPG-KEY-redhat-release
[HighAvailability]
name=Red Hat Enterprise Linux $releasever - $basearch - HighAvailability
4-1entral RHEL Operating System Upgrade Guide
Chapter 4 Install RHEL Installing RHEL
baseurl=file:///cdrom-<RHEL version>/HighAvailability
enabled=1
gpgcheck=0
gpgkey=file:///etc/pki/rpm-gpg/RPM-GPG-KEY-redhat-release
[ResilientStorage]
name=Red Hat Enterprise Linux $releasever - $basearch - ResilientStorage
baseurl=file:///cdrom-<RHEL version>/ResilientStorage
enabled=1
gpgcheck=0
gpgkey=file:///etc/pki/rpm-gpg/RPM-GPG-KEY-redhat-release
Step 7 (Applicable only for HA) If you forget the HA package and want to install it later, enter:
# yum groupinstall "High Availability"
Step 8 (Applicable only for HA) If you forget the desktop and want to install it later, enter:
# yum groupinstall "X Window System" Desktop
# vi /etc/inittab
Then, change id:3:initdefault: to id:5:initdefault: and reboot the server.
Step 9 (Applicable only for HA) Temporarily disable the firewall and SELinux to enable initial testing of the cluster:
To disable the firewall, enter:
# service iptables save
# service iptables stop
# chkconfig iptables off
# service ip6tables save
# service ip6tables stop
# chkconfig ip6tables off
Step 10 Keep all the nodes synchronized:
# echo server tick.redhat.com$'\n'restrict tick.redhat.com mask 255.255.255.255
nomodify notrap noquery >> /etc/ntp.conf
# chkconfig ntpd on
# service ntpd start
Step 11 Switch network daemons:
# service NetworkManager stop
# chkconfig NetworkManager off
# yum remove NetworkManager
# chkconfig network on
Step 12 Edit the /etc/hosts file to add the node information; for example:
192.168.1.150 node1.cisco.com node1 192.168.1.160 node2.cisco.com node2
4-2Cisco Prime Central RHEL Operating System Upgrade Guide

Cisco Prime C
C H A P T E R 5
TroubleshootingTroubleshooting OS UpgradeProblem fmctl status not coming up after inline upgrade.
Solution Object server might have corrupted during inline upgrade procedure. Restore the Object Server Database from the backup taken before inline upgrade by following the steps:
su - primeusr
fmctl stop
cp -rf ~/NCOMS/ $NCHOME/omnibus/db/NCOMS
chown primeusr:ncoadmin -R $NCHOME/omnibus/db/NCOMS
fmctl start
Problem Could not launch Alarm reports after inline upgrade.
Solution TCR Database might have corrupted during inline upgrade procedure. Restore the TCR Database from the backup, which is taken before inline upgrade, by performing the below steps:
su - primeusr
fmctl stop
mv $NCHOME/tipv2Components/TCRComponent/cognos/contentstore/cm
$NCHOME/tipv2Components/TCRComponent/cognos/contentstore/old_cm
mv $NCHOME/tipv2Components/TCRComponent/cognos/contentstore/old_cm ~/
cp -rf ~/contentstore/cm $NCHOME/tipv2Components/TCRComponent/cognos/contentstore/
Change ownership to the directory
Ex: chown primeusr:ncoadmin -R
$NCHOME/tipv2Components/TCRComponent/cognos/contentstore/cm
fmctl start
Problem database_export_import.sh execution failed during export or import operations.
Solution Check the logs in below locations:
/tmp/upgrade_logs/*.log ORACLE_BASE_directory/IMPORT_directory/*.log
To re-run the script again, you must use different name for the import or export folder name parameter (or) you have to delete the already existing logical and physical directories with the old name.
5-1entral RHEL Operating System Upgrade Guide

Chapter 5 Troubleshooting Troubleshooting OS Upgrade
Problem Oracle Database sync is not happening in DR Standby due to switchover status: “UNRESOLVABLE GAP” on primary machine.
Solution Run the below script on the standby machine as a root user:
(root)cd primeusr-home-directory/local/disaster_recovery/scripts/main/
./recreatestandbyADG.sh
5-2Cisco Prime Central RHEL Operating System Upgrade Guide
OL-31019-01