rocks and soils - the nsta website is temporarily out of...
TRANSCRIPT

77Bringing outdoor science in: T h r i f T y c l a s s r o o m l e s s o n s
Humans have built their homes upon the land, often using the rocks and stones from the land as building materials. Rocks and soil are indeed a part of every-
day life and an important component of a com-plete science curriculum.
Where do teachers get rocks to show stu-dents? Often a rock collection is one of the more common materials purchased by schools for sci-ence teaching. However, not all schools have rock collections and some cannot afford them. A thrifty science teacher can teach a unit on rocks with only those that can be found in the area. Although some locations may not yield all of the samples that would create a substantial rock col-lection, there are likely to be enough to share the basic concepts that students need in the elemen-tary and middle grades. The same would be true for soils. Even if there is only one soil type in the area, it can be used as a great starting place for teaching about soils. Local soil can be compared with purchased soil samples (e.g., potting soil or play sand). In fact, it is that comparison that lends itself to great science explorations for young people—comparing both soils and rocks through close observation and hands-on experiences.
Use these resources and the lessons in this chapter to introduce students to rocks and soils in their local area and beyond. Consult your district science curriculum and state science standards to
Copyright © 2012 NSTA. All rights reserved. For more information, go to www.nsta.org/permissions.

78 NatioNal ScieNce teacherS aSSociatioN
r o c k s a n d s o i l s
see where these lesson ideas fit best, and consider bringing in a guest speaker from a college geol-ogy department, a museum, or a rock and min-eral society.
Although these lessons do not constitute an entire unit on rocks and soils, together they do offer an introduction to the important compo-nents of the Earth that students see around them every day. Perhaps students will find out why teachers often say, “Science rocks!”
resources
Websites • http://education.usgs.gov
• http://www.geosociety.org/educate/LessonPlans/i_rocks.htm
• http://school.discoveryeducation.com/schooladventures/soil
children’s literature
• JumpIntoScience:RocksandMinerals by Steve Tomecek (National Geographic Children’s Books, 2010)
• Rocks,FossilsandArrowheads(TakeAlongGuides) by Laura Evert (Cooper Square Publishing, 2001)
• RocksinHisHead by Carol Otis Hurst (Greenwillow Books, 2001)
Copyright © 2012 NSTA. All rights reserved. For more information, go to www.nsta.org/permissions.

79Bringing outdoor science in: T h r i f T y c l a s s r o o m l e s s o n s
r o c k s a n d s o i l s
d o n ’ t F o r g e t !• Use care when students are asked to use sharp objects (such as those
in dissection kits, toothpicks, pipe cleaners, straight pins, rocks, or arrowheads).
• When gathering any objects outdoors (rocks, soil, insects, etc.), it is best to look for locations that have not been sprayed with pesticides, herbicides, or other chemicals.
• When working with water indoors, completely clean up any spills.
For a full list of safety tips, see page xi.
Copyright © 2012 NSTA. All rights reserved. For more information, go to www.nsta.org/permissions.

80 NatioNal ScieNce teacherS aSSociatioN
objectiveStudents will observe rocks that can be found locally and record their observations.
Why/how to Use This lessonTo develop an understanding of Earth sci-ence, students need to start with the basics and in particular something they can hold
in their hands. Most children who have spent any time outdoors have picked up a rock at some time, and in this lesson they will not only hold the rock but will take a closer look. This lesson could be used at the beginning of a unit on rocks or as part of a unit on rocks and soils. Consider follow-ing this lesson with “Characteristics of Rocks” and “Making a Rock Collection,” which cover all three different types of rocks.
materialssnack-size resealable plastic bags, rocks, hand lens, ruler, scale (optional), student worksheet
Procedures and Tips1. Show students a rock that you have found
nearby. Ask the students to say some words that describe the rock. Tell them that you are going to ask them to bring in their own rock from home. (If this is not possible, provide rocks for them.)
2. Give students a plastic bag to use to store a rock they will collect. Tell them that it must fit in the bag and they must be able to seal it. This will cut down on the size of the rock and prevent unsafe situations that may result from larger rocks being transported on school buses. Place the following note for parents inside the plastic bag:
PARENTS: Our class is studying ROCKS. Please help your child find a rock from the local area that will fit in this bag. Seal it up and send it to school with your child. Make sure your child knows to keep the rock in the bag until it is delivered safely to my classroom.
3. When students have brought in their rocks, divide the students into groups to compare and contrast their rocks. Ask them to write three sentences describing the rocks on their worksheets.
4. If a scale is available, students may weigh the rocks and determine which is the heaviest. Students may also use a ruler to measure the size of the rock.
5. Determine if all types of rocks (igneous, metamorphic, sedimentary) are represented by the student samples. You may wish to use this lesson to serve as an introduction to the next step—introducing the three types of rocks and their characteristics.
Grade-level considerationsUpper elementary and middle grade students may be assigned to research the geological his-tory of the area, using local rocks as a starting point. For primary grade students, attach a note for parents to the plastic bag for the rock collec-tion activity if it is being sent home. Instead of the student worksheet, you could provide a plain piece of paper on which students would draw a picture of their rock, and perhaps a picture of another rock that is different in appearance.
assessment/next stepsAssess student understanding with the sample discussion questions and the responses to the student worksheet. Rocks brought in by students may be organized into a collection that could be
e x p l o r i n g L o c a l r o c k s
Topic: Composition of Rocks
Go to: www.scilinks.org
Code: BOS026
Copyright © 2012 NSTA. All rights reserved. For more information, go to www.nsta.org/permissions.

81Bringing outdoor science in: T h r i f T y c l a s s r o o m l e s s o n s
displayed in the classroom or media center. If there are a wide variety of rocks, you may even wish to use a plastic craft box or similar container to make a permanent collection that you would keep in your classroom.
sample Discussion Questions• How are any two of the rocks alike? How are
they different?
• Describe your rock in terms of weight, color, and texture.
e x p l o r i n g L o c a l r o c k s
Copyright © 2012 NSTA. All rights reserved. For more information, go to www.nsta.org/permissions.
82 NatioNal ScieNce teacherS aSSociatioN
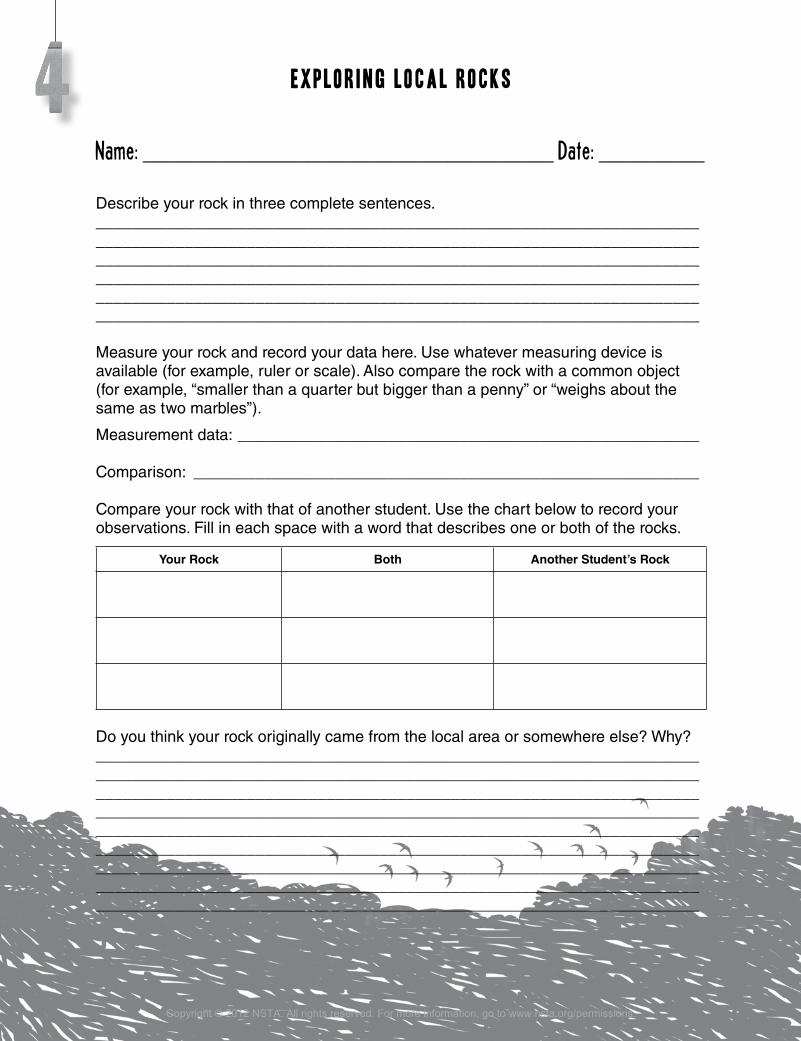
name: ___________________________________ Date: _________
e x p l o r i n g L o c a l r o c k s
Describe your rock in three complete sentences. ________________________________________________________________________________________________________________________________________________________________________________________________________________________________________________________________________________________________________________________________________________________________________________________________________________________
Measure your rock and record your data here. Use whatever measuring device is available (for example, ruler or scale). Also compare the rock with a common object (for example, “smaller than a quarter but bigger than a penny” or “weighs about the same as two marbles”).
Measurement data: ____________________________________________________
Comparison: _________________________________________________________
Compare your rock with that of another student. Use the chart below to record your observations. Fill in each space with a word that describes one or both of the rocks.
Your Rock Both Another Student’s Rock
Do you think your rock originally came from the local area or somewhere else? Why? ____________________________________________________________________________________________________________________________________________________________________________________________________________________________________________________________________________________________________________________________________________________________________________________________________________________________________________________________________________________________________________________________________________________________________________________________________________________________________
Copyright © 2012 NSTA. All rights reserved. For more information, go to www.nsta.org/permissions.

83Bringing outdoor science in: T h r i f T y c l a s s r o o m l e s s o n s
r o c k s a n d s o i l s
d o n ’ t F o r g e t !• Provide students with a lab safety form or science activity safety form
that outlines general science safety procedures. You can use your school system’s standard form, if available. If you teach in an elementary school that does not use a standard form, check with a middle school science teacher. The safety form should be sent home to be signed by parents.
• Protective equipment, including but not limited to vinyl gloves, aprons, and eye goggles, is encouraged for the activities in this book.
• When working outdoors, students should be reminded not to look directly into the Sun.
For a full list of safety tips, see page xi.
Copyright © 2012 NSTA. All rights reserved. For more information, go to www.nsta.org/permissions.

84 NatioNal ScieNce teacherS aSSociatioN
objectiveStudents will explore the characteristics of differ-ent kinds of rocks.
Why/how to Use This lessonThis activity goes beyond the local geol-ogy and guides students in distinguish-ing the three different kinds of rocks. This understanding is important to developing
an accurate concept of the Earth’s ever-changing surface.
materialssamples of igneous, metamorphic, and sedimen-tary rocks; hand lens; student worksheet
Procedures and Tips 1. For this lesson, you will need to locate
samples of the three types of rocks. Most middle schools with adequate science supplies have rock collections, as do some elementary schools. If your school does not, order from a science supply catalog or contact a local rock and mineral society or the geology department of a local college or university to request a loan or donation of rocks.
2. If the rocks are in a kit, try to take enough of them out so that students cannot see any identifying labels.
3. Give the students a set of characteristics of igneous, metamorphic, and sedimentary rocks and then ask the students to classify the rocks they have been given.
4. If your students have brought in their own rocks, ask them to classify those as well.
5. Use the sample discussion questions to generate class discussion.
6. For the last part of the student worksheet (coming up with a creative way to describe a type of rock), assign one of the three types of rocks to your students either individually or in small groups. For instance, if you have six groups of students, then two groups can be assigned igneous, two metamorphic, and two sedimentary. You may wish to write the names of the rocks on small pieces of paper and have them drawn from a bag or basket.
Grade-level considerationsStudents in primary grades do not need to know the details of the three types of rocks, although this information is appropriate for upper elemen-tary and middle school students. Students in middle grades can go further in depth with some research on differentiation of the formation of the types of rocks.
assessment/next stepsCheck the student worksheets to assess under-standing. Students should be able to separate a set of rocks into the three categories based on the characteristics of each. As enrichment and exten-sion, consider inviting a local geologist or repre-sentative of a rock and mineral society to visit the class and bring some samples of rocks.
sample Discussion Questions• What distinguishes each of the three types
of rocks?
• How are the rocks from the collection different from (or similar to) local rocks?
c h a r a c t e r i s t i c s o f r o c k s
Topic: Identifying Rocks and Minerals
Go to: www.scilinks.org
Code: BOS027
Copyright © 2012 NSTA. All rights reserved. For more information, go to www.nsta.org/permissions.

85Bringing outdoor science in: T h r i f T y c l a s s r o o m l e s s o n s 85Bringing outdoor science in: T h r i f T y c l a s s r o o m l e s s o n s
name: ___________________________________ Date: _________
Look at the samples of rocks your teacher has provided. Divide them into three categories, and support your choices by recording your observations regarding the appearance of the rocks. Use the chart below to organize your observations. Use the boxes under each category to write words that describe your observations of the rocks.
Category 1 Category 2 Category 3
Now make a chart of the three categories that scientists have used to classify rocks. Use a reference to find words that describe each category.
1. 2. 3.
How did your original list compare with the second list? ____________________________________________________________________________________________________________________________________________________________________________________________________________________________________________________________________________________________________________________________________________________
Come up with a creative way to describe one of the three types of rocks—for example, a poem, rap, or song.
c h a r a c t e r i s t i c s o f r o c k s
Copyright © 2012 NSTA. All rights reserved. For more information, go to www.nsta.org/permissions.
86 NatioNal ScieNce teacherS aSSociatioN
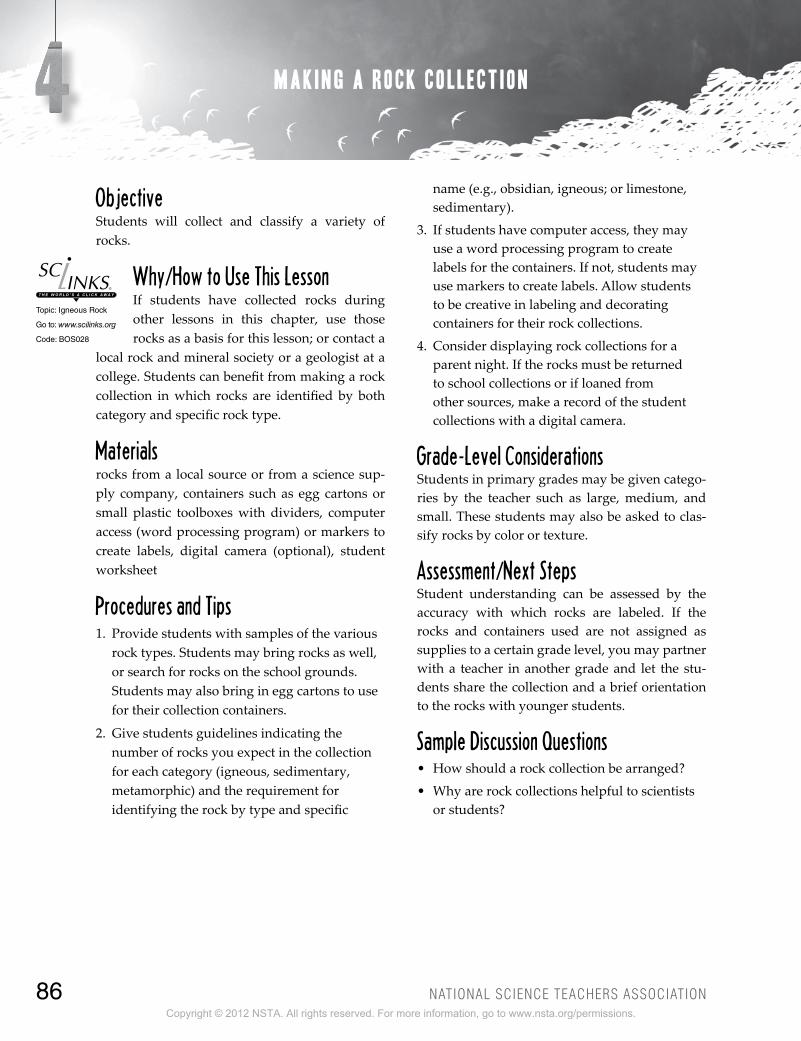
objectiveStudents will collect and classify a variety of rocks.
Why/how to Use This lessonIf students have collected rocks during other lessons in this chapter, use those rocks as a basis for this lesson; or contact a
local rock and mineral society or a geologist at a college. Students can benefit from making a rock collection in which rocks are identified by both category and specific rock type.
materialsrocks from a local source or from a science sup-ply company, containers such as egg cartons or small plastic toolboxes with dividers, computer access (word processing program) or markers to create labels, digital camera (optional), student worksheet
Procedures and Tips1. Provide students with samples of the various
rock types. Students may bring rocks as well, or search for rocks on the school grounds. Students may also bring in egg cartons to use for their collection containers.
2. Give students guidelines indicating the number of rocks you expect in the collection for each category (igneous, sedimentary, metamorphic) and the requirement for identifying the rock by type and specific
name (e.g., obsidian, igneous; or limestone, sedimentary).
3. If students have computer access, they may use a word processing program to create labels for the containers. If not, students may use markers to create labels. Allow students to be creative in labeling and decorating containers for their rock collections.
4. Consider displaying rock collections for a parent night. If the rocks must be returned to school collections or if loaned from other sources, make a record of the student collections with a digital camera.
Grade-level considerationsStudents in primary grades may be given catego-ries by the teacher such as large, medium, and small. These students may also be asked to clas-sify rocks by color or texture.
assessment/next stepsStudent understanding can be assessed by the accuracy with which rocks are labeled. If the rocks and containers used are not assigned as supplies to a certain grade level, you may partner with a teacher in another grade and let the stu-dents share the collection and a brief orientation to the rocks with younger students.
sample Discussion Questions• How should a rock collection be arranged?
• Why are rock collections helpful to scientists or students?
M a k i n g a r o c k c o l l e c t i o n
Topic: Igneous Rock
Go to: www.scilinks.org
Code: BOS028
Copyright © 2012 NSTA. All rights reserved. For more information, go to www.nsta.org/permissions.
87Bringing outdoor science in: T h r i f T y c l a s s r o o m l e s s o n s 87Bringing outdoor science in: T h r i f T y c l a s s r o o m l e s s o n s
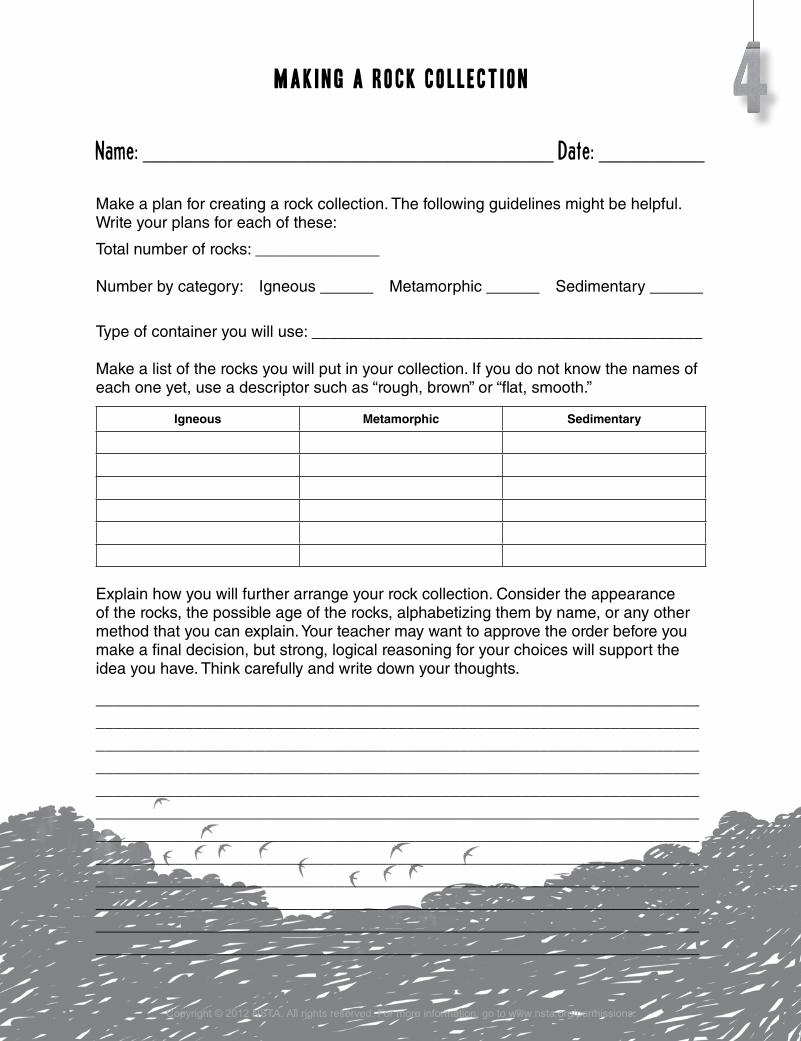
name: ___________________________________ Date: _________
Make a plan for creating a rock collection. The following guidelines might be helpful. Write your plans for each of these:
Total number of rocks: ______________
Number by category: Igneous ______ Metamorphic ______ Sedimentary ______
Type of container you will use: ____________________________________________
Make a list of the rocks you will put in your collection. If you do not know the names of each one yet, use a descriptor such as “rough, brown” or “flat, smooth.”
Igneous Metamorphic Sedimentary
Explain how you will further arrange your rock collection. Consider the appearance of the rocks, the possible age of the rocks, alphabetizing them by name, or any other method that you can explain. Your teacher may want to approve the order before you make a final decision, but strong, logical reasoning for your choices will support the idea you have. Think carefully and write down your thoughts.
________________________________________________________________________________________________________________________________________________________________________________________________________________________________________________________________________________________________________________________________________________________________________________________________________________________________________________________________________________________________________________________________________________________________________________________________________________________________________________________________________________________________________________________________________________________________________________________________________________________________________________
M a k i n g a r o c k c o l l e c t i o n
Copyright © 2012 NSTA. All rights reserved. For more information, go to www.nsta.org/permissions.

88 NatioNal ScieNce teacherS aSSociatioN
Topic: Rocks and Human History
Go to: www.scilinks.org
Code: BOS029
H o w H u m a n s u s e r o c k s
objectiveStudents will research and report how humans have used rocks historically and in the present.
Why/how to Use This lessonThe dependence of humans on natural resources such as rocks helps students understand why it is important to take care
of our planet and all that it provides. Consider using this lesson as enrichment during a unit on rocks, or as a science connection in a social stud-ies unit on Native Americans.
materialshand lens; arrowheads made from rocks (origi-nals are sometimes available for loan from uni-versities, or reasonably priced [several for $1] replicas can be purchased from vendors); Rocks,Fossils, andArrowheads (see the “Resources” sec-tion at the beginning of this chapter); student worksheet
Procedures and Tips1. Start a class discussion about the ways that
humans use rocks. (Possible answers might include in buildings, walls, or fences.) If they do not mention historical uses for hunting or weapons, then ask specifically if any student has ever heard of such a use. Show students an arrowhead.
2. If you have been able to locate replicas of arrowheads, allow students to examine them
with a hand lens. (SAFETY NOTE: Some arrowheads can be sharp—check to be sure they are not too sharp for students to handle.)
3. Ask students to consider how the arrowheads were made. You may wish to give students the opportunity to research this using books or the internet. It may be helpful to read aloud to the class a few pages from Rocks,Fossils,andArrowheads.
4. Ask students to sketch the arrowhead they have, and then to sketch how it might have been used historically.
Grade-level considerationsRather than give each student one arrowhead to examine, it would be safer for primary grade stu-dents to just look at a sample that you keep in your hands.
assessment/next stepsCheck student sketches and descriptions of the use of arrowheads for reasonable responses such as hunting.
sample Discussion Questions• What were the first tools used by humans?
How were they used?
• How have humans used rocks throughout history?
• How are rocks used by humans in the present day?
Copyright © 2012 NSTA. All rights reserved. For more information, go to www.nsta.org/permissions.

89Bringing outdoor science in: T h r i f T y c l a s s r o o m l e s s o n s 89Bringing outdoor science in: T h r i f T y c l a s s r o o m l e s s o n s
name: ___________________________________ Date: _________
What are some ways that humans have used rocks in historical times?
____________________________________________________________________________________________________________________________________________________________________________________________________________
In the smaller box sketch the historical rock item (or replica) that your teacher has provided, showing details such as shape, markings, and color. Then in the larger box sketch a scene that illustrates the use of the rock item the way it would have been used in the past.
Write a description of the scene that you have created. Use at least three complete sentences. ________________________________________________________________________________________________________________________________________________________________________________________________________________________________________________________________________________
H o w H u m a n s u s e r o c k s
Copyright © 2012 NSTA. All rights reserved. For more information, go to www.nsta.org/permissions.

90 NatioNal ScieNce teacherS aSSociatioN
objectiveStudents will compare different types of soils.
Why/how to Use This lessonEven though there are great lessons within the local rocks and soils, basic differences between types of soil are important for stu-
dents to recognize in the overall scheme of Earth science. Use this lesson to anchor other activities where students are looking at soils that have been found outdoors.
materialsplay sand, potting soil, claylike soil sample, plas-tic containers, hand lens, student worksheet
Procedures and Tips1. Have one type of soil sample available in a
plastic container, and have an extra plastic container. Pour the soil from one container to another and ask students to describe what they see.
2. Give samples of each of the three types of soil to small groups of students. Allow them to touch the samples and examine them with the hand lens.
3. Ask students to record their observations in the chart on the student worksheet.
4. Students should use a textbook, reference book, or the internet to verify the characteristics of soil that they have recorded. Students should compare the three types of soil and make any notes needed to supplement the observations they have written.
Grade-level considerationsThink about how to simplify the concept for younger students. It may be helpful to focus on one characteristic of soil such as color. For instance, if you have white sand, red clay, and black potting soil, it may be enough for primary grade students to differentiate the colors.
assessment/next stepsAssess student understanding with the discussion questions below and for reasonable responses on the student worksheet.
sample Discussion Questions• Are all soils the same? Why or why not?
• Do all soils react the same way to water or wind? Explain.
c h a r a c t e r i s t i c s o f s o i l s
Topic: Soil Types
Go to: www.scilinks.org
Code: BOS030
Copyright © 2012 NSTA. All rights reserved. For more information, go to www.nsta.org/permissions.
91Bringing outdoor science in: T h r i f T y c l a s s r o o m l e s s o n s 91Bringing outdoor science in: T h r i f T y c l a s s r o o m l e s s o n s
name: ___________________________________ Date: _________
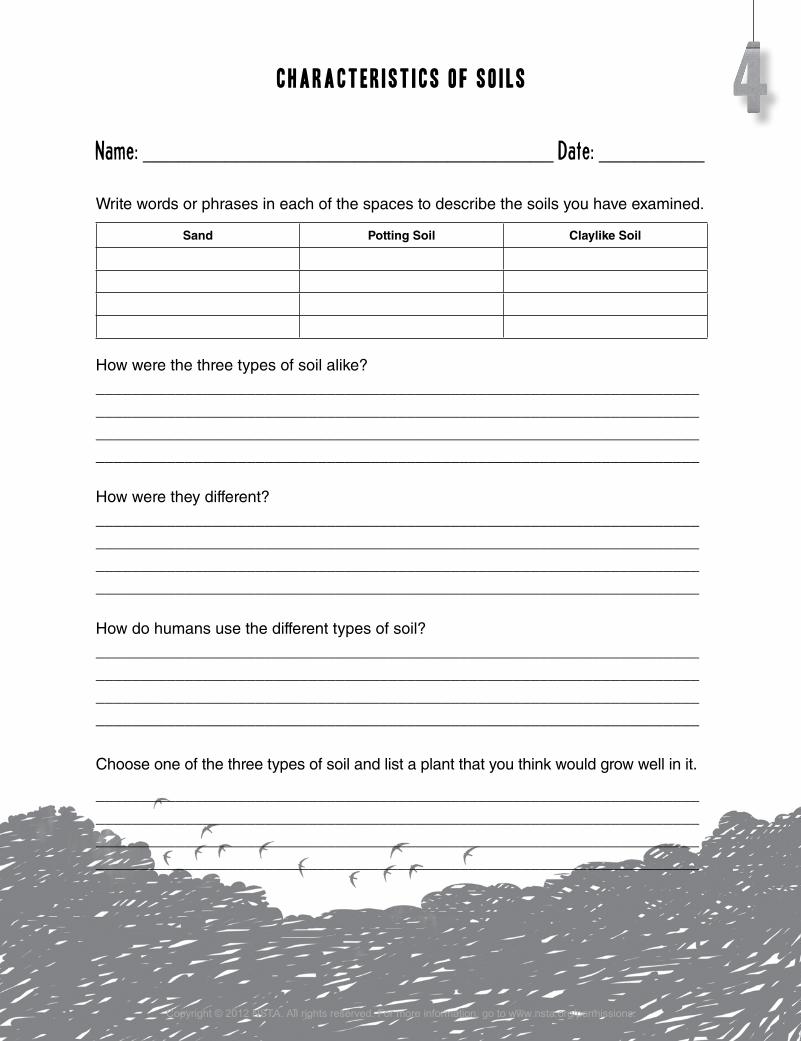
Write words or phrases in each of the spaces to describe the soils you have examined.
Sand Potting Soil Claylike Soil
How were the three types of soil alike? ________________________________________________________________________________________________________________________________________________________________________________________________________________________________________________________________________________
How were they different? ________________________________________________________________________________________________________________________________________________________________________________________________________________________________________________________________________________
How do humans use the different types of soil? ________________________________________________________________________________________________________________________________________________________________________________________________________________________________________________________________________________
Choose one of the three types of soil and list a plant that you think would grow well in it.
________________________________________________________________________________________________________________________________________________________________________________________________________________________________________________________________________________
c h a r a c t e r i s t i c s o f s o i l s
Copyright © 2012 NSTA. All rights reserved. For more information, go to www.nsta.org/permissions.
92 NatioNal ScieNce teacherS aSSociatioN
objectiveStudents will compare and contrast soils from various locations.
Why/how to Use This lessonWhether students have lived in one place all of their lives or have moved often, it is likely that they do not think about how soil
might be different from one place to another. This lesson will require students to think about the dif-ferences in soils from various locations.
materialssmall containers, samples of various types of soil, hand lens, paper plates, student worksheet
Procedures and Tips1. In your own travels or in those of friends
and colleagues, ask for soil samples as a “souvenir” from as many places as you can get them. You might ask a pharmacy for small medicine bottles or find similar-size containers for collecting soil. Small resealable plastic bags will work too. Once you have several soil samples, arrange them in groups so that you have two or three per set that look as different as possible. Label them with letters and make a key that says where they came from (e.g., A = Miami Beach, B = Mount Saint Helens, C = Great Smoky Mountains, Tennessee). Always include a sample of local soil, too.
2. Start your lesson by asking students if soil is the same everywhere. Ask them if they have been anywhere that the soil is noticeably different from the soil around their home. If you live in a strictly urban area, it’s possible that students have not seen the natural soil in the area. (Of course this is possible anywhere,
depending on how much experience students have being outdoors both at home and school.)
3. Give two or three soil samples to small groups of students and ask them to fold the student worksheet and then answer the questions on the top half of the worksheet. Give them time to discuss with other group members where they think the soils originated.
4. Give students a key that tells where the soils came from. Ask students to compare the original locations of the soils (as shown on the key) with their predictions and complete the bottom half of their worksheets.
Grade-level considerationsFor primary grades, simplify by using just two soil samples. Consider using sand and a dark soil. Primary grade students can usually identify that sand is the type of soil on a beach or in the desert.
assessment/next stepsStudents should be assessed based on their rea-soning regarding where the soil came from, not on accuracy of a specific location where the soil originated. After this lesson, you may wish to ask students to bring back soils from places they visit, perhaps from a grandparent’s home or some-where they visit during school holidays.
sample Discussion Questions• Describe the appearance of the soil in the local
area.
• Have you ever been anywhere that the soil looked different? Where? Why do you think some soils are different colors from others?
s o i l s F r o m H e r e a n d t h e r e
Topic: Soil and Climate
Go to: www.scilinks.org
Code: BOS031
Copyright © 2012 NSTA. All rights reserved. For more information, go to www.nsta.org/permissions.

93Bringing outdoor science in: T h r i f T y c l a s s r o o m l e s s o n s 93Bringing outdoor science in: T h r i f T y c l a s s r o o m l e s s o n s
name: ___________________________________ Date: _________
Fold your paper at the dotted line. Follow your teacher’s instructions. Record your observations of the soils you have.____________________________________________________________________________________________________________________________________________________________________________________________________________
Make a prediction about their original location. ____________________________________________________________________
What evidence makes you choose that location? ________________________________________________________________________________________________________________________________________
(Once all questions above are answered, your teacher will give instructions before you unfold.)
- - - - - - - - - - - - - - - - - - - - - -- - - - - FOLD HERE- - - - - - - - - - - - - - - - - - - - - - - - - -
Now you know the actual location where your soils came from. How do the actual locations differ from your prediction?________________________________________________________________________________________________________________________________________________________________________________________________________________________________________________________________________________________________________________________________________________________________________________________________________________________
Describe the soil that is found in the place you originally predicted. Is the soil there like the sample you had in any way? Explain. ________________________________________________________________________________________________________________________________________________________________________________________________________________________________________________________________________________________________________________________________________________________________________________________________________________________
____________________________________________________________________
s o i l s F r o m H e r e a n d t h e r e
Copyright © 2012 NSTA. All rights reserved. For more information, go to www.nsta.org/permissions.

94 NatioNal ScieNce teacherS aSSociatioN
Topic: What Is an Earthquake?
Go to: www.scilinks.org
Code: BOS032
objectiveStudents will identify factors that can cause changes in the surface of the Earth.
Why/how to Use This lessonStudents may have the misconception that landforms on Earth do not change—or at the very least they may think that landforms
do not change often. This lesson will help identify factors that cause or contribute to changes in the Earth’s surface features. If you teach a unit on storms or natural disasters, this would be a good lesson to include.
materialsplastic containers, soil, card stock paper or thin cardboard, scissors, toy cars, toy houses and buildings, twigs, digital camera (optional), stu-dent worksheet
Procedures and Tips 1. Discuss the various ways that the Earth’s
surface can change and how it affects human life (earthquakes, fault lines, volcanoes, erosion).
2. Following the suggestions below, you may wish to make a model that will represent an area that will be hit by an earthquake or a moving fault line.
3. Using a plastic container (shoe box size) for each of several cooperative groups in your classroom, cut card stock or cardboard into pieces that will fit in the container. Bend them once so that they are able to fold and be held down by the soil, yet have a tab or piece that sticks up above the soil. Place them carefully and then fill the container about halfway with soil.
4. Use toy cars or buildings to make a scene of a town or neighborhood. Students can add
twigs to represent trees and use other natural items found in the school yard as they see fit.
5. Once students have their models set up, they can record how it looks with a digital camera or a sketch.
6. Students can pull the tab on the “fault line” and pull it completely out of the container, which should dislodge some of the soil and move the objects that are in the scene.
7. Students should create another sketch or take an “after” photo of the scene.
8. On the worksheet, students should record what they have seen.
9. Another way to do this would be to leave out the cardboard and simply slide the container back and forth vigorously on the tabletop. You may wish to have students measure the distance they slide it each way as a means of comparison among groups. Assign each group a different length (e.g., group 1 will slide it 20 cm each way, group 2 will slide it 30 cm each way, etc.).
Grade-level considerationsThis lesson would be better as a demonstration for primary grade students. You could have one set of materials in a center that students could later visit in small groups to repeat what you have demonstrated.
assessment/next stepsAssess students on their responses on the student worksheet. You may wish to repeat the process with a larger container, giving students the opportunity to be more creative and test additional setups and hypotheses.
sample Discussion QuestionsWhat are some of the factors that change land? How do these changes affect what the land looks like?
e a r t h ’ s c h a n g i n g s u r f a c e
Copyright © 2012 NSTA. All rights reserved. For more information, go to www.nsta.org/permissions.

95Bringing outdoor science in: T h r i f T y c l a s s r o o m l e s s o n s 95Bringing outdoor science in: T h r i f T y c l a s s r o o m l e s s o n s
name: ___________________________________ Date: _________
Write a description of a fault line and an earthquake.________________________________________________________________________________________________________________________________________
Draw a sketch of your model of an area with a fault line.
What happened to the scene when you activated the fault line? ____________________________________________________________________________________________________________________________________________________________________________________________________________
Draw an updated sketch that shows what happened after the fault line shift.
What changed? How is this like real life?________________________________________________________________________________________________________________________________________________________________________________________________________________________________________________________________________________
e a r t h ’ s c h a n g i n g s u r f a c e
Copyright © 2012 NSTA. All rights reserved. For more information, go to www.nsta.org/permissions.

96 NatioNal ScieNce teacherS aSSociatioN
objectiveStudents will study soil erosion caused by water.
Why/how to Use This lessonErosion often changes the surface of the Earth in very visible ways. Students should be able to identify the effects of erosion as
one of the many forces that affects the Earth’s surface. More than likely, there is erosion some-where in your school yard or nearby.
materialsphotographs of eroded soil, rectangular plastic con-tainers, soil, water, cup or beaker for water, a vari-ety of household and natural items that can be used to try to control erosion in the student demonstra-tions, digital camera (optional), student worksheet
Procedures and Tips1. Show students some photographs of eroded
soil. These may be from a book, the internet, or ideally from the school yard or other local area. Ask students to describe what they see.
2. Ask students to watch your demonstration carefully. Using a plastic container with a layer of about 10 cm of soil, tilt it upward at one end and pour water down the center of the soil. Ask students to describe what they see.
3. Divide students into groups of about four students each and give each group a plastic container, at least the size of a shoe box. They should fill it with about the same amount of soil as in the demonstration. All of the containers should be the same size, and the amount of soil in the container should be measured so that it is uniform. Keep one dry container of soil for a control.
4. Ask students to make a plan to slow down the erosion that they saw in your demonstration.
5. Give students a variety of materials with which they may attempt to control erosion in their containers. These may be common household items such as plastic wrap, popsicle sticks/craft sticks, toothpicks, or paper clips; natural items such as small rocks, sticks, or mulch; or any other object that you think would work.
6. After students have an opportunity to create barriers to erosion or preventive measures, each group should pour a consistent amount of water onto the soil with the container tilted up at a uniform level.
7. Pour the same amount of water in the container that only had soil and no preventive measures.
8. Ask students to compare what happened. Based on the amount of soil that stayed in place, find out which group had the most effective erosion control.
Grade-level considerationsFor primary grades make this a whole-class proj-ect with only two containers. Allow students to help decide what to put in to prevent or reduce erosion. Students can draw a picture of what hap-pened and write words or a sentence to describe their drawings.
assessment/next stepsAssess students for reasonable responses on the worksheet. As a next step, consider going outdoors to document soil erosion in the school yard with digital cameras. Students can write about erosion in science journals, and they can compare the same spot a month later to see if it has changed.
sample Discussion Questions• Describe what happens to bare soil when
there is a large amount of rain.
• Have you ever seen erosion? Describe what you saw.
e r o s i o n
Topic: Soil Erosion
Go to: www.scilinks.org
Code: BOS033
Copyright © 2012 NSTA. All rights reserved. For more information, go to www.nsta.org/permissions.

97Bringing outdoor science in: T h r i f T y c l a s s r o o m l e s s o n s 97Bringing outdoor science in: T h r i f T y c l a s s r o o m l e s s o n s
name: ___________________________________ Date: _________
What happened to the soil when the water was poured?________________________________________________________________________________________________________________________________________
Choose materials to make a barrier to erosion. What will you use? How will you make your barrier? Write your plan in at least three steps.________________________________________________________________________________________________________________________________________________________________________________________________________________________________________________________________________________
Make a sketch of your barrier on the left, and then pour the water. Make a sketch on the right that shows what happened after the water was poured.
Your barrier: Show what happened afterward:
e r o s i o n
Copyright © 2012 NSTA. All rights reserved. For more information, go to www.nsta.org/permissions.

98 NatioNal ScieNce teacherS aSSociatioN
objectiveStudents will model the characteristic changing shape of a barrier island and will discover the role of a barrier island in a coastal system.
Why/how to Use This lessonBarrier islands are an important ecological and geological part of shorelines. When there is an oil spill or hurricane, it is the barrier island that stands between danger and the mainland. Use this lesson to support standards in Earth science, and consider a further study of barrier island ecol-ogy that would address life science standards.
materialsrectangular plastic containers; play sand; water; plastic representations of trees, buildings, fences, cars, and animals (optional); student worksheet
Procedures and Tips1. Find an aerial photograph of a barrier island
to show students; you can search for barrier island photographs at the U.S. Geological Survey website (www.usgs.gov). Ask students what role they think a barrier island plays in the coastal area.
2. Ask students to help you build models of barrier islands and to demonstrate its changing nature. Ask them what materials might be helpful.
3. Add sand and enough water to moisten it to a rectangular plastic container. Have students shape the sand into a model of the mainland shore and a barrier island in front of it. See the figure at the end of this lesson for a top view of the model.
4. Add enough water to model the ocean at the shoreline and to surround the barrier island model. If you are using plastic containers that are about the size of shoe boxes, it works well
to have the “shore” at one of the shorter ends so that the water has plenty of length to move back and forth.
5. The plastic container should then be gently rocked back and forth toward the shore so that water moves back and forth around the barrier island. Compare this to what happens when the tides go in and out twice a day.
6. Students should be able to observe significant changes in the barrier island. They should sketch the changes they see and write about them.
7. Check for understanding with a class discussion.
Grade-level considerationsMake this a demonstration lesson for primary grade students rather than having them work in groups.
assessment/next stepsInformal assessment will include teacher obser-vations during the activity and reasonable responses on the student worksheet. If you have given students relatively small containers for group work, the next step might be using a much bigger container for a larger model. If you live in a coastal area, consider a field trip to visit barrier islands, or invite a scientist who has researched barrier islands in your area. Coastal geologists would be a good resource, as would information from organizations such as the National Oceanic and Atmospheric Administration (NOAA; www.seagrant.noaa.gov) and Centers for Ocean Sciences Education Excellence (COSEE; www.cosee.net).
sample Discussion Questions• What is the meaning of the word barrier?
• What do you think we can demonstrate with this barrier island model?
• How do barrier islands change over time?
B a r r i e r i s l a n d s
Copyright © 2012 NSTA. All rights reserved. For more information, go to www.nsta.org/permissions.

99Bringing outdoor science in: T h r i f T y c l a s s r o o m l e s s o n s
B a r r i e r i s l a n d s
This is a representation of what the barrier island models should look like from above:
Shore Water Island Water
Copyright © 2012 NSTA. All rights reserved. For more information, go to www.nsta.org/permissions.
100 NatioNal ScieNce teacherS aSSociatioN
name: ___________________________________ Date: _________
Write a definition of a barrier island in your own words. ____________________________________________________________________________________________________________________________________________________________________________________________________________
Draw a sketch of your model of a barrier island.
What happened to the island when you moved the water to simulate waves? ________________________________________________________________________________________________________________________________________
After moving the water back and forth at least 10 times, draw an updated sketch.
What changed? How is this like real life?____________________________________________________________________________________________________________________________________________________________________________________________________________
B a r r i e r i s l a n d s
Copyright © 2012 NSTA. All rights reserved. For more information, go to www.nsta.org/permissions.