roof contour by bob parrish - labellemodels.com
TRANSCRIPT

Roof ContourBy Bob Parrish
This text will show you how to shape the roof contour on Labelle passenger and trolley kits.
The height of the clerestory on the two types of kits is different. Passenger kits have a
slightly taller clerestory and thus use a different jig kit. What will be shown here is a trolley
application but the steps to the passenger are essentially the same.
Jig kits available from Labelle Woodworking are as follows: #700 for all passenger
applications and #701 for trolley applications, including passenger, freight motor and trailer boxes.
This is a significantly improved jig over previous offerings from the company.
At this time the jig kits are marketed separately although the manufacturer is
contemplating making them a standard part of the various kits.
Shown here, a #700 passenger jig kit as supplied from the manufacturer. At the right are the profile
shapes for the rounding of the roof ends. At the left are the four pieced necessary to extend the clerestory
overhang down to the roof end.
When held up to a light, it is clear which lines are cut through and which are
reference lines for final rounding. The laser cut jig offers trace lines for reference
and large side tabs, marked L and R for ease of handling and resistance to splitting
along the grain of the wood. Cut out the various parts as needed and set aside others
for later. The last part to be used will be the upper roof rounding jig.

To start:
Shaping of the lower roof is the first step. The templates are clearly marked
and need to be sanded with a finger nail board until the suitable profile is obtained.
As passenger car roofs are more square than trolley roofs, the finished appearance
will vary between the two types of cars. At the inner edge, where the roof extension
board is concerned, this shape is nearly identical for both models.
Identify the suitable roof extension piece for each location on the roof. Here
is an example using the left. Visible is the trace line that will ultimately be the upper
shape of the roof line. Below offers a very prototypical appearance of the hollow
area as the upper roof curves down to the lower. All of the material above the trace
line will be sanded away during final finishing.

Visible now is the shaped lower roof and the clearing of the upper roof
overhang to make way for the curved insert piece. The knife is cutting back to the
end of the insert piece.

Here the piece is held up for fitting and final shaping.
Here is the final appearance from the top of insert. The piece should be glued
in and then go on to the next. Once all four corners are competed, a sanding block
can be used to bring down the insert pieces to the roof line. At first sand in the length
of the roof so as not to break out some of the wood insert piece, Then proceed to
shape over the upper roof and bring down to the lower edge of the roof assembly.
Use the jig piece marked “upper roof” to establish this shape. Upon close
examination of the construction sheets provided in the kit, it will be observed that the
rounded ends of the trolley cars offers a different profile than the passenger cars.
To finish the roof:
There are many “favorite” ways to finish out the roof. The wood grain is very
hard to disguise under model paints, whether solvent or acrylic base. One option is
to simulate a tar paper roof covering using Floquil grimy black paint. This
technique involves strips of Kleenex that are cut to a scale three, four of five foot
wide strips and peeled down to a single ply. W et the roof with a color paint of
choice. While the paint is wet, apply a strip of white Kleenex to the paint. Then seal
down with another layer of paint, getting the whole thing very wet. Allow the paint
to flow out onto the tissue in areas where there is no roof just to stiffen the tissue.
Tug around the edges and pull out flat and then allow to dry thoroughly. It will
require separate steps for the upper and lower roof areas.
When the paint is dry, use a fresh blade and trim along the edge of the wood to
remove excess tissue. It will peel away very easily and cleanly due to the dried
paint. If the tissue edges ever come loose in handling, a small line of thinned white
glue will be a very permanent remedy.
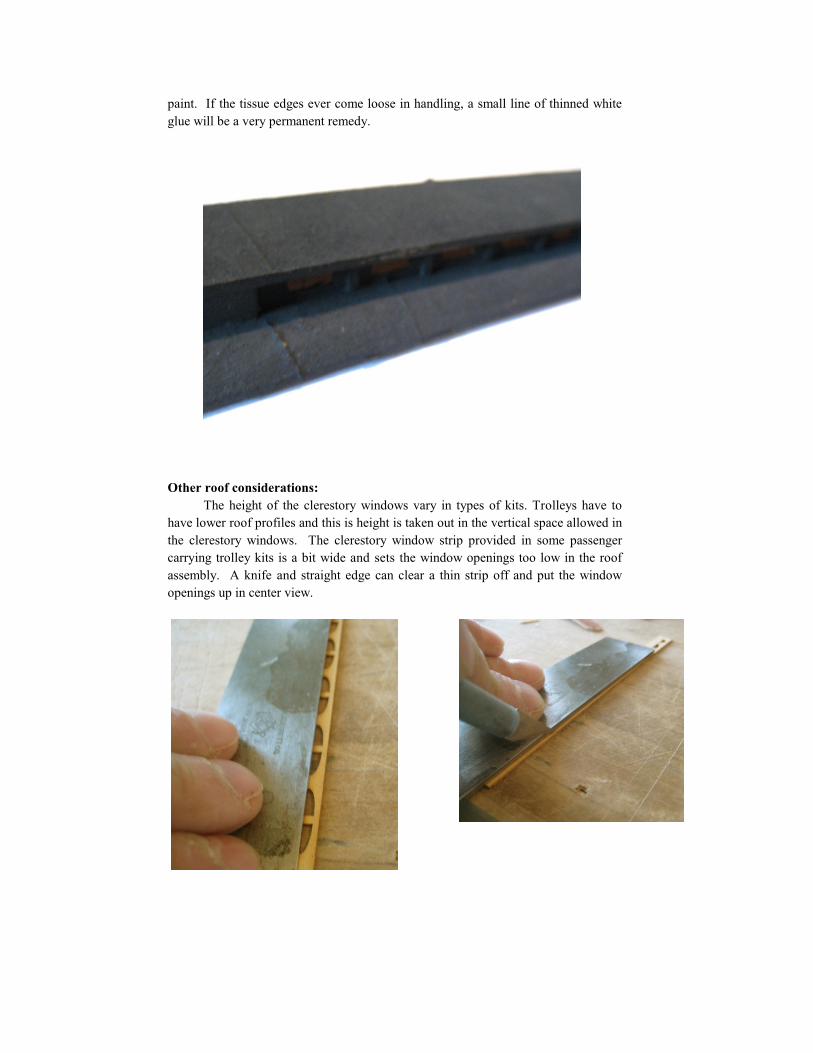
Other roof considerations:
The height of the clerestory windows vary in types of kits. Trolleys have to
have lower roof profiles and this is height is taken out in the vertical space allowed in
the clerestory windows. The clerestory window strip provided in some passenger
carrying trolley kits is a bit wide and sets the window openings too low in the roof
assembly. A knife and straight edge can clear a thin strip off and put the window
openings up in center view.

The final construction tip is one regarding how to put the mullion strips
around the clerestory window openings. To resist having to cut a bunch of very
small pieces try this. Cut pieces about the width of the window strip and glue them
appropriately as shown in the instruction sheet. Wider spaces should have wider
mullion strups. After the glue is dried, cut the mullion pieces down to the correct
height to allow them to fit into the roof assembly. The photos below show the laying
out of the mullion strips for gluing and subsequent trimming to length and the fitted
mullions in the roof assembly on a passenger application.