r&s tsma master image supplement - rohde & schwarz · supplement master image supplement...
TRANSCRIPT

R&S®TSMAAutonomous Mobile Network ScannerSupplement Master Image
Supp
lemen
t Mas
ter Im
age
1178.3857.02 ─ 03(;ÜVÇ2)

ContentsR&S®TSMA
2Supplement Master Image 1178.3857.02 ─ 03
Contents1 Master Image.......................................................................................... 2
1.1 Prepare a TSMA Image Stick / TSMA Recovery Stick................................................3
1.1.1 USB Stick Preparation.................................................................................................... 3
1.1.2 Copy File Contents on the USB Stick (Image Stick)....................................................... 6
1.1.3 Copy File Contents on the USB Stick (Recovery Stick).................................................. 6
1.2 Install the RSRecoveryCreator Tool ...........................................................................6
1.3 Capture a TSMA Image (TSMA Image Stick).............................................................. 7
1.4 Create a TSMA Recovery Stick.................................................................................. 10
1.5 Deploy a TSMA image from a TSMA Recovery Stick...............................................12
1 Master ImageThe process of creating a master image of a R&S TSMA device and deploying thismaster image to other R&S TSMA devices is split into the following main steps.
● Prepare a TSM Image Stick and a TSMA Recovery Stick.● Install the RSRecoveryCreator tool on a PC.● Capture a TSMA Image of the master device using the TSMA Image Stick.● Create a TSMA Recovery Stick from a captured TSMA Image using the
RSRecoveryCreator tool.● Recover the master image on a different R&S TSMA device using the TSMA
Recovery Stick.

Master ImageR&S®TSMA
3Supplement Master Image 1178.3857.02 ─ 03
Figure 1-1: TSMA Master Image - General Overview
1.1 Prepare a TSMA Image Stick / TSMA Recovery Stick
The following steps must be done only once.
To create a TSMA Image Stick you need the following:● USB 3.0 stick (minimum 16 GB memory space)● ImageStick_<version>.zip● PC with MS Windows 7 or higher operating system
To create a TSMA Recovery Stick you need the following:● USB 3.0 stick (minimum 16 GB memory space)● Recovery_<version>.zip● PC with MS Windows 7 or higher operating system
The ImageStick_<version>.zip and Recovery_<version>.zip can be down-loaded from https://www.rohde-schwarz.com/software/tsma/.
1.1.1 USB Stick Preparation
In order to get a TSMA Image Stick / TSMA Recovery Stick out of a USB stick, thestick has to be formatted and made bootable.
Prepare a TSMA Image Stick / TSMA Recovery Stick
Master ImageR&S®TSMA
4Supplement Master Image 1178.3857.02 ─ 03
Format the USB stick
1. Plug the USB stick into the USB port the PC.
2. Open the Windows explorer.
3. Select the USB device.
4. Open the context menu with a right-mouse click and select "Format".
The formatting of the stick starts.
When the formatting has finished, continue with the following procedure to make theUSB stick bootable.
Make the USB stick bootable
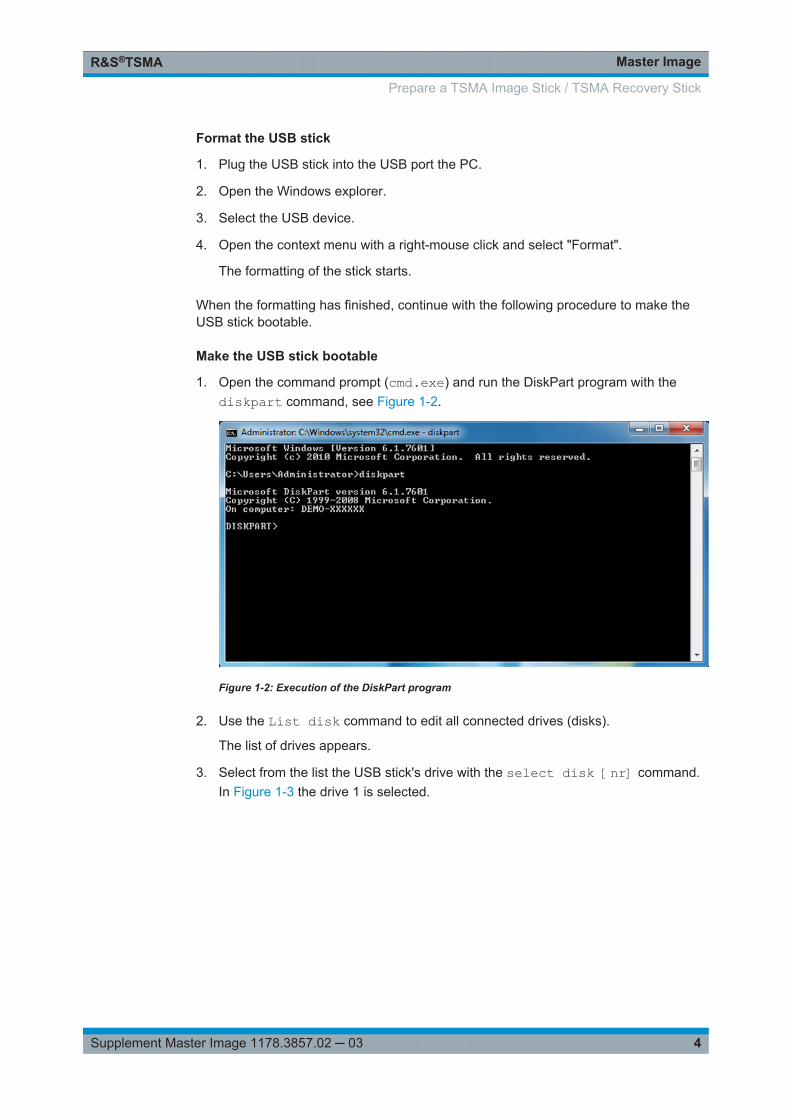
1. Open the command prompt (cmd.exe) and run the DiskPart program with thediskpart command, see Figure 1-2.
Figure 1-2: Execution of the DiskPart program
2. Use the List disk command to edit all connected drives (disks).
The list of drives appears.
3. Select from the list the USB stick's drive with the select disk [nr] command.In Figure 1-3 the drive 1 is selected.
Prepare a TSMA Image Stick / TSMA Recovery Stick

Master ImageR&S®TSMA
5Supplement Master Image 1178.3857.02 ─ 03
Figure 1-3: USB Stick drive and partition selection
4. To see the available partition of the selected drive use the list partition com-mand.
The list of partitions appears.
5. Select the drive's partition. Use the select partition 1 command.
6. Make the selected partition active with the active command.
The USB stick is now bootable. End the DiskPart program with exit, see Fig-ure 1-4.
Figure 1-4: Leaving the DiskPart program
Prepare a TSMA Image Stick / TSMA Recovery Stick

Master ImageR&S®TSMA
6Supplement Master Image 1178.3857.02 ─ 03
1.1.2 Copy File Contents on the USB Stick (Image Stick)
1. Copy ImageStick_<version>.zip in the root directory of the prepared USBstick, which will be used as TSMA Image Stick.
2. Select the zip-file and open the context menu with a right-mouse button click.
The menu opens automatically.
3. Select "Extract All".
Specify a folder for storing the copied archive contents.
4. Select the USB stick from the list of destinations and confirm the selection bypressing "OK".
The archive contents are copied. This can take several minutes.
This USB stick can now be used as TSMA Image Stick.
1.1.3 Copy File Contents on the USB Stick (Recovery Stick)
1. Copy RecoveryStick_<version>.zip in the root directory of the preparedUSB stick, which will be used as TSMA Recovery Stick.
2. Select the zip-file and open the context menu with a right-mouse button click.
The menu opens automatically.
3. Select "Extract All".
Specify a folder for storing the copied archive contents.
4. Select the USB stick from the list of destinations and confirm the selection bypressing "OK".
The archive contents are copied. This can take several minutes.
This USB stick can now be used as TSMA Recovery Stick.
1.2 Install the RSRecoveryCreator Tool
The "Recovery Creator" application must be installed on PC. TheRecoveryCreator_Setup_<version>.exe can be downloaded from https://www.rohde-schwarz.com/software/tsma/.
This application allows to upload data from the TSMA Image Stick or hard disk to aRecovery Stick.
Install the RSRecoveryCreator Tool
Master ImageR&S®TSMA
7Supplement Master Image 1178.3857.02 ─ 03
1.3 Capture a TSMA Image (TSMA Image Stick)
The capture of the image (partitions are GRUB, SSYTEM, DATA, BACKUP) takes around15 minutes with USB 3.0 stick and even longer with USB 2.0 stick.
As a prerequisite, a user backup must exist on the master device (see TSMA UserManual, Chapter 4.4 User Backup and Restore).
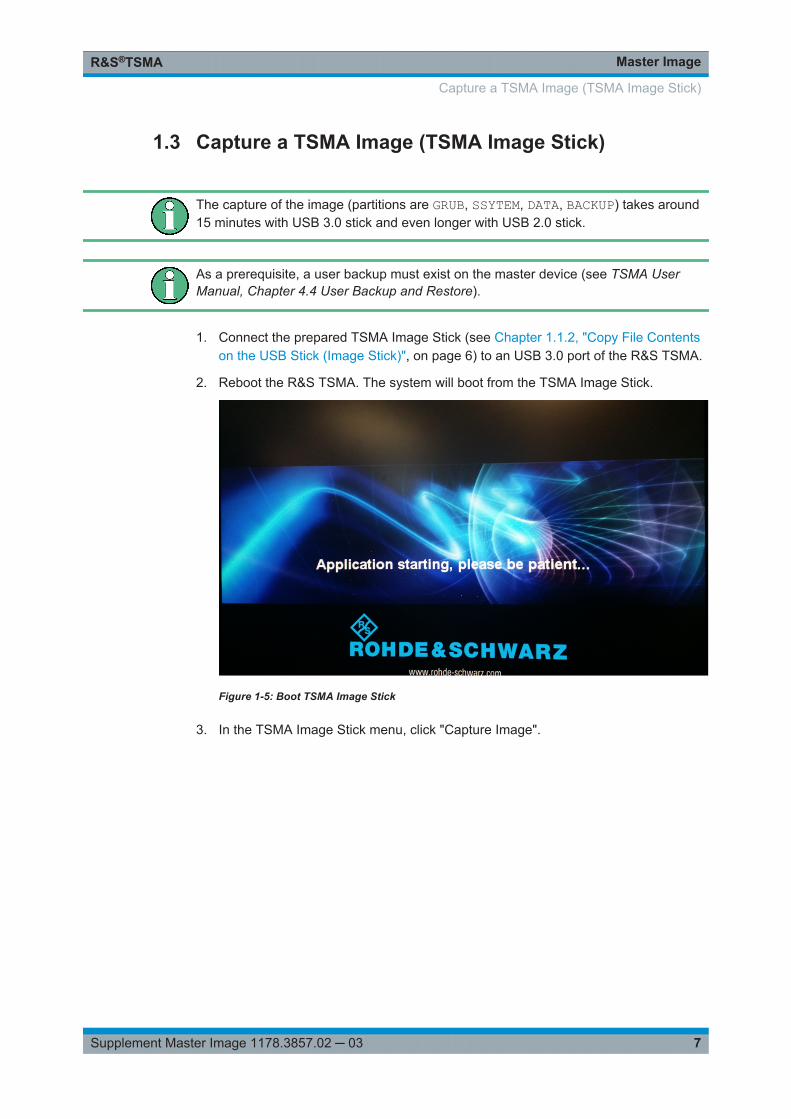
1. Connect the prepared TSMA Image Stick (see Chapter 1.1.2, "Copy File Contentson the USB Stick (Image Stick)", on page 6) to an USB 3.0 port of the R&S TSMA.
2. Reboot the R&S TSMA. The system will boot from the TSMA Image Stick.
Figure 1-5: Boot TSMA Image Stick
3. In the TSMA Image Stick menu, click "Capture Image".
Capture a TSMA Image (TSMA Image Stick)

Master ImageR&S®TSMA
8Supplement Master Image 1178.3857.02 ─ 03
Figure 1-6: TSMA Image Stick menu
4. When the Status has changed to "Finished", click "OK" and then "Reboot".
Figure 1-7: TSMA Image Stick - Image capturing finished
Capture a TSMA Image (TSMA Image Stick)

Master ImageR&S®TSMA
9Supplement Master Image 1178.3857.02 ─ 03
Figure 1-8: TSMA Image Stick menu - Reboot
5. Remove the TSMA Image Stick. The R&S TSMA will be rebooted.
Figure 1-9: Rebooting R&S TSMA
Capture a TSMA Image (TSMA Image Stick)

Master ImageR&S®TSMA
10Supplement Master Image 1178.3857.02 ─ 03
The captured image files (BACKUP.wim, DATA.wim, GRUB.wim, SYSTEM.wim) arestored on the TSMA Image Stick in the directory \Device\Images.
Figure 1-10: Captured Image Files on a TSMA Image Stick
The TSMA Image Stick can now be used as source for the creation of a TSMA Recov-ery Stick (see Chapter 1.4, "Create a TSMA Recovery Stick", on page 10). Theimage files can also be saved on a hard disk or on a network drive.
A master image consists always of the 4 image files BACKUP.wim, DATA.wim,GRUB.wim, SYSTEM.wim.
1.4 Create a TSMA Recovery Stick
Creating a TSMA Recovery Stick requires the following:● TSMA Recovery Stick● TSMA Master Images (GRUB, SYSTEM, DATA, BACKUP), available on TSMA Image
Stick or PC.● "RSRecovery Creator" tool
Create a TSMA Recovery Stick
1. Plug a prepared TSMA Recovery Stick (see Chapter 1.1.3, "Copy File Contents onthe USB Stick (Recovery Stick)", on page 6) in one of the USB 3.0 ports of yourPC.
2. Start the "Recovery Creator" application by clicking the desktop icon.
Create a TSMA Recovery Stick

Master ImageR&S®TSMA
11Supplement Master Image 1178.3857.02 ─ 03
After starting, the application checks the Recovery Stick's data configuration andstructure and reads it out. If some file contents of the TSMA Recovery Stick areincorrect or missing, the application issues an error message and offers to repeatthe procedure. Otherwise, the procedure continues as described in steps 3 and 4.
3. The "Images" tab offers download and upload of particular image files.
Figure 1-11: Selection of a TSMA Image for Transfer
4. Use the "Upload" function associated to the file' s directory and select the file youwant to transfer.
Note: The file transfer must be done for all partitions:● Drive A: "GRUB.wim"● Drive B: "SYSTEM.wim"● Drive C: "BACKUP.wim"● Drive D: "DATA.wim"The data source can be either the TSMA Image Stick or a PC storage location.
5. Press "Apply" to complete the selection and start file transfer onto the TSMARecovery Stick.
The selected TSMA image files are copied from the specified directory to theRecovery Stick (/Device/Images). The progress of uploading is displayed.
6. When the file transfer has finished for any image file (see Figure 1-12), remove theTSMA Recovery Stick.The TSMA Recovery Stick is now ready to deploy a master image onto any otherTSMA (see )Chapter 1.5, "Deploy a TSMA image from a TSMA Recovery Stick",on page 12).
Create a TSMA Recovery Stick

Master ImageR&S®TSMA
12Supplement Master Image 1178.3857.02 ─ 03
Figure 1-12: File Transfer Finished - "The operation completed successfully"
As long as the procedure is running neither the PC should be switched off nor theRecovery Stick removed.
1.5 Deploy a TSMA image from a TSMA Recovery Stick
Deployment of a TSMA image requires a TSMA Recovery Stick containing the fourmaster image files (GRUB.wim, SYSTEM.wim, DATA.wim, RECOVERY.wim).
1. Connect the TSMA Recovery Stick to an USB 3.0 port of the new R&S TSMAdevice.
2. Reboot the R&S TSMA. The R&S TSMA boots from the Recovery Stick and thestart page of the Recovery Stick is displayed.During the reboot, information about the target device and the image will bechecked. If all requirements are fulfilled, click "Start Recovery" to start the recoveryprocedure, otherwise an error message will be displayed.
Deploy a TSMA image from a TSMA Recovery Stick

Master ImageR&S®TSMA
13Supplement Master Image 1178.3857.02 ─ 03
3. In the "Recovery TSMA Progress" window, the current status of the recovery proc-ess is displayed.
4. After a successful recovery, remove the TSMA recovery stick.
5. The R&S TSMA will be rebooted.
Deploy a TSMA image from a TSMA Recovery Stick

Master ImageR&S®TSMA
14Supplement Master Image 1178.3857.02 ─ 03
© 2017 Rohde & Schwarz GmbH & Co. KGMühldorfstr. 15, 81671 München, GermanyPhone: +49 89 41 29 - 0Fax: +49 89 41 29 12 164Email: [email protected]: www.rohde-schwarz.comSubject to change – Data without tolerance limits is not binding.R&S® is a registered trademark of Rohde & Schwarz GmbH & Co. KG.Trade names are trademarks of their owners.
Throughout this manual, products from Rohde & Schwarz are indicated without the ® symbol , e.g.R&S®TSMA is indicated as R&S TSMA.