rules - against the odds · then skim through the charts and rules, reading all ... culty...
TRANSCRIPT
RULES of PLAY
LANDSKNECHT PUBLISHING SERVICES, INC.
Part #A114R Printed in the USA Copyright © 2015 Richard H. Berg
1.0 INTRODUCTION1.1 Important Terms
2.0 COMPONENTS2.1 The Game Map2.2 The Counters2.3 Markers2.4 Player Aid Charts (PAC)
3.0 CONTROL3.1 Control of Areas3.2 Control of Regions
4.0 STARTING PLAY4.1 Selection Initiative4.2 Starting Tribe Determination4.3 Secondary Tribe Draw
5.0 SEQUENCE OF PLAY5.1 The Game Turn
6.0 ADMINISTRATION PHASE6.1 Determine Play Order Segment6.2 Replenish Counter-hand Segment6.3 Collect Resource Points Segment
7.0 OPERATIONS PHASE7.1 The Rounds7.2 Player’s Impulse
8.0 END PHASE8.1 Winter Attrition Segment8.2 Disperse Tribes Segment8.3 Victory Point Segment
GAME DESiGnRICHARD H. BERG
DEVELOPERLEMBIT TOHvER
GRAPHiC DESiGnMARk MAHAFFEY
PRODUCTiOn C. RAwLING
EDiTinG JACk BECkMAN
PLAYTESTinG
Jim Brown Peter Jones Dave Smith
Philip Tohver Henry Yip
The Sunday Simulators
9.0 RESOURCE POINTS9.1 Acquiring RPs9.2 Use of RPs
10.0 ACTIONS10.1 Player Turn Actions10.2 Raising Tribes10.3 Stacking10.4 War Horde10.5 Movement10.6 Battle
11.0 THE ROMANS11.1 Guidelines11.2 Roman Actions
12.0 THE GERMANS12.1 General Rules
13.0 OPPORTUNITIES13.1 General Rules13.2 Revolts
14.0 ADvANCED GAME14.1 Rules Adjustments14.2 Roman Area Subjugation14.3 Roman Siege
2 VERCINGETORIX: TWILIGHT OF THE GAULS Rules of Play
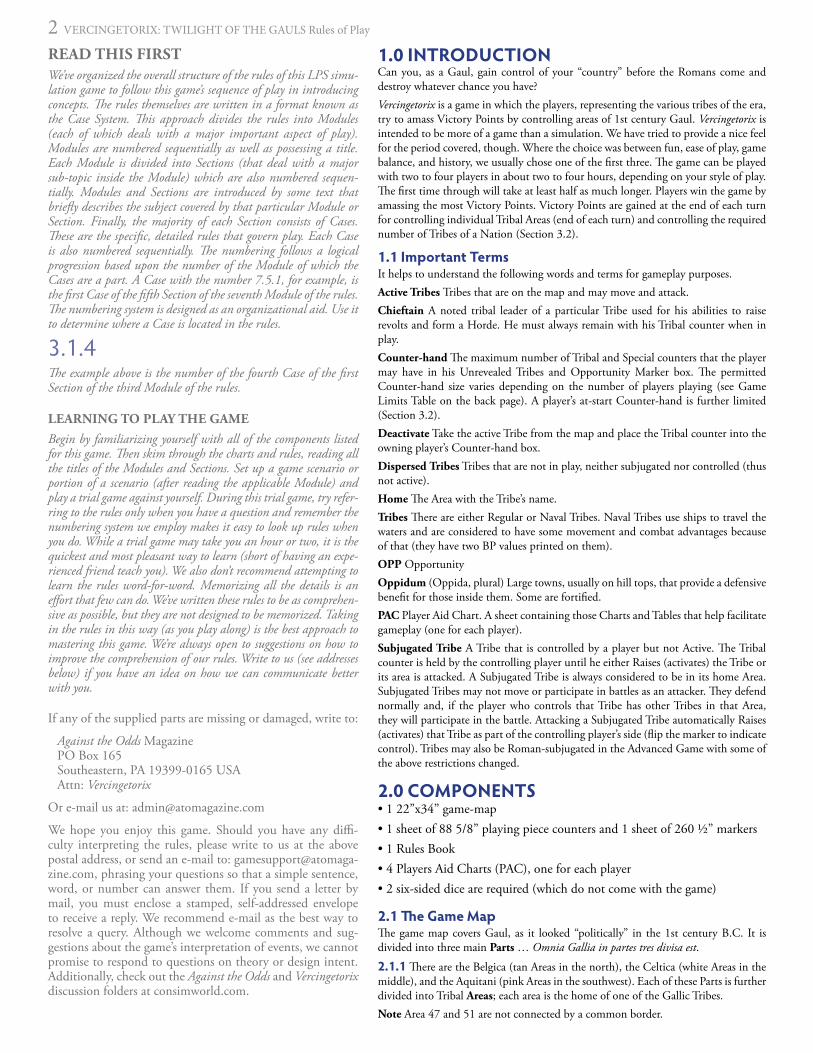
1.0 INTRODUCTION Can you, as a Gaul, gain control of your “country” before the Romans come and destroy whatever chance you have?Vercingetorix is a game in which the players, representing the various tribes of the era, try to amass Victory Points by controlling areas of 1st century Gaul. Vercingetorix is intended to be more of a game than a simulation. We have tried to provide a nice feel for the period covered, though. Where the choice was between fun, ease of play, game balance, and history, we usually chose one of the first three. The game can be played with two to four players in about two to four hours, depending on your style of play. The first time through will take at least half as much longer. Players win the game by amassing the most Victory Points. Victory Points are gained at the end of each turn for controlling individual Tribal Areas (end of each turn) and controlling the required number of Tribes of a Nation (Section 3.2).
1.1 Important TermsIt helps to understand the following words and terms for gameplay purposes.Active Tribes Tribes that are on the map and may move and attack.Chieftain A noted tribal leader of a particular Tribe used for his abilities to raise revolts and form a Horde. He must always remain with his Tribal counter when in play.Counter-hand The maximum number of Tribal and Special counters that the player may have in his Unrevealed Tribes and Opportunity Marker box. The permitted Counter-hand size varies depending on the number of players playing (see Game Limits Table on the back page). A player’s at-start Counter-hand is further limited (Section 3.2). Deactivate Take the active Tribe from the map and place the Tribal counter into the owning player’s Counter-hand box. Dispersed Tribes Tribes that are not in play, neither subjugated nor controlled (thus not active). Home The Area with the Tribe’s name.Tribes There are either Regular or Naval Tribes. Naval Tribes use ships to travel the waters and are considered to have some movement and combat advantages because of that (they have two BP values printed on them).OPP Opportunity Oppidum (Oppida, plural) Large towns, usually on hill tops, that provide a defensive benefit for those inside them. Some are fortified.PAC Player Aid Chart. A sheet containing those Charts and Tables that help facilitate gameplay (one for each player).Subjugated Tribe A Tribe that is controlled by a player but not Active. The Tribal counter is held by the controlling player until he either Raises (activates) the Tribe or its area is attacked. A Subjugated Tribe is always considered to be in its home Area. Subjugated Tribes may not move or participate in battles as an attacker. They defend normally and, if the player who controls that Tribe has other Tribes in that Area, they will participate in the battle. Attacking a Subjugated Tribe automatically Raises (activates) that Tribe as part of the controlling player’s side (flip the marker to indicate control). Tribes may also be Roman-subjugated in the Advanced Game with some of the above restrictions changed.
2.0 COMPONENTS• 1 22”x34” game-map• 1 sheet of 88 5/8” playing piece counters and 1 sheet of 260 ½” markers• 1 Rules Book• 4 Players Aid Charts (PAC), one for each player• 2 six-sided dice are required (which do not come with the game)
2.1 The Game MapThe game map covers Gaul, as it looked “politically” in the 1st century B.C. It is divided into three main Parts … Omnia Gallia in partes tres divisa est.
2.1.1 There are the Belgica (tan Areas in the north), the Celtica (white Areas in the middle), and the Aquitani (pink Areas in the southwest). Each of these Parts is further divided into Tribal Areas; each area is the home of one of the Gallic Tribes. Note Area 47 and 51 are not connected by a common border.
READ THIS FIRSTWe’ve organized the overall structure of the rules of this LPS simu-lation game to follow this game’s sequence of play in introducing concepts. The rules themselves are written in a format known as the Case System. This approach divides the rules into Modules (each of which deals with a major important aspect of play). Modules are numbered sequentially as well as possessing a title. Each Module is divided into Sections (that deal with a major sub-topic inside the Module) which are also numbered sequen-tially. Modules and Sections are introduced by some text that briefly describes the subject covered by that particular Module or Section. Finally, the majority of each Section consists of Cases. These are the specific, detailed rules that govern play. Each Case is also numbered sequentially. The numbering follows a logical progression based upon the number of the Module of which the Cases are a part. A Case with the number 7.5.1, for example, is the first Case of the fifth Section of the seventh Module of the rules. The numbering system is designed as an organizational aid. Use it to determine where a Case is located in the rules.
3.1.4The example above is the number of the fourth Case of the first Section of the third Module of the rules.
LEARNINg TO PLAy THE gAmEBegin by familiarizing yourself with all of the components listed for this game. Then skim through the charts and rules, reading all the titles of the Modules and Sections. Set up a game scenario or portion of a scenario (after reading the applicable Module) and play a trial game against yourself. During this trial game, try refer-ring to the rules only when you have a question and remember the numbering system we employ makes it easy to look up rules when you do. While a trial game may take you an hour or two, it is the quickest and most pleasant way to learn (short of having an expe-rienced friend teach you). We also don’t recommend attempting to learn the rules word-for-word. Memorizing all the details is an effort that few can do. We’ve written these rules to be as comprehen-sive as possible, but they are not designed to be memorized. Taking in the rules in this way (as you play along) is the best approach to mastering this game. We’re always open to suggestions on how to improve the comprehension of our rules. Write to us (see addresses below) if you have an idea on how we can communicate better with you. If any of the supplied parts are missing or damaged, write to:
Against the Odds Magazine PO Box 165 Southeastern, PA 19399-0165 USA Attn: Vercingetorix
Or e-mail us at: [email protected]
We hope you enjoy this game. Should you have any diffi-culty interpreting the rules, please write to us at the above postal address, or send an e-mail to: [email protected], phrasing your questions so that a simple sentence, word, or number can answer them. If you send a letter by mail, you must enclose a stamped, self-addressed envelope to receive a reply. We recommend e-mail as the best way to resolve a query. Although we welcome comments and sug-gestions about the game’s interpretation of events, we cannot promise to respond to questions on theory or design intent. Additionally, check out the Against the Odds and Vercingetorix discussion folders at consimworld.com.

VERCINGETORIX: TWILIGHT OF THE GAULS Rules of Play 32.1.2 The two red Areas in the south of Gaul are always under Roman control (the Volcae who were solidly in the pocket of the Romans). Germania—not part of Gaul—is to the east and Tribal.
2.1.3 Some Tribal Areas have Oppidum (circle or diamond in the area) that provide some defensive benefits. Some Oppida are fortified (Diamond Oppidum like Alesia [Area 34]). These have additional combat effects versus the Romans when the Oppidum is besieged in the Advanced game.
2.1.4 Player Display
A: Resource and Victory Point track for the playerB: War Horde Use this box to keep the Tribal units of a large Leader lead stack that is on the map; the units are replaced by the War Horde marker on the map.C: markers Player keeps his unused Control/Subjugated markers here.D: Unrevealed Tribes and OPP markers box Player keeps his Counter-hand here.E: Subjugated This is where a player’s subjugated Tribal counters are placed.
2.1.5 General Track This track (numbered 00 to 99) is used by each player to record his Victory Points accumulated and for the Roman Resourse and Battle Points tracking.
2.2 The Counters2.2.1 Tribes There is one counter for each of the 51 Gallic tribes in the game. Each Tribal counter displays its BP strength (note Naval have two), the Area number that is its home Area, and its stripe color, which denotes which region of Gaul it is part of.
2.2.2 Romans There are 6 counters for the Romans. Each Roman counter notes the strength (expressed as Battle Points) of the campaigning legions
(Module 9.0).
2.2.3 The Germans There is one counter for the Germanic forces (Module 10.0).
2.2.4 Opportunity (OPP) Counters
There are 7 of these which, when drawn, provide that player with varying interesting possibilities (Module 13.0).
2.3 Markers
2.3.1 Star Control Markers These are the control markers a player places in the area of a Tribe he selected at start (Case 3.2.5). The “Star” control marker indicates that no other player can control that Tribe for the entire game (although the Tribe can be subjugated during play by the Romans in the Advanced Game).
2.3.2 Control/Subjugated These markers come in one of four different player colors (yellow, grey, purple, and sky blue) and icons, helping indicate which player controls a given Area and its Tribe, and are placed on the map Areas to indicate this status.
2.3.3 Roman Subjugated Markers (Advanced Game) When the Roman wins a battle in an Area, the
Tribe of the Area becomes subjugated and the marker is placed therein.
2.3.4 Game Turn and Round Markers Used on their track on the
map to indicate which turn it currently is and which round of the turn it is.
2.3.5 Germania Lost Marker Placed on the Germanic Counter when they lose a battle for the first time in a turn.
2.3.6 Roman BP Marker (both games) and Siege Marker (Advanced Game only) Used to
denote the Roman BP strength on the General Track. The Siege marker is used to indicate the player who is
controlling the Siege. 2.4 Player Aid ChartsThere is one sheet for each player, which has the tables and charts that help to play the game.
3.0 CONTROL3.1 Control of Areas3.1.1 A Player controls a Tribal Area if he has raised its Tribe on the map (placing his control marker in the Area). Players receive 1 VP during the Victory Point Segment of each turn for each Area they control.
3.1.2 A player controls a Subjugated Tribe (which is not active on the map). Players receive 1 VP for each 2 Subjugated Tribes they control during the Victory Point Segment of each turn.
3.1.3 All other Areas are either enemy controlled or uncontrolled.
3.2 Control of RegionsAs noted (by the game, and Caesar historically), all of Gaul is divided into three parts as detailed below.
3.2.1 Players gain VPs for control of Regions in the Victory Point Segment of the last Turn of the game.
3.2.2 Aquitani (pink) To control the Aquitani region, a player must control the Area with the Oppidum and 2 other Areas.
3.2.3 Belgica (tan) To control the Belgica region, a player must control all Areas with Oppidum (7 Areas), plus all coastal Areas (3 Areas) of Belgica.
3.2.4 Celtica (white) To control the Celtica region, a player must control at least 20 of their Areas, which must include all Areas with an Oppidum.
4.0 STARTING PLAYGameplay Note There is a full listing of all the Tribes and their information on the back page of the rules to help players with these selections.
4.1 Selection Initiative4.1.1 Each player rolls a die. The player with the highest roll has Selection Initiative. Re-roll ties.
4.1.2 The player with the Initiative selects a faction color he will play and places all the counters of that color on the Player Display on the map closest to where he is sitting.
4.1.3 In a clockwise order, the other players do the same selection.
4.2 Starting Tribe Determination. The Starting Tribes are held by the selecting player for the entire course of the game. Control of the other tribes may/will change as the game progresses.
4.2.1 Each player will start the game with up to 8 BPs worth of At-Start Tribes that they will select. Each player can select a maximum of 4 tribes to reach this total BPs.
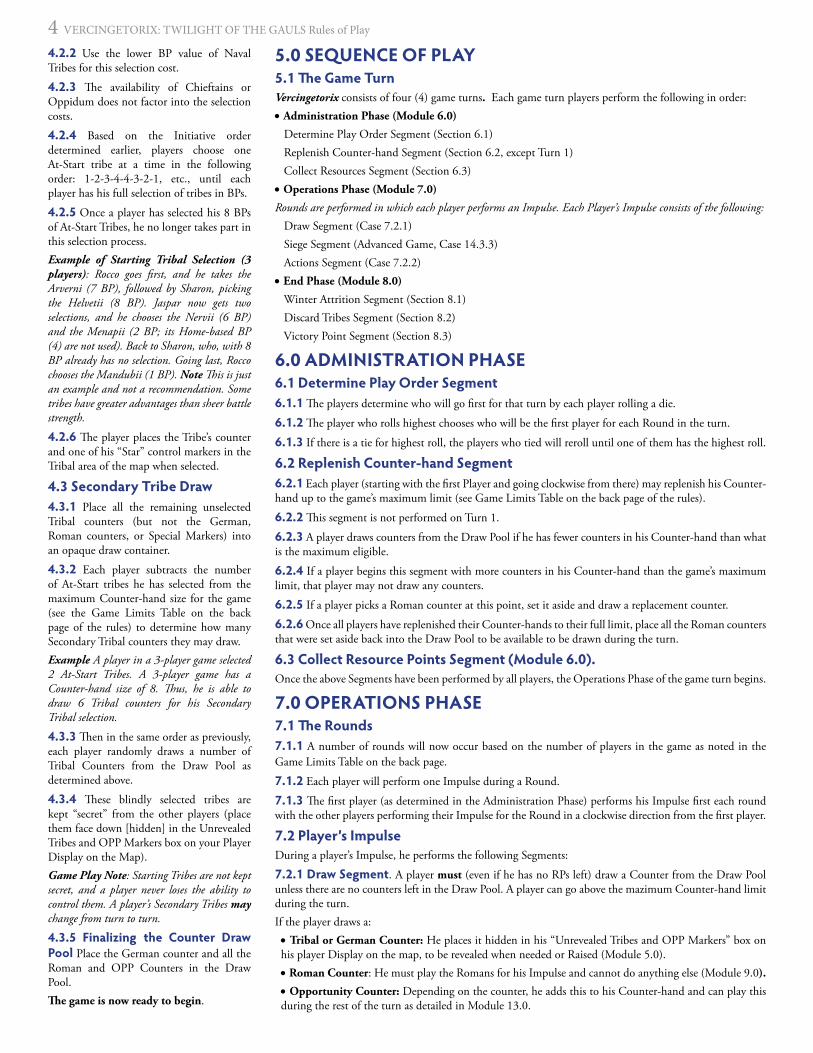
4.2.2 Use the lower BP value of Naval Tribes for this selection cost.
4.2.3 The availability of Chieftains or Oppidum does not factor into the selection costs.
4.2.4 Based on the Initiative order determined earlier, players choose one At-Start tribe at a time in the following order: 1-2-3-4-4-3-2-1, etc., until each player has his full selection of tribes in BPs.
4.2.5 Once a player has selected his 8 BPs of At-Start Tribes, he no longer takes part in this selection process. Example of Starting Tribal Selection (3 players): Rocco goes first, and he takes the Arverni (7 BP), followed by Sharon, picking the Helvetii (8 BP). Jaspar now gets two selections, and he chooses the Nervii (6 BP) and the Menapii (2 BP; its Home-based BP (4) are not used). Back to Sharon, who, with 8 BP already has no selection. Going last, Rocco chooses the Mandubii (1 BP). Note This is just an example and not a recommendation. Some tribes have greater advantages than sheer battle strength.
4.2.6 The player places the Tribe’s counter and one of his “Star” control markers in the Tribal area of the map when selected.
4.3 Secondary Tribe Draw4.3.1 Place all the remaining unselected Tribal counters (but not the German, Roman counters, or Special Markers) into an opaque draw container.
4.3.2 Each player subtracts the number of At-Start tribes he has selected from the maximum Counter-hand size for the game (see the Game Limits Table on the back page of the rules) to determine how many Secondary Tribal counters they may draw. Example A player in a 3-player game selected 2 At-Start Tribes. A 3-player game has a Counter-hand size of 8. Thus, he is able to draw 6 Tribal counters for his Secondary Tribal selection.
4.3.3 Then in the same order as previously, each player randomly draws a number of Tribal Counters from the Draw Pool as determined above.
4.3.4 These blindly selected tribes are kept “secret” from the other players (place them face down [hidden] in the Unrevealed Tribes and OPP Markers box on your Player Display on the Map).Game Play Note: Starting Tribes are not kept secret, and a player never loses the ability to control them. A player’s Secondary Tribes may change from turn to turn.
4.3.5 Finalizing the Counter Draw Pool Place the German counter and all the Roman and OPP Counters in the Draw Pool.The game is now ready to begin.
5.0 SEQUENCE OF PLAY5.1 The Game TurnVercingetorix consists of four (4) game turns. Each game turn players perform the following in order:• Administration Phase (module 6.0)
Determine Play Order Segment (Section 6.1) Replenish Counter-hand Segment (Section 6.2, except Turn 1) Collect Resources Segment (Section 6.3)• Operations Phase (module 7.0)
Rounds are performed in which each player performs an Impulse. Each Player’s Impulse consists of the following: Draw Segment (Case 7.2.1) Siege Segment (Advanced Game, Case 14.3.3) Actions Segment (Case 7.2.2)• End Phase (module 8.0)
Winter Attrition Segment (Section 8.1) Discard Tribes Segment (Section 8.2) Victory Point Segment (Section 8.3)
6.0 ADMINISTRATION PHASE6.1 Determine Play Order Segment 6.1.1 The players determine who will go first for that turn by each player rolling a die.
6.1.2 The player who rolls highest chooses who will be the first player for each Round in the turn.
6.1.3 If there is a tie for highest roll, the players who tied will reroll until one of them has the highest roll.
6.2 Replenish Counter-hand Segment
6.2.1 Each player (starting with the first Player and going clockwise from there) may replenish his Counter-hand up to the game’s maximum limit (see Game Limits Table on the back page of the rules).
6.2.2 This segment is not performed on Turn 1.
6.2.3 A player draws counters from the Draw Pool if he has fewer counters in his Counter-hand than what is the maximum eligible.
6.2.4 If a player begins this segment with more counters in his Counter-hand than the game’s maximum limit, that player may not draw any counters.
6.2.5 If a player picks a Roman counter at this point, set it aside and draw a replacement counter.
6.2.6 Once all players have replenished their Counter-hands to their full limit, place all the Roman counters that were set aside back into the Draw Pool to be available to be drawn during the turn.
6.3 Collect Resource Points Segment (Module 6.0).Once the above Segments have been performed by all players, the Operations Phase of the game turn begins.
7.0 OPERATIONS PHASE7.1 The Rounds 7.1.1 A number of rounds will now occur based on the number of players in the game as noted in the Game Limits Table on the back page. 7.1.2 Each player will perform one Impulse during a Round.
7.1.3 The first player (as determined in the Administration Phase) performs his Impulse first each round with the other players performing their Impulse for the Round in a clockwise direction from the first player.
7.2 Player’s ImpulseDuring a player’s Impulse, he performs the following Segments:
7.2.1 Draw Segment. A player must (even if he has no RPs left) draw a Counter from the Draw Pool unless there are no counters left in the Draw Pool. A player can go above the mazimum Counter-hand limit during the turn.If the player draws a:• Tribal or german Counter: He places it hidden in his “Unrevealed Tribes and OPP Markers” box on his player Display on the map, to be revealed when needed or Raised (Module 5.0). • Roman Counter: He must play the Romans for his Impulse and cannot do anything else (Module 9.0).
• Opportunity Counter: Depending on the counter, he adds this to his Counter-hand and can play this during the rest of the turn as detailed in Module 13.0.
4 VERCINGETORIX: TWILIGHT OF THE GAULS Rules of Play

VERCINGETORIX: TWILIGHT OF THE GAULS Rules of Play 57.2.2 Actions Segment A player can perform up to 3 Actions as noted in Section 10.2 during his Impulse. a) When the player has finished his Impulse, play passes clockwise to the next player to perform his Impulse of the Round. b) If this was the last player to perform his Impulse of the Round, start a new Round.c) If this was the conclusion of the last Round of the Operations Phase, proceed to the End Phase.
8.0 END PHASE 8.1 winter Attrition Segment Units not prepared to endure the winter suffer attrition.
8.1.1 The following units do not suffer Attrition:• Tribes in their home Area• Tribes on the map for which the player pays 1 RP
8.1.2 All other units suffer Attrition; attrited tribes are Dispersed and are no longer controlled.
8.2 Disperse Tribes Segment 8.2.1 A player may place any Tribe counters (except for his Starting Tribes) he has in his Counter-hand or on the map back into the Draw Container.
8.2.2 Remove any of the player’s markers on the board indicating subjugation or control of those Tribes.
8.2.3 Place all OPP counters, Roman counters, and the German counter back into the Draw Pool.
8.3 victory Point SegmentEach player totals his Victory Points during this segment.
8.3.1 Players earn VP as shown on the VP Table on the PAC.
8.3.2 Regional Control (Section 3.2) VPs are acquired only during the last turn’s Victory Point Segment of the game.
8.3.3 At the end of the last turn of the game, the player with the most VP has won.
8.3.4 Start the next game turn The Game Turn Indicator is moved into the next game turn box on the Game Turn Track. When you have completed the last game turn, the game is over and the winner is determined.
9.0 RESOURCE POINTS (RPs)Resources, in game terms, represent not only material and supplies but power and political acumen. This game is driven by RPs and their use. Players keep track of their RPs with their RP markers on their Player’s Display RP/VP track on the map.
9.1 Acquiring RPs 9.1.1 RPs are obtained from two sources during the Collect Recourse Points Segment:
• Each player automatically gets 5 RPs.
• Each Player totals up the RPs for each Tribe he controls as well as any Tribes he has subjugated and adds that tally to his RP/VP Track (adjust the RP markers to reflect the increase).
IMPORTANT GAMEPLAY NOTE: A player has the total RPs accumulated at the start of the Turn for the ENTIRE TURN (all the Rounds of a Turn). Consider your expenditures with this in mind. One of the key decisions in the game is when and where to use one’s RPs, and how many to hold in reserve for emergencies, etc.
9.2 Use of RPsPlayers use their RPs to undertake the actions they need to achieve their objectives and win the game.
9.2.1 Each action performed costs 1 RP (Module 10.0).
9.2.2 Non-Action Uses RPs can also be used to increase a player’s Battle Strength (Case 10.6.8) and for Winter Survival (Module 13.0).
9.2.3 RP are subtracted from the RP Track on the player’s Display on the map as they are used.
9.2.4 RPs can be lost due to an unsuccessful Revolt (Module 13.0).
9.2.5 Unused RPs are never lost at the end of the turn; they remain on the RP/VP Track.
10.0 ACTIONSActivation is an Action undertaken by a player in his Impulse.
10.1 Player Turn Actions6.1.1 A player may perform up to 3 actions during his Impulse.
• Raise Tribes (Section 10.2; may perform this action only once during an Impulse)
Turn 1: Raise up to 2 Tribes from the player’s Counter-hand or 1 of his Subjugated Tribes (Section 10.2). Turns 2 to 4: Raise one Tribe from the player’s Counter-hand or his Subjugated Tribes.
• move (Section 10.5) Activate one Area and Move one or more units in that Area.• Battle (Section 10.6) Activate one Area and perform a Battle therein.
Gameplay Note Roman Actions are performed in a slightly different manner (Module 11.0).
10.2 Raising Tribes In order to actively use your tribes, they must be Raised.
10.2.1 All of a player’s At-Start Tribes are considered Raised (thus active) at the start of the game.
10.2.2 A player raises a Tribe from his Counter-hand (or 2 on Turn 1) by expending 1 RP and an action for his Impulse, a) He takes the Tribe’s counter from those available in his Counter-hand box and places it in its Area on the map.b) The player places one of his control markers in its Area as well.
10.2.3 A Subjugated Tribe can be raised as well for the cost of 1 RP and one of his actions for his Impulse. a) The player takes the Tribal counter from his Subjugated box and places onto its Area on the map. b) Flip the marker in the Area over to its Control side.
10.2.4 A player can only Raise those tribes for which he has the Tribal counters (in his Counter-hand or Subjugated box).
10.2.5 Tribes that are raised may not move on the Impulse they are Raised.
10.3 Stacking10.3.1 Normal stacking (presence of more than one unit in an Area) is 2 Tribes of a individual player (exceptions: Cases 10.3.3 and 10.3.4).
10.3.2 More than one player can have units in the same Area, but each player is limited to the restriction of Case 10.3.1 above.
10.3.3 If a Chieftain is in an Area, the player may stack 3 Tribes in that Area.
10.3.4 A War Horde allows special stacking (Case 10.4.4).
10.3.5 Enemy units may occupy the same Area (Battle is voluntary).
10.3.6 If it is found that an Area is over-stacked by a player, that player must disperse units (deactivate an At-Start Tribe) to bring the Area into compliance with stacking limits.
10.3.7 (Advanced Game only) Stacking inside an Oppidum is limited to two Tribes (of any BP value).
10.4 war Horde 10.4.1 Each player may form one War Horde.
10.4.2 He must have a Chieftain within the Area the War Horde is to be formed in.
10.4.3 Replace the Tribes and Chieftain in the Area with the player’s War Horde marker (placing those units into the player’s War Horde box on his display).
10.4.4 Up to 4 Tribes may be part of a War Horde and thus 4 Tribes may be stacked in the same Area.
10.5 Movement10.5.1 As one Action during his Impulse and by expending 1 RP, a player can activate an Area in which he has one or more Tribes within and then move one to all of those Tribes.
10.5.2 All units that will move in that Area must move together (they cannot move to different Areas).
10.5.3 The moving force gets 3 Movement Points (and thus they may move up to 3 Areas if not stopped earlier).
10.5.4 Movement may only be performed between adjacent Areas across a common border connecting the two Areas.
10.5.5 A moving force may not “pick up” additional Tribal counters as it moves. It must stop and then be re-activated in a later Impulse to have those Tribes activate together.

10.5.6 A War Horde or moving stack may leave Tribes behind as it moves at no cost, but Tribes that are left behind may not move any further in that player’s Impulse.
10.5.7 For movement purposes, it costs units 1 MP to enter an Oppidum from the Area the Oppidum is in. Game Play Note There are no terrain costs; each Area and Oppidum costs 1 MP to enter.
10.5.8 No other movement may be performed until the forces currently moving have finished their movement and any attacks they wish to perform have been resolved.
10.5.9 No movement may occur across a black border line between two areas.
10.5.10 Gallic Tribal units may never enter either of the two Roman controlled Areas or into Germania.
10.5.11 Naval Movement Naval Tribes may move by sea. a) They may not combine sea movement with land movement.b) They may move along the coast up to 4 Tribal Areas (exclusive of starting Area, inclusive of landing Area) in one Activation. c) All Tribes that can move via naval movement that start in the activated Area and are selected to move during the Impulse must move together to the same landing Area. Example The Luxovii Tribe (Area 16) may be moved by sea, westward and south, along the coast and land (where it stops movement) in the Area of the Veneti (Area 22).
10.5.12 Presence of Enemy Units A friendly force must cease movement upon entering an Area that is not friendly controlled or subjugated or with enemy units therein. Naval movement ignores the presence of enemy Tribes in Areas the naval unit moves past.
10.5.13 Tribes starting in an Area occupied by enemy units are free to move out only into a friendly controlled or subjugated Area.
10.6 Battle10.6.1 A Tribe may perform Battle a maximum of twice per Impulse, once before they move and once after they have moved.
10.6.2 If they aren’t going to move, they can perform Battle twice in the same Area against two different opposing forces in that Area.
10.6.3 Each Battle is performed against one opponent’s force that is in the same Area as the player’s force. Gameplay Note If there are forces of more than one opposing player present, he must attack them each separately.
10.6.4 Each Battle normally consumes 1 Action and costs 1 RP. Design Note: There is no naval combat (in game terms).
10.6.5 Only the Tribes that started in the activated Area may attack.
10.6.6 Battle Strength Each Tribe is worth the number of BPs as printed on its counter. Naval Tribes use their higher value rating on their counter when that Tribe is defending or attacking in their home Area.
10.6.7 Oppidum Defense Each Oppidum on the map provides a defensive benefit for the controlling player’s Tribes that are within that Area if attacked by an opponent’s forces or the Romans. The value printed within the Oppidum is added to the defending player’s BP total for the battle. Example If 2 Tribes worth 9 BP are attacked in Ambiani (Area 5), which has the Oppidum of Samarobriva (a +2 Oppidum), then the defending player would increase his BP total by 2 for the battle, which would now be 11 BPs before adding the die roll. Game Play Note: Fortified Oppidum have additional benefits in the Advanced Game when defending against the Romans.
10.6.8 RPs Expenditure Each player can increase their BP total by secretly allocating 0 to 5 RPs to the battle. a) RPs are allocated and expended before any battle die rolls are made. b) Each player secretly indicates on a die the number they will spend for the battle (indicating a 6 on the die means the player is expending 0 RPs for the battle) and then both players reveal their die simultaneously.c) Each RP expended provides +1 BP for that player’s total BPs for that battle.d) Both players reduce their RP tracks by the amount expended immediately after revealing their die value.
10.6.9 Battle Die rolls: a) A Gallic Player always will roll one die to gain BPs for the battle (exception: Case 14.3.7).b) The Roman always gets to roll two dice for his force counter on the map.c) Open Ended Rolls Whenever the result of an individual die roll is a 6, the player gets to keep the 6 result and roll that die again for additional BPs. This re-roll is performed each time the die roll is a 6 result (so if the re-roll was a 6, he would keep its 6 result, now with 12 BPs accumulated from die rolls, and roll again for more BPs).
10.6.10 Battle Resolution Attacks are resolved by comparing the final net BP totals of the attacker to the defender. A player’s net BP total (attacking or defending) in an Area is determined by adding up all the values that apply as detailed from the Battle Points Table on the PAC.
10.6.11 Battle Results The highest net BP total wins the Battle. If the player’s totals are the same, a draw has occurred. Consult the Battle Results Table on the PAC and apply the results as noted. Design Note Tribes are never eliminated; they are always “in the game,” in some status, even when not on the board.
10.6.12 Dispersed Tribes Result from Battle The Tribal counter is placed back into the Draw Pool. Remove the controlling player’s control marker from the Tribe’s Area. If the Tribe is an At-Start Tribe, it is deactivated.
10.6.13 Subjugation of a Tribe Result from Battle The Tribal counter is given to the winner, who places it in his Subjugated box, and
6 VERCINGETORIX: TWILIGHT OF THE GAULS Rules of Play
its Tribal Area is now marked with the winning player’s Subjugated marker.
11.0 THE ROMANSGame Play Note In the game, the Romans are not used to gain VPs for any player; they are used to deprive the players of VPs by moving and attacking Areas controlled by a player. In the Basic Game, they do not control anything (except their original 2 Areas) but they do disperse Tribes.
11.1 Guidelines11.1.1 Use of the Romans is given to the player who draws a Roman force counter from the Draw Pool.
11.1.2 The counter drawn states the number of BPs that counter is worth.
11.1.3 When a player draws a Roman counter, the Romans are his “play” for his player Impulse of that Round.
11.1.4 He may place the Roman counter in either of the two Roman permanently controlled Areas (red Areas of Gallia Transalpina or Volcae). Place the BP marker on the General Track at the BP value of the Roman counter drawn.
11.1.5 The Romans gets 5 RPs to use during the Impulse. Mark this with the Roman RP marker on the General Track and reduce the marker’s value as the RPs are expended.
11.2 Roman Actions11.2.1 Like Tribes, each Action costs 1 RP to perform; adjust the Roman RP marker downwards as RPs are spent.
11.2.2 The controlling player will have the Romans perform actions in the Impulse until they no longer have RPs remaining.
11.2.3 The controlling player can select the following actions for the Roman unit to perform as detailed below:
11.2.4 Move Action Same as a Tribe, with the following exceptions:a) They get 4 MPs.b) They do not have to stop their movement upon entering a non-controlled Tribal Area (they just move through).c) They must end their movement for that action if they enter an Area that is player-controlled and perform a Battle.d) If they do not have an RP remaining to pay for a Battle action, they may not enter that Area.
11.2.5 Battle Action Battle is performed similar to Tribe versus Tribe Battles with the following differences: a) Romans, unlike Tribes, will perform a Battle against any/all the Tribes within an Area as a combined defending force, even if controlled by different players. The Tribal player controlling the Area resolves the Battle for the Tribal players.b) The Roman unit BP for the Battle is the current value as denoted on the General Track. c) When Romans perform Battle, they roll two dice for additional BPs, not one.

d) Use the Battle Results rows that say “Romans” for all Battle Results and apply them.
11.2.6 At end of the Roman player’s Impulse, simply remove the Roman counter from the board and set it aside.
12.0 THE GERMANS12.1 General Rules12.1.1 The German Tribes (really an amalgamation of such as the Sugambri, Usipetes, Suebi, et al.) become available only when drawn.
12.1.2 They do not have to be used immediately when drawn; the drawing player may save the counter (place it hidden in the Counter-hand box of his Player Display) for use later in that turn.
12.1.3 The player controlling the Germans must pay RPs from his RP Track to perform actions with them.
12.1.4 They are treated and used like any other Tribe a player controls, except that they cost 2 RP to Raise.
12.1.5 When raised, they are placed in the Germania Area and may then immediately move into any Tribal Area adjacent to Germania.
12.1.6 Germans may never stack or combine with other tribes to do anything.
12.1.7 The German unit has two steps, Full Strength and a Lost/Reduced marker.
12.1.8 Battle Results a) If Germans win a battle they suffer no losses. The Tribe of the Area in which the battle was fought in is now Subjugated by the player who is controlling the Germans. b) If they lose for the first time in a turn, they are marked with the Lost/Reduced marker.c) If they lose and are already reduced, they are removed from play for the remainder of the Turn.
12.1.9 Whether raised or not, the German counter must always be returned to the Draw Pool at the end of the turn.
13.0 OPPORTUNITIES 13.1 General Rules13.1.1 There are 7 of these Counters in the game.
13.1.2 It costs 1 RP to play an OPP Counter.
13.1.3 OPP Counters not used during a Turn are returned to the Pool at the end of the Turn.
13.1.4 The OPPs Counter Table on the PAC details their abilities and play restrictions.
13.2 Revolts13.2.1 A Revolt may be attempted only by a non-active player during an opponent’s Roman Impulse.
13.2.2 Each other player in clockwise order from the drawing player gets to decide if they will perform a revolt.
13.2.3 Once one player has chosen to perform a revolt, no other player can attempt a Revolt that Impulse.
13.2.4 The player deciding to perform the Revolt must play a “Druid” OPP Counter from his Counter-hand.
13.2.5 Roman play immediately stops and the player performing the Revolt rolls to see if the Revolt he is attempting takes place.
13.2.6 The player designates which Chieftain he is using to lead the Revolt, and rolls one die, comparing the result to the Chieftain’s Revolt Rating (the value printed on the Chieftain’s counter). Consult the Revolt Table on the PAC to determine the procedure to resolve this. Example The Eburones, led by Ambiorix, attempt a Revolt. The player rolls a 2. As Ambiorix’s Revolt Number is ‘3,’ which means that there is a Minor Revolt.
13.2.7 The Chieftan’s stack/War Horde may now immediately move up to 3 Areas and possibly perform Battle against the Roman counter now in play, using the normal Battle rules and costing the player 1 RP to perform the Battle.
13.2.8 Normal Battle Results apply for this battle. If the Gauls win this Battle, the Roman’s Impulse ends and the Roman counter is immediately removed from the map, as well as all Roman counters still in the Draw Pool for the remainder of the turn. They are returned for use in the next Turn.
13.2.9 If the Tribal Player loses, or there is a draw, normal Battle Results apply, and the Roman player may continue with his Impulse.-----------------------------------------------------------
14.0 ADvANCED GAMEAll players must agree to use the Advanced Game rules before the game play starts. The Advanced Game adds rules that deal with the Romans and their abilities. All Basic Game rules are in effect except where modified by the following rules.
14.1 Rules Adjustments14.1.1 Roman Initial Placement A Roman counter, after being drawn, may also be placed on the furthest forward Roman subjugated Area in Gaul that connects back to either of the two Roman Controlled Areas via connected Roman subjugated Areas.
14.1.2 Roman Actions The Roman force may perform a Battle when it stops moving at no RP cost.
14.1.3 Battle Results Any time the Roman player rolls doubles (both dice the same number) in a Battle and he has won the Battle, he reduces his BP by an additional 1 BP.
14.1.4 Revolts Use the Advanced Game effects for the result of a Revolt instead of the Basic Game effects.
14.2 Roman Area Subjugation14.2.1 When a Roman force wins a battle in a Tribal Area, mark the Area with a Roman Subjugation marker.
14.2.2 The Subjugated Area now has a Roman garrison with a BP of 1 that must be defeated by a player’s Tribal forces to remove the Subjugation
VERCINGETORIX: TWILIGHT OF THE GAULS Rules of Play 7marker.
14.2.3 Roman Garrisons The Subjugated Area has a Roman garrison which can only defend. a) When defending in a Battle, the player to the left of the active player rolls 1 die instead of 2 for the Roman’s Battle roll, but has a +2 BP bonus (representing the Garrison’s forts).b) Roman garrisons never get the benefit of an Oppidum in the Area.
14.2.4 A Tribal player that defeats a Roman garrison places his own Subjugation marker into the Area, then takes the Tribal counter from the Roman Subjugated Tribe box and places it in his display’s Subjugated box.
14.2.5 A Roman garrison losing a Battle does not remove the Romans from the Turn like a Roman counter losing a Battle does.
14.3 Roman Siege14.3.1 If the Oppidum in an Area is a fortified Oppidum and the Romans attack the Tribal forces within that Area, the player controlling the Area can retreat two of his Tribes into the fortified Oppidum. If there are more than two Tribes in the Area, the other Tribes are Dispersed (or Deactivated if At-Start Tribes).
14.3.2 When the Romans enter an Area and the controlling player (or the player controlling the non-controlled Tribe) decides to retreat into the Area’s Oppidum, the player controlling the Romans can choose to declare a Siege against those Tribal forces if the following two conditions apply:a) Roman current BP total is at least half of the all the Tribe’s total BPs therein (not modified by the Oppidum modifier).b) The Roman besieging force can trace a line of Subjugated Areas back to one of its two controlled Areas on the map.
14.3.3 Place the Roman counter on top of the Tribal forces in the Oppidum.
14.3.4 The player currently controlling the Romans takes the Roman Siege marker and places it in front of him to remind him that during the Siege Segment of his following Impulses of the turn, he must decide on what to do with the Roman siege (Cases 14.3.7 and 14.3.8).
14.3.5 If a Roman counter is drawn before it gets back to the player who started the Siege with the Romans, the new player who drew the Roman counter takes control of the Siege. Transfer the Siege marker to the new player, and that player must now make the decision about the Siege (Cases 14.3.7 or 14.3.8).
14.3.6 Once a Siege has been started, it may only end by either a Roman victory (a successful Battle or all besieged Tribal units Dispersed/Deactivated via the Siege Table rolls) or defeat (Romans losing a Battle or their BP total falls below the 1/2 BP strength required).
14.3.6 Continue the Siege The player rolls on the Roman Siege Table (see PAC) and applies the results immediately:

8 VERCINGETORIX: TWILIGHT OF THE GAULS Rules of Play
a) First, the Roman player reduces the Roman BP marker by the amount indicated.b) The Tribal player applies his result. If the result Disperses/Deactivates the last Tribe in the Oppidum, the Roman player has won the siege and places his Subjugation marker in the Area. Take the Tribal counter for the Area (wherever it is) and place it in the Roman Subjugated Tribes box.c) If the Roman BP total is now less than the required minimum, the Romans have lost the Siege. Remove the Roman counter from the Map and the Roman counters from the Draw Pool.
14.3.7 Launch an Assault The player performs a normal Battle with the following
Other Counter AbbreviationsBOUGNTUS: BodnuognatusCNVCTLTVS: ConvictolatavisDMNRX: DumnorixINDTMRUS: IndutiomarusVRCNGTRX: Vercingetorix
additional modification: the defending Gallic player gets to roll an additional die for the Battle (being in a fortified Oppidum).
14.3.8 When a new Roman counter is drawn and the Sieging force is still connected back by an uninterrupted line of Roman Subjugated Areas to either of the two Roman controlled areas, add its BP value to the current BP value of the Sieging force. The Roman BP total may never be more than 18 BPs (noted on the track). Then the controlling player makes the decision for the Siege (Cases 14.3.7 or 14.3.8).
14.3.9 If a new Roman counter is drawn and the Roman Sieging force is not connected back by an uninterrupted line of Roman Subjugated
Areas to either of the Roman controlled Areas, the Siege is broken. Remove the Sieging Roman force counter on the Oppidum and set it aside to be reused next Turn. The new Roman counter is placed as detailed in Case 14.1.1 and the player plays the Romans normally.
14.3.10 External Tribal Relief If a Tribal player moves his forces into the Area with the Roman Siege, a Battle must be paid for and fought. a) The attacking Tribal player can add ¼ (round up) of the BPs in the fortified Oppidum to his net BP total.b) Apply Battle results as noted.
Fin.
Tribes of Gaul TableTribe Area Counter Abbreviation BP Oppidum Chieftain RP
AQUITANI
ELUSATES 50 -- 1 -- -- 2VOCATES 43 -- 1-2 -- -- 0TOLOSATES 51 TLOSATES 2 Tolosa (+2) -- 2TARBELLI 49 -- 3 -- -- 1
BELgAE
ADUATUCI 8 -- 2 Aduatuca (+2) -- 8AMBIANI 5 -- 1-2 Sambrovia (+2) -- 2ATREBATES 6 ATRBATES 1 Nemetocenna (+2) -- 1BELLOVACI 11 -- 1-2 Bratuspontum (+3) -- 1CALETES 10 -- 1-2 -- -- 1EBURONES 4 -- 3 Ambiorix (3) 2MEDIOMATRICI 14 MDMTRICI 1 -- -- 2MENAPII 1 -- 2-4 -- -- 1MORINI 2 -- 2-4 -- -- 1NERVII 3 -- 6 -- Bodnuognatus (3) 2REMI 13 -- 2 Durocortorum (+2) -- 4SUESSIONES 12 SUESSI 3 Bibrax (+3) Galba (2) 2TREVERI 9 -- 3 Treves (+2) Indutiomarus (3) 2VIROMANDUI 7 VIRMNDUI 1 -- -- 2
CELTICA
AEDUI 33 -- 5 Matisco (+2) Convictolatavis (3) 5ALLOBROGES 40 ALLBRGES 3 Geneva (+1) -- 4ANDES 24 -- 1 -- -- 1ARVERNI 38 -- 7 Gergovia (+4) Vercingetorix (4) 6ARVII 31 -- 2 Lemonum (+2) -- 2BITURGES 32 -- 1 Avaricum (+2) -- 3BOII 39 -- 4 Gerogovina (+3) -- 2CADURCI 46 -- 1 Uxellodunum (+3) Lucterius (2) 1CARNUTES 26 -- 1 Cenabum (+2) -- 3CURIOSOLITES 20 CORSLTES 1-2 -- -- 1CENOMANI 25 -- 1 -- -- 2DIABLINTES 21 DIABLNTES 2 -- -- 1ESUVII 17 -- 1 -- -- 2HELVETII 42 -- 8 -- -- 1HELVII 48 -- 1 Vienna (+2) -- 2LEMOVICII 37 -- 1 -- -- 2LEUCI 29 -- 1 -- -- 1LINGONES 28 -- 1 -- -- 3LUXOVII 16 -- 1-2 -- -- 1MANDUBII 34 -- 2 Alesia (+5) -- 1NAMNETES 23 NMNETES 1-2 -- -- 1NANTUATES 41 NNTUATES 1 -- -- 1PARISII 18 -- 2 -- -- 2OSISMI 19 -- 1-2 -- -- 0PETRUCORII 44 PTRCORII 1 -- -- 2PICTONES 30 -- 1-2 -- -- 1RUTENI 47 -- 2 -- -- 2SANTONI 36 -- 1-2 -- -- 1SENONES 27 -- 2 Vellaudnodunum (+3) Acco (2) 4SEQUANI 35 -- 4 Vesontio (+2) -- 3SOTIATES 45 -- 1 -- -- 1VENELLI 15 -- 1-2 -- -- 1VENETI 22 -- 3-6 -- -- 1
Game Limits Table# of Players Counter-hand Size # Rounds per Turn
2 8 123 6 84 4 6