rylie tote bag
DESCRIPTION
Sewing pattern, tote, bag, spit up & stilettosTRANSCRIPT
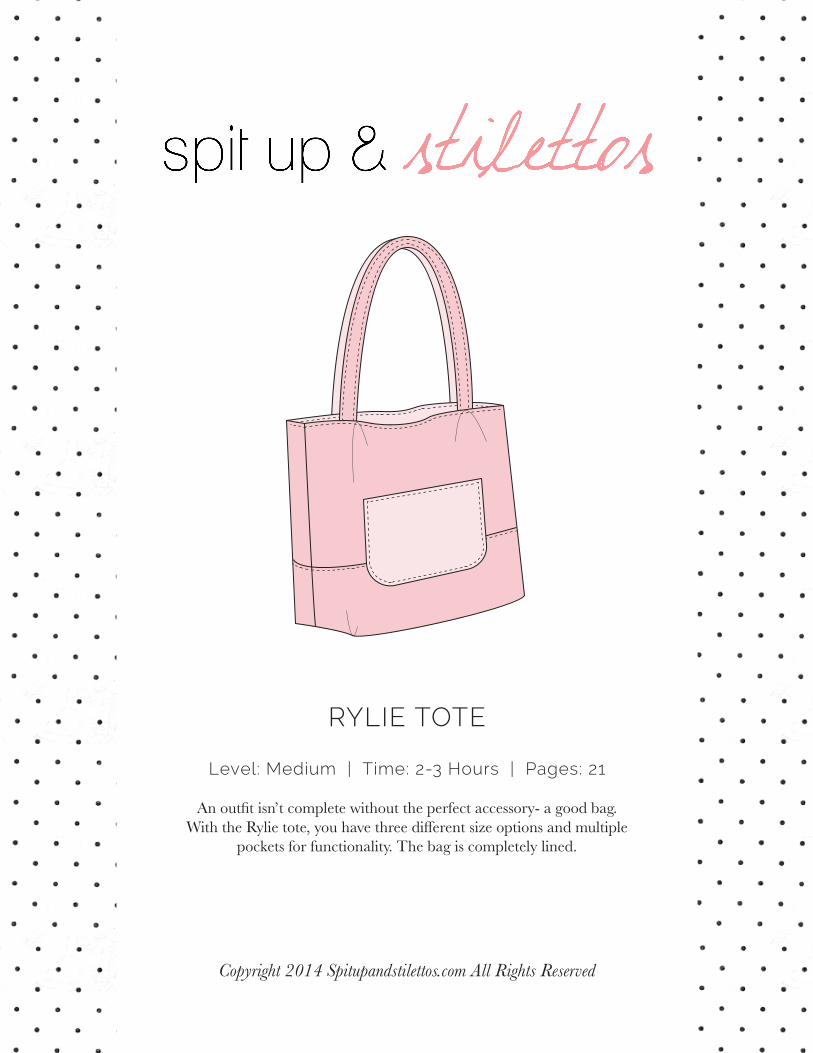
RYLIE TOTE
Level: Medium | Time: 2-3 Hours | Pages: 21
)V�W]\Å\�Q[V¼\�KWUXTM\M�_Q\PW]\�\PM�XMZNMK\�IKKM[[WZa��I�OWWL�JIO��?Q\P�\PM�:aTQM�\W\M��aW]�PI^M�\PZMM�LQٺMZMV\�[QbM�WX\QWV[�IVL�U]T\QXTM�
XWKSM\[�NWZ�N]VK\QWVITQ\a��<PM�JIO�Q[�KWUXTM\MTa�TQVML�
Copyright 2014 Spitupandstilettos.com All Rights Reserved
folded edge
• Fabric• Polyester Thread
• Fabric scissors• Pins• Chalk or marking pen• Tape (for piecing pattern)• Paper scissors (to cut pattern)
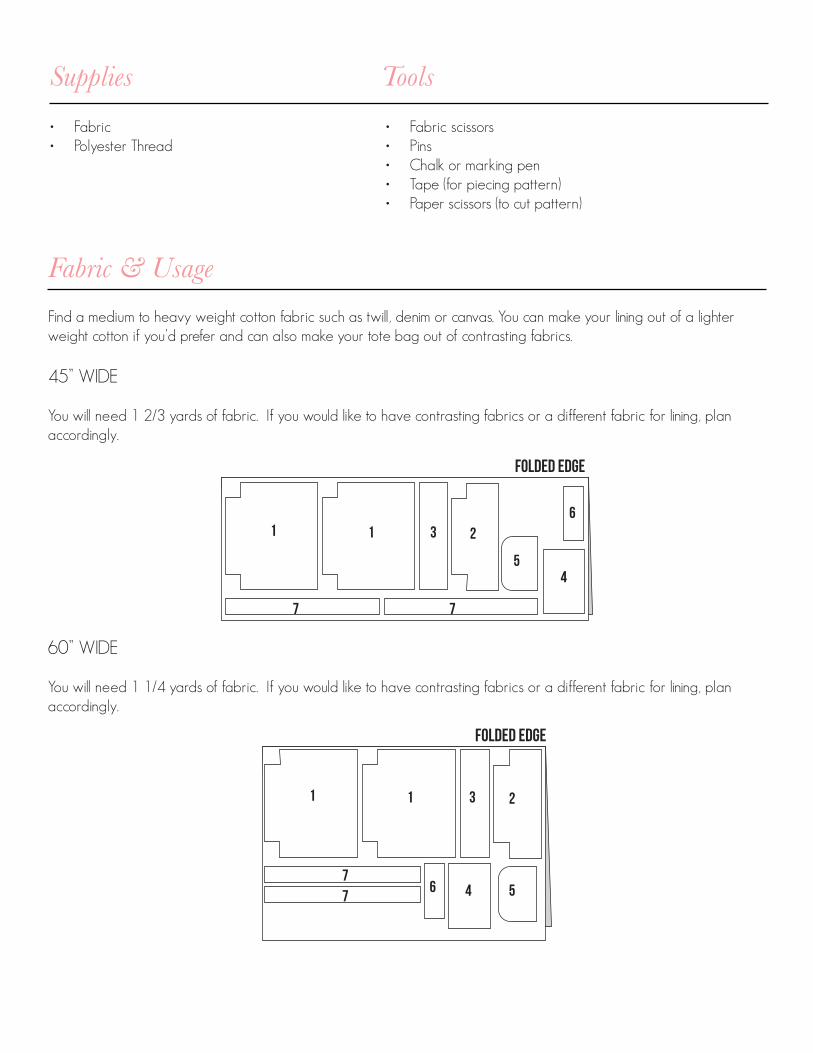
Find a medium to heavy weight cotton fabric such as twill, denim or canvas. You can make your lining out of a lighter weight cotton if you’d prefer and can also make your tote bag out of contrasting fabrics.
45” WIDE
You will need 1 2/3 yards of fabric. If you would like to have contrasting fabrics or a different fabric for lining, plan accordingly.
60” WIDE
You will need 1 1/4 yards of fabric. If you would like to have contrasting fabrics or a different fabric for lining, plan accordingly.
Supplies Tools
Fabric & Usage
1 23
4 5677
1
folded edge
1 231
7 7
54
6
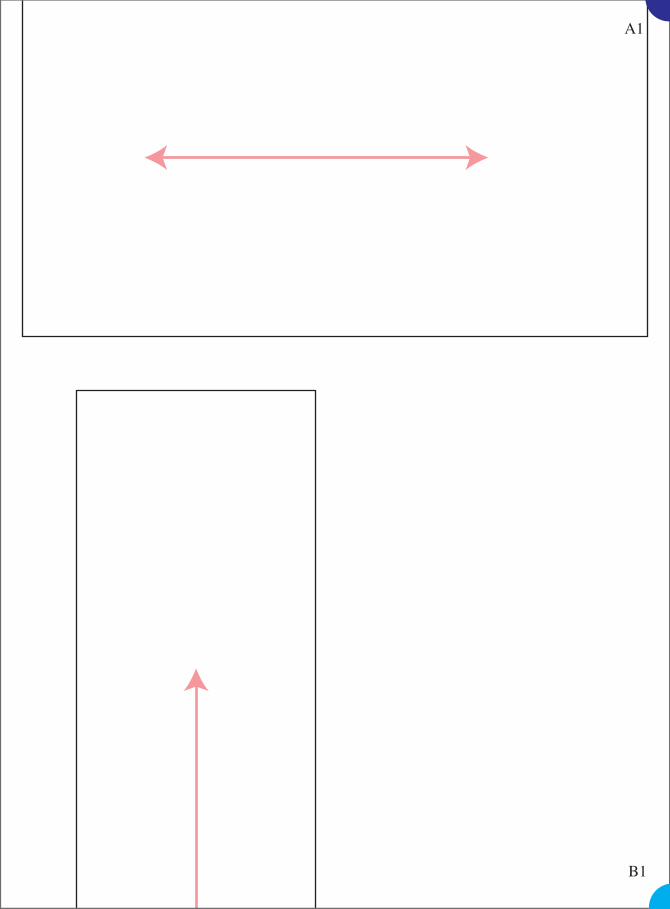
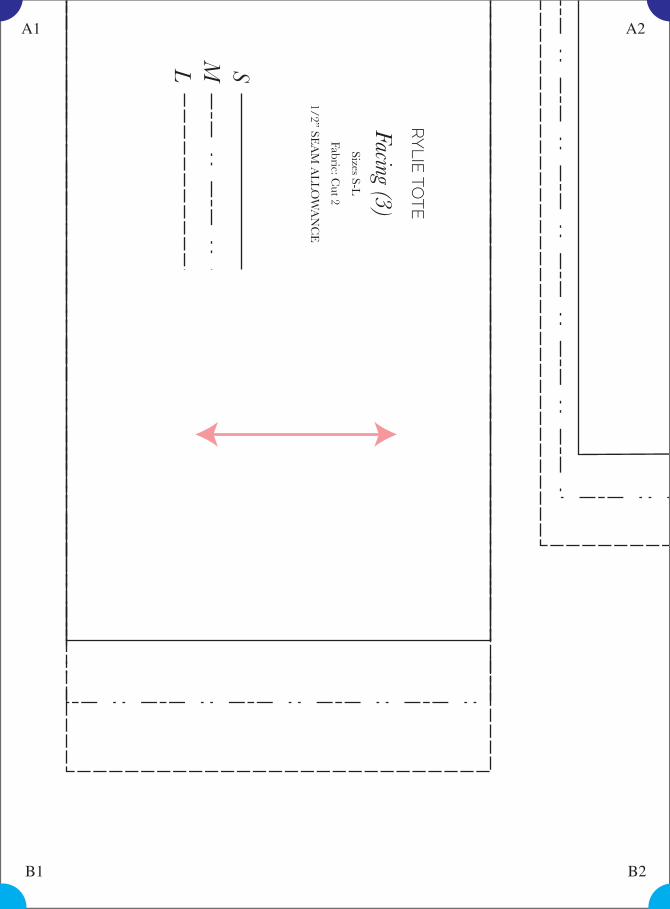
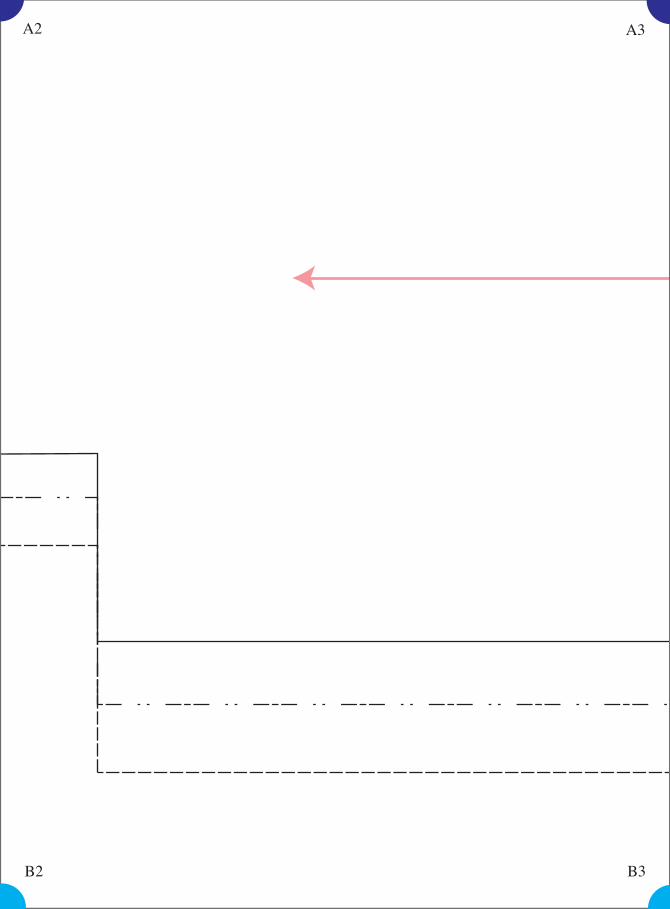
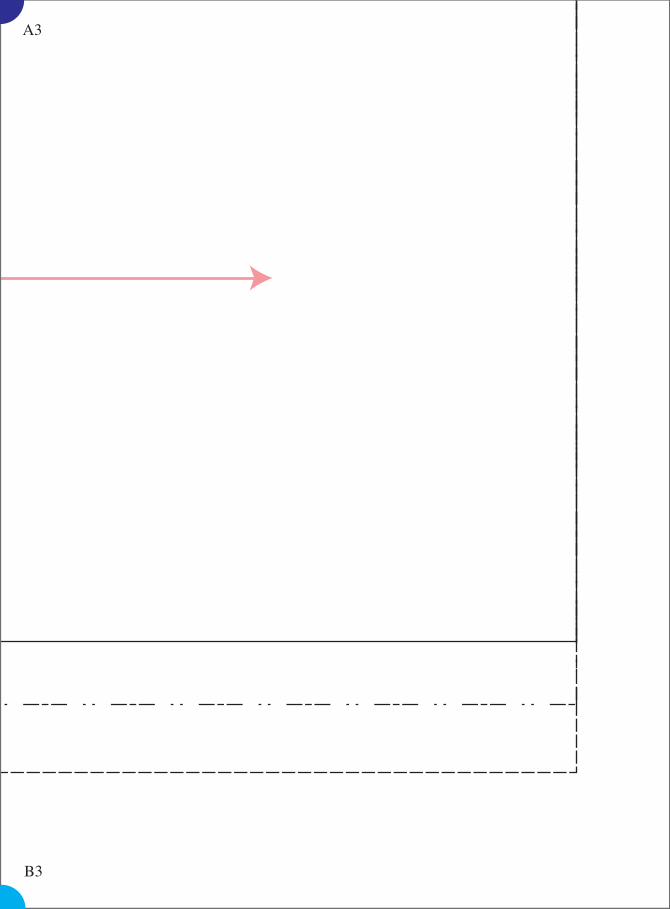
GRAIN LINEThis red arrow indicates your grain line, which you should align with the grain of your fabric. Don’t know what grain line or grain is? Let us explain. When fabric is made it is woven with threads that go in two different directions. Lengthwise, which spans the cut edges and crosswise, which spans the selvage edges (the selvage is the band of tightly woven fabric that runs up either side). The lengthwise direction is the grain of your fabric and what you use to line up your grain line.
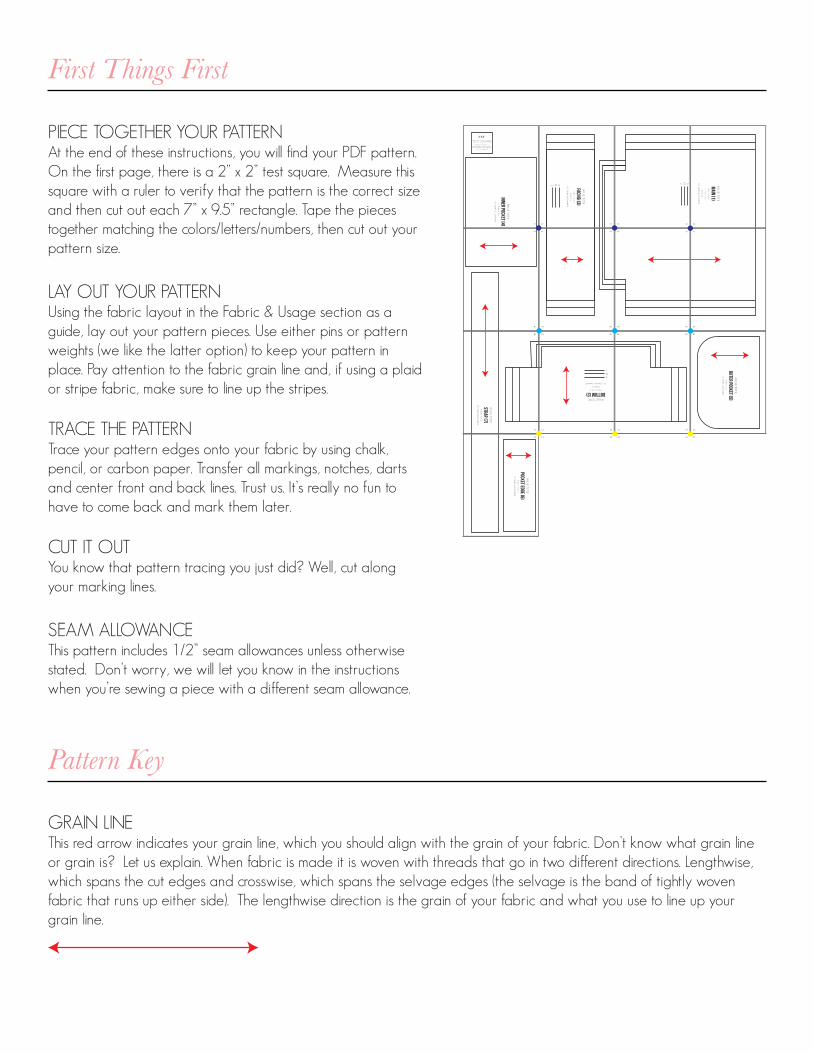
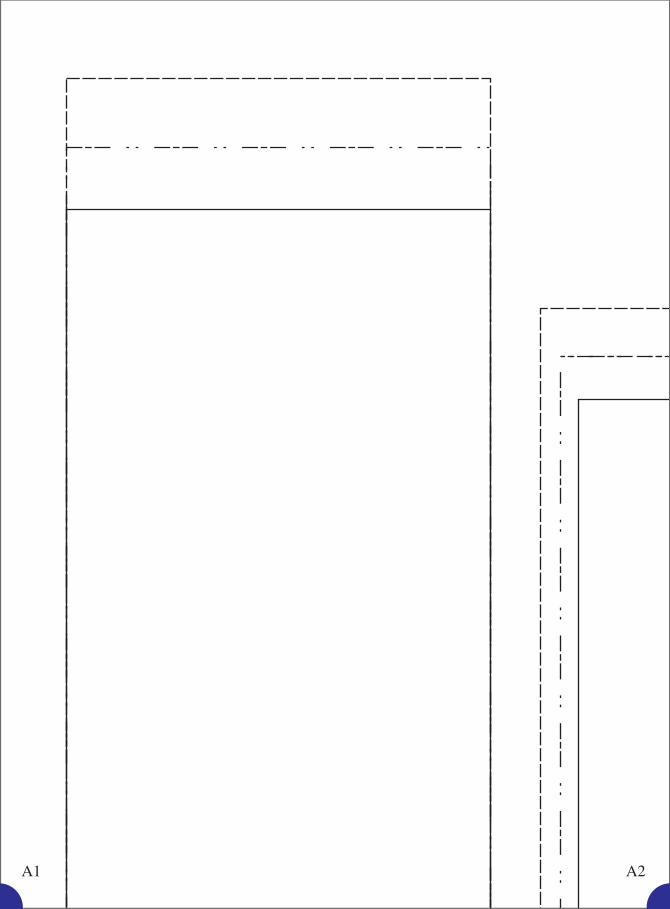
PIECE TOGETHER YOUR PATTERNAt the end of these instructions, you will find your PDF pattern. On the first page, there is a 2” x 2” test square. Measure this square with a ruler to verify that the pattern is the correct size and then cut out each 7” x 9.5” rectangle. Tape the pieces together matching the colors/letters/numbers, then cut out your pattern size.
LAY OUT YOUR PATTERNUsing the fabric layout in the Fabric & Usage section as a guide, lay out your pattern pieces. Use either pins or pattern weights (we like the latter option) to keep your pattern in place. Pay attention to the fabric grain line and, if using a plaid or stripe fabric, make sure to line up the stripes.
TRACE THE PATTERNTrace your pattern edges onto your fabric by using chalk, pencil, or carbon paper. Transfer all markings, notches, darts and center front and back lines. Trust us. It’s really no fun to have to come back and mark them later.
CUT IT OUTYou know that pattern tracing you just did? Well, cut along your marking lines.
SEAM ALLOWANCEThis pattern includes 1/2” seam allowances unless otherwise stated. Don’t worry, we will let you know in the instructions when you’re sewing a piece with a different seam allowance.
First Things First
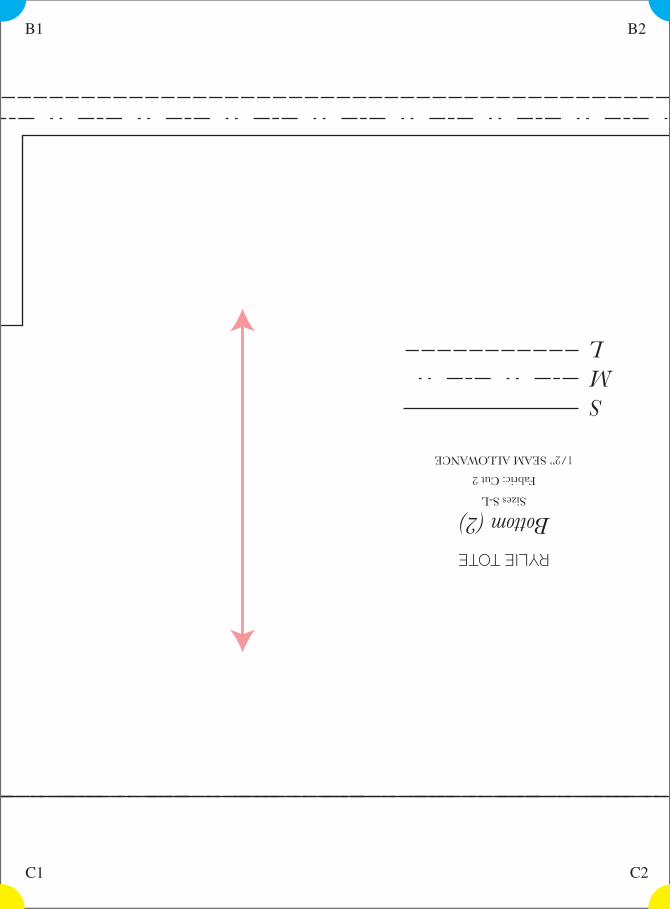
Pattern Key
SML
RY
LIE TO
TE
MAIN (1)F
ab
ric: Cu
t 2
Linin
g: C
ut 2
Size
s S-L
1/2” SEA
M A
LLOW
ANC
ERY
LIE TO
TE
INNER pocket (4)F
ab
ric: Cu
t 1
1/2” SEA
M A
LLOW
ANC
E
RY
LIE T
OT
E
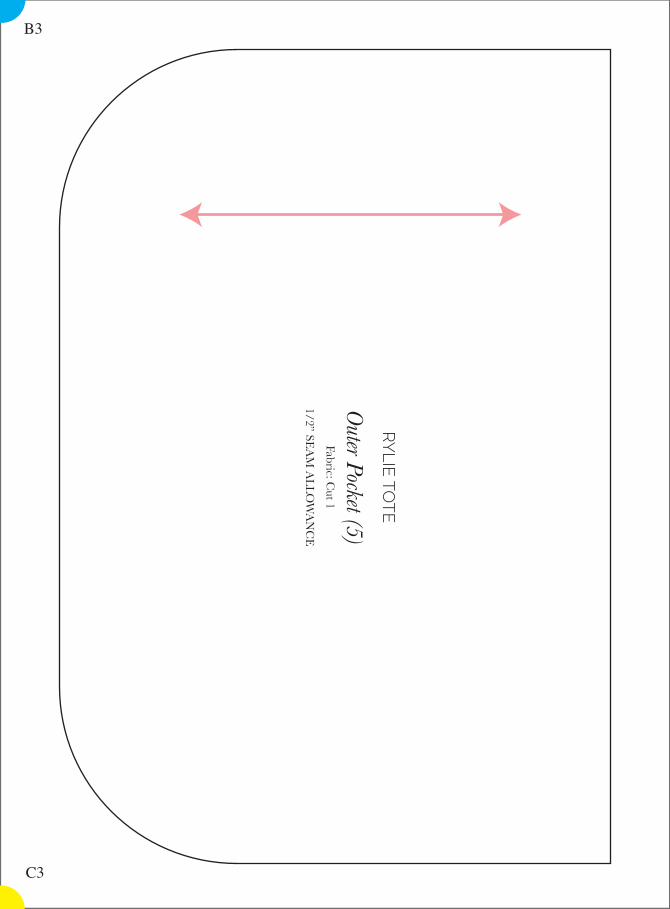
Outer pocket (5)F
ab
ric: Cu
t 1
1/2” S
EA
M A
LLOW
ANC
E
RYLIE TOTE
BOTTOM (2)Fabric: Cut 2
Sizes S-L
1/2” SEAM ALLOWANCE
SML
RY
LIE TO
TE
FACING (3)F
ab
ric: Cu
t 2
Size
s S-L
1/2” SEA
M A
LLOW
ANC
E
SML
RY
LIE TO
TE
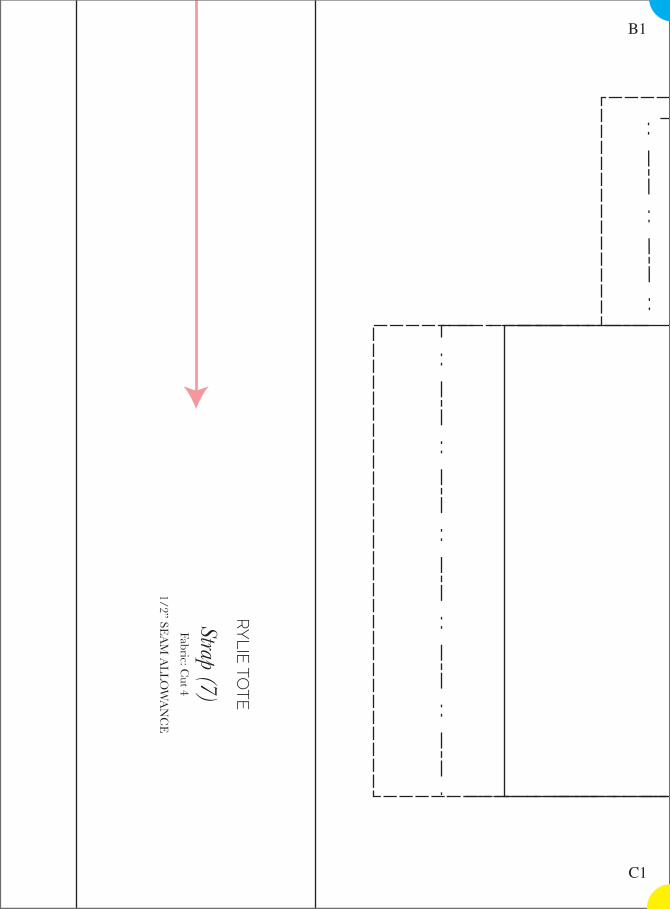
STRAP (7)F
ab
ric: Cu
t 4
1/2” SEA
M A
LLOW
ANC
E
RY
LIE T
OT
E
POCKET EDGE (6)F
ab
ric: Cu
t 1
1/2” S
EA
M A
LLOW
ANC
E
2” x 2”
TEST SQUAREMeasure this square to
make sure your scale is correct.You will make one funky garment
if its not- heads up!
B2 B2 B3 B3
B2 B2 B3 B3
C2 C2 C3 C3
C2 C2 C3 C3
B1 B1
B1 B1
C1 C1
C1 C1
A2 A2 A3 A3
A2 A2 A3 A3
A1 A1
A1 A1
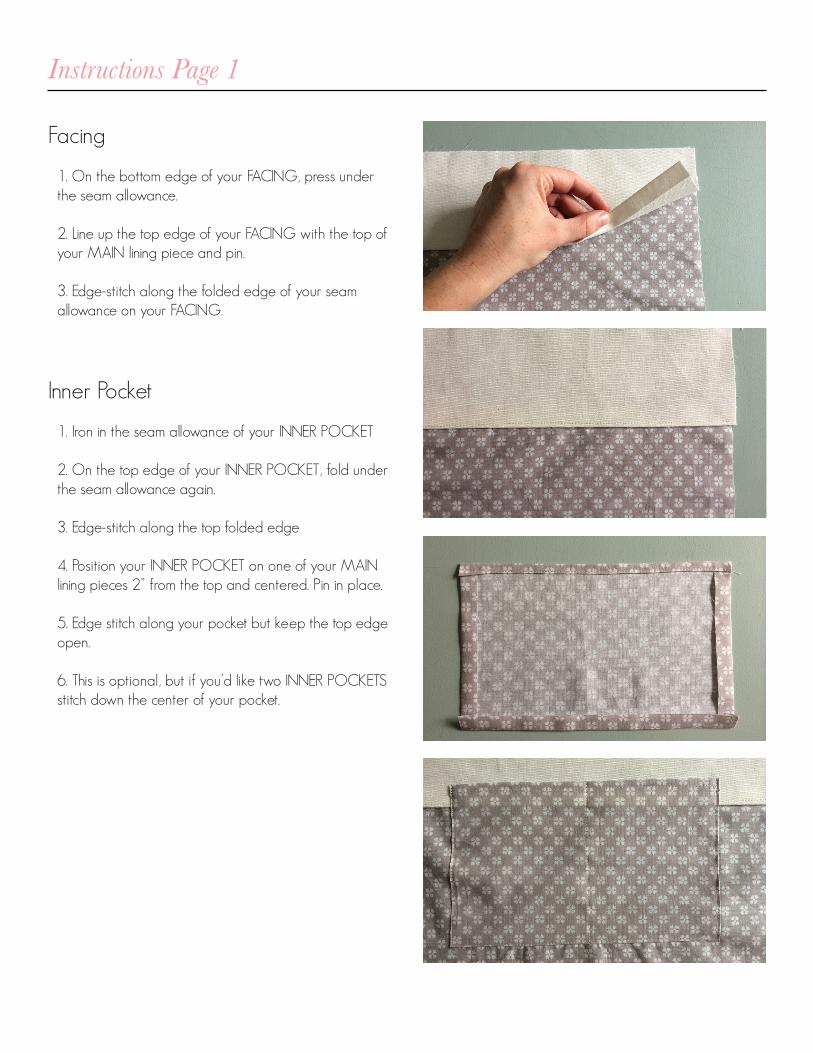
Facing
1. On the bottom edge of your FACING, press under the seam allowance.
2. Line up the top edge of your FACING with the top of your MAIN lining piece and pin.
3. Edge-stitch along the folded edge of your seam allowance on your FACING.
Inner Pocket
1. Iron in the seam allowance of your INNER POCKET
2. On the top edge of your INNER POCKET, fold under the seam allowance again.
3. Edge-stitch along the top folded edge
4. Position your INNER POCKET on one of your MAIN lining pieces 2” from the top and centered. Pin in place.
5. Edge stitch along your pocket but keep the top edge open.
6. This is optional, but if you’d like two INNER POCKETS stitch down the center of your pocket.
Instructions Page 1
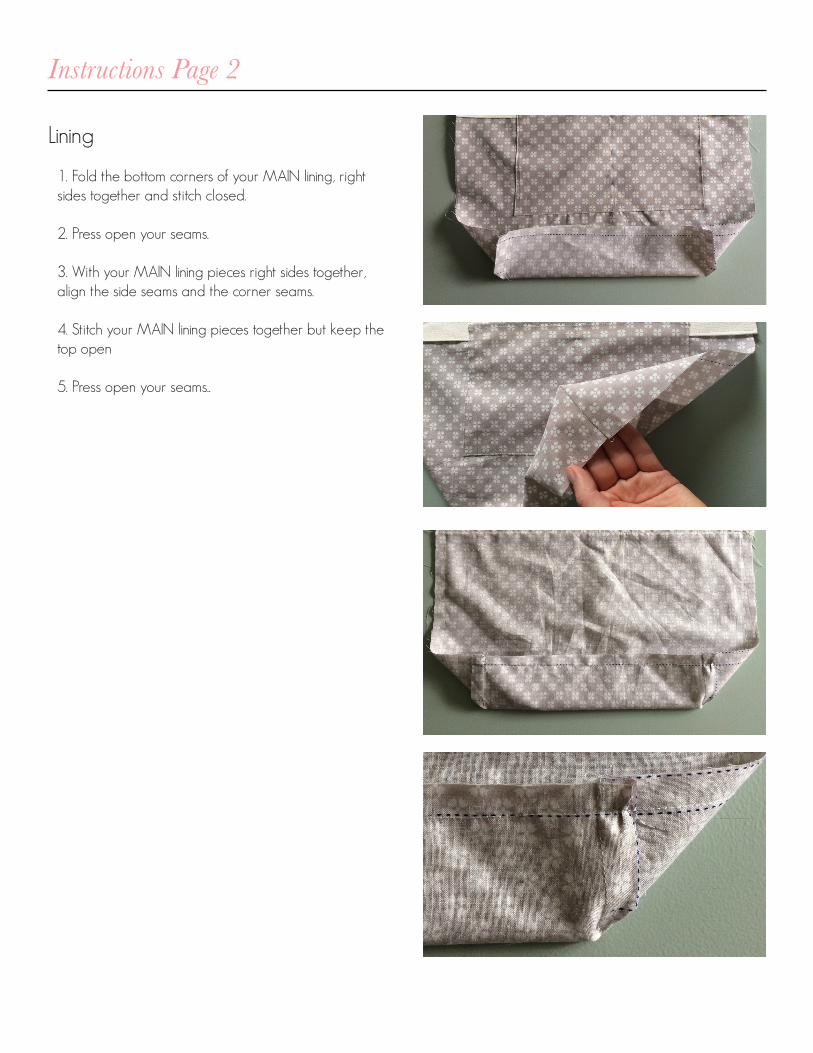
Lining
1. Fold the bottom corners of your MAIN lining, right sides together and stitch closed.
2. Press open your seams.
3. With your MAIN lining pieces right sides together, align the side seams and the corner seams.
4. Stitch your MAIN lining pieces together but keep the top open
5. Press open your seams..
Instructions Page 2
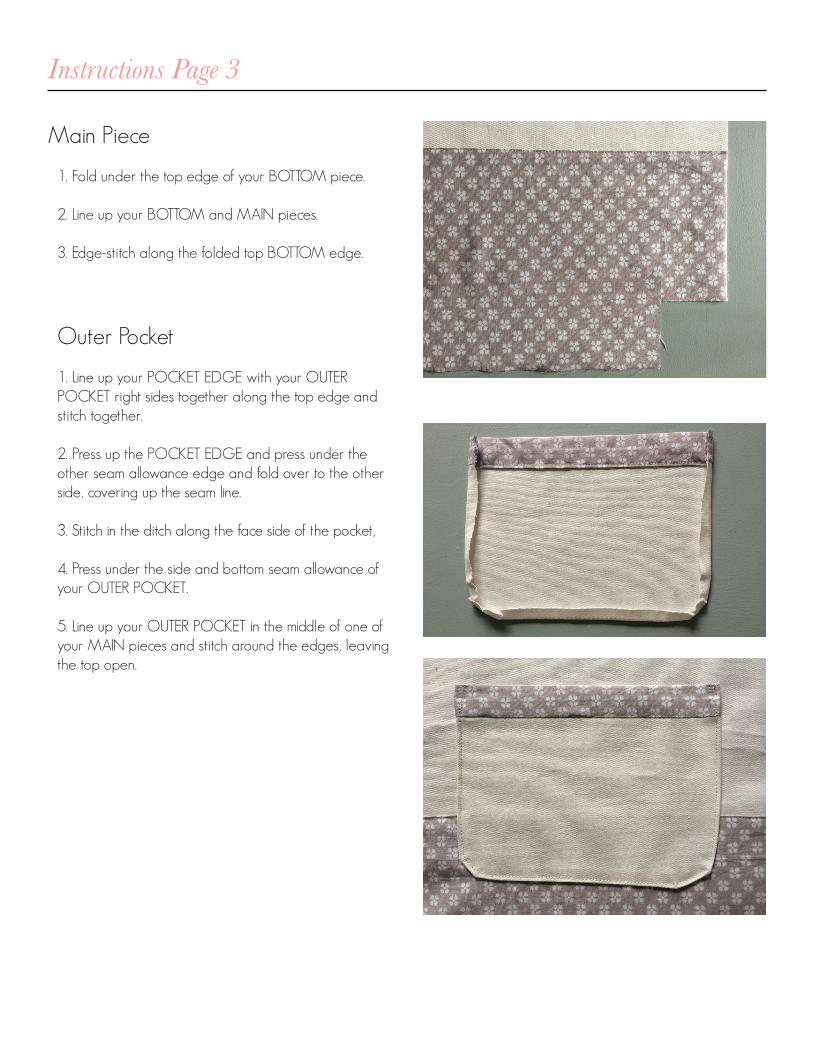
Main Piece
1. Fold under the top edge of your BOTTOM piece.
2. Line up your BOTTOM and MAIN pieces.
3. Edge-stitch along the folded top BOTTOM edge.
Outer Pocket
1. Line up your POCKET EDGE with your OUTER POCKET right sides together along the top edge and stitch together.
2. Press up the POCKET EDGE and press under the other seam allowance edge and fold over to the other side, covering up the seam line.
3. Stitch in the ditch along the face side of the pocket,
4. Press under the side and bottom seam allowance of your OUTER POCKET.
5. Line up your OUTER POCKET in the middle of one of your MAIN pieces and stitch around the edges, leaving the top open.
Instructions Page 3
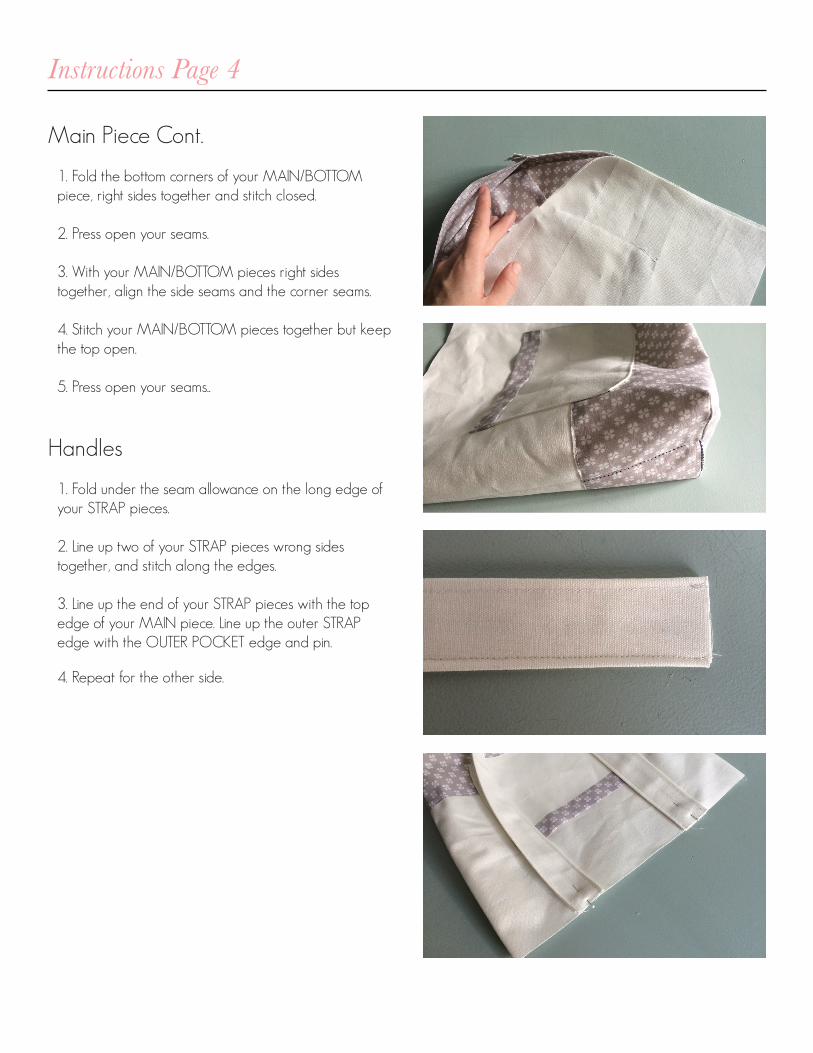
Main Piece Cont.
1. Fold the bottom corners of your MAIN/BOTTOM piece, right sides together and stitch closed.
2. Press open your seams.
3. With your MAIN/BOTTOM pieces right sides together, align the side seams and the corner seams.
4. Stitch your MAIN/BOTTOM pieces together but keep the top open.
5. Press open your seams..
Handles
1. Fold under the seam allowance on the long edge of your STRAP pieces.
2. Line up two of your STRAP pieces wrong sides together, and stitch along the edges.
3. Line up the end of your STRAP pieces with the top edge of your MAIN piece. Line up the outer STRAP edge with the OUTER POCKET edge and pin.
4. Repeat for the other side.
Instructions Page 4
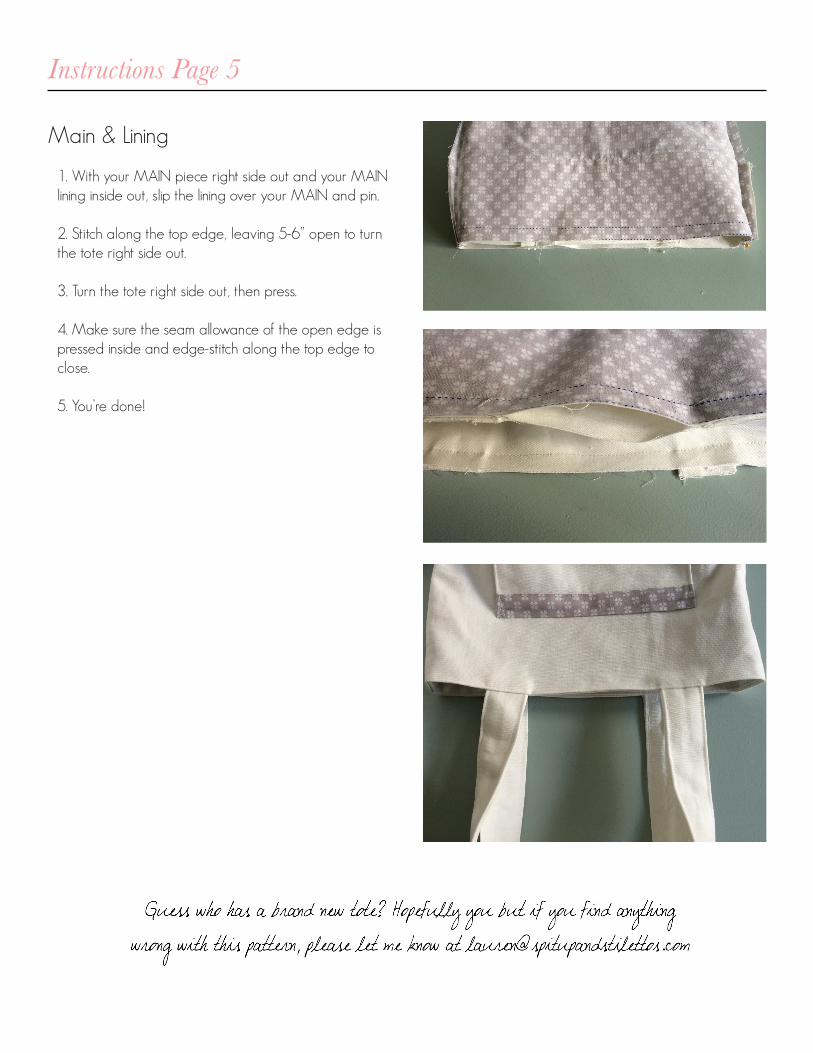
Main & Lining
1. With your MAIN piece right side out and your MAIN lining inside out, slip the lining over your MAIN and pin.
2. Stitch along the top edge, leaving 5-6” open to turn the tote right side out.
3. Turn the tote right side out, then press.
4. Make sure the seam allowance of the open edge is pressed inside and edge-stitch along the top edge to close.
5. You’re done!
Instructions Page 5
Guess who has a brand new tote? Hopefully you but If you find anything wrong with this pattern, let us know and
we will give you a free month of membership as a thank you.

RY
LIE TO
TE
Inner P
ock
et (4)
Fab
ric
: Cu
t 1
1/
2” S
EA
M A
LL
OW
AN
CE
2” x 2”
TEST SQUAREMeasure this square to
make sure your scale is correct.
You will make one funky garment
if its not- heads up!
A1
A2A1

S
ML
A2 A3

S
ML
RY
LIE TO
TE
Main
(1)
Siz
es S
-L
Fab
ric
: Cu
t 2
Lin
ing: C
ut 2
1/
2” S
EA
M A
LL
OW
AN
CE
A3
S
ML
B1
A1
S
ML
RY
LIE TO
TE
Facin
g (3
)
Siz
es S
-L
Fab
ric
: Cu
t 2
1/
2” S
EA
M A
LL
OW
AN
CE
B2B1
A2A1
B2 B3
A2 A3
B3
A3
RY
LIE TO
TE
Stra
p (7
)Fab
ric
: Cu
t 4
1/
2” S
EA
M A
LL
OW
AN
CE
B1
C1
S
M
L
RYLIE TOTE
Bottom (2)Sizes S-L
Fabric: Cut 2
1/2” SEAM ALLOWANCE
B2
C2
B1
C1

B2 B3
C2 C3
RY
LIE TO
TE
Outer P
ock
et (5)
Fab
ric
: Cu
t 1
1/
2” S
EA
M A
LL
OW
AN
CE
B3
C3

RY
LIE TO
TE
Pock
et Edge (6
)Fab
ric
: Cu
t 1
1/
2” S
EA
M A
LL
OW
AN
CE
C1