sample file - drivethrurpg.comwatermark.drivethrurpg.com/pdf_previews/180169-sample.pdf · material...
TRANSCRIPT

Sam
ple
file
DUNGEONS & DRAGONS, D&D, Wizards of the Coast, Forgotten Realms, the dragon ampersand, and all other Wizards of the Coast product names, and their respective logos are trademarks of Wizards of the Coast in the USA and other countries.
This work contains material that is copyright Wizards of the Coast and/or other authors. Such material is used with permission under the Community Content Agreement for Dungeon Masters Guild. All other original material in this work is ©Tim Bannock and published under the Community Content Agreement for Dungeon Masters Guild. Not for resale. Permission granted to print or photocopy this document for personal use only.
Curse of Strahd DM’s Kit & Screen An expansion & supplement for CURSE OF STRAHD
Credits Design: Tim Bannock (neuronphaser.com) Layout/Graphic Elements: Elena Naylor (elenanaylor.deviantart.com) This product uses content and artwork from a variety of community resources and stock art sources. Please consider supporting these amazing publishers and artists!
Matthew Richmond Patrick E. Pullen David Revoy Aaron Lee Wizards of the Coast
Special Thanks The creators of all versions of Ravenloft. The folks who have purchased previous versions of this supplement. You deserve the best, and I hope I keep making it better!
Table of Contents Using the DM’s Kit & Screen 1
The DM’s Kit 1 The DM’s Screen 1
Curse of Strahd DM’s Kit 2 Adventure Options 2 Factions 10 Sergei & Ireena 14 Tsolenka Pass 15 The Lost Gem 16 Balance 17
Curse of Strahd DM’s Screen 19 NPC Index 20
Catacombs Area Index 21 Vestiges Index 21 Barovia Areas by Level Index 21
DM Screen Panels – Portrait Layout 22 DM Screen Panels – Landscape Layout 28
Change Log 4/11/2016 +Balance, Table of Contents 5/3/2016 +Portrait layout DM Screen, Movement rules
on DM screen updated 7/28/2016 Major layout change; +Modified spell
effects to DM screen 8/5/2016 Layout update, new cover
1/25/2018 Layout update
Sam
ple
file
1
Using the DM’s Kit & Screen
The Curse of Strahd DM’s Kit & Screen includes several pages of expanded material to increase the scope of the story, thematically strengthen certain encounter locations, an provide additional focus on certain plot elements that can easily get lost amid the many encounters and locales that the players may explore in Barovia. All of this assumes you have read the adventure Curse of Strahd.
The DM’s Kit The Dungeon Master’s Kit provides several story expansions for Curse of Strahd, giving you the tools and examples to do the following:
1. Add Player Character-friendly Factions, similar to the Harpers, Zhentarim, etc.
2. Expand the role of Sergei’s lingering spirit. 3. Add and define supernatural protections for
Ireena Kolyana to explain why Strahd hasn’t already turned her into a consort.
4. Expand or change the Tsolenka Pass encounter area (Area T on the Barovia map).
5. Alter or delete encounter areas and sidequests in order to play Curse of Strahd in smaller doses, such as a single session, a few short sessions, a long adventure, or a mini-campaign.
6. Provide a complete NPC Index for ease of reference.
Considerations The material in this DM’s Kit requires some consideration before putting it into use. At the very least, read all the way through Curse of Strahd before reading this document, as none of it will make the least bit of sense if you don’t! Beyond that, keep the following points in mind.
You Got Work to Do! Specifically with regard to the faction material – but also pertinent to rearranging or expanding some story elements – there’s some amount of work that you, the Dungeon Master, must do in order to incorporate the ideas you’ll find in the DM’s Kit. Curse of Strahd does not take into account factions at all, and while the
material gathered for that section purposely and specifically draws from elements that already exist within the adventure, it’s up to you to determine the roster of important NPC members of each faction, as well as coming up with suitable sidequests for the characters to improve their faction standing. Refer to the NPC Index within this DM’s Kit to help get a list of faction members started, and refer to the Developments sections of many encounter locations in Curse of Strahd to find ideas for quests (and appropriate rewards).
Pare it Down The NPC Index in this kit and the table of Areas by Level found in Curse of Strahd are incredibly useful tools that you can use to pare things down and streamline the adventure. There are about 40 bajillion named NPCs in this adventure, and there are 24 noted locations, many with huge maps or side areas that can become complicated very quickly. When planning your campaign, consider the realistic length of sessions and how long the campaign will run, and put at least a little thought into which areas are unimportant or less interesting than others. If something jumps out at you, that’s a good thing, but if something seems a bit too ho-hum for your tastes, it’s okay to drop that area entirely. Just remember that there are consequences of doing so, especially with regard to the placement of important magic items through the Fortunes of Ravenloft Tarokka drawing featured in the adventure.
The DM’s Screen The Dungeon Master’s Screen included at the end of this product includes both the “generic” D&D tables and information a DM regularly references during a game, as well as several tables of useful information specific to Curse of Strahd, such as random encounter tables for Barovia’s wilderness and Castle Ravenloft, an index of useful subject matter, alterations to magic in Barovia, and the Madness tables from the Dungeon Master’s Guide (which are pretty regularly referenced in this adventure).
Sam
ple
file

2
Curse of Strahd DM’s Kit
Included here are several expansions to various encounter locations and storylines.
Adventure Options Expedition to Castle Ravenloft (2006) featured a section about manipulating the adventure to run it in smaller doses, due to the realities of gaming groups meeting infrequently, dealing with player turnover, or simply imploding after a few weeks or months of play. The material below is in some ways a rehash of the similarly named section in Expedition, but has been updated and reframed to be appropriate to Curse of Strahd. From Expedition to Castle Ravenloft:
One of the amazing things about the original Ravenloft module is that its fans never grew tired of running or playing in it. Thanks to the random element of the Fortunes of Ravenloft, the adventure was different every time, and we’ve tried to replicate that replayability. Even if you play the entire minicampaign, there will likely be some encounter sites that you don’t use, treasures the PCs don’t find, plans Strahd never has a chance to execute.
This is just as true in Curse of Strahd. The "main storyline" from the original I6 Ravenloft adventure module is entirely contained within chapters 2, 3, and 4 of Curse of Strahd (and even there, Curse features additional content). Everything else is bonus material, though a DM needs to be conscious of the fact that the Fortunes of Ravenloft nearly guarantees placement of the important treasures -- the Tome of Strahd, the Sunsword, and the Holy Symbol of Ravenkind -- in areas that are not limited to those 3 chapters. As long as you're aware of that, though, you're good to use, abuse, or excise everything else with a surprisingly minimal amount of work.
Keep in mind that the following material is a starting point: guidelines and big-picture ideas for condensing the campaign. There may be some hidden "gotcha!" moments or some details about Strahd or various NPCs that gets lost when certain encounter areas are removed. Refer to the NPC Index liberally during your preparation phase of the campaign, and listen to the questions that the players have (whether they voice them through their characters or bring them up in post-game session discussion) in order to ensure you aren't keeping them in the dark unnecessarily, which robs them of a satisfying roleplaying experience (or diminishes the truly dark and epic scope of Strahd's tragic background).
Mini-campaign The minicampaign is designed to use much of the material in Curse of Strahd, only excising large sidequests or areas that don’t directly relate information about Strahd’s machinations. The idea is to be able to play this over a relatively shorter timeframe without losing out on opportunities to provide insight into Strahd’s origins or lose out on gaining valuable allies. Since most areas are still in use, you can simply alter the placement of magic items during the Fortunes of Ravenloft on the fly, or write in an alternate location for the pertinent cards whose locations have been removed. Remove the following elements:
Mad Mage of Mount Baratok (Area M) Old Bonegrinder (Area O) Tsolenka Pass (Area T) Ruins of Berez (Area U) The Wizard of Wines (Area W)
Optionally, you can also remove Argynvostholt (Area Q) and the Werewolf Den (Area Z). Any “useful” characters (friend or foe) featured in these areas could either be met on the road, in the wilderness, or in Krezk or Vallaki.
Sam
ple
file

3
Prologue The characters can follow any of the hooks described in Curse of Strahd, arriving in Barovia. Consider starting them at level 4.
Act 1: Inauspicious Start The party comes upon the village of Barovia, which is currently under siege by Strahd zombies and werewolves led by Kiril Stoyanovich. Strahd is unable to subject Ireena to the third bite because she is protected by Donavich (remove the entire plot of his son, Doru, so as not to distract him), and perhaps one other element or character (such as the Holy Symbol of Ravenkind, the spirit of Sergei, magical rituals cast upon her by the Keepers of the Feather, or Sir Godfrey cast in a much earlier role). After dealing with the supernatural threat over the course of a few sessions, the party is informed of the various items that can be used against Strahd, and steered toward Madam Eva, who can help them locate the objects.
Act 2: Ill Fortunes Madam Eva’s fortune-telling in the form of the Fortunes of Ravenloft kicks off the second part of the campaign, which is the search for the items that can defeat Strahd. While much of this portion of the
adventure revolves around finding the artifacts and exploring Barovia to do so, it is important that this portion be used to fill in some of Strahd’s backstory, and understanding how the characters can keep Ireena safe. See the section titled Sergei & Ireena for some additional tips. Meanwhile, keep the search for the various artifacts down to 1-2 sessions apiece. You might consider leveling the characters up slightly faster if they are not dealing with a lot of XP-heavy encounters, perhaps using a milestone system: for each artifact uncovered, the characters gain a level. This likely places them close to or at 9th level. Whenever possible, remove 1-2 encounters from any of the locations visited. A potential alteration that can help with any or all of these plots would be to remove the Abbey of Saint Markovia from Krezk, and replace it with Argynvostholt. As it is a haunted area, the villagers would similarly avoid the place, and you’d remove the distracting sidequests regarding The Abbott’s identity and the bizarre wedding he intends for Strahd. At the same time, this unlocks a great deal of plot elements regarding Strahd’s past, and you can easily recast Sir Godfrey and other revenants at Argynvostholt as being slightly more informative about Strahd, Sergei,
Sam
ple
file

4
Tatyana, and even the Vistani. The Amber Temple provides an interesting prologue to Castle Ravenloft, but perhaps serves as an even more interesting denouement after Strahd is defeated: perhaps once Strahd is destroyed, it takes unlocking the secrets of the Amber Temple to truly keep his malice at rest (or returning Argynvost’s skull to Argynvostholt provides a beacon of light that cures the entirety of Barovia from his evil).
Act 3: The Face of Evil Armed with the artifacts and having learned a great deal about Strahd’s past, the party finally knocks on the front door of Castle Ravenloft. I’m sure Rahadin will be happy to let them in…
Long Adventure You can easily make a fairly long adventure – maybe 8-10 sessions – out of Castle Ravenloft, keeping maybe 2-3 encounter locations outside of it as a means to fill in the context of what makes Strahd such a devilish foe. In this case, simply pick the parts of the adventure you like the best and figure out how to place Ireena, Madam Eva, and perhaps both Rudolph Van Richten and Ezmerelda d’Avenir among those locations and off you go. You can remove the Tome of Strahd entirely. Some ideas:
Ireena has been hunted by Strahd for some time, and under the protection of Van Richten and Ezmerelda, has come to the Amber Temple to uncover Strahd’s weaknesses. The party either chances upon them or accompanies them, and once uncovering Strahd’s origins and some artifacts (the Sunsword and Holy Symbol), head into Castle Ravenloft to kill him.
The village of Barovia is under attack by zombies and werewolves because Donavich, Ireena and Van Richten got a hold of the Sunsword and the Holy Symbol and are hiding them in the church, where Strahd cannot go. The party is recruited from the defenders of the village to take these artifacts and accompany Ireena and Van Richten into Castle Ravenloft to defeat Strahd…but first they must accept Dark Gifts to increase their power, all provided through a nightmare vision induced by Madam Eva of the Vistani. (Basically, they adventure through the
Amber Temple as a sort of “real nightmare” and the Dark Gifts are granted specifically for them to have the power to defeat Strahd.)
In any case, consider starting the characters at level 7 or so, and be prepared to fudge things so Ireena and Strahd have some sort of epic meeting (but don’t negate the players’ influence over this!). You may even consider having Ireena run by the players or even as one of the PCs. Additionally, make sure to have Strahd show up physically once or twice to screw with the players, since that will help establish plenty of ill will, regardless of the background story and other context. Killing off a player character (with the player’s consent) and then having them run Ireena (rebuilding her as a full player character) would be some epic storytelling, but it will only work for certain players and groups.
Short Adventure In this version, the adventure is a few short encounters that establish the Curse of Strahd and the need to defeat him, one session that deals with finding one of the artifacts that can help defeat Strahd, and then two sessions in Castle Ravenloft itself. The characters should be 8th or 9th level; if 8th, consider leveling them up automatically upon finding the artifact.
Session 1: Welcome to Barovia The characters head into Barovia based on one of the hooks in Curse of Strahd; consider keeping it simple, with either an invitation from him or the Mists just pulling them in. Arriving in the village of Barovia, they help clean up the Strahd zombie and werewolf infestation alongside Ismark, Ireena, and Donavich. Interrogation of the leader of the werewolves, Kiril, reveals that the Vistani have foretold that Ireena is Tatyana reborn, which is what spurred Strahd to assault the village and destroy magical protections placed upon her by his ancient enemies, in the form of the Holy Symbol of Ravenkind.
Session 2: Getting At the Root Heading to Madam Eva at the Tser Pool Encampment, the party has their reading done, revealing that the Sunsword is located in the Amber Temple. When the
Sam
ple
file
5
party makes it clear that they are planning to take Strahd down, Madam Eva transforms and attacks! Simply swap her out with Baba Lysaga (and perhaps adding the hags from Old Bonegrinder as other “Vistani witches”), and that’s why she’s suddenly an enemy. After dealing with her, the party heads to the Amber Temple and slogs their way through it to find the Sunsword in the location of the sarcophagi. You can either remove the sarcophagi entirely, keep them as a storytelling tool to reveal much of Strahd’s origins but leave out the possibility of the Dark Gifts, or you can keep it as is, just adding the Sunsword in some likely area. Alternatively, you can replace the Amber Temple with Argynvostholt, providing Strahd’s background story through the revenants, and putting them to rest as a means of getting the Sunsword. (Whether or not that means heading into Castle Ravenloft to recover Argynvost’s skull or simply pledging to do so under pain of a geas is up to you.) You might even recast the Order of the Silver Dragon as Strahd’s former royal knights, who turned against him once he turned into a vampire by slaying Sergei. They’d thus have more intimate knowledge of him and the castle, and would present a stronger case for Ireena to join with Sergei’s spirit, if you adopt that angle as the best possible resolution for the story (once Strahd is defeated, of course).
Session 3: Entering the Castle Armed with the Sunsword, the party heads into Castle Ravenloft, encountering Strahd in at least one or two of the earliest possible areas (based on the potential readings from the Fortunes of Ravenloft), but in these cases Strahd (or the party) flees at the earliest sign of danger. This establishes him as an ever-present threat. A great encounter to end on is the Heart of Sorrow, perhaps intentionally or perhaps accidentally revealing its location by way of one of his jealous consorts: Gertruda and Escher make the most sense in this role, but it’s not hard to imagine Lief Liepsiege or Cyrus Belview acting in this manner under threat of violence.
Session 4: Defeating Strahd Ready for the final confrontation (especially if Strahd is without the Heart of Sorrow), the party explores the rest of the castle until their final, fateful battle with Strahd as foretold in Madam Eva’s reading. If the adventure drags at all, don’t hesitate to have Strahd show up and attack them a little early at least once, and in turn reveal his surprise when the Heart of Sorrow is no longer around to soak up some damage. This causes him to flee, and then sets up the final confrontation nicely. End a little early? Have the party enter the Catacombs (K84) and have another confrontation with Strahd, perhaps at less hit points, having just revived. It becomes apparent that some “last measure” means of defeating him is necessary, and this could be either the final blow coming from the Sunsword, or somehow handing Ireena over to the spirit of Sergei which manifests from the Sunsword, or some other suitably epic visual. Just make sure it’s a player character that ends Strahd and releases Sergei (and/or Ireena): make the players feel like they matter the most. If the players have had too easy a go of it and continuously trounce Strahd, have some of the other monsters in the catacombs come to his aid: there are vampire spawn, a spirit that possesses gargoyles, and plenty more to choose from.
One-Shot Since AD&D’s I6 Ravenloft adventure module started off as a Halloween adventure, it’s not like one-shots aren’t part & parcel to the Ravenloft experience, so why not run Curse of Strahd in a single session? In this format, the players head straight to Castle Ravenloft to take down Strahd, but they don’t get the benefit of the Fortunes of Ravenloft to help them get a leg up: they don’t know when Strahd shows up, and they don’t get the benefit of picking up the Holy Symbol or the Sunsword.
Developing the One-Shot The party is invited to the village of Barovia: Strahd’s fully aware of their intent. There are no zombies or werewolves, so the party immediately meets with Ireena and Ismark, who reveal that Strahd wants to turn Ireena into his consort because she bears the reborn soul of his beloved Tatyana.
Sam
ple
file
6
The PCs then enter the castle and are free to explore; it’s the DM’s job to pick some of the best encounters and steer them towards those, or present the NPCs connected to them – Cyrus, Rahadin, Lief Liepsiege, the Barovian witches, Gertruda, Escher – earlier on. Use beckoning apparitions or human-like shadows as a means of steering the party around. After the very first combat encounter, have Strahd attack before the party can rest. This is meant for Strahd to size them up, and he’ll flee or let them go after only a few rounds of combat. Don’t hesitate to also have some of his vampire spawn or other consorts show up and help out, since you’ll have less overall encounters to grind the players through. You can then draw a card and refer to the Fortunes of Ravenloft to place Strahd, or you can simply have him reappear at a time when the party enters a room where he could appear according the Fortunes of Ravenloft, so you have some guidance on his appearance and demeanor there. Either way, it’s during this second encounter that he fights to the death, and preferably that occurs somewhere around the last hour of play for the session. If you want a few milestones throughout, have the party take out the Heart of Sorrow somewhere near the midpoint of the session. This keeps the forward momentum going. If you find yourself with extra time at the end of the session, have a second battle with Strahd in the Catacombs (K84) to put him to rest once and for all. The appearance of his vampire spawn consorts here makes for quite a pitched battle. Whatever the case, plan for about six encounters during the session, including the climactic second encounter with Strahd, but not including the first one since it’s guaranteed to only last a couple rounds. That said, consider preparing upwards of 8 or 10 just so you can easily swap out a few. Pair up some of the named NPCs throughout the castle or some of the potential random monsters with some of the named NPCs in order to keep things interesting. Things like Cyrus and a couple wraiths, or Rahadin and Gertruda, or anything else fun. Should the party be nearing TPK territory at any point, don’t hesitate to utilize Ireena, Ismark,
Donavich, Ezmerelda d’Avenir, and Rudolph Van Richten as potential allies that can save the party. This is great for ensure the party reaches the second encounter with Strahd, because it’s way cooler and way meaner to have Strahd kill the party, and not Random Vampire Spawn #4.
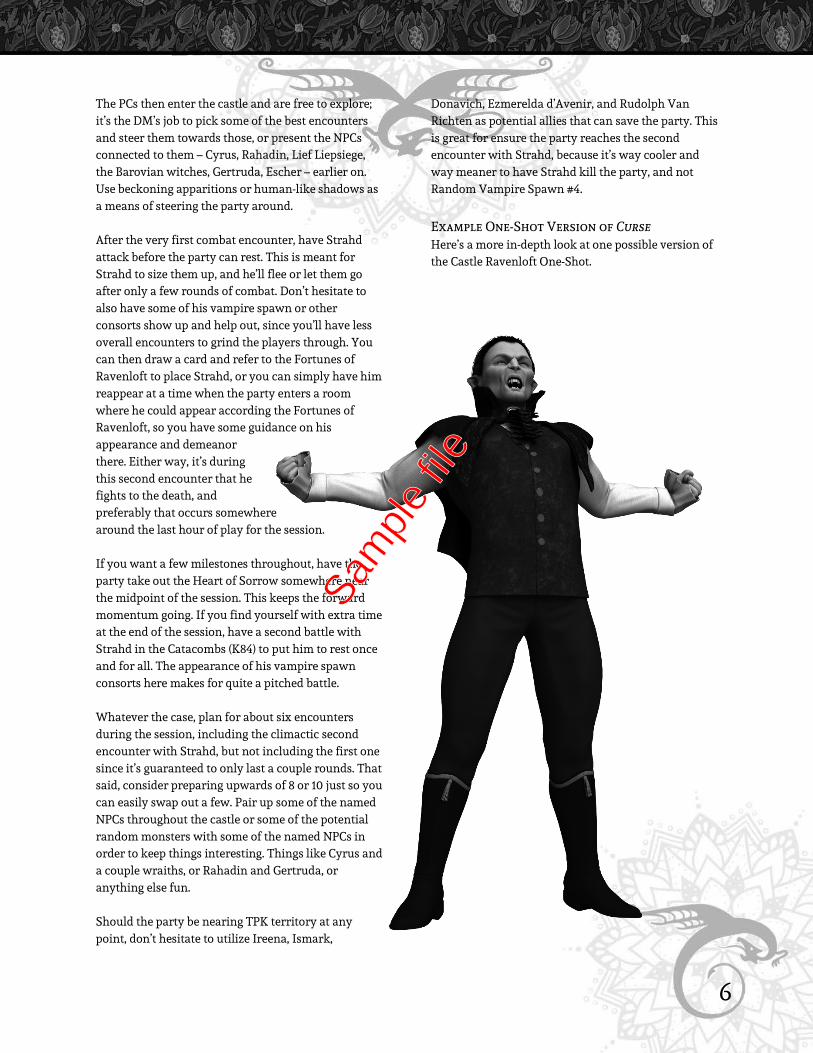
Example One-Shot Version of Curse Here’s a more in-depth look at one possible version of the Castle Ravenloft One-Shot.
Sam
ple
file
7
Basics. This scenario is balanced towards a party of 4-6 characters of level 9. To frame the characters’ journey through the castle in a sensible way despite them basically being on a railroad (or near railroad), you can simply describe how the castle has fallen into ruin, and many of the wings, side rooms, and upper towers of the castle have crumbled, filling many areas with rubble that the party cannot navigate, or that you simply gloss over as they move between rooms with encounters that are actually fun. Otherwise, you can simply give up on the logic of the castle’s layout, and simply say each room the party actually comes across is located roughly adjacent to each other. This is fine for a one-shot, but do keep in mind that if the party uses a lot of movement, they may initiate encounters in multiple rooms, and since these encounters are often hard or deadly in terms of challenge rating, you may be leading your players into a TPK if you cram everything immediately next to each other. Not Just Combat. We want to make the adventure interesting and feature some NPCs to interact with, rather than just to kill, since that’s so important to Strahd’s backstory and his domain. So we’ll begin with the party meeting Rudolph Van Richten on the road to Castle Ravenloft. He can fill the party in on anything they feel they need to know, and leads them to the carriage, knowing its the only way to arrive at the gates of Castle Ravenloft without any undo encounters. At some point — maybe during the carriage ride, or just before, or shortly after — he might ask what they learned from the Vistani, at which point the DM can run the Tarokka reading as a flashback. There’s a couple ways to run the Tarokka reading, but the end result should be the same: whatever items get placed, the party already completed some adventure(s) to obtain at least one of them, and therefore they have that advantage. Stacking the Tarokka deck so the party starts with the Sunsword (COS 223) or the Holy Symbol of Ravenloft (COS 222) might be best, but honestly any of the items presented in the appendix can be helpful. James Introcaso has a great simplified version of the Tarokka reading for a one-shot Curse of Strahd game, but it still assumes you’ll be using most of Castle Ravenloft. Look for it by hitting your favorite search
engine and looking for “Playing Curse of Strahd as a One Shot.” Areas I and J (COS 37-38). Strahd’s nightmare (MM 235), Beucephalus will be drawing the carriage (maybe acting as a normal horse). It is mounted by Strahd’s animated armor (COS 227). Once the party arrives at the Gates of Ravenloft (Area J) — whether they take the carriage, or put Van Richten in as a decoy and follow it from a distance — they get waylaid by 6-8 Strahd zombies (COS 241). At that point, the nightmare busts off the carriage and attacks, along with the animated armor. The party can stand and fight or rush into the castle grounds, but don’t forget there’s a patch of green slime (DMG chapter 5) in the entry tunnel. K1. Front Courtyard through K6. Overlook (COS 52-54). Normally, Rahadin (COS 237) meets the party in K8 and acts the part of the goodly castle chamberlain, but his abilities to move around and stay hidden make him a much better villain outside, where there should be rain and fog (don’t you know anything about setting the mood?!). So have him out on the grounds; the party will run into him any time you feel the need to drive them inside (perhaps he won’t even pursue them once they enter the castle). To make matters worse, the party has a chance of encountering Strahd himself (COS 239-240) for the very first time at K6. Overlook, and you can roll on Strahd’s Minions table (COS 239) for some additional monsters patrolling the grounds, or simply place 1d4+2 Strahd zombies there. These encounters are brutal if faced en masse, but the point is to (1) drive the party inside, and (2) maybe have the party meet Strahd once or get in a few words with Rahadin that might reveal Strahd’s tragedy — like his anger — is never ending. Alternatively, you can just skip the outside area other than the front door. Rahadin doesn’t get to use his abilities as well indoors, though, so you might want to consider either still having an encounter with him outside, maybe by replacing all the monsters in the first encounter (Area J) other than Beucephalus with Rahadin. The nightmare and the chamberlain are a pretty nasty force to reckon with, though. K8. Great Entry (COS 55). When the party enters, they are greated by a high ceilinged hall with lit torches, soon to be extinguished by the fluttering of wings
Sam
ple
file

8
from the eight gargoyles (MM 140) that will attack! A fight in the pitch dark at any level is going to be difficult, and with flying creatures this is no less the case; keep in mind that the gargoyles have darkvision out to 60 ft. K10. Dining Hall (COS 56). An illusion of Strahd sits at the organ beyond a fully set dining table. This illusion, according to the room entry text, might “talk about his family or shed light on the castle’s history,” making this the perfect opportunity to begin to reveal some facets of Strahd’s ultimate tragedy. This is also a great place to dress the room with huge paintings of Strahd, Sergei, their parents and perhaps even Tatyana; better still that Sergei and Tatyana share a picture with an engraved plate below it that reads “THE BETROTHED” or some such. A picture of Tatyana appears on COS 67. A portrait of Strahd appears on COS 70. Portraits of King Barov and Queen Ravenovia appear on COS 94. Unless I missed something, no pictures exist of Strahd’s brother Sergei, so having his depiction marred, scratched, damaged, destroyed, or completely absent are totally in character with the story of Strahd’s jealousy, so use that to your advantage: create handouts of all of these portraits except Sergie, or find a picture in a similar art style (such as Lief Liepsig in COS) and damage it or photoshop extreme warping or something. K15. Chapel (COS 57). The Icon of Ravenloft (COS 222) can be found here, clutched in the hands of an NPC that might sell the adventure a little more than just some rando who died here. For example, if Van Richten ever splits off from the party, place his corpse here. Did you do a flashback with Madame Eva? Have it be her, or a Vistani agent of hers. Don’t know what would sell it best? Ask one of the players: “Quickly tell me about your character’s mentor/lover/best friend.” Then say, “Yeah, that’s the dude/dudette that’s lying dead on the floor, clutching the Icon of Ravenloft. You don’t know how they knew how to find you, but they obviously wanted to deliver this artifact to you to help you on your quest…but clearly they fared poorly in Strahd’s domain.” K20. Heart of Sorrow & Staircase (COS 59). A spiral staircase runs up into the heart of the ruined castle…and un-ironically, that’s where the Heart of
Sorrow (COS 59 and 239) lies. Or rather, floats. Ringing the staircase, set on the walls are 10 animated halberds (treat as flying swords — MM 20 — with AC 15 and dealing 1d10+1 slashing damage) and at varying levels along the upper portion of the staircase near the Heart are 3 guardian portraits (COS 227). The guardian portraits are another opportunity to add portraits of Strahd, King Barov, Queen Ravenovia, or Sergei and possibly Tatyana, their visages warping and appearing demonic as they attack and act against the PCs. As soon as the Heart takes any damage, 4 vampire spawn (MM 298) are dispatched and appear in 3 rounds, scuttling in from above using their Spider Climb ability to cling to the walls. If you assume that Castle Ravenloft lies largely in ruins — thus blocking off all the other rooms of the place other than the ones you want the party to go through — you can place plenty of rubble around for the guardian portraits to make use of with their telekinesis. Note also that if the party attacks the Heart, the appearance of the vampire spawn in 3 rounds will make this an incredibly deadly encounter
Sam
ple
file
9
unless they make quick work of the halberds and portraits. That said, it’s relatively easy to avoid the guardian portraits if they simply move to the lower portions of the staircase and head down to the catacombs, rather than lingering on the staircase itself and fighting all of these enemies. K84. Catacombs (COS 85-93). The catacombs are the heart of the adventure (you know, as opposed to the room with the Heart, I guess) because this is where the party meets Strahd for what might seem like the final confrontation. Several monsters exist in the crypts, and several story beats can be revealed as the party opens tombs to attempt to trap or escape from Strahd and his minions. This is a great sequence for a running battle to find the source of Strahd’s power, perhaps with some snippet of info gleaned from either Madame Eva’s Tarokka reading or Van Richten’s intelligence on Strahd’s abilities: defeating him at or placing his injured or seemingly destroyed body in his coffin might be the only way to see to it that he is defeated once and for all, freeing the souls trapped in Barovia. The Catacombs you might want to include are listed below with the resident monster(s) and some additional notes. Generally speaking, you want to use these as opportunities to add monsters to the encounter and — unlike in previous encounters — probably refrain from piling them on top of creatures from the Strahd’s Minions table (COS 239) since that would make this area a guaranteed TPK: remember, Strahd should be present, fighting the party and taunting them the whole time they are in the catacombs: this is their chance to feel like they are in a final boss fight. Except their not, because Strahd reappears in K86 if defeated here (unless you’re running out of time for the one-shot!).
#20 (COS 89). Vampire spawn (MM 298). Sasha Ivliskova was one of Strahd’s many brides. Waking her up is both creepy (read the line she speaks upon rising!) and a great opportunity to shed some light on the Ireena/Tatyana connection, as well as Strahd’s long legacy of taking brides that he cannot truly love. For example, Sasha might bear a resemblance to Ireena (and the portraits of Tatyana that the party has seen by this point), but making it clear that it’s
only a minor resemblance might drive home the theme that Sasha was not the reborn soul of Tatyana. Or maybe she was; depends how you wanna play it. If Ireena is present, or mentioned, Sasha flies into a jealous rage because that’s who Strahd “truly loved,” which is a sore spot for this long-forgotten wife of Strahd’s. #21 (COS 89). Banshee (MM 23). Patrina Velikovna was a rival of Strahd’s in life, but for the purposes of this one-shot, her role can be changed to be another former bride of Strahd’s, or as the tormented victim of Strahd’s family’s ascendancy to power in Barovia; perhaps she was murdered and imprisoned here as some sort of leverage against Rahadin. Worse still, maybe she died at Rahadin’s hands, his former lover whom Strahd forced him to kill to prove his loyalty to the vampire lord. #27 (COS 90). 3 giant wolf spiders (MM 330). In lieu of using the Strahd’s Minions table, activating these monsters and the following few helps get across the idea that Strahd has low-powered creatures at his beck and call. #35 (COS 92). 6 ghouls (MM 148). #38 (COS 92). Wraith (MM 302), 3 hell hounds (MM 182). The shattered spear located here could be repaired or wielded as the Blood Spear or Gulthias Staff (both COS 221) if you haven’t already handed out such items. #39 (COS 93). Beucephalus the nightmare (MM 235, 104 hit points). If this hellish horse hasn’t made his debut earlier, or wasn’t defeated, he’s here.
K85. Sergei’s Tomb and K88. Tomb of King Barov and Queen Ravenovia (COS 93 & 94). You can place these among the other crypts in the catacombs to reveal them a bit earlier (and more easily) to the players in order to build some story hooks. Sergei’s tomb is a great area to hide any last-minute treasures the party could use, especially healing items. In fact, a great device would be that entering this crypt — with all of
Sam
ple
file
10
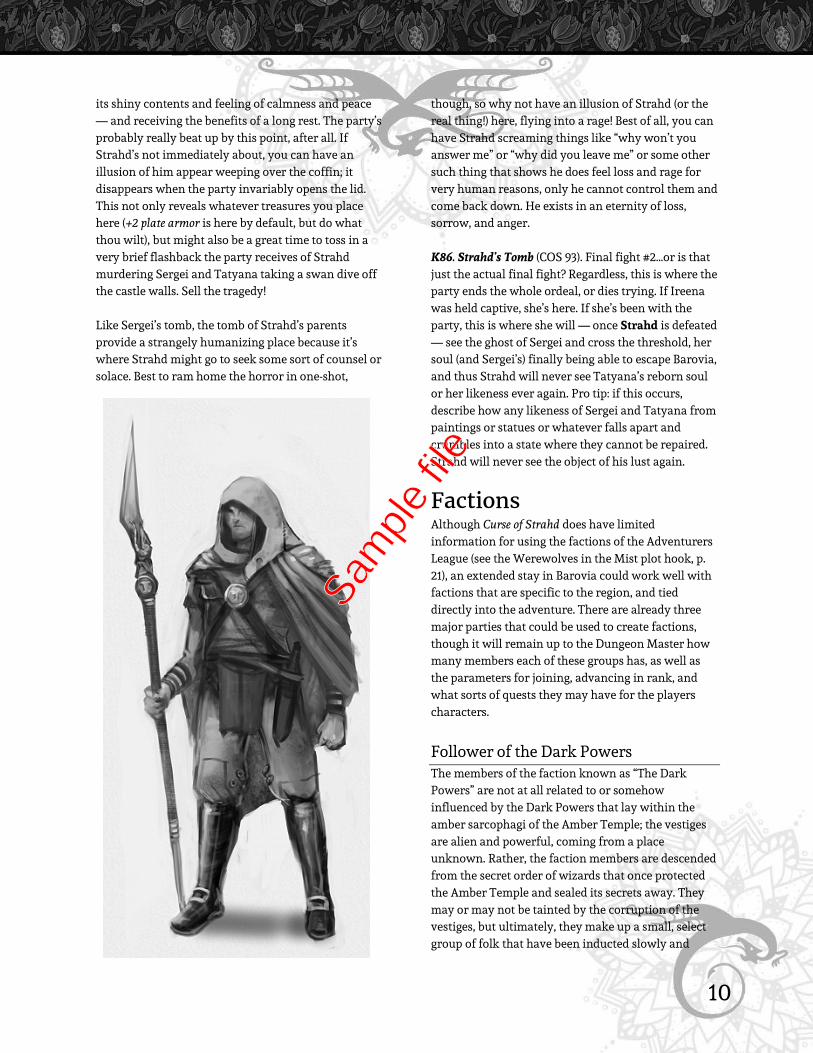
its shiny contents and feeling of calmness and peace — and receiving the benefits of a long rest. The party’s probably really beat up by this point, after all. If Strahd’s not immediately about, you can have an illusion of him appear weeping over the coffin; it disappears when the party invariably opens the lid. This not only reveals whatever treasures you place here (+2 plate armor is here by default, but do what thou wilt), but might also be a great time to toss in a very brief flashback the party receives of Strahd murdering Sergei and Tatyana taking a swan dive off the castle walls. Sell the tragedy! Like Sergei’s tomb, the tomb of Strahd’s parents provide a strangely humanizing place because it’s where Strahd might go to seek some sort of counsel or solace. Best to ram home the horror in one-shot,
though, so why not have an illusion of Strahd (or the real thing!) here, flying into a rage! Best of all, you can have Strahd screaming things like “why won’t you answer me” or “why did you leave me” or some other such thing that shows he does feel loss and rage for very human reasons, only he cannot control them and come back down. He exists in an eternity of loss, sorrow, and anger. K86. Strahd’s Tomb (COS 93). Final fight #2…or is that just the actual final fight? Regardless, this is where the party ends the whole ordeal, or dies trying. If Ireena was held captive, she’s here. If she’s been with the party, this is where she will — once Strahd is defeated — see the ghost of Sergei and cross the threshold, her soul (and Sergei’s) finally being able to escape Barovia, and thus Strahd will never see Tatyana’s reborn soul or her likeness ever again. Pro tip: if this occurs, describe how any likeness of Sergei and Tatyana from paintings or statues or whatever falls apart and crumbles into a state where they cannot be repaired. Strahd will never see the object of his lust again.
Factions Although Curse of Strahd does have limited information for using the factions of the Adventurers League (see the Werewolves in the Mist plot hook, p. 21), an extended stay in Barovia could work well with factions that are specific to the region, and tied directly into the adventure. There are already three major parties that could be used to create factions, though it will remain up to the Dungeon Master how many members each of these groups has, as well as the parameters for joining, advancing in rank, and what sorts of quests they may have for the players characters.
Follower of the Dark Powers The members of the faction known as “The Dark Powers” are not at all related to or somehow influenced by the Dark Powers that lay within the amber sarcophagi of the Amber Temple; the vestiges are alien and powerful, coming from a place unknown. Rather, the faction members are descended from the secret order of wizards that once protected the Amber Temple and sealed its secrets away. They may or may not be tainted by the corruption of the vestiges, but ultimately, they make up a small, select group of folk that have been inducted slowly and
Sam
ple
file
11
carefully into knowledge that the Amber Temple exists, and that its secrets need to remain protected, but furthermore that a certain balance must remain in the domain: if Strahd is somehow defeated in a lasting manner, the forces that the Dark Powers draw from him would be rent asunder, and an even worse fate would befall all that exist in Barovia. For now, it is believed that this fate would include the utter and complete annihilation of every soul in Barovia, though even the highest ranking faction members believe there are even deeper layers to the secrets of this ultimate fate.
Goals Gather arcane or forbidden lore across
Barovia and from other lands when available.
Keep the Vistani from exerting too much influence over Barovia or Strahd’s other servitors.
Proactively discourage or eliminate rumors about a “final means” of destroying Strahd.
Eliminate those that seek the Amber Temple for any means other than prolonging Strahd’s torture.
Beliefs The Dark Powers keep Barovia from being
entirely consumed by Strahd’s wrath, but require Strahd as a focus to ensure all of the souls here aren’t obliterated entirely. It is a delicate balance, beyond good and evil, law or chaos.
The Dark Gifts come at a heavy price, but greater still would be the price of letting the secrets of the Amber Temple fall into the hands of those that seek power for power’s sake.
Darkness and sorrow will never leave Barovia, but Barovia itself must know some small hope, or else some greater terror will come to rule the land and utterly annihilate all beings.
Member Traits & Typical Quests Members of the Dark Powers faction are trained to work autonomously, and are given relatively simple commands that often lead to very complicated relationships with the inhabitants of Barovia. As a
secretive group descended from a cabal of hidden arcanists dedicated to a God of Secrets and attempting to keep a temple filled with evil spirits hidden from everyone, it’s perhaps unsurprising that members are not immediately inducted into the organization with a lot of knowledge, but instead are plied with promises of the epic scope of their tasks and how they are protecting every last soul in Barovia. As one rises through the ranks, they soon find out just how literal this is, but their mission profile changes very little. Generally, members of the Dark Powers are tasked with keeping the Vistani in check, ensuring foolish rumors about Strahd’s imminent defeat are quelled, and quests that in many ways prolong or exacerbate Strahd’s suffering (or at least his frustration). The dual nature of acting against Strahd and the Vistani but also – in the end – needing Strahd allows faction members to interact easily with the general populace, but they must always be on the lookout for Strahd’s spies.
Ranks Agent (rank 1) Shadower (rank 2) Keeper (rank 3) Preceptor (rank 4) Silent Master (rank 5)
Order of the Silver Dragon The silver dragon Argynvost lived in the idyllic valley that became Barovia for many years under the guise of a human nobleman, Lord Argynvost. He was in the process of building up a sizable army of knights, paladins and other holy warriors dedicated to the cause of good when Strahd and his army arrived. With the destruction of the order at the hands of the invaders, Lord Argynvost’s secret of being a silver dragon quickly came out, as he used the full extent of his power to fight back, but it was to no avail. Eventually he perished, and his knights were slain nearly to a man. The dragon’s greatest secret died with him: that he’d planned for the Order of the Silver Dragon to march on the Amber Temple and become its new protectors, since the wizards that once guarded it had been lost to the corruption of the vestiges buried within that unholy place. The Order of the Dragon that exists now is a disparate organization born from the scions of surviving knights and their relatives, and they are dedicated not
Sam
ple
file
12
to some misty-eyed goal regarding a temple no one’s ever heard of, but instead finding peace for the restless spirits that have taken over Argynvost’s former home, as well as for getting revenge on Strahd. In a way, this aligns with why the spirits of Argynvostholt are so restless, but their inner corruption and their haunted (and haunting) nature restrains their ability to actually strike out and gain revenge. The faction must balance getting revenge without succumbing to the darkness that has overtaken the spirits of the silver dragon’s manor. And they must avoid Strahd’s spies at every turn while doing so.
Goals To uncover any lore that might help with
putting the tortured spirits of Argynvostholt to rest.
Gaining revenge for Argynvost’s destruction, acting out in any way that can inflict long-term harm against Strahd and his machinations.
Secretly discover and identify Strahd’s spies, and out them in the most public way possible without being uncovered in turn.
Discover any lore about Argynvost’s origins and his plans for the original Order of the Silver Dragon.
Beliefs Strahd not only killed Argynvost and the
original knights of the Order, but also cursed them to continue on after death, torturing them through the steady corruption of Barovia and its people.
Argynvost (and Argynvostholt in turn) may have left behind artifacts and lore that can help in defeating Strahd and lifting the curse that haunts the spirits of the original knights.
The Vistani, while clearly able to travel unimpeded within Strahd’s lands, are not truly allies of Strahd, and thus may have knowledge or powers that can be useful to the Order.
Member Traits & Typical Quests The Order tries very hard to present itself as a strong, unified association of valorous men and women dedicated to an ancient organization of light and
good, but the fact is that they are little more than disorganized rebels hiding amidst Strahd’s spies, trying to feel out the Vistani, and full of lofty ideals but unsure of what actions to take. These are people that are good, through and through, but suffer from odds heavily against them and ineffectual leadership that, if made public, could easily be detained or destroyed by Strahd. Thus, fomenting disorder and taking whatever little, hidden actions against Strahd that are safe tend to be the order of the day, rather than any sweeping activities that could really harm the vampire’s control of Barovia.
Ranks Squire (rank 1) Knight (rank 2) Sovereign Knight (rank 3) Holy Knight (rank 4) Dragon Knight (rank 5)
Sam
ple
file