saturn 1b and v test-launch report - model rocketry supplies
TRANSCRIPT

Page 1
1130 Elkton Drive, Suite A
Colorado Springs, CO 80907 USA
www.ApogeeRockets.com
orders @ApogeeRockets.com
phone 719-535-9335 fax 719-534-9050
N E W S L E T T E R
I S S U E 5 8
Saturn 1B and V Test-Launch ReportSaturn 1B and V Test-Launch ReportSaturn 1B and V Test-Launch ReportSaturn 1B and V Test-Launch ReportSaturn 1B and V Test-Launch ReportBy Tim Van Milligan
Time for something completely different...I thought I'd write a report about the first launches of the
Apogee Saturn 1B and the Saturn V rockets (which I flew onSaturday, July 21). I don't usually write launch reports be-cause I know that they can sometimes get a little boring toread. But for historical reasons, I thought I'd better documentthese flights.
Another reason I had for writing this article is that I hopeto teach younger modelers how to test launch new designs.This is an important skill to acquire; especially once youprogress beyond Skill Level 1 model rockets.
Getting Ready For the First Launch
This past week, I found a little time to complete the con-struction of the flight test vehicles of the Saturn 1B and theSaturn V. Most of the production parts I now have in stock:tubes, plastic nose cones, transitions, and centering rings. ButI don't have all the final wraps and the fins yet. However, Iwas able to cobble together some prototype parts that were"close-enough" to the final production pieces that will be inthe kit.
For example, for the vacuum form wraps that I didn't have,I used parts of wraps that are used on other areas of the rocket.While they didn't have the correct scale appearance, they wouldprovide the same mass and aerodynamic drag effects as thefinal parts.
The same went for the fins. I made a simple urethane cast-ing of the prototype fins. While these didn't have the surfacedetail as the production parts, they would be close to the ac-tual weight and size. A objective of the flight program was touse "scale" fins, and not to make them larger if at all possible.
Overall, I wanted the flight vehicle to match -- as close aspossible --- the final production vehicle. I am reasonably as-sured that I was/am pretty close.
For the Saturn V, I did have time to put down a coat ofprimer, and the white base color paint. So it's final weight
should be pretty close to the actual production kit. I ran out oftime on the Saturn 1B, and I didn't have a chance to paint it.
Even though the models were built, I knew I wasn't ableto test fly them yet. The reason is that I didn't know the Cen-ter-of-Pressure location for them. Without this, I didn't knowhow much nose weight to add to them, so that they'll flystraight.
To find out the CP location, I used a great software pro-gram called "RockSim." You may have heard of it...
When I enter a rocket design into RockSim, I don't try tomatch the picture with the actual appearance of the rocket. Itry to match the aerodynamic qualities. So, if you looked atmy RockSim files, the first thing you'd notice is that there isno escape tower on the models. The reason is that this partwould throw off the CP calculations.
In the Barrowman equations, the reference area used tocalculate the CP is chosen as the base area of the nose cone. Ifthe area is very small compared to the rest of the diameter ofthe rocket (like the escape tower nose cone), then the CP loca-tion will be way off. I wouldn't trust those numbers. That iswhy in my RockSim files, the escape tower is missing. Thereare other differences too. I'll be posting the files to my website later, and you can see them for yourself and note the dif-ferences.
The RockSim files were very enlightening. It told me thatthe Saturn 1B was going to need a whole lot of nose weight.Yikes! Even so, the size of the parachutes I had selected wereadequate to bring it down at a nice slow rate.
Being that I have been around rocketry for a while, I hada pretty good idea what motors would be good for the models.I selected a F20-4 Econojet from Aerotech as the first motorfor the Saturn 1B. I have a hunch that most people will even-tually fly the model on the F20; because it is a inexpensivelaunch with lots of smoke and noise.
For the Saturn V, I chose the G80-4 rocket motor; alsofrom Aerotech. The delays were selected based on that I knewthat, despite the low weight for the rockets, they would be

Page 2
About this NewsletterYou can subscribe “FREE” to receive this e-zine at the Apogee Components web
site (www.ApogeeRockets.com), or sending an email to: [email protected]
with "SUBSCRIBE" as the subject line of the message.
A P O G E E R O C K E T S
P E A K O F F L I G H T
very draggy. They would slow down real quick after motorburnout.
I used a high fixed drag coefficient of 0.9 for both mod-els. With this selected, RockSim told me that my choice ofmotors would be reasonable -- with good take-off speeds, andejection within a second of the apogee point.
Note: for those of you needing extra assistance in select-ing rocket motors, please see the series of articles beginningin Newsletter 38.
With my RockSim simulations completed, I was able toput the final touches on the rockets and prep them for flight.The hardest part was figuring out how to add the significantamount of nose weight to the Saturn 1B. But these types ofthings out is why we do test flights.
The last thing that I prepped was the harness for the cap-sule section of the models. I'm playing around with severaldifferent ways of making it descend horizontally. What I'mlooking for is something that is quick and easy; and doesn'tdetract from the appearance of the rockets.
For the first launches, I did choose not to add the escapetower to the capsule. From a flight perspective, it wouldn'treally affect the trajectory or altitude of the models. I'll waituntil later in the test program to add them to the flight models.
Launch Day
It was luck that the day of the first launch was also the32nd anniversary of the First Men On The Moon. I took thatas a good omen.
I found out about a launch that was occurring in Pueblo,Colorado. It was being hosted by Jason Unwin; who volun-teers at the Weisbrod Aircraft Museum at the Pueblo Airport.Jason is organizing a new N.A.R. section in Pueblo, and hasfound a very nice field to fly from. It is always good for thehobby when a club secures a big flying field. So I thought I'dtake advantage of the field, and at the same time show supportfor the budding club.
The launch site is on a 20,000 acre military reservationknown as the Pueblo Chemical Depot. This military installa-tion would have been closed down years ago; except for onething. It is a storage location for chemical weapons (like mus-tard gas). These weapons are going to be destroyed in the nextdecade; but until they are -- it is safer to leave them alone intheir storage bunkers than to transport them to another mili-tary base.
The storage bunkers were off limits, but being that theplace was 20,000 acres, there is still had miles and miles ofroom to roam.
The day started out around 9 a.m. with a rocket buildingsession for the new members of the Pueblo club. There wereprobably at least a dozen kids that showed up -- each draggingalong their parents. It was nice to see the next generation ofrocketeers getting hands-on instruction from Jason and a fewof the club members that came down from the ColoradoSprings Rocket Society.
The building session lasted until around 11 a.m., at whichtime Jason gave everyone a safety briefing. I found this veryworthwhile for the kids. The only thing that I would have donedifferent is to tell the kids what to expect when they headed tothe launch site. Every club runs things a little different, so it isgood to know the procedures on how the range operates. Thiswould reduce the initial confusion when everyone wanted toload the rockets onto the launch rack at the same time.
I also need to make a mental note to remember to includea discussion about retrieving someone else's rocket. I don'tmind people chasing down my rockets -- it saves me the trek.But I would like people to collapse the parachute and stuff itinto the tube. This would prevent damage to the model andkeep the chute from getting too tangled. And at large launches;where there is usually some type of "lost and found" box, italso prevents the contents of the box from looking like a hugeplastic mess. Getting your rocket out of the box can be moredamaging than the flight and landing.
Parachutes failure would play a large role in the kid'sflights. The instructions given to them during the building ses-sion were a little too brief in this respect. More care should begiven to parachute folding instructions; and then there wouldhave been less "plastic wad" recovery.
Launch Conditions
Summer launches in Colorado are usually guaranteed tobe sunny. This day was no exception. The sky was crisp andclear. Since the Pueblo Chemical Depot is mostly flat withonly a few small trees, we had great views in all directions. Icould easily see mountains on the horizon that were well over70 miles away.
The day started out warm, and got toaster-oven hot bymiddle afternoon. I think it reached about 97 or 98 degrees.

Page 3
To stifle the heat, a breeze would have felt welcome. Occa-sionally there was a variable breeze, but it couldn't make upits mind on which direction it was going to blow. Sometimesit blew to the east, sometimes to the west. A lot of the time, itwas dead calm. On a scale of 1 to 10, only the heat indexwould have kept this from being a perfect launch day. I wouldhave given it a "9."
The humidity was very low, about 30 percent, so all theglue on those newly built rockets was dry by the time the rock-ets got out to the launch area. I worry about that type of thingwhen the models are built the same day they are launched.
The launches got underway by around 11:30 with rackupon rack of the kids' newly built models. All the kits flewnice and straight, and the kids had lots of fun chasing themdown (along with my dog Lacey). Even the occasional plas-tic-wad recovery device didn't dampen their enthusiasm.
I got as much enjoyment out of watching them squealwith delight over their own rockets as I did with my ownsqueals of joy with my rocket projects. I have to say that ifyou're not launching with a club, you're missing out on oneheck of a parade of excitement.
I had the Saturn rockets prepped by 12 noon, but heldback to let the kids launch first. I had my Easy-Up canopywith me, so I became quite popular with all those seeking someshade. So while I waited to launchmy rockets, I had a chance to sell afew of the Apogee products: booksand rocket kits.
The launch of theSaturn 1B
About 1 o'clock, I took theSaturn 1B to the launch pad. The1/4 inch launch rod supplied at therange was a mounted on a tripod;which was weighted down with anold wooden pallet. It would havetaken a hurricane force wind toblow that pad over. But since therewas no wind, it was a bit overkill.
The excitement of the smallcrowd was beginning to grow as theother rockets on the rack werelaunched first. Most of the kids hadnever seen such a big rocket before-- let alone an "F" motor. So whenthe countdown ended at zero; andthe rocket still sat on the pad, theywere mildly disappointed. Youprobably guessed it; igniter failure.
I was using the Aerotech supplied copperhead igniter withthe F20 motor. It came tightly folded in the little shipping tube,so my guess is that there was a short somewhere on the strip.
I grabbed one of my own copperheads, and loaded up themodel on the launch pad. Again, the other models were clearedfrom the rack before the countdown of the Saturn 1B couldbegin.
After a brief announcement of the significance of the Sat-urn 1B, the LCO began the countdown: "Going in: 5, 4, 3, 2,1, LAUNCH!"
This time, the copperhead did its job, and after the cham-ber pressure built up, the rocket motor roared to life. Fullthrottle...
The model seemed to take off like a bullet. But I noticedthat it was arching downwind a little bit after clearing the rodbecause of the slight breeze blowing at lift-off. This indicatesthat it was definitely not overstable. Had it been overstable, itwould have turned slightly into the wind.
Secretly, I was hoping that is was overstable, so that Icould remove some of the nose weight on future launches.Because it wasn't, I'll have to give it some deep reflection be-fore I decide to try that.
At about 30 feet into the air, the rocket had already accel-erated to a goodly amount of speed, and the fins were finally
A P O G E E R O C K E T S
P E A K O F F L I G H T
Instructions: Click on the box above to start the movie playing.
Saturn_1B_launch.mov

Page 4
producing the forces needed to counteract the crosswind. Be-cause of this, it stopped arching with the wind and had at-tained a straight vector -- like it was following a taut rope intothe sky. My calibrated eyeball says it was maybe 5 degreesfrom vertical. I didn't notice any spinning of the rocket as itascended either.
The sound of liftoff was echoing off a nearby building,and it really added to the effect of the launch. The kids and theparents that had never seen a composite propellant motorlaunched before were going spasmatic. I was just happy it didn'tcato on the rod...
By now, the rocket was coasting high into the air (RockSimpredicted about 700 feet). I was videotaping the launch at thetime, so I was searching through the viewfinder to find therocket in the sky. The blasted camera has auto focus, and wastrying to focus on the wispy high clouds in the sky. Becauseof this, I didn't get to see if the ejection was right at apogee ornot. But from the PA system in the background, I heard theLCO say "All Rigggght!" That told me the chutes were outand had blossomed fully.
Then I heard him say, "looks like the upper part is catch-ing a thermal..." That would have meant a long chase to re-cover the rocket. I started out after the model; and then I no-ticed that about six other folks were helping me out too. Theywere moving a lot faster than I was, since I was carrying thevideo camera and at the same time trying not to step in anyholes where a rattlesnake might be hiding. So I turned thevideo camera back on to record the descent of the two parts.
Even at a launch elevation of 4000 feet, the sections camedown nice and slow. Through the eye of the video camera, Imanaged to just catch the last 20 feet of the upper portion ofthe rocket, and the final 50 feet of the descent of the bottompart. The capsule made it to the ground before one of the chas-ers got to it, but the bottom section hung up just enough forsomeone to catch it mid-air. It was a cool sight to see.
The two parts had drifted maybe 300 yards downwind tothe west. Both parts came down close together, so I didn't havefar to go to retrieve them.
The flight lasted about a minute, but the memories willlast me a lifetime.
After I returned back to the shade of my canopy, I lookedthe rocket over: no damage at all. Hence, I was a very happycamper.
First Flight of the Saturn V
The Saturn V was nearly completely prepped while I wasout launching the Saturn 1B. The only remaining thing I hadto do was take the bigger parachute from the smaller modeland attach it to the capsule portion of the Saturn V. So withina few minutes, the Saturn V was ready to go.
But I wasn't... I was hot and thirsty from the launch of theSaturn 1B. So I cooled my heels for a while; and talked to thepeople that wanted to learn more about the Saturn 1B flight.So it was probably a half hour before I took the Saturn V outto the launch pad.
After loading the Saturn V on the pad, I snapped a quickphotograph of it. I at least wanted one picture of it; just in caseit had a early demise.
As previously, there was a rack full of other models thatwere launched prior to the Saturn V. This allowed the antici-pation of the small crowd to build to heightened levels. I washoping that I wouldn't suffer another igniter failure. That wouldhave been a huge let-down for the spectators.
But they wouldn't be disappointed on this attempt.When the LCO said: "Ready in -- 5, 4, 3, 2, 1, LAUNCH,"
the popping sound that a copperhead igniter makes when burn-ing was immediately drowned out by the loud rumble of themotor coming up to full power.
I had placed the model as low on the launch rod as pos-sible, because I wanted to allow the rocket to get up to flightvelocity before it reached the end of the launch rod. This meantthat the base of the rocket was nearly touching the blast de-flector. Those of you familiar with this type of situation knowthat distinctive sound the motor makes at it fills the void be-neath the rocket with exhaust gases. It has sort of a suckingsound. This is known as the "Lovelace Effect."
But once the cavity is filled with gasses and the rocketstarts to move upward on the rod, the sound of the motor isfree to escape. And then you hear the very loud blast and roarof the motor. Because of this, the motor seams to be a lot louderthan its actual size says it should make. The spectators, whowere overwhelmed by the sound of the F20 motor in the Sat-urn 1B where now completely orgasmic from the roar of G80rocket motor.
The trajectory of this flight was slightly upwind of thelaunch rod, indicating a slight over stability condition. But itwas very close to being a near vertical launch. As before, Ididn't notice any spinning of the model. I am completely sat-isfied with the flight aspects of the rocket so far.
I was able to keep the video camera on the rocket all theway to deployment, which occurred very close to apogee. Thechute of the capsule section blossomed almost immediatelyon ejection; while there was a slight hesitation for the bottomportion's chute to fully open. Again, the both fell at a niceslow rate. Fortunately, they stayed close together for me whileI was video taping; so I was able to keep them both in thepicture for a significant portion of the descent.
The breeze had swung around by this time, and was blow-ing to the southeast. This was in the complete opposite direc-tion as the launch of the Saturn 1B. The two portions of the
A P O G E E R O C K E T S
P E A K O F F L I G H T
Page 5
model both landed about 300 yardsaway, and were easily picked up bythe people helping me chase themdown.
This time, I didn't try to re-cover them myself. I immediatelyheaded toward the shade of thecanopy. A few minutes later, JasonUnwin showed up with the rocket.He seemed to be heading rightpassed me to his own vehicle. I hadto remind him that I wasn't donat-ing it to the museum (not yet any-way).
I did an inspection of themodel. This time, the bottom por-tion suffered a slight crack in theplastic of one of the fin fairings. Ihad somewhat expected this to hap-pen. I think I have a way to stopthat from happening, but I'll needto test it out on a future test flight.
The upper portion of the rockethad zero damage. So all in all, I wasvery pleased with the flight. Thespectators were far more enthusi-astic; and they begged me to fly it again.
I had planned on making several test flights, and had takena stash of motors with me just for this reason. While I wasgetting ready to put in another motor, the rocket fell over andsnapped a fin. Wouldn't you know it... Murphy's Law said Iwas done for the day. The fin was repairable, but it was get-ting a bit hot, and people were starting to call it a day. I didn'twant to force anyone to sit in the hot sun while I fixed the fin,so I packed it in too.
There is video of both of the launches. I'll be posting themto the Apogee Components web site as soon as I can edit themdown and convert them to Quicktime format. It shouldn't bemore than a couple of days.
In conclusion, what did we learn?I'm not talking about the flights of the models. But in
general terms, what did you learn about how to proceed withtest flights?
Here are some key things that I did and that you shouldtoo:
1. Input the rocket into RockSim to determine it's CP lo-cation.
2. Adjust the CG of the rocket as necessary using noseweight. You can use RockSim to find out how much you'll
A P O G E E R O C K E T S
P E A K O F F L I G H T
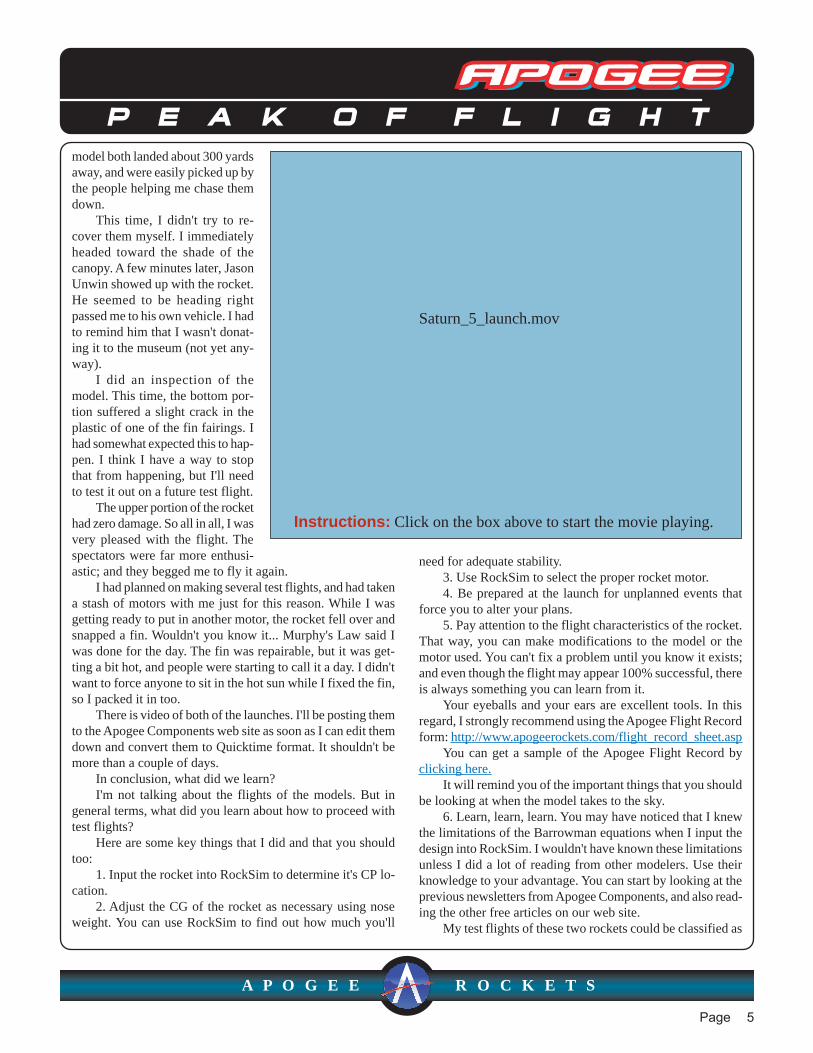
Instructions: Click on the box above to start the movie playing.
Saturn_5_launch.mov
need for adequate stability.3. Use RockSim to select the proper rocket motor.4. Be prepared at the launch for unplanned events that
force you to alter your plans.5. Pay attention to the flight characteristics of the rocket.
That way, you can make modifications to the model or themotor used. You can't fix a problem until you know it exists;and even though the flight may appear 100% successful, thereis always something you can learn from it.
Your eyeballs and your ears are excellent tools. In thisregard, I strongly recommend using the Apogee Flight Recordform: http://www.apogeerockets.com/flight_record_sheet.asp
You can get a sample of the Apogee Flight Record byclicking here.
It will remind you of the important things that you shouldbe looking at when the model takes to the sky.
6. Learn, learn, learn. You may have noticed that I knewthe limitations of the Barrowman equations when I input thedesign into RockSim. I wouldn't have known these limitationsunless I did a lot of reading from other modelers. Use theirknowledge to your advantage. You can start by looking at theprevious newsletters from Apogee Components, and also read-ing the other free articles on our web site.
My test flights of these two rockets could be classified as

Page 6
100% successful. But they did leave me with a lot of otherthings that I want to try; because I think the flights can beimproved upon even further.
Doing these test flights makes you feel a part of the realspace program. I hope that you get the same feeling when youlaunch your rockets.
About the Author:
Tim Van Milligan is the owner of Apogee Components
A P O G E E R O C K E T S
P E A K O F F L I G H T
(http://www.apogeerockets.com) and the curator of the rock-etry education web site: http://www.apogeerockets.com/edu-cation. He is also the author of the books: "Model Rocket De-sign and Construction," "69 Simple Science Fair Projects withModel Rockets: Aeronautics" and publisher of the FREE e-zine newsletter about model rockets. You can subscribe to thee-zine at the Apogee Components web site, or sending an emailto: [email protected] with "SUBSCRIBE" as the sub-ject line of the message.
RockSim: Software That Lets You Design Amazing Rockets!
RockSim is the leading software for designing rockets, and finding out how high they'll fly. With it, you can:
RockSim Makes Your Rocket Visions Come Alive!
Design Any Size Rocket.Use Any Size Motor.Create Assymetric Fin
Arrangements.Print Fin & Ring Templates.Find The Best Size
Parachute Or Streamer.Predict Altitude, Speed.Simulate Electronic
Staging Events.Simulate Dual-Deployment.Determine Close-Proximity-
Recovery Launch Angle.
Mix Motor Sizes In Cluster Configurations.
Display 2D Layouts And Rotating-3D Images.
View Annimations Of The Launch And Recovery.
Predict Cd and CP.Supports Up To 3 Stages
Including Strap-on's.Graph Out The Results.Export Results To Any
Spreadsheet Program.Huge Parts Database.Use It To Teach Others
About Rocketry.Hold a Virtual Contest
Against Your Friends.Apogee Components, Inc.1130 Elkton Drive, Suite AColorado Springs, Colorado 80907-8501 USA
Tel: (719) 535-9335 Fax: (719) 534-9050Web Site: www.ApogeeRockets.com/RockSim.asp
FREE
Demo Version.
Download
it today.
Yes!It is EasyTo Use.
Just $95!It costs a little more, but
it can save you Hundreds.