scale radio controlled electric … fly foam models wilga...scale radio controlled electric powered...
TRANSCRIPT

1
SCALE RADIO CONTROLLED ELECTRIC POWERED
WWIILLGGAA 22000000
OPERATION AND ASSEMBLY INSTRUCTIONS
The SAPAC WILGA is supplied as 2 versions - one is an ARF version which includes the Brushed motor only – no R/C equipment, ESC or
Batteries.
The READY TO FLY version includes the Transmitter and receiver, Motor + Servos installed with ESC and a LiPo Battery and 12 Volt DC.
Balance Charger.
ARF model require a minimum of a 4 Channel radio system. These models are simple to assemble, factory painted in Injection Moulded Foam and are
great fun to fly.
This model is not a toy. Please read carefully and follow instructions
to ensure correct assembly of this model aircraft.

2
INDEX
INTRODUCTION ............................................................................................................................................ 2 DESCRIPTION ............................................................................................................................................ 2 FEATURES ................................................................................................................................................. 2
PLEASE READ CAREFULLY BEFORE COMMENCING .............................................................................. 3 WARRANTY ................................................................................................................................................ 3 WARNINGS ................................................................................................................................................ 3 CAUTIONS .................................................................................................................................................. 3
KIT CONTENTS ............................................................................................................................................. 4 ASSEMBLING THE AIRCRAFT ..................................................................................................................... 5
INSTALLING MAIN WING ........................................................................................................................... 5 THE FUSELAGE AND TAIL FEATHERS .................................................................................................... 5 THE UNDERCARRIAGE ............................................................................................................................. 6 OPTINAL FLOAT FITTING .......................................................................................................................... 6
BRINGING IT ALL TOGETHER ..................................................................................................................... 6 SETTING UP THE TRANSMITTER ............................................................................................................ 7 RECEIVER INSTRUCTIONS ...................................................................................................................... 8
CHARGING THE BATTERY .......................................................................................................................... 8 RANGE CHECKING BEFORE FLIGHT ......................................................................................................... 9 GETTING READY TO FLY ............................................................................................................................. 9 TIPS FROM THE PRO’S .............................................................................................................................. 10 OTHER MODELS AVAILABLE .................................................................................................................... 11
INTRODUCTION The original aircraft is produced by the Polish company PZL and the 2000 is the latest version in the Wilga series. Always popular for its rugged construction and versatility, these attributes have been incorporated into our model. Bear in mind however that the model is of lightweight construction which will not stand: rough handling.
DESCRIPTION The SAPAC Wilga-2000 is a 4-channel proportional R/C airplane with full functions that provide great performance at slow speeds and low altitudes It has a very light body which provides for safe flying. The Wilga-2000's neutral flight tendencies allow for quick recovery in even the most extreme situations. All you need to do is cut the throttle, release the elevator and it will return to straight and level flight. These features make the aircraft very novice friendly.
FEATURES
Steady in flight and very easy to master Great at slow-speed for easy flying Great for restricted-space and low altitude flying. Excellent control and stability. It can perform the loops, rolls and inverted flight aerobatics. Elegant styling and design It can be converted to a floatplane with the same outstanding performance. (Pontoon sold separately.) The Wilga-2000 has been independently developed by Sapac. The high wing is very suitable for beginners and mid level flyers.
ABOUT SAPAC’S PONTOONS The SAPAC pontoon meets the demands of float flyers in many ways. It has all the clean and efficient lines of full size pontoons and has the ability to float and lift heavy planes into the air, while adding very little weight to the aircraft. Because of its design, your aircraft will track straight and cut smoothly through the water from initial throttle advance through the step and into the air. Once in the air, you will experience great flying characteristics and performance. Just like many advanced full size float planes your aircraft will take off and land not only from the water, but from grass and snow too. We highly recommend SAPAC pontoons for the beginner and experienced flyer.
3
BASIC DIMENSIONS Wing span ----------------------------------------1160mm Length ---------------------------------------------888mm Wing area-----------------------------------------16.82 sq.dm. Weight---------------------------------------------Land plane – 550g Float plane – 600g COMPONENTS Motor------------------------------------------------290 ED brushed motor with reduction gear box Electronic speed control-----------------------15A brushed ESC Propeller –---------------------------------------- 8”x 6” three-bladed propeller Battery--------------------------------------------- 1200mAh 3S 11.1v Lithium Polymer(LiPo) R/C system--------------------------------------- PPM-FM 4 channel proportional control R/C system
PLEASE READ CAREFULLY BEFORE COMMENCING This model is not a toy. It is a highly detailed functional scale model. We hope that this product will bring you hours of enjoyment and entertainment. Due to the sophisticated technical nature of this product, it is important that you carefully review all of the following warnings, cautions, and warranty terms. Likewise you should review and follow the following instructions for usage. Due to the fact that Tates Performance Hobbies is constantly improving the quality and functional characteristics of its products some details, colours, and functions may differ slightly from the images presented on the box and in the instructions.
WARRANTY Tates Performance Hobbies guarantees that this model is free from defects both in material and craftsmanship on the date of purchase. This guarantee does not cover any component parts damaged by use or modification. Tates Performance Hobbies liability will under no circumstances exceed the original cost of the purchased model. Moreover, Tates Performance Hobbies reserves the right to change or modify this warranty without notice. If upon purchasing this product the buyer finds defects to the product as a result of the manufacturing process we recommend that you return this product to the place of purchase to exchange or refund the product. Given that Tates Performance Hobbies has no control over the final assembly or use of this product, Tates Performance Hobbies shall assume no liability for damage caused resulting from the use by the user of the final user-assembled product. By using this product the user accepts all resulting liability. If the purchaser of this product is not prepared to accept the liability associated with the use of this product, they are advised to return this model within 14 days to the place of purchase. The product must be in complete and unused condition along with receipt of purchase at the moment of return.
WARNINGS 1. Never leave the model in direct sunlight for prolonged periods of time. 2. Never fly this model near an AIRPORT, check with your local airport authorities for minimum distance to available sites. 3. Never use this model near power lines, radio towers, or other locations where there is known high radio wave or electromagnetic activity. 4. Do not allow water or liquid to touch the model or any of the components. 5. Store the model in a cool dry location as high humidity can damage the model and its components. 6. Protect the model from bumps, jolts, and concussions from other hard objects as this could damage the model. 7. Keep the model clean of dust, mud and dirt. 8. Never place foreign objects on top of the model 9. Use the model ONLY in wide open spaces that are free of people, or at your local RC flight club. 10. NEVER use the model near populated pedestrian areas. This could lead to damage of property or injury to bystanders. 11. Prior to take off, always check that transmitter and receiver batteries are fully charged and are fresh. As battery power decreases the quality of the radio signal diminishes and control over the model could fail. 12. Please dispose of used batteries and electronic components in accordance with your municipal and federal regulations
relating to these types of products. 13. Keep in mind that those in your vicinity may also use radio control models. Please check prior to take off that you are using a unique frequency to all those around you. Not doing so may cause you and others to lose control of the model. 14. If the model does not properly respond to control inputs, land immediately and do not attempt to use the model until the cause has been determined and fixed. 15. After flying, switch off the power on the model and then the transmitter.
CAUTIONS 1. This product is not suitable for children under 14 years of age, adult supervision of children under this age is highly recommended. 2. This kit contains a number of small parts which are fragile and may act as choking hazards. 3. Please store and assemble this model well out of the reach of small children. 4. Only use batteries of the same or equivalent type. 5. The power supply terminals are not to be short-circuited. 6. Do not use new and old batteries together. Do not mix different brands or kinds of batteries. 7. Make sure to insert batteries with correct (+) and (-) polarity. 8. If the toy gets wet, dry it, and stop playing to avoid short-circuiting that may cause hazards. 9. Do not put fingers, hair, or clothes into the shafts or rotating parts of the model. 10. NEVER LEAVE CHARGING BATTERIES UNATTENTED!!!!!!

4
PRODUCT CONTAINS SMALL PARTS - KEEP AWAY FROM YOUNG CHILDREN NOT SUITABLE FOR CHILDREN UNDER 14 YEARS OF AGE UNLESS SUPERVISED BY AN ADULT COLORS, SPECIFICATONS AND CHARACTERISTICS MAY BE DIFFERENT FROM PICTURE AND DESCRIPTON ON THE BOX AND MANUAL. Tates Performance Hobbies may be contacted by E Mail on – [email protected] or Phone 03 52224201
CONTENTS – Ready To Fly Version.
( The ARF version includes Motor, but does NOT have the servos installed, ESC controller, Battery or Charger )
KIT CONTENTS
OPTINAL EXTRA FLOATS

5
ASSEMBLING THE AIRCRAFT Before starting, cover your work top with something soft like a bath towel so that the fragile surface of the model does not get damaged while you are working on it. Additionally, if you obtain a polystyrene box from your greengrocer and cut a semi-circular hole in the opposite ends, it will make a useful stand on which to securely rest the model. CAUTION! To avoid damage, do not connect the battery before you finish the assembly.
INSTALLING MAIN WING Take one of the wing panels and insert the plastic wing joiner into the slot at the wing root, noting that the shorter of the two prongs should be at the top so that it clicks into place when fully inserted. Now give the wing root a coat of the provided glue and slide the second wing on to the joiner. Whilst holding the two wing panels firmly together wrap masking tape around the joint (this will be removed at a later stage). Now attach the two aileron pushrods to the outer holes on the aileron servo arms and the clevises to the two aileron horns. With the servo arms aligned span wise, ie at the neutral position, check to see that the ailerons are also at the neutral position at the wing root and tip; if not, adjust the clevises by screwing them in or out as appropriate. The wings can now be put aside whilst you work on the rest of the model. TIP: We recommend using Epoxy or CA glues as they are generally more reliable than a PVA type glue that is supplied. THE FUSELAGE AND TAIL FEATHERS (tail feathers = tailplane, elevator, fin and rudder).
The tailplane, with the elevator attached, mounts on the plate at the aft end of the fuselage and is held in place by the two screws provided. Do not over tighten these screws, just snug is fine. Connect the clevis at the end of the elevator pushrod to the horn on the elevator. Slide the fin into its slot on the top of the fuselage after running in a smear of the glue, then connect the clevis at the end of the rudder pushrod to the rudder horn.
6
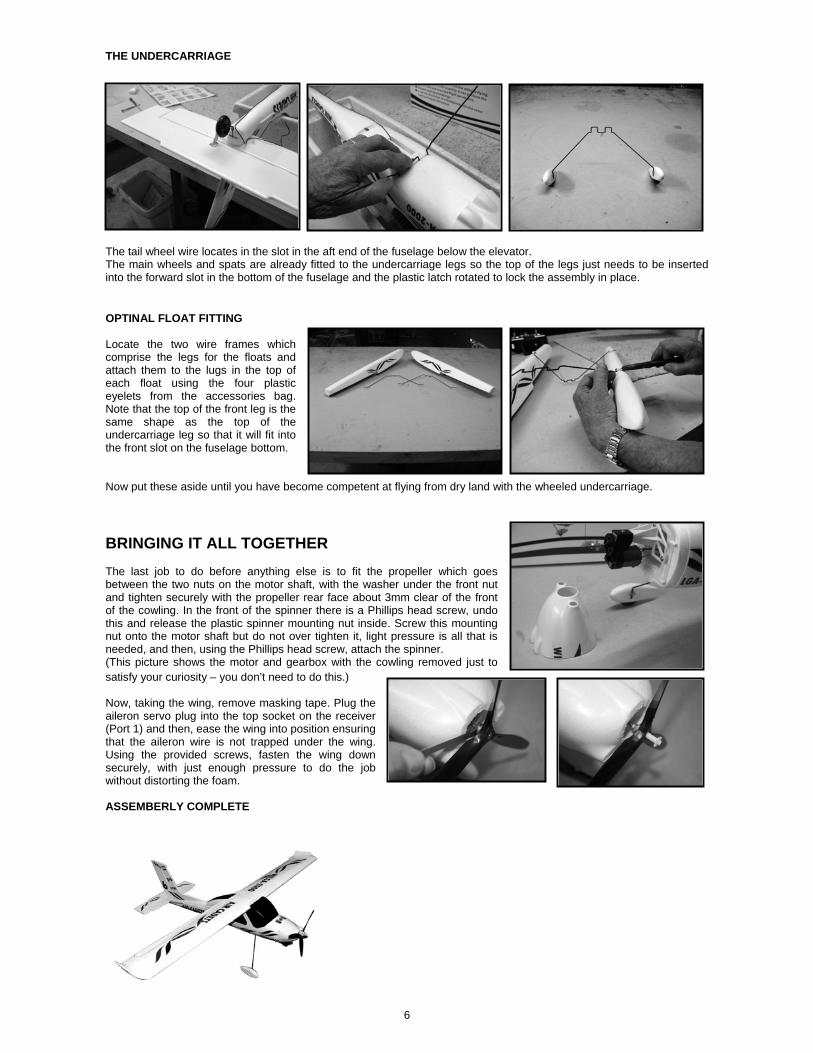
THE UNDERCARRIAGE
The tail wheel wire locates in the slot in the aft end of the fuselage below the elevator. The main wheels and spats are already fitted to the undercarriage legs so the top of the legs just needs to be inserted into the forward slot in the bottom of the fuselage and the plastic latch rotated to lock the assembly in place.
OPTINAL FLOAT FITTING Locate the two wire frames which comprise the legs for the floats and attach them to the lugs in the top of each float using the four plastic eyelets from the accessories bag. Note that the top of the front leg is the same shape as the top of the undercarriage leg so that it will fit into the front slot on the fuselage bottom. Now put these aside until you have become competent at flying from dry land with the wheeled undercarriage.
BRINGING IT ALL TOGETHER The last job to do before anything else is to fit the propeller which goes between the two nuts on the motor shaft, with the washer under the front nut and tighten securely with the propeller rear face about 3mm clear of the front of the cowling. In the front of the spinner there is a Phillips head screw, undo this and release the plastic spinner mounting nut inside. Screw this mounting nut onto the motor shaft but do not over tighten it, light pressure is all that is needed, and then, using the Phillips head screw, attach the spinner. (This picture shows the motor and gearbox with the cowling removed just to satisfy your curiosity – you don’t need to do this.) Now, taking the wing, remove masking tape. Plug the aileron servo plug into the top socket on the receiver (Port 1) and then, ease the wing into position ensuring that the aileron wire is not trapped under the wing. Using the provided screws, fasten the wing down securely, with just enough pressure to do the job without distorting the foam. ASSEMBERLY COMPLETE
7
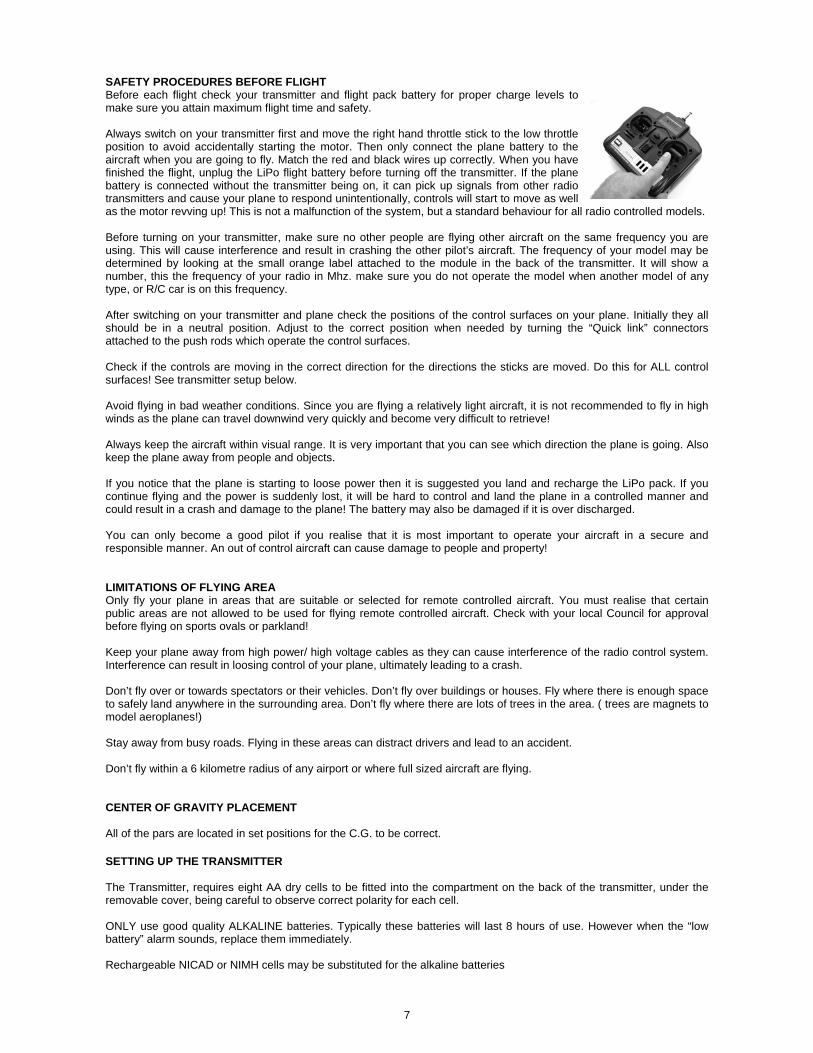
SAFETY PROCEDURES BEFORE FLIGHT Before each flight check your transmitter and flight pack battery for proper charge levels to make sure you attain maximum flight time and safety. Always switch on your transmitter first and move the right hand throttle stick to the low throttle position to avoid accidentally starting the motor. Then only connect the plane battery to the aircraft when you are going to fly. Match the red and black wires up correctly. When you have finished the flight, unplug the LiPo flight battery before turning off the transmitter. If the plane battery is connected without the transmitter being on, it can pick up signals from other radio transmitters and cause your plane to respond unintentionally, controls will start to move as well as the motor revving up! This is not a malfunction of the system, but a standard behaviour for all radio controlled models. Before turning on your transmitter, make sure no other people are flying other aircraft on the same frequency you are using. This will cause interference and result in crashing the other pilot’s aircraft. The frequency of your model may be determined by looking at the small orange label attached to the module in the back of the transmitter. It will show a number, this the frequency of your radio in Mhz. make sure you do not operate the model when another model of any type, or R/C car is on this frequency. After switching on your transmitter and plane check the positions of the control surfaces on your plane. Initially they all should be in a neutral position. Adjust to the correct position when needed by turning the “Quick link” connectors attached to the push rods which operate the control surfaces. Check if the controls are moving in the correct direction for the directions the sticks are moved. Do this for ALL control surfaces! See transmitter setup below. Avoid flying in bad weather conditions. Since you are flying a relatively light aircraft, it is not recommended to fly in high winds as the plane can travel downwind very quickly and become very difficult to retrieve! Always keep the aircraft within visual range. It is very important that you can see which direction the plane is going. Also keep the plane away from people and objects. If you notice that the plane is starting to loose power then it is suggested you land and recharge the LiPo pack. If you continue flying and the power is suddenly lost, it will be hard to control and land the plane in a controlled manner and could result in a crash and damage to the plane! The battery may also be damaged if it is over discharged. You can only become a good pilot if you realise that it is most important to operate your aircraft in a secure and responsible manner. An out of control aircraft can cause damage to people and property!
LIMITATIONS OF FLYING AREA Only fly your plane in areas that are suitable or selected for remote controlled aircraft. You must realise that certain public areas are not allowed to be used for flying remote controlled aircraft. Check with your local Council for approval before flying on sports ovals or parkland! Keep your plane away from high power/ high voltage cables as they can cause interference of the radio control system. Interference can result in loosing control of your plane, ultimately leading to a crash. Don’t fly over or towards spectators or their vehicles. Don’t fly over buildings or houses. Fly where there is enough space to safely land anywhere in the surrounding area. Don’t fly where there are lots of trees in the area. ( trees are magnets to model aeroplanes!) Stay away from busy roads. Flying in these areas can distract drivers and lead to an accident. Don’t fly within a 6 kilometre radius of any airport or where full sized aircraft are flying. CENTER OF GRAVITY PLACEMENT All of the pars are located in set positions for the C.G. to be correct.
SETTING UP THE TRANSMITTER The Transmitter, requires eight AA dry cells to be fitted into the compartment on the back of the transmitter, under the removable cover, being careful to observe correct polarity for each cell. ONLY use good quality ALKALINE batteries. Typically these batteries will last 8 hours of use. However when the “low battery” alarm sounds, replace them immediately. Rechargeable NICAD or NIMH cells may be substituted for the alkaline batteries
8
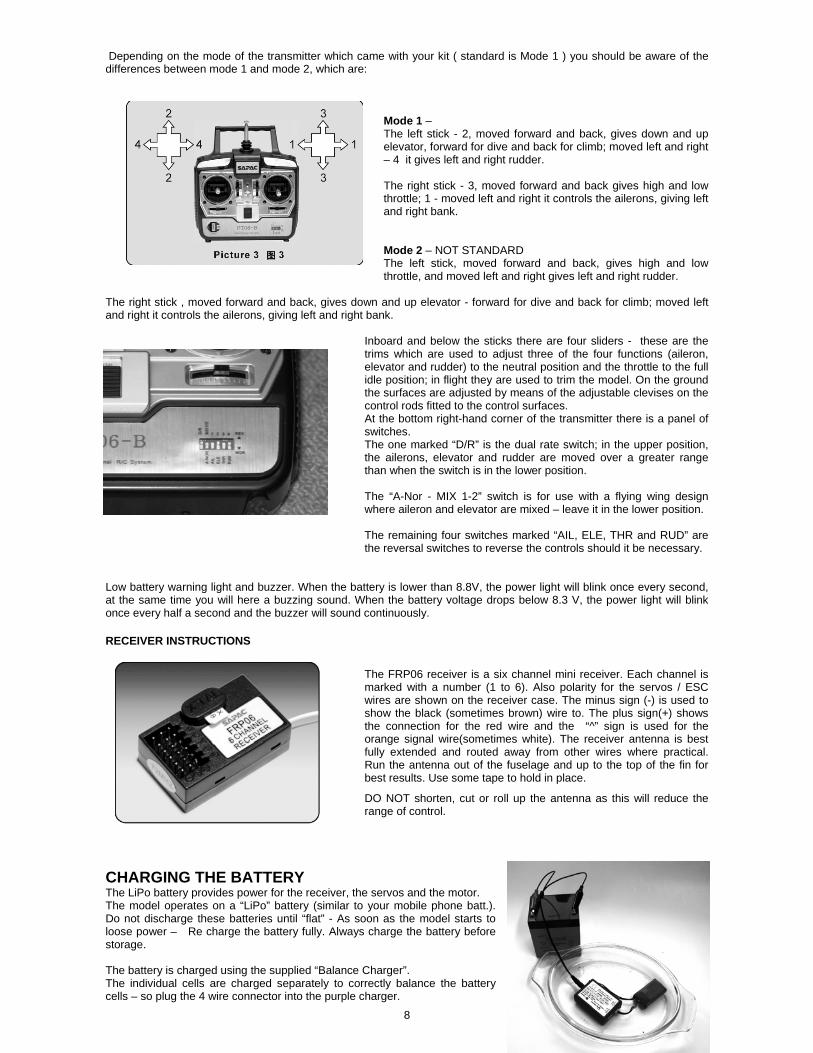
Depending on the mode of the transmitter which came with your kit ( standard is Mode 1 ) you should be aware of the differences between mode 1 and mode 2, which are:
Mode 1 – The left stick - 2, moved forward and back, gives down and up elevator, forward for dive and back for climb; moved left and right – 4 it gives left and right rudder. The right stick - 3, moved forward and back gives high and low throttle; 1 - moved left and right it controls the ailerons, giving left and right bank. Mode 2 – NOT STANDARD The left stick, moved forward and back, gives high and low throttle, and moved left and right gives left and right rudder.
The right stick , moved forward and back, gives down and up elevator - forward for dive and back for climb; moved left and right it controls the ailerons, giving left and right bank.
Inboard and below the sticks there are four sliders - these are the trims which are used to adjust three of the four functions (aileron, elevator and rudder) to the neutral position and the throttle to the full idle position; in flight they are used to trim the model. On the ground the surfaces are adjusted by means of the adjustable clevises on the control rods fitted to the control surfaces. At the bottom right-hand corner of the transmitter there is a panel of switches. The one marked “D/R” is the dual rate switch; in the upper position, the ailerons, elevator and rudder are moved over a greater range than when the switch is in the lower position. The “A-Nor - MIX 1-2” switch is for use with a flying wing design where aileron and elevator are mixed – leave it in the lower position. The remaining four switches marked “AIL, ELE, THR and RUD” are the reversal switches to reverse the controls should it be necessary.
Low battery warning light and buzzer. When the battery is lower than 8.8V, the power light will blink once every second, at the same time you will here a buzzing sound. When the battery voltage drops below 8.3 V, the power light will blink once every half a second and the buzzer will sound continuously.
RECEIVER INSTRUCTIONS
The FRP06 receiver is a six channel mini receiver. Each channel is marked with a number (1 to 6). Also polarity for the servos / ESC wires are shown on the receiver case. The minus sign (-) is used to show the black (sometimes brown) wire to. The plus sign(+) shows the connection for the red wire and the “^” sign is used for the orange signal wire(sometimes white). The receiver antenna is best fully extended and routed away from other wires where practical. Run the antenna out of the fuselage and up to the top of the fin for best results. Use some tape to hold in place.
DO NOT shorten, cut or roll up the antenna as this will reduce the range of control.
CHARGING THE BATTERY The LiPo battery provides power for the receiver, the servos and the motor. The model operates on a “LiPo” battery (similar to your mobile phone batt.). Do not discharge these batteries until “flat” - As soon as the model starts to loose power – Re charge the battery fully. Always charge the battery before storage. The battery is charged using the supplied “Balance Charger”. The individual cells are charged separately to correctly balance the battery cells – so plug the 4 wire connector into the purple charger.

9
The battery will take around 1.5 hours to charge from flat. The RED light indicates all connections are correct and when the Green Charge light (Indicates charging is underway) goes OFF - you know the battery is fully charged.
The Charger operates on 12 Vlt DC. The included 240 to 12 Volt adapter may be used to power the charger from your home power points. Attach the GREEN plug from the selection and fit to the adapter lead. If the polarity is wrong – the RED charger light will not illuminate –
reverse the connection to rectify. Plug the adapter into the charger for charging. The charger may also be powered from a 12 Vlt. DC battery – like a car battery, to enable charging away from the home. Attach the lead with “alligator” clips to the DC battery ( RED to + BLACK to - ) Then plug into the Purple charger for charging. It is highly recommended to use a fireproof dish or bowl to contain the battery while charging - see photo – this is a safety precaution in case of a fire. Always Charge the battery outside if possible and never leave unattended. Disconnect the battery if it gets hot.
SAFETY PRECAUTIONS for LiPo Batteries Never leave Lithium Polymer batteries unattended whilst charging. Never charge Lithium Polymer batteries inside a model; hot batteries can cause fires. Never charge Lithium Polymer batteries inside a motor vehicle. Never charge Lithium Polymer batteries on any surface which can catch fire e.g. wooden benches. Do not dispose of batteries in a fire. Do not allow batteries to get wet. Do not use the batteries with positive and negative terminals reversed. Do not short circuit the battery. Do not pierce the battery or subject it to heavy knocks or impacts. Do not use or store the battery inside motor vehicles during hot weather. Doing so may cause the battery to
overheat, risking fire or explosion. If your battery balloons in size, is punctured or is malformed, take precautions to get the battery to a non-flammable
area for at least one hour. IN CASE OF FIRE. After several hours place the battery in salt water.
RANGE CHECKING BEFORE FLIGHT Before your first flight, it is a very good idea to check whether you will have the maximum range possible. This is achieved by getting a helper to hold the plane while you walk away from the plane while the set and plane both turned on and the aerial on the transmitter fully down. With everything set up correctly you should be able to walk 20 to 30 paces away before the servos begin to twitch around. If you only achieve a short distance before erratic behaviour of the servos or motor then you must not fly and check out and rectify the problem before attempting to fly. Re-routing the aerial away from the battery and servo/ motor leads will often help!
GETTING READY TO FLY Always ensure that the transmitter is switched on, that the antenna is extended fully , that the throttle lever is set at its lowest point ( stick to the bottom on the gimbal ) and the model is being held securely before connecting the battery, this will prevent unexpected start ups which could cause injury. OK, so having done that, the battery can be placed in its compartment under the nose and its red plug connected to the socket inside. After a pause you will hear some “beeping” telling you that the battery, the electronic speed control and the motor are all in communication. When the beeping stops, slowly advancing the throttle will cause the motor to start and continue to speed up until full throttle is reached. Having checked the motor, stop it by bringing the throttle lever back to full low and then, by moving the elevator, aileron and rudder sticks, check that all surfaces move in the correct direction and by the required amount. If any of these move in the wrong direction there are reversing switches on the front of the transmitter to correct the situation, With the trims, (they are the small sliders alongside the sticks), in the central position, check that the ailerons, rudder and elevator are properly aligned; if not, make adjustments to the appropriate clevises. Having the surfaces properly aligned with the trims in the central position will ensure that the model on its first flight will be near to being “in trim” and any minor out of trim condition will then be correctable by use of the trim sliders. You may wish to engage the assistance of a modeller with some R/C experience to guide you through this all important phase and also to cast his eye over the model to ensure all is correct. The first task is to range check the radio equipment. Go to an area clear of trees and metal fences, like the middle of a sports field to ensure clear reception.

10
FIRST FLIGHTS It will be VERY helpful if you are able to obtain help from an experienced model pilot during your first flights. It is a very good idea to find a model club in your area or at least someone that can fly RC planes. They can help with the final setup and flight testing of your plane. Making sure it is an enjoyable experience and not a disaster! Flying a radio controlled model aircraft is difficult, due to the good hand to eye co-ordination required. Good eyesight is needed to see what the model is doing and a basic knowledge of the theory of flight is useful. Practice – like anything worthwhile is required to master the skills for the hobby. Accidents DO occur and damage WILL be caused to the model when this happens. So if you are not prepared to accept this – do not attempt to fly this model. That is the bad news ! But the development of new and exciting skills and the enjoyment of seeing your own radio controlled model obeying your every command is well worth it !! This is a great hobby for all ages and abilities, so ENJOY !! Now, if the day has arrived when there is practically no breeze and you have found an area about the same size as a football oval with a smooth surface, place the model on the ground, facing directly into that slight breeze and have your helper hold it. After checking again that the control surfaces are moving in the correct direction, extend the transmitter antenna, give your helper the nod and start your take off by slowly advancing the throttle to full power, at the same time holding in some up elevator to prevent a nose-dive and being ready to apply aileron to correct any tendency to roll . Unless you have a long smooth surface to take off from – you are probably best to “hand launch” the model with the help of a friend. The model is not designed to take off from grass, only smooth hard surfaces. Hand launching is a good method to get your model airborne as there is less risk of getting caught up in holes Etc. in the runway. Have a helper hold the model above their head, gripping the fuselage around the middle, so it is evenly balanced. While facing into any wind, run forward and “push” the model forward and slightly down so the model can attain flying speed quickly. Do not “throw” the model as this can cause an unstable launch. Once airborne and at about 100 feet altitude, commence your first turn by the application of aileron ( Right hand stick ) and a small amount of up elevator ( pull back on the Left hand stick ) to hold the nose into the turn. If you find that the model is getting too high, reduce throttle, then continue making turns left and right to familiarise yourself with its flight characteristics, keeping the model within clear view at a distance of no more than 200 metres. After a few minutes you’ll be ready to land, so reduce the throttle setting to about 10% and prepare to land into the breeze at the end of a sweeping 180 degree approach, being ready to increase power if you are about to land short, or reduce it further if the model is about to overshoot.
TIPS FROM THE PRO’S If you have a computer flight simulator, it is a good idea to practice with it before actually flying. It is a good idea to taxi the plane around on the ground with a moderate amount of throttle. This will help you get use to the rudder ground controls. You must learn to use only gentle movements of the controls. When using proportional radio control systems, only slight corrections are necessary to change the direction of the plane. Do not push the joysticks to maximum deflection for more than three seconds. This will result in a crash! It is a very good idea to find a model club in your area or at least someone that can fly RC planes. They can help with the final setup and flight testing of your plane. Making sure it is an enjoyable experience and not a disaster! Take off and land into the wind. Always try to keep the model in front of you. Extra motor batteries are available – so one can be charging while flying with the other. After market chargers are available to make charge times faster. A complete range of spare parts are available from where you purchased this product. See the Instruction manual for a listing of part sets. Some parts may not be “in stock” at the time of enquiry. If a part of the airframe is damaged or broken – most times it may be repaired by using Epoxy – like Araldite or Foam Compatible Super glues like MERCURY foam safe – most other glues will melt the foam. The use of tape – like duct tape and packing tape - is also very effective in repairing broken parts. If the part is not repairable, then most parts are available separately.

11
Other Models Available
Great performance with the LiPo and brushless power system.
TL-2000 – Scale EP Sport Trainer Wingspan: 1150mm Length: 800mm Wing Loading: 34.8g/dm Flying Weight: 700g Motor: Brushed with Gearbox Prop: 3-blade 8X6 Speed Controller: 18A ESC Battery: 3S 1200 Mah LiPo Optional Floats Available.
Distributed in Australia By :- Tates Performance Hobbies
135 Shannon Ave Geelong West. VIC 3218 Ph 03 52224201 Fax 03 52231257
E Mail ; [email protected] Web : www.rcworld.com.au ABN 80007437523
Red Arrow Ducted Fan Jet Wingspan = 950mm Length = 1000mm Weight = 620Gm. Brushless In-runner 64mm Dia. Fan 11.1 Vlt 2200 Mah LiPo – 25A ESC
Extra 300 3D Extreme Wingspan = 960mm Length = 897mm Weight = 620Gm. 11X4.5 Prop = 1050Gm Thrust for 3D Hover. Brushless KV4000 motor – 8:1 Gearbox 11.1 Vlt 1500 Mah LiPo – 22A ESC
SAPAC Shock Foamy - Airframe Only Specs:- Wingspan = 860mm, Weight 340Gm. Carbon Reinforced, Lazer Cut.