scaling up with php and aws
TRANSCRIPT

Scaling Up
With PHP and AWS
Our code connects peoplewith services they need
thedmsgrp.comheathdutton.com
Your Mission...
● You have 240 concurrent users.● Handle 5 times as many.● In 2 weeks..

Your Weapons...
Step 1 - Add a CDN
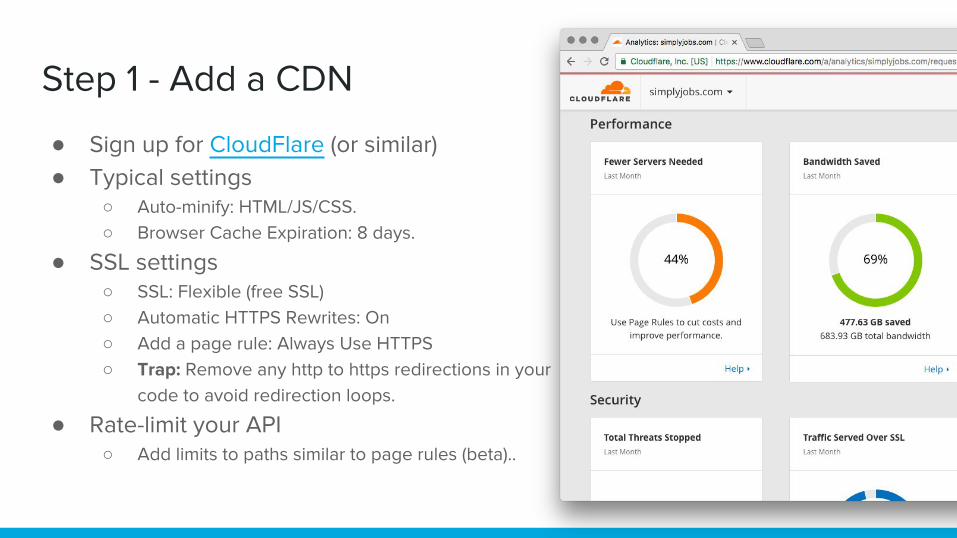
Step 1 - Add a CDN
● Sign up for CloudFlare (or similar)● Typical settings
○ Auto-minify: HTML/JS/CSS.○ Browser Cache Expiration: 8 days.
● SSL settings○ SSL: Flexible (free SSL)○ Automatic HTTPS Rewrites: On○ Add a page rule: Always Use HTTPS○ Trap: Remove any http to https redirections in your
code to avoid redirection loops.
● Rate-limit your API○ Add limits to paths similar to page rules (beta)..
+42%more users can be handled by adding the CDN.

Step 2 - Load Testing
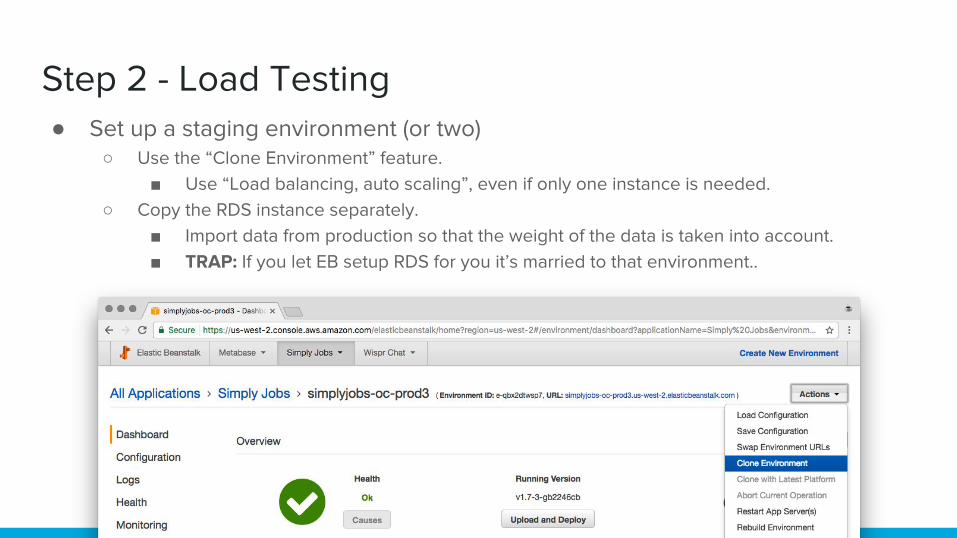
● Set up a staging environment (or two)○ Use the “Clone Environment” feature.
■ Use “Load balancing, auto scaling”, even if only one instance is needed.○ Copy the RDS instance separately.
■ Import data from production so that the weight of the data is taken into account.■ TRAP: If you let EB setup RDS for you it’s married to that environment..
Step 2 - Load Testing

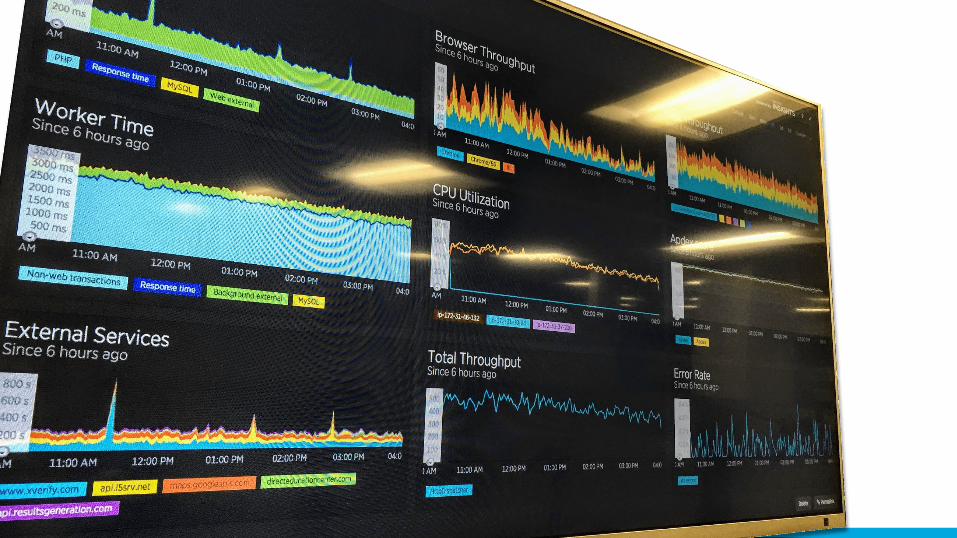
Step 2 - Load Testing● Install NewRelic (everywhere)
○ Use .ebextensions○ TRAP: Keep your staging/dev environments in the Free Tier..
Step 2 - Load Testing

● Use BlazeMeter (or jMeter) for your baseline.○ Increase simulated users till failure.○ Compare this to NewRelic data from now on..
Step 2 - Load Testing
Step 3 - Optimize the Environment
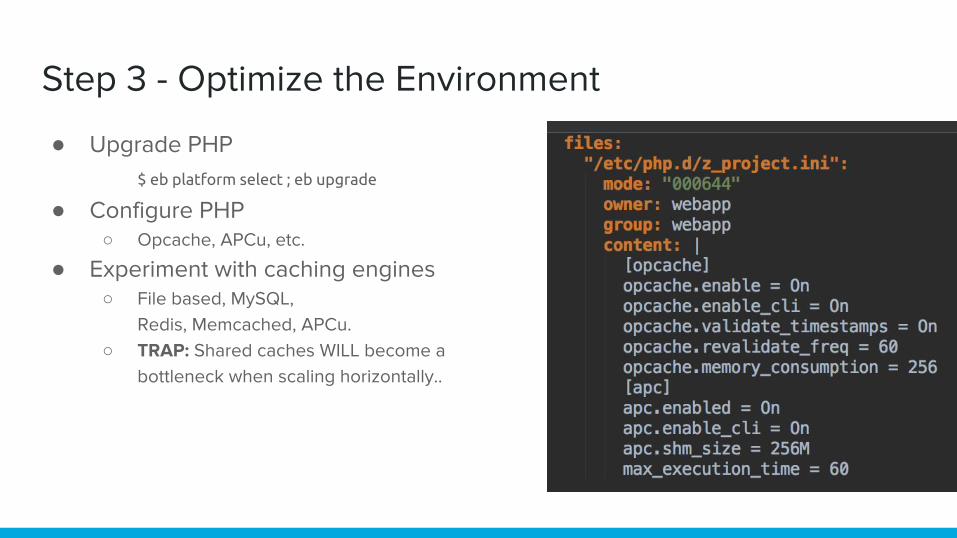
● Upgrade PHP$ eb platform select ; eb upgrade
● Configure PHP○ Opcache, APCu, etc.
● Experiment with caching engines○ File based, MySQL,
Redis, Memcached, APCu.○ TRAP: Shared caches WILL become a
bottleneck when scaling horizontally..
Step 3 - Optimize the Environment
+39%faster after optimizing the environment.
Step 4 - Scale Vertically
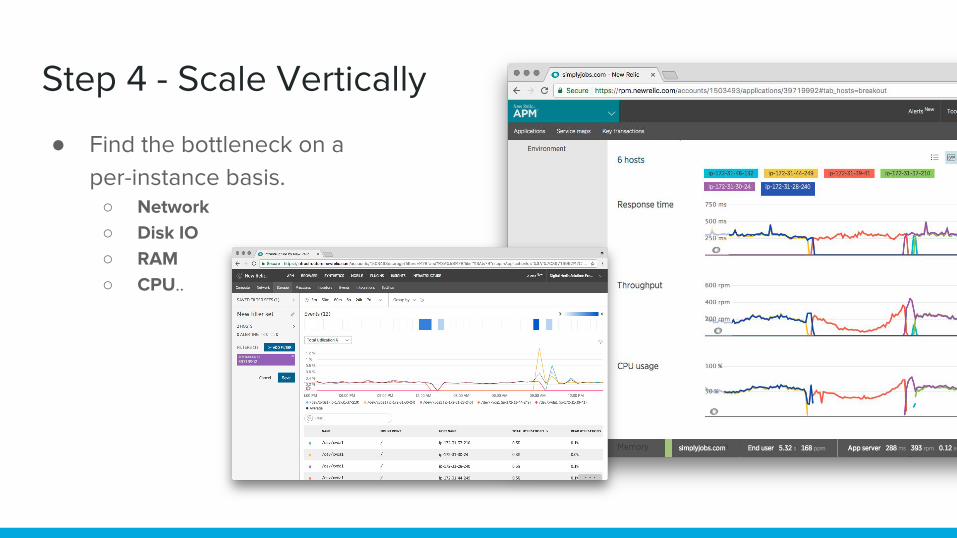
● Find the bottleneck on a per-instance basis.○ Network○ Disk IO○ RAM○ CPU..
Step 4 - Scale Vertically
Step 4 - Scale Vertically
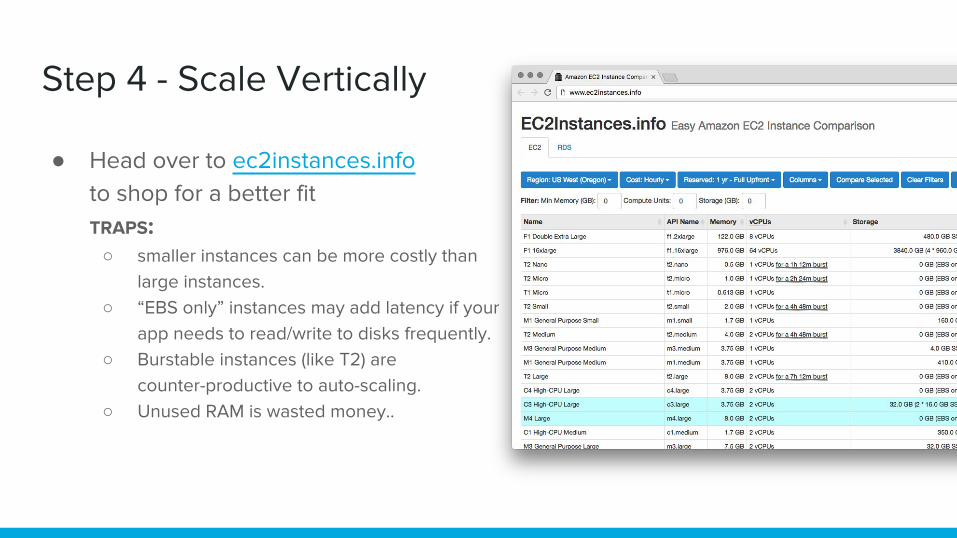
● Head over to ec2instances.infoto shop for a better fitTRAPS:○ smaller instances can be more costly than
large instances.○ “EBS only” instances may add latency if your
app needs to read/write to disks frequently.○ Burstable instances (like T2) are
counter-productive to auto-scaling.○ Unused RAM is wasted money..
Step 4 - Scale Vertically
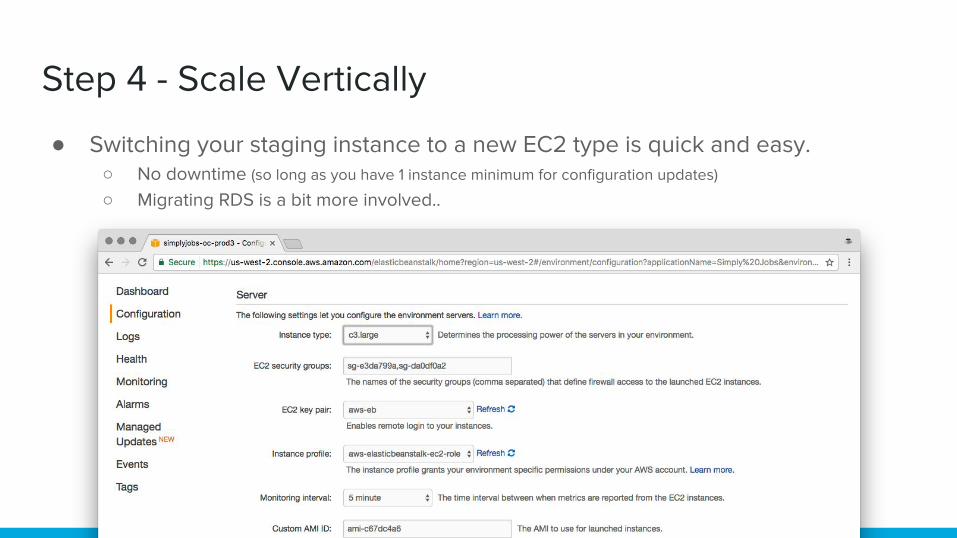
● Switching your staging instance to a new EC2 type is quick and easy.○ No downtime (so long as you have 1 instance minimum for configuration updates)
○ Migrating RDS is a bit more involved..
+9%faster after scaling vertically.

Step 5 - Scale Horizontally
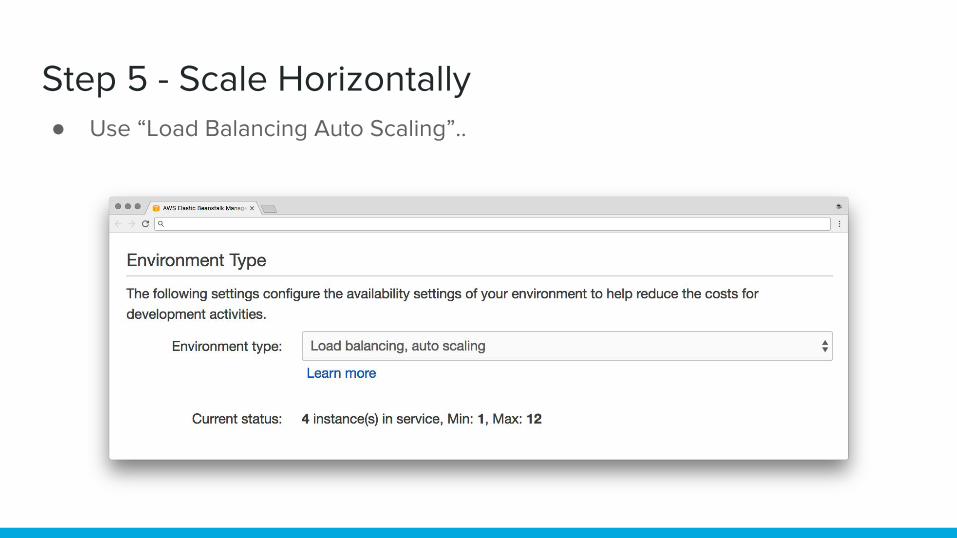
Step 5 - Scale Horizontally● Use “Load Balancing Auto Scaling”..
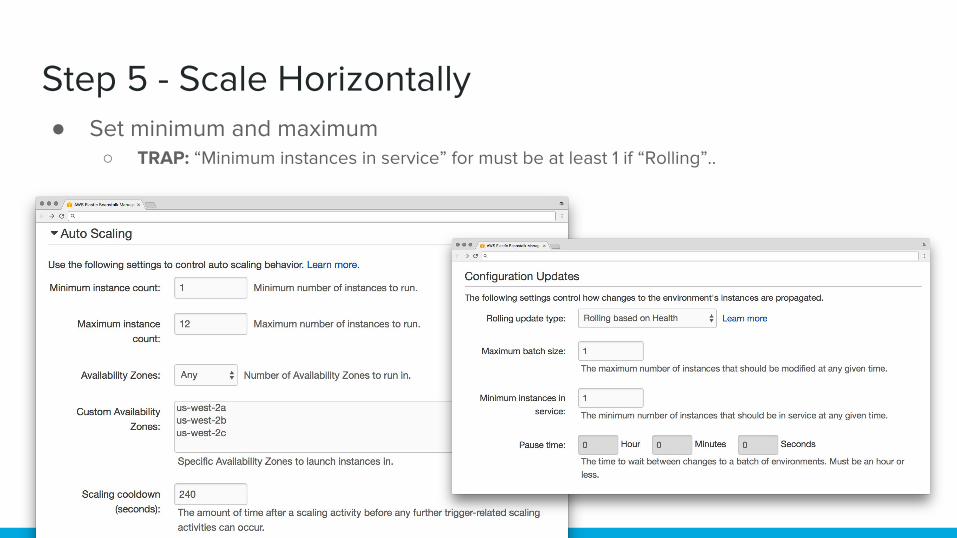
Step 5 - Scale Horizontally● Set minimum and maximum
○ TRAP: “Minimum instances in service” for must be at least 1 if “Rolling”..
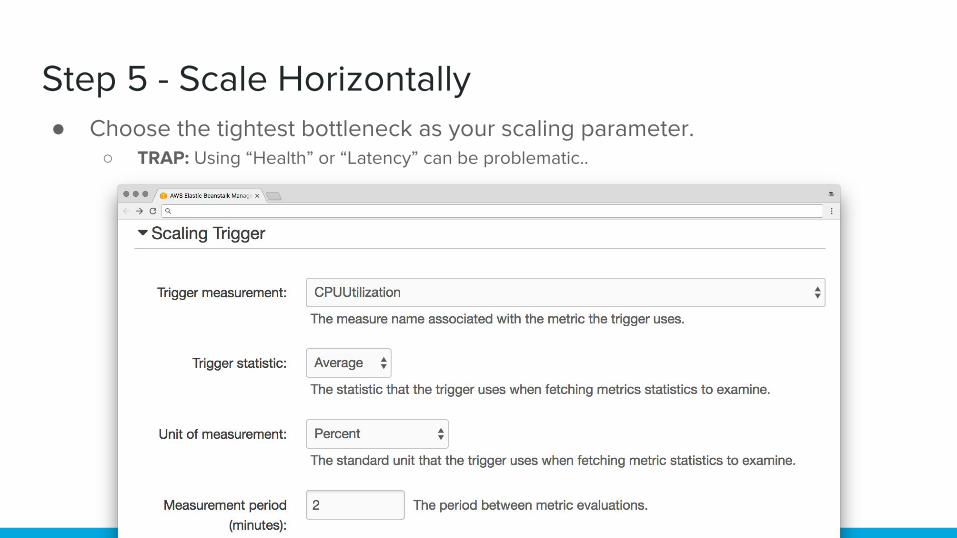
Step 5 - Scale Horizontally● Choose the tightest bottleneck as your scaling parameter.
○ TRAP: Using “Health” or “Latency” can be problematic..

Step 5 - Scale Horizontally● Play with the thresholds..
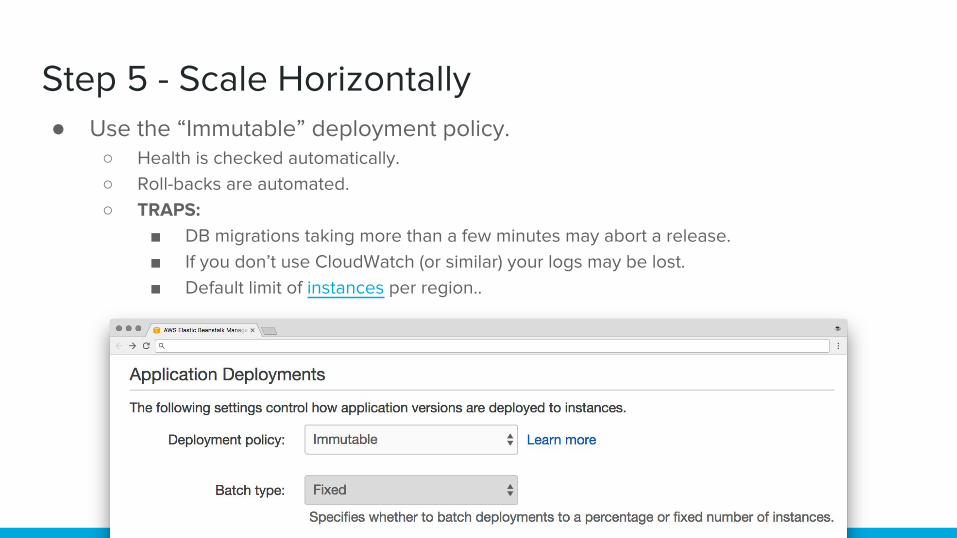
Step 5 - Scale Horizontally● Use the “Immutable” deployment policy.
○ Health is checked automatically.○ Roll-backs are automated.○ TRAPS:
■ DB migrations taking more than a few minutes may abort a release.■ If you don’t use CloudWatch (or similar) your logs may be lost.■ Default limit of instances per region..
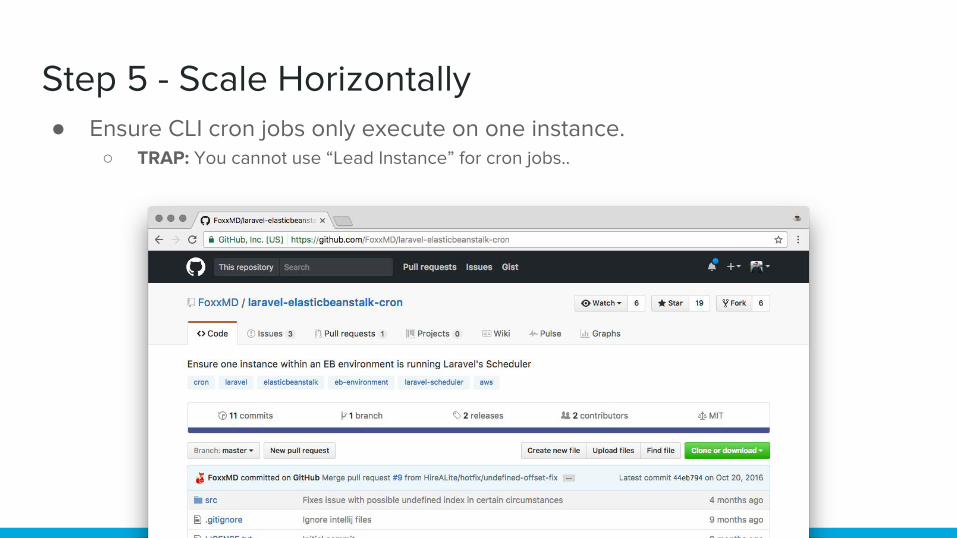
Step 5 - Scale Horizontally● Ensure CLI cron jobs only execute on one instance.
○ TRAP: You cannot use “Lead Instance” for cron jobs..

+50%faster after scaling horizontally.
Step 6 - Optimize Databases

Step 6 - Optimize Databases
● Look at slow queries in NewRelic..
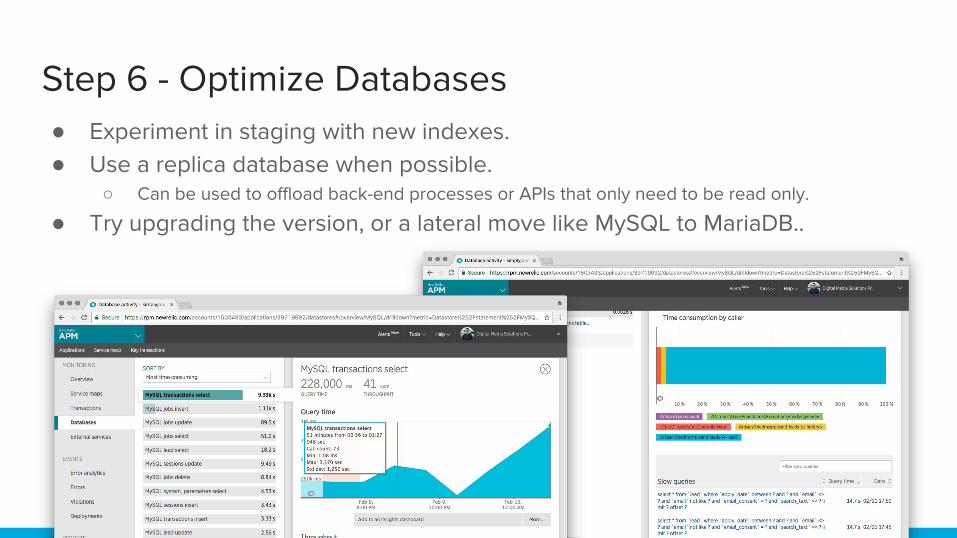
Step 6 - Optimize Databases● Experiment in staging with new indexes.● Use a replica database when possible.
○ Can be used to offload back-end processes or APIs that only need to be read only.
● Try upgrading the version, or a lateral move like MySQL to MariaDB..

Step 6 - Optimize Databases
● TRAP: Zombie queries!○ Connection count is limited by RAM of the RDS instance.○ One slow query can cause a cascade of locked queries, hitting your limit easily.○ Use MySQL Workbench to find (and kill) zombie queries.○ Set maximum values for interactive_timeout and wait_timeout to match your application.
(not 8 hours, which is the default)..
+30%faster after optimizing the database.
Step 7 - Optimize Code
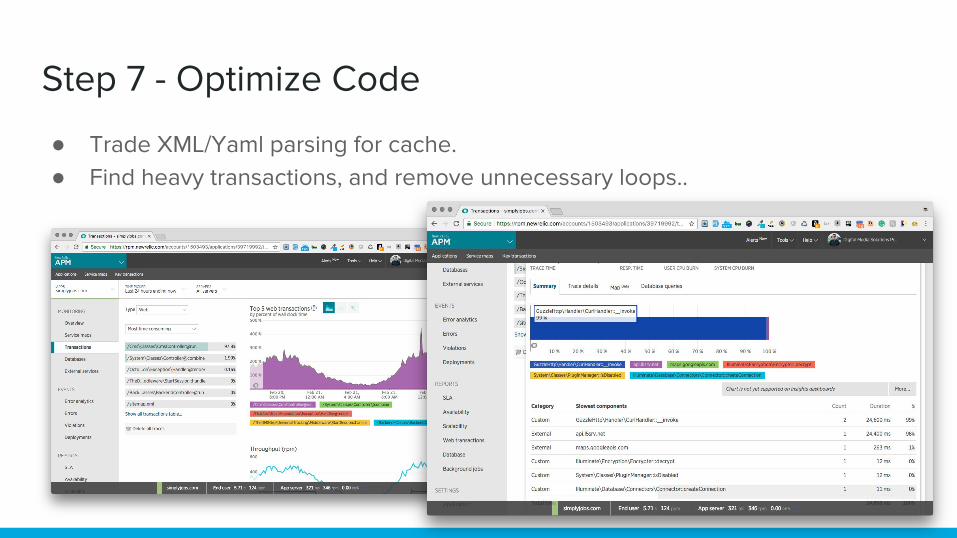
Step 7 - Optimize Code
● Trade XML/Yaml parsing for cache.● Find heavy transactions, and remove unnecessary loops..

Step 7 - Optimize Code
● Platform compilation (Mage / Laravel / etc)
○ Useful to test deployment success.○ TRAP: Custom code may break if not following the pattern of the framework.
● Optimize autoloader (Composer)
○ TRAP: Commit your composer.lock file, or compose before upload.
● Cache-Control wherever possible.○ Move more logic into javascript, so that HTML can be cached externally by the CDN..
Step 7 - Optimize Code
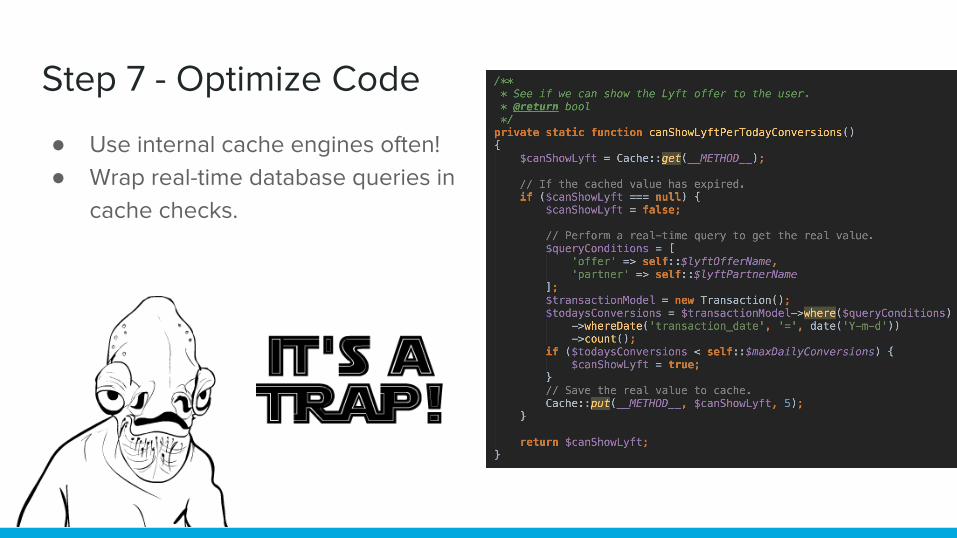
● Use internal cache engines often!● Wrap real-time database queries in
cache checks.
Step 7 - Optimize Code
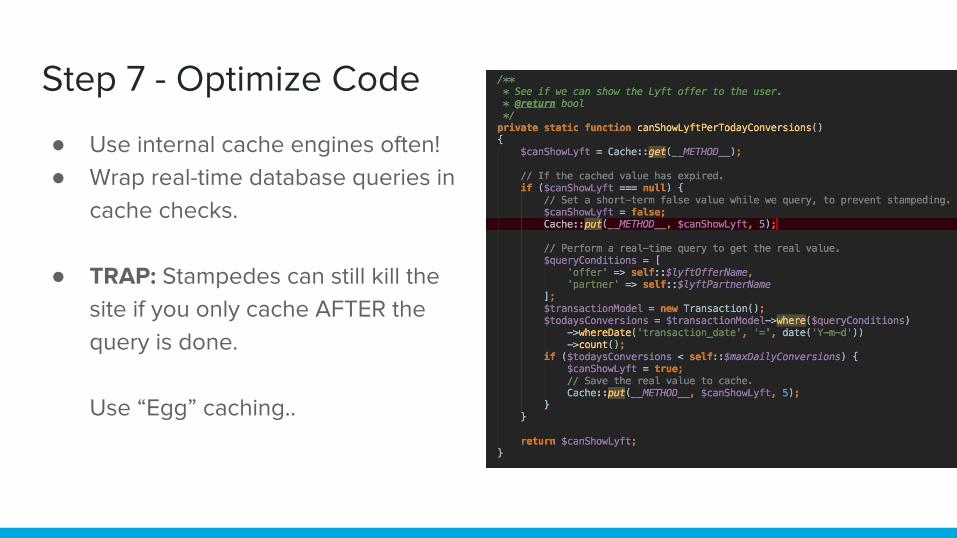
● Use internal cache engines often!● Wrap real-time database queries in
cache checks.
● TRAP: Stampedes can still kill the site if you only cache AFTER the query is done.
Use “Egg” caching..

+20%faster after optimizing the code.
How is our scalability looking now?

Your Results…● Can handle 1,200+ concurrent users (200,000+ daily visitors).● Hosting costs are down 60% (per user).● You have a plan:
Address the bottleneck, load test, Repeat....
Code sample: github.com/TheDMSGroup/laravel-eb