scanning procedures ma
TRANSCRIPT

Scanning Procedures
1. The Mac scanner is hooked up to the first computer at the front desk. It says “ScanSnap S1300i” on it.
2. Flip up the cover. A blue light should turn on.3. Click on Finder, Applications, ScanSnap.
SECTION 4 (b)
Click
Click

4. Once in the ScanSnap folder, click “ScanSnap Manager.”
5. Go to the menu bar the top of the screen (next to the apple logo). Click “ScanSnap Manager” in the menu bar. A list of options will drag down. Choose “Settings.”
6. Choose “High Quality” from the list of options and click “Apply.”
7. The
SECTION 4 (b)
Click
Click
Click
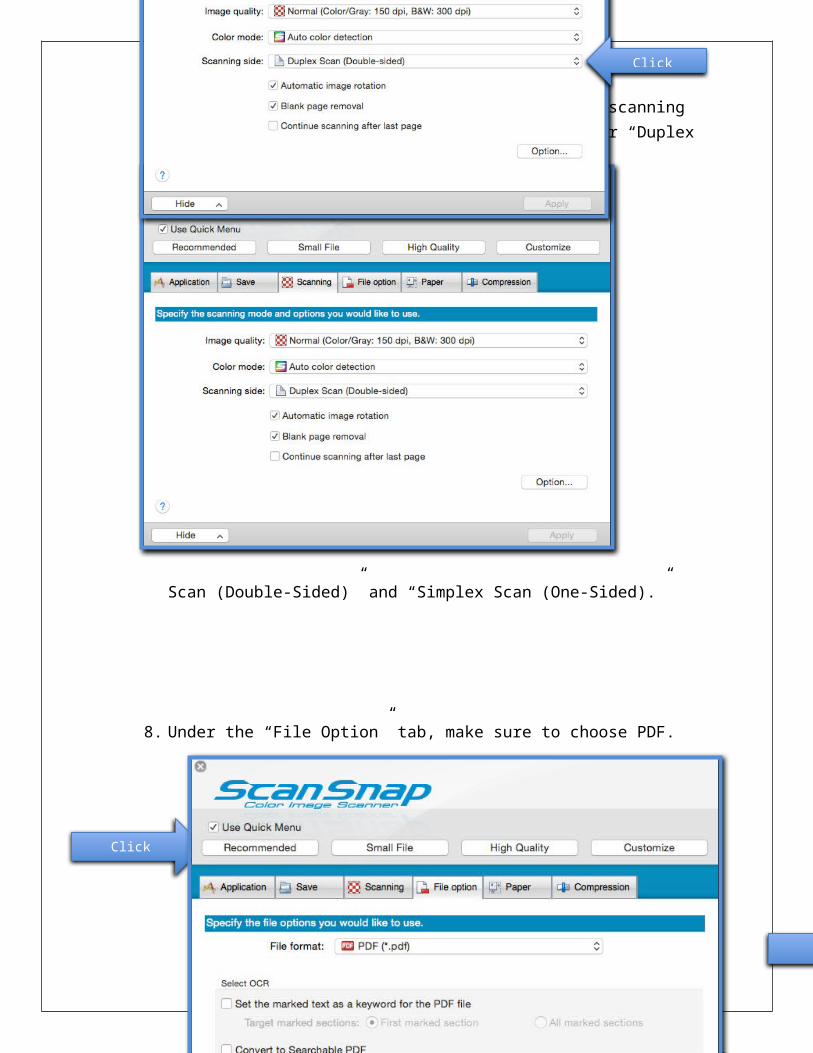
page below will open. Choose the correct “scanning side” for your document. There is an option for “Duplex Scan (Double-Sided)” and “Simplex Scan (One-Sided).”
8. Under the “File Option” tab, make sure to choose PDF.
SECTION 4 (b)
Click

9. You are now ready to scan your document. Place your document facedown with the top of the document feeding into the scanner first.
10.Push the blue button. Your document will scan through the machine and the following window will open. Choose “Scan to folder.”
SECTION 4 (b)
Click
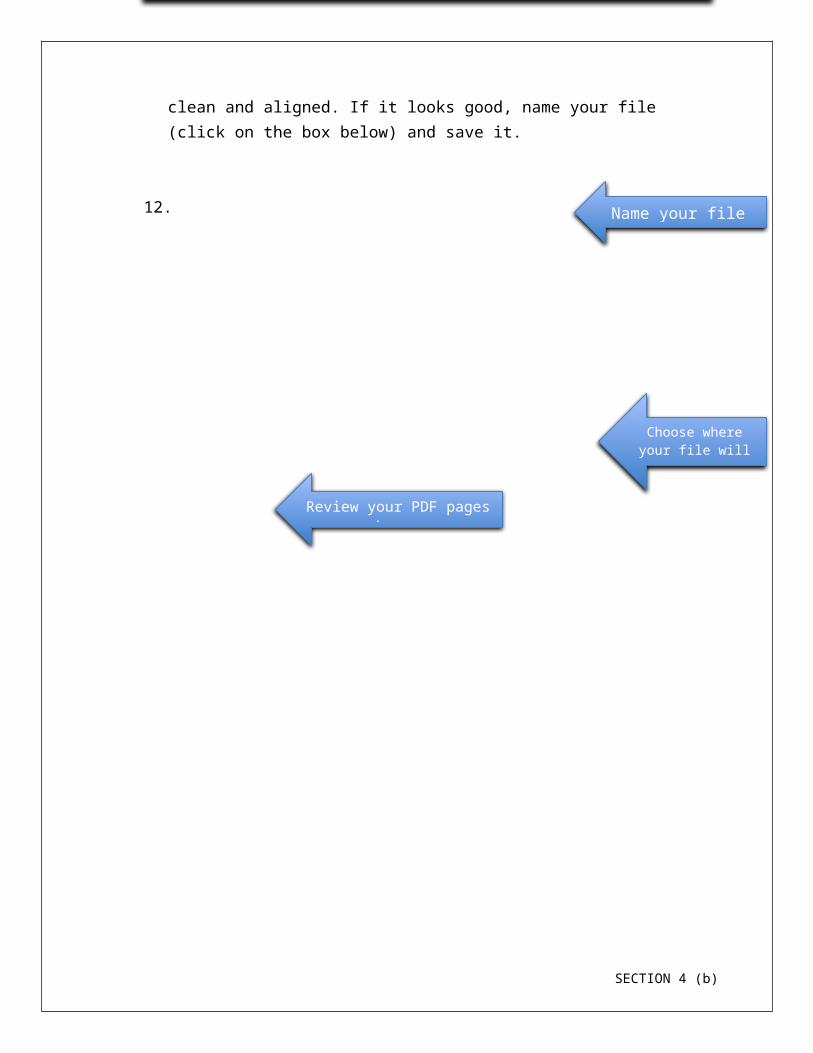
11. This window will open. From here, you can review each page of your scanned PDF to make sure everything looks clean and aligned. If it looks good, name your file (click on the box below) and save it.
12.
SECTION 4 (b)
Name your file here.
Review your PDF pages here.
Choose where your file will be saved here.

SECTION 4 (b)