schoology for parents: create account
TRANSCRIPT

Schoology for Parents: Create an Account
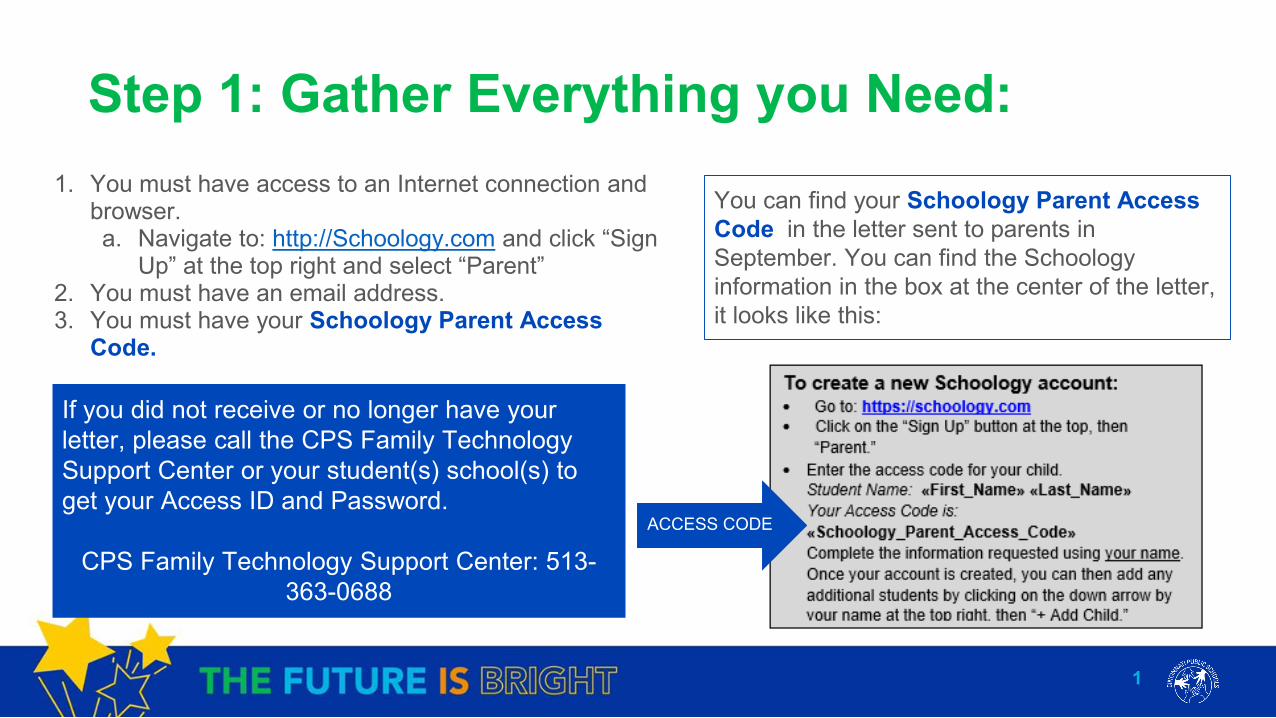
Step 1: Gather Everything you Need:
1
1. You must have access to an Internet connection and browser. a. Navigate to: http://Schoology.com and click “Sign
Up” at the top right and select “Parent”2. You must have an email address.3. You must have your Schoology Parent Access
Code.
You can find your Schoology Parent Access Code in the letter sent to parents in September. You can find the Schoology information in the box at the center of the letter, it looks like this:
If you did not receive or no longer have your letter, please call the CPS Family Technology Support Center or your student(s) school(s) to get your Access ID and Password.
CPS Family Technology Support Center: 513-363-0688
ACCESS CODE

Step 2: Create Account
2
1. To sign up, enter the Access Code provided by CPS. 2. Click Continue.
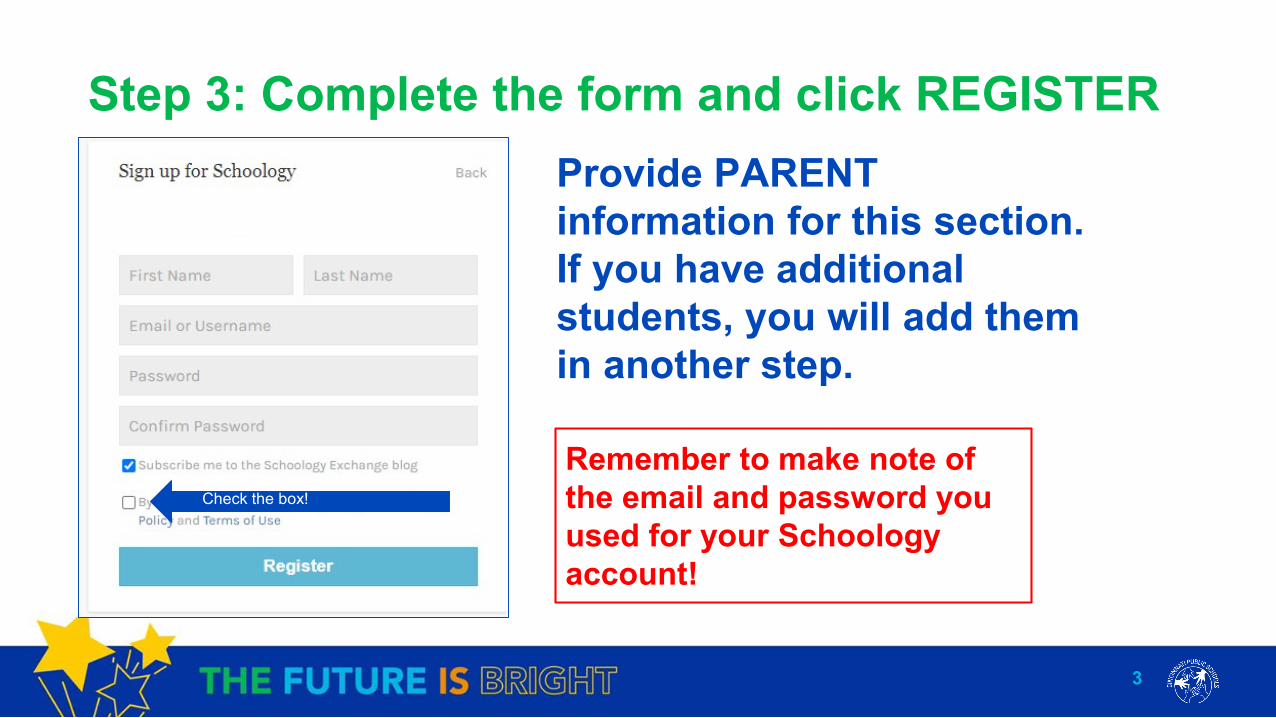
Step 3: Complete the form and click REGISTER
3
Provide PARENT information for this section. If you have additional students, you will add them in another step.
Remember to make note of the email and password you used for your Schoology account!
Check the box!

Step 4: Navigate through Schoology Notifications
4
Make sure the PARENT name is reflected in the top right-hand corner. Click the drop-down to change to the parent name if it is not visible. If no PARENT name is available, contact the HelpDesk.

Step 5: Add other Students to your Account
5
1. Click the dropdown menu next to the parent name at the top right.
2. Click “Add Child”3. Enter Parent Access
Code for next student. 4. Repeat for all students
in your household.
Click here first!
Click here next!

Step 6: Move Between Student Accounts
6
1. To review your student’s account, click the dropdown menu next to the parent name at the top right.
2. Select the student you want to review. A green check mark will show next to the selected student.
3. Click on “Courses” at the top and select course to view. Note: You will not have access to all aspects of Schoology, especially discussions and interactions with other students. You also cannot turn in or complete assignments from a parent account.
Click here first!
Select Student
When viewing as a student, you will see this note across the top of your screen:

Step 7: Finish Enrollment & Log In
7
1. Once you have completed enrollment and added your students, you can login with your username/email and password any time at Schoology.com or app.schoology.com
2. Add the Schoology Mobile app to your phone and login with the same credentials.

8
Need further assistance? Call the
CPS Family Technology Support
Center:513-363-0688
