scripting/ programming tips and troubleshooting
TRANSCRIPT
Scripting/ Programming
Tips and Troubleshooting
U2 Data Management Solutions 1099 18th St., Suite 2500
Denver, CO 80202 Phone: 303.294.0800 FAX: 303.293.8880
Contributors
Kenny Brunel, Alan Buckley, Trevor Grover, Tim Rasmussen, Ed Robb, David Robertshaw, Susie Siegesmund
U2 DATA MANAGEMENT SOLUTIONS
Contents
Adding an Icon to Turn a Local Printer On or Off..............................................................1 Creating an Automated Login Using the Learn Script .......................................................4 Creating an Icon to Start the wIntegrate Dialer...................................................................7 Detecting Client Type From a BASIC Program ...............................................................14 Examining Constants in the wIntegrate Environment ......................................................15 Hanging Up a Modem Using Event OnExit......................................................................17 How to Create a DDE Link to Excel .................................................................................19 How to Create a Function Key Icon Bar ...........................................................................22 How to Create A GUI Login Script ...................................................................................29 How to Create an Icon to Disconnect a Modem Session..................................................36 How to Create Menus.........................................................................................................39 How to Generate Random Numbers..................................................................................44 How to Import Multiple Files.............................................................................................46 How to Write a BASIC Program to Import a File ............................................................50 Limiting the Number of Sessions a User May Open ........................................................54 The Server Library Script...................................................................................................56 Using A DDE Link to Transfer Data to Word ..................................................................62 Using wIntegrate as a DDE Server ....................................................................................66 WIN.IMPORT Hangs After a File Transfer......................................................................71
- I -
U2 DATA MANAGEMENT SOLUTIONS
Moprinor osyst Slavprinacc UsuBAscre On do prin Ba Thedefa
WeTheandwIn Icon Weexis
wIntegrate Tech Tips
Adding An Icon to Turn a Local
Printer On or Off
st dumb terminals allow the text being displayed on the screen to be printed to a locally attached ter. This is called auxiliary printing. Typically, the keyboard has a key that toggles the printer on ff. Auxiliary printing is controlled by the terminal's firmware rather than by the host operating em. wIntegrate provides compatibility with this feature via slave printing.
e printing captures the output that would have gone to the screen and redirects it to the local ter. Because auxiliary printing is proprietary to a given dumb terminal, wIntegrate uses scripts to
omplish the same task.
ally, the appropriate escape sequences to enable or disable slave printing are coded into a host SIC application. When these sequences are received by wIntegrate, a script is run to capture en output and redirect it to the printer, then another script disables the screen capture.
occasion, you may want to capture the screen output without having to code a BASIC program to so. This Tip will describe how to add an icon to the Bar_Gen icon bar that can toggle the local ter on and off.
r_Gen.wis
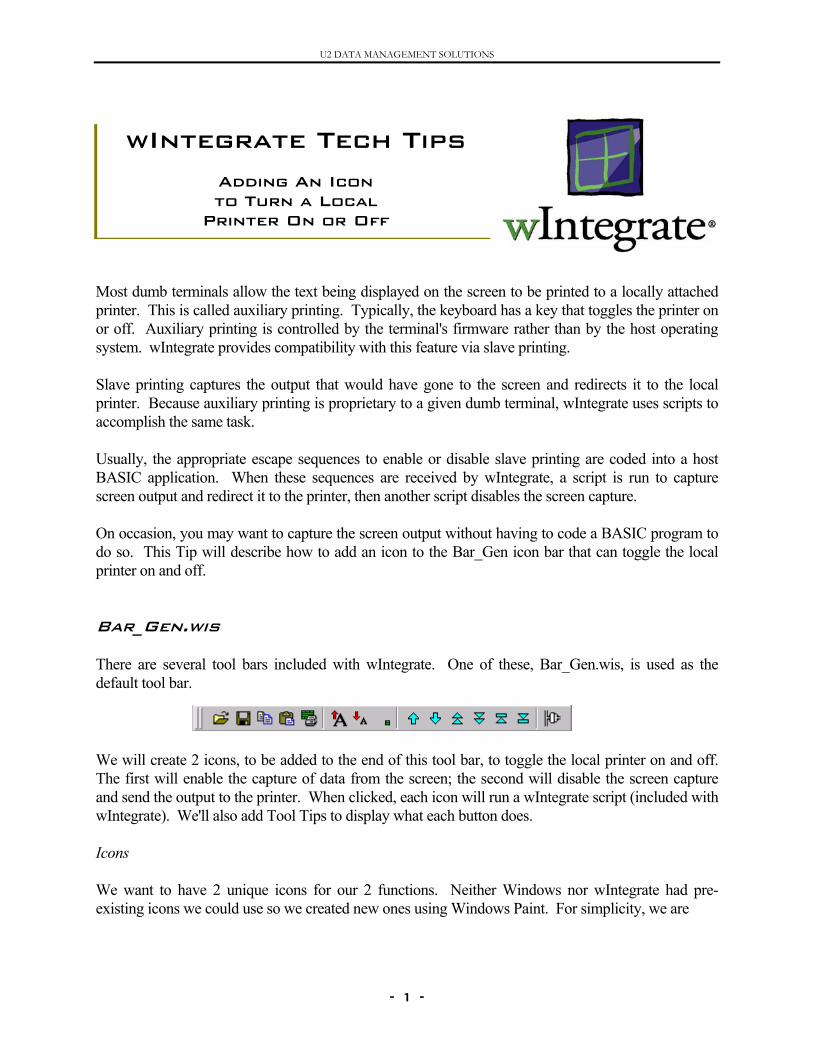
re are several tool bars included with wIntegrate. One of these, Bar_Gen.wis, is used as the ult tool bar.
will create 2 icons, to be added to the end of this tool bar, to toggle the local printer on and off. first will enable the capture of data from the screen; the second will disable the screen capture send the output to the printer. When clicked, each icon will run a wIntegrate script (included with tegrate). We'll also add Tool Tips to display what each button does.
s
want to have 2 unique icons for our 2 functions. Neither Windows nor wIntegrate had pre-ting icons we could use so we created new ones using Windows Paint. For simplicity, we are
- 1 -
U2 DATA MANAGEMENT SOLUTIONS
using an image of a printer to enable the printer, and the same image with a circle and hash to disable it. These icons are 16 pixels on a side, the same size as the other icons on the tool bar. These are stored in the \image subdirectory under wIntegrate.
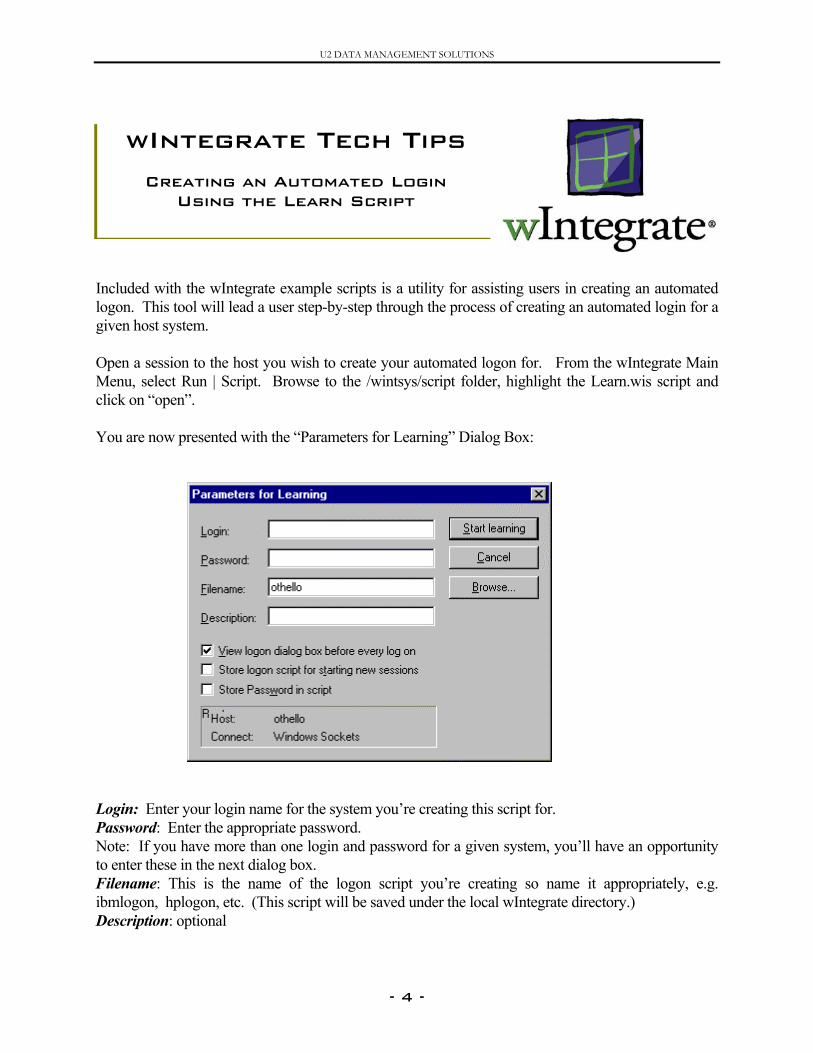
Modifying Bar_Gen.wis The final step is to add the script commands to Bar_Gen.wis to display our icons and tool tips, and to add functionality to them. Edit \wintsys\iconbar\Bar_Gen.wis and add the following lines of code shown in BOLD. If you are using wIntegrate 3.0, do not add the 2 lines for AddToolTip (underlined). . . . AddIcon 'image\i_pagedn.bmp',"Invoke ScrollNextPage" AddToolTip 'Scroll down one screen' AddIcon 'image\i_paget.bmp',"Invoke ScrollTopPage" AddToolTip 'Show top screen' AddIcon 'image\i_pageb.bmp',"Invoke ScrollEndPage" AddToolTip 'Show current screen' AddSeparator AddIcon 'image\i_conn.bmp',"Set PortOpen=True" AddToolTip 'Open connection' AddSeparator AddIcon 'image\i_slave.bmp',"Dialog RunScript;Set Filename='wintsys\wit_scr\copyprt';Invoke" AddToolTip 'Printer ON' AddIcon 'image\i_noslv.bmp',"Dialog RunScript;Set Filename='wintsys\wit_scr\printoff';Invoke" AddToolTip 'Printer OFF' EndCreateIconBar EndIf . . . The resulting tool bar now has the new icons:
- 2 -
U2 DATA MANAGEMENT SOLUTIONS
Local Printing
When you click the printer icon, the script \wintsys\wit_scr\copyprt.wis is executed. This script causes everything that appears on the screen from that point on, whether input from the user or data sent by the host, to be captured to a temporary file on the hard disk. This is done to ensure that wIntegrate doesn't maintain a lock on the printer for excessively long periods, and to allow the data to be printed as a continuous job. When you click this icon, the script \wintsys\wit_scr\Printoff.wis is executed. The screen capture is disabled and the data captured to the temporary file on the hard disk is printed at the local printer.
- 3 -
U2 DATA MANAGEMENT SOLUTIONS
Incllogogive OpeMeclic You
LogPasNotto eFileibmDes
wIntegrate Tech Tips
Creating an Automated Login Using the Learn Script
uded with the wIntegrate example scripts is a utility for assisting users in creating an automated n. This tool will lead a user step-by-step through the process of creating an automated login for a n host system.
n a session to the host you wish to create your automated logon for. From the wIntegrate Main nu, select Run | Script. Browse to the /wintsys/script folder, highlight the Learn.wis script and k on “open”.
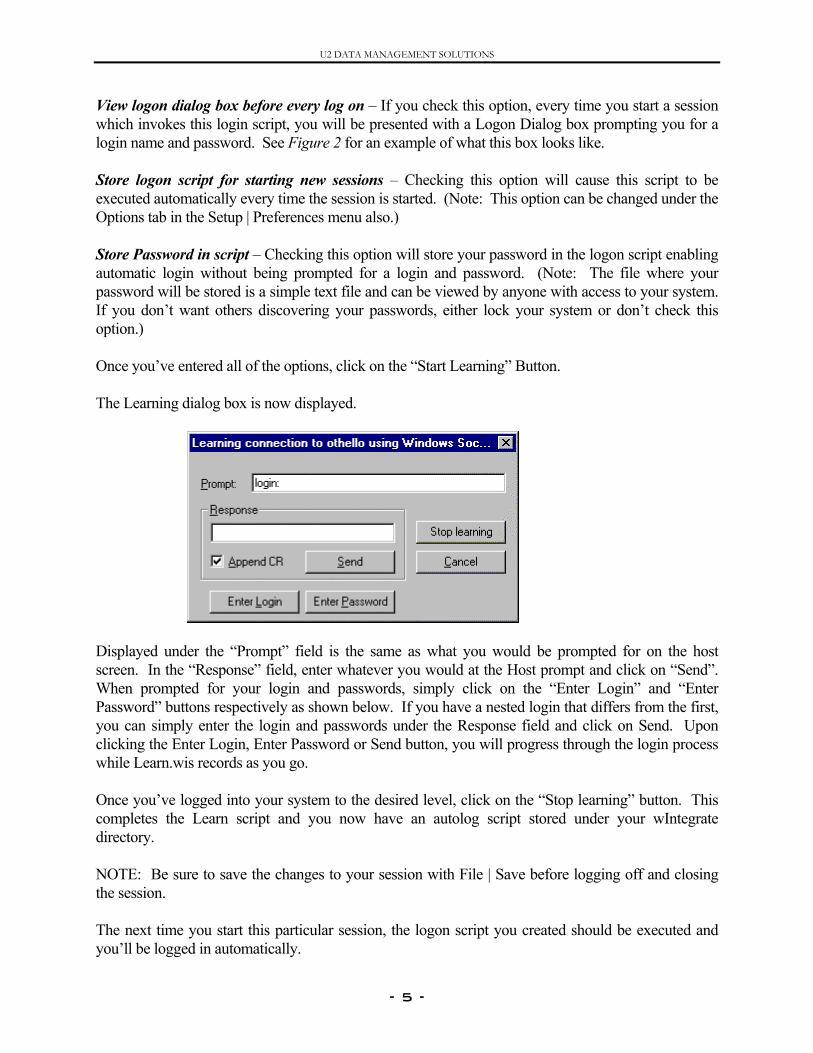
are now presented with the “Parameters for Learning” Dialog Box:
in: Enter your login name for the system you’re creating this script for. sword: Enter the appropriate password. e: If you have more than one login and password for a given system, you’ll have an opportunity nter these in the next dialog box. name: This is the name of the logon script you’re creating so name it appropriately, e.g. logon, hplogon, etc. (This script will be saved under the local wIntegrate directory.) cription: optional
- 4 -
U2 DATA MANAGEMENT SOLUTIONS
View logon dialog box before every log on – If you check this option, every time you start a session which invokes this login script, you will be presented with a Logon Dialog box prompting you for a login name and password. See Figure 2 for an example of what this box looks like. Store logon script for starting new sessions – Checking this option will cause this script to be executed automatically every time the session is started. (Note: This option can be changed under the Options tab in the Setup | Preferences menu also.) Store Password in script – Checking this option will store your password in the logon script enabling automatic login without being prompted for a login and password. (Note: The file where your password will be stored is a simple text file and can be viewed by anyone with access to your system. If you don’t want others discovering your passwords, either lock your system or don’t check this option.) Once you’ve entered all of the options, click on the “Start Learning” Button. The Learning dialog box is now displayed.
Displayed under the “Prompt” field is the same as what you would be prompted for on the host screen. In the “Response” field, enter whatever you would at the Host prompt and click on “Send”. When prompted for your login and passwords, simply click on the “Enter Login” and “Enter Password” buttons respectively as shown below. If you have a nested login that differs from the first, you can simply enter the login and passwords under the Response field and click on Send. Upon clicking the Enter Login, Enter Password or Send button, you will progress through the login process while Learn.wis records as you go. Once you’ve logged into your system to the desired level, click on the “Stop learning” button. This completes the Learn script and you now have an autolog script stored under your wIntegrate directory. NOTE: Be sure to save the changes to your session with File | Save before logging off and closing the session. The next time you start this particular session, the logon script you created should be executed and you’ll be logged in automatically.
- 5 -

U2 DATA MANAGEMENT SOLUTIONS
If you Checked the View logon dialog box before every log on- this is the dialog you will be presented with each time you start the session. Figure 2.
- 6 -
U2 DATA MANAGEMENT SOLUTIONS
Ad TheaddmetwIn 1.
wIntegrate Tech Tips
Creating an Icon to Start the wIntegrate Dialer
ding an Icon for the wIntegrate dialer in wIntegrate 3.0
simplest way to add any Icon to a wIntegrate Icon Bar is to make a copy of an existing Icon Bar, your changes to that new bar, and enable it as the default Icon Bar. Below is a step by step hod to make a copy of an existing Icon Bar, make some additions to it and select it from the tegrate Setup options.
Make a copy of a wIntegrate Icon Bar
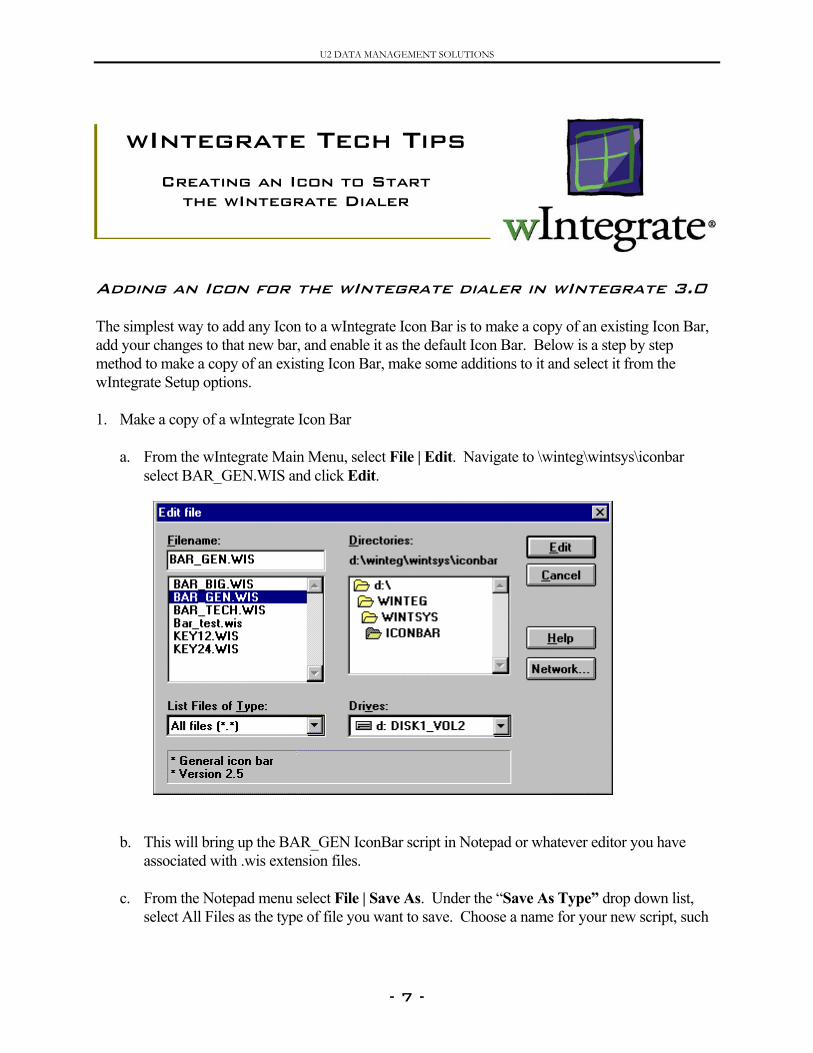
a. From the wIntegrate Main Menu, select File | Edit. Navigate to \winteg\wintsys\iconbar select BAR_GEN.WIS and click Edit.
b. This will bring up the BAR_GEN IconBar script in Notepad or whatever editor you have
associated with .wis extension files. c. From the Notepad menu select File | Save As. Under the “Save As Type” drop down list,
select All Files as the type of file you want to save. Choose a name for your new script, such
- 7 -
U2 DATA MANAGEMENT SOLUTIONS
as NEW_BAR.WIS and click on Save. Note: Be sure to save this under \winteg\wintsys\iconbar.
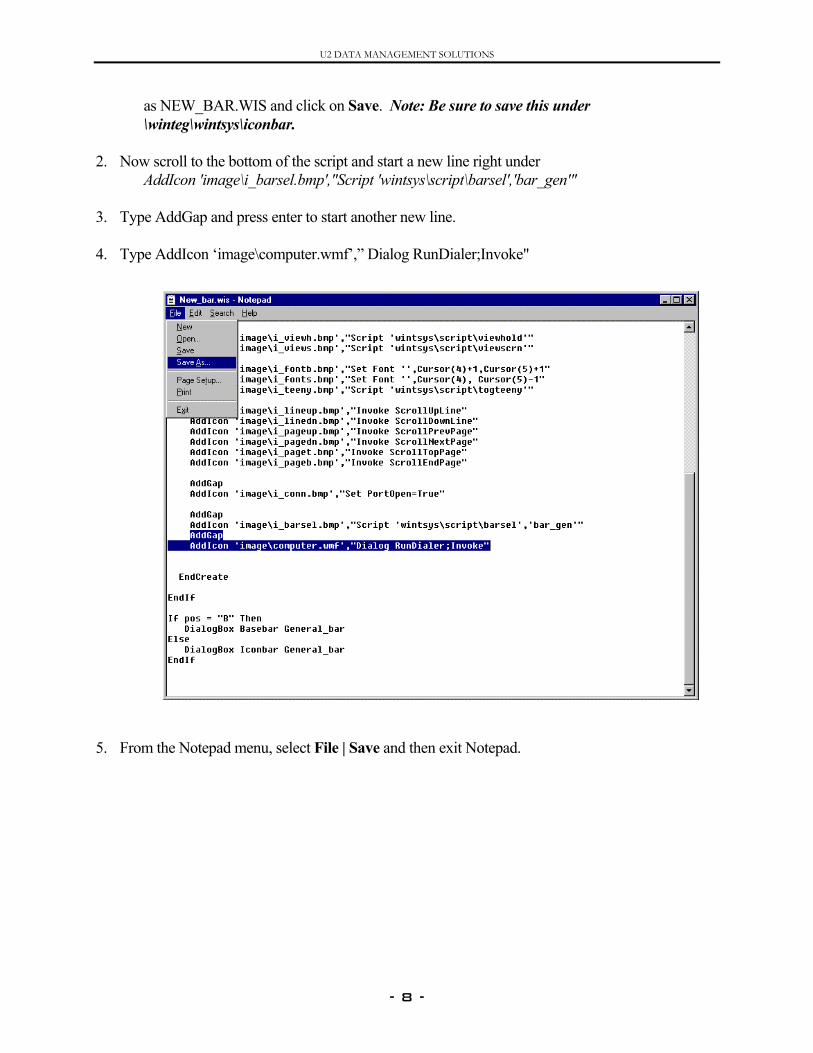
2. Now scroll to the bottom of the script and start a new line right under
AddIcon 'image\i_barsel.bmp',"Script 'wintsys\script\barsel','bar_gen'" 3. Type AddGap and press enter to start another new line. 4. Type AddIcon ‘image\computer.wmf’,” Dialog RunDialer;Invoke"
5. From the Notepad menu, select File | Save and then exit Notepad.
- 8 -
U2 DATA MANAGEMENT SOLUTIONS
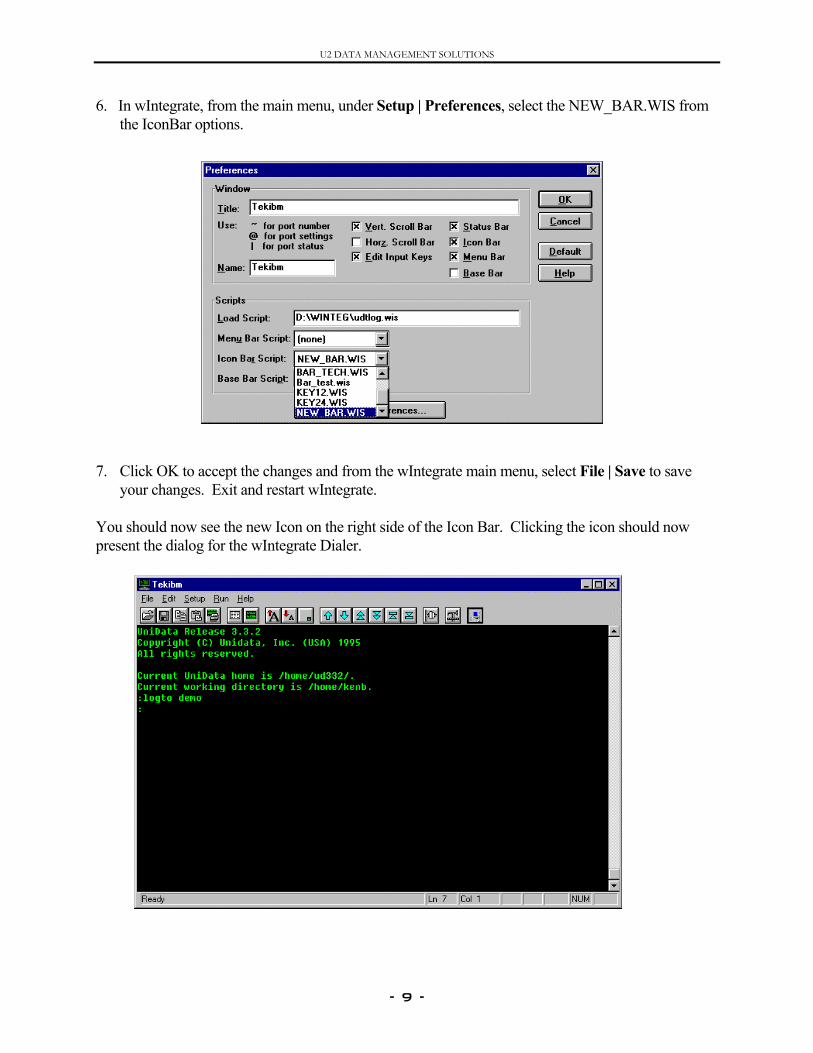
6. In wIntegrate, from the main menu, under Setup | Preferences, select the NEW_BAR.WIS from the IconBar options.
7. Click OK to accept the changes and from the wIntegrate main menu, select File | Save to save
your changes. Exit and restart wIntegrate. You should now see the new Icon on the right side of the Icon Bar. Clicking the icon should now present the dialog for the wIntegrate Dialer.
- 9 -
U2 DATA MANAGEMENT SOLUTIONS
Adding an Icon for the wIntegrate dialer in wIntegrate 98 wIntegrate 98 (V4.0.1 and later) includes an option to customize Toolbars. By using this feature or by editing the Icon bar script, one can add an icon to the IconBar to call a function. Method 1. Using Setup | Customize Toolbars.
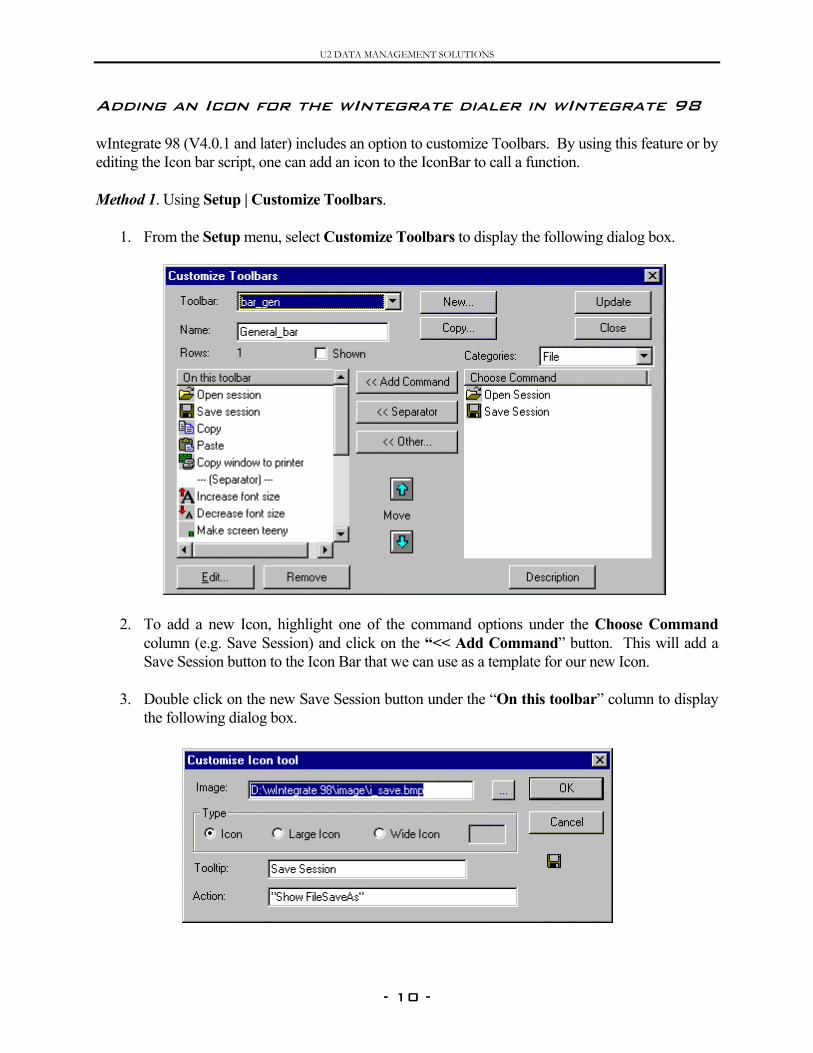
1. From the Setup menu, select Customize Toolbars to display the following dialog box.
2. To add a new Icon, highlight one of the command options under the Choose Command
column (e.g. Save Session) and click on the “<< Add Command” button. This will add a Save Session button to the Icon Bar that we can use as a template for our new Icon.
3. Double click on the new Save Session button under the “On this toolbar” column to display
the following dialog box.
- 10 -

U2 DATA MANAGEMENT SOLUTIONS
4. Click on the Elipses (...) to browse for a new image to use for our Icon and select computer.bmp from the winteg\image folder.
5. In the Tooltip: text box, enter your description of the new button. (e.g. Dialer). 6. In the Action: text box: enter the command to invoke the dialer, “Script ‘\wintsys\script\dialer.wis’”. 7. Your changes should appear the same as in the image below:
8. Now click OK. Click on Close to conclude the customization of the toolbar. When asked if you want to save the changes, select “yes”.
9. Now try out your new button. It should bring up the wIntegrate dialer.
- 11 -
U2 DATA MANAGEMENT SOLUTIONS
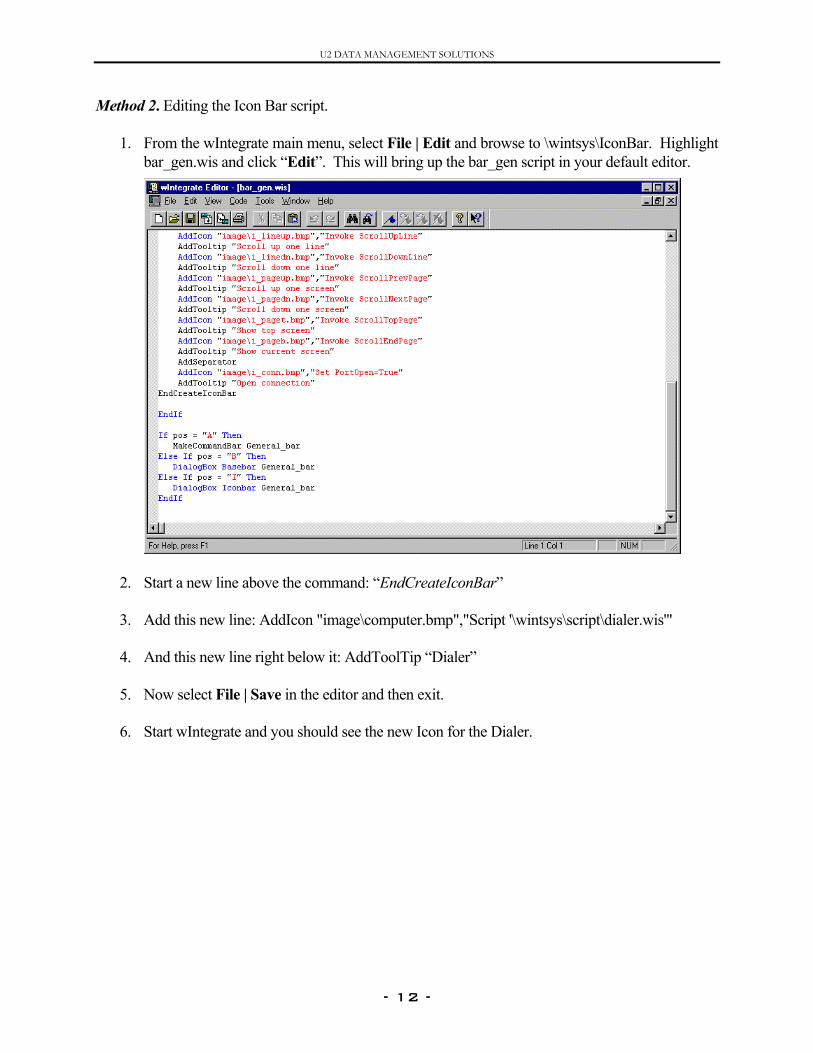
Method 2. Editing the Icon Bar script.
1. From the wIntegrate main menu, select File | Edit and browse to \wintsys\IconBar. Highlight bar_gen.wis and click “Edit”. This will bring up the bar_gen script in your default editor.
2. Start a new line above the command: “EndCreateIconBar” 3. Add this new line: AddIcon "image\computer.bmp","Script '\wintsys\script\dialer.wis'"
4. And this new line right below it: AddToolTip “Dialer”
5. Now select File | Save in the editor and then exit.
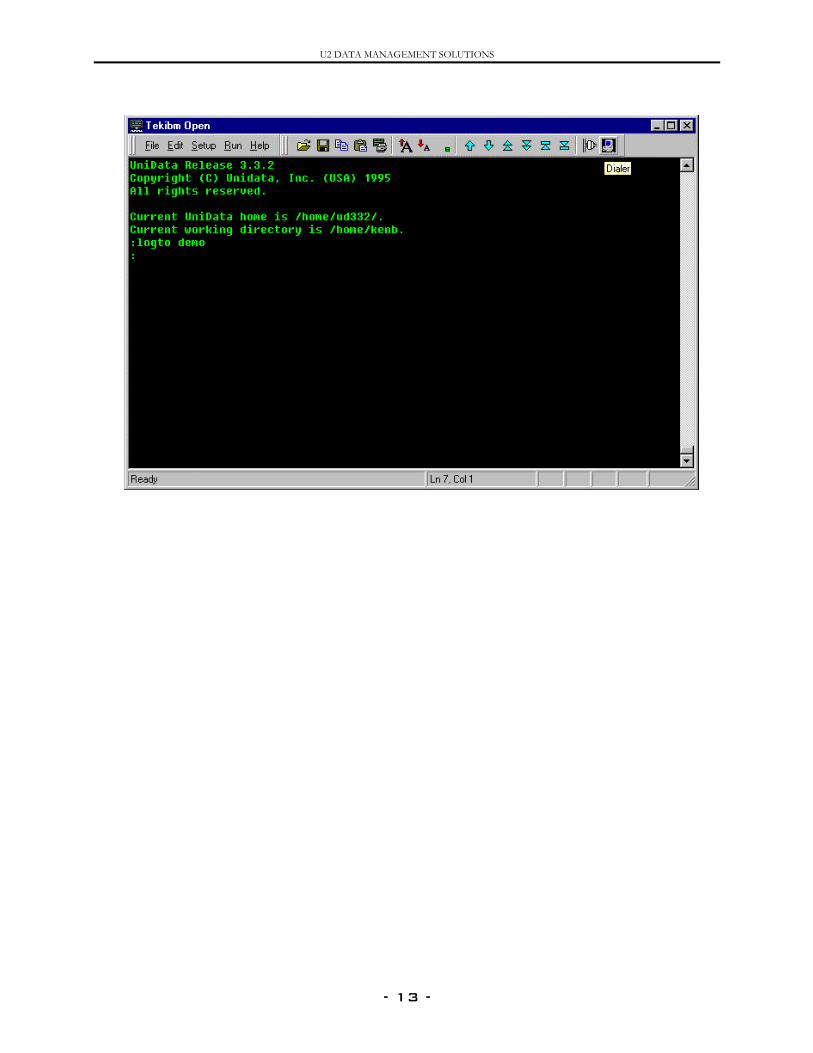
6. Start wIntegrate and you should see the new Icon for the Dialer.
- 12 -
U2 DATA MANAGEMENT SOLUTIONS
- 13 -
U2 DATA MANAGEMENT SOLUTIONS
wInto uerroto dappdiff Oncthe C I I For C I I As termTer
wIntegrate Tech Tips
Detecting Client Type From a BASIC Program
tegrate host routines only work with clients running wIntegrate. If a host application is designed se these routines but the client is a terminal, or running another emulator program, you will get an r message as soon as a call to a host routine is made. wIntegrate does not provide a mechanism etect client type because you need some sort of INPUT with a timeout in the host BASIC
lication. This is generally achievable on every O/S, but it is one of the few things which is erent for every machine type.
e you know what the command used for the timeout on your host is, you can add a routine like following in your host program:
ALL WIN.COMSUB("Enter 1") NPUTWITHQUICKTIMEOUT DUM; * Whatever the actual routine is for your host F DUM = "1" THEN PRINT "Good choice you have wIntegrate!!"
example, if you are using UniData, this program would be:
ALL WIN.COMSUB("Enter 1") NPUT DUM WAITING 1 F DUM = "1" THEN PRINT "Good choice you have wIntegrate!!"
an alternative, if there is an existing escape sequence which returns a value to the host for dumb inals, you can modify a wIntegrate emulation file (.WIT) to send something different back. The
mId lines in the wit files define these routines.
- 14 -
U2 DATA MANAGEMENT SOLUTIONS
wIntegrate Tech Tips
Examining Constants in the wIntegrate
Environment
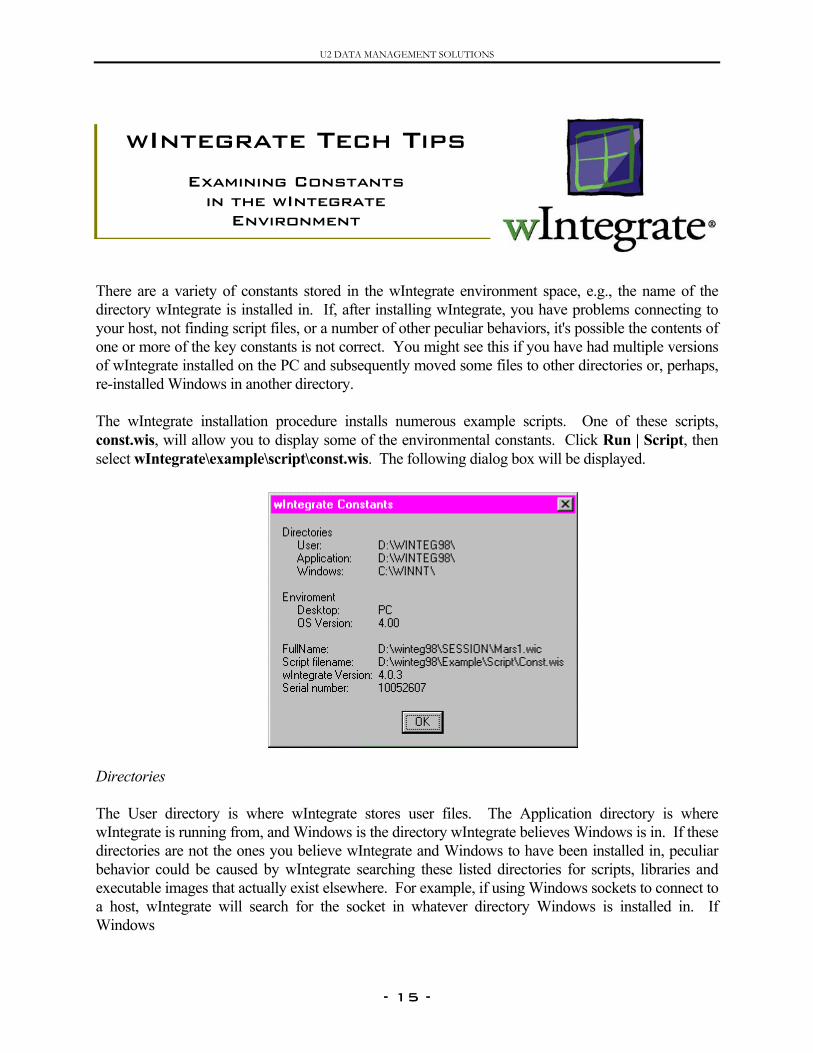
There are a variety of constants stored in the wIntegrate environment space, e.g., the name of the directory wIntegrate is installed in. If, after installing wIntegrate, you have problems connecting to your host, not finding script files, or a number of other peculiar behaviors, it's possible the contents of one or more of the key constants is not correct. You might see this if you have had multiple versions of wIntegrate installed on the PC and subsequently moved some files to other directories or, perhaps, re-installed Windows in another directory. The wIntegrate installation procedure installs numerous example scripts. One of these scripts, const.wis, will allow you to display some of the environmental constants. Click Run | Script, then select wIntegrate\example\script\const.wis. The following dialog box will be displayed.
Directories The User directory is where wIntegrate stores user files. The Application directory is where wIntegrate is running from, and Windows is the directory wIntegrate believes Windows is in. If these directories are not the ones you believe wIntegrate and Windows to have been installed in, peculiar behavior could be caused by wIntegrate searching these listed directories for scripts, libraries and executable images that actually exist elsewhere. For example, if using Windows sockets to connect to a host, wIntegrate will search for the socket in whatever directory Windows is installed in. If Windows
- 15 -
U2 DATA MANAGEMENT SOLUTIONS
is really installed and running from another directory other than the one called 'Windows', and you put the socket in the directory called 'Windows', wIntegrate won't find it and so will be unable to make a connection. Environment Desktop: will indicate 'PC'; OS Version will display the specific version of Windows. In the above example, we are using NT 4.00. FullName This is the name of the configuration file, including the full path, used by this session. Script filename The full path const.wis is being run from. wIntegrate Version The release of wIntegrate, for example, 3.0.9, 4.0.3, etc. Serial number The 8-digit wIntegrate serial number. This is the same as on the splash screen when starting wIntegrate or clicking Help | About. Const.wis will only show you where wIntegrate is looking for files, not modify the paths. It can be useful when you need to examine the wIntegrate environment.
- 16 -
U2 DATA MANAGEMENT SOLUTIONS
Whlinehosdiscmodup aSes At comexitprevwIn CL TheCLOare * C* If P T W EEnd
wIntegrate Tech Tips
Hanging Up A Modem Using Event OnExit
en you use a modem to connect to a remote host, you may find that the host doesn’t disconnect the when you log off. Normally, if this is the case, the host is prompting you to log in again. If your t doesn’t automatically disconnect the line after logging the user off, wIntegrate will not onnect the line, either. In this case, a common solution is to reboot the PC, thereby resetting the em and forcing the line to disconnect – a rather ungraceful technique. We described how to set n icon to disconnect the line in another Tech Tip, ‘How to Set up an Icon to Disconnect a Modem
sion in wIntegrate’.
version 3.0.01, the script command, Event OnExit, was added. This command sets up another mand to run whenever the program ends. When an exit command is defined, the program can be ed only with Invoke FileExit or by deleting this Event with Event Delete OnExit. This command ents the normal Exit dialog from being shown. You can use this Event command to have tegrate run a script to check whether the port is open, and if so, close it before closing wIntegrate.
OSPORT.WIS
first step is to create the script to be run when wIntegrate is closed. Using any text editor, create SPORT.WIS. You can use any name for this script, but remember, in wIntegrate 3.0 file names
restricted to the 8.3 DOS naming convention. Our script will be saved in \winteg\wintsys\script.
LOSPORT.WIS
ortStatus() Then ype “+++” ait Delay “1s”
nter “ATH” If
- 17 -
U2 DATA MANAGEMENT SOLUTIONS
EVEXIT.WIS The last step is to create a script for Event OnExit. As with the previous script, you can use any name for the script but you are restricted to the DOS 8.3 naming convention. Using a text editor, add the following line to the script. Event OnExit ‘Script “winteg\wintsys\script\closport.wis”’ In wIntegrate, select Setup, Preferences. Insert the path and name of this script in the Load Script field. If you already use a load script, insert the above line at the bottom of SESSION1.WIS, or whatever startup script you are using when you start a wIntegrate session. Now, when you when you close wIntegrate, it will check to see if the port is still connected, and, if so, disconnect it.
- 18 -
U2 DATA MANAGEMENT SOLUTIONS
YouExcDDwill ThefunWINpro The CACACACACACA UsiwInlangThi The * SCA* NCATO* TCAVA
wIntegrate Tech Tips
How to Create a DDE Link to Excel
can use wIntegrate to establish a DDE link to any application that supports DDE. Microsoft el is such an application. This discussion will provide some insight into how you might set up a E link to Excel using the wIntegrate host routines in a BASIC program. For DDE to work, you need to have Excel properly installed on the PC.
re are 6 BASIC subroutines provided with wIntegrate which are used to perform a variety of DDE ctions: WIN.DDECLOSE, WIN.DDEEXEC, WIN.DDEOPEN, WIN.DDEPOKE,
.DDEREQ, and WIN.DDETIME. We will use sections from the WIN.DDEDEMO program, vided with wIntegrate, to show you how you might implement a DDE link to Excel.
subroutine calls we’ll use are:
LL WIN.PCRUN(APP.NAME,ARGS) to start Excel LL WIN.DDEOPEN(NAME, APP.NAME, TOPIC, STARTED.OK) to open the link LL WIN.DDEREQ(NAME, ITEM, VALUE) to fetch data LL WIN_.DEPOKE(NAME, ITEM, VALUE) to send data LL WIN.DDEEXEC(NAME, MACRO) to execute a macro LL WIN.DDECLOSE(NAME) to close the link
ng these subroutines, we can pass Excel 4.0 script commands back and forth between tegrate and Excel. The important thing to note is that you must use the Excel 4.0 script uage rather than the Visual Basic script language now used in Excel version 95 and newer.
s is a restriction of Excel, not wIntegrate.
first thing we want to do is find out what topics Excel supports.
tart Excel – you will want to add logic to determine if Excel is started or not LL WIN.PCRUN("excel","") ow we open a link to Excel. Our link name is EXCEL_LINK LL WIN.DDEOPEN("EXCEL_LINK","excel","System", OK) PICS = '' he Excel script command, “Topics”, returns a list of the topics available in Excel LL WIN.DDEREQ("EXCEL_LINK", "Topics", TOPICS) LUE = TOPICS
- 19 -
U2 DATA MANAGEMENT SOLUTIONS
* Now we want to print out the topics PRINT "The topics known by Excel are" PRINT VALUE * Finally, we close the link to Excel CALL WIN.DECLOSE("EXCEL_LINK") When we run this code segment, the following is returned from Excel: [Book1]Sheet1 [Book1]Sheet2 [Book1]Sheet3 System The items in BOLD are the ‘topics’ you can use with the WIN.DDEOPEN subroutine. If you had a spreadsheet called ‘ABCDE’ open in Excel, you would see the topics: [path to the spreadsheet]ABCDE System First, we open a link to the spread sheet 'Sheet1', which we determined was a valid topic name. CALL WIN.DDEOPEN("EXCEL_SHEET","EXCEL","SHEET1",OK) Now, let’s add some data to the spreadsheet. Add the titles to the spreadsheet. We put the text, ‘Fruit’ in Row 2, Column 2, and ‘Quantity’ in Row 2, column 3. CALL WIN.DDEPOKE("EXCEL_SHEET", "R2C2", "Fruit") CALL WIN.DDEPOKE("EXCEL_SHEET", "R2C3", "Quantity") We’ll use a simple loop to populate our spreadsheet. WIN.DDEPOKE is used to send the data to Excel. R.DATA = "Apple"; R.DATA<1,2> = 20 R.DATA<2,1> = "Banana"; R.DATA<2,2> = 30 R.DATA<3,1> = "Pear"; R.DATA<3,2> = 10 FOR J = 1 TO 3 CALL WIN.DDEPOKE("EXCEL_SHEET", "R":(J+3):"C2", R.DATA<J,1>) CALL WIN.DDEPOKE("EXCEL_SHEET", "R":(J+3):"C3", R.DATA<J,2>) NEXT J We’d like a total so we’ll put the text , ‘Total’ in row 8, column 2, and use a formula to sum the data in cells C4-C6, placing that total in row 8, column 3. CALL WIN.DDEPOKE("EXCEL_SHEET", "R8C2","Total") CALL WIN.DDEPOKE("EXCEL_SHEET", "R8C3","=SUM(C4:C6)") Finally, close the link.
- 20 -

U2 DATA MANAGEMENT SOLUTIONS
CALL WIN.DDECLOSE("EXCEL_SHEET") The logic used here can be applied to other DDE links to Excel, or to any program that supports DDE, for that matter. You may find that the most difficult part of using DDE is determining what the command syntax for the target application is.
- 21 -
U2 DATA MANAGEMENT SOLUTIONS
Soman uutilappeac KE Incl\win
winfun
Clicon t En KE
wIntegrate Tech Tips
How to Create A Function Key Icon Bar
e terminals can be configured to display a diagram of the function keys. Each function key has nderlying process that occurs when that key is selected. Additionally, many application programs
ize a diagram of the function keys which, when clicked, perform specific functions in that lication. wIntegrate can be customized in a similar manner to display a function key icon bar, h key selectable using the mouse.
Y12.WIS and KEY24.WIS
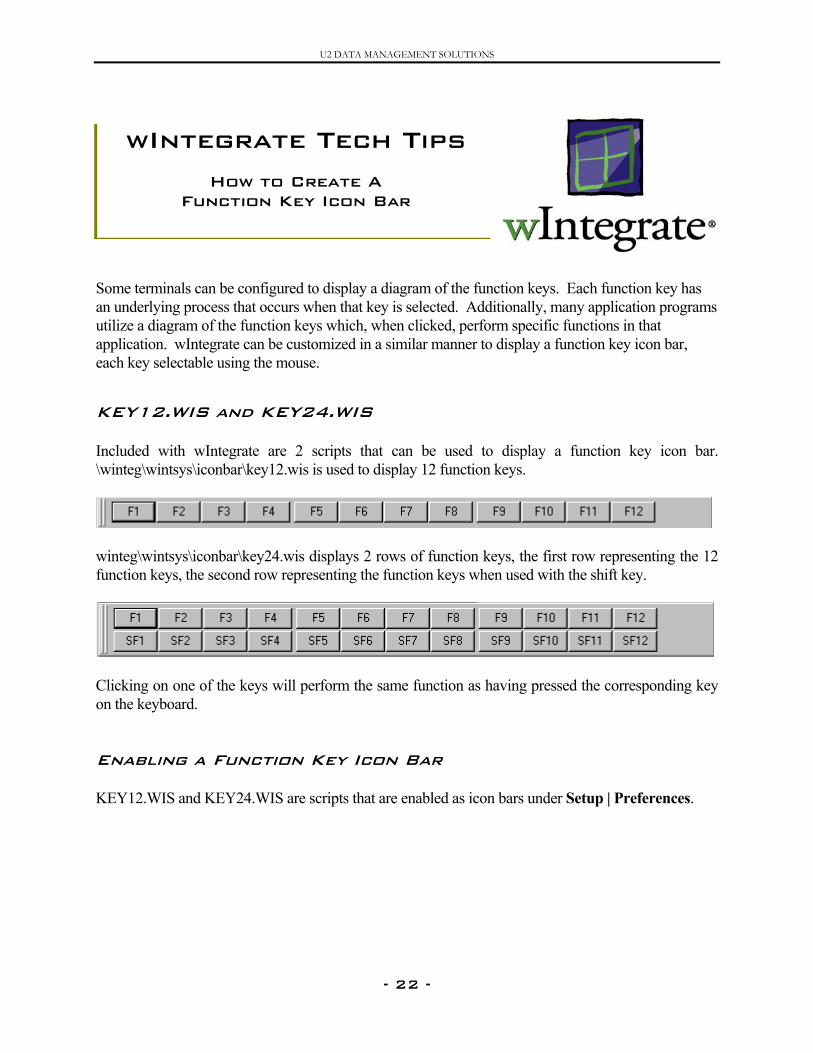
uded with wIntegrate are 2 scripts that can be used to display a function key icon bar. teg\wintsys\iconbar\key12.wis is used to display 12 function keys.
teg\wintsys\iconbar\key24.wis displays 2 rows of function keys, the first row representing the 12 ction keys, the second row representing the function keys when used with the shift key.
king on one of the keys will perform the same function as having pressed the corresponding key he keyboard.
abling a Function Key Icon Bar
Y12.WIS and KEY24.WIS are scripts that are enabled as icon bars under Setup | Preferences.
- 22 -
U2 DATA MANAGEMENT SOLUTIONS
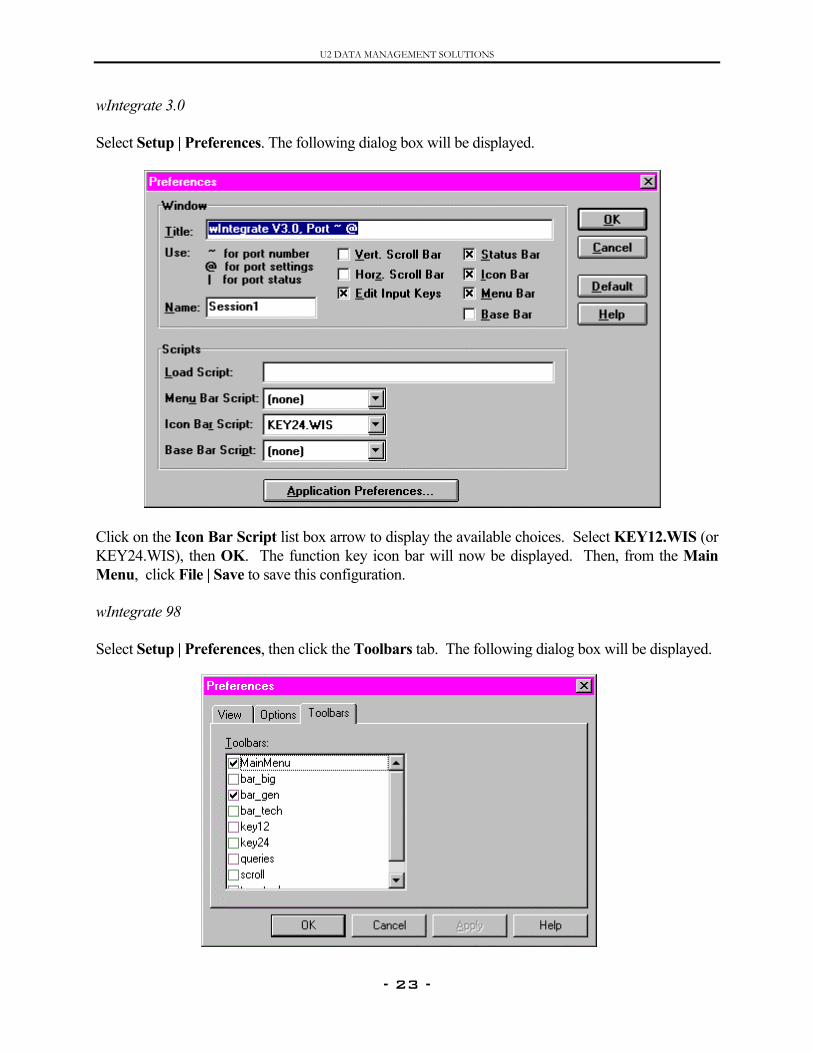
wIntegrate 3.0 Select Setup | Preferences. The following dialog box will be displayed.
Click on the Icon Bar Script list box arrow to display the available choices. Select KEY12.WIS (or KEY24.WIS), then OK. The function key icon bar will now be displayed. Then, from the Main Menu, click File | Save to save this configuration. wIntegrate 98 Select Setup | Preferences, then click the Toolbars tab. The following dialog box will be displayed.
- 23 -
U2 DATA MANAGEMENT SOLUTIONS
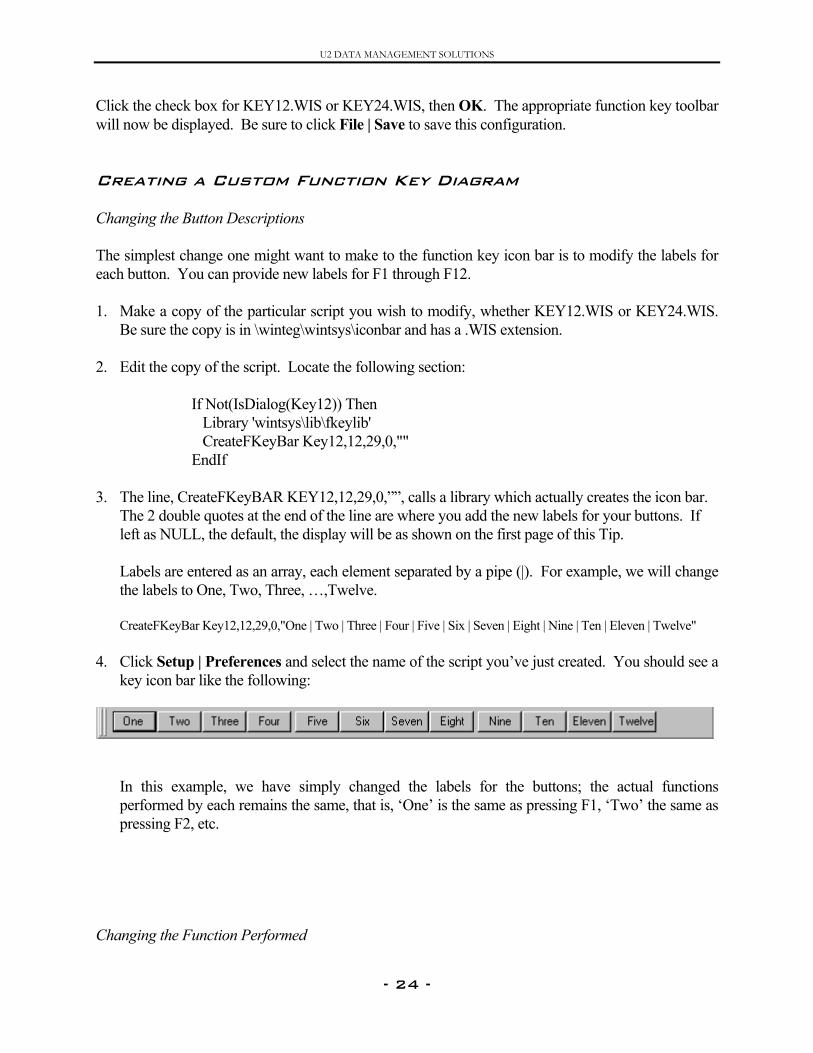
Click the check box for KEY12.WIS or KEY24.WIS, then OK. The appropriate function key toolbar will now be displayed. Be sure to click File | Save to save this configuration. Creating a Custom Function Key Diagram Changing the Button Descriptions The simplest change one might want to make to the function key icon bar is to modify the labels for each button. You can provide new labels for F1 through F12. 1. Make a copy of the particular script you wish to modify, whether KEY12.WIS or KEY24.WIS.
Be sure the copy is in \winteg\wintsys\iconbar and has a .WIS extension. 2. Edit the copy of the script. Locate the following section:
If Not(IsDialog(Key12)) Then Library 'wintsys\lib\fkeylib' CreateFKeyBar Key12,12,29,0,"" EndIf
3. The line, CreateFKeyBAR KEY12,12,29,0,””, calls a library which actually creates the icon bar.
The 2 double quotes at the end of the line are where you add the new labels for your buttons. If left as NULL, the default, the display will be as shown on the first page of this Tip. Labels are entered as an array, each element separated by a pipe (|). For example, we will change the labels to One, Two, Three, …,Twelve. CreateFKeyBar Key12,12,29,0,"One | Two | Three | Four | Five | Six | Seven | Eight | Nine | Ten | Eleven | Twelve"
4. Click Setup | Preferences and select the name of the script you’ve just created. You should see a key icon bar like the following:
In this example, we have simply changed the labels for the buttons; the actual functions performed by each remains the same, that is, ‘One’ is the same as pressing F1, ‘Two’ the same as pressing F2, etc.
Changing the Function Performed
- 24 -
U2 DATA MANAGEMENT SOLUTIONS
KEY12.WIS and KEY24.WIS call a library script \winteg\wintsys\lib\Fkeylib.wis. Fkeylib creates the key icon bar and defines what each key’s underlying function is. By design, Fkeylib issues a ‘Key Run <function key>’, where <function key> is the specific function key matching the label on a button. To change the actual definitions of each key we will need to create a new script. Note: NEVER change any of the wIntegrate libraries; always make a copy to modify. For our example, we will modify the key icon bar and definitions to work with a host-based application, in this case, the VMS Eve text editor. Using Fkeylib.wis as a template, we will create a new subroutine to create our icon bar. EditBar.WIS The first step is to identify what buttons are desired and their labels. We’ve chosen 12 of the most commonly used functions for our icon bar and given them appropriate labels. We will use the “|” to separate the text for each label.
Top | Bottom | PgUp | PgDn | Find | Next | BegLn | EndLn | Del Ln | Cut | Paste | Select | Exit
Next, we need to determine what the specific escape sequences are for each of these functions. As with the labels, we separate the escape sequence for each button by a pipe.
\eOP\eOu|\eOP\eOt|\e[5~|\e[6~|\e[1~|\eOp\eOR|\eOP\e[D|\eOr|\eOS|\eOv|\eOP\eOv|\e[4~|\026 Now we copy \winteg\wintsys\iconbar\key12.wis to \winteg\wintsys\iconbar\EditBar.wis. Since EditBar.wis is in the iconbar subdirectory, it will be visible to wIntegrate through the Setup | Preferences menu option. We’ve created a variable, called Labels, to store the button labels names array, and a variable, called Defns, to store the escape sequences array. Labels = " Top | Bottom | PgUp | PgDn | Find | Next | BegLn | EndLn | Del Ln | Cut | Paste | Select | Exit " Defns = "\eOP\eOu|\eOP\eOt|\e[5~|\e[6~|\e[1~|\eOp\eOR|\eOP\e[D|\eOr|\eOS|\eOv|\eOP\eOv|\e[4~|\026" The buttons are displayed in a dialog box, so we need to create a subroutine to create that dialog box and the buttons. Sub CreateVMSFKeyBar($name, no_keys, but_width, text, defns ) If Not(IsDialog($name)) Then but_gap = 1 col = but_gap j = 0 row = 2 row_size = 13 size = row_size + 4
- 25 -
U2 DATA MANAGEMENT SOLUTIONS
DialogBox Create is used to create the dialog box. DialogBox Create $name 0,100,400,size Style WS_CHILD Font 8,"helv" We want 13 buttons on the dialog box, one for each element in our Labels array. Loop j+=1 but = "F":j
but_text = Field(text,'|',j) but_defn = Field(defns,'|',j) Pushbutton but_text,$but,col,row,but_width,row_size When clicked, we want each button to perform its underlying escape sequence. The Type command is used to send text to the host, but not terminate it with a <CR>. The ControlCommand causes the escape sequence to be sent when a button is clicked. ControlCommand $but,"Type '":but_defn:"'" col += but_width + but_gap If (j&3) = 0 then col+=2
Until j = no_keys Repeat EndCreate EndIf EndSub This takes care of creating the dialog box and buttons. Now we need the main module to be run. *EditBar.WIS pos = CommandLine Define the variables Labels and Defns. Labels = " Top | Bottom | PgUp | PgDn | Find | Next | BegLn | EndLn | Del Ln | Cut | Paste | Select | Exit " Defns = "\eOP\eOu|\eOP\eOt|\e[5~|\e[6~|\e[1~|\eOp\eOR|\eOP\e[D|\eOr|\eOS|\eOv|\eOP\eOv|\e[4~|\026" If IsShown(EditBar) Then EndScript If Not(IsDialog(EditBar)) Then We want to be able to call the subroutine VMSFkeyBar that we previously created. In order to do this, we need to tell wIntegrate where the subroutine is, and make that script a library. In this case, the subroutine is in the same script file. ‘ScriptFile’ is a global variable used to represent ‘this file’. DLib = 'Library "':ScriptFile:'";' Once we’ve told wIntegrate where to locate our subroutine, we can call it. There are 5 parameters that are passed to the subroutine: the name of the dialog box, number of buttons, how wide to make the buttons, Labels variable, and Defns variable.
- 26 -
U2 DATA MANAGEMENT SOLUTIONS
CreateVMSFKeyBar EditBar,13,29,0,Labels,Defns
EndIf This places the icon bar on the session window. If pos = "A" Then Library "wintsys\lib\iconlib" MakeCommandBar EditBar Else If pos = "B" Then DialogBox BaseBar EditBar Else If pos = "I" Then DialogBox IconBar KEditBar EndIf EndScript When we put it all together, we have the following script: *EditBar.WIS pos = CommandLine Labels = " Top | Bottom | PgUp | PgDn | Find | Next | BegLn | EndLn | Del Ln | Cut | Paste | Select | Exit " Defns = "\eOP\eOu|\eOP\eOt|\e[5~|\e[6~|\e[1~|\eOp\eOR|\eOP\e[D|\eOr|\eOS|\eOv|\eOP\eOv|\e[4~|\026" If IsShown(EditBar) Then EndScript If Not(IsDialog(EditBar)) Then DLib = 'Library "':ScriptFile:'";'
CreateVMSFKeyBar EditBar,13,29,Labels,Defns EndIf If pos = "A" Then Library "wintsys\lib\iconlib" MakeCommandBar EditBar Else If pos = "B" Then DialogBox BaseBar EditBar Else If pos = "I" Then DialogBox IconBar KEditBar EndIf EndScript Sub CreateVMSFKeyBar($name, no_keys, but_width, text, defns ) If Not(IsDialog($name)) Then but_gap = 1 col = but_gap j = 0 row = 2 row_size = 13 size = row_size + 4 DialogBox Create $name 0,100,400,size
- 27 -
U2 DATA MANAGEMENT SOLUTIONS
Style WS_CHILD Font 8,"helv" Loop j+=1 but = "F":j
but_text = Field(text,'|',j) but_defn = Field(defns,'|',j) Pushbutton but_text,$but,col,row,but_width,row_size ControlCommand $but,"Type '":but_defn:"'" col += but_width + but_gap If (j&3) = 0 then col+=2
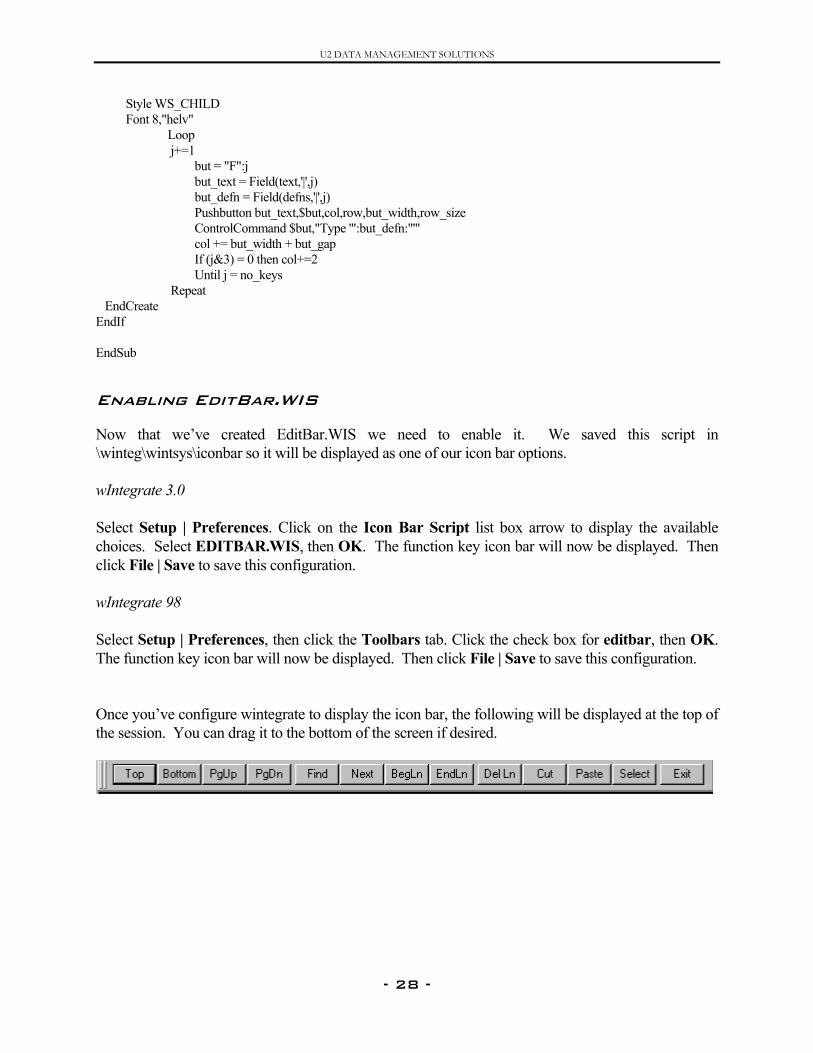
Until j = no_keys Repeat EndCreate EndIf EndSub Enabling EditBar.WIS Now that we’ve created EditBar.WIS we need to enable it. We saved this script in \winteg\wintsys\iconbar so it will be displayed as one of our icon bar options. wIntegrate 3.0 Select Setup | Preferences. Click on the Icon Bar Script list box arrow to display the available choices. Select EDITBAR.WIS, then OK. The function key icon bar will now be displayed. Then click File | Save to save this configuration. wIntegrate 98 Select Setup | Preferences, then click the Toolbars tab. Click the check box for editbar, then OK. The function key icon bar will now be displayed. Then click File | Save to save this configuration. Once you’ve configure wintegrate to display the icon bar, the following will be displayed at the top of the session. You can drag it to the bottom of the screen if desired.
- 28 -
U2 DATA MANAGEMENT SOLUTIONS
On simhowPCproexte Thehan Copwhawis MA MAmuthen
Conhosspa
wIntegrate Tech Tips
How to Create a GUI Login Script
occasion we’ve been asked how one would create a GUI script as a front-end to wIntegrate to plify the login process. This Tech Tip provides an example of such a script. Remember, ever, this is an unsupported script. The commands used are documented in the wIntegrate
Scripts Reference manual. You can also find examples of these commands in other scripts vided with wIntegrate. Simply search the wIntegrate directory tree for files with the .WIS nsion and the text you are looking for.
re are actually 2 scripts that make up the GUI login process – a master script and a script that dles the connection to the host.
y each script to any text editor and save them with a .WIS file extension. We document t each piece of the script is in the script itself. You may eliminate any comment lines you
h without affecting the functionality.
STER.WIS
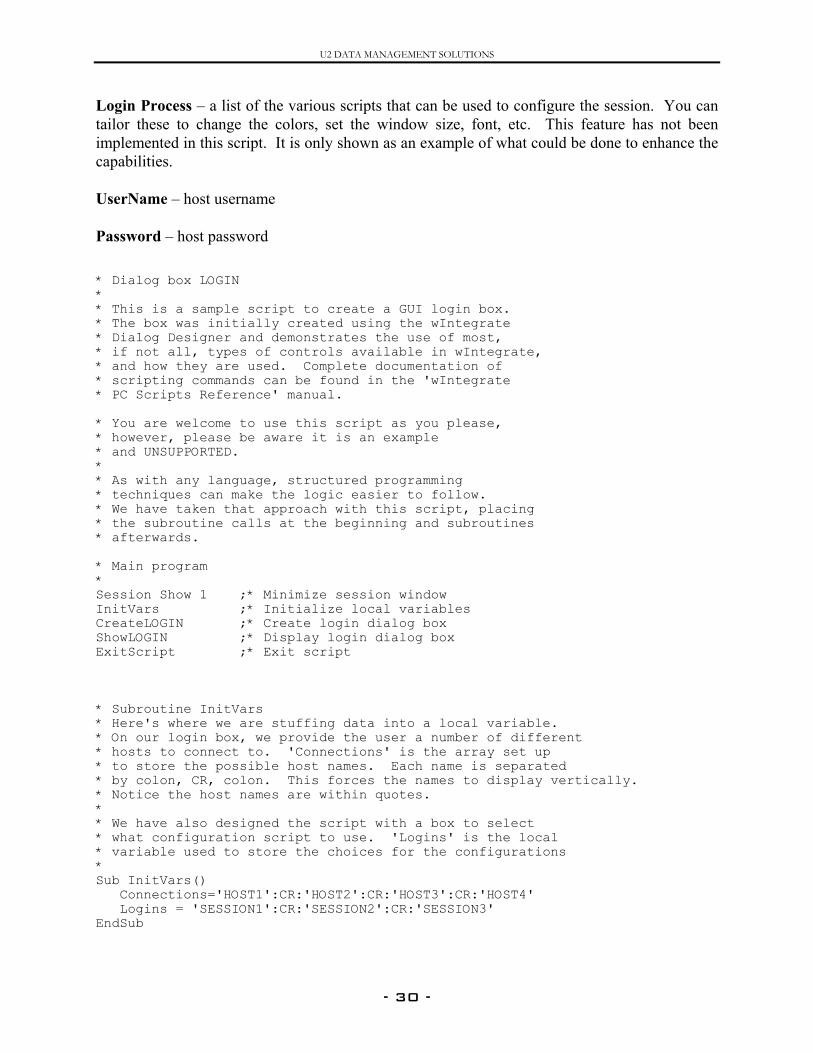
STER.WIS is used to create the login dialog box. It is designed to provide the user with ltiple choices for host connections and startup scripts to use. To run it, select Run | Script, locate MASTER.WIS. The following dialog box will be displayed.
nections – these are the names of each host the user can connect to. These are not the actual t names, though they certainly can be. They can be descriptive but for ease of use, don’t use ces.
- 29 -
U2 DATA MANAGEMENT SOLUTIONS
Login Process – a list of the various scripts that can be used to configure the session. You can tailor these to change the colors, set the window size, font, etc. This feature has not been implemented in this script. It is only shown as an example of what could be done to enhance the capabilities. UserName – host username Password – host password * Dialog box LOGIN * * This is a sample script to create a GUI login box. * The box was initially created using the wIntegrate * Dialog Designer and demonstrates the use of most, * if not all, types of controls available in wIntegrate, * and how they are used. Complete documentation of * scripting commands can be found in the 'wIntegrate * PC Scripts Reference' manual. * You are welcome to use this script as you please, * however, please be aware it is an example * and UNSUPPORTED. * * As with any language, structured programming * techniques can make the logic easier to follow. * We have taken that approach with this script, placing * the subroutine calls at the beginning and subroutines * afterwards. * Main program * Session Show 1 ;* Minimize session window InitVars ;* Initialize local variables CreateLOGIN ;* Create login dialog box ShowLOGIN ;* Display login dialog box ExitScript ;* Exit script * Subroutine InitVars * Here's where we are stuffing data into a local variable. * On our login box, we provide the user a number of different * hosts to connect to. 'Connections' is the array set up * to store the possible host names. Each name is separated * by colon, CR, colon. This forces the names to display vertically. * Notice the host names are within quotes. * * We have also designed the script with a box to select * what configuration script to use. 'Logins' is the local * variable used to store the choices for the configurations * Sub InitVars() Connections='HOST1':CR:'HOST2':CR:'HOST3':CR:'HOST4' Logins = 'SESSION1':CR:'SESSION2':CR:'SESSION3' EndSub
- 30 -
U2 DATA MANAGEMENT SOLUTIONS
* Subroutine CreateLOGIN * This subroutine sets up the dialog box with the various controls * The name of the dialog box is 'LOGIN'. * Sub CreateLOGIN() * * If the dialog box already exists in memory we don't want to * try to recreate it as an error will occur. So we check for the * existence of the dialog box in memory. If it's not there we * create it, if it is we'll simply display it. * IF Not(IsDialog(LOGIN)) then DB CR LOGIN 80,50,229,98 CP "Login Processing" SY WS_CAPTION|WS_THICKFRAME|WS_POPUP|DS_ABSALIGN * This line creates the rectangle around the connections and login process * controls. It must be the first control. * Control "Rect",None,"static",SS_BLACKFRAME|WS_VISIBLE,12,6,62,89 * * * A combo box is used to display the list of available host connections * CB COMBO_LOG_PROC,15,61,53,31,CBS_DROPDOWN|CBS_SORT|WS_VSCROLL * * We've added a graphic to the dialog box for esthetics and for debugging * If the graphic is clicked, the underlying session is shown under the * login box. This can be useful while you debug your script as you can * see the commands and errors on the host. Once you have your script working * satisfactorily you can comment out the ControlCommand GBTN_LOGO line. * GB "d:\WINTEG\image\computer.wmf",GBTN_LOGO,87,6,55,26 CC GBTN_LOGO,'Session Show 0' * * The list box is used to display the various configuration files available * This is shown for example purposes only and is not functional. However, * one could use this control to set up various configurations not related * to the host connection, e.g. colors, emulation, preferences, etc. * LB LIST_CONNECT,15,17,53,24,WS_VSCROLL * * We use an edit box, with the ES_PASSWORD style, to get the password * and username from the user. The ES_PASSWORD causes whatever is entered * for the password to be displayed as asterisks. * ET EDIT_PASSWORD,87,78,88,12,ES_PASSWORD|WS_BORDER|WS_TABSTOP ET EDIT_USERNAME,87,47,88,12 * * And, of course, we need a way to exit the login process without completing * the login process. This button removes the LOGIN dialog box from memory. * PB "Exit",PBTN_CANCEL,184,78,40,12 CC PBTN_CANCEL,'DialogBox End LOGIN, False;DialogBox Delete LOGIN' * * After entering the username/password, selecting the connection, and * the session file, the user presses the 'Login' button to actually * perform the login. When pressed, this button runs a script, in this case
- 31 -
U2 DATA MANAGEMENT SOLUTIONS
* called d:\winteg\example\script~1\login.wis, which takes the values * selected for host and configuration, and does the actual login. * PB "Login",PBTN_LOGIN,184,58,40,12 CC PBTN_LOGIN,"Script 'd:\winteg\example\script~1\login.wis'" * * The following LText lines are the text descriptions for each of the * controls displayed. * LT "Login Process",TXT_LOG_PROCESS,15,51,53,9 LT "Connections",TXT_CONNECTIONS,13,8,53,9 LT "Password",TXT_PASSWORD,87,68,40,9 LT "UserName",TXT_USERNAME,87,37,40,9 * * The next lines define the defaults that appear in the controls. To * set up defaults for each control you build the appropriate command line * for each control, then concatenate them together. In this example, * we select the LOGIN dialog box, then the list box called LIST_CONNECT. * On this list box we set HOST1 to be the default. Then, we concatenate * that command to one in which we set SESSION1 to be the default on the * combo box COMBO_LOG_PROC. * InitLine= 'DB SL LOGIN, LIST_CONNECT, "HOST1"' InitLine= InitLine:CR: 'DB SL LOGIN, COMBO_LOG_PROC, "SESSION1"' * * Now we run the command to actually select the defaults * IC InitLine * EndCreate endif * * At this point, we have the LOGIN dialog box, whether it was just * created or already in memory. Now we need to load the data we * initilized in subroutine InitVars into dynamic arrays for the * specific controls. The data in a control is referenced by * the dialog box it's on and by the control name. 'Connections' * is the local variable which contains the information for the * host names; 'Logins' contains the names of configurations. * LOGIN.LIST_CONNECT=Connections LOGIN.COMBO_LOG_PROC=Logins EndSub * Subroutine ExitScript * This subroutine is run when the 'Exit' button is clicked. The * line, Invoke FileExit, will exit the session as well as the script. * Sub ExitScript() * Invoke FileExit EndScript EndSub * Subroutine ShowLOGIN * This subroutine displays the dialog box called LOGIN. Previously,
- 32 -
U2 DATA MANAGEMENT SOLUTIONS
* we detected the existence of the dialog box and, based on whether * it was in memory, either created it or skipped that process. * Sub ShowLOGIN() DB SH LOGIN If ReturnValue = 'Cancel' then * Invoke FileExit EndScript EndIf EndSub * LOGIN.WIS * This script is called from the LOGIN dialog box. * * We have the information in local variables so don't * need the dialog box open anymore. This closes the * LOGIN dialog box then restores the session window. * DialogBox END LOGIN * * Display the session window now * Session Show 0 * Now we're going to take the choice made for the LIST_CONNECT * control and set up the appropriate connection. HOST1 and HOST2 * make connections using Windows sockets; HOST3 uses a serial * connection * * Basically, we are taking exactly what you'd find in your * connection .WIS file and prepending a 'Set' to the command * You could add any or all of the items found in the .WIS file. * * Notice, HOST2 and HOST3 have a line for LoginText. This is * what the prompt from the host would be. At the bottom of this * script is Wait ForText loop which causes the script to wait until * the specific login prompt is received before sending the username * and password. This is a good practice as the script can run * faster than the host and send the username/password before the host * is ready, preventing the login from working * If LOGIN.LIST_CONNECT = "HOST1" then Set Port = "Windows Sockets" Set Host = "255.255.255.100" Set PortOpen = 1 Set TelnetPort = 23 * This prompt would be the actual response expected from your host LoginText="Username:" Else If LOGIN.LIST_CONNECT = "HOST2" then Set Port = "Windows Sockets" Set Host = "255.255.255.101" Set PortOpen = 1 Set TelnetPort = 23 * This prompt would be the actual response expected from your host LoginText="login:" Else If LOGIN.LIST_CONNECT = "HOST3" then Set Port = "COM2:"
- 33 -
U2 DATA MANAGEMENT SOLUTIONS
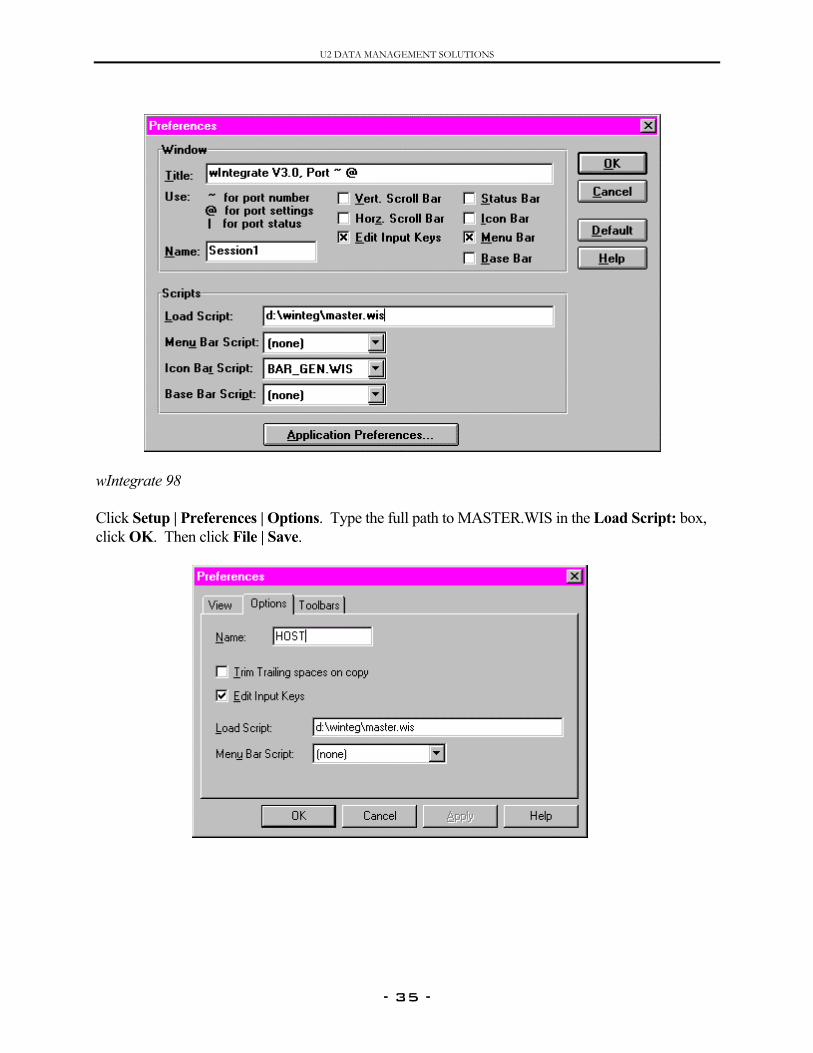
Set BaudRate = 9600 Set Databits = 8 Set Stopbits = "1" Set Parity = "None" Set Flow = "XOn" Set ParityCheck = 0 Set ReportErrors = 0 Set TransmitDelay = 0 Set TransmitBlockSize = 0 Set ZeroTopBit = 0 Set PortOpen = 1 * This prompt would be the actual response expected from your host LoginText="Username:" EndIf EndIf EndIf Wait ForText LoginText,,Found Enter LOGIN.EDIT_USERNAME Enter LOGIN.EDIT_PASSWORD EndScript Implementing MASTER.WIS Typically, you would like the login script to be run when wIntegrate is started. For this to happen, MASTER.WIS needs to be the Load script in the session file. wIntegrate 3.0 Select Setup | Preferences. Type in the full path for MASTER.WIS in the Load Script: box, click OK. Then click File | Save.
- 34 -
U2 DATA MANAGEMENT SOLUTIONS
wIntegrate 98 Click Setup | Preferences | Options. Type the full path to MASTER.WIS in the Load Script: box, click OK. Then click File | Save.
- 35 -
U2 DATA MANAGEMENT SOLUTIONS
Youthe wInresethe wha Althyouthe Cr wInspeyou Icon TheWit Whsele32x Usibe uVaryouSav Thedisp
wIntegrate Tech Tips
How to Create an Icon to Disconnect a Modem Session
can use the Dialer feature in wIntegrate, and a modem, to connect to a remote host computer. At
end of your session, if the host doesn’t automatically disconnect the line after logging the user off, tegrate will not disconnect the line. In this case, the usual solution is to reboot the PC, thereby tting the modem and forcing the line to disconnect. Another technique is to simply type ‘ATH’ at blank session screen. But what if the host ‘sees’ the ATH and starts the log-in process again, now t can you do? You can type +++, wait a second or two, then type ATH.
ough you can’t change anything in wIntegrate to force the disconnect, you can set up an icon on r icon bar which, when clicked, will do the disconnect in a graceful way without having to reboot PC. The following discussion will explain how you can set up such an icon.
eating the icon
tegrate is shipped with a small collection of icons, stored in WINTEG\ICON. These are in a cific format and have the ICO extension. Most likely, you will want to create a unique icon of r own rather than use one of the shipped ones.
Editor
icon editor, WINTEG\WICONED.EXE, though unsupported, is an easy-to-use pixel editor. h it, you can create your own icons or modify existing ones.
en you start the editor you are presented with 4 dialog boxes - edit, colors, tools, and info. First, ct File, New, then enter the size of the icon in pixels, and the number of colors to use, 2 or 16. 32 is the size we use for the standard icons. After selecting the size, the color palette is enabled.
ng the color palette, you can configure a color for the left and right mouse buttons, and a color to sed as the mask, or background. ious drawing shapes can be selected from the tools box. Using a combination of colors and tools, design the icon by clicking on various pixels. Once you’ve completed your design, click File, e.
icon, when displayed on the icon bar, will only show the upper left quarter of the actual icon. To lay it in its entirety requires further modification of the script and is beyond the scope of this
- 36 -
U2 DATA MANAGEMENT SOLUTIONS
article. You may, however, look at winteg\wintsys\iconbar\bar_tech.wis or bar_big.wis for ideas on how to modify the script to display the icon full size. Modifying the Icon Bar Script The default icon bar established at installation is WINTEG\WINTSYS\ICONBAR\BAR_GEN.WIS. We will modify this script to display our new icon, and to perform the disconnect when it’s clicked. Using any text editor, such as Notepad or WordPad, edit this script. We want to put the icon at the end of the existing icons so we’ll locate the following lines of code in the script. AddGap AddIcon 'image\i_conn.bmp',"Set PortOpen=True" AddGap AddIcon 'image\i_barsel.bmp',"Script 'wintsys\script\barsel','bar_gen'" EndCreate We also want a space between the last icon and our new one so we’ll add several AddGap statements, then AddIcon to add the icon. AddGap AddIcon 'image\i_barsel.bmp',"Script 'wintsys\script\barsel','bar_gen'" AddGap AddGap AddIcon 'icon\discon.ico', "Script 'wintsys\script\hangup'" EndCreate Our new icon, in this case, icon\discon.ico, runs a script whenever the icon is clicked. This script, wintsys\script\hangup, completes our disconnect project. HANGUP.WIS script
- 37 -
U2 DATA MANAGEMENT SOLUTIONS
So far, we’ve created an icon to disconnect a serial connection and modified the iconbar script to display the icon and run a script to do the actual disconnect. The last piece of the puzzle is to create that script. For our example, we’ll call the script wintsys\script\hangup.wis. Again using a text editor, create the following script: TYPE "+++" Wait Delay "1s" ENTER "ATH" TYPE “+++” gets the modem’s attention, allowing you to enter additional modem commands. Wait Delay “1s” causes the script to wait one second. This is necessary to give the modem time to get into the command mode following the +++. Depending on your modem, you might have to increase this from 1 second to 2 or more. ENTER “ATH” sends the standard hangup command, ATH, to the modem. Since we’ve added this icon to the bar_gen.wis script, select Setup, Preferences and make sure you’ve chosen this script for your Icon Bar Script. The next time you start a wIntegrate session the iconbar with your new icon will be displayed. You can also click on Run, Script, then run winteg\wintsys\iconbar\bar_gen.wis.
- 38 -

U2 DATA MANAGEMENT SOLUTIONS
wInusincomScr Ho EacmenThemen
wIntegrate Tech Tips
How to Create Menus
tegrate allows you to modify existing menus and even create your own. This is accomplished g the script language and one or more of the 19 Menu commands. Detailed descriptions of the mands, as well as a detailed example of creating a menu, can be found in the wIntegrate PC
ipts Reference.
w menus are defined
h menu, and item on the menu, has a name. By way of example, we’ll first examine the default u, called Mainmenu, to see what a menu structure is like and what the various item names are. following tree shows the name of each menu and submenu called from the main wIntegrate u, and the names of the items on those menus. Note: *wIntegrate 3.0 only; **wIntegrate 98 only
Mainmenu ________________________________|_______________________________________________________________________ | | | | | File Edit Setup Run Help |-FileSessionWizard** |-EditCopy |-SetupTerminal |-RunImportFile | |-FileOpen |-EditCopySpecial |-SetupCommunications |-RunExportFile |-HelpIndex |-FileAnother |-EditSelectWindow |-SetupColours |-RunBridgeCopy |-HelpGettingStarted* |-FileSave |-EditSelectAll |-SetupCharacter |-RunSpoolFile |-HelpGuidedTour* |-FileSaveAs |-EditCopyTo |-SetupPreferences |-FTP** |-HelpCommands* |-FileControlPanel* |-EditPaste |-SetupApplication** |-RunReceiveFile |-HelponHelp |-FilePrinterSetup |-EditRecord |-SetupMouse |-RunSendFile |-HelpUserApplication* |-FilePrint |-EditPlay |-SetupKeyboard |-RunKermitCommand |-HelpStatus |-FileEdit |-EditSearch |-SetupCustomizeToolbar** | |-RunKermitGetFile |-WOW** |-FileDelete* | |-RunKermitSendFile |-HelpAbout |-FileExit | |-RunKermitFinish |-FileExitAll | |-RunKermitServer |-RunQuery |-RunSQL |-RunDialer |-RunScript |-RunProgram |-RunResizeWindow |-RunClearBackPages |-Scroll | |-ScrollPreviousPage | |-ScrollNextPage | |-ScrollUpLine | |-ScrollDownLine | |-ScrollTopPage | |-ScrollEndPage | |-ScrollLeftColumn | |-ScrollRightColumn | |-ScrollAcrossWidth | |-ScrollBackWidth | |-RunRestartPort
- 39 -
U2 DATA MANAGEMENT SOLUTIONS
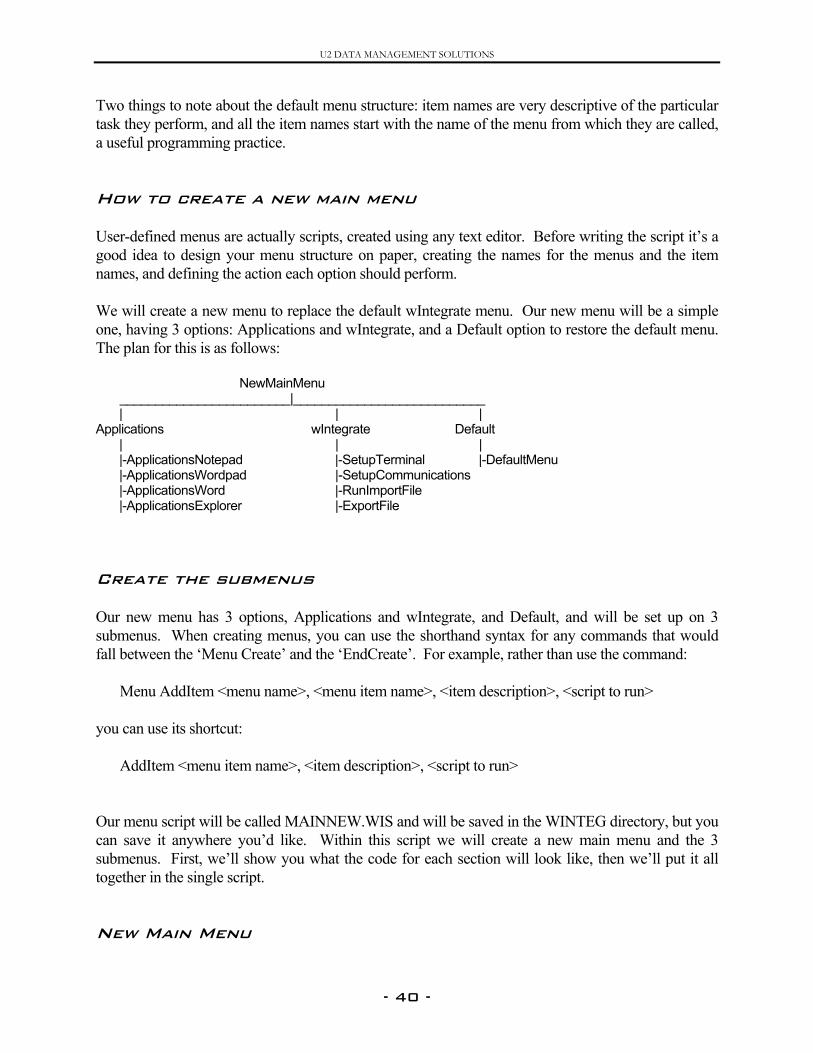
Two things to note about the default menu structure: item names are very descriptive of the particular task they perform, and all the item names start with the name of the menu from which they are called, a useful programming practice. How to create a new main menu User-defined menus are actually scripts, created using any text editor. Before writing the script it’s a good idea to design your menu structure on paper, creating the names for the menus and the item names, and defining the action each option should perform. We will create a new menu to replace the default wIntegrate menu. Our new menu will be a simple one, having 3 options: Applications and wIntegrate, and a Default option to restore the default menu. The plan for this is as follows:
NewMainMenu ________________________|___________________________ | | | Applications wIntegrate Default | | | |-ApplicationsNotepad |-SetupTerminal |-DefaultMenu |-ApplicationsWordpad |-SetupCommunications |-ApplicationsWord |-RunImportFile |-ApplicationsExplorer |-ExportFile Create the submenus Our new menu has 3 options, Applications and wIntegrate, and Default, and will be set up on 3 submenus. When creating menus, you can use the shorthand syntax for any commands that would fall between the ‘Menu Create’ and the ‘EndCreate’. For example, rather than use the command: Menu AddItem <menu name>, <menu item name>, <item description>, <script to run> you can use its shortcut: AddItem <menu item name>, <item description>, <script to run> Our menu script will be called MAINNEW.WIS and will be saved in the WINTEG directory, but you can save it anywhere you’d like. Within this script we will create a new main menu and the 3 submenus. First, we’ll show you what the code for each section will look like, then we’ll put it all together in the single script. New Main Menu
- 40 -
U2 DATA MANAGEMENT SOLUTIONS
Menu Create NewMainMenu EndCreate Applications Submenu Menu Create Applications AddItem ApplicationsNotepad, “Start &Notepad”,”Invoke FileEdit” AddItem ApplicationsWord, “Start &Word”, 'Dialog RunProgram;Set Filename = "winword.exe";Set Arguments = "";Invoke' AddItem ApplicationsWordpad, “Start Word&pad”, 'Dialog RunProgram;Set Filename = "write.exe";Set Arguments = "";Invoke' AddItem ApplicationsExplorer, “Start &Explorer”, 'Dialog RunProgram;Set Filename = "explorer.exe";Set Arguments = "";Invoke' EndCreate wIntegrate submenu Menu Create wIntegrate AddItem wIntegrateTerminal, “Set up &Terminal”, “Invoke SetupTerminal” AddItem wIntegrateCommunications, “Set up &Communications”, “Invoke SetupCommunications” Attach RunImportFile, “&Import file to PC” Attach RunExportFile, “&Export PC file to host” EndCreate Default submenu The default submenu is an ‘out’ for your menu. If your new menu doesn’t let you accomplish a task you can always go to the default menu. This submenu calls a script, PREF.WIS, to enable the file transfer options on the Run menu. You will need to create this script separately. Menu Create Default AddItem DefaultMenu, “&Default Menu”,”Script ‘pref.wis’” EndCreate PREF.WIS
- 41 -
U2 DATA MANAGEMENT SOLUTIONS
We created this script in the WINTEG directory, but you can save it anywhere you’d like. Just remember to use the full path in the AddItem command in the Default submenu. The first line recalls the default main menu; the second line adds the file transfer options to the Run menu. Menu Main Default Script ‘wintsys/menu/ftmenu.wis’ MAINNEW.WIS Now that we have our new main menu and the 3 submenus, we can put everything together into a single script, called MAINNEW.WIS. Note, we check to see if each menu has already been created in memory and, if so, skip creating it again. * MAINMENU.WIS * * Create a new default main menu in wIntegrate * * Create new main menu – check to see if it exists first * If Not(IsMenu(NewMainMenu)) Then Menu Create NewMainMenu EndCreate EndIf * Create APPLICATIONS submenu – check to see if it exists * If Not(IsMenu(Applications)) Then Menu Create Applications AddItem ApplicationsNotepad, “Start &Notepad”, 'Dialog RunProgram;Set Filename = "notepad.exe";Set Arguments ="";Invoke' AddItem ApplicationsWord, “Start &Word”, 'Dialog RunProgram;Set Filename = "winword.exe";Set Arguments = "";Invoke' AddItem ApplicationsWordpad, “Start Word&pad”, 'Dialog RunProgram;Set Filename ="write.exe";Set Arguments = "";Invoke' AddItem ApplicationsExplorer, “Start &Explorer”, 'Dialog RunProgram;Set Filename ="explorer.exe";Set Arguments = "";Invoke' EndCreate EndIf * Create wIntegrate submenu – check to see if it exists * If Not(IsMenu(wIntegrate)) Then Menu Create wIntegrate
- 42 -
U2 DATA MANAGEMENT SOLUTIONS
Attach SetupTerminal, “Set up &Terminal” Attach SetupCommunications, “Set up &Communications” Attach RunImportFile, “&Import file to PC” Attach RunExportFile, “&Export PC file to host” EndCreate EndIf * Create the default menu – check to see if it exists * If Not(IsMenu(Default)) Then Menu Create Default AddItem DefaultMenu, “&Default Menu”,”Script ‘\pref.wis’” EndCreate EndIf * Add submenus to NewMainMenu * Menu Attach NewMainMenu, Applications, “Applications” Menu Attach NewMainMenu, wIntegrate, “wIntegrate” Menu Attach NewMainMenu, Default, “Default” * Make NewMainMenu the default menu * Menu Main NewMainMenu To run the new menu in an existing wIntegrate session, click on Run, Script and select MAINNEW.WIS. If you’d like this to be loaded when you start wIntegrate, with the default menu still displayed, select Setup, Preferences, then put the script name in the ‘Load Script’ box. Be sure to select File, Save afterwards.
- 43 -
U2 DATA MANAGEMENT SOLUTIONS
At ranpro Us Thedete Ra Syn Ran Par Thefoll
wIntegrate Tech Tips
How to Generate Random Numbers
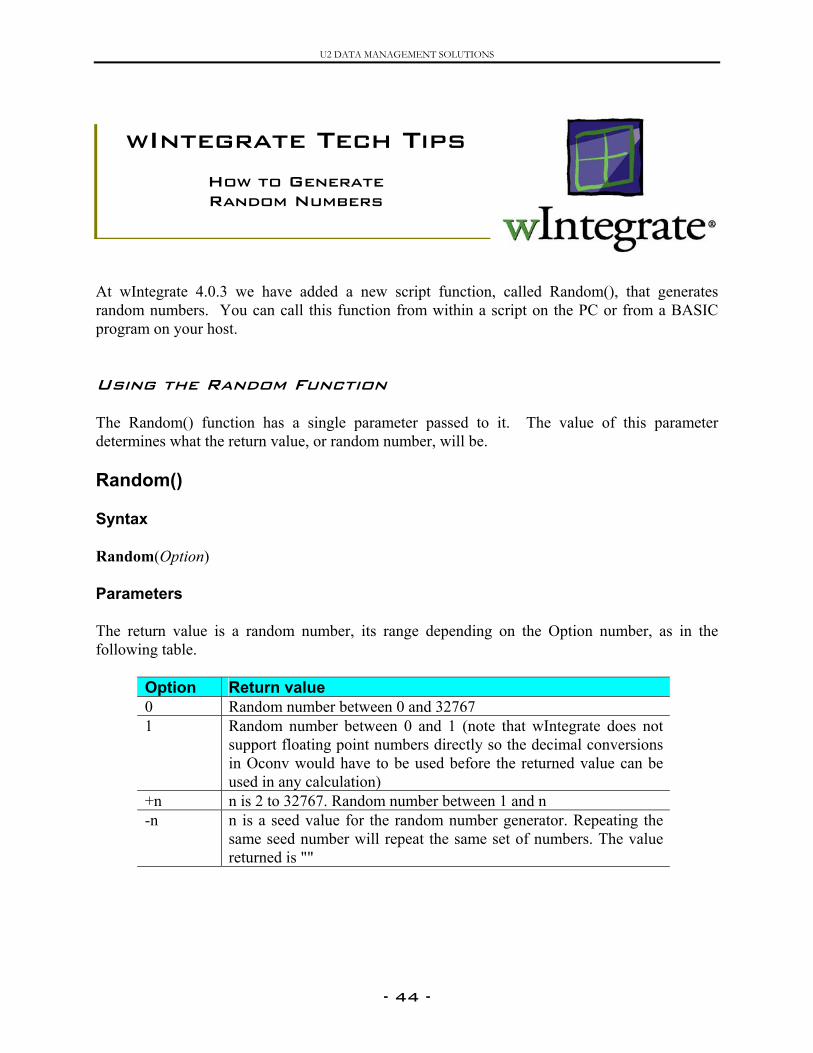
wIntegrate 4.0.3 we have added a new script function, called Random(), that generates dom numbers. You can call this function from within a script on the PC or from a BASIC gram on your host.
ing the Random Function
Random() function has a single parameter passed to it. The value of this parameter rmines what the return value, or random number, will be.
ndom()
tax
dom(Option)
ameters
return value is a random number, its range depending on the Option number, as in the owing table.
Option Return value 0 Random number between 0 and 32767 1 Random number between 0 and 1 (note that wIntegrate does not
support floating point numbers directly so the decimal conversions in Oconv would have to be used before the returned value can be used in any calculation)
+n n is 2 to 32767. Random number between 1 and n -n n is a seed value for the random number generator. Repeating the
same seed number will repeat the same set of numbers. The value returned is ""
- 44 -
U2 DATA MANAGEMENT SOLUTIONS
Examples Scripts * Seed the random number generator based on the time var = Random(-time()) * Return a value from 1 to 100 var = Random(100) You can also see an example of the Random() function in use in Example\Script\race.wis. This script simulates a race between 10 entrants. The Random() function is used to determine the winner. Each time you run it, there is a different winner. Basic program Although the Random function is not implemented specifically in a host routine, you can still call it using WIN.HSCRIPT or WIN.HSCRIPTC. The following example uses WIN.HSCRIPT to build, then run, a script on the PC. The random number is displayed in a MessageBox. SCRIPT='' SCRIPT<-1>='var= Random(100)' SCRIPT<-1>='MessageBox var' CALL WIN.HSCRIPT(SCRIPT)
- 45 -
U2 DATA MANAGEMENT SOLUTIONS
wInyouabothe app SommanwInimp Im TheThe
wIntegrate Tech Tips
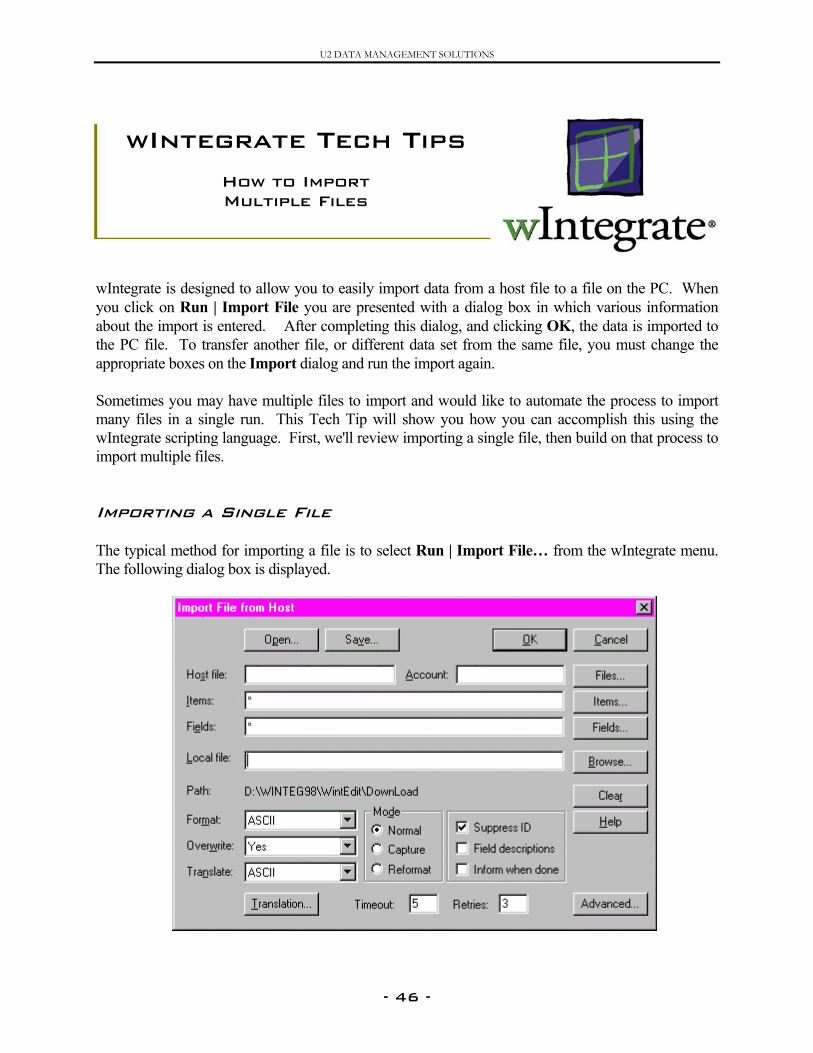
How to Import Multiple Files
tegrate is designed to allow you to easily import data from a host file to a file on the PC. When click on Run | Import File you are presented with a dialog box in which various information ut the import is entered. After completing this dialog, and clicking OK, the data is imported to PC file. To transfer another file, or different data set from the same file, you must change the ropriate boxes on the Import dialog and run the import again.
etimes you may have multiple files to import and would like to automate the process to import y files in a single run. This Tech Tip will show you how you can accomplish this using the tegrate scripting language. First, we'll review importing a single file, then build on that process to ort multiple files.
porting a Single File
typical method for importing a file is to select Run | Import File… from the wIntegrate menu. following dialog box is displayed.
- 46 -
U2 DATA MANAGEMENT SOLUTIONS
After filling in the appropriate information, and clicking OK, the import proceeds, transferring the data from the host to the PC. If this import is one that would be done periodically, the settings can be saved in a file and called up later. Click Save to store the settings in a script file format. By default, saved import, export and bridge copy scripts are saved in the FileTran subdirectory in the wIntegrate folder. The following example shows a saved import session. The information entered by the user for Host file, Items, Fields and Local file is shown in bold. * File Import Save * Saved on Mon, 07 Jun 1999 11:48 Dialog RunImportFile Configure Account="" File="CUSTOMER" Items='SELECT CUSTOMER WITH STATE = "CO"' Fields="NAME ADDRESS CITY STATE ZIP" DosFile="d:\test.xls" Format="XLS" Inform="0" Timeout="5" Retries="3" AutoExit="0" Translate="ASCII" Translation="\255,\r\n\f\r\n,\254,\r\n" Overwrite="Yes" SuppressId="1" Mode="Normal" FieldDescriptions="0" NumberConversion="0" NumberSeparator="," NumberCurrency="$" NumberDecimal="." ExplodeValues=0 RepeatValues=0 Update The next time this report is to be generated, simply select Run | Import file…, click the Open button on the Import dialog then locate the saved script. Now click OK and the import will proceed as if you had entered the parameters manually. This process will be the basis for importing multiple files. Importing Multiple Files Importing multiple files is really little different from importing a single file, however, you do have to create and run a script to do it. Fortunately, virtually all of this script can be generated by wIntegrate so you don't have to learn scripting.
- 47 -
U2 DATA MANAGEMENT SOLUTIONS
In the previous example, we have a saved script used to import data from the CUSTOMER file. We will do the same thing to create a script for 2 other files, STUDENT and COURSES, then use these to create a single script to import all three files. First, using any text editor, append the 3 WIS files together. For display purposes we have replaced some sections of each script with ellipses (…). We want each import to complete then process the next one without user intervention so we set AutoExit="1" for each section. When we were loading each script into the Import dialog we clicked OK to execute it. To accomplish the same thing in our script we add "Invoke" after each "Update" line. This is the equivalent of the OK button on the Import dialog. Now we save the script, in our example, Multi.wis. * File Import Save … File="CUSTOMER" Items='SELECT CUSTOMER WITH STATE = "CO"' Fields="NAME ADDRESS CITY STATE ZIP" DosFile="d:\test1.xls" … AutoExit="1" … RepeatValues=0 Update Invoke * File Import Save … File="STUDENT" Items="*" Fields="*" DosFile="d:\test2.xls" … AutoExit="1" … RepeatValues=0 Update Invoke * File Import Save … File="COURSES" Items="*" Fields="*" DosFile="d:\test3.xls" … AutoExit="0" … RepeatValues=0 Update Invoke We now have a single script which will import 3 separate files. To run the script, you must be at the TCL/ECL prompt. Now select Run | Script from the wIntegrate menu, locate the script, then click Open. Upon clicking Open, the imports will proceed in order, one after the other. As each file is
- 48 -

U2 DATA MANAGEMENT SOLUTIONS
being imported the Import File Monitor will be displayed showing the progress of the import just as it is when using Run | Import File. Following the last file, the monitor will close and return you to the TCL/ECL prompt in the session window.
- 49 -
U2 DATA MANAGEMENT SOLUTIONS
Usuor ewithsamsubhosThi WI WINyourou WINequwheExpwIn IM Thedonto im The WIN whe
wIntegrate Tech Tips
how to Write a BASIC Program to Import a File
ally, when you need to transfer data between your PC and host using wIntegrate’s import xport functions you click on Run | Import File or Run | Export File and fill in the dialogs the appropriate information regarding the specific transfer. You can accomplish the e thing from within a BASIC program using the WIN.IMPORT or WIN.EXPORT host routines provided with wIntegrate. By doing so, you can integrate file transfers into your t-based application, freeing your users from the task of manually performing a transfer. s Tech Tip will show you how to create such a program.
N.IMPORT/WIN.EXPORT
.IMPORT and WIN.EXPORT are subroutines, written in BASIC, that are installed on r host when you run the host routine installation script, INST_PGM.WIS. Like all of the tines installed, these are compiled and cataloged for you as part of the installation process.
.IMPORT is called when you want to transfer data from the host to the PC. It is the ivalent of clicking Run | Import File from the wIntegrate menu. WIN.EXPORT is called n you want to transfer data from the PC to the host. It is the equivalent of clicking Run | ort File from the wIntegrate menu. The syntax for these routines can be found in the tegrate Host Routines Reference manual.
PORT.BAS
same basic coding procedure is used for both importing and exporting. As importing is e more frequently than exporting, we will create a simple program, called IMPORT.BAS,
port data from the host to the PC.
command syntax for WIN.IMPORT is:
.IMPORT(“PCFILE”,”FILE”,”ITEMS”,”FIELDS”,”OPTS”,”STATUS”)
re,
- 50 -
U2 DATA MANAGEMENT SOLUTIONS
PCFILE – the name of the PC file to be created, including any path FILE – the name of the host file the data is to be imported from ITEMS – IDs of the records to be imported or ECL/TCL command to execute FIELDS – names of the attributes to be imported OPTS – dynamic array holding the various options for the import (Format, Translate, etc.) STATUS – returned status OPTS<1> - format of the PC file (ASC, XLS, CSV, etc.) OPTS<2> - Overwrite OPTS<3> - Mode OPTS<4> - Suppress ID OPTS<5> - Field Descriptions OPTS<6> - Translate OPTS<7> - Translation OPTS<8> - AutoExit OPTS<9> - Inform OPTS<10> - Timeout OPTS<11> - Retries OPTS<13,1> - Number Conversion OPTS<13,2> - Number Separator OPTS<13,3> - Number Currency OPTS<13,4> - Number Decimal OPTS<14,1> - Explode Values OPTS<14,2> - Repeat Values Some of the elements in the OPTS array have default values so they do not have to be specified in your program unless you are changing them. The default values are listed in the following table. OPTS<1> - uses PC file extension OPTS<2> - Yes OPTS<3> - Normal OPTS<4> - 0 OPTS<5> - 0 OPTS<6> -Ascii OPTS<7> - \255,\r\n\f\r\n,\254,\r\n OPTS<8> - 1 OPTS<9> - 0 OPTS<10> - 5 OPTS<11> - 3
- 51 -
U2 DATA MANAGEMENT SOLUTIONS
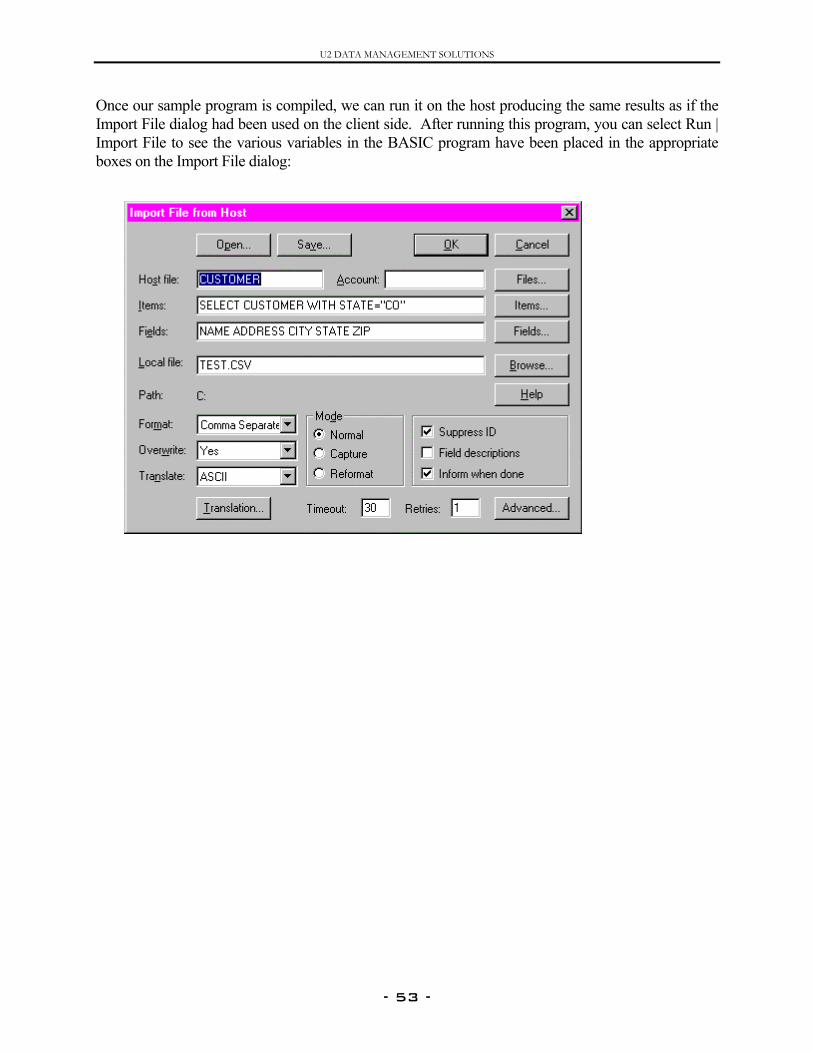
In our sample program we will define all of the variables, then pass them to WIN.IMPORT. We’ll also define all of the elements in the OPTS dynamic array to demonstrate how they are being used. Under normal circumstances you would only define the specific elements in this array that would be different from the default. Note: if the extension of the PC file you are creating is not one of those used as a default, you must explicitly define OPTS<1>. For example, if you are creating an ASCII file but use a file extension of LIS, you need to define OPTS<1>=”ASC” otherwise wIntegrate will use LIS as the format which is not valid. Now compile and catalog the program. * Define all of the variables PCFILE = "C:\TEST.CSV" FILE = "CUSTOMER" ITEMS = 'SELECT CUSTOMER WITH STATE="CO"' FIELDS = "NAME ADDRESS CITY STATE ZIP" STATUS = "" OPTS = "" OPTS<1> = "CSV" ;* Use Comma Separated Value format OPTS<2> = "Yes" ;* Overwrite PC file OPTS<3> = "Normal" ;* Use Normal mode OPTS<4> = "1" ;* Suppress the ID OPTS<5> = "0" ;* Don't include field descriptions OPTS<6> = "ASCII" ;* Use translation for Ascii format only OPTS<7> = "\255,\r\n\f\r\n,\254,\r\n" ;* Default translations OPTS<8> = "1" ;* Exit after transfer completes OPTS<9> = "0" ;* Inform when transfer completes OPTS<10> = "30" ;* Timeout, in seconds OPTS<11> = "1" ;* Number of retries * The following are set on the Advanced options dialog OPTS<13,1> = "1" ;* Set number conversion OPTS<13,2> = "," ;* Number separator OPTS<13,3> = "$" ;* Number Currency OPTS<13,4> = "." ;* Number decimal OPTS<14,1>="1" ;* Explode values OPTS<14,2>="1" ;* Repeat values CALL WIN_IMPORT(PCFILE,FILE,ITEMS,FIELDS,OPTS,STATUS) END
- 52 -
U2 DATA MANAGEMENT SOLUTIONS
Once our sample program is compiled, we can run it on the host producing the same results as if the Import File dialog had been used on the client side. After running this program, you can select Run | Import File to see the various variables in the BASIC program have been placed in the appropriate boxes on the Import File dialog:
- 53 -
U2 DATA MANAGEMENT SOLUTIONS
WhlimwIn In ygivethe circhavade wI Theloopmax Exa The\win
wIntegrate Tech Tips
Limiting the Number of Sessions a User
May Open
en you start wIntegrate you can open more than one session. The available Windows resources it the number of sessions you may open at any given time. You can open 6-7 sessions when using tegrate 3.0 and almost an unlimited number when using wIntegrate 4.0.
our environment it may be advantageous to limit the number of sessions a user can open at any n time. This Tech Tip will show you how you can change the wIntegrate environment to restrict number of sessions. A word of caution, however. These changes are made to text files and can be umvented by a user who understands how wIntegrate works. Usually, though, most users don't e the knowledge or desire to change the environment so these techniques should be more than quate.
ntegrate 4.0
script \wintsys\script\NewSess.Wis is run each time that you open a new session. We'll add a to check for the current number of open sessions. Anytime a new session will exceed the imum number allowed the script will display an error message then close using File | Exit.
mple
following example will limit the number of sessions that can be opened concurrently to 2. Edit tsys\script\NewSess.Wis and add the code shown in bold:
- 54 -
U2 DATA MANAGEMENT SOLUTIONS
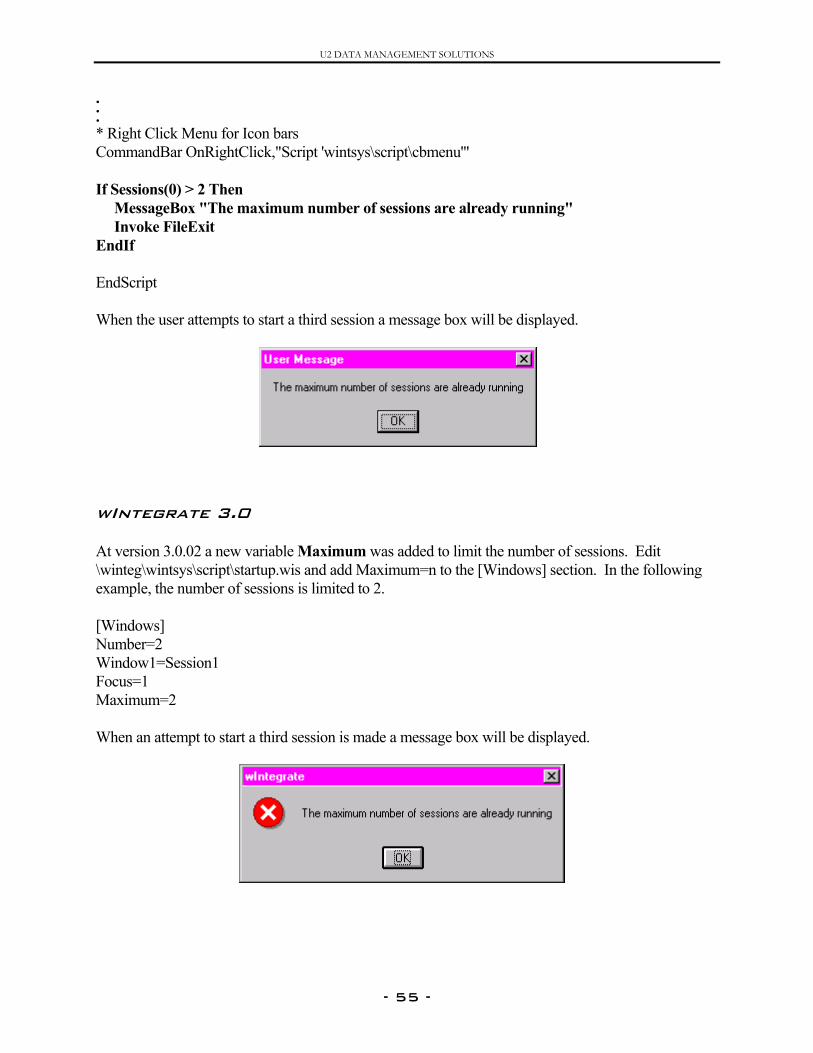
. . . * Right Click Menu for Icon bars CommandBar OnRightClick,"Script 'wintsys\script\cbmenu'" If Sessions(0) > 2 Then MessageBox "The maximum number of sessions are already running" Invoke FileExit EndIf EndScript When the user attempts to start a third session a message box will be displayed.
wIntegrate 3.0 At version 3.0.02 a new variable Maximum was added to limit the number of sessions. Edit \winteg\wintsys\script\startup.wis and add Maximum=n to the [Windows] section. In the following example, the number of sessions is limited to 2. [Windows] Number=2 Window1=Session1 Focus=1 Maximum=2 When an attempt to start a third session is made a message box will be displayed.
- 55 -
U2 DATA MANAGEMENT SOLUTIONS
Muscriof s Thecomlangturn Se TheSerthe A cthe CD
wIntegrate Tech Tips
The Server Library Script
ch of the functionality within wIntegrate is provided using scripts written in the wIntegrate pting language. Rather than rewrite, or even reuse, subroutines in each wIntegrate script, libraries ubroutines were created and are then called from scripts.
Server Library consists of commands that enable you to read from and write to files on the host puter. Each Server Library command is nothing more than a subroutine written using the script uage. These server commands interact with the wIntegrate server process on the host, which in , communicates with the database.
rver Commands
Server Library is called \wintsys\lib\server.wis. The following commands are available in the ver Library. When you use these commands you must be at the database prompt on your host and wIntegrate host routines must be installed and available to the account.
omplete discussion of the syntax, usage and examples of each of these commands can be found in PC Scripts Reference manual. A copy of the PC Script Reference is included on the wIntegrate . You can also search the wIntegrate directory tree for other scripts using these commands.
Command Description CheckServer Checks if the server is running and starts it if it is not. CloseServer Stops the host-side process. ExecAccess Executes statements stored with StoreAccess. Fields Gets a list of fields in a host file to a list or combo box. Files Gets a list of files in the current host account to a list or
combo box, GetMachineType Returns the current host machine type. HCall Calls a host subroutine. HRead Reads a record from a host file. HReadU Reads, and locks, a single record from a host file. HReadV Reads a single field from a host file record. HReadVU Reads a single field from a host file and locks the item. HRelease Release a lock from a host file or record.
- 56 -
U2 DATA MANAGEMENT SOLUTIONS
HWrite Writes a record to a host file and unlocks the file. HWriteU Writes a record to a host file and leaves the file locked. HWriteV Writes a single field to a host file record. HWriteVU Writes a single field to a host file record and leave the file
locked. Items Sends the host fields to a list or combo box on the PC. LocalPrint Turns the local PC printer ON or OFF. MultiExec Executes one or more host statements via the host server. OpenServer The CheckServer command uses this to start host routines
if they are not already open. ServerErrMsg Returns a string description of the error number returned
by any Server library command. StoreAccess Stores statements for execution with ExecAccess.
Global Variables In addition to the Server Library commands, there are global variables that are used by these commands.
Variable Description Server_Error The last error from the server. Server_Open True – The server is running.
False – The serve is not running. Server_Ready True – The server is ready for a command.
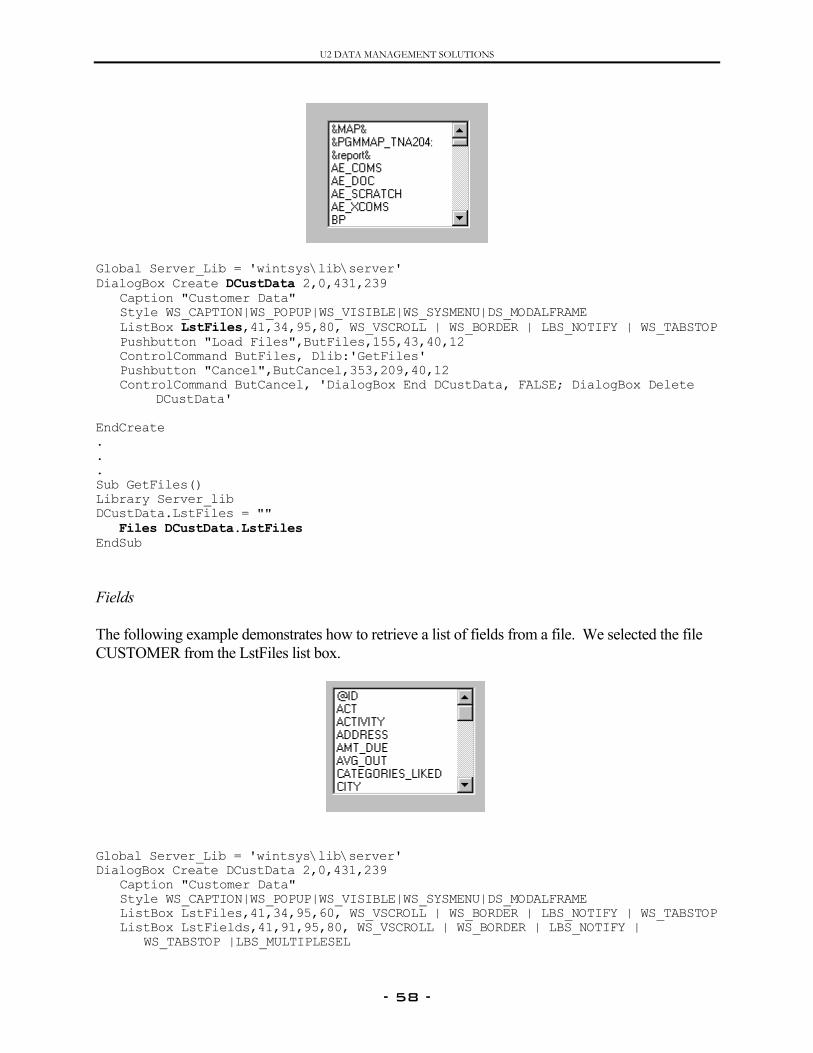
False – The server is not ready for a command. Examples The following examples demonstrate how to use some of the Server Library commands. Note you must define the Server Library before you can use any of the commands. Files In this example, a list box is used to display the list of files returned using the Files command. The dialog box is named DCustData and the list box LstFiles.
- 57 -
U2 DATA MANAGEMENT SOLUTIONS
Global Server_Lib = 'wintsys\lib\server' DialogBox Create DCustData 2,0,431,239 Caption "Customer Data" Style WS_CAPTION|WS_POPUP|WS_VISIBLE|WS_SYSMENU|DS_MODALFRAME ListBox LstFiles,41,34,95,80, WS_VSCROLL | WS_BORDER | LBS_NOTIFY | WS_TABSTOP Pushbutton "Load Files",ButFiles,155,43,40,12 ControlCommand ButFiles, Dlib:'GetFiles' Pushbutton "Cancel",ButCancel,353,209,40,12
ControlCommand ButCancel, 'DialogBox End DCustData, FALSE; DialogBox Delete DCustData'
EndCreate . . . Sub GetFiles() Library Server_lib DCustData.LstFiles = "" Files DCustData.LstFiles EndSub Fields The following example demonstrates how to retrieve a list of fields from a file. We selected the file CUSTOMER from the LstFiles list box.
Global Server_Lib = 'wintsys\lib\server' DialogBox Create DCustData 2,0,431,239 Caption "Customer Data" Style WS_CAPTION|WS_POPUP|WS_VISIBLE|WS_SYSMENU|DS_MODALFRAME
ListBox LstFiles,41,34,95,60, WS_VSCROLL | WS_BORDER | LBS_NOTIFY | WS_TABSTOP ListBox LstFields,41,91,95,80, WS_VSCROLL | WS_BORDER | LBS_NOTIFY |
WS_TABSTOP |LBS_MULTIPLESEL
- 58 -
U2 DATA MANAGEMENT SOLUTIONS
Pushbutton "Load Files",ButFiles,155,43,40,12 ControlCommand ButFiles, Dlib:'GetFiles' Pushbutton "Load Fields",ButFields,155,96,40,12 ControLCommand ButFields, Dlib:'GetFields' Pushbutton "Cancel",ButCancel,353,209,40,12
ControlCommand ButCancel, 'DialogBox End DCustData, FALSE; DialogBox Delete DCustData'
EndCreate . . . Sub GetFields() Library Server_lib DCustData.LstFields = "" Fields DCustData.LstFields,DCustData.LstFiles EndSub MultiExec MultiExec is used to execute a query statement on the host. Before using it, you must first open the server on the host. In the first example, a single statement SSELECT is being executed on the host. In the second example, the SSELECT is performed, followed by a LIST of the file using the select list. Global Server_Lib = 'wintsys\lib\server' OpenServer sel = ‘SSELECT WIN.ORDEMultiExec sel, “F W Q”
R WITH CUSTNAME LIKE “A...”’
Global Server_Lib = 'wintsys\lib\server' OpenServer sel = ‘SSELECT WIN.ORDER WITH CUSTNAME LIKE “A...”’ Ins sel, -1, “LIST WIN.ORDER WITH QUANTITY < 100” MultiExec sel, “F W Q”
- 59 -
U2 DATA MANAGEMENT SOLUTIONS
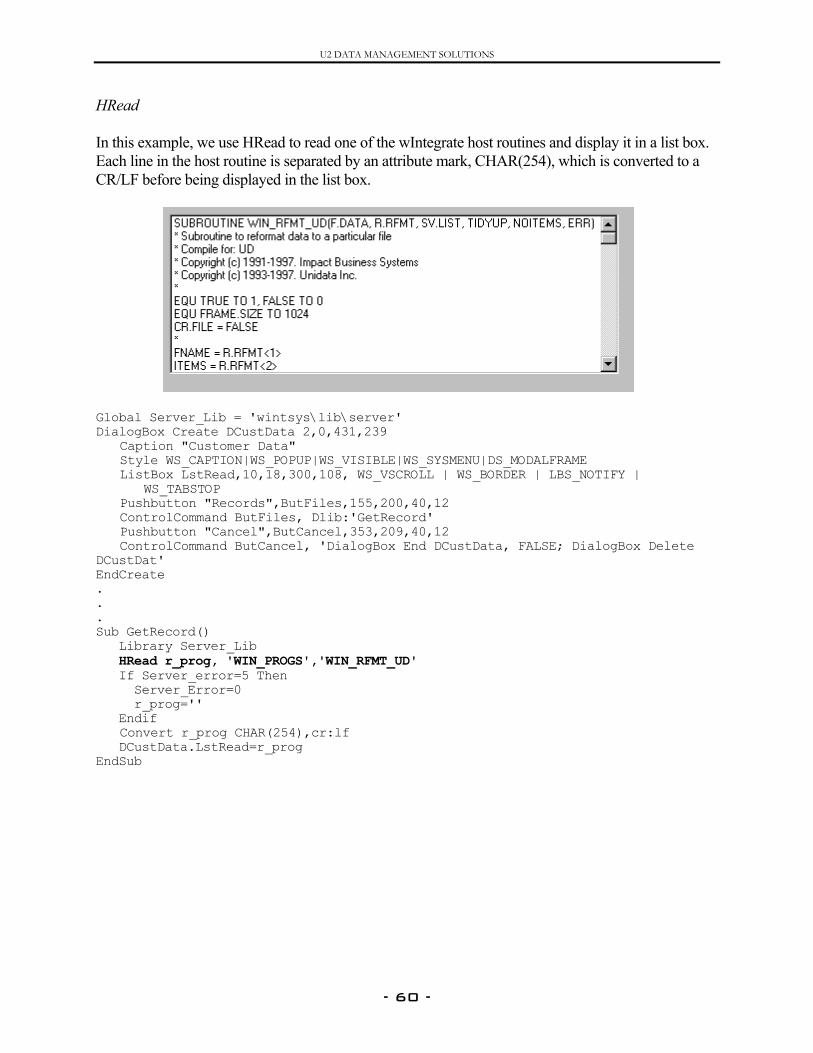
HRead In this example, we use HRead to read one of the wIntegrate host routines and display it in a list box. Each line in the host routine is separated by an attribute mark, CHAR(254), which is converted to a CR/LF before being displayed in the list box.
Global Server_Lib = 'wintsys\lib\server' DialogBox Create DCustData 2,0,431,239 Caption "Customer Data" Style WS_CAPTION|WS_POPUP|WS_VISIBLE|WS_SYSMENU|DS_MODALFRAME
ListBox LstRead,10,18,300,108, WS_VSCROLL | WS_BORDER | LBS_NOTIFY | WS_TABSTOP
Pushbutton "Records",ButFiles,155,200,40,12 ControlCommand ButFiles, Dlib:'GetRecord' Pushbutton "Cancel",ButCancel,353,209,40,12 ControlCommand ButCancel, 'DialogBox End DCustData, FALSE; DialogBox Delete DCustDat' EndCreate . . . Sub GetRecord() Library Server_Lib HRead r_prog, 'WIN_PROGS','WIN_RFMT_UD' If Server_error=5 Then Server_Error=0 r_prog='' Endif Convert r_prog CHAR(254),cr:lf DCustData.LstRead=r_prog EndSub
- 60 -
U2 DATA MANAGEMENT SOLUTIONS
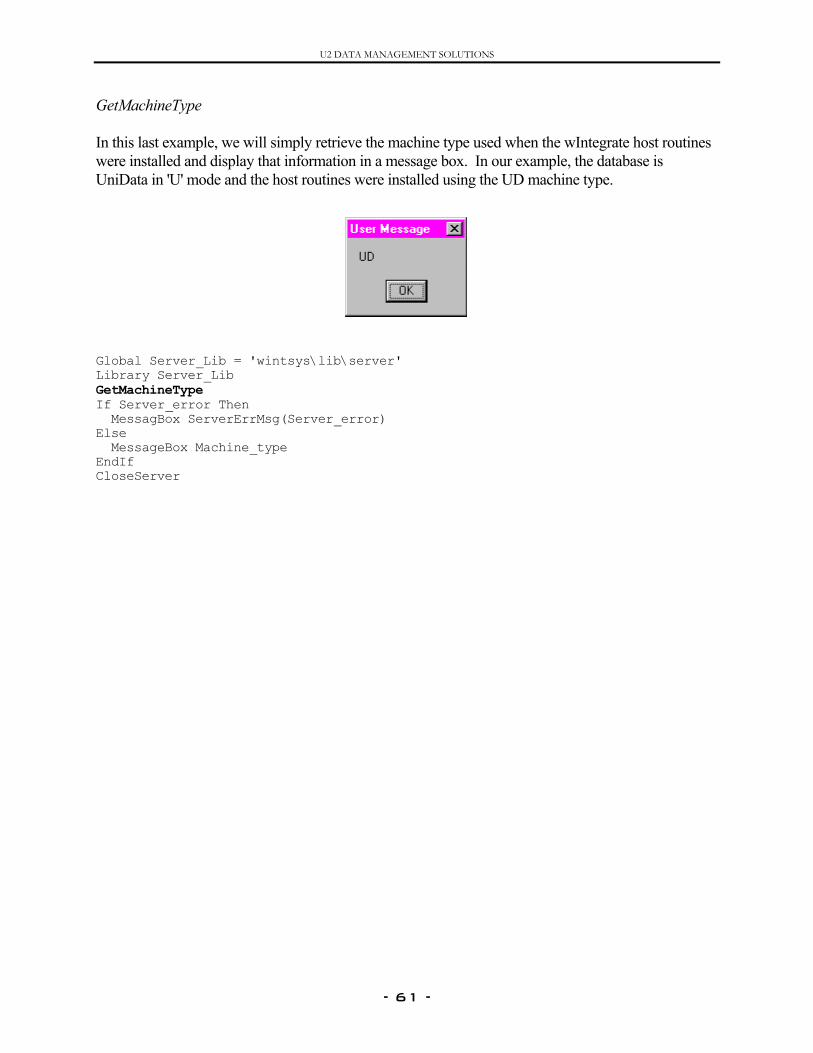
GetMachineType In this last example, we will simply retrieve the machine type used when the wIntegrate host routines were installed and display that information in a message box. In our example, the database is UniData in 'U' mode and the host routines were installed using the UD machine type.
Global Server_Lib = 'wintsys\lib\server' Library Server_Lib GetMachineType If Server_error Then MessagBox ServerErrMsg(Server_error) Else MessageBox Machine_type EndIf CloseServer
- 61 -
U2 DATA MANAGEMENT SOLUTIONS
Int wInthatusin Desthe on youapp In tlink Cr In extrWofina ThwInnamyouuse On
wIntegrate Tech Tips
Using a DDE Link to Transfer Data to Word
roduction
tegrate supports the use of DDE to update information from wIntegrate to any other application also supports DDE. DDE is supported both in the wIntegrate scripting language and on the host g BASIC subroutines provided with wIntegrate.
criptions of the wIntegrate DDE script commands can be found in the PC Scripts Reference while BASIC subroutines are documented in the Host Routines Reference. Both manuals are included the wIntegrate CD. Each application you use DDE with will have its own command syntax, and will need to determine that syntax before writing your script or program. This may be in that lication's on-line Help, in its documentation, or by contacting the manufacturers support staff.
his Tech Tip we demonstrate how to use some of wIntegrate's BASIC subroutines to set up a DDE to Microsoft Word.
eating a Program
this example, we prepare a form letter which contains information from a Unidata file. Data is acted from the UniData CUSTOMER sample database and used to prepare a simple form letter in rd. The formatting is set in the Word document, some text sent, data is extracted from a file, and lly, additional text is sent.
is example was prepared on a Dec Alpha running the VMS operating system. On VMS, the tegrate calls use underscores in the subroutine names. On other platforms the wIntegrate routine es have periods. For example, on VMS we use WIN_DDEEXEC. On other operating systems would use the command, WIN.DDEEXEC. Here are two lines from this program showing both s.
VMS, the command line for a carriage return would be:
CALL WIN_DDEEXEC(CONVNAME,'[InsertPara]')
- 62 -
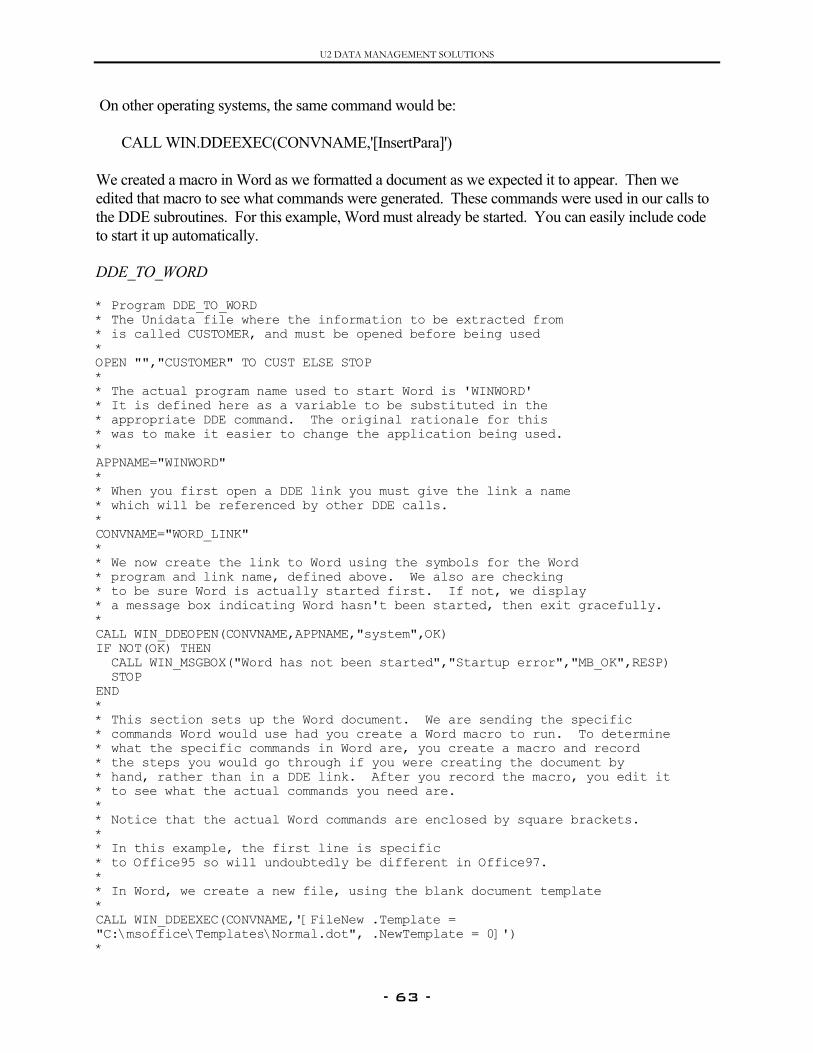
U2 DATA MANAGEMENT SOLUTIONS
On other operating systems, the same command would be: CALL WIN.DDEEXEC(CONVNAME,'[InsertPara]') We created a macro in Word as we formatted a document as we expected it to appear. Then we edited that macro to see what commands were generated. These commands were used in our calls to the DDE subroutines. For this example, Word must already be started. You can easily include code to start it up automatically. DDE_TO_WORD * Program DDE_TO_WORD * The Unidata file where the information to be extracted from * is called CUSTOMER, and must be opened before being used * OPEN "","CUSTOMER" TO CUST ELSE STOP * * The actual program name used to start Word is 'WINWORD' * It is defined here as a variable to be substituted in the * appropriate DDE command. The original rationale for this * was to make it easier to change the application being used. * APPNAME="WINWORD" * * When you first open a DDE link you must give the link a name * which will be referenced by other DDE calls. * CONVNAME="WORD_LINK" * * We now create the link to Word using the symbols for the Word * program and link name, defined above. We also are checking * to be sure Word is actually started first. If not, we display * a message box indicating Word hasn't been started, then exit gracefully. * CALL WIN_DDEOPEN(CONVNAME,APPNAME,"system",OK) IF NOT(OK) THEN CALL WIN_MSGBOX("Word has not been started","Startup error","MB_OK",RESP) STOP END * * This section sets up the Word document. We are sending the specific * commands Word would use had you create a Word macro to run. To determine * what the specific commands in Word are, you create a macro and record * the steps you would go through if you were creating the document by * hand, rather than in a DDE link. After you record the macro, you edit it * to see what the actual commands you need are. * * Notice that the actual Word commands are enclosed by square brackets. * * In this example, the first line is specific * to Office95 so will undoubtedly be different in Office97. * * In Word, we create a new file, using the blank document template * CALL WIN_DDEEXEC(CONVNAME,'[FileNew .Template = "C:\msoffice\Templates\Normal.dot", .NewTemplate = 0]') *
- 63 -
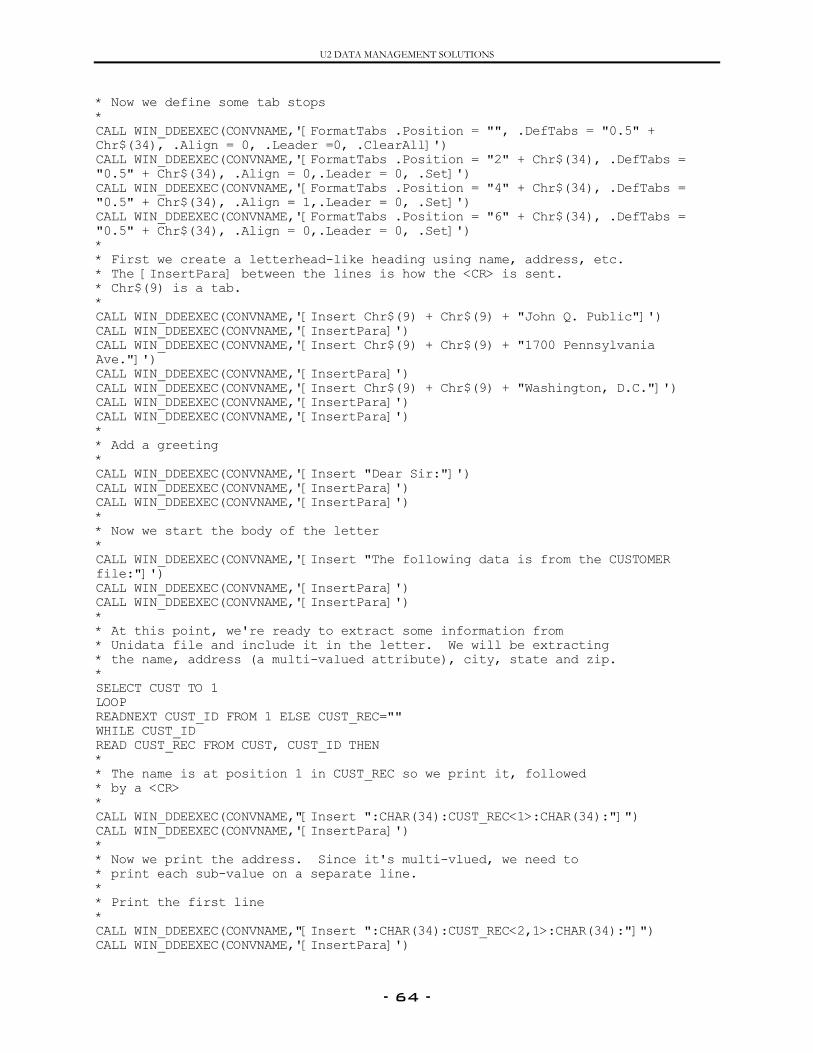
U2 DATA MANAGEMENT SOLUTIONS
* Now we define some tab stops * CALL WIN_DDEEXEC(CONVNAME,'[FormatTabs .Position = "", .DefTabs = "0.5" + Chr$(34), .Align = 0, .Leader =0, .ClearAll]') CALL WIN_DDEEXEC(CONVNAME,'[FormatTabs .Position = "2" + Chr$(34), .DefTabs = "0.5" + Chr$(34), .Align = 0,.Leader = 0, .Set]') CALL WIN_DDEEXEC(CONVNAME,'[FormatTabs .Position = "4" + Chr$(34), .DefTabs = "0.5" + Chr$(34), .Align = 1,.Leader = 0, .Set]') CALL WIN_DDEEXEC(CONVNAME,'[FormatTabs .Position = "6" + Chr$(34), .DefTabs = "0.5" + Chr$(34), .Align = 0,.Leader = 0, .Set]') * * First we create a letterhead-like heading using name, address, etc. * The [InsertPara] between the lines is how the <CR> is sent. * Chr$(9) is a tab. * CALL WIN_DDEEXEC(CONVNAME,'[Insert Chr$(9) + Chr$(9) + "John Q. Public"]') CALL WIN_DDEEXEC(CONVNAME,'[InsertPara]') CALL WIN_DDEEXEC(CONVNAME,'[Insert Chr$(9) + Chr$(9) + "1700 Pennsylvania Ave."]') CALL WIN_DDEEXEC(CONVNAME,'[InsertPara]') CALL WIN_DDEEXEC(CONVNAME,'[Insert Chr$(9) + Chr$(9) + "Washington, D.C."]') CALL WIN_DDEEXEC(CONVNAME,'[InsertPara]') CALL WIN_DDEEXEC(CONVNAME,'[InsertPara]') * * Add a greeting * CALL WIN_DDEEXEC(CONVNAME,'[Insert "Dear Sir:"]') CALL WIN_DDEEXEC(CONVNAME,'[InsertPara]') CALL WIN_DDEEXEC(CONVNAME,'[InsertPara]') * * Now we start the body of the letter * CALL WIN_DDEEXEC(CONVNAME,'[Insert "The following data is from the CUSTOMER file:"]') CALL WIN_DDEEXEC(CONVNAME,'[InsertPara]') CALL WIN_DDEEXEC(CONVNAME,'[InsertPara]') * * At this point, we're ready to extract some information from * Unidata file and include it in the letter. We will be extracting * the name, address (a multi-valued attribute), city, state and zip. * SELECT CUST TO 1 LOOP READNEXT CUST_ID FROM 1 ELSE CUST_REC="" WHILE CUST_ID READ CUST_REC FROM CUST, CUST_ID THEN * * The name is at position 1 in CUST_REC so we print it, followed * by a <CR> * CALL WIN_DDEEXEC(CONVNAME,"[Insert ":CHAR(34):CUST_REC<1>:CHAR(34):"]") CALL WIN_DDEEXEC(CONVNAME,'[InsertPara]') * * Now we print the address. Since it's multi-vlued, we need to * print each sub-value on a separate line. * * Print the first line * CALL WIN_DDEEXEC(CONVNAME,"[Insert ":CHAR(34):CUST_REC<2,1>:CHAR(34):"]") CALL WIN_DDEEXEC(CONVNAME,'[InsertPara]')
- 64 -
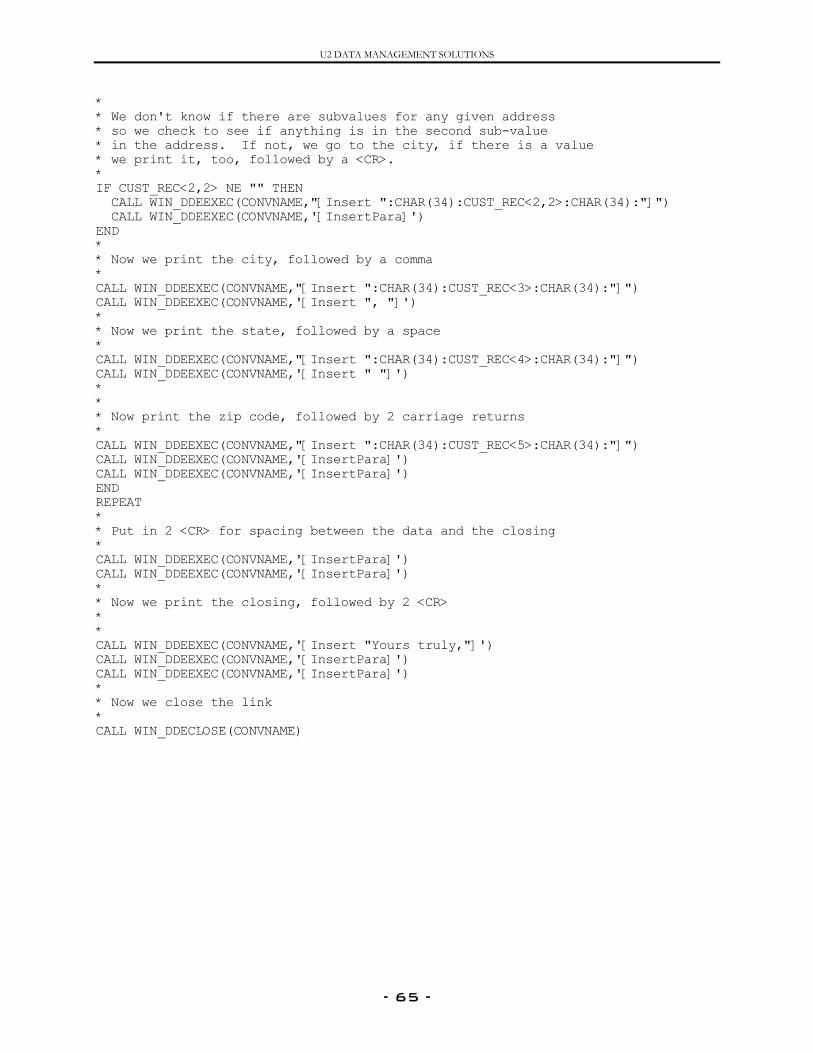
U2 DATA MANAGEMENT SOLUTIONS
* * We don't know if there are subvalues for any given address * so we check to see if anything is in the second sub-value * in the address. If not, we go to the city, if there is a value * we print it, too, followed by a <CR>. * IF CUST_REC<2,2> NE "" THEN CALL WIN_DDEEXEC(CONVNAME,"[Insert ":CHAR(34):CUST_REC<2,2>:CHAR(34):"]") CALL WIN_DDEEXEC(CONVNAME,'[InsertPara]') END * * Now we print the city, followed by a comma * CALL WIN_DDEEXEC(CONVNAME,"[Insert ":CHAR(34):CUST_REC<3>:CHAR(34):"]") CALL WIN_DDEEXEC(CONVNAME,'[Insert ", "]') * * Now we print the state, followed by a space * CALL WIN_DDEEXEC(CONVNAME,"[Insert ":CHAR(34):CUST_REC<4>:CHAR(34):"]") CALL WIN_DDEEXEC(CONVNAME,'[Insert " "]') * * * Now print the zip code, followed by 2 carriage returns * CALL WIN_DDEEXEC(CONVNAME,"[Insert ":CHAR(34):CUST_REC<5>:CHAR(34):"]") CALL WIN_DDEEXEC(CONVNAME,'[InsertPara]') CALL WIN_DDEEXEC(CONVNAME,'[InsertPara]') END REPEAT * * Put in 2 <CR> for spacing between the data and the closing * CALL WIN_DDEEXEC(CONVNAME,'[InsertPara]') CALL WIN_DDEEXEC(CONVNAME,'[InsertPara]') * * Now we print the closing, followed by 2 <CR> * * CALL WIN_DDEEXEC(CONVNAME,'[Insert "Yours truly,"]') CALL WIN_DDEEXEC(CONVNAME,'[InsertPara]') CALL WIN_DDEEXEC(CONVNAME,'[InsertPara]') * * Now we close the link * CALL WIN_DDECLOSE(CONVNAME)
- 65 -
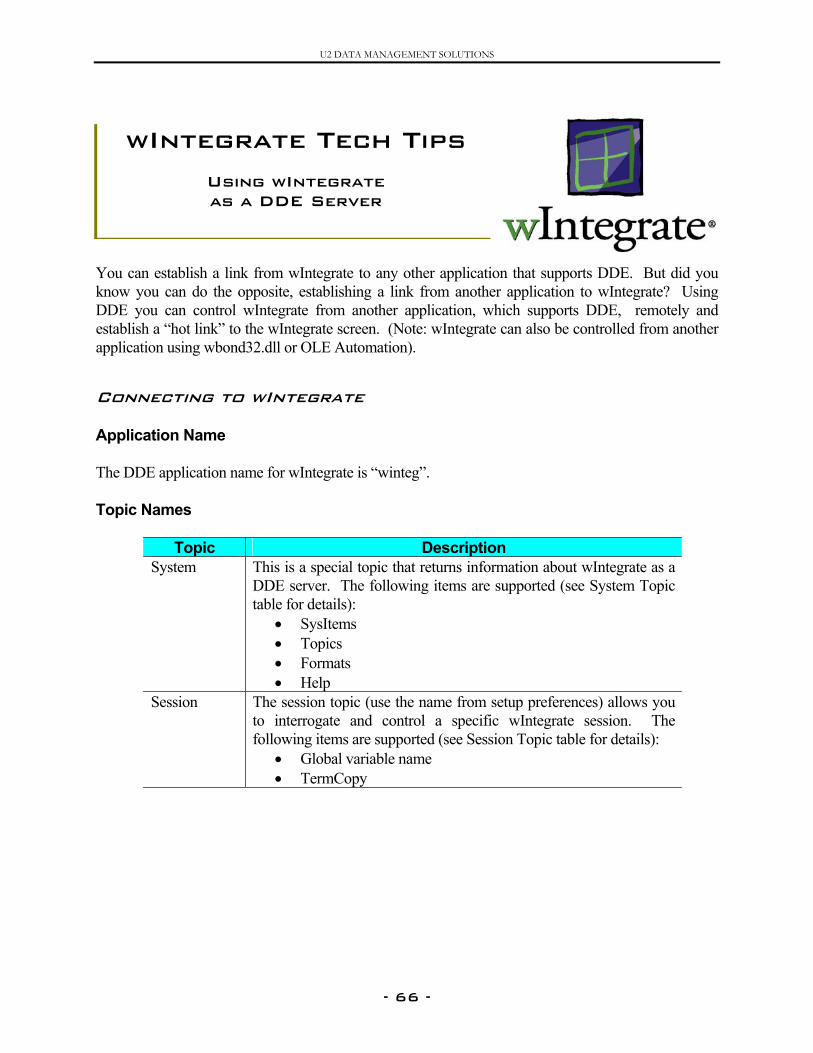
U2 DATA MANAGEMENT SOLUTIONS
YouknoDDestaapp Co Ap The Top
wIntegrate Tech Tips
Using wIntegrate as a DDE Server
can establish a link from wIntegrate to any other application that supports DDE. But did you w you can do the opposite, establishing a link from another application to wIntegrate? Using E you can control wIntegrate from another application, which supports DDE, remotely and blish a “hot link” to the wIntegrate screen. (Note: wIntegrate can also be controlled from another lication using wbond32.dll or OLE Automation).
nnecting to wIntegrate
plication Name
DDE application name for wIntegrate is “winteg”.
ic Names
Topic Description System This is a special topic that returns information about wIntegrate as a
DDE server. The following items are supported (see System Topic table for details):
• SysItems • Topics • Formats • Help
Session The session topic (use the name from setup preferences) allows you to interrogate and control a specific wIntegrate session. The following items are supported (see Session Topic table for details):
• Global variable name • TermCopy
- 66 -
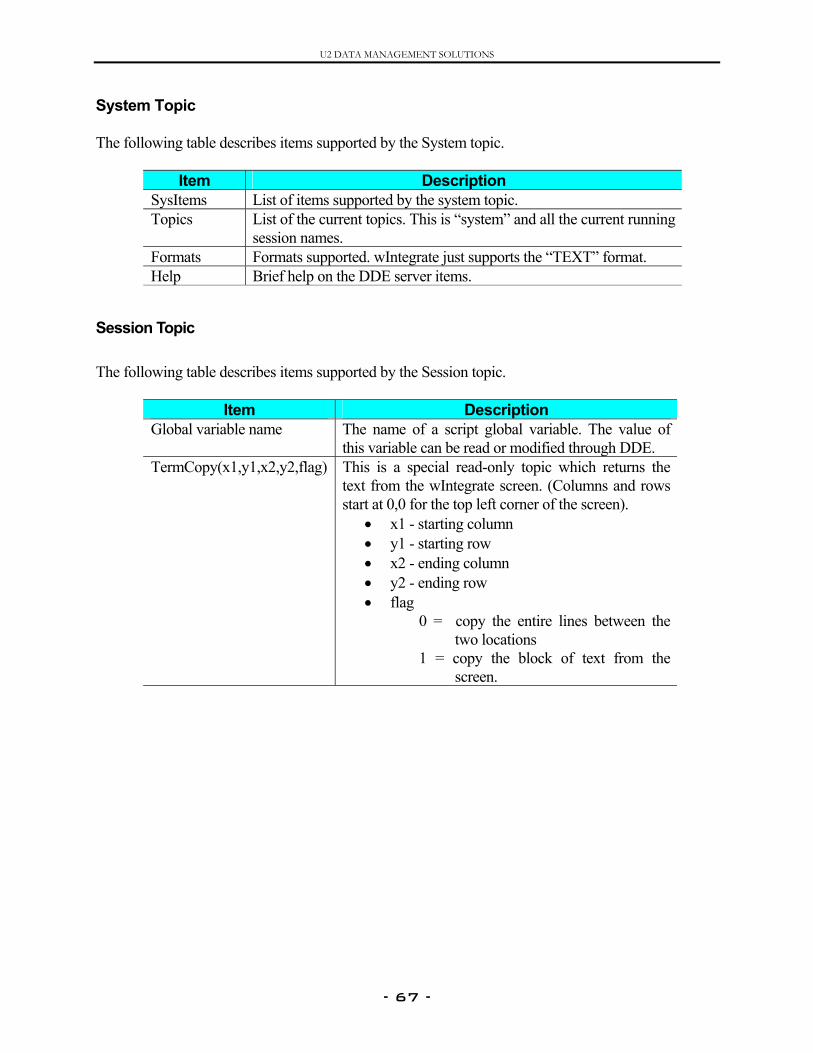
U2 DATA MANAGEMENT SOLUTIONS
System Topic The following table describes items supported by the System topic.
Item Description SysItems List of items supported by the system topic. Topics List of the current topics. This is “system” and all the current running
session names. Formats Formats supported. wIntegrate just supports the “TEXT” format. Help Brief help on the DDE server items.
Session Topic The following table describes items supported by the Session topic.
Item Description Global variable name The name of a script global variable. The value of
this variable can be read or modified through DDE. TermCopy(x1,y1,x2,y2,flag) This is a special read-only topic which returns the
text from the wIntegrate screen. (Columns and rows start at 0,0 for the top left corner of the screen).
• x1 - starting column • y1 - starting row • x2 - ending column • y2 - ending row • flag
0 = copy the entire lines between the two locations
1 = copy the block of text from the screen.
- 67 -
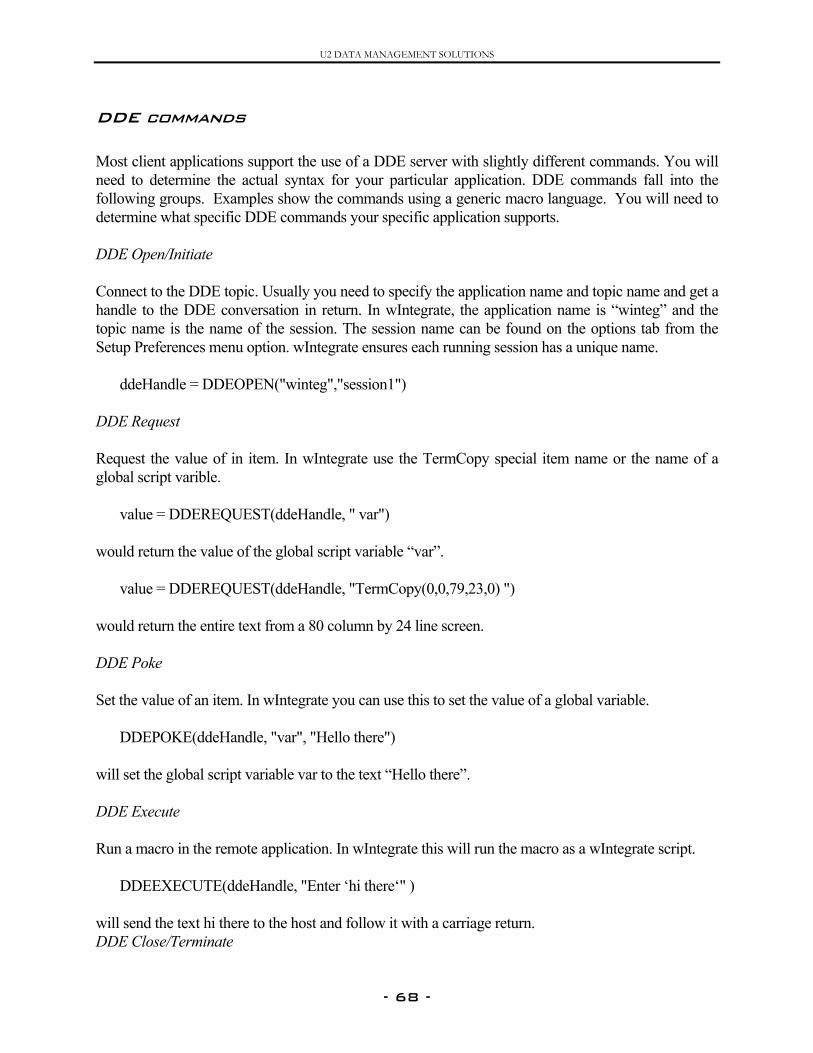
U2 DATA MANAGEMENT SOLUTIONS
DDE commands Most client applications support the use of a DDE server with slightly different commands. You will need to determine the actual syntax for your particular application. DDE commands fall into the following groups. Examples show the commands using a generic macro language. You will need to determine what specific DDE commands your specific application supports. DDE Open/Initiate Connect to the DDE topic. Usually you need to specify the application name and topic name and get a handle to the DDE conversation in return. In wIntegrate, the application name is “winteg” and the topic name is the name of the session. The session name can be found on the options tab from the Setup Preferences menu option. wIntegrate ensures each running session has a unique name.
ddeHandle = DDEOPEN("winteg","session1") DDE Request Request the value of in item. In wIntegrate use the TermCopy special item name or the name of a global script varible.
value = DDEREQUEST(ddeHandle, " var")
would return the value of the global script variable “var”. value = DDEREQUEST(ddeHandle, "TermCopy(0,0,79,23,0) ")
would return the entire text from a 80 column by 24 line screen. DDE Poke Set the value of an item. In wIntegrate you can use this to set the value of a global variable.
DDEPOKE(ddeHandle, "var", "Hello there")
will set the global script variable var to the text “Hello there”. DDE Execute Run a macro in the remote application. In wIntegrate this will run the macro as a wIntegrate script.
DDEEXECUTE(ddeHandle, "Enter ‘hi there‘" )
will send the text hi there to the host and follow it with a carriage return. DDE Close/Terminate
- 68 -
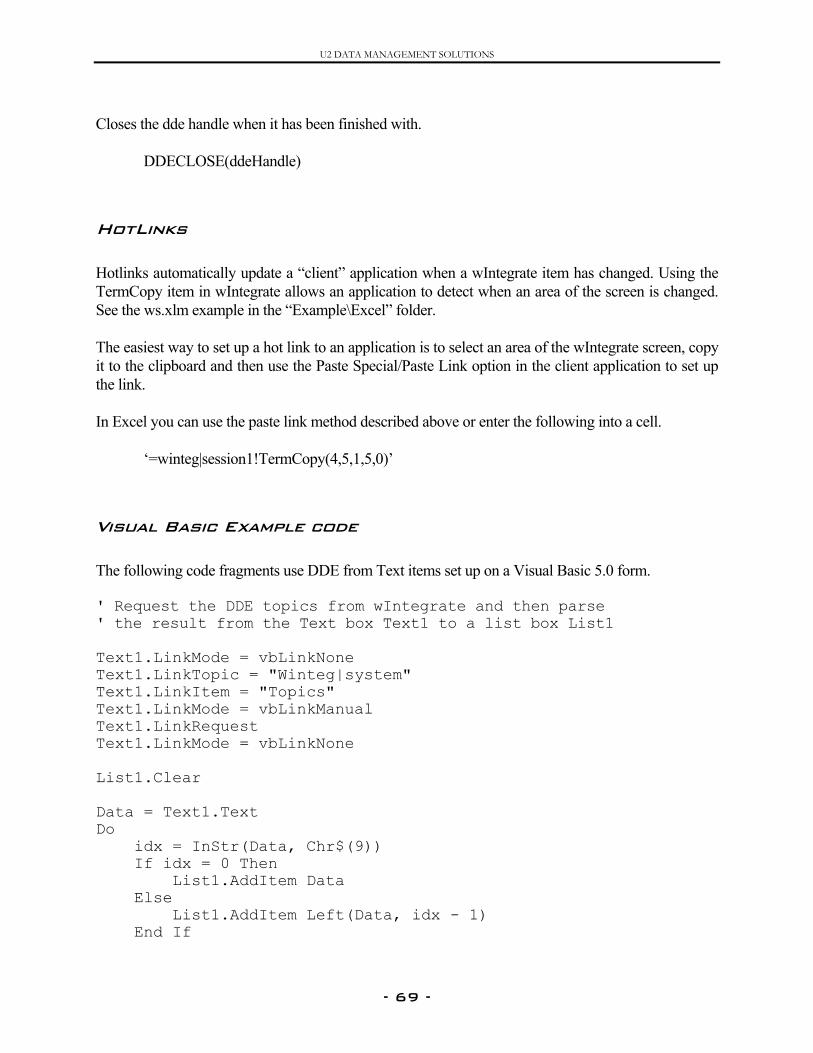
U2 DATA MANAGEMENT SOLUTIONS
Closes the dde handle when it has been finished with. DDECLOSE(ddeHandle)
HotLinks Hotlinks automatically update a “client” application when a wIntegrate item has changed. Using the TermCopy item in wIntegrate allows an application to detect when an area of the screen is changed. See the ws.xlm example in the “Example\Excel” folder. The easiest way to set up a hot link to an application is to select an area of the wIntegrate screen, copy it to the clipboard and then use the Paste Special/Paste Link option in the client application to set up the link. In Excel you can use the paste link method described above or enter the following into a cell.
‘=winteg|session1!TermCopy(4,5,1,5,0)’
Vsual Basic Example code i The following code fragments use DDE from Text items set up on a Visual Basic 5.0 form. ' Request the DDE topics from wIntegrate and then parse ' the result from the Text box Text1 to a list box List1 Text1.LinkMode = vbLinkNone Text1.LinkTopic = "Winteg|system" Text1.LinkItem = "Topics" Text1.LinkMode = vbLinkManual Text1.LinkRequest Text1.LinkMode = vbLinkNone List1.Clear Data = Text1.Text Do idx = InStr(Data, Chr$(9)) If idx = 0 Then List1.AddItem Data Else List1.AddItem Left(Data, idx - 1) End If
- 69 -
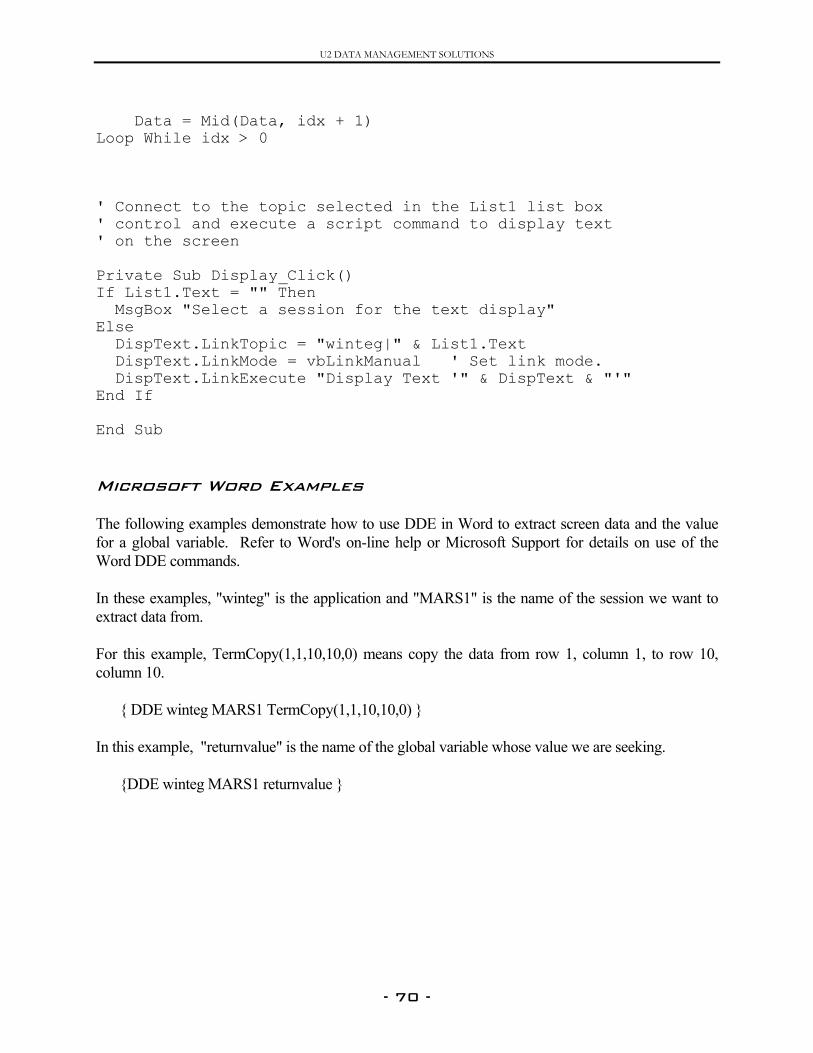
U2 DATA MANAGEMENT SOLUTIONS
Data = Mid(Data, idx + 1) Loop While idx > 0 ' Connect to the topic selected in the List1 list box ' control and execute a script command to display text ' on the screen Private Sub Display_Click() If List1.Text = "" Then MsgBox "Select a session for the text display" Else DispText.LinkTopic = "winteg|" & List1.Text DispText.LinkMode = vbLinkManual ' Set link mode. DispText.LinkExecute "Display Text '" & DispText & "'" End If End Sub Microsoft Word Examples The following examples demonstrate how to use DDE in Word to extract screen data and the value for a global variable. Refer to Word's on-line help or Microsoft Support for details on use of the Word DDE commands. In these examples, "winteg" is the application and "MARS1" is the name of the session we want to extract data from. For this example, TermCopy(1,1,10,10,0) means copy the data from row 1, column 1, to row 10, column 10.
{ DDE winteg MARS1 TermCopy(1,1,10,10,0) } In this example, "returnvalue" is the name of the global variable whose value we are seeking.
{DDE winteg MARS1 returnvalue }
- 70 -
U2 DATA MANAGEMENT SOLUTIONS
WINimponeImpwhestat WeproCTRmanwill A s INPPRI Whreprhasto c
wIntegrate Tech Tips
WIN.IMPORT Hangs After a File Transfer
.IMPORT, one of the subroutines provided with wIntegrate, is used in a BASIC program to
ort files to the PC. When called from a program, WIN.IMPORT causes the same behavior as if had selected Run, Import File from the wIntegrate menu. While the import is in progress, the ort File Monitor is displayed showing the status of the transfer. If the appropriate setting is used n calling WIN.IMPORT, the File Import Monitor closes at the completion of the transfer, the
us is returned to the basic program, and the program continues.
have seen instances where the transfer completes, the File Monitor closes, but the BASIC gram hangs in a loop waiting for the STATUS to be returned from the PC. wIntegrate uses
L-B, CHAR(2), extensively in the file transfer process. If the host has been configured in such a ner that CTRL-B is not sending CHAR(2), the STATUS won’t be returned and WIN.IMPORT hang.
imple test program can be run to determine what character CTRL-B is sending:
UT DUM NT SEQ(DUM)
en you run this program, at the prompt, press CTRL-B, followed by a carriage return. A number, esenting the ASCII code of the key pressed, is displayed. If it displays anything but ‘2’, CTRL-B
been re-defined. If you have CTRL-B defined as something other than CHAR(2), you will need hange it back to CHAR(2) if you wish to use WIN.IMPORT.
- 71 -