secondaryteachingguiderevision-239
TRANSCRIPT
7/27/2019 SecondaryTeachingGuiderevision-239
http://slidepdf.com/reader/full/secondaryteachingguiderevision-239 1/58
Teaching Handball In the
Middle and Secondary Schools
By Pete Tyson and LeaAnn Martin2007
7/27/2019 SecondaryTeachingGuiderevision-239
http://slidepdf.com/reader/full/secondaryteachingguiderevision-239 2/58
Table of Contents
Page
Table of Contents
IntroductionTeaching Notes
General Comments for Teachers
NASPE Standards
Content Outline/NASPE Standards
Lesson 1
Lesson 2
Lesson 3
Lesson 4
Lesson 5Lesson 6
Lesson 7
Lesson 8
Lesson 9
Lesson 10
Lesson 11
Lesson 12
Lesson 13
Lesson 14Lesson 15
Lesson 16
Lesson 17
Lesson 18
Lesson 19
Lesson 20
Alternative Activities
Advanced Drills and Techniques
Rules of Sportsmanship
One-Wall Handball Rules
One-Wall Court Specifications
Two or Three-Wall Courts
Resources

7/27/2019 SecondaryTeachingGuiderevision-239
http://slidepdf.com/reader/full/secondaryteachingguiderevision-239 3/58
Introduction
HANDBALL is the perfect addition to any physical education program. It is
played by hundreds of thousands of youngsters, either as a part of the
physical education curriculum or as a playground game. Handball is oftenreferred to as “the perfect game.”
What Makes Handball the Perfect Game?
¾ HANDBALL is a great LIFETIME SPORT. Team sports are fine, butcurrent trends in physical education focus on sports and games that
youngsters can and will play for a lifetime.
¾ HANDBALL is a great FITNESS ACTIVITY. The game requires
strength, speed, agility, power, balance, flexibility, cardio-vascular
endurance and symmetrical body coordination. Dr. Kenneth Cooper, in
his classic book, AEROBICS , states "The best conditioning exercises
are running, swimming, cycling, walking, stationary running, handball,
basketball, and squash, and in just about that order." Note that the
TOP GAME mentioned is handball! Because handball is physically
demanding, it is a great off-season conditioner for athletes as well!
¾ HANDBALL meets objectives for PHYSICAL EDUCATION and the
NATIONAL ASSOCIATION FOR SPORT AND PHYSICAL
EDUCATION (NASPE). Handball involves a wide variety of movement
concepts (speeds, levels, directions, pathways, etc.) and fundamental
skills (locomotor, striking, eye-hand coordination, manipulative skills,
etc.). And, handball involves lots of physical activity and
sportsmanship.
¾ HANDBALL is for EVERYONE. In this game, size is no advantage. In
so many activities, taller participants have an advantage. In handball,
however, one doesn’t have to be big to be successful. Smaller students
can participate on an equal basis with larger students.
7/27/2019 SecondaryTeachingGuiderevision-239
http://slidepdf.com/reader/full/secondaryteachingguiderevision-239 4/58
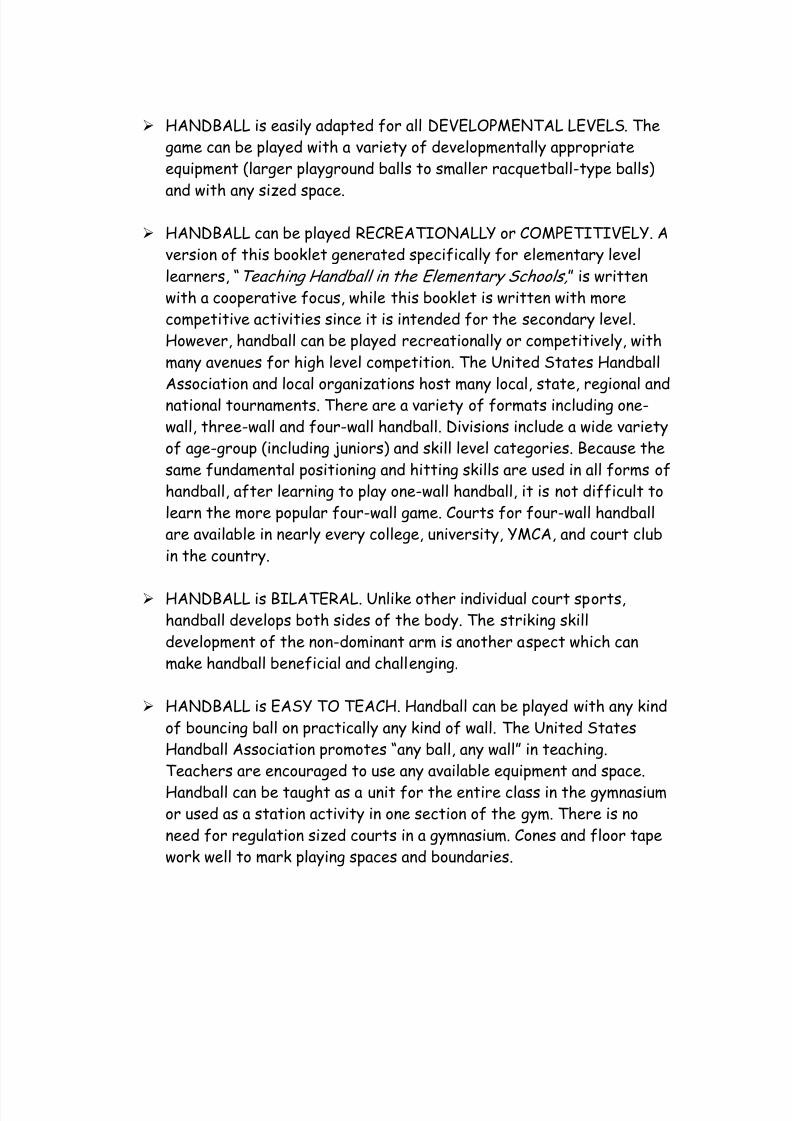
¾ HANDBALL is easily adapted for all DEVELOPMENTAL LEVELS. The
game can be played with a variety of developmentally appropriate
equipment (larger playground balls to smaller racquetball-type balls)
and with any sized space.
¾ HANDBALL can be played RECREATIONALLY or COMPETITIVELY. A
version of this booklet generated specifically for elementary level
learners, “Teaching Handball in the Elementary Schools,” is written
with a cooperative focus, while this booklet is written with more
competitive activities since it is intended for the secondary level.
However, handball can be played recreationally or competitively, with
many avenues for high level competition. The United States Handball
Association and local organizations host many local, state, regional andnational tournaments. There are a variety of formats including one-
wall, three-wall and four-wall handball. Divisions include a wide variety
of age-group (including juniors) and skill level categories. Because the
same fundamental positioning and hitting skills are used in all forms of
handball, after learning to play one-wall handball, it is not difficult to
learn the more popular four-wall game. Courts for four-wall handball
are available in nearly every college, university, YMCA, and court club
in the country.
¾ HANDBALL is BILATERAL. Unlike other individual court sports,
handball develops both sides of the body. The striking skill
development of the non-dominant arm is another aspect which can
make handball beneficial and challenging.
¾ HANDBALL is EASY TO TEACH. Handball can be played with any kind
of bouncing ball on practically any kind of wall. The United States
Handball Association promotes “any ball, any wall” in teaching.
Teachers are encouraged to use any available equipment and space.
Handball can be taught as a unit for the entire class in the gymnasiumor used as a station activity in one section of the gym. There is no
need for regulation sized courts in a gymnasium. Cones and floor tape
work well to mark playing spaces and boundaries.

7/27/2019 SecondaryTeachingGuiderevision-239
http://slidepdf.com/reader/full/secondaryteachingguiderevision-239 5/58
¾ HANDBALL is LOW COST. The United States Handball Association
provides free lesson plans, free in-service training for teachers, and
some free equipment. Many lead-ups and progressions can be done
with common physical education equipment, such as playground balls or
tennis balls.
¾ HANDBALL is FUN. Teachers will not have to motivate the students
to participate because it is fun and challenging. In fact, once students
learn how to play handball, teachers have a difficult time keeping
them from playing.
Teaching Notes
This teaching guide was written with two important concepts in mind.
• Maximum Participation9 There is very little waiting or “down” time.
9 No youngster is ever eliminated from a game or activity.
9 Every youngster gets equal opportunity to play and experience
success.
9 Youngsters do not wait in line to participate. All students are
active.• Maximum Success
9 Developmental levels of learners are recognized.
9 Progressions are taught.
9 Teachers help youngsters experience success.9 The focus is on the positive.
General Comments For Teachers
• Although there is a "regulation" court size and "official rules,"modifications in court dimensions, equipment, and playing rules can be
made to suit your specific situation.
• Hopefully, your teaching area will allow for several courts to be
marked off. However, if you can only find room for one court, you
7/27/2019 SecondaryTeachingGuiderevision-239
http://slidepdf.com/reader/full/secondaryteachingguiderevision-239 6/58
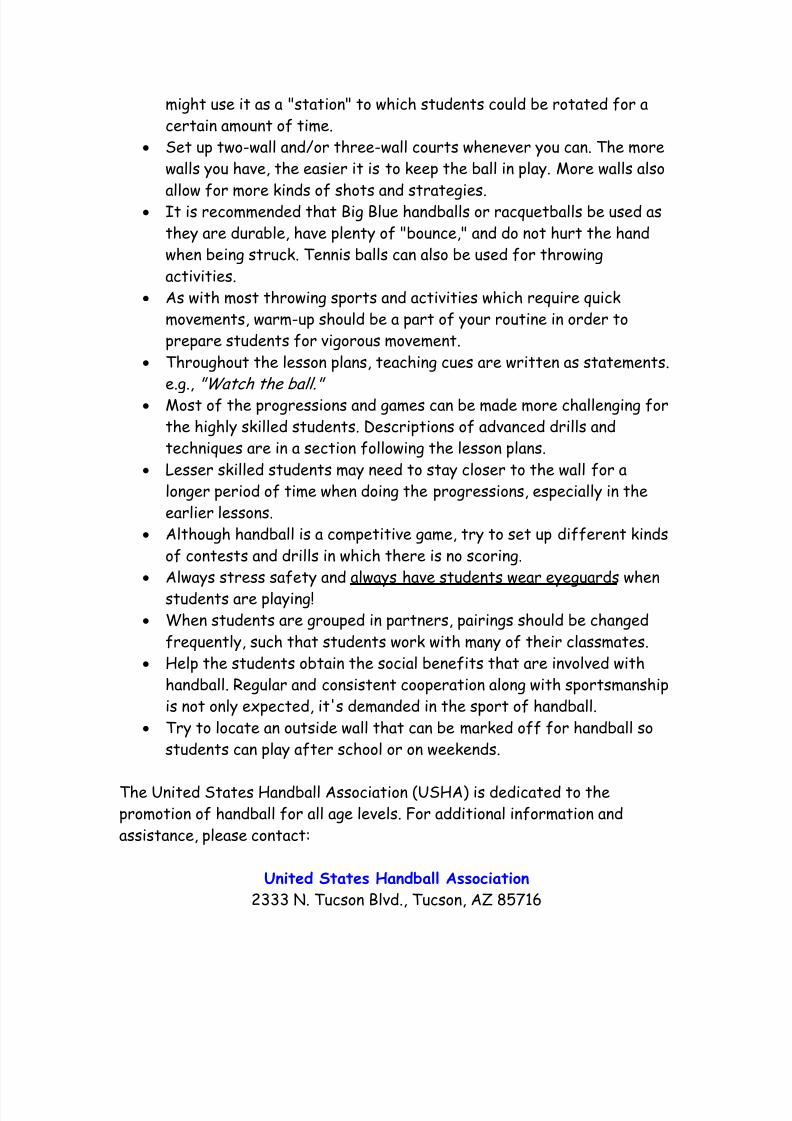
might use it as a "station" to which students could be rotated for a
certain amount of time.
• Set up two-wall and/or three-wall courts whenever you can. The more
walls you have, the easier it is to keep the ball in play. More walls also
allow for more kinds of shots and strategies.• It is recommended that Big Blue handballs or racquetballs be used as
they are durable, have plenty of "bounce," and do not hurt the hand
when being struck. Tennis balls can also be used for throwing
activities.
• As with most throwing sports and activities which require quick
movements, warm-up should be a part of your routine in order to
prepare students for vigorous movement.
• Throughout the lesson plans, teaching cues are written as statements.
e.g., "Watch the ball." • Most of the progressions and games can be made more challenging for
the highly skilled students. Descriptions of advanced drills and
techniques are in a section following the lesson plans.
• Lesser skilled students may need to stay closer to the wall for a
longer period of time when doing the progressions, especially in the
earlier lessons.
• Although handball is a competitive game, try to set up different kinds
of contests and drills in which there is no scoring.
• Always stress safety and always have students wear eyeguards when
students are playing!
• When students are grouped in partners, pairings should be changed
frequently, such that students work with many of their classmates.
• Help the students obtain the social benefits that are involved with
handball. Regular and consistent cooperation along with sportsmanship
is not only expected, it's demanded in the sport of handball.
• Try to locate an outside wall that can be marked off for handball so
students can play after school or on weekends.
The United States Handball Association (USHA) is dedicated to thepromotion of handball for all age levels. For additional information and
assistance, please contact:
United States Handball Association
2333 N. Tucson Blvd., Tucson, AZ 85716

7/27/2019 SecondaryTeachingGuiderevision-239
http://slidepdf.com/reader/full/secondaryteachingguiderevision-239 7/58
Telephone: 1-(520)-795-0434
E-mail: [email protected]
WEB: http://www.ushandball.org
Note: There is a special section on the website for teachers!
The following lesson plans for teaching handball in middle and secondary
schools have been written for grades 6-12. Court size and distances (from
the wall when hitting a ball) can easily be adjusted to match developmental
levels of learners.
7/27/2019 SecondaryTeachingGuiderevision-239
http://slidepdf.com/reader/full/secondaryteachingguiderevision-239 8/58
National Association for Sport and Physical Education
(NASPE) Standards
Standard 1: Demonstrates competency in motor skills and movement
patterns needed to perform a variety of physical
activities.
Standard 2: Demonstrates understanding of movement concepts,
principles, strategies, and tactics as they apply to the
learning and performance of physical activities.
Standard 3: Participates regularly in physical activity.
Standard 4: Achieves and maintains a health-enhancing level of
fitness.Standard 5: Exhibits responsible personal and social behavior that
respects self and others in physical activity settings.
Standard 6: Values physical activity for health, enjoyment, challenge,
self-expression, and/or social interaction.
*National Association for Sport and Physical Education. (2004). Moving into the future:
National Standards for Physical Education (2nd ed.). Reston, VA: Author.
7/27/2019 SecondaryTeachingGuiderevision-239
http://slidepdf.com/reader/full/secondaryteachingguiderevision-239 9/58
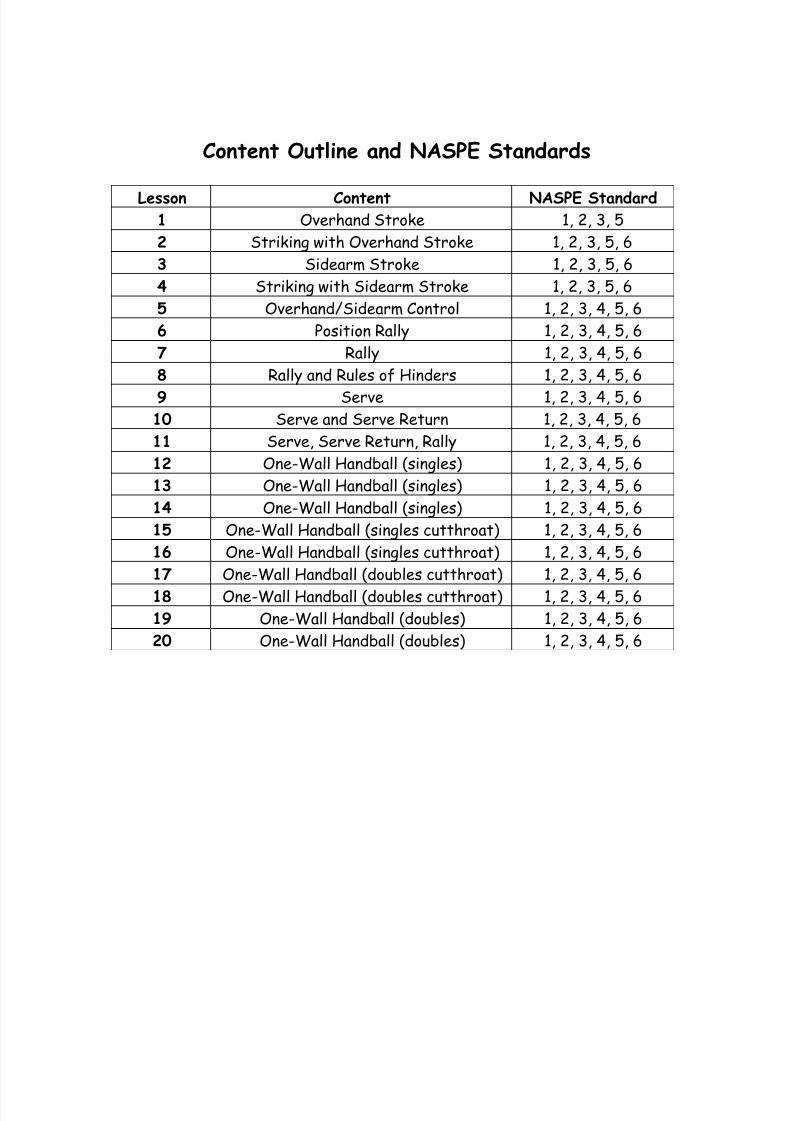
Content Outline and NASPE Standards
Lesson Content NASPE Standard1 Overhand Stroke 1, 2, 3, 5
2 Striking with Overhand Stroke 1, 2, 3, 5, 6
3 Sidearm Stroke 1, 2, 3, 5, 6
4 Striking with Sidearm Stroke 1, 2, 3, 5, 6
5 Overhand/Sidearm Control 1, 2, 3, 4, 5, 6
6 Position Rally 1, 2, 3, 4, 5, 6
7 Rally 1, 2, 3, 4, 5, 6
8 Rally and Rules of Hinders 1, 2, 3, 4, 5, 6
9 Serve 1, 2, 3, 4, 5, 610 Serve and Serve Return 1, 2, 3, 4, 5, 6
11 Serve, Serve Return, Rally 1, 2, 3, 4, 5, 6
12 One-Wall Handball (singles) 1, 2, 3, 4, 5, 6
13 One-Wall Handball (singles) 1, 2, 3, 4, 5, 6
14 One-Wall Handball (singles) 1, 2, 3, 4, 5, 6
15 One-Wall Handball (singles cutthroat) 1, 2, 3, 4, 5, 6
16 One-Wall Handball (singles cutthroat) 1, 2, 3, 4, 5, 6
17 One-Wall Handball (doubles cutthroat) 1, 2, 3, 4, 5, 6
18 One-Wall Handball (doubles cutthroat) 1, 2, 3, 4, 5, 6
19 One-Wall Handball (doubles) 1, 2, 3, 4, 5, 6
20 One-Wall Handball (doubles) 1, 2, 3, 4, 5, 6

7/27/2019 SecondaryTeachingGuiderevision-239
http://slidepdf.com/reader/full/secondaryteachingguiderevision-239 10/58
"The game of fives (handball) is what no one despises who has ever played it.
It is the
finest exercise for the body and the best relaxation for the mind. He who takes to playing
at fives is twice young." William Hazlitt, 1819
Action shot of FRED LEWIS hitting against VERN ROBERTS.
These two players have won many
4-Wall and 3-Wall National
Championships.
7/27/2019 SecondaryTeachingGuiderevision-239
http://slidepdf.com/reader/full/secondaryteachingguiderevision-239 11/58
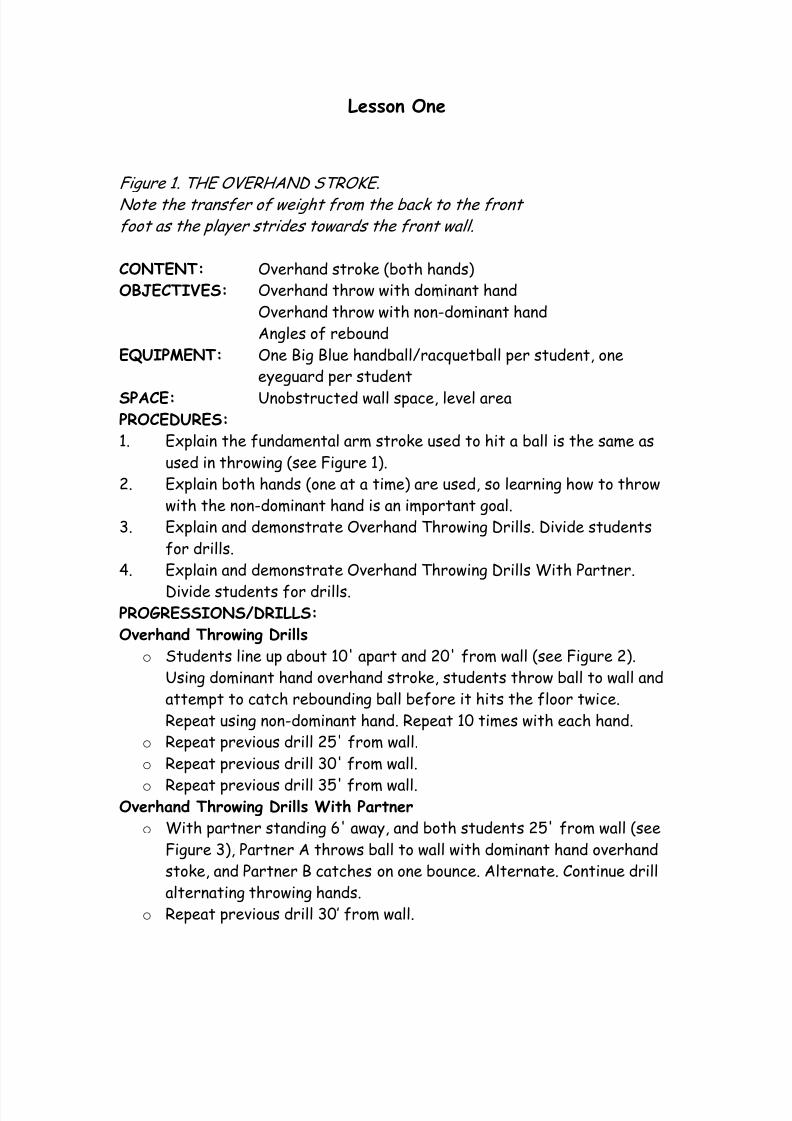
Lesson One
Figure 1. THE OVERHAND STROKE.
Note the transfer of weight from the back to the front
foot as the player strides towards the front wall.
CONTENT: Overhand stroke (both hands)
OBJECTIVES: Overhand throw with dominant hand
Overhand throw with non-dominant hand
Angles of rebound
EQUIPMENT: One Big Blue handball/racquetball per student, oneeyeguard per student
SPACE: Unobstructed wall space, level area PROCEDURES:
1. Explain the fundamental arm stroke used to hit a ball is the same as
used in throwing (see Figure 1).
2. Explain both hands (one at a time) are used, so learning how to throw
with the non-dominant hand is an important goal.
3. Explain and demonstrate Overhand Throwing Drills. Divide students
for drills.
4. Explain and demonstrate Overhand Throwing Drills With Partner.
Divide students for drills.PROGRESSIONS/DRILLS:
Overhand Throwing Drills
o Students line up about 10' apart and 20' from wall (see Figure 2).
Using dominant hand overhand stroke, students throw ball to wall and
attempt to catch rebounding ball before it hits the floor twice.
Repeat using non-dominant hand. Repeat 10 times with each hand.
o Repeat previous drill 25' from wall.
o Repeat previous drill 30' from wall.
o Repeat previous drill 35' from wall.Overhand Throwing Drills With Partner
o With partner standing 6' away, and both students 25' from wall (see
Figure 3), Partner A throws ball to wall with dominant hand overhand
stoke, and Partner B catches on one bounce. Alternate. Continue drill
alternating throwing hands.
o Repeat previous drill 30’ from wall.

7/27/2019 SecondaryTeachingGuiderevision-239
http://slidepdf.com/reader/full/secondaryteachingguiderevision-239 12/58
o Repeat previous drill 35’ from wall.
COMMENTS:
¾ Stress safety. Always have students wear eyeguards.
¾ When students throw ball to wall, the ball should rebound off
the floor in front of the point from which the throw occurred."Attempt to imitate your strong hand when throwing with your
other hand." Look for reciprocation. “Relax your arm and allow it
to whip." “Rotate your shoulders and hips as you stride toward
the wall."
¾ Students should not throw as hard as they can. Work on
control. Most throws with the non-dominant hand will not be
well controlled so students may run out of their areas when
making the retrieves. "Make sure no one is in the path of your
throw."
NASPE STANDARDS: 1, 2, 3, 5

7/27/2019 SecondaryTeachingGuiderevision-239
http://slidepdf.com/reader/full/secondaryteachingguiderevision-239 13/58
Lesson Two
CONTENT: Striking with overhand stroke (both hands)
OBJECTIVES: Overhand hitting stroke with dominant hand
Overhand hitting stroke with non-dominant handCatch a rebounding ball before it hits the floor twice
Figure 4.. The hand should be cupped
with the fingers together when contact is
made with the ball. Also, make sure to
keep the wrist relaxed..
Figure 5. Proper point of contact
vhen hitting the ball with the
overhand stroke. Note that the elbow is bent.
EQUIPMENT: One Big Blue handball/racquetball per student, one
eyeguard per student
SPACE: Unobstructed wall space, level area
PROCEDURES:
1. Explain the fundamental arm stroke used to hit a ball is the same as
used in throwing.
2. Explain the hand should be in a cupped position and the wrist relaxedwhen contacting the ball (see Figure 4).
3. Explain and demonstrate Overhand Hitting Drills. Divide students for
drills.
4. Explain and demonstrate Overhand Hitting Drills With Partner. Divide
students for drills.
PROGRESSIONS/DRILLS:
Overhand Hitting Drills
o Students line up about 10' apart and 20' from wall. Using dominant
hand overhand stroke, students throw ball to wall and attempt tocatch rebounding ball before it hits the floor twice. Students should
attempt to catch the ball in the position they would be in to hit the
ball (see Figure 5).
o Repeat using non-dominant hand. Repeat 5 times with each hand.
o Repeat previous drill, but instead of catching the ball, students hit
the ball to wall with overhand stroke and attempt to catch the
7/27/2019 SecondaryTeachingGuiderevision-239
http://slidepdf.com/reader/full/secondaryteachingguiderevision-239 14/58
rebounding ball before it hits the floor twice. If students are having
difficulty, they can also toss the ball high to themselves, and move
under the ball to hit the ball to the wall.
o Repeat previous two drills 30' from wall.
o Repeat previous drill 35' from wall.Overhand Hitting Drills With Partner
o With partner standing 6' away, and both students 25' from wall,
Partner A throws ball to wall with dominant hand and Partner B hits
the ball back to the wall. Parmer A attempts to catch the ball before
it hits the floor twice. Alternate. Continue drill alternating hitting
hands.
o Repeat previous drill 30' from wall.
o Repeat previous drill 35' from wall.
COMMENTS:¾ Stress safety. Always have students wear eyeguards.
¾ When students throw ball to the wall, the ball should rebound
high enough so the overhand hitting stroke can be used.
Emphasize importance of good positioning. Students should get
to a "set" position before striding towards the wall as they hit
the ball. The ball should be stroked, not batted. "Keep your
hand cupped and wrist relaxed as you hit the ball." "Roll the ball
off the fingers as you follow-through." "Use the same arm
stroke to hit the ball that you used when throwing." "Attempt
to imitate your strong hand when hitting with your weak hand."
¾ Students should not throw or hit as hard as they can. Work on
control. Most throws and hits with the non-dominant hand will
not be well controlled, so students may run out of their areas
when making the retrieves. "Make sure no one is in front of you
before you begin each drill."
NASPE STANDARDS: 1, 2, 3, 5, 6

7/27/2019 SecondaryTeachingGuiderevision-239
http://slidepdf.com/reader/full/secondaryteachingguiderevision-239 15/58
Lesson Three
Figure 6. THE SIDEARM STROKE. Note how the
elbow is bent and the wrist curled on the backswing.Lead with the elbow and contact the ball on a line
with the center of the body with the arm nearly fully
extended.
THE LOW SIDEARM STROKE. This stroke is
identical to the sidearm stroke, except that contact
with the ball is much closer to the floor. The knees
and waist must be bent more in order to assume this
lower position. This is the stroke used most often
when attempting the low offensive kill shot that will be described in the section, "Advanced Techniques"
CONTENT: Sidearm stoke (both hands)
OBJECTIVES: Sidearm throwing stroke with dominant hand
Sidearm throwing stroke with non-dominant hand
EQUIPMENT: One Big Blue handball/racquetball per student, one
eyeguard per student
SPACE: Unobstructed wall space, level area
PROCEDURES:1. Explain the fundamental techniques of the sidearm stoke (see Figure
6).
2. Explain the sidearm stoke is used on balls that are hit from below the
height of the shoulders.
3. Explain and demonstrate Sidearm Throwing Drills. Divide students for
drills.
4. Explain and demonstrate Sidearm Throwing Drills With Partner.
Divide students for drills.
PROGRESSIONS/DRILLS:o Repeat all of the drills in Lesson One, except have students use
sidearm throwing stroke instead of overhand strokes.
COMMENTS:
¾ Stress safety. Always have students wear eyeguards.
¾ Students should work in pairs, even when only one of them is
doing a specific drill. "Make sure no one is in the path of your
7/27/2019 SecondaryTeachingGuiderevision-239
http://slidepdf.com/reader/full/secondaryteachingguiderevision-239 16/58
throw." One student should stand about 20' behind the partner
who is doing the drill in order to retrieve balls that get by the
hitting partner. The retriever should bounce the ball back to
the partner. The retriever should be attentive and move to get
in correct position to catch any ball that gets by the hittingpartner. This is excellent practice for positioning.
¾ Students should not throw as hard as they can. Most throws
with the sidearm stroke will not be as controlled as with the
overhand stroke, especially with the non-dominant hand. "Start
with your body in a slight crouch and with your left shoulder
facing the wall when throwing with your right hand, and your
right shoulder facing the wall when throwing with your left
hand.” "Bend your elbow and draw your arm back, keeping your
elbow higher than your hand ." "Rotate your shoulders and hips as you stride toward the wall." "Lower your shoulder and lead
with your elbow." "Relax your arm and allow it to whip."
¾ When students throw ball to the wall, the ball should rebound
on floor in front of the point from which the throw occurred,
but if the throw is too hard or too high, students should
attempt to catch ball on the fly (before it hits the floor).
NASPE STANDARDS: 1, 2, 3, 5, 6
7/27/2019 SecondaryTeachingGuiderevision-239
http://slidepdf.com/reader/full/secondaryteachingguiderevision-239 17/58
Lesson Four
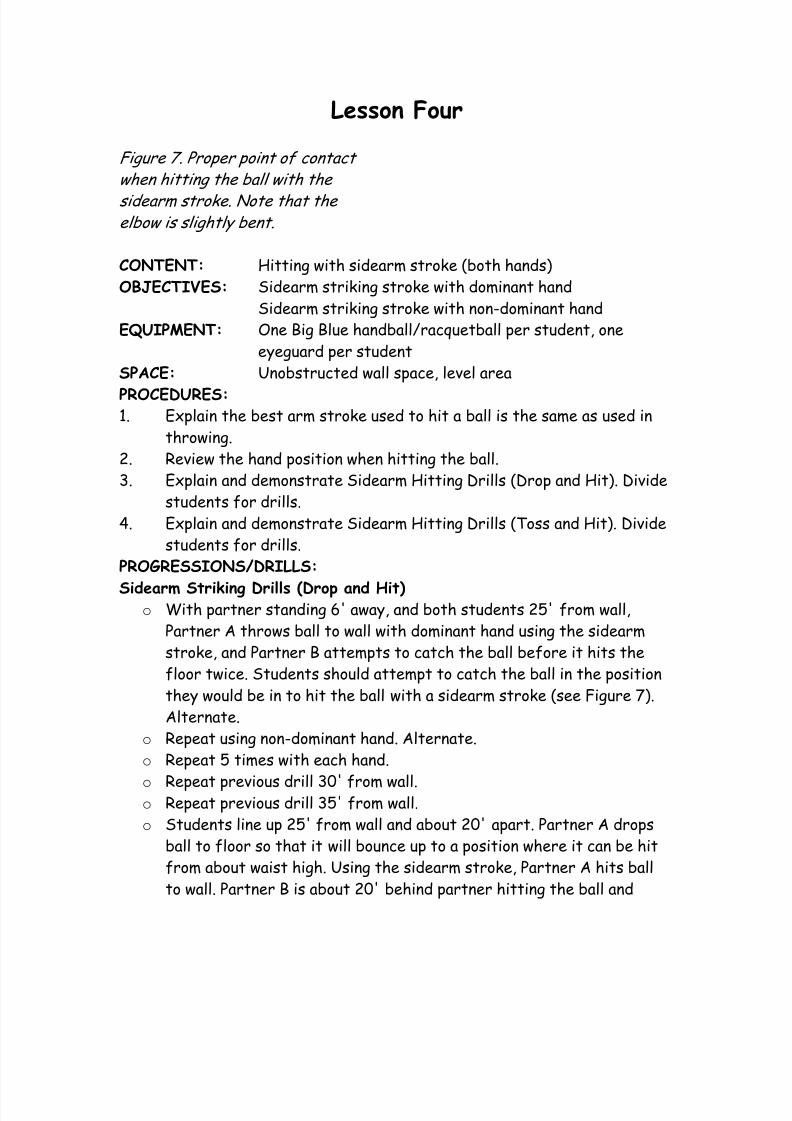
Figure 7. Proper point of contact
when hitting the ball with the
sidearm stroke. Note that the elbow is slightly bent.
CONTENT: Hitting with sidearm stroke (both hands)
OBJECTIVES: Sidearm striking stroke with dominant hand
Sidearm striking stroke with non-dominant hand
EQUIPMENT: One Big Blue handball/racquetball per student, one
eyeguard per student
SPACE: Unobstructed wall space, level area
PROCEDURES:1. Explain the best arm stroke used to hit a ball is the same as used in
throwing.
2. Review the hand position when hitting the ball.
3. Explain and demonstrate Sidearm Hitting Drills (Drop and Hit). Divide
students for drills.
4. Explain and demonstrate Sidearm Hitting Drills (Toss and Hit). Divide
students for drills.
PROGRESSIONS/DRILLS:
Sidearm Striking Drills (Drop and Hit)o With partner standing 6' away, and both students 25' from wall,
Partner A throws ball to wall with dominant hand using the sidearm
stroke, and Partner B attempts to catch the ball before it hits the
floor twice. Students should attempt to catch the ball in the position
they would be in to hit the ball with a sidearm stroke (see Figure 7).
Alternate.
o Repeat using non-dominant hand. Alternate.
o Repeat 5 times with each hand.
o Repeat previous drill 30' from wall.o Repeat previous drill 35' from wall.
o Students line up 25' from wall and about 20' apart. Partner A drops
ball to floor so that it will bounce up to a position where it can be hit
from about waist high. Using the sidearm stroke, Partner A hits ball
to wall. Partner B is about 20' behind partner hitting the ball and
7/27/2019 SecondaryTeachingGuiderevision-239
http://slidepdf.com/reader/full/secondaryteachingguiderevision-239 18/58
attempts to catch the rebounding ball before it hits the floor twice.
Alternate hands 5 times each.
o Partners alternate and repeat.
o Repeat previous drill 30' from wall.
o Repeat previous drill 35' from wall.Sidearm Striking Drills (Toss and Hit)
o With partners standing 6' apart, and 25' from wall, Partner A tosses
ball (use underhand toss) to wall with dominant hand, and Partner B
hits the ball back to the wall with a sidearm stroke. Partner A
attempts to catch the ball before it hits the floor twice. Alternate.
o Continue drill alternating hitting hands.
o Repeat previous drill 30' from wall.
o Repeat previous drill 35' from wall.
COMMENTS:¾ Stress safety. Always have students wear eyeguards.
¾ When students toss ball to the wall, the ball should rebound and
drop low enough so the sidearm hitting stroke can be used.
Emphasize positioning. Students should get to a "set" position
before striding toward the wall as they hit the ball. The ball
should be stroked, not batted. Some students will attempt to
use their hands as a racquet face and make contact with a firm,
flat hand. The more relaxed the wrist and hand, the more
success students will experience. "Let the ball drop to a waist
high or lower position before you hit." "Keep your hand cupped
and wrist relaxed as you hit the ball." "Roll the ball off the
fingers as you follow-through." "Use the same arm stroke to hit
the ball that you used when throwing."
¾ Students should not throw or hit as hard as they can. Work on
control. Most throws and hits will not be well controlled, so
students may run out of their areas when making the retrieves.
For less confusion, separate the groups further apart, or have
alternating groups perform drill, and the alternate groups not
doing drills can be additional retrievers. "Make sure no one is in front of you before you begin each drill." Encourage retrievers
to go after ball as quickly as possible. Remind students to
bounce the ball to their partners when returning the ball to
them.

7/27/2019 SecondaryTeachingGuiderevision-239
http://slidepdf.com/reader/full/secondaryteachingguiderevision-239 19/58
NASPE STANDARDS: 1, 2, 3, 5, 6
7/27/2019 SecondaryTeachingGuiderevision-239
http://slidepdf.com/reader/full/secondaryteachingguiderevision-239 20/58
Lesson Five
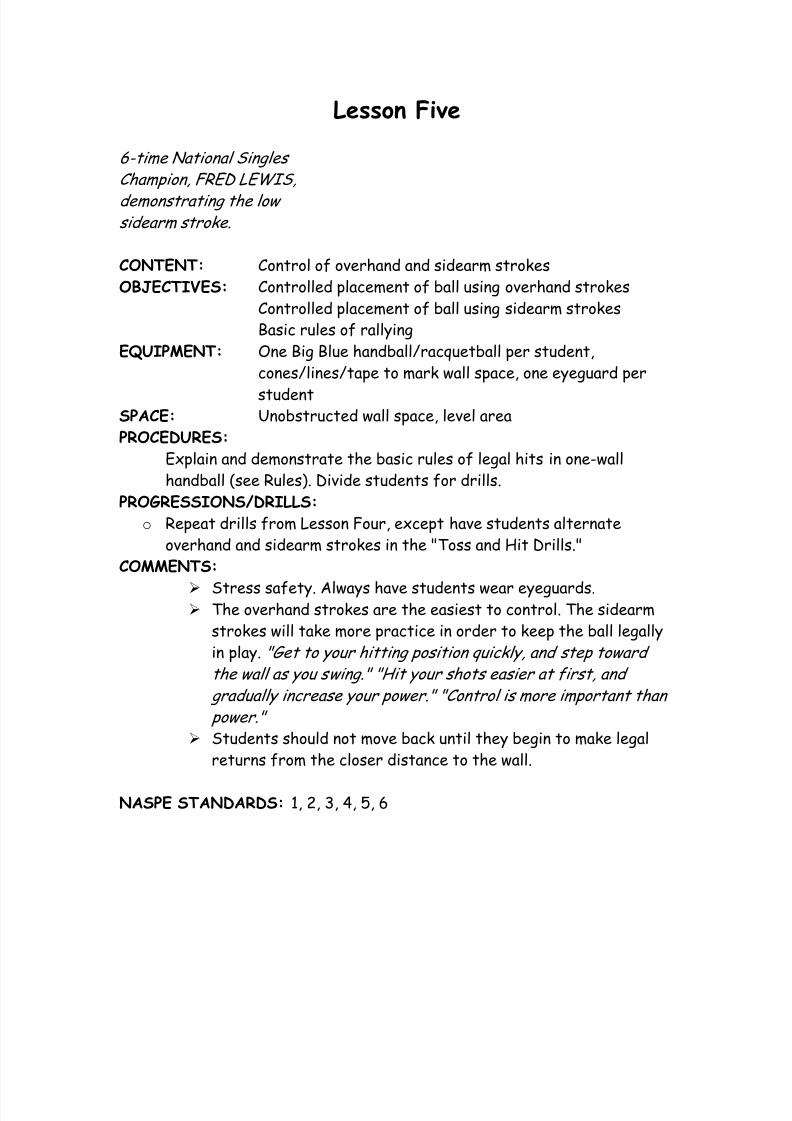
6-time National Singles
Champion, FRED LEWIS,
demonstrating the low sidearm stroke.
CONTENT: Control of overhand and sidearm strokes
OBJECTIVES: Controlled placement of ball using overhand strokes
Controlled placement of ball using sidearm strokesBasic rules of rallying
EQUIPMENT: One Big Blue handball/racquetball per student,
cones/lines/tape to mark wall space, one eyeguard per
student SPACE: Unobstructed wall space, level area
PROCEDURES:
Explain and demonstrate the basic rules of legal hits in one-wall
handball (see Rules). Divide students for drills.
PROGRESSIONS/DRILLS:
o Repeat drills from Lesson Four, except have students alternate
overhand and sidearm strokes in the "Toss and Hit Drills."
COMMENTS:
¾ Stress safety. Always have students wear eyeguards.¾ The overhand strokes are the easiest to control. The sidearm
strokes will take more practice in order to keep the ball legally
in play. "Get to your hitting position quickly, and step toward
the wall as you swing." "Hit your shots easier at first, and
gradually increase your power." "Control is more important than
power."
¾ Students should not move back until they begin to make legal
returns from the closer distance to the wall.
NASPE STANDARDS: 1, 2, 3, 4, 5, 6

7/27/2019 SecondaryTeachingGuiderevision-239
http://slidepdf.com/reader/full/secondaryteachingguiderevision-239 21/58
Lesson Six
Figure 8. THE UNDERHAND
STROKE This is the best stroke to use when the ball must be
contacted close to the body. The
forearm and fingers point towards
the floor when contact is made.
This is also a good stroke to use
vhen attempting to hit a ball that
is very close to the floor Again,
note the transfer of veight from
the back foot to the front when hitting the ball.
CONTENT: Warm-up drills and position rallies
OBJECTIVES: Control shots while rallying with a partner
Strike with the underhand stroke when necessary
EQUIPMENT: One Big Blue handball/racquetball per student,
cones/lines/tape to mark wall space, one eyeguard per
student
SPACE: Unobstructed wall space, level area PROCEDURES:
1. Explain and demonstrate Warm-up Drills. Divide students for drills.
2. Explain that the underhand stroke can be used to hit a ball that is low
and too close to the body to use the sidearm stroke.
3. Demonstrate the underhand stroke (see Figure 8).
4. Explain and demonstrate Position Rally Drills (see Figure 9). Divide
students for drill.
PROGRESSIONS/DRILLS:
Warm-up Drillso Students line up about 10' apart and 20' from wall. Alternating
overhand and sidearm strokes, students throw ball to wall and catch
rebounding ball before it hits the floor twice. Repeat 5 times with
each hand.
o Repeat previous drill 25' from wall.
o Repeat previous drill 30' from wall.

7/27/2019 SecondaryTeachingGuiderevision-239
http://slidepdf.com/reader/full/secondaryteachingguiderevision-239 22/58
o From 20' away from wall, students drop ball to the floor and hit ball
to the wall using the sidearm stroke and catch rebounding ball. Repeat
5 times with each hand.
o Repeat previous drill 25' from wall.
o Repeat previous drill 30' from wall.
o From 20' away from the wall, students toss ball (use underhand toss
with dominant hand) to wall and hit back to the wall. Alternate
overhand and sidearm strokes. Repeat 5 times with each hand.
o Repeat previous drill 25' from wall.
o Repeat previous drill 30' from wall.
Position Rally Drills
o Floor of court is divided in half with imaginary line from the center of
the wall back to the center of the back line. Partners stand 20' from
wall. Partner A stands in left half of the court and Partner B stands inright half. Partner A tosses ball to wall so that the ball will rebound to
Partner B. Partner B hits ball to wall and attempts to make ball
rebound to Partner A, but if the ball rebounds back to Partner B's
half of court, Partner B should hit it again. Partners attempt to rally,
but each partner must stay in their half of the court. Whichever half
of the court the ball rebounds to, the partner in that area makes the
return. When the rally is over, Partner B tosses the ball to the wall so
that it will rebound to Partner A, who hits the ball back to the wall to
begin another rally. Continue drill for a set period of time. Partners
change sides or rotate with two other students and continue drill for
a set period of time.
o Repeat previous drills 25' from wall.
o Repeat previous drills 30' from wall.
Figure 9. Position Rally. Partners
start 20' from wall and gradually
back up. Rotate vith retrievers (C,
D) alter doing drill from each
position.
COMMENTS:
¾ Stress safety. Always have students wear eyeguards.
¾ The "Warm-up Drills" should be done prior to any rallying and/or
games. In the "Position Rally Drills," students should attempt to make
7/27/2019 SecondaryTeachingGuiderevision-239
http://slidepdf.com/reader/full/secondaryteachingguiderevision-239 23/58
legal returns (hit the ball before it hits the floor twice). Often,
however, this is impossible, and students should attempt their shots
even if the ball has bounced more than once on the floor.
¾ "Remember, control is more important than power."
¾ Encourage students to use their non-dominant hands. Some of the
¾ position drills could be NON-DOMINANT HANDS ONLY. To cut down
on "chasing the ball," do the "Position Rally Drills" with four students.
Two of the students should be positioned behind the back line to
serve as retrievers. Remind retrievers to practice their movement and
position as the other players rally. Rotate positions every 2 or 3
minutes.
NASPE STANDARDS: 1, 2, 3, 4, 5, 6
7/27/2019 SecondaryTeachingGuiderevision-239
http://slidepdf.com/reader/full/secondaryteachingguiderevision-239 24/58

7/27/2019 SecondaryTeachingGuiderevision-239
http://slidepdf.com/reader/full/secondaryteachingguiderevision-239 25/58
Rally Drills (cooperative)
o Partners stand 6' apart and about 20' away from wall. Partner A
tosses ball to the wall so that it will rebound to Partner B, who hits
the ball back to the wall before it bounces twice on the floor.
Partners alternate hitting as long as they are making legal returns.When a shot is not legally returned or when interference occurs,
players should stop play, return to their starting positions and start
another rally. Two other students position themselves behind the end
line to be retrievers. Alternate with retrievers every 2 or 3 minutes.
o Repeat previous drill with partners starting 30' from wall. Alternate
with retrievers.
o Repeat previous drill, but rotate positions every 2 minutes.
COMMENTS:
¾ Stress safety. Make sure students are wearing eyeguards.¾ If a partner throws or hits the ball to the wall, and it rebounds
back toward him/herself, he/she should quickly move out of the
way so he/she does not interfere with his/her partner's hit.
Often, players will be unable to avoid accidental interference,
but they should always make their best attempt. Make sure
students are not directly in front of a player who is hitting the
ball. Players will get hit with the ball occasionally. Make certain
that students are protecting their faces when looking back at
partners hitting from behind them.
¾ Emphasize cooperative theme. "You want your partner to be
successful." "Count how many legal hits in a row you and your
partner can make."
NASPE STANDARDS: 1, 2, 3, 4, 5, 6

7/27/2019 SecondaryTeachingGuiderevision-239
http://slidepdf.com/reader/full/secondaryteachingguiderevision-239 26/58
Lesson Eight
Action shot of former National Singles and National Doubles
Champion, STUFFY SINGER. The
spectators are behind a glass side
wall.
CONTENT: The rally and rules of hinders
OBJECTIVES: Rally with a partner
Rules of interference
Safety proceduresPositioning when opponent is hitting the ball
"Hinder" (interference) rules
EQUIPMENT: One Big Blue handball/racquetball per student,
cones/lines/tape to mark wall space, one eyeguard per
student
SPACE: Unobstructed wall space, level area
PROCEDURES:
1. Warm-up drills (see Lesson Six).
2. Review safety procedures from Lesson Seven.3. Review proper positioning when partner is hitting the ball and how to
protect face when looking back.
4. Explain "Hinder" rules (see Rules).
5. Divide students for Cooperative Rally Drills (see Lesson Seven).
COMMENTS:
¾ Stress safety. Make sure students are wearing eyeguards. Make
certain that students are "protecting their faces" when looking back
at partner hitting from behind them. "Watch your partner hit the ball,
but protect your face."
¾ Keep emphasizing the importance of moving quickly into a good hitting
position. "You will have better control of your shots if you get to a set
position before attempting to hit the ball." Have students count how
many times in a row they make legal hits.
¾ “Remember, control is more important than power." Have the students
do some rallies using the non-dominant hands only.

7/27/2019 SecondaryTeachingGuiderevision-239
http://slidepdf.com/reader/full/secondaryteachingguiderevision-239 27/58
NASPE STANDARDS: 1, 2, 3, 4, 5, 6

7/27/2019 SecondaryTeachingGuiderevision-239
http://slidepdf.com/reader/full/secondaryteachingguiderevision-239 28/58
Lesson Nine
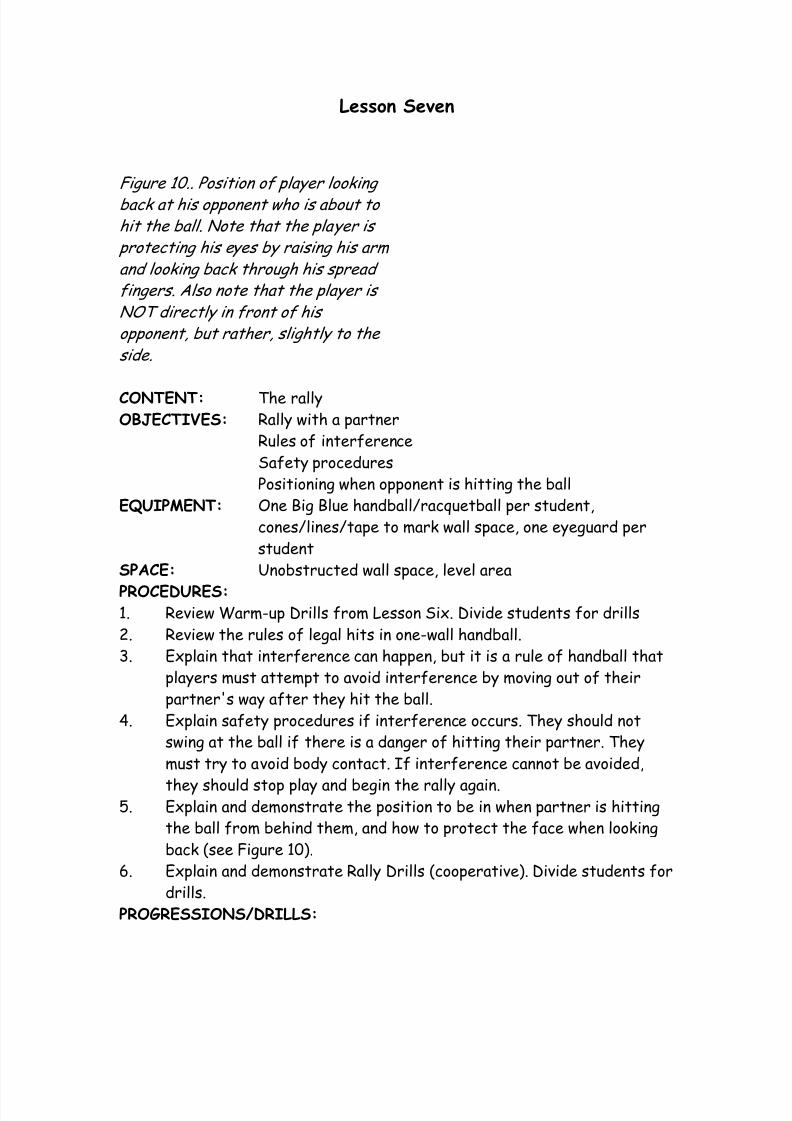
Figure 11. Position of
server and receiver for
serving drills.
Figure 12. Rotation method
for Serving Drills
CONTENT: The serve
OBJECTIVES: Rules of serving
Legal servesProper positioning after serving
Catch the rebounding serve before it hits the floor twiceEQUIPMENT: One Big Blue handball/racquetball per student,
cones/lines/tape to mark wall space, one eyeguard per
student
SPACE: Unobstructed wall space, level area
PROCEDURES:
1. Warm-up Drills (see Lesson Six).
2. Explain and demonstrate a legal serve (see Rules).
3. Demonstrate different ways (overhand, sidearm) to hit legal serves.
4. Demonstrate the different kinds of "fault" and "out" serves andexplain the penalties (see Rules).
5. Explain and demonstrate what the server should do after making
service attempt:
a) Back up a couple of steps after rebounding serve passes the
short line.
b) With face protected, watch the receiver hit (or catch) theball.
c) Do not stand directly in front of the receiver when he/she hits
(or catches) the ball.6. Explain Serving Drills. Divide students for drills.
PROGRESSIONS/DRILLS:
Serving Drills
o Partner A stands in service zone and serves the ball with his dominant
hand. Repeat 10 times. Alternate using the sidearm and overhand
strokes. Partner B (receiver of service) stands a few feet behind back

7/27/2019 SecondaryTeachingGuiderevision-239
http://slidepdf.com/reader/full/secondaryteachingguiderevision-239 29/58
line halfway between the side lines (see Figure 11). Receiver catches
rebounding serve before it hits the floor twice. After catching ball,
receiver bounces ball back to the server and tells server if the serve
was "good" (legal), a "fault", or an "out." Partners alternate and repeat
drill.o Repeat previous drill using non-dominant hand to serve.
COMMENTS:
¾ Stress safety. Always have students wear eyeguards.
¾ Although serving in a competitive game would probably not be
done with the non-dominant hand, this is a good drill because
students will experience more overall success with their non-
dominant hand. Service drills can easily be done by more than 2
students by the "rotation" method (see Figure 12). Stress
SAFETY. Remember, what the server does after serving is justas important as the serve itself. "Protect your face when you
look back." "Look back and make sure the receiver is ‘ready’
before you serve." "Try to hit legal serves." “Receivers, try to
catch the ball in a ‘hitting position" (see Figures 5 and 7).
¾ Watch for good fundamental strokes by the server. If the
students seem to be experiencing a high rate of success, a more
challenging activity would be the Cooperative Rally Drill (see
Lesson Seven) for the last few minutes of the class.
NASPE STANDARDS: 1, 2, 3, 4, 5, 6
7/27/2019 SecondaryTeachingGuiderevision-239
http://slidepdf.com/reader/full/secondaryteachingguiderevision-239 30/58
Lesson Ten
CONTENT: Serve and serve return
OBJECTIVES: Rules of service return
Legal service returnCatch the rebound of the service return (server)
EQUIPMENT: One Big Blue handball/racquetball per student,
cones/lines/tape to mark wall space, one eyeguard per
student
SPACE: Unobstructed wall space, level area
PROCEDURES:
1. Warm-up Drills (see Lesson Six).
2. Review the rules of serving and what the server should do after
serving.3. Explain the rules of service return (see Rules).
4. Explain the Serve and Serve Return Drill. Divide students for drill.
PROGRESSIONS/DRILLS:
Serve and Serve Return Drill
o Student stands in service zone and serves the ball. Partner (receiver
of service) stands a few feet behind back line, halfway between the
side lines (see Figure 11). Receiver hits rebounding serve before it
hits the floor twice, attempting to make a legal return. If the
receiver makes a legal return, the server attempts to catch therebounding ball before it hits the floor twice.
o Repeat previous drill 10 times.
o Alternate partners (or rotate positions) and repeat previous drill.
COMMENTS:
¾ Stress safety. Always have students wear eyeguards.
¾ "Protect your face when you look back." "Look back and make
sure the receiver is 'ready' before you serve." "Try to hit legal
serves."
¾ The service return is the key shot in the rally. It's easy toserve, but difficult to return service legally. "Receivers, move
quickly to good hitting position so you can control your returns."
¾ The "Serve and Serve Return Drill" is a good practice drill from
beginning players to tournament competitors.
NASPE STANDARDS: 1, 2, 3, 4, 5, 6
7/27/2019 SecondaryTeachingGuiderevision-239
http://slidepdf.com/reader/full/secondaryteachingguiderevision-239 31/58
Lesson Eleven
CONTENT: Serve, serve return, and rally
OBJECTIVES: Sequences of previously learned skills in used in a gamesituation
EQUIPMENT: One Big Blue handball/racquetball per student,
cones/lines/tape to mark wall space, one eyeguard per
student
SPACE: Unobstructed wall space, level area
PROCEDURES:
1. Warm-up Drills (see Lesson Six).
2. Review the rules of serving and returning serve. Divide students for
Serve and Serve Return Drills (see Lesson Ten).3. Review the rules of hinders.
4. Explain the Serve, Serve Return and Rally Drill. Divide students for
drill.
PROGRESSIONS/DRILLS:
Serve, Serve Return, and Rally Drill
o This is the same drill as the "Serve and Serve Return Drill," except
instead of catching the receiver's return, the server attempts to hit
the ball back to the wall. If the server makes the legal return, the
receiver attempts to hit the ball back, and so forth.o Repeat previous drill (with same server) 5 times.
o Rotate positions and repeat previous drill.
COMMENTS:
¾ Stress safety. Always have students wear eyeguards. "Protect
your face when you look back." "Get out of your opponent's way
after you hit your shot."
¾ This last drill should be done with at least three students, with
one student positioned about 10'-15' behind the receiver to be
the retriever. This is a very important position (the retrieversmight run more than the drill participants). The retriever can
also act as the side lines and back line judge. "Remember, if the
ball hits the side line or back line, it is good." Although this is
not a "cooperative rally," encourage the students to "keep the
ball in play."

7/27/2019 SecondaryTeachingGuiderevision-239
http://slidepdf.com/reader/full/secondaryteachingguiderevision-239 32/58
NASPE STANDARDS: 1, 2, 3, 4, 5, 6

7/27/2019 SecondaryTeachingGuiderevision-239
http://slidepdf.com/reader/full/secondaryteachingguiderevision-239 33/58
Lesson Twelve
Players positions for 1-wall
singles (C is retreiver), and rotation method alter each
game
CONTENT: One-wall handball (singles)
OBJECTIVES: One-wall handball (singles)
Scoring the game properly
Good sportsmanship
EQUIPMENT: One Big Blue handball/racquetball per student,
cones/lines/tape to mark wall space, one eyeguard perstudent
SPACE: Unobstructed wall space, level area
PROCEDURES:
1. Warm-up Drills (See Lesson Six).
2. Ask if there are any questions about the rules (serve, serve return,
rally, hinders).
3. Serve, Serve Return and Rally Drill (see Lesson Eleven).
4. Explain the rules of scoring (see Rules). Teachers or selected
students should play a short demonstration game which is scoredproperly.
5. Explain the concept and rules of Sportsmanship (see Rules).
6. Remind students about safety procedures.
7. Divide students to play one-wall handball singles (short games).
COMMENTS:
¾ Stress sportsmanship and safety. Always have students wear
eyeguards. "Protect your face when you look back."
¾ The Serve, Serve Return and Rally Drill should be done prior to
playing any game. It gives the students with different skilllevels equal opportunities to serve and return serve, and it is
much like playing a game, except in a "cooperative" manner (no
winners, no losers).
¾ At least three students (try to group them according to skill)
should be involved in each game (see Figure 13). One will be the
retriever who positions him/herself about 10'- 15' behind the
7/27/2019 SecondaryTeachingGuiderevision-239
http://slidepdf.com/reader/full/secondaryteachingguiderevision-239 34/58
receiver. The retriever should also act as the side lines and
back line judge. Encourage retrievers to quickly go after ball.
"Remember, if the ball hits the side line or back line, it is good."
¾ Shorten each game to five points or a certain time limit ( five
minutes). "Look back and make sure the receiver is ready before you serve." "Call out the score before you serve." Rotate
students after each game and begin again.
¾ Stress sportsmanship. Praise examples of good sportsmanship
as much (or more) than you praise good skill. "If you make an
illegal hit, call it against yourself." "Shake hands after each
game." In competition, players are penalized for
unsportsmanlike conduct.
NASPE STANDARDS: 1, 2, 3, 4, 5, 6

7/27/2019 SecondaryTeachingGuiderevision-239
http://slidepdf.com/reader/full/secondaryteachingguiderevision-239 35/58
Lesson Thirteen
CONTENT: One-wall handball (singles)
OBJECTIVES: One-wall handball (singles)
Scoring the game properly
Good sportsmanship
EQUIPMENT: One Big Blue handball/racquetball per student,
cones/lines/tape to mark wall space, one eyeguard perstudent
SPACE: Unobstructed wall space, level area
PROCEDURES:
1. Warm-up Drills (see Lesson Six).2. Serve, Serve Return. and Rally Drill (see Lesson Eleven). Review the
rules of scoring.3. Review the rules of sportsmanship.
4. Remind students about safety procedures.
5. Explain and demonstrate the "unofficial" way to determine who serves
first (see Comments).
6. Divide students (at least three students to each court) to play one-
wall handball singles (short games).
COMMENTS:
¾ See the "COMMENTS" from the previous lesson.
¾ Stress sportsmanship and safety. Always have students weareyeguards.
¾ The "unofficial" way to determine first server is to "lag." Players
stand behind the short line and toss the ball to the wall. The player
whose rebounding ball lands closest to the line becomes the first
server. The second closest determines the receiver, and the furthest
away, the retriever. It doesn't matter if the ball lands in front of orbehind the line. If, during a rally, students disagree on whether a
particular serve or shot was good, have them "play it over."
"Remember, call a hinder only if you are sure you could have made the retrieve had the interference not happened."
NASPE STANDARDS: 1, 2, 3, 4, 5, 6
7/27/2019 SecondaryTeachingGuiderevision-239
http://slidepdf.com/reader/full/secondaryteachingguiderevision-239 36/58
Lesson Fourteen
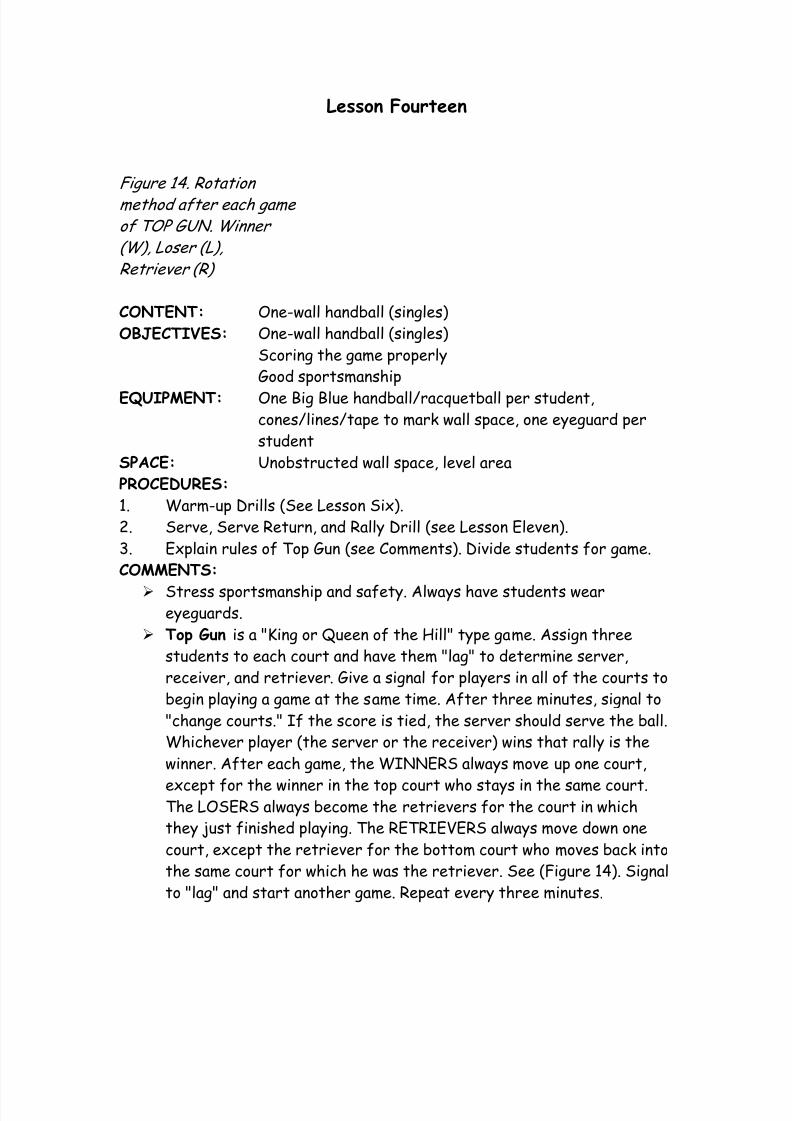
Figure 14. Rotation
method after each game
of TOP GUN. Winner
(W), Loser (L),
Retriever (R)
CONTENT: One-wall handball (singles)
OBJECTIVES: One-wall handball (singles)
Scoring the game properlyGood sportsmanship
EQUIPMENT: One Big Blue handball/racquetball per student,cones/lines/tape to mark wall space, one eyeguard per
student
SPACE: Unobstructed wall space, level area
PROCEDURES:
1. Warm-up Drills (See Lesson Six).
2. Serve, Serve Return, and Rally Drill (see Lesson Eleven).
3. Explain rules of Top Gun (see Comments). Divide students for game.
COMMENTS:
¾ Stress sportsmanship and safety. Always have students weareyeguards.
¾ Top Gun is a "King or Queen of the Hill" type game. Assign three
students to each court and have them "lag" to determine server,
receiver, and retriever. Give a signal for players in all of the courts to
begin playing a game at the same time. After three minutes, signal to
"change courts." If the score is tied, the server should serve the ball.Whichever player (the server or the receiver) wins that rally is the
winner. After each game, the WINNERS always move up one court,
except for the winner in the top court who stays in the same court.The LOSERS always become the retrievers for the court in whichthey just finished playing. The RETRIEVERS always move down one
court, except the retriever for the bottom court who moves back into
the same court for which he was the retriever. See (Figure 14). Signal
to "lag" and start another game. Repeat every three minutes.

7/27/2019 SecondaryTeachingGuiderevision-239
http://slidepdf.com/reader/full/secondaryteachingguiderevision-239 37/58
NASPE STANDARDS: 1, 2, 3, 4, 5, 6

7/27/2019 SecondaryTeachingGuiderevision-239
http://slidepdf.com/reader/full/secondaryteachingguiderevision-239 38/58
Lesson Fifteen
Figure 15. Rotation method
alter each rally for Singles Cutthroat. Winner (W),
Loser (L) Temporary
Retriever (TR)
Figure 15A. Rotation method
alter each rally for JAI-ALAI.
Players waiting turn (P)
High school students playing handball on a
modified 3-Wall court inside the gymnasium
CONTENT: One-wall handball (singles cutthroat)
OBJECTIVES: One-wall handball singles in which all three players have a
score in the same game
EQUIPMENT: One Big Blue handball/racquetball per student,
cones/lines/tape to mark wall space, one eyeguard per
student
SPACE: Unobstructed wall space, level area
PROCEDURES:
1. Warm-up Drills (see Lesson Six).2. Serve, Serve Return. and Rally Drill (see Lesson Eleven).
3. Review the method of determining first server, receiver, and
retriever.
4. Remind students about sportsmanship and safety.
5. Explain the rules for Singles Cutthroat (see Comments). Divide
students for game.
COMMENTS:
¾ Stress sportsmanship and safety. Always have students wear
eyeguards.¾ Singles Cutthroat is a game played with at least three players,
although onlytwo of them are on the court at once. The third player is
the "temporary" retriever. This game is played just like singles,
except that after every rally is over, whichever player loses that rally
always becomes the retriever, and the retriever always becomes the
receiver for the next rally. As in singles, the winner of each rally
7/27/2019 SecondaryTeachingGuiderevision-239
http://slidepdf.com/reader/full/secondaryteachingguiderevision-239 39/58
becomes the server. Three scores are being kept at the same time.
Whenever a player serves, he/she has the opportunity to add to his
score. The first player to score a certain number of points (or is
ahead at the end of a certain period of time) is the winner.
¾ Jai-Alai Handball is a similar game to Singles Cutthroat except thatmore than three players participate. In this game, the loser of each
rally goes to the end of the waiting line (groups should be relatively
small so that the line is short) and waits for his/her turn in order to
become the receiver of the serve (see Figure 15). The game is fast
paced, so the wait is very short. This can be a good game to use if
your number of courts is limited.
¾ NASPE STANDARDS: 1, 2, 3, 4, 5, 6

7/27/2019 SecondaryTeachingGuiderevision-239
http://slidepdf.com/reader/full/secondaryteachingguiderevision-239 40/58
Lesson Sixteen
Figure 16. Rotation method after each game of TOP
GUN CUTTHROAT Winner (W), 2nd Place (2), 3rd Place (3)
CONTENT: One-wall handball (singles cutthroat)
OBJECTIVES: One-wall handball singles in which all three players have a
score in the same game
EQUIPMENT: One Big Blue handball/racquetball per student,
cones/lines/tape to mark wall space, one eyeguard per
student
SPACE: Unobstructed wall space, level area PROCEDURES:
1. Warm-up Drills (See Lesson Six).
2. Serve. Serve Return, and Rally Drill (see Lesson Eleven).
3. Remind students about sportsmanship and safety.
4. Review the rules for Singles Cutthroat (see Lesson Fifteen).
5. Explain the rules of Top Gun Cutthroat (see Comments). Divide
students for game.
COMMENTS:
¾ Stress sportsmanship and safety. Always have students weareyeguards.
¾ Top Gun Cutthroat is another "King or Queen of the Mountain" type
of game. The three players on each court "lag" to determine server,
receiver, and retriever. Signal for players on all of the courts to begin
playing "Singles Cutthroat." After three minutes, signal to "change
courts." The winner always moves up one court, except for the winner
in the top court who stays in that court. The 2nd place finisher
remains in the same court. The 3rd place finisher always moves down
one court, except the 3
rd
place finisher in the bottom court who staysin that court (see Figure 16). If players are tied at the end of the
game time, they play one rally to determine the order of finish. Signal
to "lag" and start a new game. Repeat.
NASPE STANDARDS: 1, 2, 3, 4, 5, 6
7/27/2019 SecondaryTeachingGuiderevision-239
http://slidepdf.com/reader/full/secondaryteachingguiderevision-239 41/58
Lesson Seventeen
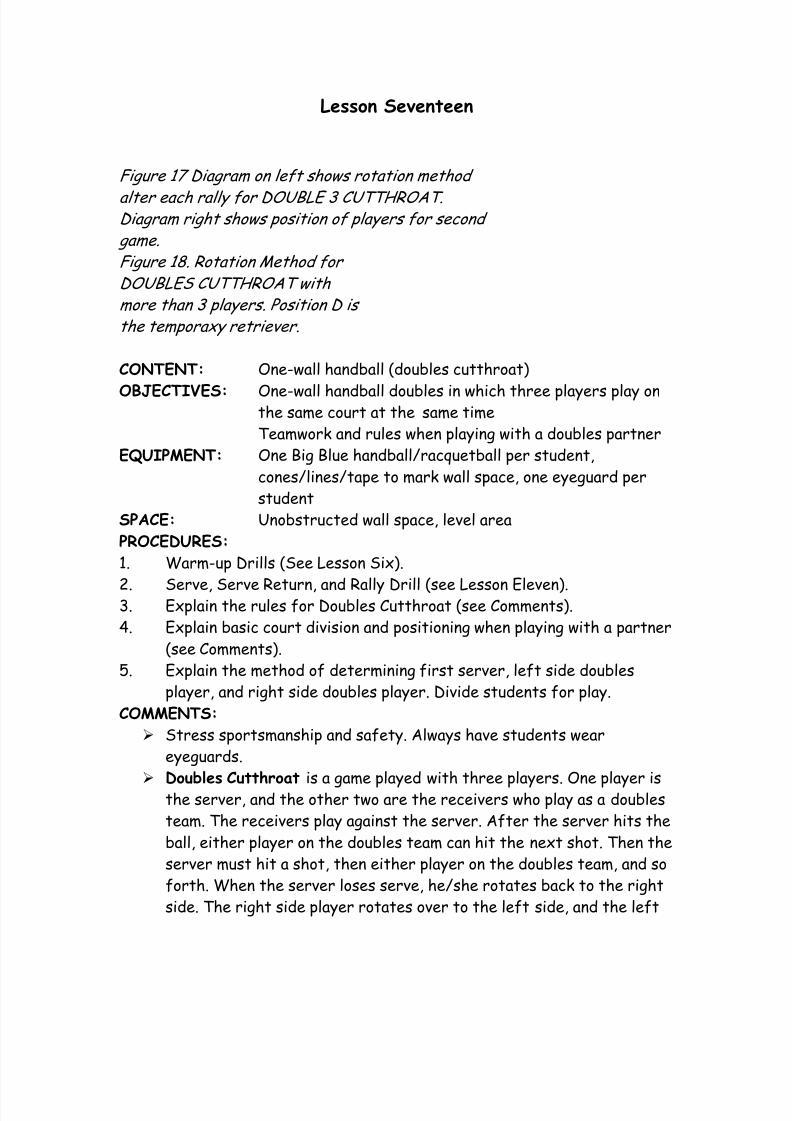
Figure 17 Diagram on left shows rotation method
alter each rally for DOUBLE 3 CUTTHROAT.Diagram right shows position of players for second
game.
Figure 18. Rotation Method for
DOUBLES CUTTHROAT with
more than 3 players. Position D is
the temporaxy retriever.
CONTENT: One-wall handball (doubles cutthroat)
OBJECTIVES: One-wall handball doubles in which three players play onthe same court at the same time
Teamwork and rules when playing with a doubles partner
EQUIPMENT: One Big Blue handball/racquetball per student,
cones/lines/tape to mark wall space, one eyeguard per
student
SPACE: Unobstructed wall space, level area
PROCEDURES:
1. Warm-up Drills (See Lesson Six).
2. Serve, Serve Return, and Rally Drill (see Lesson Eleven).3. Explain the rules for Doubles Cutthroat (see Comments).
4. Explain basic court division and positioning when playing with a partner
(see Comments).
5. Explain the method of determining first server, left side doubles
player, and right side doubles player. Divide students for play.
COMMENTS:
¾ Stress sportsmanship and safety. Always have students wear
eyeguards.
¾ Doubles Cutthroat is a game played with three players. One player isthe server, and the other two are the receivers who play as a doubles
team. The receivers play against the server. After the server hits the
ball, either player on the doubles team can hit the next shot. Then the
server must hit a shot, then either player on the doubles team, and so
forth. When the server loses serve, he/she rotates back to the right
side. The right side player rotates over to the left side, and the left

7/27/2019 SecondaryTeachingGuiderevision-239
http://slidepdf.com/reader/full/secondaryteachingguiderevision-239 42/58
side player rotates up to become the server. Repeat the same rotation
after each server loses serve. Continue rotating in the same manner
until one player scores a set number of points (or is ahead at the end
of a set period of time). The winner of this game serves first in the
next game. The two receivers exchange sides, so the rotation order isdifferent (see Figure 17). Doubles cutthroat could also be played with
more than three players. The additional player(s) would be the
retriever(s). This might be a better way to play in order to eliminate
too much "chasing" (see Figure 18).
¾ Doubles Rules (when playing "Doubles Cutthroat"): Either player on
the team can hit the ball after the server's hit. If one player hits
his/her partner with the ball, whether the ball is going to or coming
from the wall, the team loses the rally. If either member of the
doubles team interferes with the server, or the server interfereswith either member of the doubles team, a "hinder" can be called
(assuming, of course, that the ball was playable had the interference
not occurred). NO hinder can be called if one player interferes with
his/her own partner.
¾ Court Division and Positioning for the doubles team are important so
the players will know which partner should attempt the shot. There
will be less confusion and less chance of the partners running into
each other in their attempt to make the return. The court should be
divided (with an imaginary line) from the center of the wall straight
back to the center of the back line (see Figure 19). Each partner is
responsible for balls rebounding into his/her area. Partners should call
out "mine" or "yours" on balls that rebound down the middle of the
court. When receiving service, the partners should be in a "side-by-
side" positioning (see Figure 19). Although partners usually attempt to
hit only those balls that rebound into their area, they should be ready
to move into their partner's area for a retrieve if necessary.
NASPE STANDARDS: 1, 2, 3, 4, 5, 6

7/27/2019 SecondaryTeachingGuiderevision-239
http://slidepdf.com/reader/full/secondaryteachingguiderevision-239 43/58
Lesson Eighteen
Figure 19. Dotted line represents court
division for doubles team. Partners (B, B) are in receiving position. Note that partner of
server is outside of side line
Figure 20. Rotation method
for TOP GUN DOUBLES
CUTTHROAT. Winner (W), 2nd Place (2) 3rd Place
(3)
CONTENT: One-wall handball (doubles cutthroat) OBJECTIVES: One-wall handball doubles in which three players play on
the same court at the same time
Teamwork and rules when playing with a doubles partner
EQUIPMENT: One Big Blue handball/racquetball per student,
cones/lines/tape to mark wall space, one eyeguard per
student
SPACE: Unobstructed wall space, level area PROCEDURES:
1. Warm-up Drills (See Lesson Six).2. Serve, Serve Return, and Rally Drill (see Lesson Eleven).
3. Review the rules for Doubles Cutthroat (see Lesson Seventeen)
4. Review Court Division and Positioning (see Lesson Seventeen).
5. Review the rules of Top Gun Cutthroat (see Lesson Sixteen). Divide
students for game.
COMMENTS:
¾ Stress sportsmanship and safety. Always have students wear
eyeguards.
¾ Top Gun Cutthroat is played the same way for both Singles Cutthroatand Doubles Cutthroat (see Figure 20).
NASPE STANDARDS: 1, 2, 3, 4, 5, 6
7/27/2019 SecondaryTeachingGuiderevision-239
http://slidepdf.com/reader/full/secondaryteachingguiderevision-239 44/58
Lesson Nineteen
Action in the finals of the 1986 National 3-Wall Doubles
Championships.
CONTENT: One-wall handball (doubles)
OBJECTIVES: One-wall handball doubles Teamwork and rules when playing with a doubles partner
EQUIPMENT: One Big Blue handball/racquetball per student,
cones/lines/tape to mark wall space, one eyeguard per
student SPACE: Unobstructed wall space, level area
PROCEDURES:
1. Warm-up Drills (See Lesson Six).
2. Serve, Serve Return. and Rally Drill (see Lesson Eleven).
3. Explain the rules for Doubles (see Rules).
4. Review Court Division and Positioning. The server's partner must stand
outside of the side line when the serve is attempted (see Figure 19).
COMMENTS:
¾ Stress sportsmanship and safety. Always have students weareyeguards.
¾ Interference will occur more often in doubles. Remind students to
"move out of the way after you hit your shot." "Try to hit the ball
ONLY if it comes into your court area." As in singles, players should
not position themselves directly in front of the player who is hitting
the ball.
NASPE STANDARDS: 1, 2, 3, 4, 5, 6

7/27/2019 SecondaryTeachingGuiderevision-239
http://slidepdf.com/reader/full/secondaryteachingguiderevision-239 45/58
Lesson Twenty
NATY ALVARADO preparing
to hit another of his great shots.Naty has won more National
Singles Championships than
any player in history.
CONTENT: One-wall handball (doubles)
OBJECTIVES: One-wall handball doubles
Teamwork and rules when playing with a doubles partner
EQUIPMENT: One Big Blue handball/racquetball per student,
cones/lines/tape to mark wall space, one eyeguard perstudent
SPACE: Unobstructed wall space, level area
PROCEDURES:
1. Warm-up Drills (see Lesson Six).
2. Serve, Serve Return. and Rally Drill (see Lesson Eleven).
3. Review the rules for Doubles (see Lesson Seventeen).
4. Explain the rules for Top Gun Doubles (see Comments). Divide
students for game.
COMMENTS:¾ Top Gun Doubles is played with six players per court, two doubles
teams playing, and one doubles team acting as retrievers. After each
game, the winners always move up one court, except the winners in the
top court who remain in that court. The losers always become the
retrievers for the same court in which they just played. The
retrievers always move down one court, except the retrievers in the
bottom court who move back into that court. This game could be
played without retrievers, but unless there is a wall, net, or fence a
short distance behind the back line, a lot of time will be wasted inchasing the ball. This is another good game to play if you have a small
number of courts.

7/27/2019 SecondaryTeachingGuiderevision-239
http://slidepdf.com/reader/full/secondaryteachingguiderevision-239 46/58

7/27/2019 SecondaryTeachingGuiderevision-239
http://slidepdf.com/reader/full/secondaryteachingguiderevision-239 47/58
Students are divided into groups of five or six. Each group needs a folding
mat (e.g., 4X8 gymnastics mat), a deck of cards, and a sign with activities
associated with each card. Each group and their mat are positioned along the
boundary of a basketball/volleyball court boundary. A dealer is designated
for each group. The dealer deals a single card to each person in the group.Each person in the group performs a designated exercise/activity, according
to the card received. For example, if a student is dealt a spade (that is not a
face card) the student performs that number of non-dominant hand sidearm
throws (without a ball). If a student is dealt a heart (that is not a face
card), the student performs that number of dominant arm overhand throws
(without a ball), etc. Face cards can be different activities that might be
fitness related (e.g., a jack means the student performs 10 rope jumps using
one foot or does 10 curl-ups on the mat) or could be skill related (e.g., a jack
means the student goes to the wall and does 10 drop and hits). Each studentcompletes their respective task UNLESS someone in the group is dealt an
ace in that hand. In that case, members of the group ignore their tasks and
the entire group jogs one lap around the perimeter of the gym. Each person
in the group must complete their task before the dealer can deal the next
hand. The goal is to finish the deck as quickly as possible.
*This activity was originally created by a group of physical education teachers inWashington. It has been modified for handball.
Hand TennisThis is a great activity for the center of the gym and can be used as a
station activity or as an activity while other activities (handball or non-
handball related) take place around the perimeter. A short net is set up and
mini-tennis courts are designated. Players can play singles or doubles. A BigBlue Handball or racquetball is used to play modified tennis with the hands,
with players attempting to control a hit across the net to land “in bounds” of
the court.

7/27/2019 SecondaryTeachingGuiderevision-239
http://slidepdf.com/reader/full/secondaryteachingguiderevision-239 48/58
Advanced Drills and Techniques
THE FLY SHOT:The fly shot refers to a ball being hit before it hits the floor. It is more
difficult than hitting a ball after one bounce because the player has lesstime to get into position for his/her shot attempt. However, it is a very
important shot for advanced levels of play. The practice drills are similar to
those used when first learning to hit a ball after one bounce.
PROGRESSIONS/DRILLS:
o The player should start at the short line and underhand toss the ballto the wall so it will rebound (on the fly) back to the player's position.
The player quickly moves into position and hits the ball before it hits
the floor. This drill should be done with each hand using each of the
various strokes. The player should continue the drill from the shortline until consistent success is achieved.
o The player should then move to a deeper court position (about 5'
behind the short line) and continue the previous drills.
o Player should move about 5' deeper in the court each time consistent
success is achieved from a certain position. At first, the player should
just try to hit legal returns, but later, he/she should be trying to hit
good placement shots.
INDIVIDUAL RALLYThese kinds of drills are good for learning control with both hands, and
moving quickly into good hitting positions.
PROGRESSIONS/DRILLS:
o The player stands just behind short line and tosses the ball to the wall
so it will rebound and hit the floor in front of the point from where
the ball was tossed. The player then hits the ball back to the wall andattempts to keep hitting each rebounding ball for a set period of time.
The player uses whichever hand he/she chooses to hit the ball. This
drill should be done with another student who is the retriever andcounter. Alternate positions and repeat.
o Repeat the same drill, alternating hands for each hit.
o Repeat the same drill using the non-dominant hand only.
o Players should back up to the service line and repeat the previous
drills.
o Players should back up to the back line and repeat the previous drills.

7/27/2019 SecondaryTeachingGuiderevision-239
http://slidepdf.com/reader/full/secondaryteachingguiderevision-239 49/58
SERVICE PLACEMENT Most top one-wall players believe that a well-controlled serve is the most
important shot in the game. Serves that rebound and bounce low near the
short line, or deep, near the long line, are the most difficult to retrieve.Having the serve also land close to one of the side lines makes it even more
difficult for the retriever, especially if he/she does not know which
direction the serve is being aimed.
PROGRESSIONS/DRILLS:
o The player stands in the service zone, halfway between the side lines,
and serves the ball using his low sidearm stroke. The court is marked
off (see Figure 21) so when the rebounding serve bounces into a
specific area, the server receives a certain number of points. Serve
10 times and total points. Alternate with retriever and repeat.o Repeat previous drill, except the server stands 5' to the right of
center for his/her serve attempts.
o Repeat previous drill, except the server stands 5' to the left of
center for his/her serve attempts.
o Player stands in the center of the service zone and uses his overhand
stroke to serve the ball. The serves must rebound and bounce in the
areas closest to the back line in order to count points. Alternate with
retriever and repeat.
Figure 21. Point value for
Serving Drills
PASS SHOTSThe pass shot is just what the name implies, a shot that is hit past the
opponent. Control of the passing angles is very important in order to move
the opponent out of the advantageous front court position. These shots are
usually classified as "cross court" and "down the line" passes.
PROGRESSIONS/DRILLS:o Student stands near the short line and to the right of center, and
throws the ball with his/her dominant hand to the wall, attempting to
make the ball rebound and land in the marked off area near the left
side line (see Figure 22). Repeat several times. Student then drops
the ball to the floor and on a first bounce, hits the ball to the wall

7/27/2019 SecondaryTeachingGuiderevision-239
http://slidepdf.com/reader/full/secondaryteachingguiderevision-239 50/58
attempting to make the ball rebound into the same target area.
Repeat several times. Student then underhand tosses the ball to the
wall so that it will rebound back to him/herself, and then hits the ball,
into the same target area. Repeat 10 times and total points. Alternate
with retriever and repeat.o Repeat previous drill from 20' from the wall.
o Repeat previous drill from 25', 30', and 34' (back line).
o Repeat previous drills except ball should be directed to the target
area near the right side line (see Figure 22).
o Repeat previous drills, except student stands to the left of center to
do drills.
o Repeat previous drills using non-dominant hand, except student stands
near the left side line (if he/she is right-handed, or near the right
side line if he/she is left-handed).
Figure 22. Pass Shot Drills.
Student receives 1 point for
each shot that rebounds into
one of the shaded areas
KILLS SHOTSA kill shot is a ball that hits the wall so low, the opponent cannot make the
retrieve. This is the most spectacular shot in the game, and requires a lot ofpractice, as the margin for error is very slim. The player should use the low
sidearm stroke when attempting this offensive shot (see Figure 23).
Figure 23 Action shot of
GORDIE PFEIFER
demonstrating the perfect way
to hit the kill shot.
PROGRESSIONS/DRILLS:
o Students stands just in front of the short line and halfway between
the side lines and throws the ball with his low sidearm stroke
(dominant hand) to the target areas on the wall (see Figure 24).
Repeat several times. Student then drops the ball to the floor and on
a first rebound, hits the ball to the target areas. Repeat several
times. Student then underhand tosses the ball to the wall and hits the
7/27/2019 SecondaryTeachingGuiderevision-239
http://slidepdf.com/reader/full/secondaryteachingguiderevision-239 51/58
rebounding ball to the target areas. Repeat 10 times and total points.
Alternate with retriever and repeat.
o Repeat previous drill starting 20' from wall.
o Repeat previous drill from 25', 30', and 35'.
o Repeat previous drills, except student's starting position is 5' to theright of center.
o Repeat previous drills, except student's starting position is 5' to the
left of center.
o Repeat previous drills using non-dominant hand.
NOTE - - At first, the students should just try to hit the ball into the low
areas on the wall. Later on, they should attempt to make their kill shots
rebound and land as close to the side lines as possible.
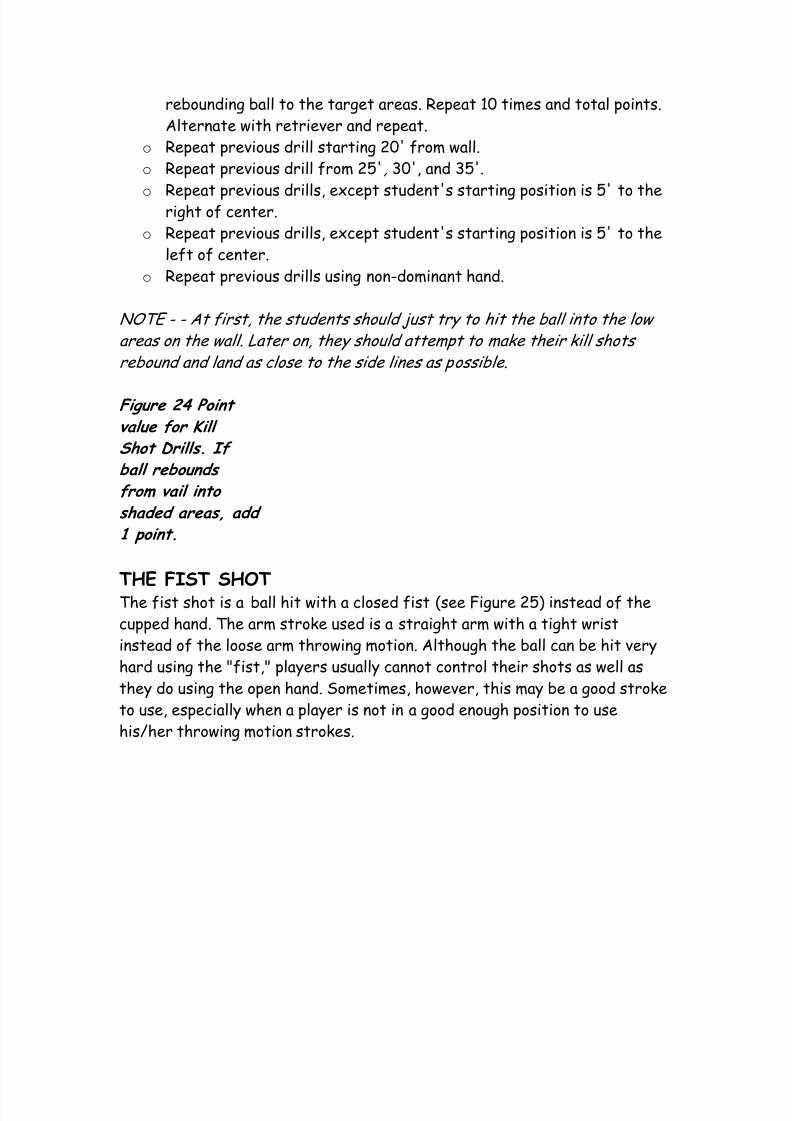
Figure 24 Point
value for Kill
Shot Drills. If
ball rebounds
from vail into
shaded areas, add
1 point.
THE FIST SHOT The fist shot is a ball hit with a closed fist (see Figure 25) instead of the
cupped hand. The arm stroke used is a straight arm with a tight wrist
instead of the loose arm throwing motion. Although the ball can be hit very
hard using the "fist," players usually cannot control their shots as well as
they do using the open hand. Sometimes, however, this may be a good stroke
to use, especially when a player is not in a good enough position to use
his/her throwing motion strokes.
7/27/2019 SecondaryTeachingGuiderevision-239
http://slidepdf.com/reader/full/secondaryteachingguiderevision-239 52/58
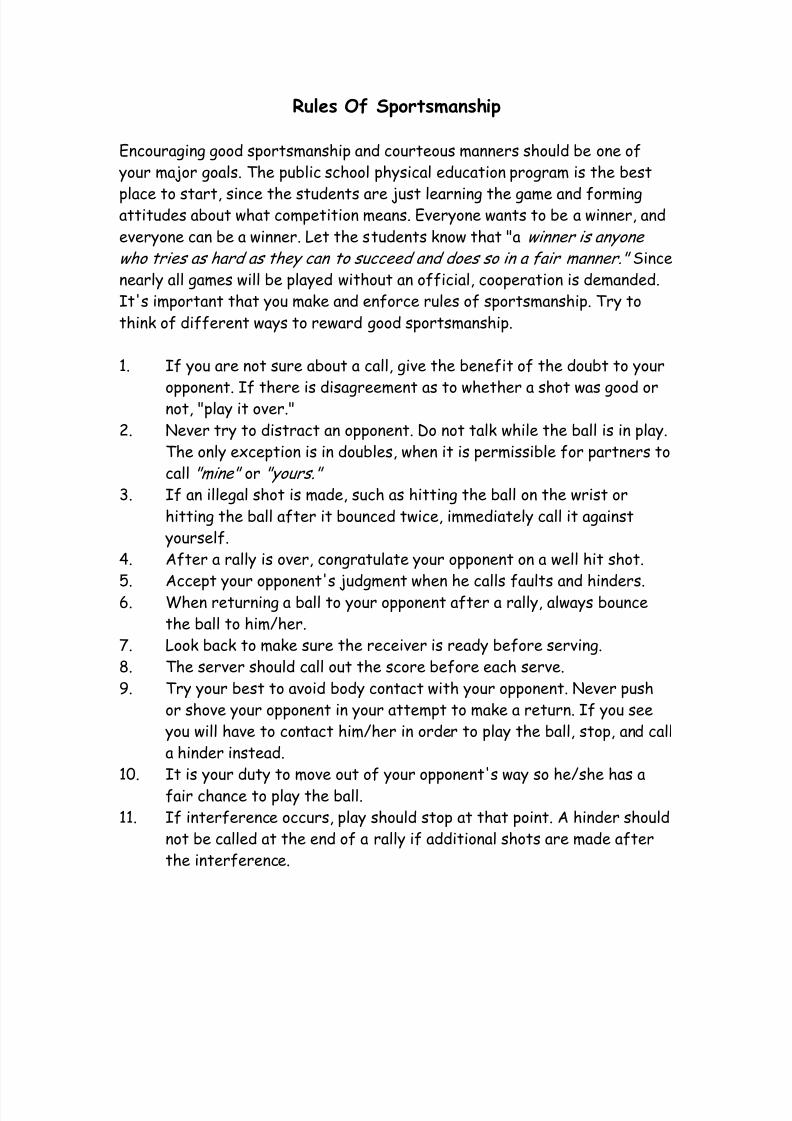
Rules Of Sportsmanship
Encouraging good sportsmanship and courteous manners should be one of
your major goals. The public school physical education program is the best
place to start, since the students are just learning the game and formingattitudes about what competition means. Everyone wants to be a winner, and
everyone can be a winner. Let the students know that "a winner is anyone
who tries as hard as they can to succeed and does so in a fair manner." Since
nearly all games will be played without an official, cooperation is demanded.
It's important that you make and enforce rules of sportsmanship. Try to
think of different ways to reward good sportsmanship.
1. If you are not sure about a call, give the benefit of the doubt to your
opponent. If there is disagreement as to whether a shot was good ornot, "play it over."
2. Never try to distract an opponent. Do not talk while the ball is in play.
The only exception is in doubles, when it is permissible for partners to
call "mine" or "yours."
3. If an illegal shot is made, such as hitting the ball on the wrist or
hitting the ball after it bounced twice, immediately call it against
yourself.
4. After a rally is over, congratulate your opponent on a well hit shot.
5. Accept your opponent's judgment when he calls faults and hinders.6. When returning a ball to your opponent after a rally, always bounce
the ball to him/her.
7. Look back to make sure the receiver is ready before serving.
8. The server should call out the score before each serve.
9. Try your best to avoid body contact with your opponent. Never push
or shove your opponent in your attempt to make a return. If you see
you will have to contact him/her in order to play the ball, stop, and call
a hinder instead.
10. It is your duty to move out of your opponent's way so he/she has a
fair chance to play the ball.
11. If interference occurs, play should stop at that point. A hinder should
not be called at the end of a rally if additional shots are made after
the interference.

7/27/2019 SecondaryTeachingGuiderevision-239
http://slidepdf.com/reader/full/secondaryteachingguiderevision-239 53/58
12. Call a hinder only when you are certain that if your opponent had not
been in your way, you could have reached the ball in time to make a
legal return.
13. Shake hands with your opponent after each game.
14. Fair play is always the rule.
7/27/2019 SecondaryTeachingGuiderevision-239
http://slidepdf.com/reader/full/secondaryteachingguiderevision-239 54/58
Vern, Gary and Pete:
In the old booklet, the “BASIC ONE-WALL
HANDBALL RULES appeared here. But, in the
document that was sent to me, they were not
included. So, I am assuming they will be
included here???

7/27/2019 SecondaryTeachingGuiderevision-239
http://slidepdf.com/reader/full/secondaryteachingguiderevision-239 55/58
Standard Specifications Of A One-Wall
Handball Court
• WALL - The wall shall be 20 feet wide and 16 feet high.
• FLOOR - The floor shall be 20 feet wide and 34 feet long. Thesidelines should extend at least 3 feet beyond the long line. There
should be a minimum of 6 feet outside each sideline and in back of the
long line to allow sufficient movement area for the players.
• SHORT LINE - This line is parallel to the front wall with its back edge
16 feet from the wall.• SERVICE MARKERS - These markers (lines) should be at least 6
inches long, and be parallel to and midway between the short and long
lines, extending inward from the sidelines. The imaginary further
extension and joining of these markers indicate the "Service Line."• SERVICE ZONE - The floor area inside of and including the short,
side, and service lines (or markers).
• RECEIVING ZONE - The floor area in back of the short line, bounded
by and including the long line and sidelines.
• PLAYING ZONE - After the ball is legally served, the playing zone is
the floor area between the front wall and the long line, and between
and including the sidelines.
Two-Wall Or Three-Wall Courts
Rule differences - If the serve hits a side wall before hitting the front wall,
the server is "out." The serve can hit one side wall after contacting the
front wall, either on the fly or after bouncing on the floor. The return of
serve and any other shot during the rally can hit a side wall before hitting
the front wall. In 3-wall handball, a serve that hits the front wall and both
side walls before contacting the floor is a "fault."
Sometimes a corner in a gymnasiumwill allow a side wall to be added.
This adds variety in shot choice and
makes it easier to keep the ball in
play.The side walls could be any length
on a 3-wall court
7/27/2019 SecondaryTeachingGuiderevision-239
http://slidepdf.com/reader/full/secondaryteachingguiderevision-239 56/58
Vern, Gary and Pete:
In the old booklet, the “RESOURCE
MATERIALS” appeared here. But, in the
document that was sent to me, they were not
included. So, I am assuming they will be
included here???
By the way, the list of resources should be
updated and be the same in the elementarybooklet.
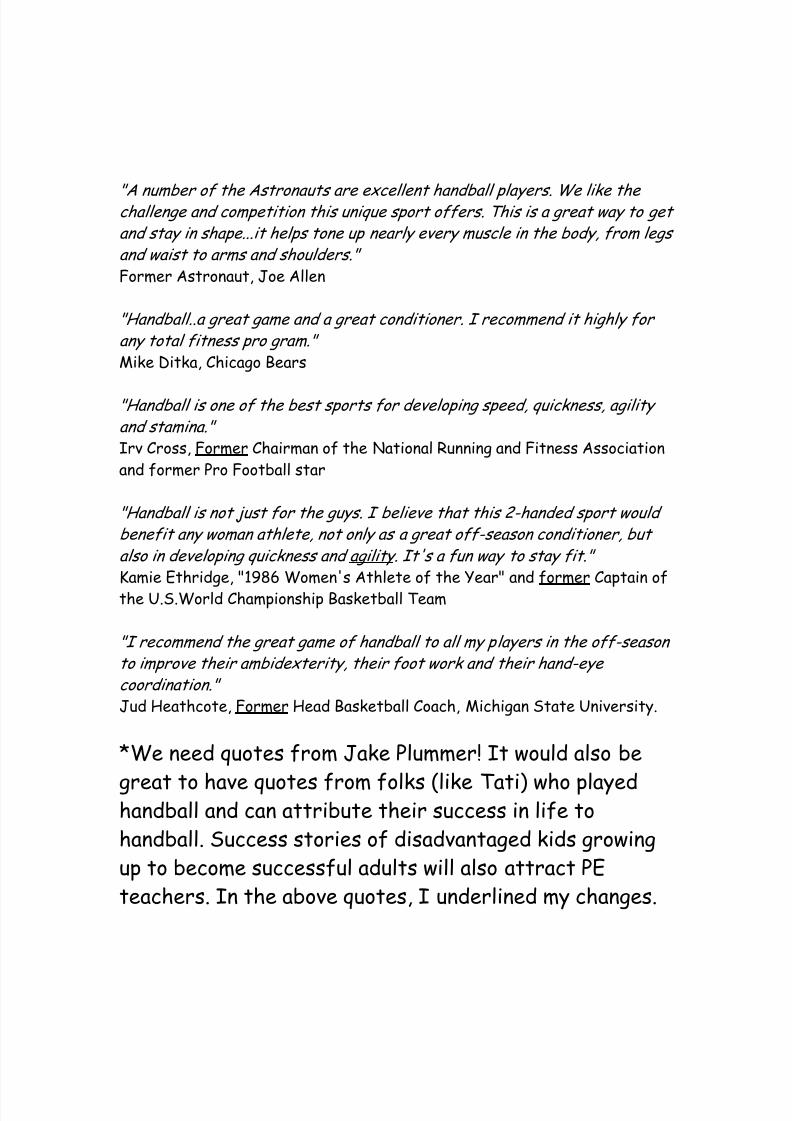
7/27/2019 SecondaryTeachingGuiderevision-239
http://slidepdf.com/reader/full/secondaryteachingguiderevision-239 57/58
"A number of the Astronauts are excellent handball players. We like the challenge and competition this unique sport offers. This is a great way to get
and stay in shape...it helps tone up nearly every muscle in the body, from legs
and waist to arms and shoulders."
Former Astronaut, Joe Allen
"Handball..a great game and a great conditioner. I recommend it highly for
any total fitness pro gram."
Mike Ditka, Chicago Bears
"Handball is one of the best sports for developing speed, quickness, agility
and stamina."
Irv Cross, Former Chairman of the National Running and Fitness Association
and former Pro Football star
"Handball is not just for the guys. I believe that this 2-handed sport would
benefit any woman athlete, not only as a great off-season conditioner, but
also in developing quickness and agility. It's a fun way to stay fit."
Kamie Ethridge, "1986 Women's Athlete of the Year" and former Captain of
the U.S.World Championship Basketball Team
"I recommend the great game of handball to all my players in the off-season
to improve their ambidexterity, their foot work and their hand-eye
coordination."
Jud Heathcote, Former Head Basketball Coach, Michigan State University.
*We need quotes from Jake Plummer! It would also be
great to have quotes from folks (like Tati) who playedhandball and can attribute their success in life to
handball. Success stories of disadvantaged kids growing
up to become successful adults will also attract PE
teachers. In the above quotes, I underlined my changes.

7/27/2019 SecondaryTeachingGuiderevision-239
http://slidepdf.com/reader/full/secondaryteachingguiderevision-239 58/58