section viii - university of marylandinternational.jifsan.umd.edu/docs/gaps/en/section...
TRANSCRIPT

Practical Exercises
Introduction
Experiments/Demonstrations
Water as a Contamination Agent
Product Integrity and Produce Contamination
Handwashing
Chlorine Concentration and Water Quality Management
Fruit Spoilage
ExperimentsUsingArtificial“Germs”
Fresh Produce Quality
Problem Solving
Traceback Investigation
PlanningforanEffectiveTrainingCourseonGAPs:3Scenarios
FieldSiteVisitGuide
Improving the Safety and Quality ofFresh Fruits and Vegetables:
A Training Manual for Trainers
Section VIII


Copyright © 2010 University of Maryland. This work may be reproduced, in whole or in part, without prior written permission, for personal use. No other use is permitted without the express prior written permission of the University of Maryland. For permission, contact JIFSAN,
Patapsco Building Suite 2134, University of Maryland, College Park 20740
JIFSANGoodAgriculturalPracticesManualSection VIII, Module 1–Introduction
A Field Site Visit Guide provides a brief outline of key points to observe during site visits. Similar tools are referenced in the Additional Resources section.
Case Studies, not included here, have been developed with direct input from producers in the region to ensure that topics and presentation are appropriate. It is always helpful if a case study relates closely to a practical situation that might be faced by the trainees, i.e. the use of a specific crop or production situation that is familiar to the audience. They are intended to build understanding and awareness of practices that may be presented to individual growers, packers, and shippers for consideration and incorporation into their own operations.
IntroductionIt is helpful in food safety training programs to have practical activities to reinforce the passive lecture. Frequently, the need to provide lab space and limited instructional time and supervision prevents inclusion of activities. In addition, trainers may be reluctant to sacrifice time needed for presenting new concepts to allow time for activities.
However, if food safety training is to have a lasting impact, involvement of the trainees is essential. All participants, as groups or individually, should take part in practical activities such as experiments, discussion groups and problem solving exercises. Time also should be allowed for feedback from these activities. In addition to critical listening, this leads to critical thinking.
Trainers are encouraged to use as many practical exercises as possible to complement the lecture material. Trainers may decide to use any of the following activities or to use ones from other sources. Use of activities not only will increase comprehension of the material by those being trained as trainers, but will also provide them with ideas for involving the participants in training they conduct.
The Experiments and Demonstrations presented in this section have been designed to be simple, inexpensive, and to use minimum equipment. Although some require a source of water and one involves preparation of materials in a laboratory, none require an actual laboratory in the classroom so they can be conducted in almost any training setting.
Discussion questions provide an opportunity for input by course participants. These may be addressed by the group as a whole or may be discussed within small groups with a summary session for the whole group.
A Problem Solving exercise contains brief story problems that allow trainees to apply lesson concepts as they work through the problem. Trainers may choose other exercises for this purpose.

VIII-2 Copyright © 2010 University of Maryland.

Copyright © 2010 University of Maryland. This work may be reproduced, in whole or in part, without prior written permission, for personal use. No other use is permitted without the express prior written permission of the University of Maryland. For permission, contact JIFSAN,
Patapsco Building Suite 2134, University of Maryland, College Park 20740
JIFSANGoodAgriculturalPracticesManualSection VIII, Experiments/Demonstrations
3. Place water and ice in bowl. Add 10 drops of food coloring (or dye) to the water. Stir to mix.
4. Submerge fruit samples in the water for 10 minutes.5. Remove fruit from the water and allow it to drain for
10 minutes.6. Observe the amount of dye on the outer surface of
product. Record observations in the chart below.7. Using a sharp knife, remove a slice about 1 inch from
the stem end of the product. Observe and record the amount of dye penetration.
8. Clean the knife to remove any dye. Cut the product in half. Observe and record the amount of dye penetration on the cut surface.
Discussion Results1. How much dye was on the surface of the product?
2. How much in the interior?
3. What kinds of barriers prevented the dye from penetrating throughout the product?
4. Suppose the dye represents microorganisms in the water. What conclusions can be drawn about water as a means for these organisms to contaminate produce?
Water as a Contamination Agent
Purpose:To investigate how water can serve as a source of contamination for fresh produce
Materialsforeachgroup:• Fresh produce sample of two or three whole pieces
per group. Produce may be a product produced by participants or may be representative of various types of products such as a leafy product, a product with an edible skin and a product with skin that is removed before eating.
• Knife• Bowl • One liter water• Ice if available• Blue food coloring or dye• Slotted spoon, tongs, or other tool to remove fruit from
water
Procedure:1. Divide class into groups of 3 – 4 people.2. Assign each group a produce product and give each
2-3 whole pieces of produce. The same product may be assigned to more than one group.
ResultsUse the following scale to record amount of dye penetration: 4 = lots of dye 3 = moderate dye 2 = some dye 1 = slight dye 0 = no dye
Product Outer Surface Stem End Cut Surface
JIFSANGoodAgriculturalPracticesManualSection VIII, Experiments/Demonstrations
Copyright © 2010 University of Maryland. This work may be reproduced, in whole or in part, without prior written permission, for personal use. No other use is permitted without the express prior written permission of the University of Maryland. For permission, contact JIFSAN,
Patapsco Building Suite 2134, University of Maryland, College Park 20740
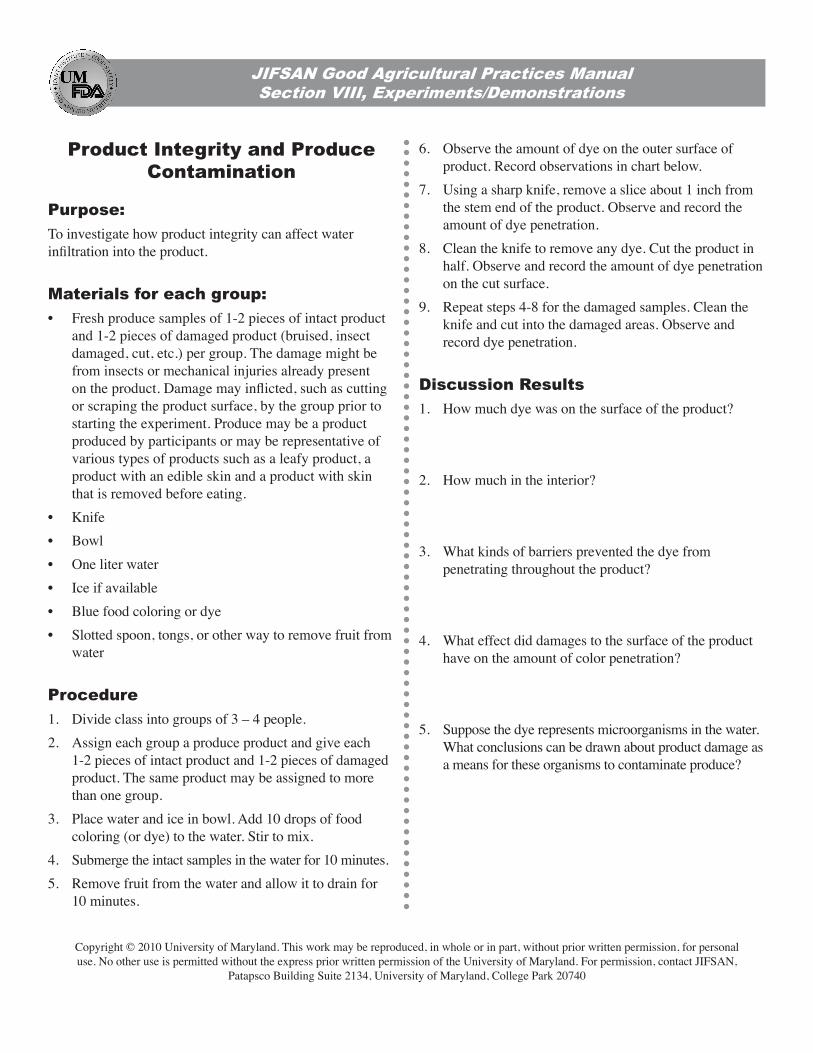
6. Observe the amount of dye on the outer surface of product. Record observations in chart below.
7. Using a sharp knife, remove a slice about 1 inch from the stem end of the product. Observe and record the amount of dye penetration.
8. Clean the knife to remove any dye. Cut the product in half. Observe and record the amount of dye penetration on the cut surface.
9. Repeat steps 4-8 for the damaged samples. Clean the knife and cut into the damaged areas. Observe and record dye penetration.
Discussion Results1. How much dye was on the surface of the product?
2. How much in the interior?
3. What kinds of barriers prevented the dye from penetrating throughout the product?
4. What effect did damages to the surface of the product have on the amount of color penetration?
5. Suppose the dye represents microorganisms in the water. What conclusions can be drawn about product damage as a means for these organisms to contaminate produce?
Product Integrity and Produce Contamination
Purpose:To investigate how product integrity can affect water infiltration into the product.
Materialsforeachgroup:• Fresh produce samples of 1-2 pieces of intact product
and 1-2 pieces of damaged product (bruised, insect damaged, cut, etc.) per group. The damage might be from insects or mechanical injuries already present on the product. Damage may inflicted, such as cutting or scraping the product surface, by the group prior to starting the experiment. Produce may be a product produced by participants or may be representative of various types of products such as a leafy product, a product with an edible skin and a product with skin that is removed before eating.
• Knife• Bowl • One liter water• Ice if available• Blue food coloring or dye• Slotted spoon, tongs, or other way to remove fruit from
water
Procedure1. Divide class into groups of 3 – 4 people.2. Assign each group a produce product and give each
1-2 pieces of intact product and 1-2 pieces of damaged product. The same product may be assigned to more than one group.
3. Place water and ice in bowl. Add 10 drops of food coloring (or dye) to the water. Stir to mix.
4. Submerge the intact samples in the water for 10 minutes.5. Remove fruit from the water and allow it to drain for
10 minutes.
VIII-5 Copyright © 2010 University of Maryland.
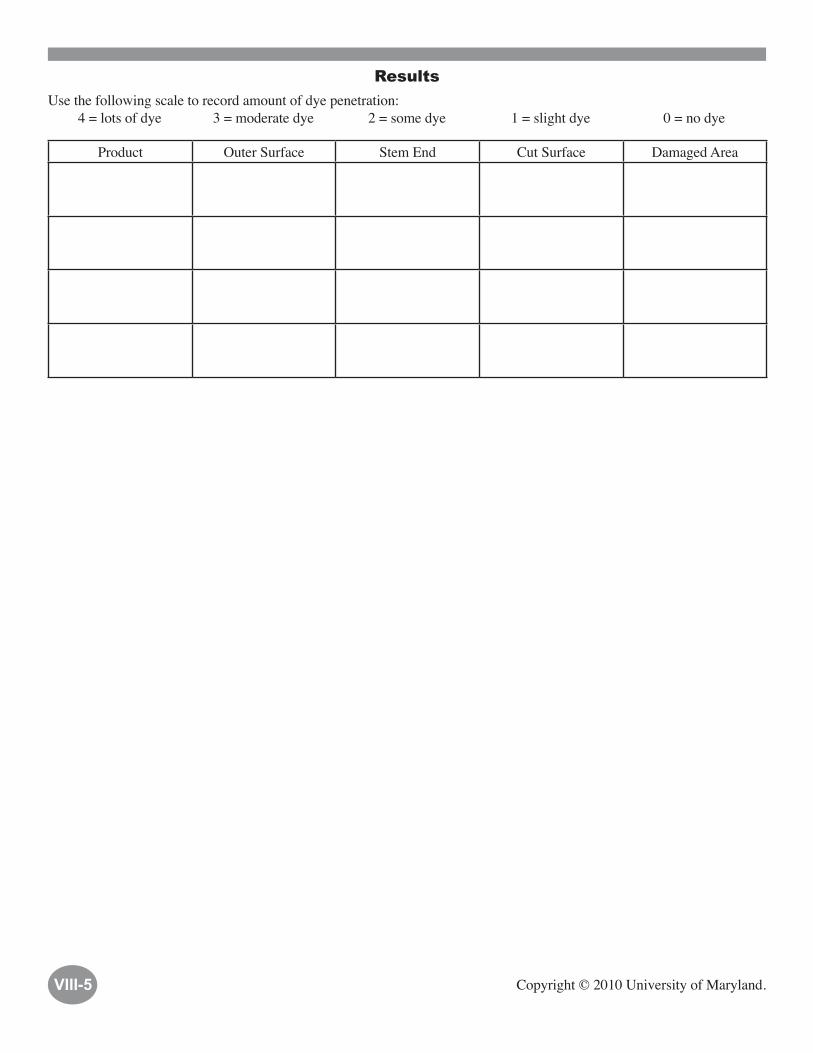
ResultsUse the following scale to record amount of dye penetration: 4 = lots of dye 3 = moderate dye 2 = some dye 1 = slight dye 0 = no dye
Product Outer Surface Stem End Cut Surface Damaged Area

JIFSANGoodAgriculturalPracticesManualSection VIII, Experiments/Demonstrations
Copyright © 2010 University of Maryland. This work may be reproduced, in whole or in part, without prior written permission, for personal use. No other use is permitted without the express prior written permission of the University of Maryland. For permission, contact JIFSAN,
Patapsco Building Suite 2134, University of Maryland, College Park 20740
b. Hands are then rinsed with water (without soap), excess water is shaken off, and, while hands are still wet, Quadrant 2 is touched.
c. Step b. is repeated twice more, touching Quadrant 3 and then 4.
3. The second student in the pair should use the plate labeled “Soap.” Step 2 above is followed except soap is used in each of the washing steps.
4. Plates should be covered and incubated, inverted, at 35°C or room temperature for 24 to 48 hours.
Discussing Results1. How effective was rinsing with plain water for
removing microorganisms from hands?
2. Was the effectiveness improved with more rinsing?
3. What was the effect of adding soap to the washing process?
4. In our experiment, each step added to the amount of time the hands were washed. Were more microorganisms removed by using a longer wash and more soap?
Handwashing Purpose: To observe the effect of washing time and the use of soap on the removal of microorganisms from hands.
Materials:• Facilities for washing hands
• Markers
• For each pair of students:
- Two petri plates containing nutrient agar
- Soap
Procedure:1. On the bottom of the petri dishes, draw lines to divide
each plate into four quadrants.
a. Label the quadrants on each plate 1 through 4.
b. Label one plate “Water,” the other “Soap.”
2. One student in each pair should work with the “Water” plate.
a. Quadrant 1 should be touched lightly with one or more fingers.
ResultsRecord the results in the table below using the scale:
4 = maximum growth 3 = moderate growth 2 = some growth 1 = a little growth 0 = no growth
PlateQuadrants
1 2 3 4
Water
Soap

JIFSANGoodAgriculturalPracticesManualSection VIII, Experiments/Demonstrations
Copyright © 2010 University of Maryland. This work may be reproduced, in whole or in part, without prior written permission, for personal use. No other use is permitted without the express prior written permission of the University of Maryland. For permission, contact JIFSAN,
Patapsco Building Suite 2134, University of Maryland, College Park 20740
Remember: This is a small demonstration. A more reasonable volume of water in a commercial setting might be 500 to 5,000 gallons in the processing tank. The values from this small scale calculation can be applied to any volume to prepare a solution with 100 ppm free chlorine from a 5.25% NaOCl concentrate by calculating a dilution factor. This factor is derived by dividing the total volume of solution, in this case 500 ml, by the amount of chlorine concentrate to be added, which is 0.95 ml:
Precision is not essential for this calculation. Note that the calculated dilution factor is 526, but for a practical application we can round the dilution factor to 500.
Suppose there is a tank size of 8,000 liters. To determine how much chlorine concentrate would be needed to yield 100 ppm free chlorine, divide 8,000 by the dilution factor of 500.
Therefore, 16 liters of chlorine concentrate would be added to the 8,000 liter tank to give approximately 100 ppm free chlorine.
PartB:InfluenceofpHandorganicmatter on free chlorine levels.
Purpose: To observe the effects of pH and organic matter on the free chlorine levels in a solution. This exercise may be conducted in the classroom but for convenience a demonstration using PowerPoint is provided.
Materials:• 500 ml deionized water
• chlorine test strips
Chlorine Concentration and Water Quality Management
PartA:CalculatingVolumeofChlorineNeededtoObtainaSpecificConcentration
Purpose:This discussion provides experience in calculating the volume of chlorine (sodium hypochlorite) needed to provide the desired concentration of free chlorine (ppm) in a solution.
Procedure:The following formula is used to determine how much sodium hypochlorite (NaOCl) to add to potable water:
For this small scale demonstration, we have the following criteria:
• The concentrated NaOCl is 5.25% chlorine (approximately the concentration of household bleach). Since 5.25% is the same as 5.25 parts per hundred, we would multiple this number by 10,000 to get parts per million (ppm).
• The desired free chlorine concentration in our processing water is 100 ppm.
• We want to make a total volume of 500 ml for our processing tank.
To calculate the amount of NaOCl that would be needed, plug the above values into the formula and calculate as follows:
Taking it a step further:
Volume of NaOCl needed=(desired ppm of free chlorine) X (total tank volume)
(% NaOCl in concentrate) X (10,000)
8,000 liters= 16 liters
500
Volume of NaOCl needed=(100 ppm of free chlorine) X (500 ml)
(5.25) X (10,000)= 0.95 ml
Dilution factor =500 ml
0.95 ml= 526, which is a unit-less term.

VIII-8 Copyright © 2010 University of Maryland.
juice quickly lowers the pH to about 4.5, but most importantly it completely depletes the amount of free chlorine to near zero.
DiscussionQuestions:1. What effect does adding chlorine have on the pH of
water?
2. What effect does lowering pH and adding organic matter have on the chlorine concentration?
3. What are the implications of these effects to a fruit or vegetable operation using chlorine as a sanitizing agent?
Conclusion:Any substantial adjustment of the chlorine concentration in water will require an adjustment of pH as well. Water quality management involves many parameters, not just chlorine.
• pH meter or other method of determining pH
• weak acid solution
• tomato juice
Procedure:1. Measure the pH of the 500 ml of deionized water.
2. Using the calculations from Part A above, add the proper amount of chlorine (1.0 ml) needed to give this 500 ml solution approximately 100 ppm free chlorine.
3. Measure the chlorine concentration with a test strip. Was the calculation correct to give 100 ppm free chlorine?
4. Measure the pH of the solution. Recall that under these conditions most of the chlorine is in hypochlorite form.
5. Adjust the pH to about 7.0 with diluted acid. This establishes the desired equilibrium between hypochlorite and hypochlorous acid.
6. To simulate the addition of organic matter to the water, add a few drops of tomato juice. The tomato
ResultsUse the following table to record the results of the tests in the steps above.
(Instructor’s note: Column of values from previous experiments may be used as a guide for expected values or for discussion if teaching conditions do not allow actually performing the experiment)
Parameter Values obtained from previous experiments
Measured
pH of deionized water (Step 1) 6.6
Chlorine concentration after adding 0.95 ml chlorine concentrate (Step 3)
100 ppm
pH of the chlorinated solution (Step 4) 9.8
pH after adding organic matter (Step 6) 4.5
Chlorine concentration after adding organic matter (Step 6) about 0

JIFSANGoodAgriculturalPracticesManualSection VIII, Experiments/Demonstrations
Copyright © 2010 University of Maryland. This work may be reproduced, in whole or in part, without prior written permission, for personal use. No other use is permitted without the express prior written permission of the University of Maryland. For permission, contact JIFSAN,
Patapsco Building Suite 2134, University of Maryland, College Park 20740
2. Provide each group with several pieces of the same product. Have participants assess the quality of the produce, noting the presence of any defects.
3. One piece of the product should be placed in the coolest possible place in the teaching area. If a refrigerator is available, this could be used. Place a second piece in a warmest available location. A third piece should be placed in a plastic bag, the bag closed and placed in the warmest location.
4. A fourth piece of product should be cut into three pieces. Place one of the pieces in each of the locations described in step 3 above.
Discussing the Results1. What spoilage/deterioration factors played a role in the
changes observed in these products?
2. What are the implications of observations from this experiment on how produce should be handled during storage and transportation?
Fruit Spoilage
Purpose:To demonstrate the effects of produce handling and storage conditions on product spoilage.
Materials:For each group:
• Produce – select kinds most likely to be encountered by class participants
• Knife
• Plastic bag
Procedure:For a 1-day class, set up this experiment early in the day and look at the results at the end of the day. For a multiple day class, evaluate the products 24 to 48 hours after the experiment is set up.
1. Divide class into groups of 3-4 people.
ResultsAt the end of the experiment evaluate the product condition using the following scale:
4 = high quality product, good condition 3 = good quality, slight spoilage 2 = fair quality, moderate spoilage 1 = poor quality, extreme spoilage
ProductStorage Conditions
Pre-Storage Cool Warm Packaged
Intact
Cut
Intact
Cut

JIFSANGoodAgriculturalPracticesManualSection VIII, Experiments/Demonstrations
Copyright © 2010 University of Maryland. This work may be reproduced, in whole or in part, without prior written permission, for personal use. No other use is permitted without the express prior written permission of the University of Maryland. For permission, contact JIFSAN,
Patapsco Building Suite 2134, University of Maryland, College Park 20740
• If not, where were problem areas (between fingers, around cuticles, etc)?
Describe for participants the correct handwashing procedure.
Repeat the activity above with participants using this procedure.
Discuss: • Was this procedure more effective in removing
germs? Why?
HowGermsareSpread-Ia) Prior to the arrival of class participants, the instructor
rubs the Germ product on their instructor hands. As the class participants arrive, the instructor greets several with a handshake.
b) After a period of time, a UV light is passed over participants.
c) “Germs” spread from the instructor’s greeting should glow on participants’ hands and on articles they have touched. Likely places for glowing to appear include participants’ hands, pencils and paper, chairs, clothing, hair, etc.
Discuss:• Ease with which germs were spread from the
instructor’s hands to the participant’s and then to anything they touched.
• Implications of the easy spread of germs in produce production and handling situations.
HowGermsareSpread-IIa) Prior to the arrival of class participants, a light dusting
of “germ powder” is placed in various areas of the teaching room - on tables, counters, etc.
ExperimentsUsingArtificial“Germs”
GloGerm® and Glitterbug® are commercially available products that contain plastic “germs” which fluoresce when exposed to UV light . The products come in both lotion and powder forms. They are useful to represent microorganisms in demonstrations. The following are ideas for experiments using these products. Instructors’ needs and situations may suggest additional ways these products can aid in demonstrating sanitation practices.
Note: Because some people have expressed concern about working with “germs” in these experiments, be careful to reassure participants that these are simulations and that the “germs” are not real nor are they in any way harmful.
HandwashingDepending on class size, time and facilities, this experiment may be done with a few volunteers demonstrating to the class or it may be an activity for the entire class.
a) Participants apply a small amount of the lotion form of the product to their hands, rubbing it on like hand lotion. When they look at their hands under a UV light, they should be covered with glowing “germs.”
b) Participants then wash their hands as they would normally. After washing, look at their hands under the UV light again. If handwashing was thorough, there should not be any “germs” remaining. Any areas not washed well will glow.
c) A variation of this demonstration would be to observe the “germs” on unwashed hands. Instruct one person to rinse their hands with water. Instruct another person to wash their hands with soap for at least 20 seconds. Observe any remaining “germs” after washing.
Discussion:• Was the handwashing procedure complete so that all of
the “germs” washed off?
VIII-11 Copyright © 2010 University of Maryland.
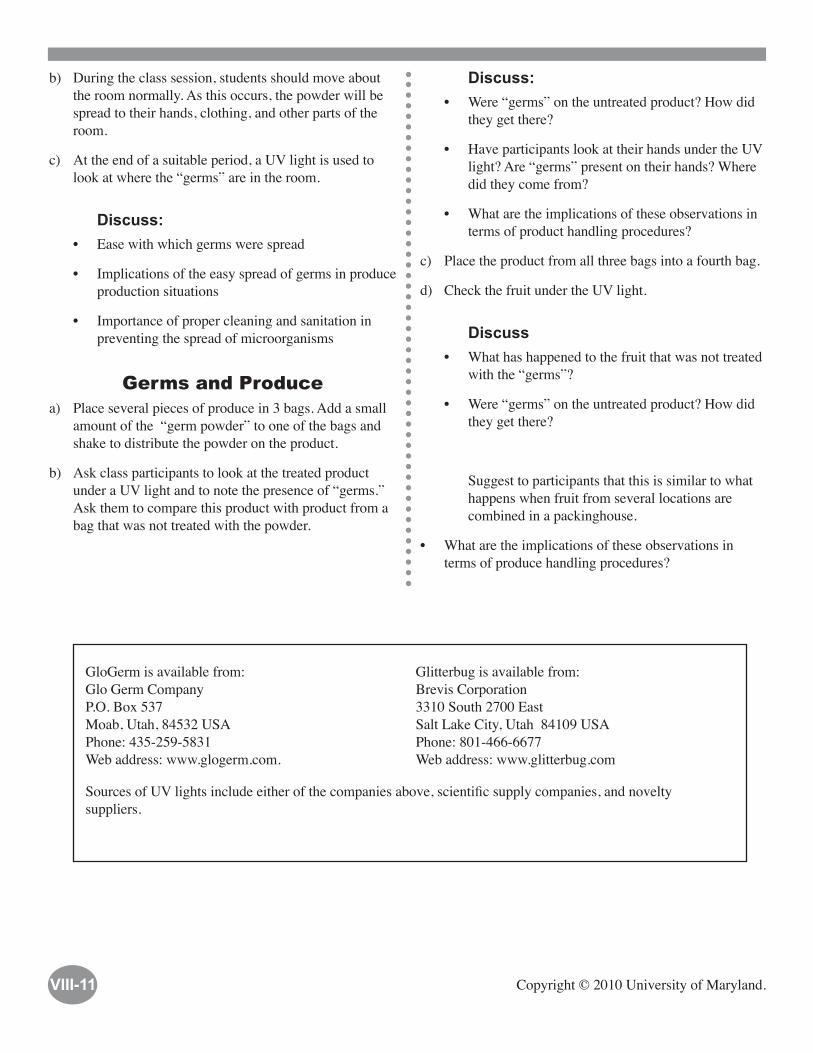
Discuss:• Were “germs” on the untreated product? How did
they get there?
• Have participants look at their hands under the UV light? Are “germs” present on their hands? Where did they come from?
• What are the implications of these observations in terms of product handling procedures?
c) Place the product from all three bags into a fourth bag.
d) Check the fruit under the UV light.
Discuss• What has happened to the fruit that was not treated
with the “germs”?
• Were “germs” on the untreated product? How did they get there?
Suggest to participants that this is similar to what happens when fruit from several locations are combined in a packinghouse.
• What are the implications of these observations in terms of produce handling procedures?
b) During the class session, students should move about the room normally. As this occurs, the powder will be spread to their hands, clothing, and other parts of the room.
c) At the end of a suitable period, a UV light is used to look at where the “germs” are in the room.
Discuss: • Ease with which germs were spread
• Implications of the easy spread of germs in produce production situations
• Importance of proper cleaning and sanitation in preventing the spread of microorganisms
GermsandProducea) Place several pieces of produce in 3 bags. Add a small
amount of the “germ powder” to one of the bags and shake to distribute the powder on the product.
b) Ask class participants to look at the treated product under a UV light and to note the presence of “germs.” Ask them to compare this product with product from a bag that was not treated with the powder.
GloGerm is available from: Glo Germ Company P.O. Box 537 Moab, Utah, 84532 USA Phone: 435-259-5831 Web address: www.glogerm.com.
Glitterbug is available from: Brevis Corporation 3310 South 2700 East Salt Lake City, Utah 84109 USA Phone: 801-466-6677 Web address: www.glitterbug.com
Sources of UV lights include either of the companies above, scientific supply companies, and novelty suppliers.

JIFSANGoodAgriculturalPracticesManualSection VIII, Experiments/Demonstrations
Copyright © 2010 University of Maryland. This work may be reproduced, in whole or in part, without prior written permission, for personal use. No other use is permitted without the express prior written permission of the University of Maryland. For permission, contact JIFSAN,
Patapsco Building Suite 2134, University of Maryland, College Park 20740
4. The different groups with different ideas about quality standards would be similar to different countries setting up their own standards. What are some of the problems that might occur in attempting to harmonize standards between countries?
Discussion Questions1) Using your country as an example, how could
application of programs to enhance the safety of produce enhance:
a) The export potential for local agricultural products?
b) The domestic market for fresh produce?
c) Give examples of each.
2) An outbreak of foodborne illness may have serious effects on the health of those who ate the contaminated food. However, its long-term effects may go much further. Within your country, how would a foodborne illness outbreak affect
a) The economy?
b) The labor force?
3) With the goal of harmonizing your country’s food laws and regulations with those of trade partners (or Codex) how would you go about:
a) Accessing information on national laws?
b) Obtaining comparable data on trading partners or from international sources?
c) Writing a step-by-step procedure for your industry on “How to export fresh produce to the U.S.”?
4) What fresh produce standards would you like to adopt for your local industry and why?
5) What components should be considered in developing for industry use:
a) Inspection protocols for surveying the GAP compliance status of fresh produce farms.
Fresh Produce Quality
Purpose:To observe attributes affecting produce quality.
Materials:Produce – samples of the same product from several different sources, such as farms, packinghouses, and grocery stores.
Procedure:• Divide the class into groups of 3-5. Assign a produce
product to each group (be sure the same product is assigned to at least 2 groups).
• Ask the groups to develop a set of Standards for their assigned product.
• Have available samples of the products assigned to the participants. Provide groups with samples of their product from several sources - such as from farms, packinghouses, and grocery stores. Ask the groups to rate these based on their established standards.
• Have groups with the same products compare their list of standards and the ratings assigned to products from the different sources. Provide time for the groups to discuss their lists and to explain why they chose the criteria they used. Multiple groups with the same product should be allowed time to discuss the items that on their standards lists and to reach agreement on items to include.
Discussion:1. What factors were considered in setting up the
standards?
2. When standards were actually applied to produce, was there a need to alter or revise original criteria? Explain.
3. Was it easy for different groups to reach a consensus on a single set of standards? Why or why not?

VIII-13 Copyright © 2010 University of Maryland.
b) An industry protocol for monitoring and responding to fresh produce-induced food illness outbreaks.
6) Discuss the target groups you anticipate training.
a) What characteristics are unique to this target group?
b) What techniques will you employ to best get the message across to this group?
7) Discuss how the above principles apply to the produce industry in your country
a) Describe the food safety system in your country. Identify the various government Agencies, Departments or Ministries involved in ensuring the safety of fresh fruits and vegetables and the responsibilities of each.
b) Discuss how the produce industry should approach interacting with each of these?
c) Discuss ways that you can obtain information from these groups that is relevant to your fresh produce industry. For areas that you are uncertain about, prepare a list of questions that you can take home with you for further research about obtaining this information.
Copyright © 2010 University of Maryland. This work may be reproduced, in whole or in part, without prior written permission, for personal use. No other use is permitted without the express prior written permission of the University of Maryland. For permission, contact JIFSAN,
Patapsco Building Suite 2134, University of Maryland, College Park 20740
remained. The implicated seed lot was a blend of 5 lots from fields of four farmers and was harvested between 1984 and 1996. The seed processor and the farmers were located in Idaho. Because two sprouting facilities (in two states) were associated with the implicated alfalfa sprouts and a single lot of seeds (from Idaho) were common to both it was likely that the contamination of the seeds occurred before sprouting.
Immediate control measures were put into place, including removing the 6,000 pounds of seed from the marketplace. Meetings were held with public health officials explaining to seed growers the need to protect alfalfa seed in sprouting from contamination during growing, harvesting and packing. Public television and radio announcements were made to advise the public about the risks of contaminated sprouting seeds. The sprout industry explored ways to treat sprouts to make them safe for human consumption.
FurtherInvestigation:Inspection of the alfalfa fields revealed three possible sources of contamination: cattle manure, irrigation water and deer feces. Although manure is not normally applied to alfalfa fields in Idaho, cattle feed lots were common in the area and alfalfa fields of one farmer were adjacent to a feed lot. Manure may have leaked or been illegally dumped into the alfalfa fields or run-off water from neighboring fields.
Water contaminated by manure may have been used to irrigate the fields. In addition, three of four farmers occasionally saw deer in their fields and one field was located near a wildlife refuge. The seed from each farmer was harvested and mechanically cleaned at the same seed processing plant. The seeds were then placed in 50-pound bags. No further processing occurred.
Most of the seed was produced to plant alfalfa fields (e.g., to produce hay for livestock feed): the relatively small amount of seed used for sprouting was not handled any differently than the raw agricultural commodity seed. In the situation described, the source of contaminated seed was identified.
JIFSANGoodAgriculturalPracticesManualSection VIII, Problem Solving
Traceback Investigation
Multistate Outbreak of E. coliO157:H7Infection 1, 2
In the State of Michigan during June1997, 52 cases of E. coli O157:H7 infections were reported compared to only 18 cases reported in June 1996. Based on laboratory testing, it was suspected that the cases of E. coli infection resulted from a common source.
The cases were spread over 10 counties in Michigan indicating the source was relatively widespread. Onset of symptoms among known cases extended over approximately one month suggesting that the source of contamination was either a product with an appreciable shelf-life or that there was on-going production of a contaminated product.
Interviews were conducted with a limited number of patients to explore all potential sources of infection. Interviews revealed that most patients had consumed lettuce and alfalfa sprouts in the week before they became ill. No single restaurant or special event was identified that all patients had attended. A traceback was triggered when further epidemiological studies indicated a statistically significant link between alfalfa sprouts and the outbreak.
Of the 16 patients who ate sprouts for whom the source of the sprouts could be traced, 15 led to a single sprouting facility in Michigan. Investigations of the source of the alfalfa sprouts led to a single sprouting facility.
Sprouts grown in the facility at the time of the outbreak came from two lots of seeds: one from Idaho and one from Australia. At this point in the investigation, a concurrent outbreak of E. coli O157:H7 infection was reported in the State of Virginia. Epidemiological studies also linked this outbreak to alfalfa sprouts. In Virginia the source of sprouts could be traced for 13 patients and all led to a single lot of seed harvested from Idaho. This was the same lot as the one used at the implicated facility in Michigan.
Traceback of the seed to the distributor identified it as part of a 17,000-pound lot of which 6,000 pounds still

VIII-15 Copyright © 2010 University of Maryland.
1. Using visuals from the traceback module in the manual, prepare a flow chart of this traceback.
2. What information did the investigators need at each step of the investigation to proceed to the next step? What difficulties might have prevented them from getting the information needed?
3. After identifying the source of the seeds, what additional steps would be needed to help prevent outbreaks from occurring in the future?
4. In inspecting the alfalfa fields and harvesting process, what possible points of contamination should be considered?
1 Information on this case study was taken from the Centers for Disease Control and Prevention (CDC) Case Study: A Multistate Outbreak of E. coli O157:H7 Infection: Instructors Version. The case study was based on two-real life outbreak investigations undertaken in Michigan and Virginia in 1997. Some of the information on the actual traceback had been altered to better serve as a learning exercise. The complete case study is available on the CDC’s website: http://www.cdc.gov/phtn/casestudies
2 For more information on safe handling of sprouts, see FDA Publications in Additional Resources section.

Copyright © 2010 University of Maryland. This work may be reproduced, in whole or in part, without prior written permission, for personal use. No other use is permitted without the express prior written permission of the University of Maryland. For permission, contact JIFSAN,
Patapsco Building Suite 2134, University of Maryland, College Park 20740
1. How will the needs of the participants be identified and confirmed?
2. What are the training objectives?
3. What method of organization of the training content will be the most logical (outline form only)?
4. What training methods will be used and on what basis were they selected?
5. What type of training material will be used and why?
6. What is an interesting way to organize the training course?
7. How will the course be evaluated?
After the working groups have completed their summary, each small group should present its plan to the entire audience for discussion and feedback. Trainers should encourage discussion and refer trainees to appropriate sections/pages in the manual for guidance in answering the questions.
1. Methods to determine and validate participants needs should be listed.
2. Training objectives should be measurable and should address changes in knowledge, behavior/practices and/or attitude.
3. Organization of the training content should have a logical flow.
4. The training methods selected should be specified and justified.
5. The type of training aids to be used should be justified.
6. The organization of the course should fit the time allotted and include meals and breaks.
7. An evaluation should include measures of reaction, learning, behavior and results.
Planning for an Effective Training CourseonGAPs:
3ScenariosThe following exercise is designed to allow trainees to apply the ideas presented in Section VI on Developing an Effective Training Program. Sample situations are provided below. The information for each situation and the questions to be discussed should be printed on handouts or on a visual so the trainees can easily view them.
The exercise may be conducted as part of each of the training modules in this section or at the completion of the entire section. For the exercise, assign the trainees to small working groups. Each group can be presented with a separate training situation or the same situation may be discussed by all of the groups.
Situation 1: Cooperative – Farm Worker Supervisors The agriculture department wants assistance in developing and delivering a training course aimed at the supervisors of farm workers at a local snow pea cooperative.
Situation 2: Tomato Packinghouse Personnel The owner/operator of a large tomato packing facility has requested a training course for plant workers. Consider groups of employees in the facility that perform common tasks. For example, one group may consist of people who are grading the tomatoes, another group could be the cleaning and sanitation crew, another could be the facility maintenance crew that repairs equipment, etc.
Situation 3: Fresh Produce Warehouse A training team of technical advisors has been asked to deliver a training course for warehouse workers and supervisors.
Groups should consider the following questions about the organization and delivery of a training course for their assigned situation:
JIFSANGoodAgriculturalPracticesManualSection VIII, Problem Solving

Copyright © 2010 University of Maryland. This work may be reproduced, in whole or in part, without prior written permission, for personal use. No other use is permitted without the express prior written permission of the University of Maryland. For permission, contact JIFSAN,
Patapsco Building Suite 2134, University of Maryland, College Park 20740
Trainees should be made aware of the sensitivities of visiting a produce growing or handling facility to avoid misunderstandings due to questions, comments or gestures made to the management, supervisors or workers at the site. Trainees should be reminded not to interrupt workers performing their job.
One approach to reinforce Principle material through a field site visit is to note the Good Agricultural Practices and Good Manufacturing Practices that are in place, or that may need to be strengthened to avoid contamination of fresh produce along the production and distribution chain. As a guide for information to note, the following worksheet/checklist can be used by trainees and adapted as appropriate for a site visit to a given operation or facility. Some of the information can be gathered through observation and some through questions directed to the tour guide for the facility. Prior to the visit, a spokesperson may be designated to ask questions of the tour guide on behalf of the group.
JIFSANGoodAgriculturalPracticesManualSectionVIII,FieldSiteVisitGuide
FieldSiteVisitGuideThe purpose of field site visits may vary depending on the needs of the participants and the focus of the training course. Once determined, the purpose of the field site visit should be made clear to the trainees prior to the visit and should serve to reinforce the Principle material presented in the course. Having trainees take an active role in making observations and in class discussion after site visits is useful to make the visits more meaningful.
Trainers are encouraged to visit the site prior to the visit by trainees. During this preliminary visit, the trainers can note practices and be prepared to point these out during the training visit. This preliminary visit would also offer a good opportunity for the trainers to obtain the information to answer trainees’ questions during the visit.
Name of Farmer/Operation: _______________________________________________________
Location: ______________________________________________________________________
Date of Visit: ___________________________________________________________________
Crops Grown: __________________________________________________________________
Agricultural Water
• What activities in this operation use water? What is the source of the water used?
• Has the quality of the water been determined? How? Results?
• Were treatments needed to improve the water quality? What treatments? When were they applied?

VIII-18 Copyright © 2010 University of Maryland.
• Were efforts made to identify possible sources of water contamination? What control measures were used to prevent water contamination?
Manure Management
• Is animal manure used for fertilizer?
• Is the manure composted? How?
• How is manure applied?
• Are records kept of manure use, dates applied?
Animal/Pest Management
• What controls are in place to limit farm animals and domestic animals near production fields?
• What controls are in place to limit wild animals (birds, rodents) from fields?
Treatments/Fertilizers/Pesticides
• Are chemical fertilizers used?
• What records are kept of their use?

VIII-19 Copyright © 2010 University of Maryland.
• What is the source of water used to mix with chemical fertilizers?
• What methods are used to control pests (use of pesticides, biological treatments, etc.)?
• What is the water source for mixing and applying pesticides?
• What records are kept on fertilizer and pesticide use?
Harvest Tools and Equipment
• What harvest methods are used? (i.e. bare hands, gloved hands, automated machines)?
• How are harvest tools cleaned and sanitized?
• What types of harvest containers are used? (i.e., re-usable, made from what materials)
• How are containers cleaned and stored when not in use?
• How is large crop equipment cleaned? (i.e. blades, chutes, conveyors)
• Is equipment used for hauling fresh produce also used for other tasks such as hauling garbage, manure? If so how is it cleaned?

VIII-20 Copyright © 2010 University of Maryland.
Packing Facility
• How is packing facility cleaned?
• What is the water source for cleaning the packing facility?
• Does the packing facility recycle water? If so explain procedure.
• Is the produce cooled? How is it cooled? (i.e. water spray, hydro-cooler, hydro-vac, forced air). What is the source of the water?
• Is water with a disinfectant used in the packing facility? How are residues of the disinfectant monitored and recorded?
• If hydro-coolers are used, are they cleaned and how often? How often is the water changed?
• If ice is used, what is the source of the ice?
• What is the disposal method for wastewater?
• What controls are taken to limit reptiles/insects, birds inside the packing area?
• What measures are taken to avoid cross-contamination within the packing facility?

VIII-21 Copyright © 2010 University of Maryland.
Transportation:VehiclesandEquipment
• What types of vehicles are used to transport produce from the field to the packinghouse? Are the vehicles also used for transporting animals, manure, or chemicals?
• What measures are taken to ensure trucks are clean and sanitary? Are they inspected?
• Is the produce temperature monitored while it is being transported?
Worker Health and Hygiene
• Are there health and hygiene and sanitation training programs for workers? If so, are they in their own language?
• Is there supervisory oversight for worker health/hygiene/sanitation? What measures are taken to ensure that ill workers are not handling produce?
• What type of toilets and handwashing facilities are provided for workers? Where are they located? Are they being used?
• What is the disposal method for wastewater/sewage?
• What measures are taken to ensure handwashing and toilet facilities are well supplied with soap, water and drying devises and that workers use the facilities?

VIII-22 Copyright © 2010 University of Maryland.