secure file interchange 2 whitenoise laboratories inc. quick user guide
TRANSCRIPT

Secure File Interchange 2
Whitenoise Laboratories Inc.
Quick User Guide

Login Page
Manufactured default settings
Default Username = User
Default Password = password1
[You can change username and password under Options.]
Use your Internet browser and go to your secure portal: http://sasktel.wnlabs.com

Home page
Activity logs for recent logins
Invitations from other users and
groups
Menu bar for users
Menu bar for administrators
New file notification

Inbox – getting your secure files
1. Check the box of file you want to retrieve. [You can choose multiple files.]
2. Click download files button
Easily sort any
database to locate files, persons or
status –
Click any of the headers
Inbox button

Inbox – detail button
Clicking the detail button on your inbox files will provide you file information such as file size and date. You can download the chosen file from this screen.

Downloading files from your inbox
Check the box of the file to download. Click download files.
When you download a file from your inbox you have two choices.
Selecting Open will immediately decrypt the file and deposit it to your desktop for immediate use.
Selecting Save will save the file securely in an encrypted state to your desktop (and protected from other eyes). You can decrypt the file later when you want to use it.

Sending Secure Files
Send File button
1. Check the box of the person to whom you
want to send the file
securely.
2. Click Next.When you send a secure file to an individual, they will receive it encrypted in their own unique key.

Sending a secure file to a group
3. Choose a group to send the file to or
click Next.
When you send a secure file to a group, each member of that group will receive the file encrypted in their own unique key.

Browse to locate and encrypt file to send
4. Click the browse button to go select the file you want to send.

Selecting the file for secure transmission
5. Right click on the file to
send
6. Left click on Encrypt selection

File is securely encrypted for transmission
When you have already logged in your key into the session, the file will automatically encrypt.

Attach encrypted file to deliver
7. Click open to attach file.

Send your secure file
File name description
8. Click Finish
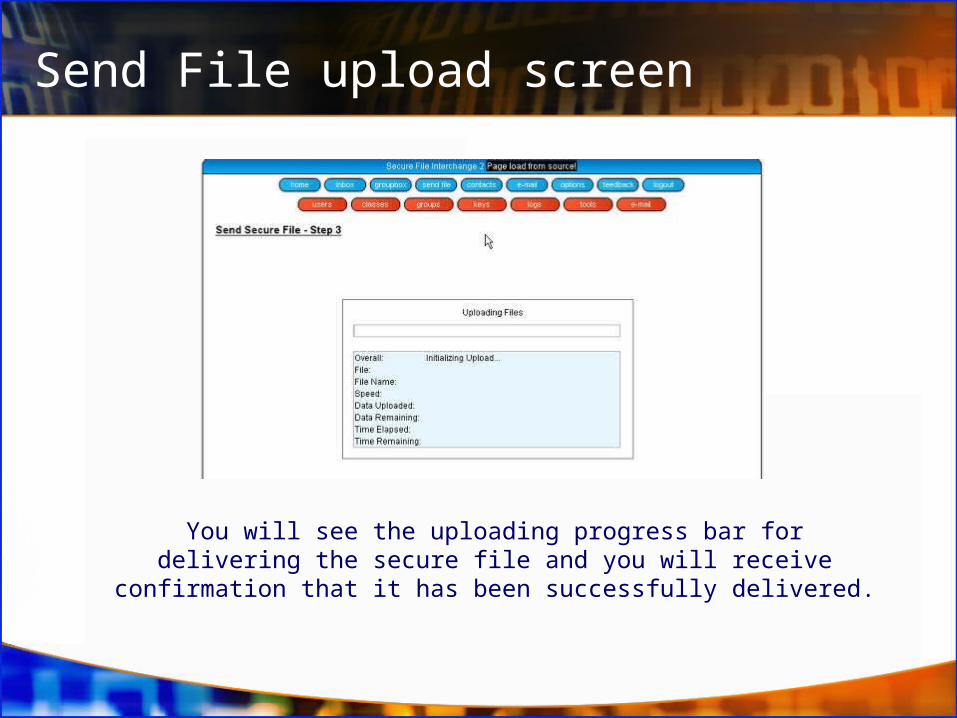
Send File upload screen
You will see the uploading progress bar for delivering the secure file and you will receive confirmation that it has been successfully delivered.

Contacts page
From this page you will see system users that you can exchange secure files with and you can make requests to new persons with whom you want to exchange
secure files.
Search system users by Name,
Classification or status.
Make a request
Contacts

SFI Email Utility
You can also use SFI to send secure emails and email attachments to other SFI users. They will receive these encrypted in their own unique keys. You can email
individuals or groups in one simple step.
Choose recipient(s)

SFI Email utility
Type your email and click Send.

Options pageOptions
Change your email address, password or layout.

Change your password
The manufactured default password for an SFI account is ‘password1’.
Select a new password for assured privacy. Enter the default password and then your new password twice.
Options - Password
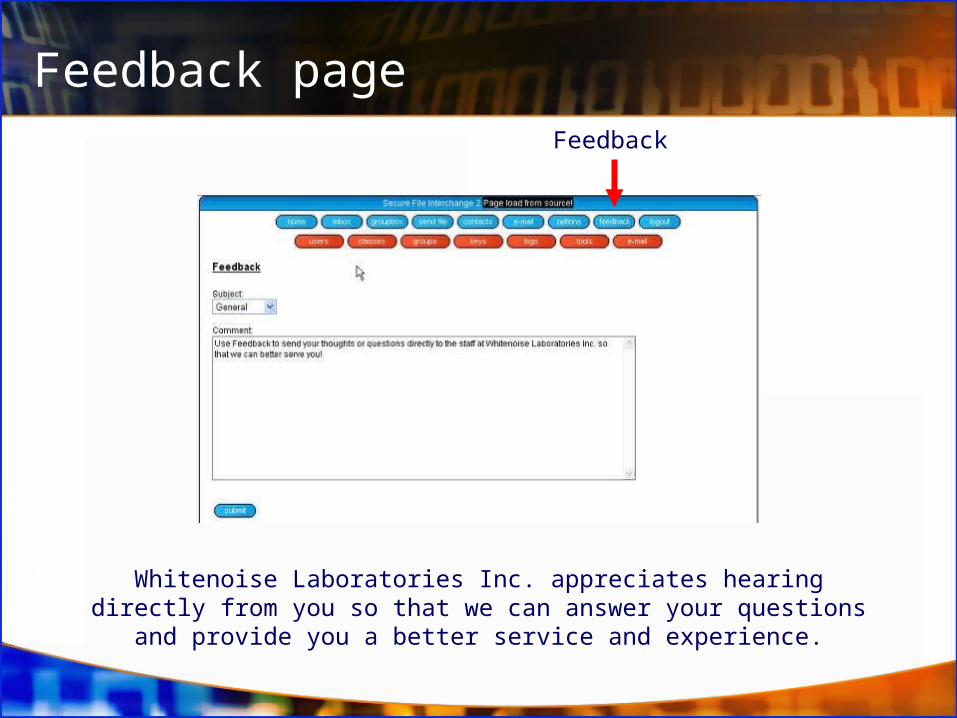
Feedback pageFeedback
Whitenoise Laboratories Inc. appreciates hearing directly from you so that we can answer your questions and provide you a better service and
experience.

Secure File Interchange 2
Whitenoise Laboratories Inc.
Administrator’s Menu for managing Secure File Interchange

Administrators manage users
Users
Quickly add or remove users or modify their rights on the system.

Administrators manage classes
Administrators can quickly add or remove classes and their rights, as well as assign storage limits to different classes of persons.

Administrators manage groups
Administrators can quickly create or eliminate groups ie sales, marketing etc.
They can add or remove members from these groups.
Groups are important and convenient. When a secure file is sent to a group, each person of that group will receive the file encrypted in their own unique
key. This is accomplished with one simple step.
groups

Administrators manage logs
Standards insist that logs are kept of all activity on a secure system. The administrator can access logs to evaluate system use and activity. It is critical for non-repudiation.
logs
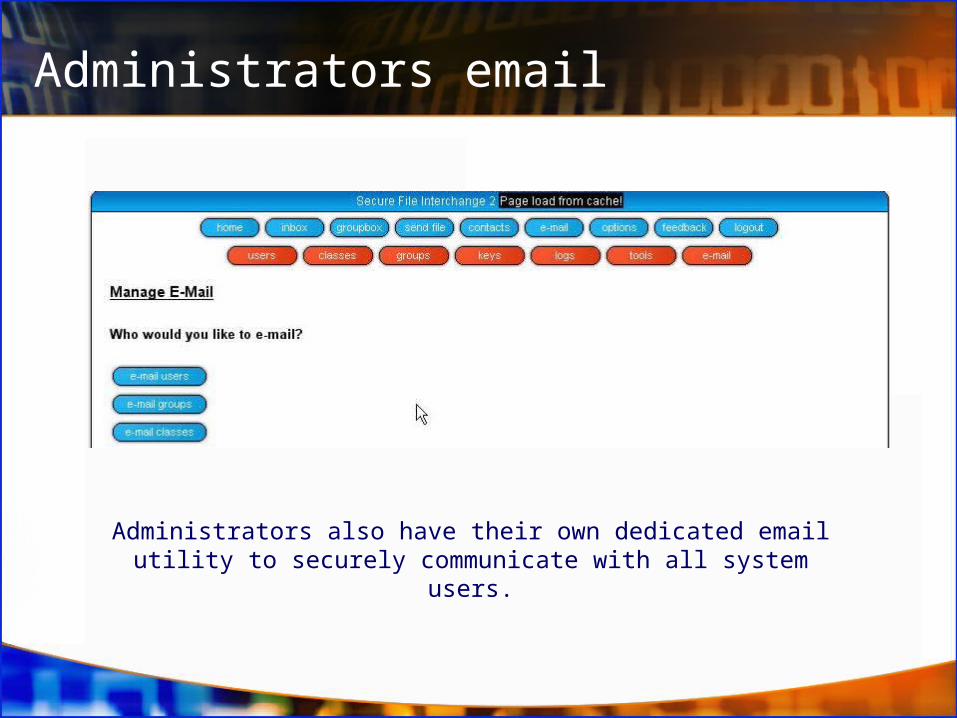
Administrators email
Administrators also have their own dedicated email utility to securely communicate with all system users.
