setting up a trinocular dissecting microscope for best viewing
TRANSCRIPT

Setting up a trinocular dissectingmicroscope for best viewing

Ocular tube for mounting a camera
Oculars for viewing by eye
“Trinocular” means three oculars or eyepieces
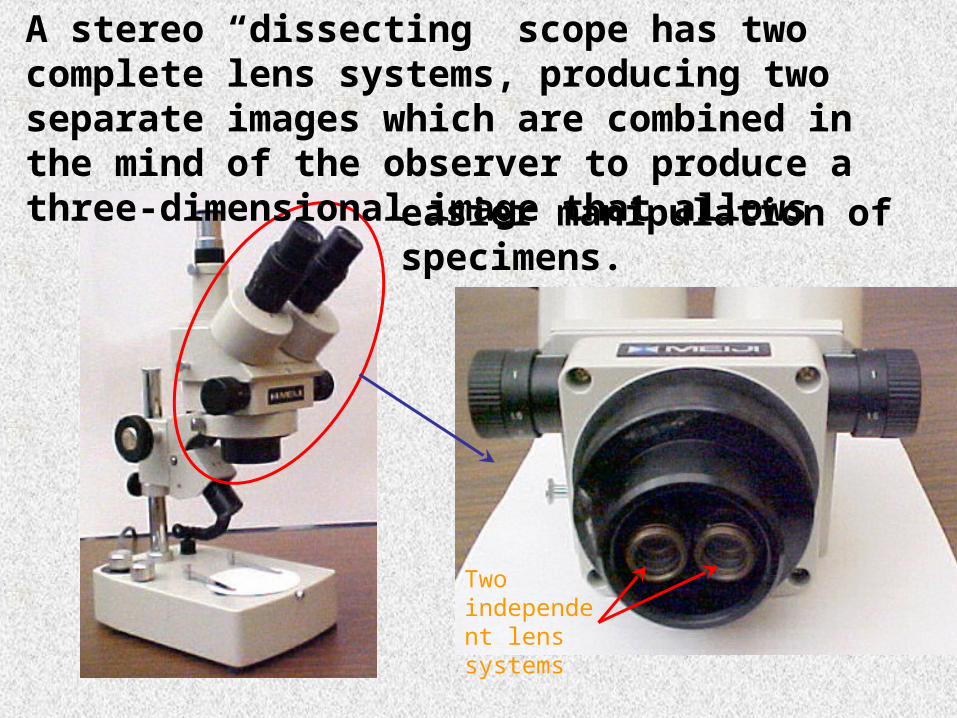
Two independent lens systems
A stereo “dissecting” scope has two complete lens systems, producing two separate images which are combined in the mind of the observer to produce a three-dimensional image that allows
easier manipulation of specimens.

Upper illuminator for “incident light” viewing
Lower illuminator for “transmitted light” viewing
Specimens can be illuminated from two light sources; one below and one above, depending on needs of viewing a
particular specimen

Dimmer switch for lights
Light source selection switch
Illuminating specimens from below provides for “transmitted” light viewing and from above for “incident” light viewing. One control switch selects the light source and the other varies light intensity. To preserve bulb life, IT IS IMPORTANT
to reduce electric current surge by turning the dimmer all the way down before operating the light-source selection switch.
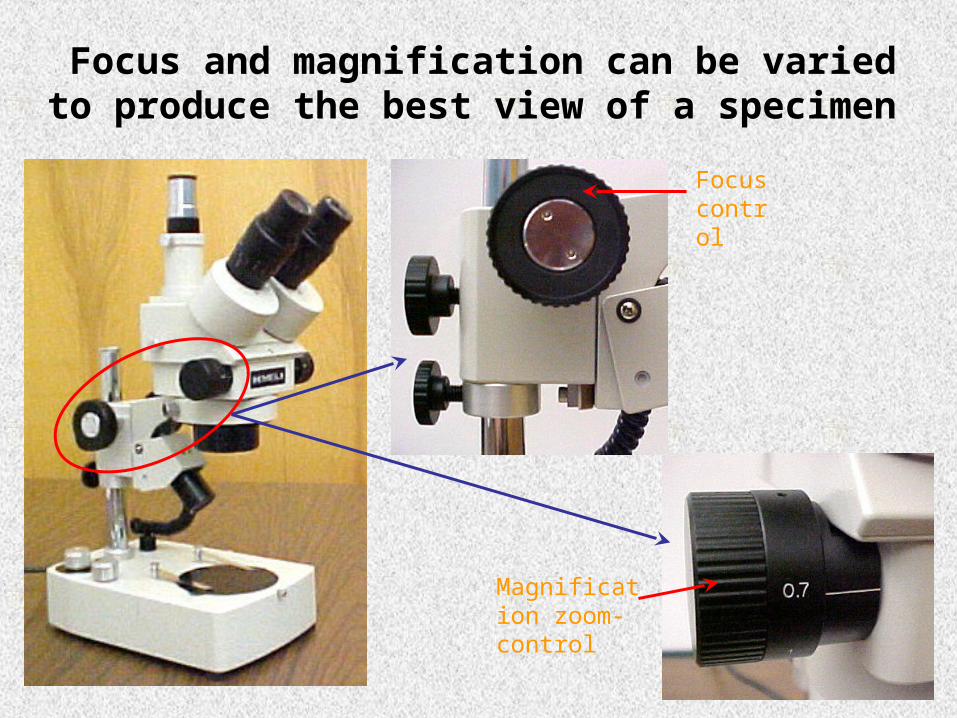
Magnification zoom-control
Focus control
Focus and magnification can be varied to produce the best view of a specimen

Light-colored stage for dark specimens and dark-colored stage for light ones
Specimens for incident-light viewing can be placed against various backgrounds to improve contrast and feature
identification
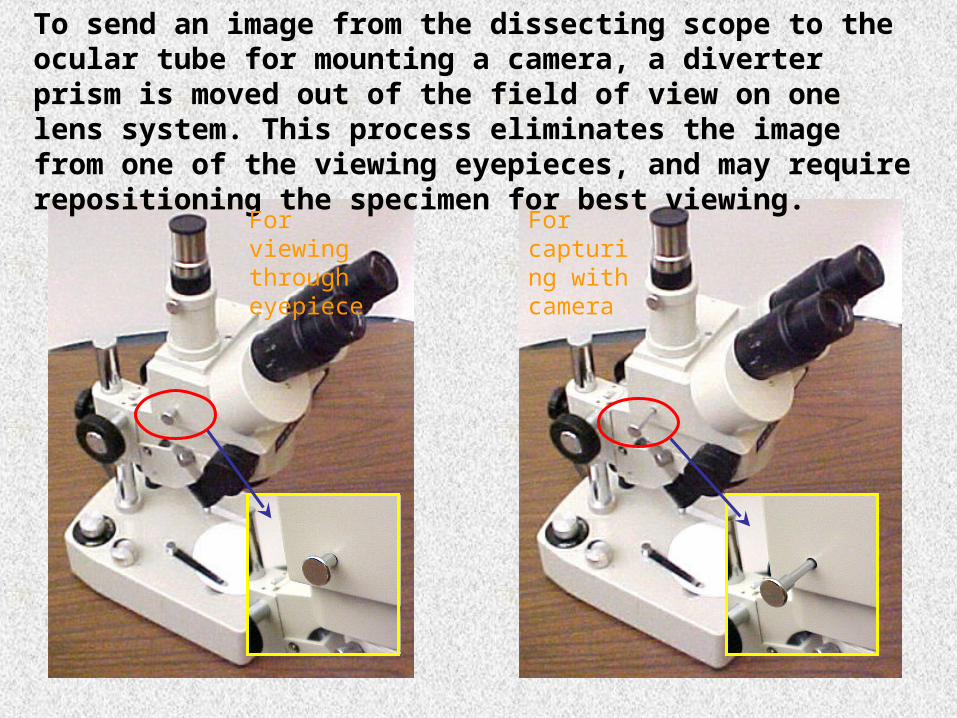
To send an image from the dissecting scope to the ocular tube for mounting a camera, a diverter prism is moved out of the field of view on one lens system. This process eliminates the image from one of the viewing eyepieces, and may require repositioning the specimen for best viewing.
For viewing through eyepiece
For capturing with camera

A stereo dissecting microscope is normally used to view relatively large specimens at
magnifications from about 5X to about 50X. The scope provides a very large range of adjustment to accommodate a variety of
specimen sizes and to allow many options for specimen illumination.

To accommodate large specimens, the entire focusing head of the scope can be raised on the support column. Small
specimens can be accommodated by lowering the focusing head on the support column. The illuminator can be moved to
provide light as needed for best viewing.
Support column
Focusing head

Adjust the microscope eyepieces so you can comfortably see a well-focused image through both
Space eyepieces so you can comfortably see through both at the same time.If one eyepiece tube is fixed focus, close the opposite eye and, using the microscope focusing knob, carefully focus an image of the sample for the open eye. (If both eyepiece tubes are variable focus, either one will do.) Now close the other eye and use the variable focus eyepiece tube to bring the image into focus for the open eye.
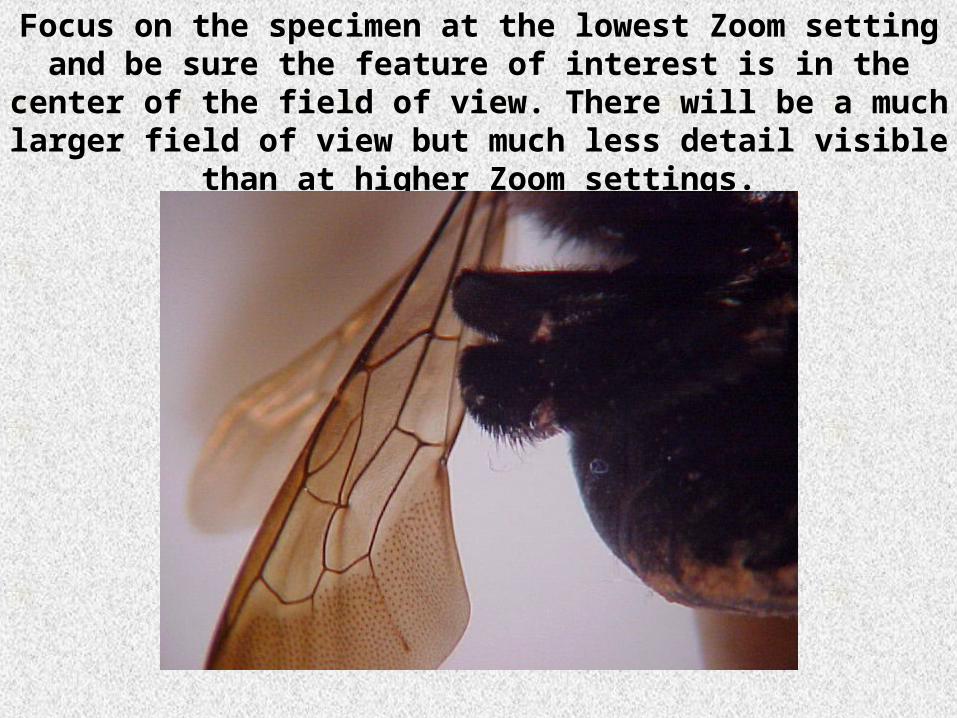
Focus on the specimen at the lowest Zoom setting and be sure the feature of interest is in the center of the field of view. There will be a much larger field of view but much less detail
visible than at higher Zoom settings.
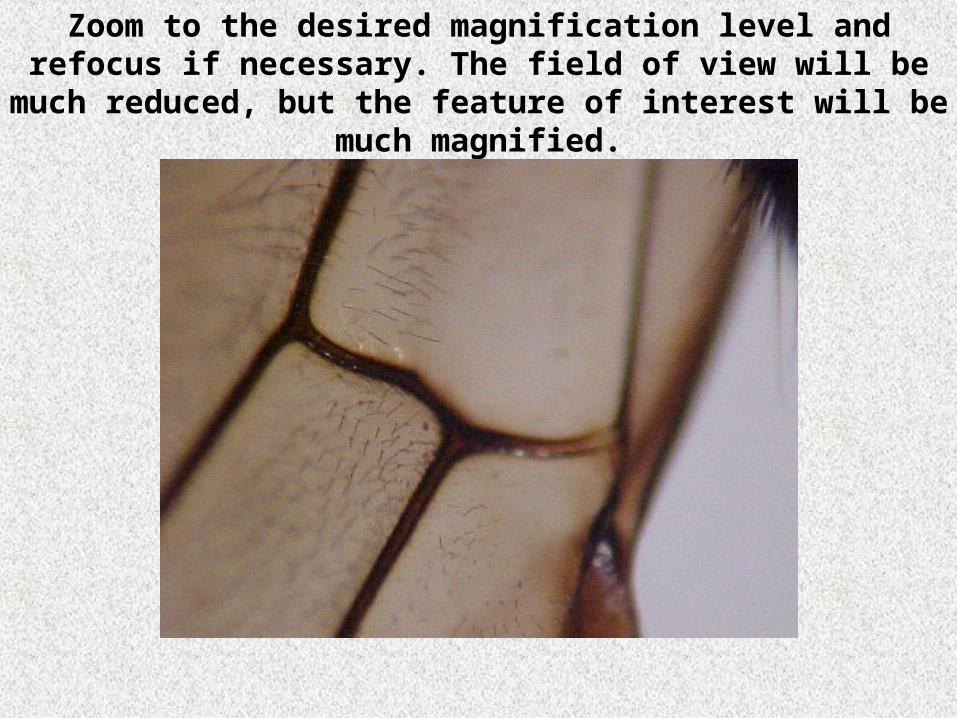
Zoom to the desired magnification level and refocus if necessary. The field of view will be much reduced, but the
feature of interest will be much magnified.
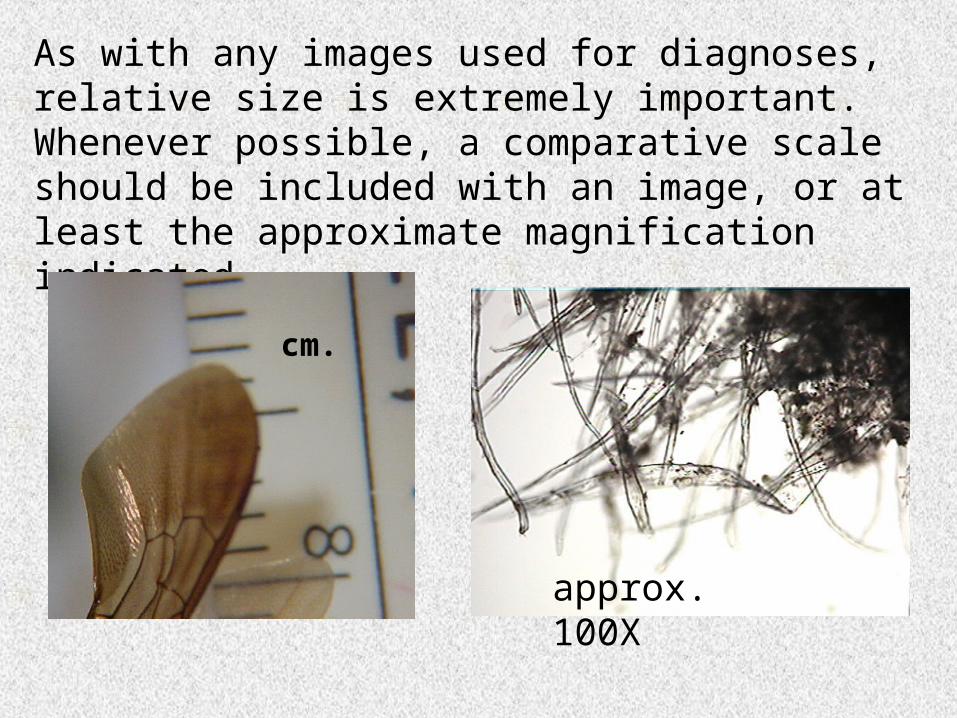
As with any images used for diagnoses, relative size is extremely important. Whenever possible, a comparative scale should be included with an image, or at least the approximate magnification indicated.
cm.
approx. 100X
When the microscope has been adjusted to produce the best image of a specimen, it is
ready for capturing with the camera. Now the diverter-prism must be pulled into position to
direct light up the third ocular tube to the camera mounted on it.
REMEMBERWhat you see in the camera or on the image-
capture viewer is what will be saved to a digital file. NOT NECESSARILY what you see by eye through the eyepieces. BE SURE a final focus is made in the camera viewer or on the image-
capture viewer.

REVIEW1) Be sure illuminator dimmer is turned all the way down before
selecting a light source on the scope.
2) Once the light source is selected, turn dimmer control up slowly
3) Move focusing head to a position on the support column that allows appropriate focusing
4) Focus on specimen at desired magnification
5) Adjust eyepieces for best viewing
6) Adjust illuminator for best lighting
7) “Zoom” to a different magnification if desired, refocus and readjust light
8) Divert image to camera, reposition specimen and fine focus on camera or image-capture viewer.
9) Capture desired image