sewing crafts
TRANSCRIPT
Sewing Crafts from Bloggers eBook
Find thousands of free crafts, decorating ideas, handmade gifts and more at www.FaveCrafts.com. 2
Sewing Crafts from Bloggers eBook
Copyright 2009 by Prime Publishing LLC
All rights reserved. No part of this book may be reproduced or transmitted in any form or by any means, electronic or mechanical, including photocopying, recording, or by any information storage or retrieval system, without written permission from the publisher, except in the case of brief quotations embodied
in critical articles and reviews.
Trademarks are property of their respective holders. When used, trademarks are for the benefit of the trademark owner only.
Published by Prime Publishing LLC, 3400 Dundee Road, Northbrook, IL 60062 – www.primecp.com
Sewing Crafts from Bloggers eBook
Find thousands of free crafts, decorating ideas, handmade gifts and more at www.FaveCrafts.com. 3
Letter from the Editors
Greetings Sewers and Crafters,
National Sewing Month has quickly come and gone, which means we have a lots of fresh patterns to share that have been compiled during the past month and beyond. At FaveCrafts, we appreciate the contributions of expert crafters everywhere and wanted to feature some of our favorite sewing patterns from Bloggers and Contributors. Their creativity is truly unmatched.
In this eBook you’ll find tutorials and patterns for everything from practical and budget‐friendly clothing patterns, holiday projects, lovely bags and clutches, and decorations for your home. If you’re feeling like your old clothes are piling up and need a repurposing idea, check out our patterns for turning old into new. If you’re looking for a way to show your mom you love her, create a sewn eye mask so she can relax. There are tons of great crafts to be sewn right here, so dust off the sewing machine and get started!
Happy Sewing!
You can find more Sewing Patterns, free knitting patterns, craft projects and extensive decorating ideas at www.FaveCrafts.com.
Our eBooks, like all our craft projects, are absolutely FREE to members of our crafting community. Please feel free to share with family and friends and ask them to sign up at our website for our free e‐mail newsletter.
Happy Crafting,
The Editors of FaveCrafts
www.FaveCrafts.com
www.FaveCraftsBlog.com
Sewing Crafts from Bloggers eBook
Find thousands of free crafts, decorating ideas, handmade gifts and more at www.FaveCrafts.com. 4
Sewing Crafts Table of Contents
Clothing ...................................................... 5
Girls Tiered Skirt ............................................. 5
Recycle Your Hubby’s Old T‐Shirts ................. 6
Reversible Scrap Fabric Apron ....................... 9
Give Old Clothes a New Life ......................... 12
Girls' Twirl Dress........................................... 13
Easy Appliqué Flowers ................................. 18
Turn Men's XL Sweatshirts into a Convertible Blouson Tunic ............................................... 19
Quick and Easy Half Apron ........................... 25
Guest Tutorial: Guitar Reverse Applique Shirt ..................................................................... 28
Sweet Collar Sewing Tutorial ....................... 30
Turn a Men's Shirt into a Girly Dress ........... 32
Sewing For The Holidays ....................... 36
Easter Daisy and Fabric Topiary ................... 36
Embellish a Pillow for Mom ......................... 39
Fleece Gnome Hat Tutorial .......................... 41
Easter Chick Appliqué Shirt .......................... 43
Mother's Day Sleep Mask ............................ 45
Egg Cup Pincushion ...................................... 48
Home Décor Crafts ................................. 50
Framed Monogram ...................................... 50
Embellish a Tea Towel ................................. 52
Heating Pillow with Buckwheat ................... 53
Sewn Bags ................................................ 55
Bow Bag Sewing Tutorial ............................. 55
Camping or Sleep Over Bag ......................... 58
Place Mat Purse ........................................... 62
Dragonfly Coin Purse or Wallet ................... 63
Muslin Snack Bags........................................ 66

Clothing
Girls Tiered Skirt
By: Kelly Savery for Mini Me Clothing
This is a must-have for every little girl. This free easy sewing pattern uses beautiful fabrics and basic techniques to create a fantastic tiered skirt that your little girl will love.
Materials:
• Fabric o Yardage varies: the least you
would need is ½ yard. More for longer skirt.
• Scissors • Elastic • Surger • Thread • Ruler • Rotary cutter
Steps:
1. Choose 2-4 different kinds of coordinating fabric.
2. Cut them in strips from selvage to selvage of various widths, depending how long I want the skirt to be, usually for little sizes like 3-4 I use 3 strips about 4” wide.
3. Take two of the strips and lay them good side to good side and pin them down the middle. Surge them together and repeat this process with the other strips until they are all sewn to each other.
4. Between steps, iron fabric strips as you sew them together.
5. Take the selvage ends good to good and sew them together. By now it is starting to resemble a skirt.
6. Trim both ends with a rotary cutter to be sure they are even.
7. After deciding which fabric you want to be the top of the skirt, fold over and iron about 1” twice so no raw edges are showing and do the same with the bottom.
8. Sew (with a traditional machine, do not surge) around the top leaving an opening for the elastic, and do the same to the bottom with no opening.
9. Choose the width of your elastic, I like to use ½”, the length will be determined by the size of skirt you want to make, for instance for size 3-4 I use 18” and then increase a ½” for each size above that, now put it through the top and sew the ends of the elastic together and close the opening in the waist band.
10. Turn right side out and your skirt is done!
Sewing Crafts from Bloggers eBook
Find thousands of free crafts, decorating ideas, handmade gifts and more at www.FaveCrafts.com. 6
Recycle Your Hubby’s Old TShirts
By: Stephanie Boarman for Ooh Baby!
My husband, has what we can only refer to as, a t-shirt collection. From the reasonable to the ridiculous, he has collected and worn it. There are so many that I can barely close the dresser drawer, it takes the jaws of life just to put the laundry away. Behold...
One shirt at a time, I am slowly reducing the collection to the oldest and most tattered, not fit for recycling. Anyway, if this works on your man, then hopefully this tutorial below will be helpful.
Materials:
• Really cool old t-shirt • Thread • 1/4" to 1/2" elastic • safety pin • 1 cute child to wear pants!
Steps:
We begin with one of Dad's treasured gems: the hookah caterpillar Grateful Dead shirt
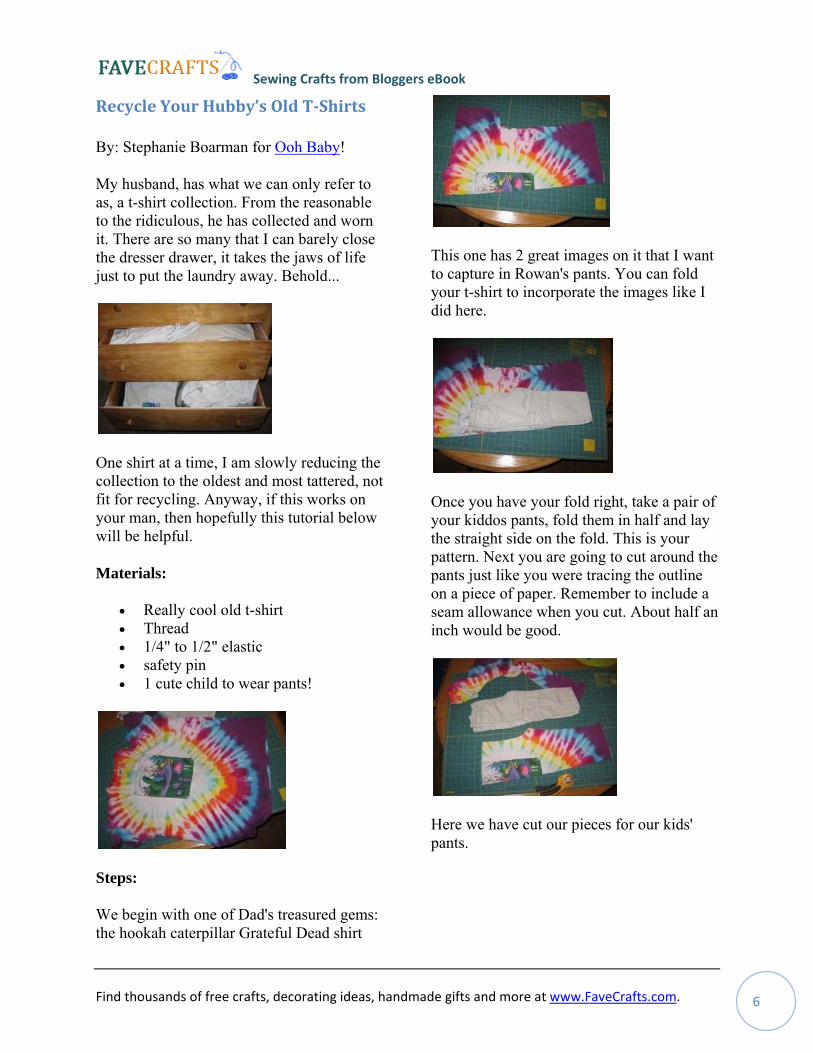
This one has 2 great images on it that I want to capture in Rowan's pants. You can fold your t-shirt to incorporate the images like I did here.
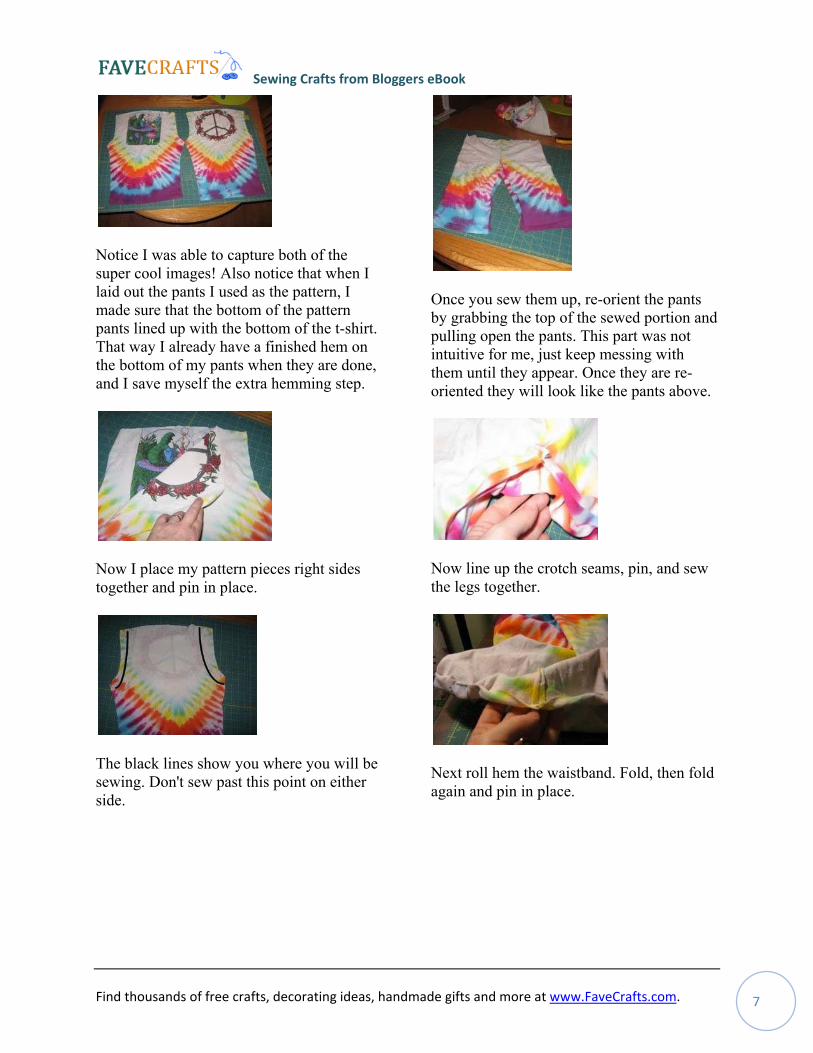
Once you have your fold right, take a pair of your kiddos pants, fold them in half and lay the straight side on the fold. This is your pattern. Next you are going to cut around the pants just like you were tracing the outline on a piece of paper. Remember to include a seam allowance when you cut. About half an inch would be good.
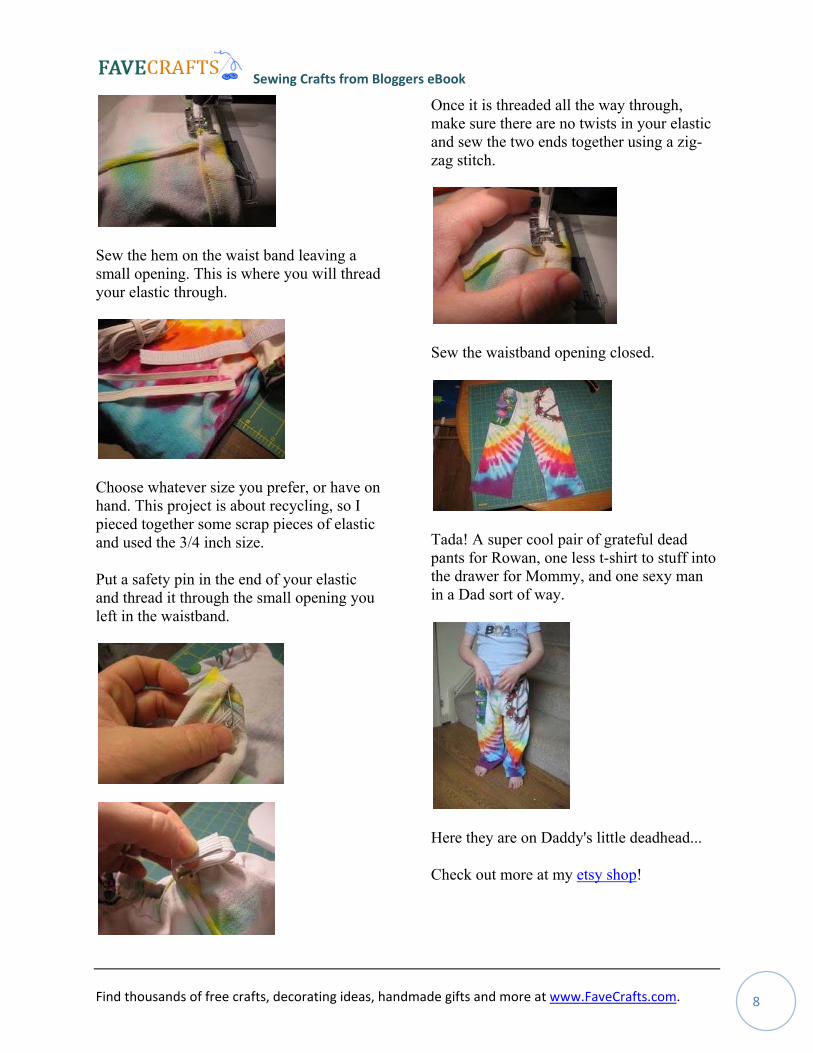
Here we have cut our pieces for our kids' pants.
Sewing Crafts from Bloggers eBook
Find thousands of free crafts, decorating ideas, handmade gifts and more at www.FaveCrafts.com. 7
Notice I was able to capture both of the super cool images! Also notice that when I laid out the pants I used as the pattern, I made sure that the bottom of the pattern pants lined up with the bottom of the t-shirt. That way I already have a finished hem on the bottom of my pants when they are done, and I save myself the extra hemming step.
Now I place my pattern pieces right sides together and pin in place.
The black lines show you where you will be sewing. Don't sew past this point on either side.
Once you sew them up, re-orient the pants by grabbing the top of the sewed portion and pulling open the pants. This part was not intuitive for me, just keep messing with them until they appear. Once they are re-oriented they will look like the pants above.
Now line up the crotch seams, pin, and sew the legs together.
Next roll hem the waistband. Fold, then fold again and pin in place.
Sewing Crafts from Bloggers eBook
Find thousands of free crafts, decorating ideas, handmade gifts and more at www.FaveCrafts.com. 8
Sew the hem on the waist band leaving a small opening. This is where you will thread your elastic through.
Choose whatever size you prefer, or have on hand. This project is about recycling, so I pieced together some scrap pieces of elastic and used the 3/4 inch size.
Put a safety pin in the end of your elastic and thread it through the small opening you left in the waistband.
Once it is threaded all the way through, make sure there are no twists in your elastic and sew the two ends together using a zig-zag stitch.
Sew the waistband opening closed.
Tada! A super cool pair of grateful dead pants for Rowan, one less t-shirt to stuff into the drawer for Mommy, and one sexy man in a Dad sort of way.
Here they are on Daddy's little deadhead...
Check out more at my etsy shop!

Sewing Crafts from Bloggers eBook
Find thousands of free crafts, decorating ideas, handmade gifts and more at www.FaveCrafts.com. 9
Reversible Scrap Fabric Apron
By: Jennifer Juniper of Hope Studios
I popped out of my own little bloggy universe to meet up with you over here and toss out a tutorial. Ready? Let’s make us some Reversible Fabric Scrap Aprons, baby! Let’s see if we can complete this project using what we have around the house.
Materials:
• Fabric Scraps • Various Trims • Sewing machine • Iron • Needle and Thread • Scissors
I worked out this project with my girlfriends, and we decided to pool our scraps of fabric and trim, to mix it up a little. I think most people can make this apron with the extra fabric and trim they have on hand. If you need something, consider
getting some fat quarters in the quilting section of your local fabric store.
Cut your fabric into strips and squares of various widths and press. Don’t stress, you can’t mess this up. Just make sure your scraps have straight edges.
Sew, right sides together, to form a patchwork from all your strips and squares. The dimensions should be 27 inches x 21 inches for your panel. You can measure and cut to size after you piece your scraps together.
Press everything flat.
Sewing Crafts from Bloggers eBook
Find thousands of free crafts, decorating ideas, handmade gifts and more at www.FaveCrafts.com. 10
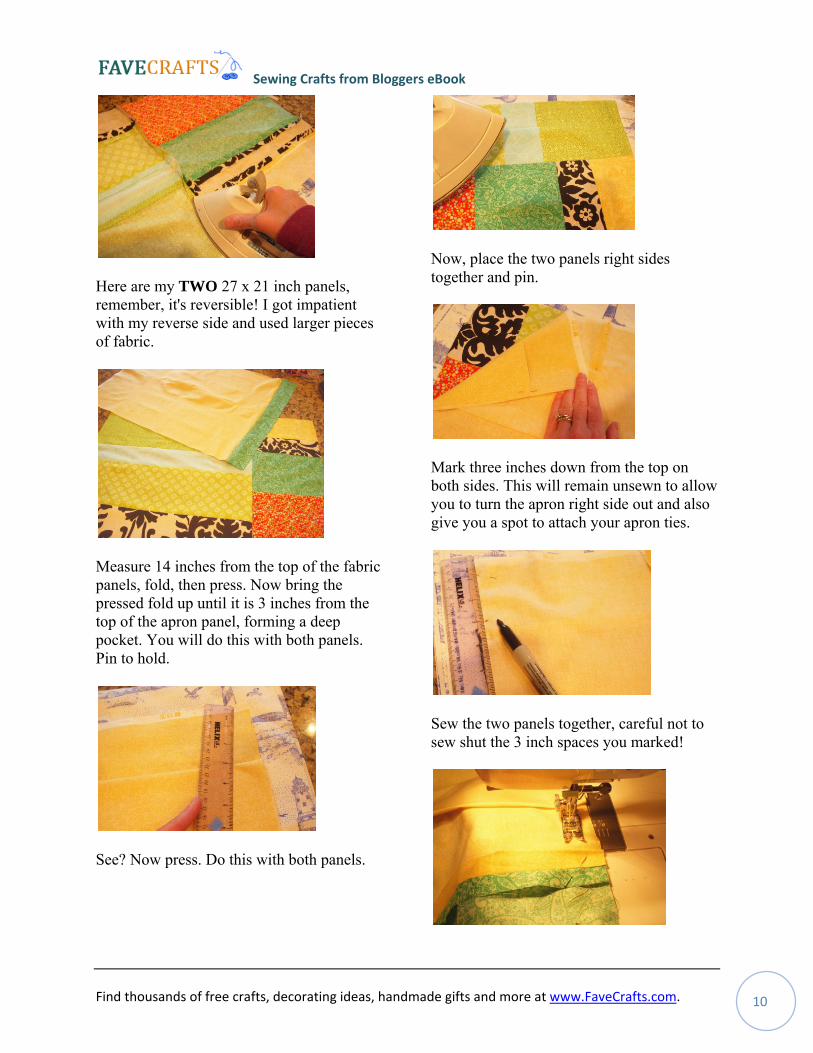
Here are my TWO 27 x 21 inch panels, remember, it's reversible! I got impatient with my reverse side and used larger pieces of fabric.
Measure 14 inches from the top of the fabric panels, fold, then press. Now bring the pressed fold up until it is 3 inches from the top of the apron panel, forming a deep pocket. You will do this with both panels. Pin to hold.
See? Now press. Do this with both panels.
Now, place the two panels right sides together and pin.
Mark three inches down from the top on both sides. This will remain unsewn to allow you to turn the apron right side out and also give you a spot to attach your apron ties.
Sew the two panels together, careful not to sew shut the 3 inch spaces you marked!
Sewing Crafts from Bloggers eBook
Find thousands of free crafts, decorating ideas, handmade gifts and more at www.FaveCrafts.com. 11
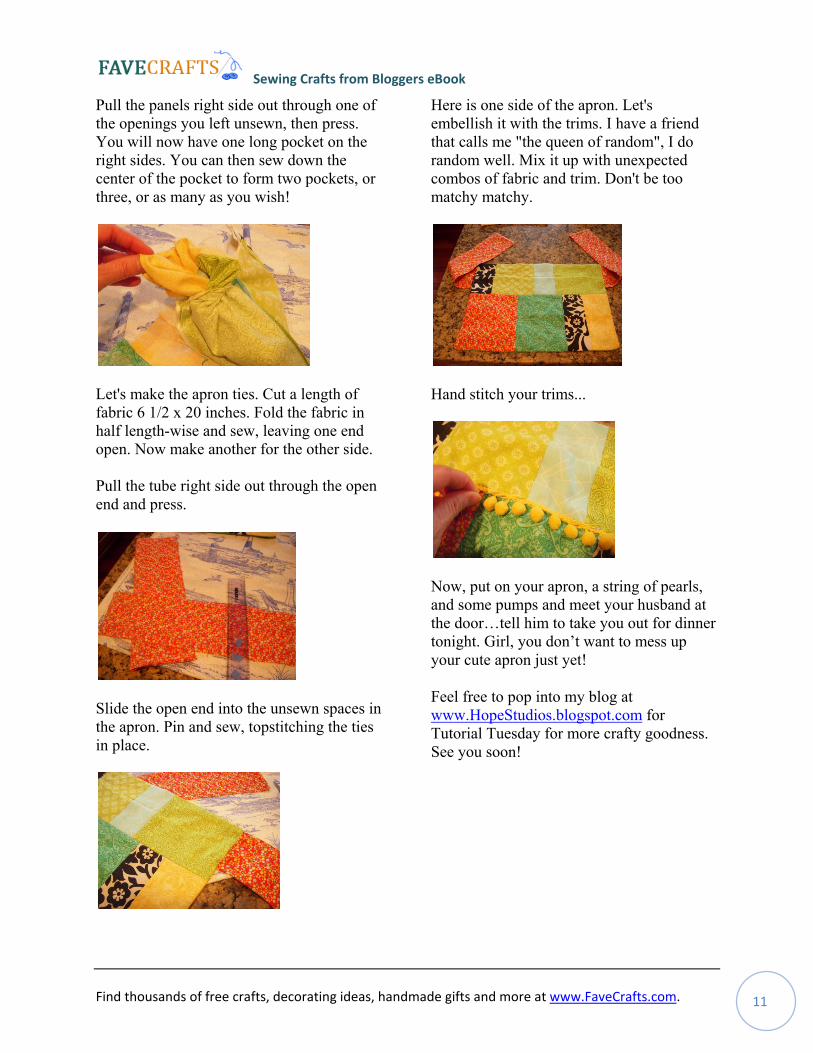
Pull the panels right side out through one of the openings you left unsewn, then press. You will now have one long pocket on the right sides. You can then sew down the center of the pocket to form two pockets, or three, or as many as you wish!
Let's make the apron ties. Cut a length of fabric 6 1/2 x 20 inches. Fold the fabric in half length-wise and sew, leaving one end open. Now make another for the other side. Pull the tube right side out through the open end and press.
Slide the open end into the unsewn spaces in the apron. Pin and sew, topstitching the ties in place.
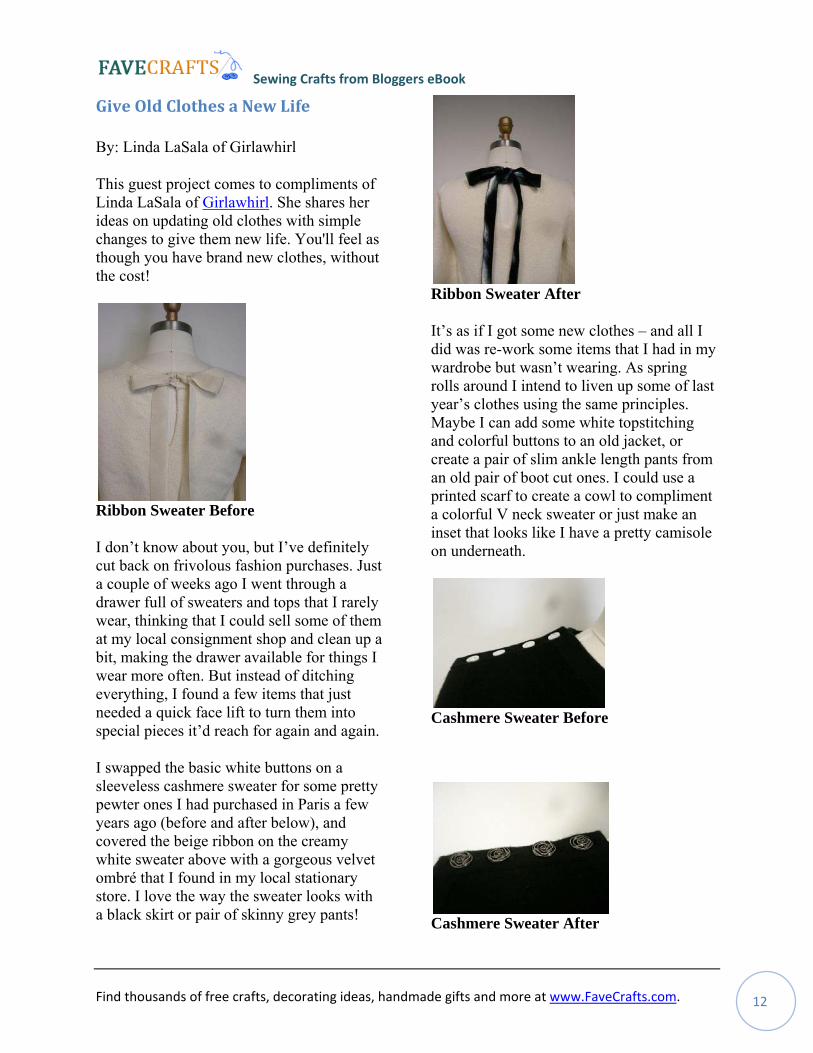
Here is one side of the apron. Let's embellish it with the trims. I have a friend that calls me "the queen of random", I do random well. Mix it up with unexpected combos of fabric and trim. Don't be too matchy matchy.
Hand stitch your trims...
Now, put on your apron, a string of pearls, and some pumps and meet your husband at the door…tell him to take you out for dinner tonight. Girl, you don’t want to mess up your cute apron just yet!
Feel free to pop into my blog at www.HopeStudios.blogspot.com for Tutorial Tuesday for more crafty goodness. See you soon!
Sewing Crafts from Bloggers eBook
Find thousands of free crafts, decorating ideas, handmade gifts and more at www.FaveCrafts.com. 12
Give Old Clothes a New Life
By: Linda LaSala of Girlawhirl
This guest project comes to compliments of Linda LaSala of Girlawhirl. She shares her ideas on updating old clothes with simple changes to give them new life. You'll feel as though you have brand new clothes, without the cost!
Ribbon Sweater Before
I don’t know about you, but I’ve definitely cut back on frivolous fashion purchases. Just a couple of weeks ago I went through a drawer full of sweaters and tops that I rarely wear, thinking that I could sell some of them at my local consignment shop and clean up a bit, making the drawer available for things I wear more often. But instead of ditching everything, I found a few items that just needed a quick face lift to turn them into special pieces it’d reach for again and again.
I swapped the basic white buttons on a sleeveless cashmere sweater for some pretty pewter ones I had purchased in Paris a few years ago (before and after below), and covered the beige ribbon on the creamy white sweater above with a gorgeous velvet ombré that I found in my local stationary store. I love the way the sweater looks with a black skirt or pair of skinny grey pants!
Ribbon Sweater After
It’s as if I got some new clothes – and all I did was re-work some items that I had in my wardrobe but wasn’t wearing. As spring rolls around I intend to liven up some of last year’s clothes using the same principles. Maybe I can add some white topstitching and colorful buttons to an old jacket, or create a pair of slim ankle length pants from an old pair of boot cut ones. I could use a printed scarf to create a cowl to compliment a colorful V neck sweater or just make an inset that looks like I have a pretty camisole on underneath.
Cashmere Sweater Before
Cashmere Sweater After
Sewing Crafts from Bloggers eBook
Find thousands of free crafts, decorating ideas, handmade gifts and more at www.FaveCrafts.com. 13
Girls' Twirl Dress
By: Denise Knapp from Denise/Whimsy Couture
This wonderful contribution came to use from Denise Knapp of Whimsy Couture. This adorable twirl dress is the perfect free sewing pattern for any little girl. The bright colors and the flow will be "sew" fun for her.
Materials and Sizing Chart:
Purchase your fabric, wash, dry and iron before you begin (that prevents any shrinkage). This sizing chart is only a guide. Please measure the individual to determine exact measurements for perfect fit. These dresses fit comfortably and can be worn within a
couple of sizes. You can easily increase or decrease the measurements to your own liking.
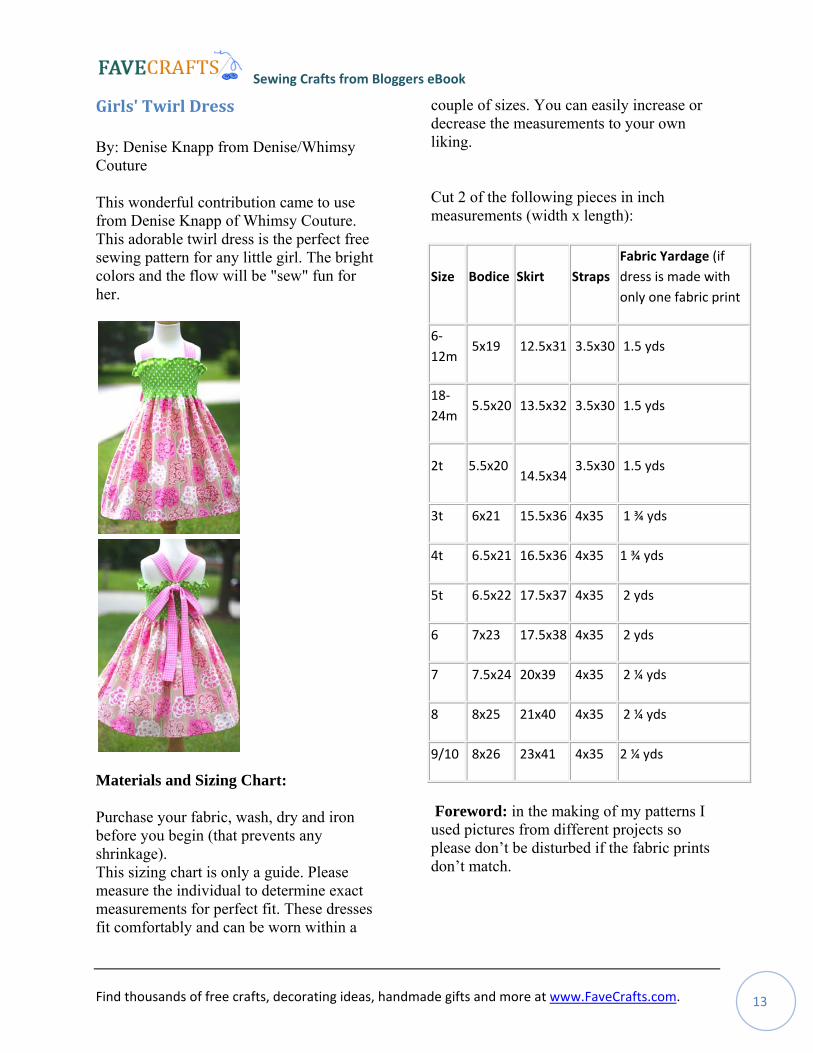
Cut 2 of the following pieces in inch measurements (width x length):
Size Bodice Skirt Straps Fabric Yardage (if dress is made with only one fabric print
6‐12m
5x19 12.5x31 3.5x30 1.5 yds
18‐24m
5.5x20 13.5x32 3.5x30 1.5 yds
2t 5.5x20 14.5x34
3.5x30 1.5 yds
3t 6x21 15.5x36 4x35 1 ¾ yds
4t 6.5x21 16.5x36 4x35 1 ¾ yds
5t 6.5x22 17.5x37 4x35 2 yds
6 7x23 17.5x38 4x35 2 yds
7 7.5x24 20x39 4x35 2 ¼ yds
8 8x25 21x40 4x35 2 ¼ yds
9/10 8x26 23x41 4x35 2 ¼ yds
Foreword: in the making of my patterns I used pictures from different projects so please don’t be disturbed if the fabric prints don’t match.
Sewing Crafts from Bloggers eBook
Find thousands of free crafts, decorating ideas, handmade gifts and more at www.FaveCrafts.com. 14
Please sew all seam allowances with 1/3 inch except when stated differently.
These are your cut fabric pieces. The two big pieces are for the skirt part, the green pieces are the bodice front and back and the two pink long strips are for the ties.
Start with the ties and fold one strip over and let one edge meet the other. Right side of fabric print is inside now. Straight stitch (sew) starting at one end and sew around the corner all the way to the other end leaving the other end open. Trim both corners at small end diagonally off. Turn strap right side out and press. Now fold in the open end to about ¼ inch and press. Repeat with other strip and lay both straps aside.
Take now one bodice piece and fold down the top edge to about ¼ inch and press. Fold down once more and press again.
Straight stitch close to the inner edge on the wrong side of the fabric. Repeat with other bodice piece. Lay both pieces aside.
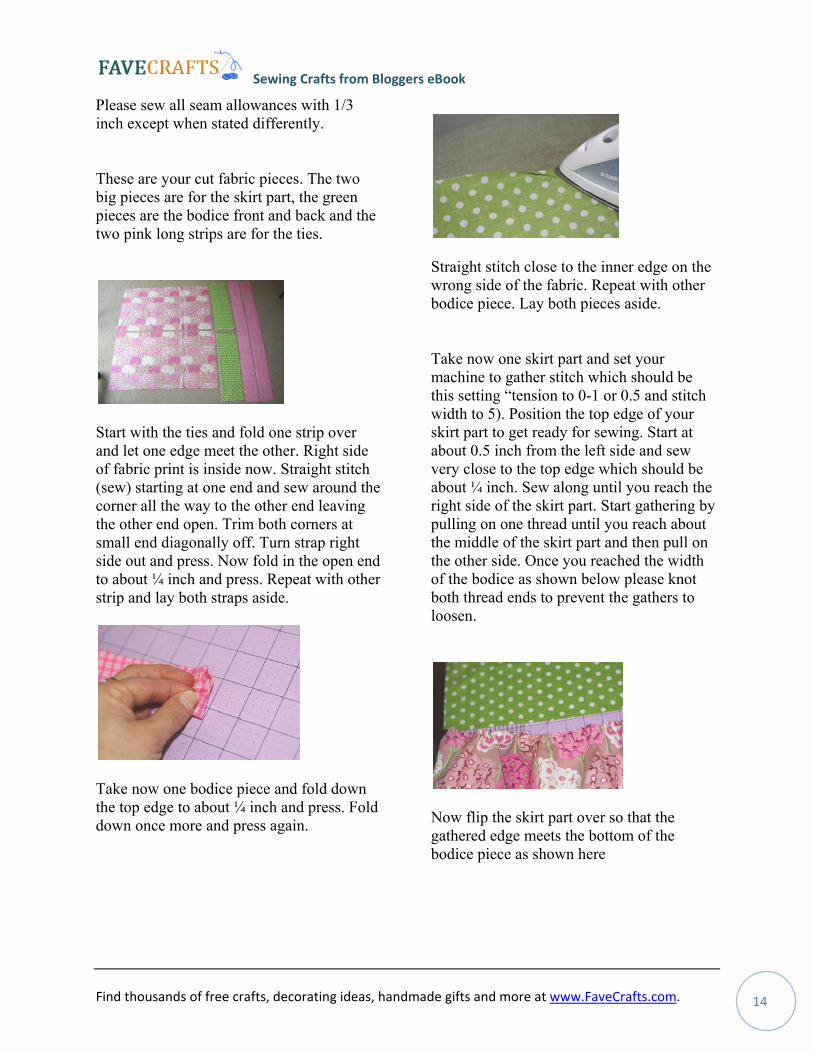
Take now one skirt part and set your machine to gather stitch which should be this setting “tension to 0-1 or 0.5 and stitch width to 5). Position the top edge of your skirt part to get ready for sewing. Start at about 0.5 inch from the left side and sew very close to the top edge which should be about ¼ inch. Sew along until you reach the right side of the skirt part. Start gathering by pulling on one thread until you reach about the middle of the skirt part and then pull on the other side. Once you reached the width of the bodice as shown below please knot both thread ends to prevent the gathers to loosen.
Now flip the skirt part over so that the gathered edge meets the bottom of the bodice piece as shown here
Sewing Crafts from Bloggers eBook
Find thousands of free crafts, decorating ideas, handmade gifts and more at www.FaveCrafts.com. 15
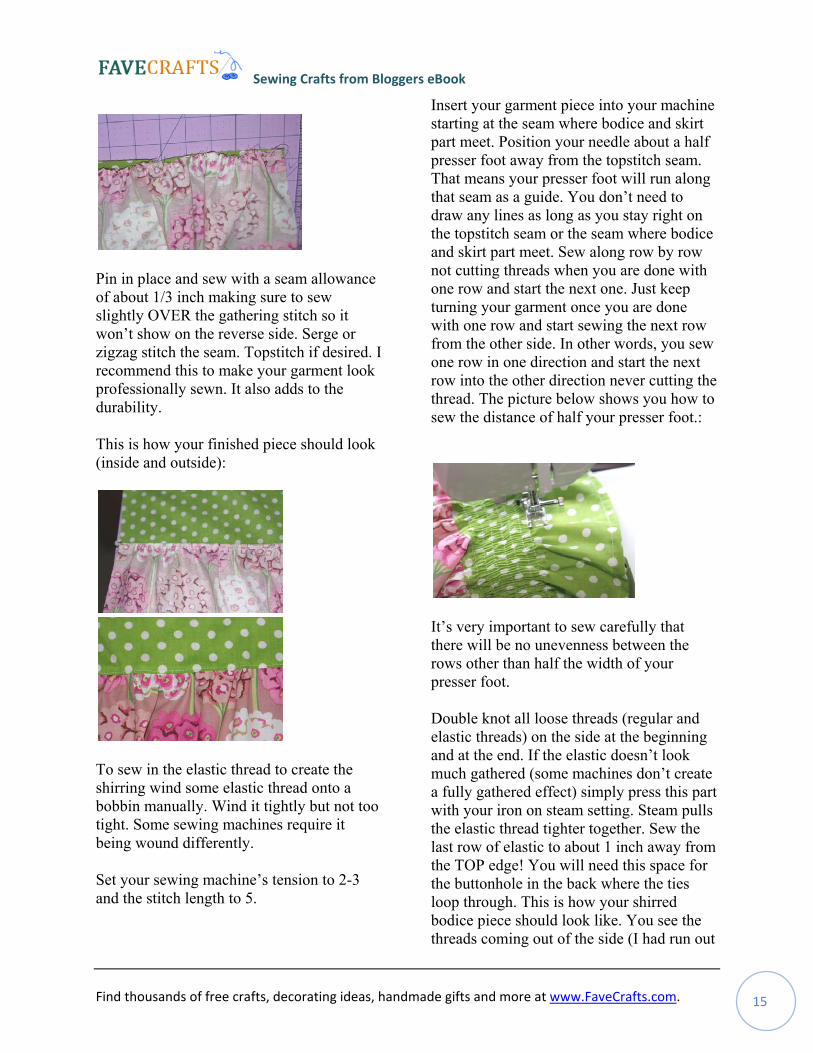
Pin in place and sew with a seam allowance of about 1/3 inch making sure to sew slightly OVER the gathering stitch so it won’t show on the reverse side. Serge or zigzag stitch the seam. Topstitch if desired. I recommend this to make your garment look professionally sewn. It also adds to the durability.
This is how your finished piece should look (inside and outside):
To sew in the elastic thread to create the shirring wind some elastic thread onto a bobbin manually. Wind it tightly but not too tight. Some sewing machines require it being wound differently.
Set your sewing machine’s tension to 2-3 and the stitch length to 5.
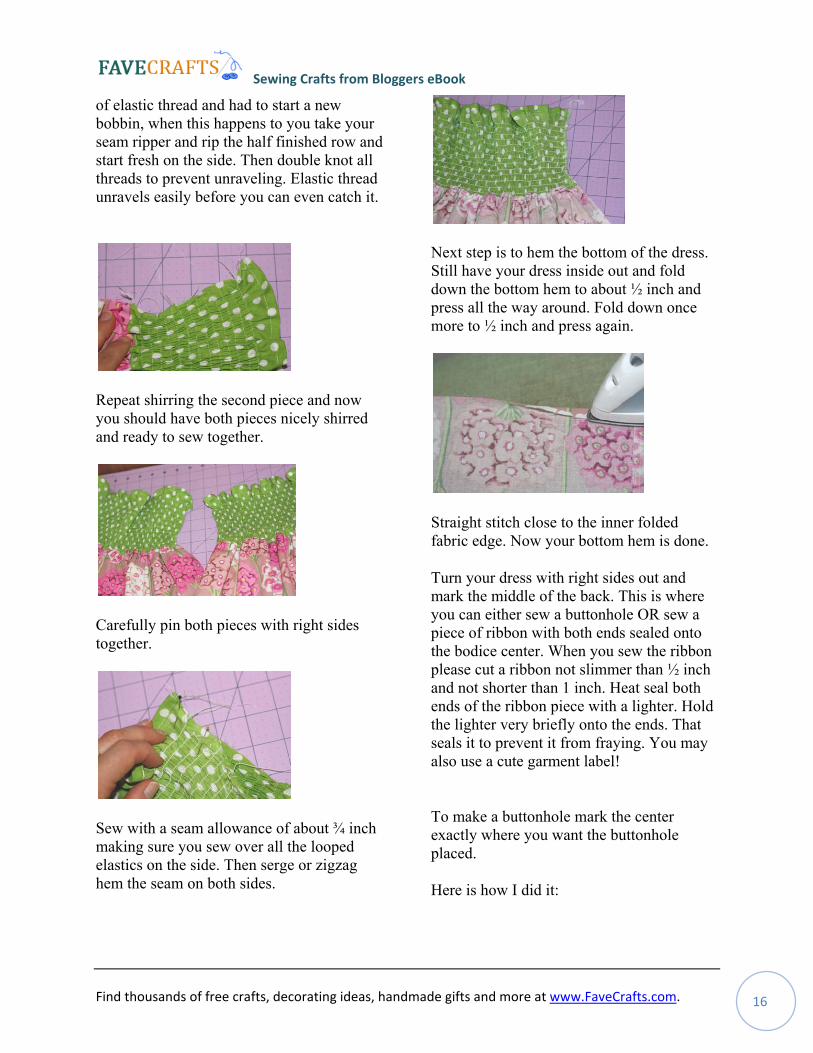
Insert your garment piece into your machine starting at the seam where bodice and skirt part meet. Position your needle about a half presser foot away from the topstitch seam. That means your presser foot will run along that seam as a guide. You don’t need to draw any lines as long as you stay right on the topstitch seam or the seam where bodice and skirt part meet. Sew along row by row not cutting threads when you are done with one row and start the next one. Just keep turning your garment once you are done with one row and start sewing the next row from the other side. In other words, you sew one row in one direction and start the next row into the other direction never cutting the thread. The picture below shows you how to sew the distance of half your presser foot.:
It’s very important to sew carefully that there will be no unevenness between the rows other than half the width of your presser foot. Double knot all loose threads (regular and elastic threads) on the side at the beginning and at the end. If the elastic doesn’t look much gathered (some machines don’t create a fully gathered effect) simply press this part with your iron on steam setting. Steam pulls the elastic thread tighter together. Sew the last row of elastic to about 1 inch away from the TOP edge! You will need this space for the buttonhole in the back where the ties loop through. This is how your shirred bodice piece should look like. You see the threads coming out of the side (I had run out
Sewing Crafts from Bloggers eBook
Find thousands of free crafts, decorating ideas, handmade gifts and more at www.FaveCrafts.com. 16
of elastic thread and had to start a new bobbin, when this happens to you take your seam ripper and rip the half finished row and start fresh on the side. Then double knot all threads to prevent unraveling. Elastic thread unravels easily before you can even catch it.
Repeat shirring the second piece and now you should have both pieces nicely shirred and ready to sew together.
Carefully pin both pieces with right sides together.
Sew with a seam allowance of about ¾ inch making sure you sew over all the looped elastics on the side. Then serge or zigzag hem the seam on both sides.
Next step is to hem the bottom of the dress. Still have your dress inside out and fold down the bottom hem to about ½ inch and press all the way around. Fold down once more to ½ inch and press again.
Straight stitch close to the inner folded fabric edge. Now your bottom hem is done.
Turn your dress with right sides out and mark the middle of the back. This is where you can either sew a buttonhole OR sew a piece of ribbon with both ends sealed onto the bodice center. When you sew the ribbon please cut a ribbon not slimmer than ½ inch and not shorter than 1 inch. Heat seal both ends of the ribbon piece with a lighter. Hold the lighter very briefly onto the ends. That seals it to prevent it from fraying. You may also use a cute garment label!
To make a buttonhole mark the center exactly where you want the buttonhole placed. Here is how I did it:
Sewing Crafts from Bloggers eBook
Find thousands of free crafts, decorating ideas, handmade gifts and more at www.FaveCrafts.com. 17
The arrow shows you how I measured the center. I folded the bodice in half and stretched it which is heavily shirred (I guess you can mark it BEFORE you do the shirring) and marked it that way. Now here is the middle of the bodice and the penciled in line marks exactly where I want my buttonhole to go:
(Buttonhole sewing is a task for the more advanced sewer and can definitely create trouble. Once the buttonhole is sewn and coming to find out it’s done wrong you can’t hardly rip it open without trace. Please practice the buttonhole sewing several times before you attempt it on your almost finished garment) Sew the buttonhole in place with an opening just big enough to insert both ties. I usually go with ¾ to 1 inch width.
To attach the ties to the front do the following:
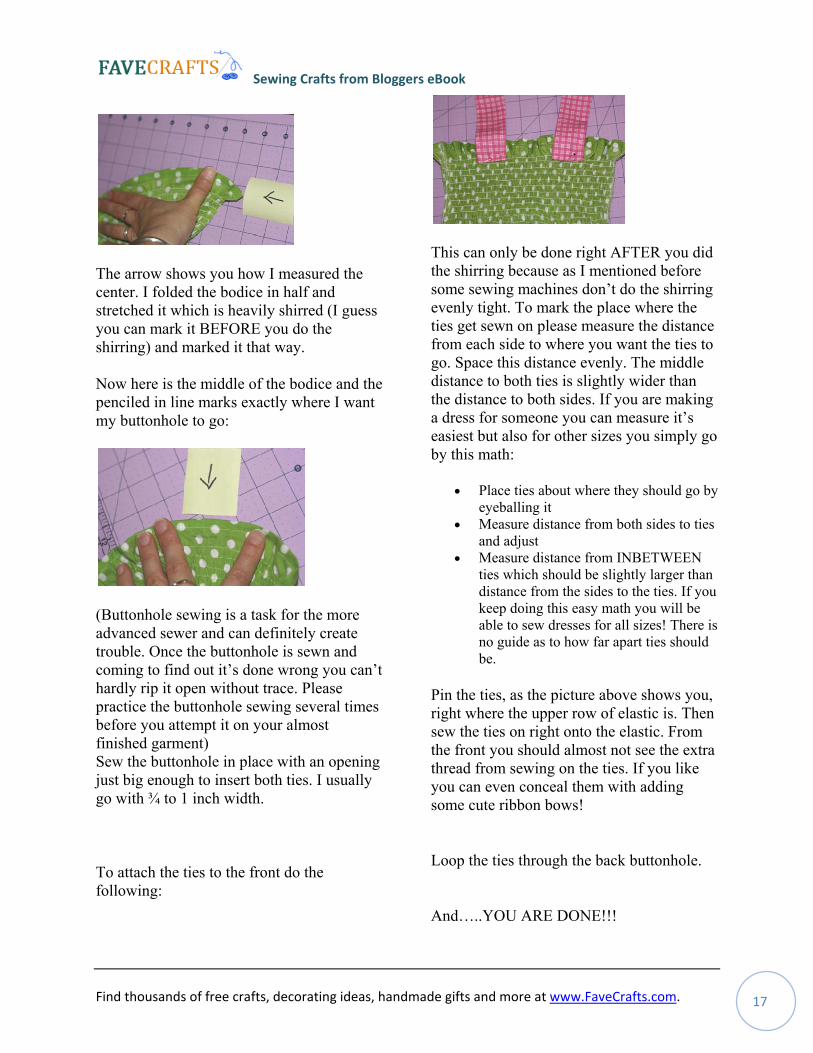
This can only be done right AFTER you did the shirring because as I mentioned before some sewing machines don’t do the shirring evenly tight. To mark the place where the ties get sewn on please measure the distance from each side to where you want the ties to go. Space this distance evenly. The middle distance to both ties is slightly wider than the distance to both sides. If you are making a dress for someone you can measure it’s easiest but also for other sizes you simply go by this math:
• Place ties about where they should go by eyeballing it
• Measure distance from both sides to ties and adjust
• Measure distance from INBETWEEN ties which should be slightly larger than distance from the sides to the ties. If you keep doing this easy math you will be able to sew dresses for all sizes! There is no guide as to how far apart ties should be.
Pin the ties, as the picture above shows you, right where the upper row of elastic is. Then sew the ties on right onto the elastic. From the front you should almost not see the extra thread from sewing on the ties. If you like you can even conceal them with adding some cute ribbon bows!
Loop the ties through the back buttonhole.
And…..YOU ARE DONE!!!
Sewing Crafts from Bloggers eBook
Find thousands of free crafts, decorating ideas, handmade gifts and more at www.FaveCrafts.com. 18
Easy Appliqué Flowers
By: Jenya of MyEvaForeva
Even if you don't own a sewing machine, you can easily add interesting appliqué flowers to any garment. This tutorial shows you how to dress up clothing in a simple and inexpensive way with scrap fabric pieces.
This project comes to us from Jenya of MyEvaForeva. She has two Etsy shops at forEvaMore and EvaForeva, where this kind of applique is typical.
Start with some scrap pieces. Hey, they don't even need to be the same color!
Sculpt a flowery form with your hands.
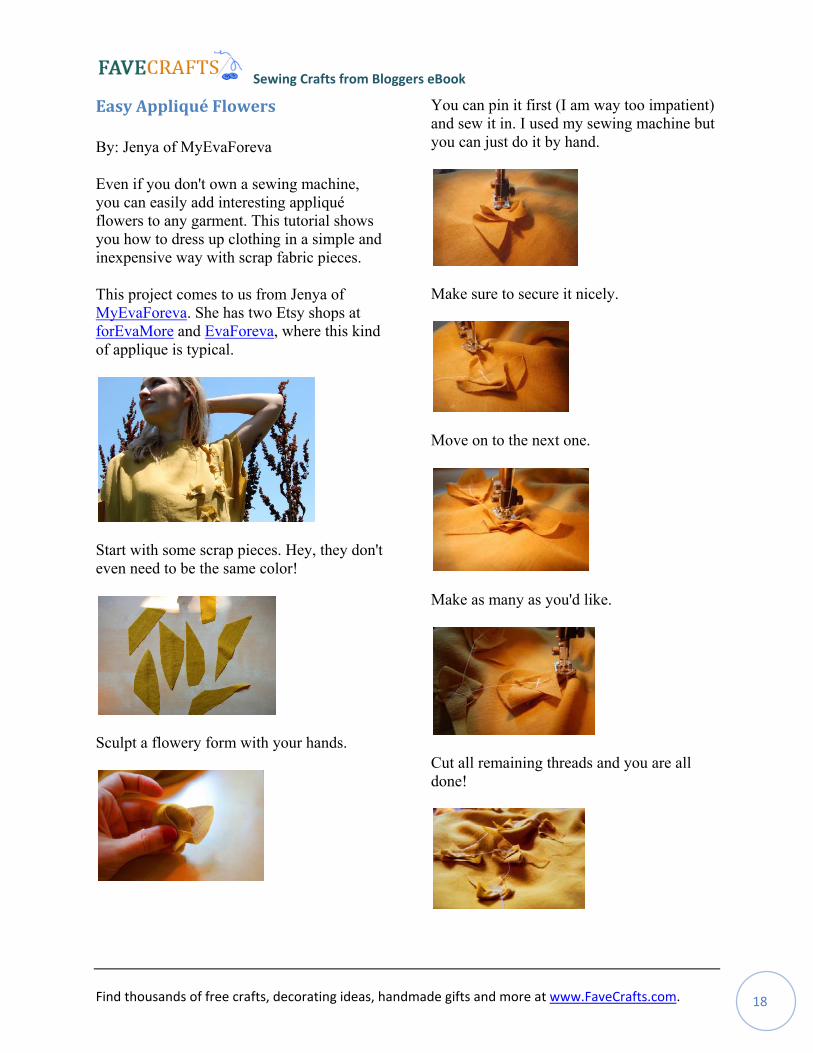
You can pin it first (I am way too impatient) and sew it in. I used my sewing machine but you can just do it by hand.
Make sure to secure it nicely.
Move on to the next one.
Make as many as you'd like.
Cut all remaining threads and you are all done!
Sewing Crafts from Bloggers eBook
Find thousands of free crafts, decorating ideas, handmade gifts and more at www.FaveCrafts.com. 19
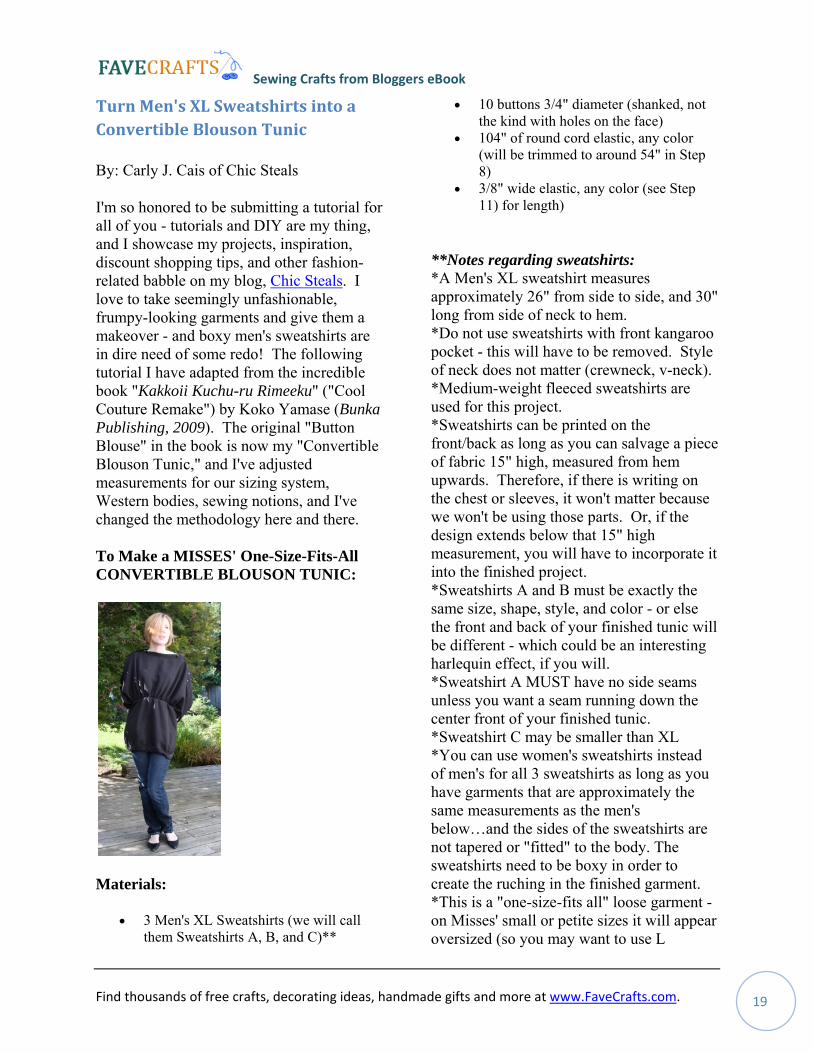
Turn Men's XL Sweatshirts into a Convertible Blouson Tunic
By: Carly J. Cais of Chic Steals
I'm so honored to be submitting a tutorial for all of you - tutorials and DIY are my thing, and I showcase my projects, inspiration, discount shopping tips, and other fashion-related babble on my blog, Chic Steals. I love to take seemingly unfashionable, frumpy-looking garments and give them a makeover - and boxy men's sweatshirts are in dire need of some redo! The following tutorial I have adapted from the incredible book "Kakkoii Kuchu-ru Rimeeku" ("Cool Couture Remake") by Koko Yamase (Bunka Publishing, 2009). The original "Button Blouse" in the book is now my "Convertible Blouson Tunic," and I've adjusted measurements for our sizing system, Western bodies, sewing notions, and I've changed the methodology here and there. To Make a MISSES' One-Size-Fits-All CONVERTIBLE BLOUSON TUNIC:
Materials:
• 3 Men's XL Sweatshirts (we will call them Sweatshirts A, B, and C)**
• 10 buttons 3/4" diameter (shanked, not the kind with holes on the face)
• 104" of round cord elastic, any color (will be trimmed to around 54" in Step 8)
• 3/8" wide elastic, any color (see Step 11) for length)
**Notes regarding sweatshirts: *A Men's XL sweatshirt measures approximately 26" from side to side, and 30" long from side of neck to hem. *Do not use sweatshirts with front kangaroo pocket - this will have to be removed. Style of neck does not matter (crewneck, v-neck). *Medium-weight fleeced sweatshirts are used for this project. *Sweatshirts can be printed on the front/back as long as you can salvage a piece of fabric 15" high, measured from hem upwards. Therefore, if there is writing on the chest or sleeves, it won't matter because we won't be using those parts. Or, if the design extends below that 15" high measurement, you will have to incorporate it into the finished project. *Sweatshirts A and B must be exactly the same size, shape, style, and color - or else the front and back of your finished tunic will be different - which could be an interesting harlequin effect, if you will. *Sweatshirt A MUST have no side seams unless you want a seam running down the center front of your finished tunic. *Sweatshirt C may be smaller than XL *You can use women's sweatshirts instead of men's for all 3 sweatshirts as long as you have garments that are approximately the same measurements as the men's below…and the sides of the sweatshirts are not tapered or "fitted" to the body. The sweatshirts need to be boxy in order to create the ruching in the finished garment. *This is a "one-size-fits all" loose garment - on Misses' small or petite sizes it will appear oversized (so you may want to use L
Sewing Crafts from Bloggers eBook
Find thousands of free crafts, decorating ideas, handmade gifts and more at www.FaveCrafts.com. 20
sweatshirts instead), and on Misses' L sizes it will appear closer to body measurements (there will still be at least several inches of ease). Women's sizes: use XXL or larger - and adjust required elastic lengths accordingly (you may want to add two or more extra buttons and buttonholes for stability at the neck). Tools:
• Sewing Machine • Sewing Machine Needle (Med. Weight
Knits) • All-Purpose thread matching your
sweatshirts • Zigzag foot • Straight Stitch foot • Buttonhole foot (optional) • Fabric Scissors • Hand sewing needle • Safety Pin/Bodkin • Iron & Ironing Board (optional)
Instructions:
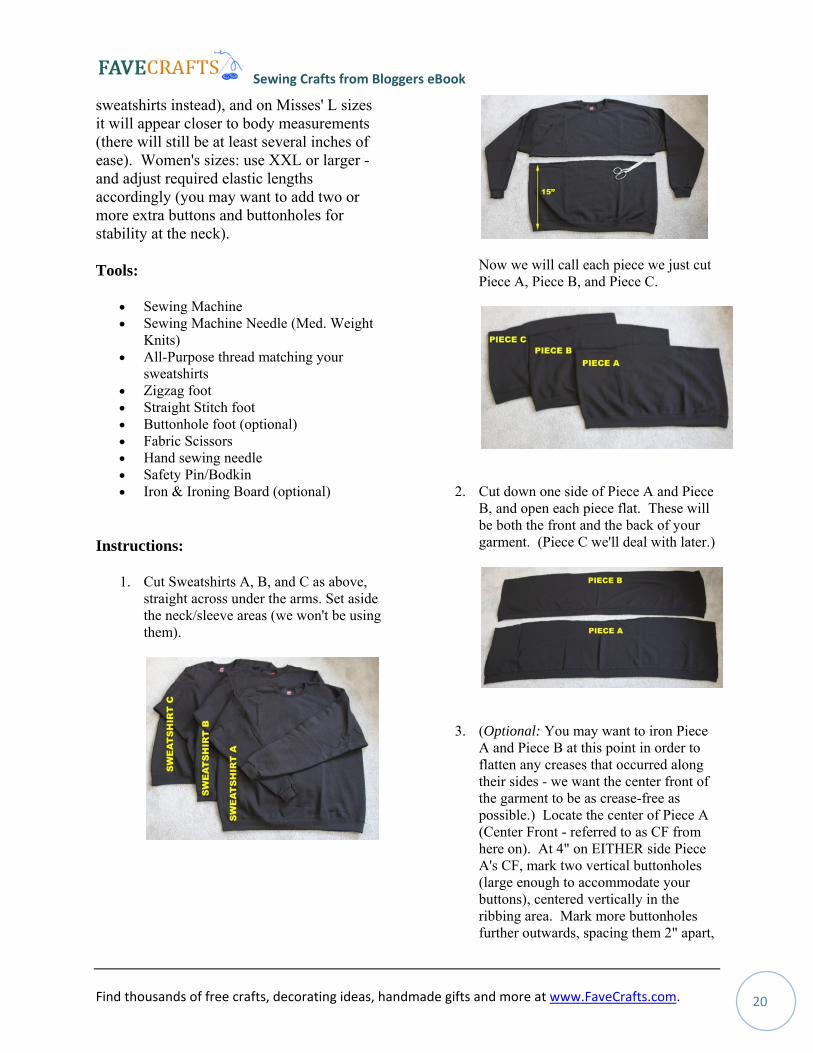
1. Cut Sweatshirts A, B, and C as above, straight across under the arms. Set aside the neck/sleeve areas (we won't be using them).
Now we will call each piece we just cut Piece A, Piece B, and Piece C.
2. Cut down one side of Piece A and Piece B, and open each piece flat. These will be both the front and the back of your garment. (Piece C we'll deal with later.)
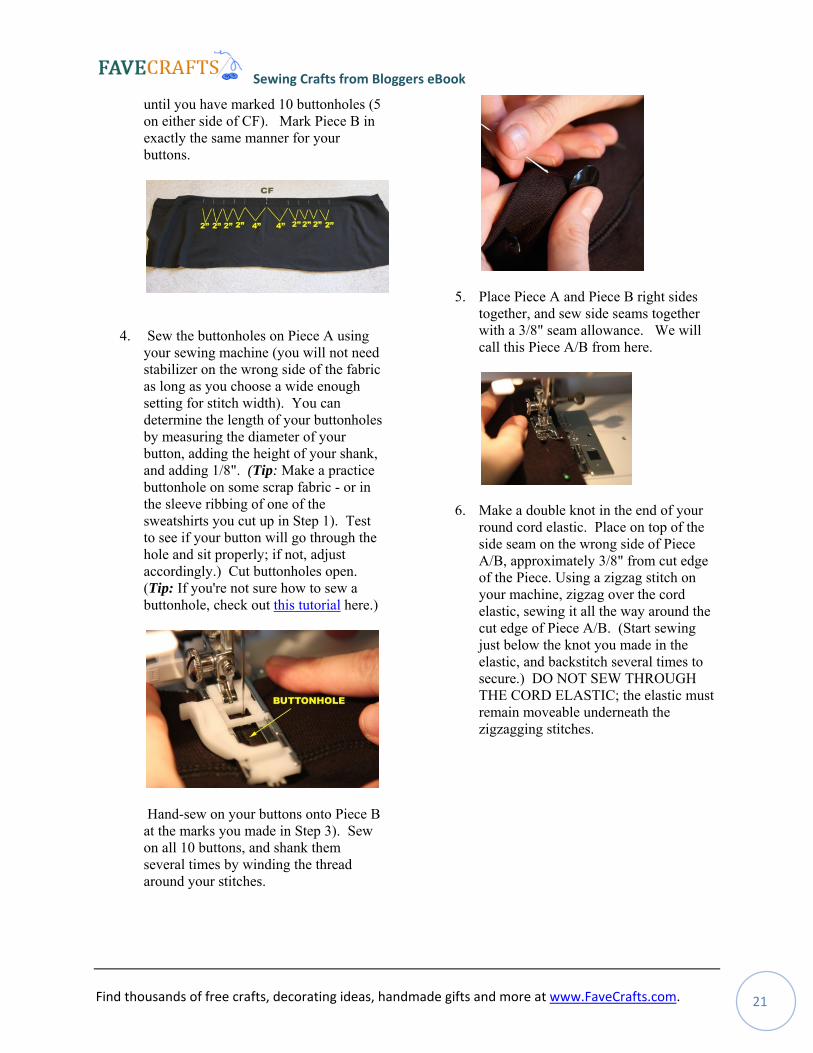
3. (Optional: You may want to iron Piece A and Piece B at this point in order to flatten any creases that occurred along their sides - we want the center front of the garment to be as crease-free as possible.) Locate the center of Piece A (Center Front - referred to as CF from here on). At 4" on EITHER side Piece A's CF, mark two vertical buttonholes (large enough to accommodate your buttons), centered vertically in the ribbing area. Mark more buttonholes further outwards, spacing them 2" apart,
Sewing Crafts from Bloggers eBook
Find thousands of free crafts, decorating ideas, handmade gifts and more at www.FaveCrafts.com. 21
until you have marked 10 buttonholes (5 on either side of CF). Mark Piece B in exactly the same manner for your buttons.
4. Sew the buttonholes on Piece A using your sewing machine (you will not need stabilizer on the wrong side of the fabric as long as you choose a wide enough setting for stitch width). You can determine the length of your buttonholes by measuring the diameter of your button, adding the height of your shank, and adding 1/8". (Tip: Make a practice buttonhole on some scrap fabric - or in the sleeve ribbing of one of the sweatshirts you cut up in Step 1). Test to see if your button will go through the hole and sit properly; if not, adjust accordingly.) Cut buttonholes open. (Tip: If you're not sure how to sew a buttonhole, check out this tutorial here.)
Hand-sew on your buttons onto Piece B at the marks you made in Step 3). Sew on all 10 buttons, and shank them several times by winding the thread around your stitches.
5. Place Piece A and Piece B right sides together, and sew side seams together with a 3/8" seam allowance. We will call this Piece A/B from here.
6. Make a double knot in the end of your round cord elastic. Place on top of the side seam on the wrong side of Piece A/B, approximately 3/8" from cut edge of the Piece. Using a zigzag stitch on your machine, zigzag over the cord elastic, sewing it all the way around the cut edge of Piece A/B. (Start sewing just below the knot you made in the elastic, and backstitch several times to secure.) DO NOT SEW THROUGH THE CORD ELASTIC; the elastic must remain moveable underneath the zigzagging stitches.
Sewing Crafts from Bloggers eBook
Find thousands of free crafts, decorating ideas, handmade gifts and more at www.FaveCrafts.com. 22
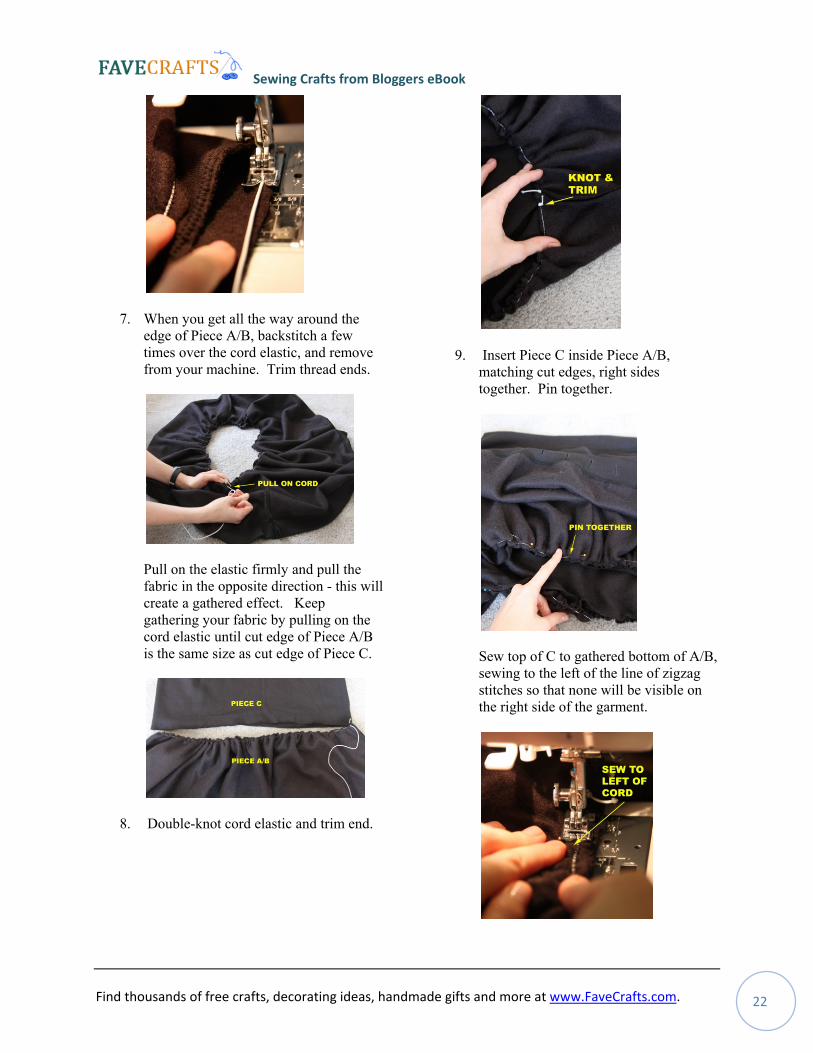
7. When you get all the way around the edge of Piece A/B, backstitch a few times over the cord elastic, and remove from your machine. Trim thread ends.
Pull on the elastic firmly and pull the fabric in the opposite direction - this will create a gathered effect. Keep gathering your fabric by pulling on the cord elastic until cut edge of Piece A/B is the same size as cut edge of Piece C.
8. Double-knot cord elastic and trim end.
9. Insert Piece C inside Piece A/B, matching cut edges, right sides together. Pin together.
Sew top of C to gathered bottom of A/B, sewing to the left of the line of zigzag stitches so that none will be visible on the right side of the garment.
Sewing Crafts from Bloggers eBook
Find thousands of free crafts, decorating ideas, handmade gifts and more at www.FaveCrafts.com. 23
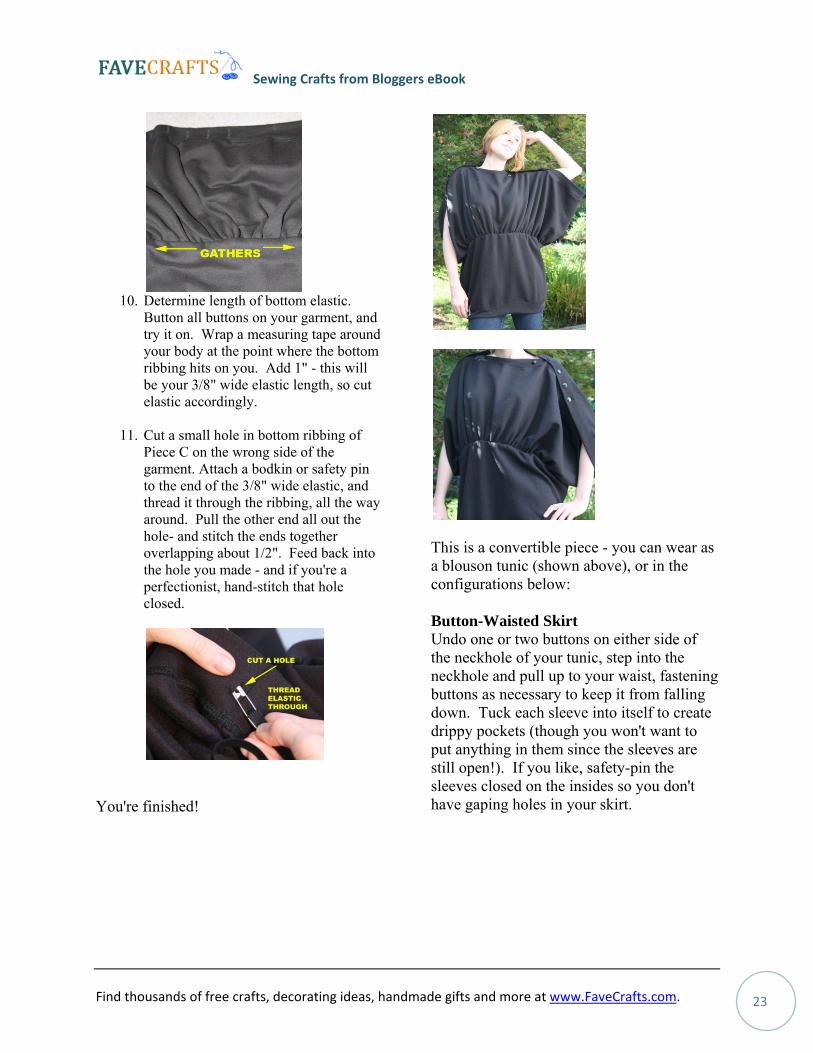
10. Determine length of bottom elastic.
Button all buttons on your garment, and try it on. Wrap a measuring tape around your body at the point where the bottom ribbing hits on you. Add 1" - this will be your 3/8" wide elastic length, so cut elastic accordingly.
11. Cut a small hole in bottom ribbing of Piece C on the wrong side of the garment. Attach a bodkin or safety pin to the end of the 3/8" wide elastic, and thread it through the ribbing, all the way around. Pull the other end all out the hole- and stitch the ends together overlapping about 1/2". Feed back into the hole you made - and if you're a perfectionist, hand-stitch that hole closed.
You're finished!
This is a convertible piece - you can wear as a blouson tunic (shown above), or in the configurations below: Button-Waisted Skirt Undo one or two buttons on either side of the neckhole of your tunic, step into the neckhole and pull up to your waist, fastening buttons as necessary to keep it from falling down. Tuck each sleeve into itself to create drippy pockets (though you won't want to put anything in them since the sleeves are still open!). If you like, safety-pin the sleeves closed on the insides so you don't have gaping holes in your skirt.
Sewing Crafts from Bloggers eBook
Find thousands of free crafts, decorating ideas, handmade gifts and more at www.FaveCrafts.com. 24
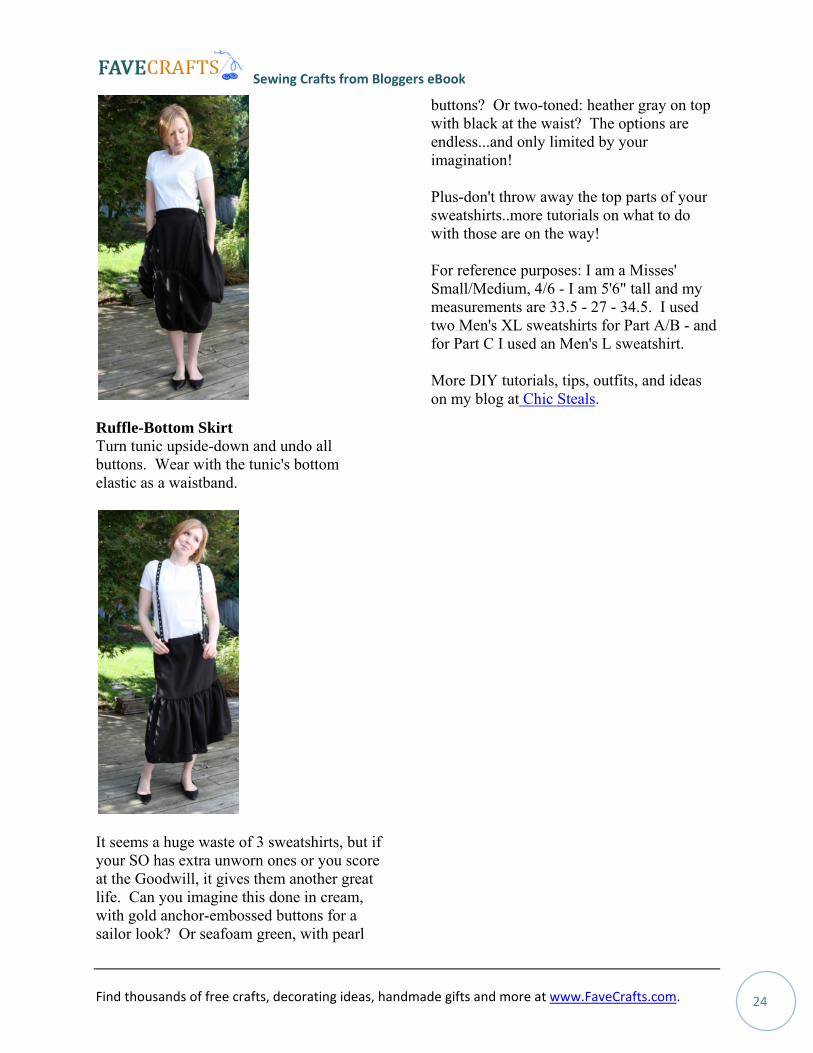
Ruffle-Bottom Skirt Turn tunic upside-down and undo all buttons. Wear with the tunic's bottom elastic as a waistband.
It seems a huge waste of 3 sweatshirts, but if your SO has extra unworn ones or you score at the Goodwill, it gives them another great life. Can you imagine this done in cream, with gold anchor-embossed buttons for a sailor look? Or seafoam green, with pearl
buttons? Or two-toned: heather gray on top with black at the waist? The options are endless...and only limited by your imagination! Plus-don't throw away the top parts of your sweatshirts..more tutorials on what to do with those are on the way! For reference purposes: I am a Misses' Small/Medium, 4/6 - I am 5'6" tall and my measurements are 33.5 - 27 - 34.5. I used two Men's XL sweatshirts for Part A/B - and for Part C I used an Men's L sweatshirt. More DIY tutorials, tips, outfits, and ideas on my blog at Chic Steals.
Sewing Crafts from Bloggers eBook
Find thousands of free crafts, decorating ideas, handmade gifts and more at www.FaveCrafts.com. 25
Quick and Easy Half Apron
By: Ashley Johnston of Make It and Love It
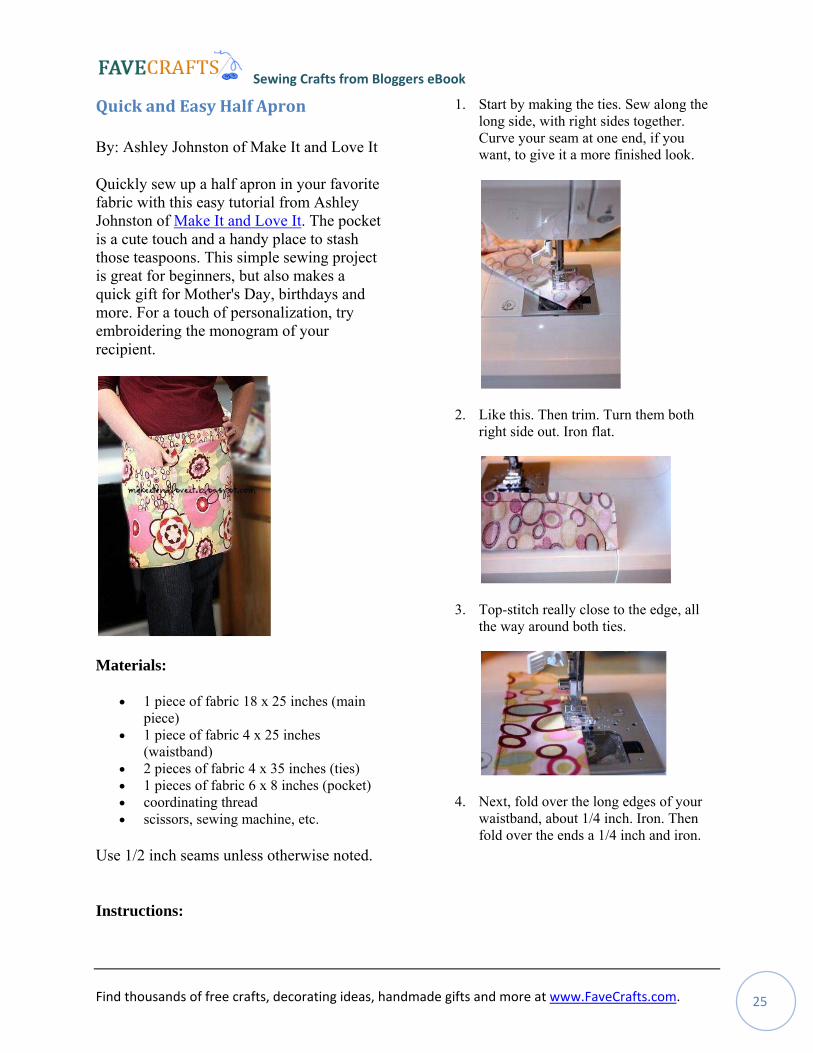
Quickly sew up a half apron in your favorite fabric with this easy tutorial from Ashley Johnston of Make It and Love It. The pocket is a cute touch and a handy place to stash those teaspoons. This simple sewing project is great for beginners, but also makes a quick gift for Mother's Day, birthdays and more. For a touch of personalization, try embroidering the monogram of your recipient.
Materials:
• 1 piece of fabric 18 x 25 inches (main piece)
• 1 piece of fabric 4 x 25 inches (waistband)
• 2 pieces of fabric 4 x 35 inches (ties) • 1 pieces of fabric 6 x 8 inches (pocket) • coordinating thread • scissors, sewing machine, etc.
Use 1/2 inch seams unless otherwise noted.
Instructions:
1. Start by making the ties. Sew along the long side, with right sides together. Curve your seam at one end, if you want, to give it a more finished look.
2. Like this. Then trim. Turn them both right side out. Iron flat.
3. Top-stitch really close to the edge, all the way around both ties.
4. Next, fold over the long edges of your waistband, about 1/4 inch. Iron. Then fold over the ends a 1/4 inch and iron.
Sewing Crafts from Bloggers eBook
Find thousands of free crafts, decorating ideas, handmade gifts and more at www.FaveCrafts.com. 26
5. Then fold the whole waistband in half lengthwise and iron.
6. Next, you’re going to sew around 3 edges of the main piece. The 2 sides (shorter sides) and the bottom (one of the longer sides). Turn under each edge a 1/4 inch, and then 1/4 inch again. Sew.
7. See all 3 sides that are sewn?
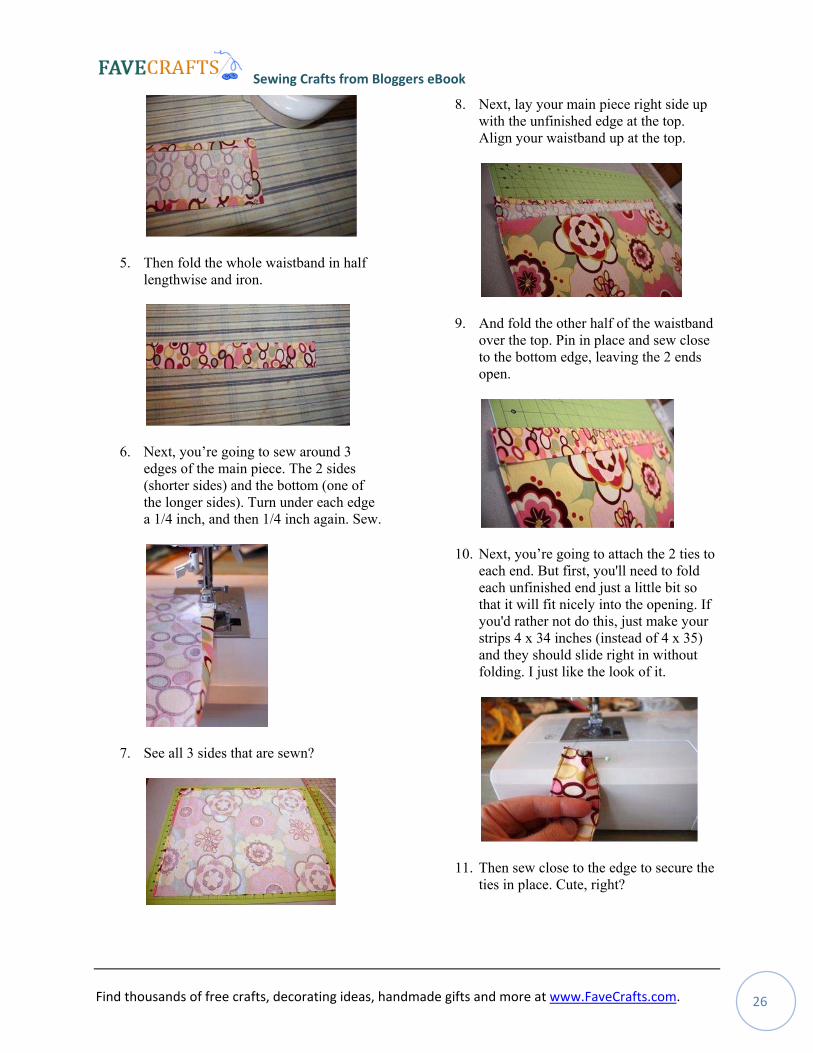
8. Next, lay your main piece right side up with the unfinished edge at the top. Align your waistband up at the top.
9. And fold the other half of the waistband over the top. Pin in place and sew close to the bottom edge, leaving the 2 ends open.
10. Next, you’re going to attach the 2 ties to each end. But first, you'll need to fold each unfinished end just a little bit so that it will fit nicely into the opening. If you'd rather not do this, just make your strips 4 x 34 inches (instead of 4 x 35) and they should slide right in without folding. I just like the look of it.
11. Then sew close to the edge to secure the ties in place. Cute, right?
Sewing Crafts from Bloggers eBook
Find thousands of free crafts, decorating ideas, handmade gifts and more at www.FaveCrafts.com. 27
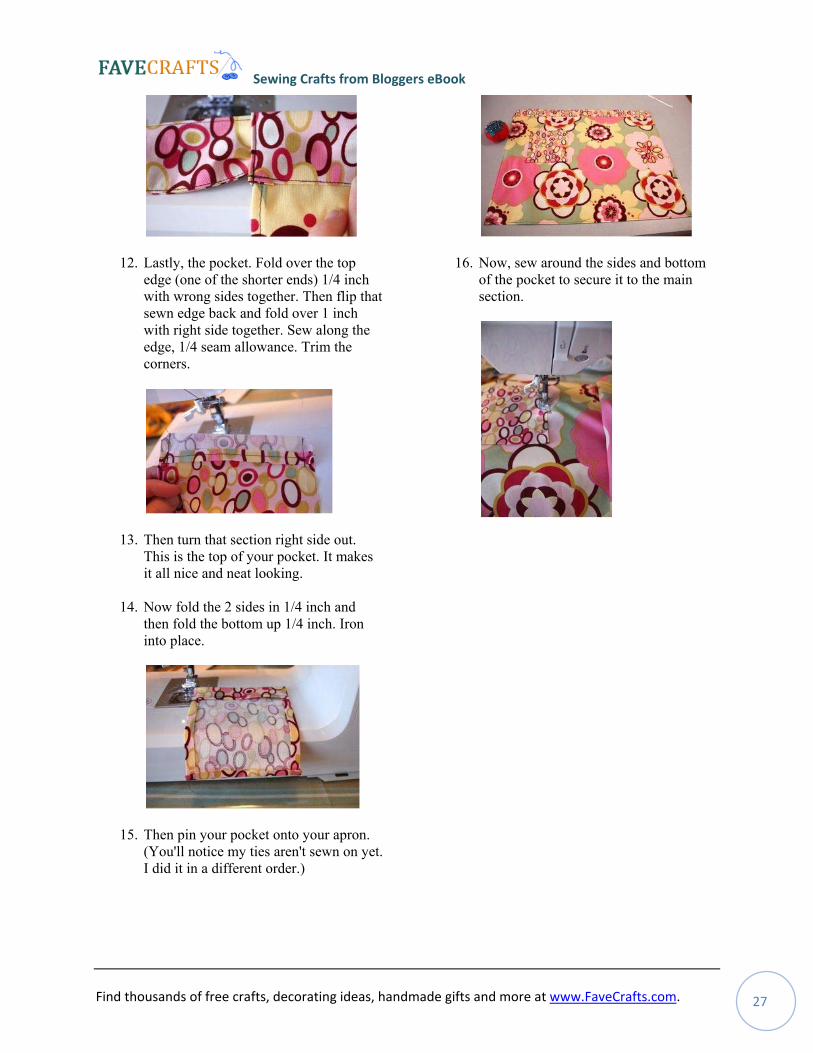
12. Lastly, the pocket. Fold over the top edge (one of the shorter ends) 1/4 inch with wrong sides together. Then flip that sewn edge back and fold over 1 inch with right side together. Sew along the edge, 1/4 seam allowance. Trim the corners.
13. Then turn that section right side out. This is the top of your pocket. It makes it all nice and neat looking.
14. Now fold the 2 sides in 1/4 inch and then fold the bottom up 1/4 inch. Iron into place.
15. Then pin your pocket onto your apron. (You'll notice my ties aren't sewn on yet. I did it in a different order.)
16. Now, sew around the sides and bottom of the pocket to secure it to the main section.
Sewing Crafts from Bloggers eBook
Find thousands of free crafts, decorating ideas, handmade gifts and more at www.FaveCrafts.com. 28
Guest Tutorial: Guitar Reverse Appliqué Shirt
By: Melissa Boclair of Three Prince Designs
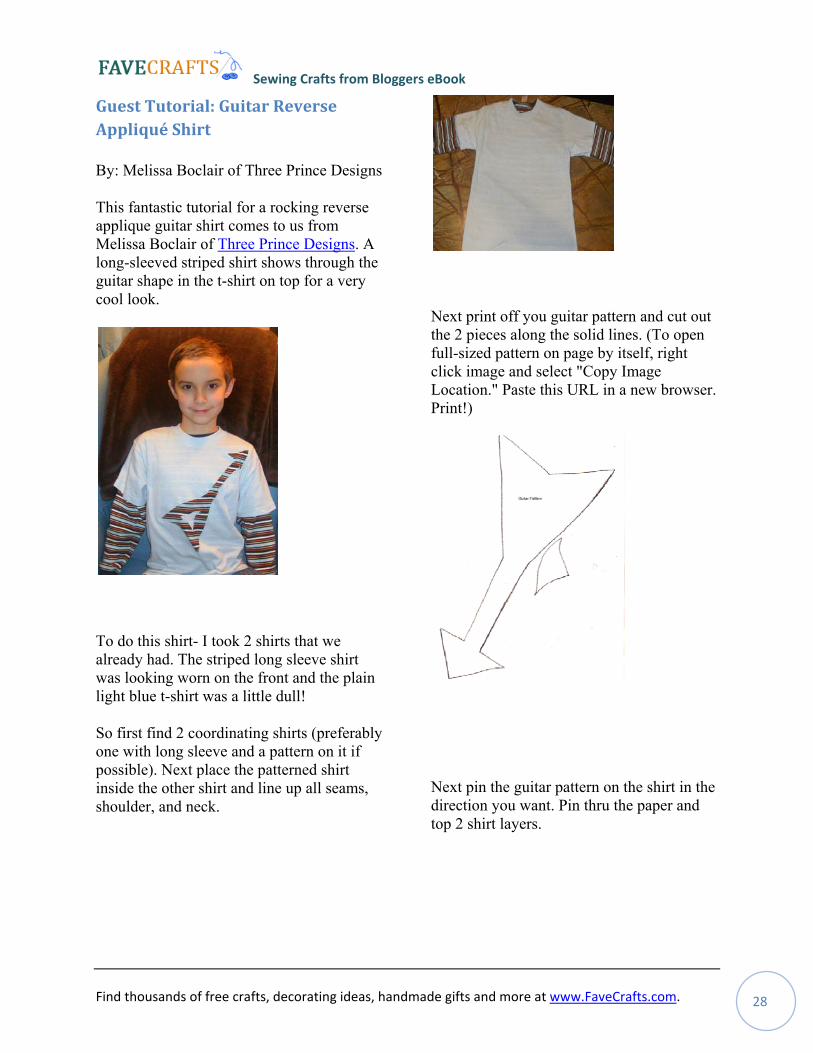
This fantastic tutorial for a rocking reverse applique guitar shirt comes to us from Melissa Boclair of Three Prince Designs. A long-sleeved striped shirt shows through the guitar shape in the t-shirt on top for a very cool look.
To do this shirt- I took 2 shirts that we already had. The striped long sleeve shirt was looking worn on the front and the plain light blue t-shirt was a little dull!
So first find 2 coordinating shirts (preferably one with long sleeve and a pattern on it if possible). Next place the patterned shirt inside the other shirt and line up all seams, shoulder, and neck.
Next print off you guitar pattern and cut out the 2 pieces along the solid lines. (To open full-sized pattern on page by itself, right click image and select "Copy Image Location." Paste this URL in a new browser. Print!)
Next pin the guitar pattern on the shirt in the direction you want. Pin thru the paper and top 2 shirt layers.
Sewing Crafts from Bloggers eBook
Find thousands of free crafts, decorating ideas, handmade gifts and more at www.FaveCrafts.com. 29
Next sew about a 1/8 inch along the outside of the paper template. Only sew thru the top 2 layers of the shirt.
After sewing along all the edges- remove the pins and paper. Next carefully cut out only the top shirt fabric inside the guitar pattern you just sewed on. Cut close to the thread- but make sure not to cut thru the thread!!
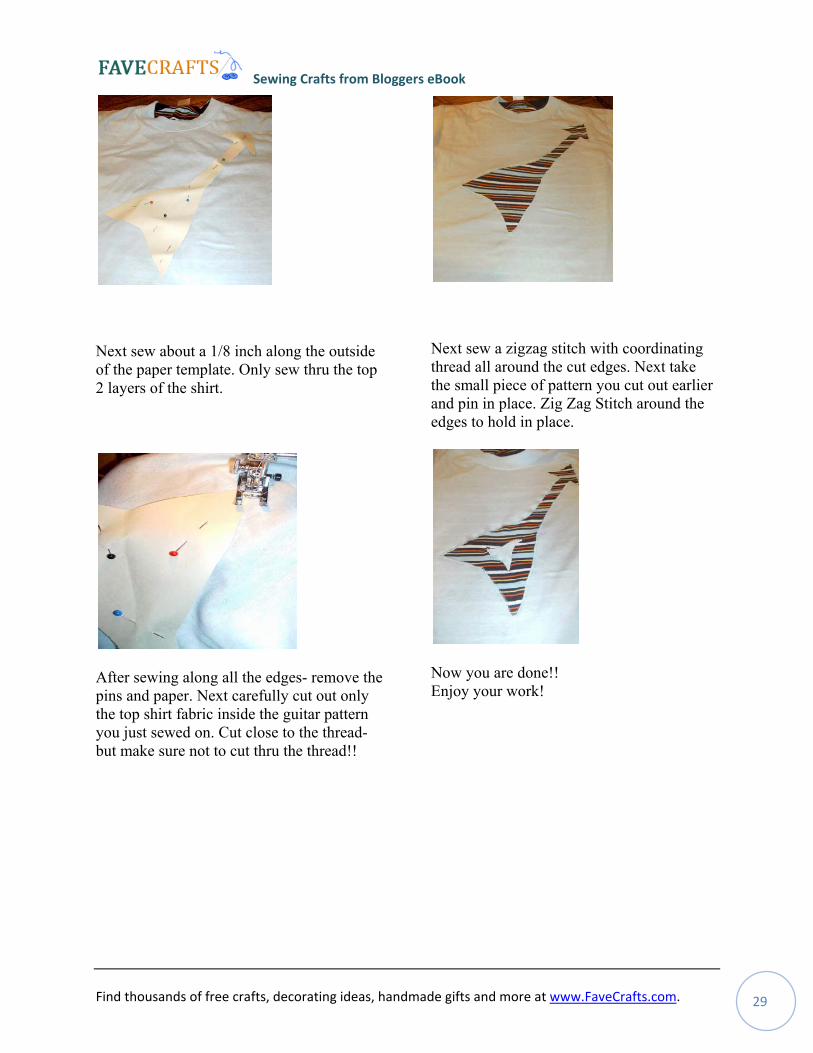
Next sew a zigzag stitch with coordinating thread all around the cut edges. Next take the small piece of pattern you cut out earlier and pin in place. Zig Zag Stitch around the edges to hold in place.
Now you are done!! Enjoy your work!
Sewing Crafts from Bloggers eBook
Find thousands of free crafts, decorating ideas, handmade gifts and more at www.FaveCrafts.com. 30
Sweet Collar Sewing Tutorial
By: Jenya of MyEvaForeva
Create a fun and pretty collar to wear over any outfit with this easy sewing tutorial. Anyone can make this tie-on collar in the fabric of your choice.
This project comes to us from Jenya of MyEvaForeva. She has two Etsy shops at forEvaMore and EvaForeva, where this kind of applique is typical.
Make a mock out of another fabric. When you do it, just make sure you measure your neck circumference and incorporate it in your template.
\
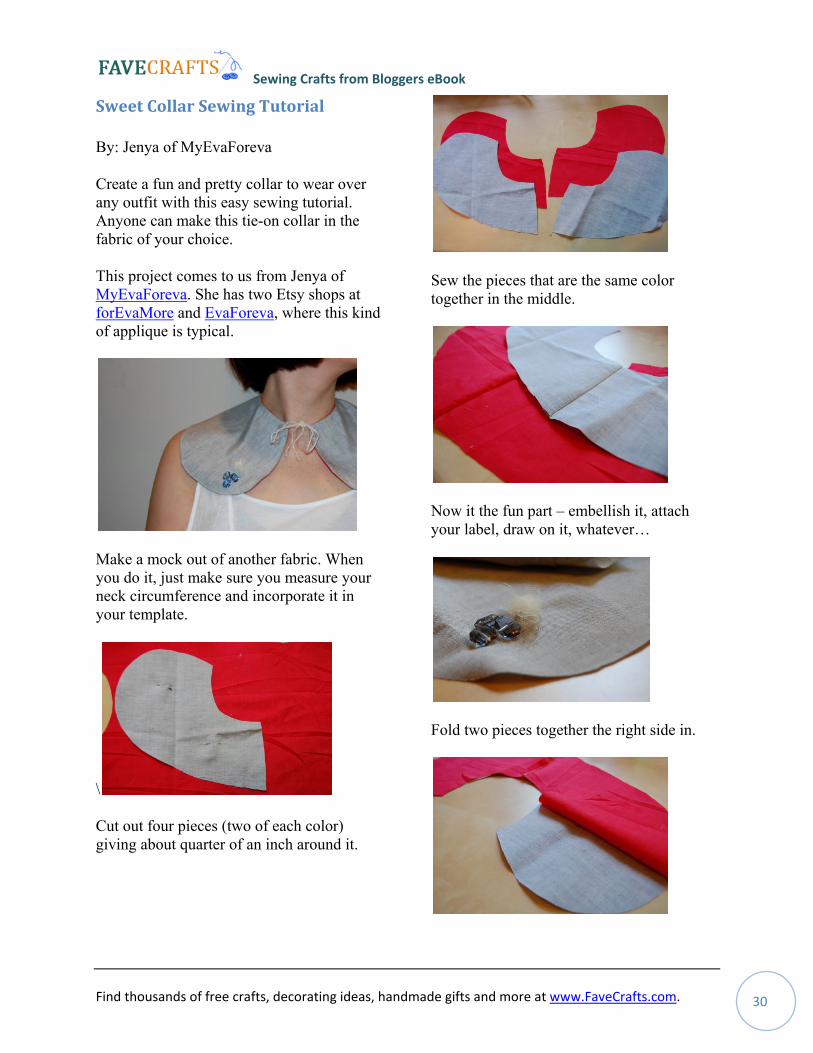
Cut out four pieces (two of each color) giving about quarter of an inch around it.
Sew the pieces that are the same color together in the middle.
Now it the fun part – embellish it, attach your label, draw on it, whatever…
Fold two pieces together the right side in.
Sewing Crafts from Bloggers eBook
Find thousands of free crafts, decorating ideas, handmade gifts and more at www.FaveCrafts.com. 31
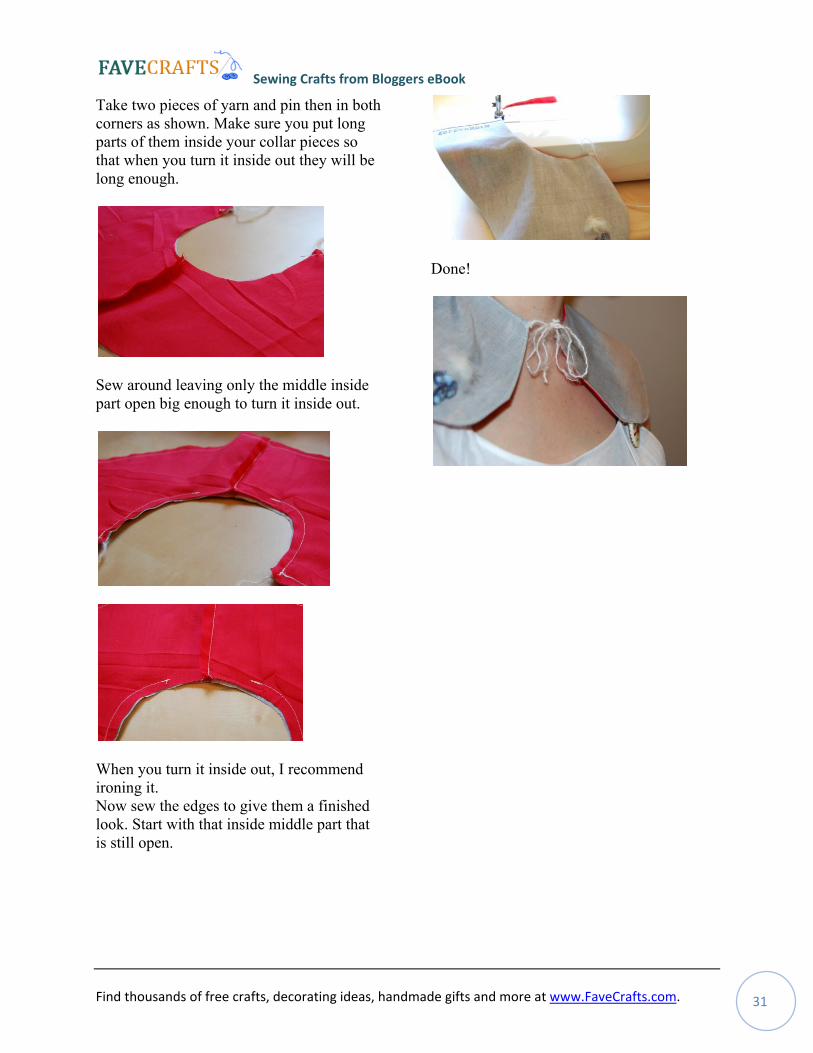
Take two pieces of yarn and pin then in both corners as shown. Make sure you put long parts of them inside your collar pieces so that when you turn it inside out they will be long enough.
Sew around leaving only the middle inside part open big enough to turn it inside out.
When you turn it inside out, I recommend ironing it. Now sew the edges to give them a finished look. Start with that inside middle part that is still open.
Done!
Sewing Crafts from Bloggers eBook
Find thousands of free crafts, decorating ideas, handmade gifts and more at www.FaveCrafts.com. 32
Turn a Men's Shirt into a Girly Dress
By: Tatyana Chambers of DBA Art Studio Shanti and Wool Thumb Creations
Inspired by so many refashion projects available on the web, I've decided to do something of a kind myself. I love to reduce-reuse-recycle when I can, and some of my other upcycled and repurposed projects can be found at my online store. Graphic designer and a teacher by education, I started my one-person business two years ago, and have been very active since. I love to work with all kinds of fiber, fabrics, paper, metal, beads, etc.
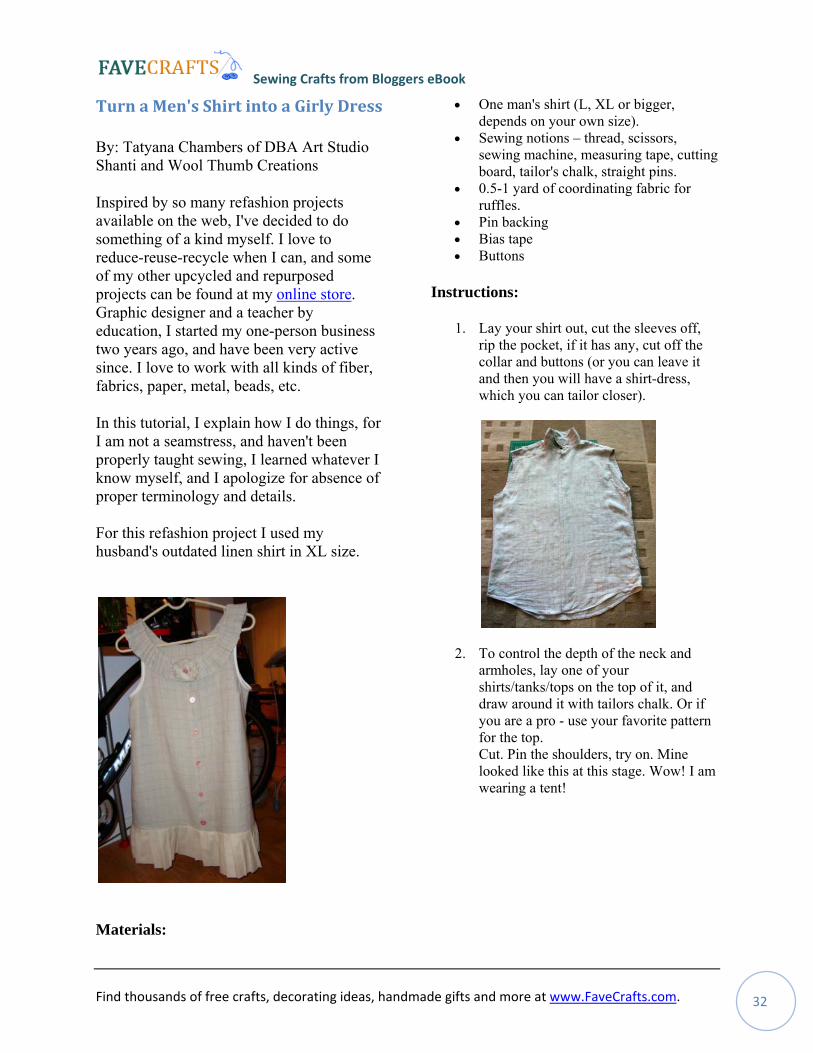
In this tutorial, I explain how I do things, for I am not a seamstress, and haven't been properly taught sewing, I learned whatever I know myself, and I apologize for absence of proper terminology and details. For this refashion project I used my husband's outdated linen shirt in XL size.
Materials:
• One man's shirt (L, XL or bigger, depends on your own size).
• Sewing notions – thread, scissors, sewing machine, measuring tape, cutting board, tailor's chalk, straight pins.
• 0.5-1 yard of coordinating fabric for ruffles.
• Pin backing • Bias tape • Buttons
Instructions:
1. Lay your shirt out, cut the sleeves off, rip the pocket, if it has any, cut off the collar and buttons (or you can leave it and then you will have a shirt-dress, which you can tailor closer).
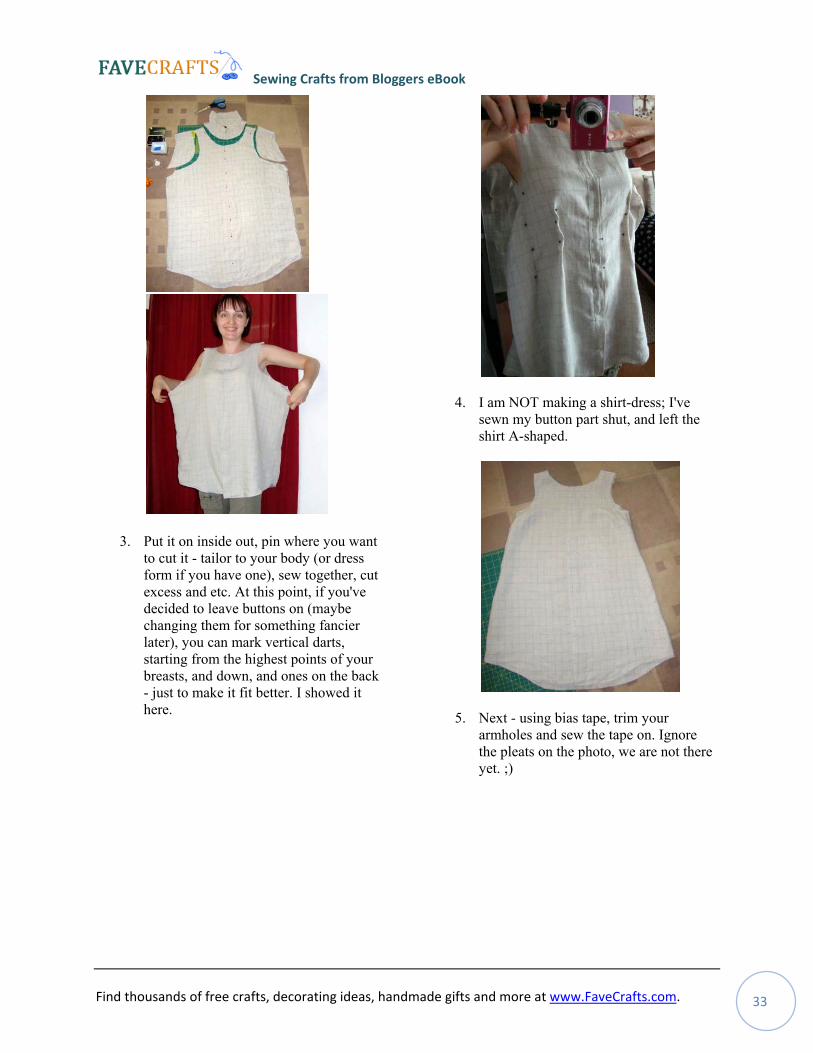
2. To control the depth of the neck and armholes, lay one of your shirts/tanks/tops on the top of it, and draw around it with tailors chalk. Or if you are a pro - use your favorite pattern for the top. Cut. Pin the shoulders, try on. Mine looked like this at this stage. Wow! I am wearing a tent!
Sewing Crafts from Bloggers eBook
Find thousands of free crafts, decorating ideas, handmade gifts and more at www.FaveCrafts.com. 33
3. Put it on inside out, pin where you want to cut it - tailor to your body (or dress form if you have one), sew together, cut excess and etc. At this point, if you've decided to leave buttons on (maybe changing them for something fancier later), you can mark vertical darts, starting from the highest points of your breasts, and down, and ones on the back - just to make it fit better. I showed it here.
4. I am NOT making a shirt-dress; I've sewn my button part shut, and left the shirt A-shaped.
5. Next - using bias tape, trim your armholes and sew the tape on. Ignore the pleats on the photo, we are not there yet. ;)
Sewing Crafts from Bloggers eBook
Find thousands of free crafts, decorating ideas, handmade gifts and more at www.FaveCrafts.com. 34
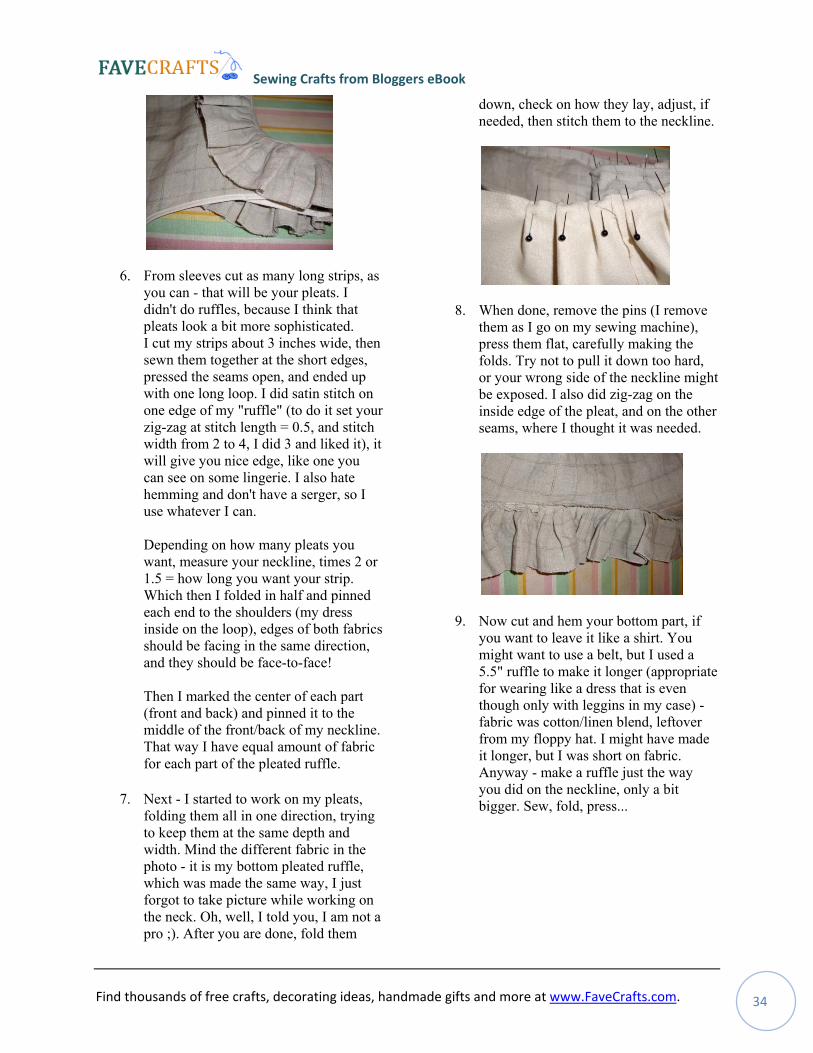
6. From sleeves cut as many long strips, as you can - that will be your pleats. I didn't do ruffles, because I think that pleats look a bit more sophisticated. I cut my strips about 3 inches wide, then sewn them together at the short edges, pressed the seams open, and ended up with one long loop. I did satin stitch on one edge of my "ruffle" (to do it set your zig-zag at stitch length = 0.5, and stitch width from 2 to 4, I did 3 and liked it), it will give you nice edge, like one you can see on some lingerie. I also hate hemming and don't have a serger, so I use whatever I can. Depending on how many pleats you want, measure your neckline, times 2 or 1.5 = how long you want your strip. Which then I folded in half and pinned each end to the shoulders (my dress inside on the loop), edges of both fabrics should be facing in the same direction, and they should be face-to-face! Then I marked the center of each part (front and back) and pinned it to the middle of the front/back of my neckline. That way I have equal amount of fabric for each part of the pleated ruffle.
7. Next - I started to work on my pleats, folding them all in one direction, trying to keep them at the same depth and width. Mind the different fabric in the photo - it is my bottom pleated ruffle, which was made the same way, I just forgot to take picture while working on the neck. Oh, well, I told you, I am not a pro ;). After you are done, fold them
down, check on how they lay, adjust, if needed, then stitch them to the neckline.
8. When done, remove the pins (I remove them as I go on my sewing machine), press them flat, carefully making the folds. Try not to pull it down too hard, or your wrong side of the neckline might be exposed. I also did zig-zag on the inside edge of the pleat, and on the other seams, where I thought it was needed.
9. Now cut and hem your bottom part, if you want to leave it like a shirt. You might want to use a belt, but I used a 5.5" ruffle to make it longer (appropriate for wearing like a dress that is even though only with leggins in my case) - fabric was cotton/linen blend, leftover from my floppy hat. I might have made it longer, but I was short on fabric. Anyway - make a ruffle just the way you did on the neckline, only a bit bigger. Sew, fold, press...
Sewing Crafts from Bloggers eBook
Find thousands of free crafts, decorating ideas, handmade gifts and more at www.FaveCrafts.com. 35
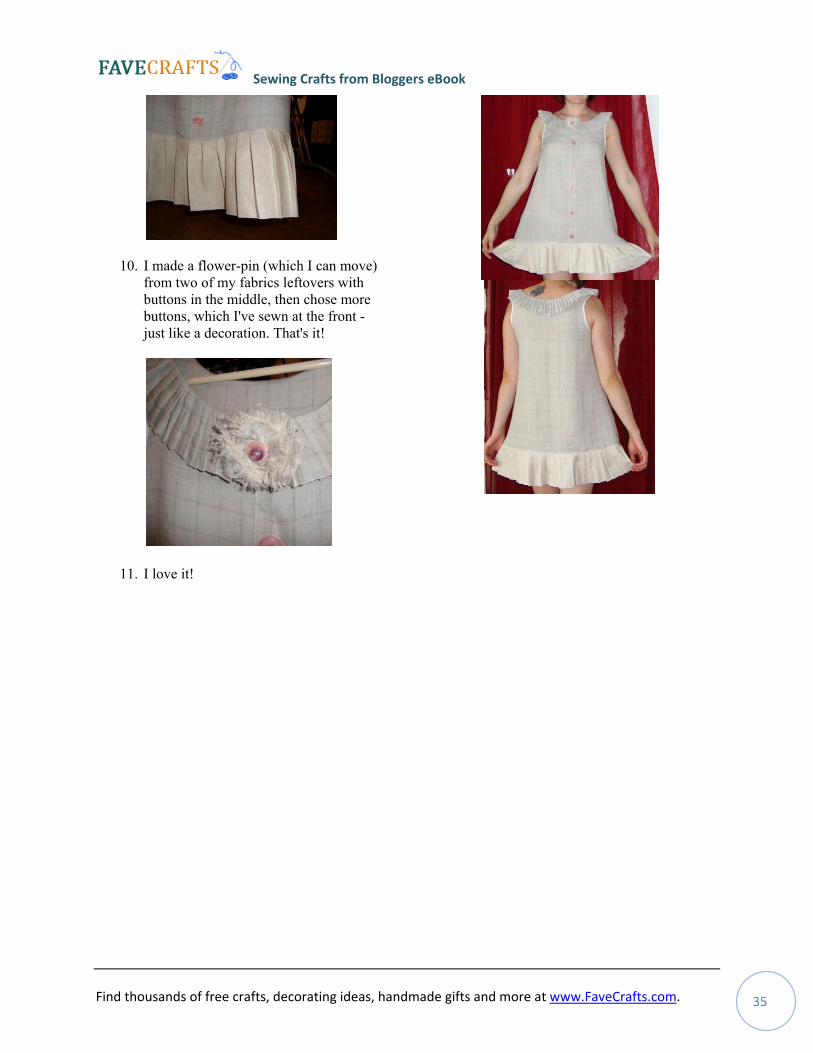
10. I made a flower-pin (which I can move) from two of my fabrics leftovers with buttons in the middle, then chose more buttons, which I've sewn at the front - just like a decoration. That's it!
11. I love it!
Sewing Crafts from Bloggers eBook
Find thousands of free crafts, decorating ideas, handmade gifts and more at www.FaveCrafts.com. 36
Sewing For The Holidays
Easter Daisy and Fabric Topiary
By: Chica and Jo
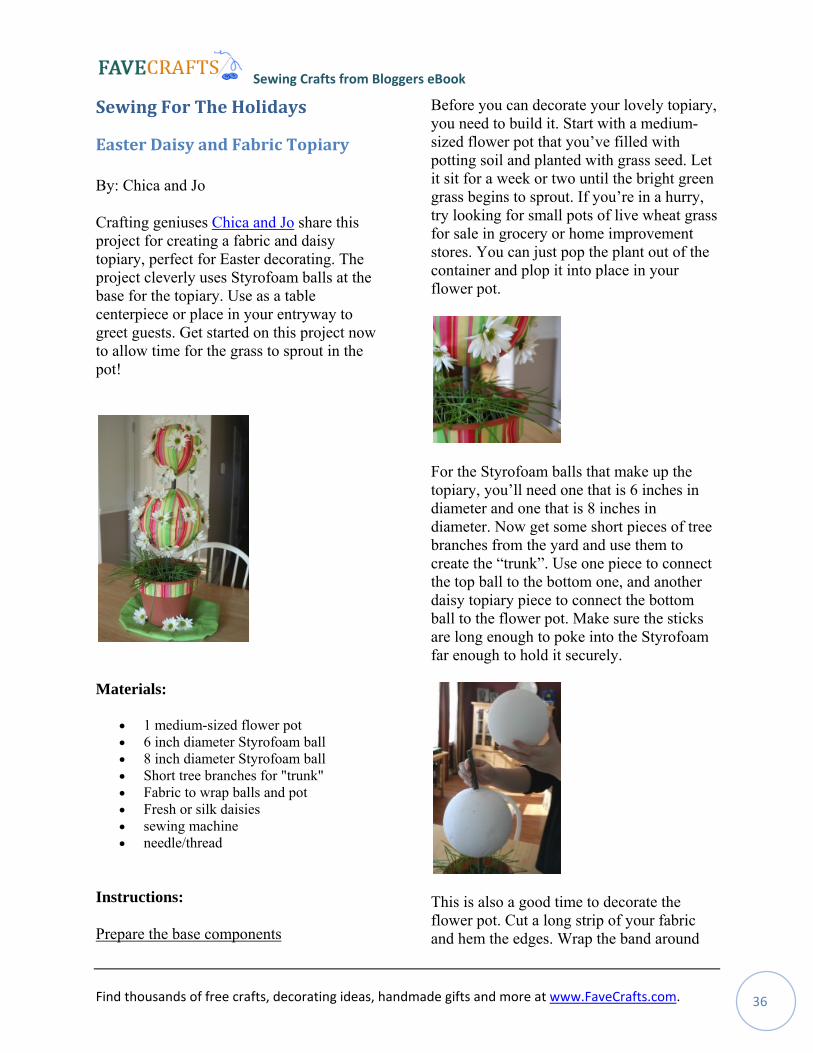
Crafting geniuses Chica and Jo share this project for creating a fabric and daisy topiary, perfect for Easter decorating. The project cleverly uses Styrofoam balls at the base for the topiary. Use as a table centerpiece or place in your entryway to greet guests. Get started on this project now to allow time for the grass to sprout in the pot!
Materials:
• 1 medium-sized flower pot • 6 inch diameter Styrofoam ball • 8 inch diameter Styrofoam ball • Short tree branches for "trunk" • Fabric to wrap balls and pot • Fresh or silk daisies • sewing machine • needle/thread
Instructions:
Prepare the base components
Before you can decorate your lovely topiary, you need to build it. Start with a medium-sized flower pot that you’ve filled with potting soil and planted with grass seed. Let it sit for a week or two until the bright green grass begins to sprout. If you’re in a hurry, try looking for small pots of live wheat grass for sale in grocery or home improvement stores. You can just pop the plant out of the container and plop it into place in your flower pot.
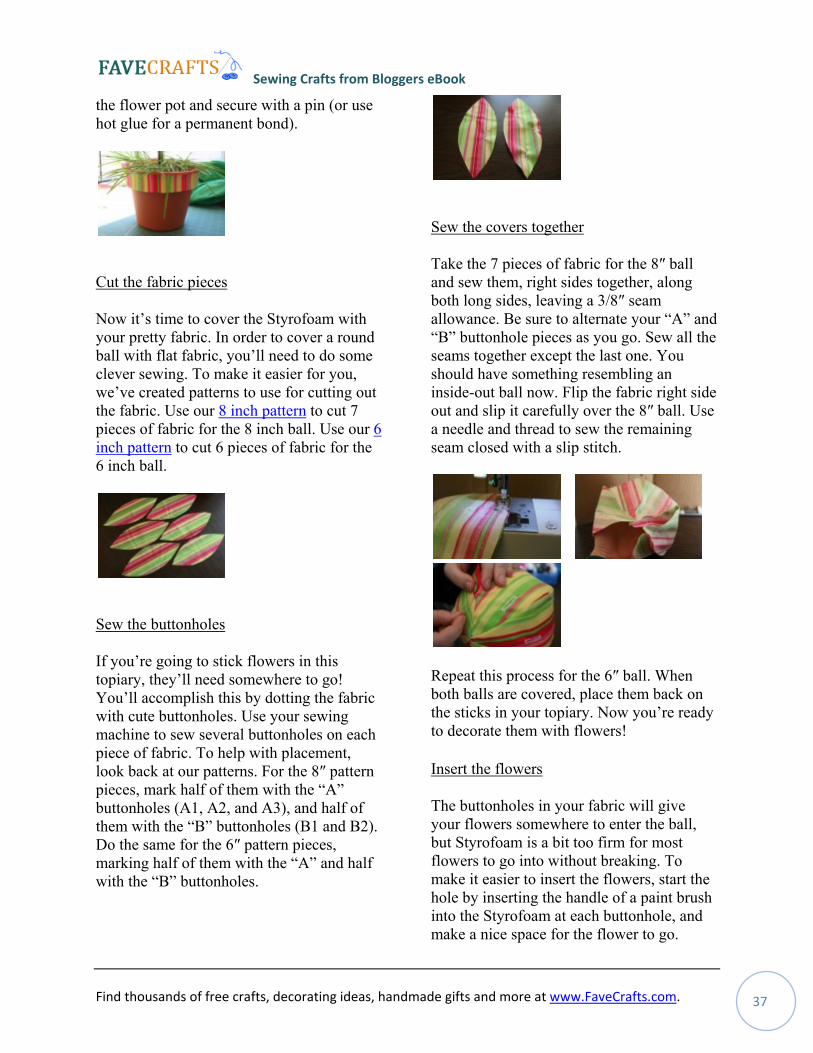
For the Styrofoam balls that make up the topiary, you’ll need one that is 6 inches in diameter and one that is 8 inches in diameter. Now get some short pieces of tree branches from the yard and use them to create the “trunk”. Use one piece to connect the top ball to the bottom one, and another daisy topiary piece to connect the bottom ball to the flower pot. Make sure the sticks are long enough to poke into the Styrofoam far enough to hold it securely.
This is also a good time to decorate the flower pot. Cut a long strip of your fabric and hem the edges. Wrap the band around
Sewing Crafts from Bloggers eBook
Find thousands of free crafts, decorating ideas, handmade gifts and more at www.FaveCrafts.com. 37
the flower pot and secure with a pin (or use hot glue for a permanent bond).
Cut the fabric pieces
Now it’s time to cover the Styrofoam with your pretty fabric. In order to cover a round ball with flat fabric, you’ll need to do some clever sewing. To make it easier for you, we’ve created patterns to use for cutting out the fabric. Use our 8 inch pattern to cut 7 pieces of fabric for the 8 inch ball. Use our 6 inch pattern to cut 6 pieces of fabric for the 6 inch ball.
Sew the buttonholes
If you’re going to stick flowers in this topiary, they’ll need somewhere to go! You’ll accomplish this by dotting the fabric with cute buttonholes. Use your sewing machine to sew several buttonholes on each piece of fabric. To help with placement, look back at our patterns. For the 8″ pattern pieces, mark half of them with the “A” buttonholes (A1, A2, and A3), and half of them with the “B” buttonholes (B1 and B2). Do the same for the 6″ pattern pieces, marking half of them with the “A” and half with the “B” buttonholes.
Sew the covers together
Take the 7 pieces of fabric for the 8″ ball and sew them, right sides together, along both long sides, leaving a 3/8″ seam allowance. Be sure to alternate your “A” and “B” buttonhole pieces as you go. Sew all the seams together except the last one. You should have something resembling an inside-out ball now. Flip the fabric right side out and slip it carefully over the 8″ ball. Use a needle and thread to sew the remaining seam closed with a slip stitch.
Repeat this process for the 6″ ball. When both balls are covered, place them back on the sticks in your topiary. Now you’re ready to decorate them with flowers! Insert the flowers
The buttonholes in your fabric will give your flowers somewhere to enter the ball, but Styrofoam is a bit too firm for most flowers to go into without breaking. To make it easier to insert the flowers, start the hole by inserting the handle of a paint brush into the Styrofoam at each buttonhole, and make a nice space for the flower to go.
Sewing Crafts from Bloggers eBook
Find thousands of free crafts, decorating ideas, handmade gifts and more at www.FaveCrafts.com. 38
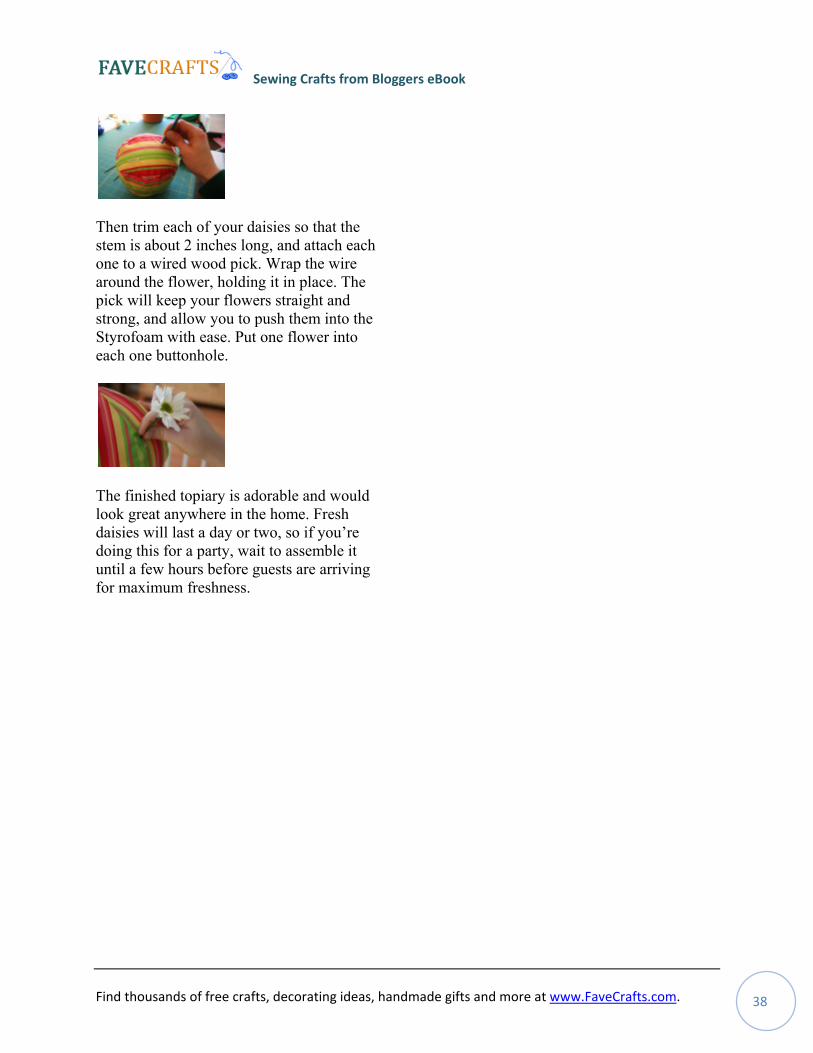
Then trim each of your daisies so that the stem is about 2 inches long, and attach each one to a wired wood pick. Wrap the wire around the flower, holding it in place. The pick will keep your flowers straight and strong, and allow you to push them into the Styrofoam with ease. Put one flower into each one buttonhole.
The finished topiary is adorable and would look great anywhere in the home. Fresh daisies will last a day or two, so if you’re doing this for a party, wait to assemble it until a few hours before guests are arriving for maximum freshness.
Sewing Crafts from Bloggers eBook
Find thousands of free crafts, decorating ideas, handmade gifts and more at www.FaveCrafts.com. 39
Embellish a Pillow for Mom
By: Ashley of Domestic Fashionista
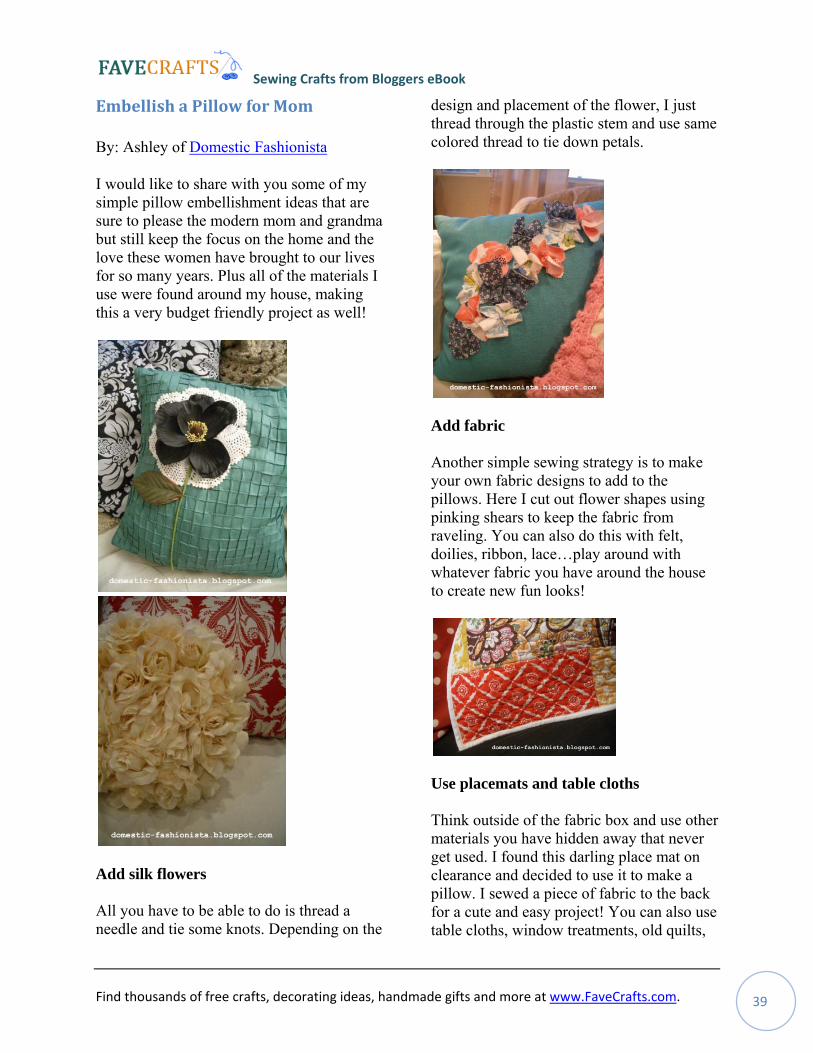
I would like to share with you some of my simple pillow embellishment ideas that are sure to please the modern mom and grandma but still keep the focus on the home and the love these women have brought to our lives for so many years. Plus all of the materials I use were found around my house, making this a very budget friendly project as well!
Add silk flowers All you have to be able to do is thread a needle and tie some knots. Depending on the
design and placement of the flower, I just thread through the plastic stem and use same colored thread to tie down petals.
Add fabric Another simple sewing strategy is to make your own fabric designs to add to the pillows. Here I cut out flower shapes using pinking shears to keep the fabric from raveling. You can also do this with felt, doilies, ribbon, lace…play around with whatever fabric you have around the house to create new fun looks!
Use placemats and table cloths Think outside of the fabric box and use other materials you have hidden away that never get used. I found this darling place mat on clearance and decided to use it to make a pillow. I sewed a piece of fabric to the back for a cute and easy project! You can also use table cloths, window treatments, old quilts,
Sewing Crafts from Bloggers eBook
Find thousands of free crafts, decorating ideas, handmade gifts and more at www.FaveCrafts.com. 40
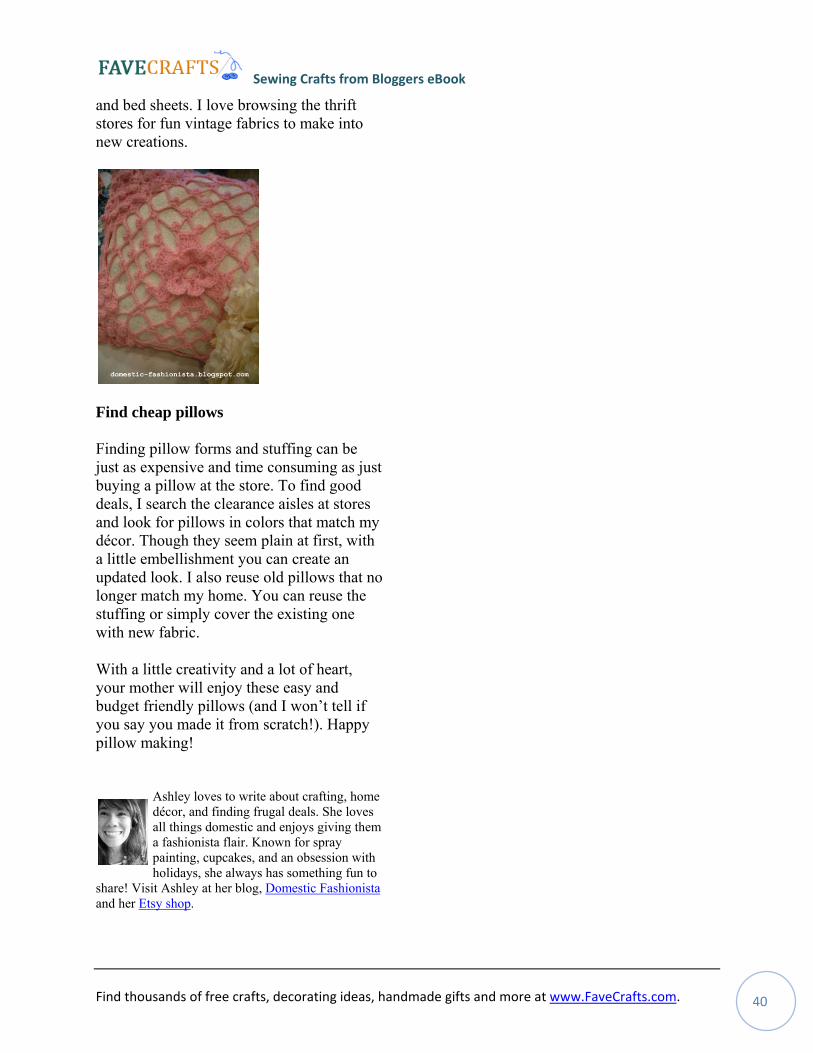
and bed sheets. I love browsing the thrift stores for fun vintage fabrics to make into new creations.
Find cheap pillows Finding pillow forms and stuffing can be just as expensive and time consuming as just buying a pillow at the store. To find good deals, I search the clearance aisles at stores and look for pillows in colors that match my décor. Though they seem plain at first, with a little embellishment you can create an updated look. I also reuse old pillows that no longer match my home. You can reuse the stuffing or simply cover the existing one with new fabric.
With a little creativity and a lot of heart, your mother will enjoy these easy and budget friendly pillows (and I won’t tell if you say you made it from scratch!). Happy pillow making!
Ashley loves to write about crafting, home décor, and finding frugal deals. She loves all things domestic and enjoys giving them a fashionista flair. Known for spray painting, cupcakes, and an obsession with holidays, she always has something fun to
share! Visit Ashley at her blog, Domestic Fashionista and her Etsy shop.
Sewing Crafts from Bloggers eBook
Find thousands of free crafts, decorating ideas, handmade gifts and more at www.FaveCrafts.com. 41
Fleece Gnome Hat Tutorial
By: Beth Ritzman for BabyEtte Boutique
Have you ever seen anything so cute you just couldn't stand it? For me this little hat is right up there with newborn foals and Hello Kitty. And it's sooo simple to make! I'll show you, but I must warn you, I am a self taught seamstress and my Grandma would fall out of her recliner if she saw my methods. But hey...They work! I call it "Instinctive Sewing."
Materials: No-pill fleece about 24" square Matching thread Sewing shears Pins Baby's head measurement
First, cut your fleece into 2 rectangles and lay them right sides together (I'm using scraps from my babywearing poncho, which works too). Take your baby's head measurement and add 1" for ease and 1" for seam allowance, for a total of 2" extra. Then divide this by 2. Use this number to measure out from one side along the bottom and mark that place with a pin. You can also use another of your child's hats as a guide.
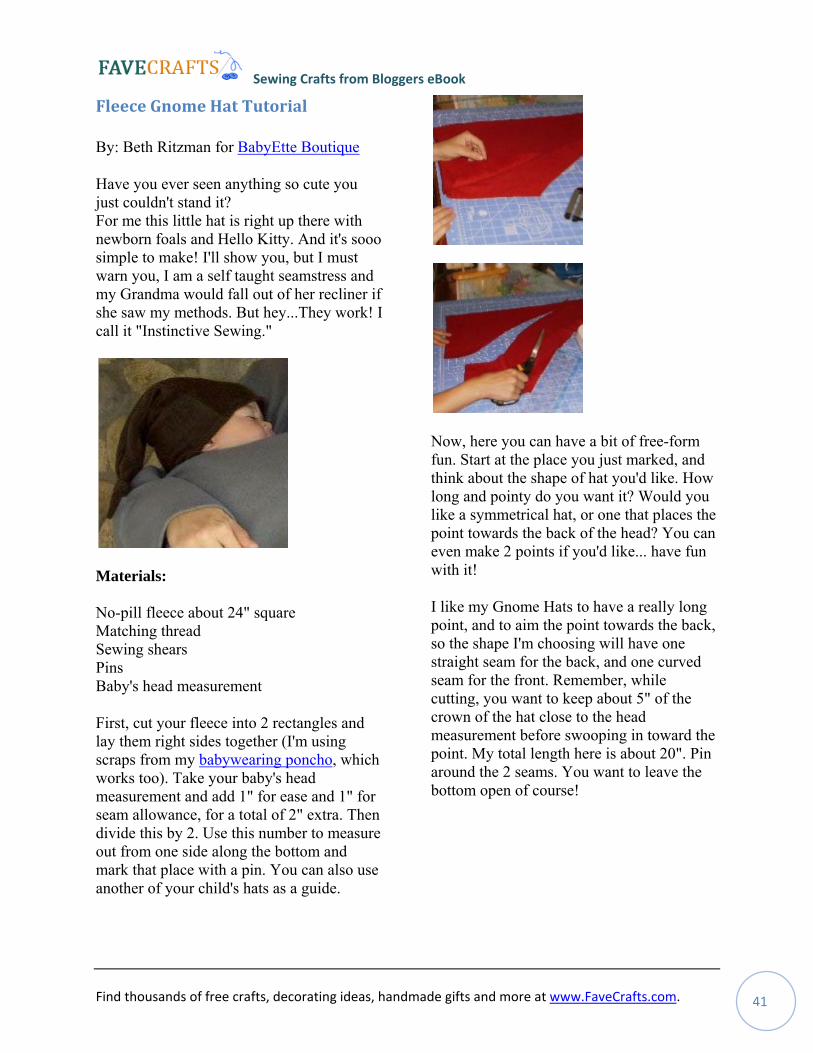
Now, here you can have a bit of free-form fun. Start at the place you just marked, and think about the shape of hat you'd like. How long and pointy do you want it? Would you like a symmetrical hat, or one that places the point towards the back of the head? You can even make 2 points if you'd like... have fun with it!
I like my Gnome Hats to have a really long point, and to aim the point towards the back, so the shape I'm choosing will have one straight seam for the back, and one curved seam for the front. Remember, while cutting, you want to keep about 5" of the crown of the hat close to the head measurement before swooping in toward the point. My total length here is about 20". Pin around the 2 seams. You want to leave the bottom open of course!
Sewing Crafts from Bloggers eBook
Find thousands of free crafts, decorating ideas, handmade gifts and more at www.FaveCrafts.com. 42
Use a straight stitch to sew up one side and down the other, leaving a ½" seam.
Trim your seam allowance and the tip of the hat, being careful not to cut any stitches.
Now we're going to turn the point inside out. I've found the best way to do this is reach one hand inside and then poke the tip between your fingers from the outside. Grab the point and pull it out! Work as much of the point through as you can by hand, then use a bone turner or some fancy tool to gently poke out the tip of the hat. Me? I really go for it and use my closed shears. But don't worry, I'm careful.
Now that everything has turned out well... lets give this hat a hem! Turn the bottom in about ¼" and run it through your machine, folding as you go. You could measure and pin first... but really? Do we really need all that measuring and pinning? Be instinctual...
It will be OK! Fleece is very forgiving. Like a puppy.
I like to use a decorative stitch along the bottom.
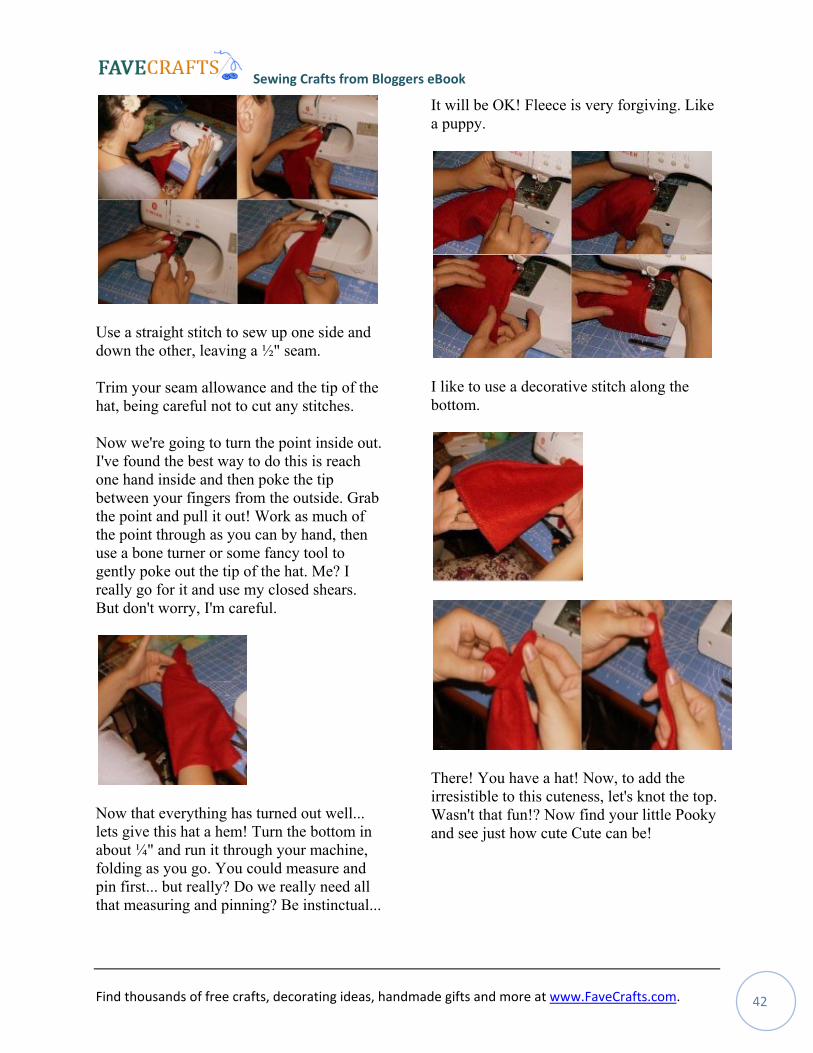
There! You have a hat! Now, to add the irresistible to this cuteness, let's knot the top. Wasn't that fun!? Now find your little Pooky and see just how cute Cute can be!

Sewing Crafts from Bloggers eBook
Find thousands of free crafts, decorating ideas, handmade gifts and more at www.FaveCrafts.com. 43
Easter Chick Appliqué Shirt
By: Amanda Cusick of Kitschy Coo
Amanda walks us through how to create a very cool Easter chick applique shirt from a basic tee. While perfect for Easter eggs hunts, kids (and fun-loving adults) can wear this shirt throughout the spring.
Amanda Cusick of Kitschy Coo is a creator of hip clothing for babies and kids and also offers patterns for sale at her Etsy shop.
Materials:
• Garment to appliqué • Template • Sewing machine capable of zig zag
stitch • Two contrasting scrap fabrics • Double sided fusible web • Tear away stabilizer • Thread • Button
Instructions:
1. Heat-fuse both your scrap fabrics with double sided fusible web, with sticky side (the side without paper) facing the wrong side of your fabric.
2. Trace and cut the bird body from scrap one.
3. Trace and cut the bird wing from scrap two.
4. Peel off the backing paper and position on your garment.
5. Heat-fuse the bird appliqué to your garment.
6. Cut the tear away stabilizer to a size bigger than your chick (including legs and beak).
7. Pin the stabilizer to the underside of your garment. This picture shows your fused pieces, and the pins indicate the size of the stabilizer required.
8. Set your sewing to a machine to tight
zigzag (I use 2.5 width and 0.5 length).
9. Stitch all the way around the body of the bird, with one side of the stitch on the garment and the other side of the stitch in your appliqué (binding and hiding the raw edges). The green lines in the picture show how your zigzag stitch straddles the raw edge. It helps to lessen the foot pressure of your machine so it is easier to turn around curves and it doesn't put as much pressure on the fabric causing waviness. Where you change direction or need a tighter curve, lower your needle down into the fabric, lift your foot and pivot.
Sewing Crafts from Bloggers eBook
Find thousands of free crafts, decorating ideas, handmade gifts and more at www.FaveCrafts.com. 44
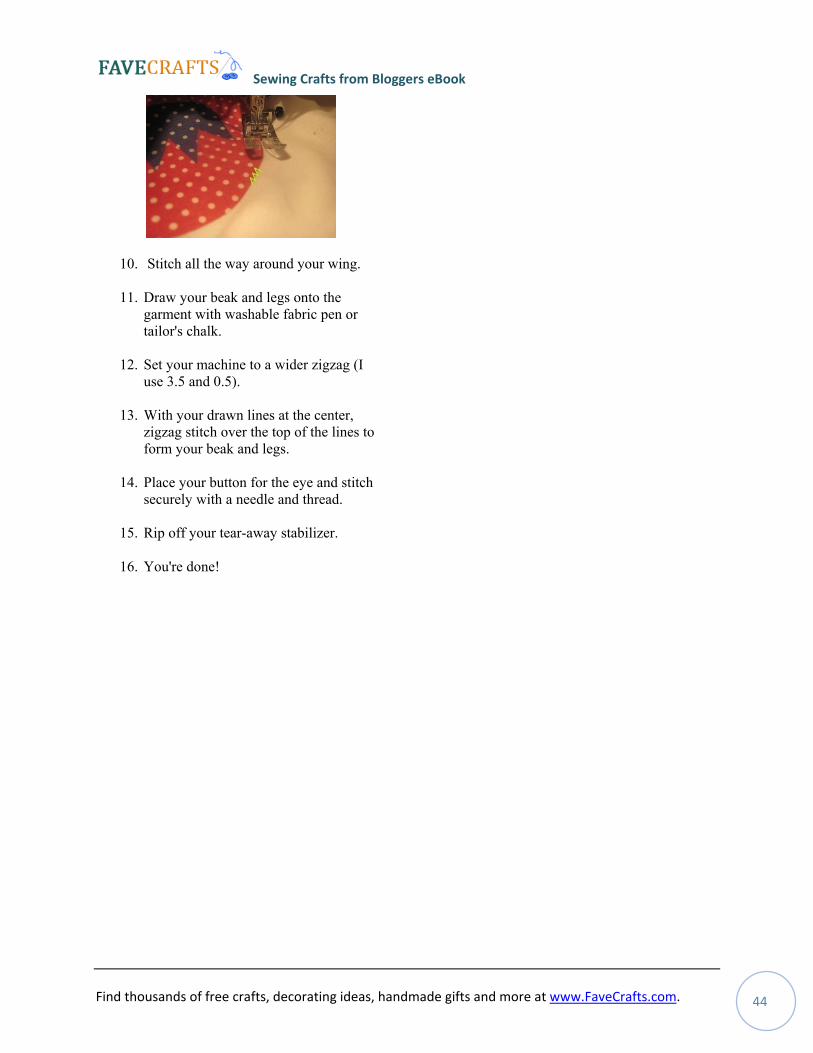
10. Stitch all the way around your wing.
11. Draw your beak and legs onto the garment with washable fabric pen or tailor's chalk.
12. Set your machine to a wider zigzag (I use 3.5 and 0.5).
13. With your drawn lines at the center, zigzag stitch over the top of the lines to form your beak and legs.
14. Place your button for the eye and stitch securely with a needle and thread.
15. Rip off your tear-away stabilizer.
16. You're done!
Sewing Crafts from Bloggers eBook
Find thousands of free crafts, decorating ideas, handmade gifts and more at www.FaveCrafts.com. 45
Mother's Day Sleep Mask
By: Meg of The Closet Seamstress
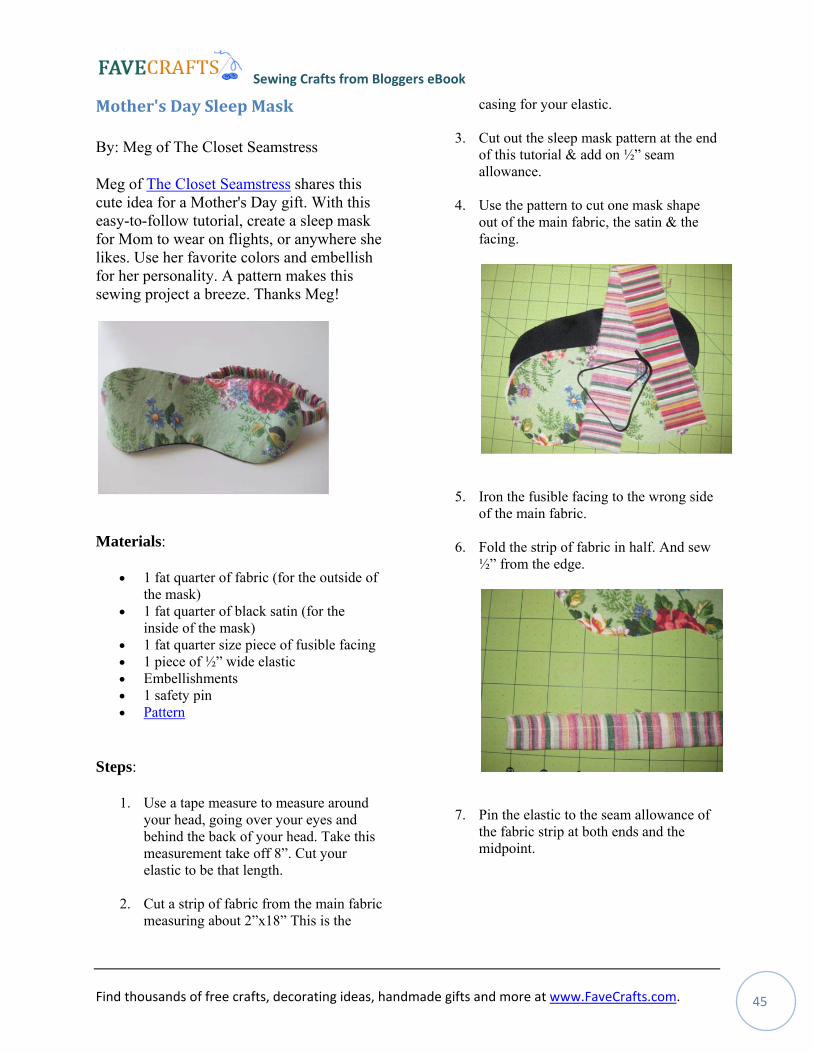
Meg of The Closet Seamstress shares this cute idea for a Mother's Day gift. With this easy-to-follow tutorial, create a sleep mask for Mom to wear on flights, or anywhere she likes. Use her favorite colors and embellish for her personality. A pattern makes this sewing project a breeze. Thanks Meg!
Materials:
• 1 fat quarter of fabric (for the outside of the mask)
• 1 fat quarter of black satin (for the inside of the mask)
• 1 fat quarter size piece of fusible facing • 1 piece of ½” wide elastic • Embellishments • 1 safety pin • Pattern
Steps:
1. Use a tape measure to measure around your head, going over your eyes and behind the back of your head. Take this measurement take off 8”. Cut your elastic to be that length.
2. Cut a strip of fabric from the main fabric measuring about 2”x18” This is the
casing for your elastic.
3. Cut out the sleep mask pattern at the end of this tutorial & add on ½” seam allowance.
4. Use the pattern to cut one mask shape out of the main fabric, the satin & the facing.
5. Iron the fusible facing to the wrong side of the main fabric.
6. Fold the strip of fabric in half. And sew ½” from the edge.
7. Pin the elastic to the seam allowance of the fabric strip at both ends and the midpoint.
Sewing Crafts from Bloggers eBook
Find thousands of free crafts, decorating ideas, handmade gifts and more at www.FaveCrafts.com. 46
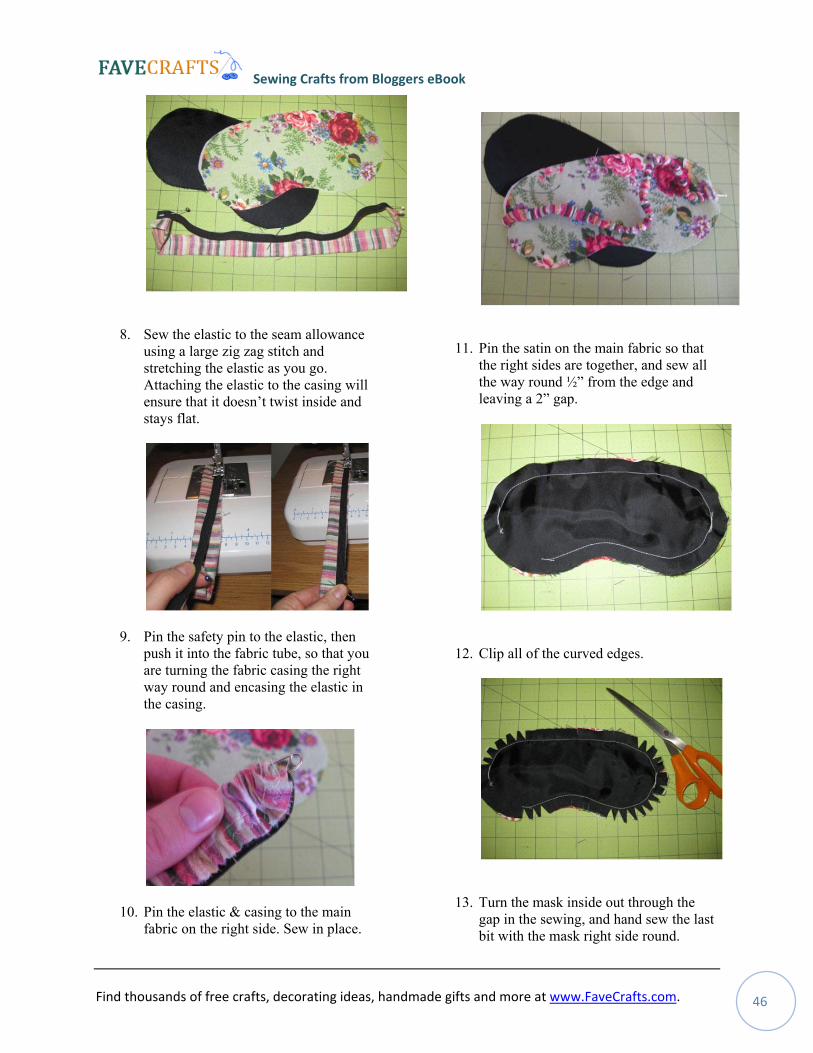
8. Sew the elastic to the seam allowance using a large zig zag stitch and stretching the elastic as you go. Attaching the elastic to the casing will ensure that it doesn’t twist inside and stays flat.
9. Pin the safety pin to the elastic, then push it into the fabric tube, so that you are turning the fabric casing the right way round and encasing the elastic in the casing.
10. Pin the elastic & casing to the main fabric on the right side. Sew in place.
11. Pin the satin on the main fabric so that the right sides are together, and sew all the way round ½” from the edge and leaving a 2” gap.
12. Clip all of the curved edges.
13. Turn the mask inside out through the gap in the sewing, and hand sew the last bit with the mask right side round.
Sewing Crafts from Bloggers eBook
Find thousands of free crafts, decorating ideas, handmade gifts and more at www.FaveCrafts.com. 47
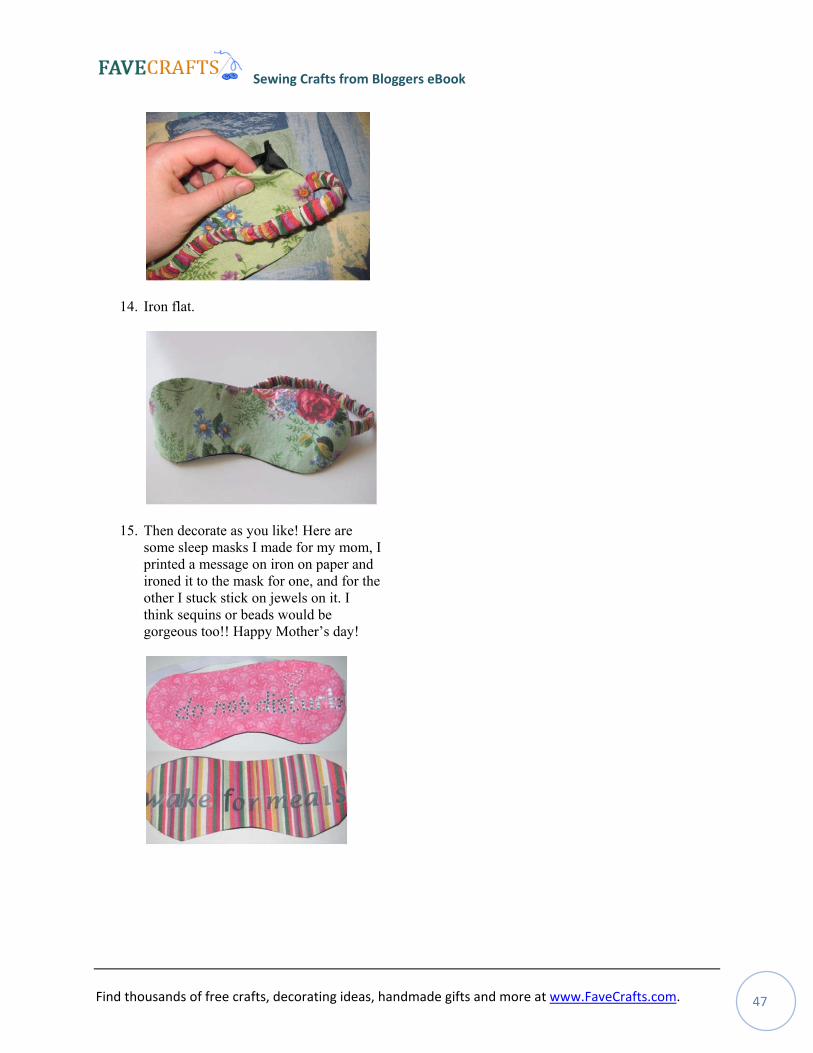
14. Iron flat.
15. Then decorate as you like! Here are some sleep masks I made for my mom, I printed a message on iron on paper and ironed it to the mask for one, and for the other I stuck stick on jewels on it. I think sequins or beads would be gorgeous too!! Happy Mother’s day!
Sewing Crafts from Bloggers eBook
Find thousands of free crafts, decorating ideas, handmade gifts and more at www.FaveCrafts.com. 48
Egg Cup Pincushion
By: Christina Lane, The Sometimes Crafter
The talented Christina Lane of The Sometimes Crafter shares this free sewing pattern for creating an adorable egg cup pincushion. These are perfect for Easter, but fun anytime you want a little color in your surroundings. Use fabric scraps left over from a project to create several.
Materials:
• Egg cup • Fabric scrap (approx. 5” square) • Polyfill • Needle Thread • Glue gun glue
Directions:
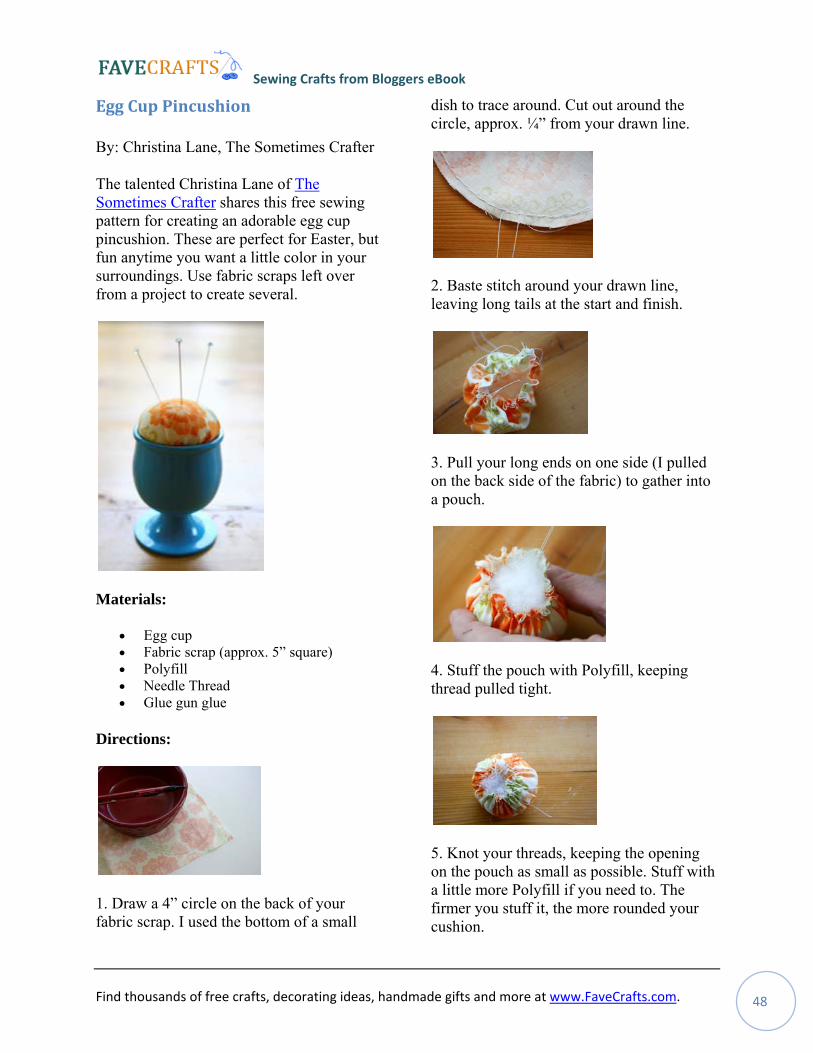
1. Draw a 4” circle on the back of your fabric scrap. I used the bottom of a small
dish to trace around. Cut out around the circle, approx. ¼” from your drawn line.
2. Baste stitch around your drawn line, leaving long tails at the start and finish.
3. Pull your long ends on one side (I pulled on the back side of the fabric) to gather into a pouch.
4. Stuff the pouch with Polyfill, keeping thread pulled tight.
5. Knot your threads, keeping the opening on the pouch as small as possible. Stuff with a little more Polyfill if you need to. The firmer you stuff it, the more rounded your cushion.
Sewing Crafts from Bloggers eBook
Find thousands of free crafts, decorating ideas, handmade gifts and more at www.FaveCrafts.com. 49
6. With your needle and thread stitch the opening all the way closed. I worked from one side to the opposite for a few stitches, and then did the opposite direction a few times.
You should now have a closed cushion as shown.
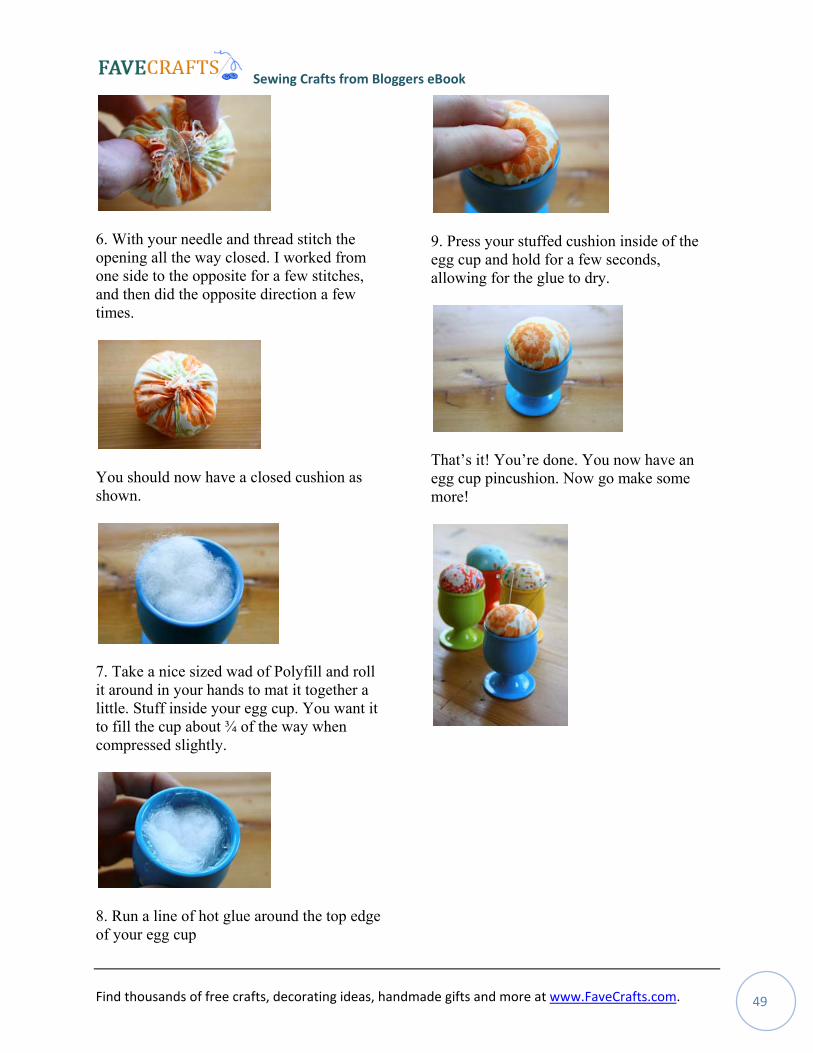
7. Take a nice sized wad of Polyfill and roll it around in your hands to mat it together a little. Stuff inside your egg cup. You want it to fill the cup about ¾ of the way when compressed slightly.
8. Run a line of hot glue around the top edge of your egg cup
9. Press your stuffed cushion inside of the egg cup and hold for a few seconds, allowing for the glue to dry.
That’s it! You’re done. You now have an egg cup pincushion. Now go make some more!
Sewing Crafts from Bloggers eBook
Find thousands of free crafts, decorating ideas, handmade gifts and more at www.FaveCrafts.com. 50
Home Décor Crafts
Framed Monogram
By: Abby Welker of A Feathered Nest
Abby Welker of A Feathered Nest shows us how to create a beautiful, framed monogram with felt and fabric. A bird embellishment tops of a simple sewn creation for truly creative decor. Make one for every member of the family!
Materials:
• Picture Frame • Cardstock • Fabric the size of your frame • One sheet of matching felt • Additional felt for embellishments • DMC Floss or thread in a contrasting
color • Hand-sewing needle (needs a sharp
tip, not a blunt tip) • Fabric glue • Thin piece of cardboard the size of
your frame. (I cut up a cereal box)
STEP 1: Letter Stencils Find a font you like, print your monogram
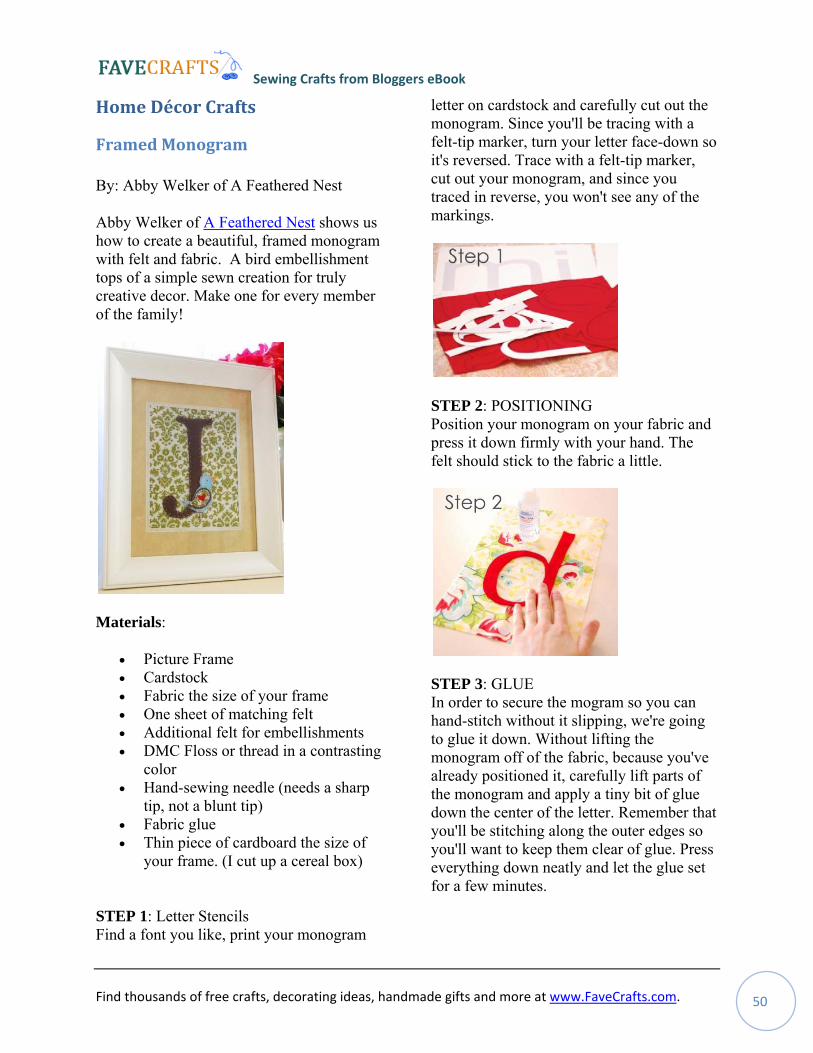
letter on cardstock and carefully cut out the monogram. Since you'll be tracing with a felt-tip marker, turn your letter face-down so it's reversed. Trace with a felt-tip marker, cut out your monogram, and since you traced in reverse, you won't see any of the markings.
STEP 2: POSITIONING Position your monogram on your fabric and press it down firmly with your hand. The felt should stick to the fabric a little.
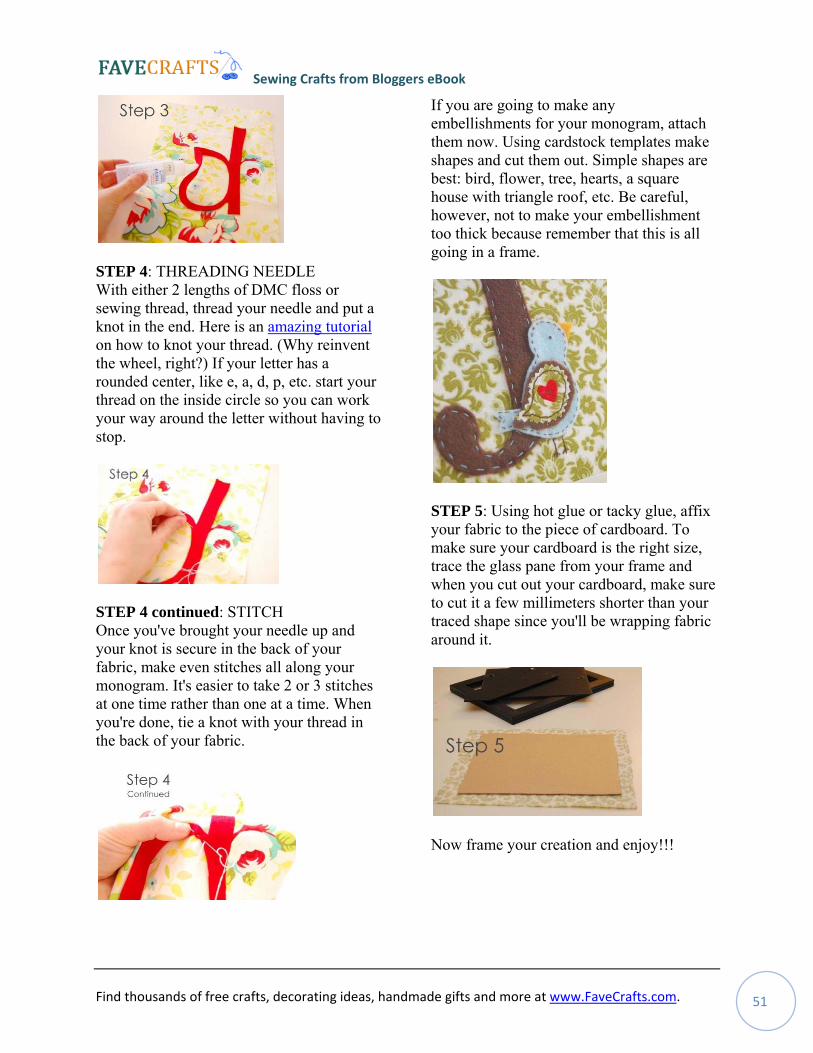
STEP 3: GLUE In order to secure the mogram so you can hand-stitch without it slipping, we're going to glue it down. Without lifting the monogram off of the fabric, because you've already positioned it, carefully lift parts of the monogram and apply a tiny bit of glue down the center of the letter. Remember that you'll be stitching along the outer edges so you'll want to keep them clear of glue. Press everything down neatly and let the glue set for a few minutes.
Sewing Crafts from Bloggers eBook
Find thousands of free crafts, decorating ideas, handmade gifts and more at www.FaveCrafts.com. 51
STEP 4: THREADING NEEDLE With either 2 lengths of DMC floss or sewing thread, thread your needle and put a knot in the end. Here is an amazing tutorial on how to knot your thread. (Why reinvent the wheel, right?) If your letter has a rounded center, like e, a, d, p, etc. start your thread on the inside circle so you can work your way around the letter without having to stop.
STEP 4 continued: STITCH Once you've brought your needle up and your knot is secure in the back of your fabric, make even stitches all along your monogram. It's easier to take 2 or 3 stitches at one time rather than one at a time. When you're done, tie a knot with your thread in the back of your fabric.
If you are going to make any embellishments for your monogram, attach them now. Using cardstock templates make shapes and cut them out. Simple shapes are best: bird, flower, tree, hearts, a square house with triangle roof, etc. Be careful, however, not to make your embellishment too thick because remember that this is all going in a frame.
STEP 5: Using hot glue or tacky glue, affix your fabric to the piece of cardboard. To make sure your cardboard is the right size, trace the glass pane from your frame and when you cut out your cardboard, make sure to cut it a few millimeters shorter than your traced shape since you'll be wrapping fabric around it.
Now frame your creation and enjoy!!!
Sewing Crafts from Bloggers eBook
Find thousands of free crafts, decorating ideas, handmade gifts and more at www.FaveCrafts.com. 52
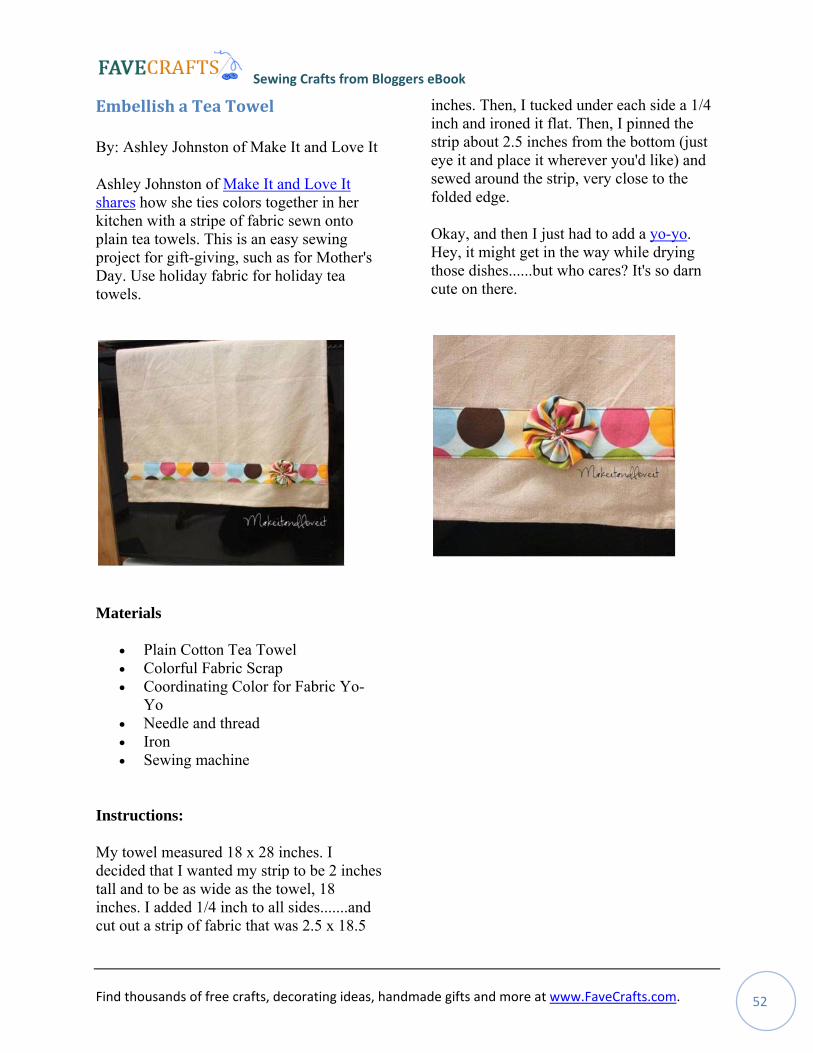
Embellish a Tea Towel
By: Ashley Johnston of Make It and Love It
Ashley Johnston of Make It and Love It shares how she ties colors together in her kitchen with a stripe of fabric sewn onto plain tea towels. This is an easy sewing project for gift-giving, such as for Mother's Day. Use holiday fabric for holiday tea towels.
Materials
• Plain Cotton Tea Towel • Colorful Fabric Scrap • Coordinating Color for Fabric Yo-
Yo • Needle and thread • Iron • Sewing machine
Instructions:
My towel measured 18 x 28 inches. I decided that I wanted my strip to be 2 inches tall and to be as wide as the towel, 18 inches. I added 1/4 inch to all sides.......and cut out a strip of fabric that was 2.5 x 18.5
inches. Then, I tucked under each side a 1/4 inch and ironed it flat. Then, I pinned the strip about 2.5 inches from the bottom (just eye it and place it wherever you'd like) and sewed around the strip, very close to the folded edge.
Okay, and then I just had to add a yo-yo. Hey, it might get in the way while drying those dishes......but who cares? It's so darn cute on there.

Sewing Crafts from Bloggers eBook
Find thousands of free crafts, decorating ideas, handmade gifts and more at www.FaveCrafts.com. 53
Heating Pillow with Buckwheat
By: Jenya of MyEvaForeva
Sew up an easy pillow filled with buckwheat to serve as a heating pad. Buckwheat holds the heat (or cold) better than rice or other grains and is hypoallergenic, since buckwheat is not actually a cereal or grass. Add a few drops of your favorite fragrance oil, or just enjoy the smell of buckwheat. You can also use this pillow as a wrist pillow when working with your computer mouse.
This project comes to us from Jenya of MyEvaForeva. She has two Etsy shops at forEvaMore and EvaForeva.
Materials:
• hand knitted piece (optional, but if you do use it – only natural yarn like wool or cotton)
• piece of fabric (preferably cotton) that is at least twice bigger than your knitted piece
• sewing machine • needle and threads • scissors • piece of paper • buckwheat
Instructions:
knit a cover piece; make it the shape you want your heating pad to be. Place your hand knitted piece in a flat position and slightly stretch
Cut your cotton into two exactly the same pieces so that they are slightly bigger than your knitted piece
Take two cotton pieces and place the knitted piece in between like in the photo
Sew around the edges making sure you get all three layers. Leave an opening about 2” long
Sewing Crafts from Bloggers eBook
Find thousands of free crafts, decorating ideas, handmade gifts and more at www.FaveCrafts.com. 54
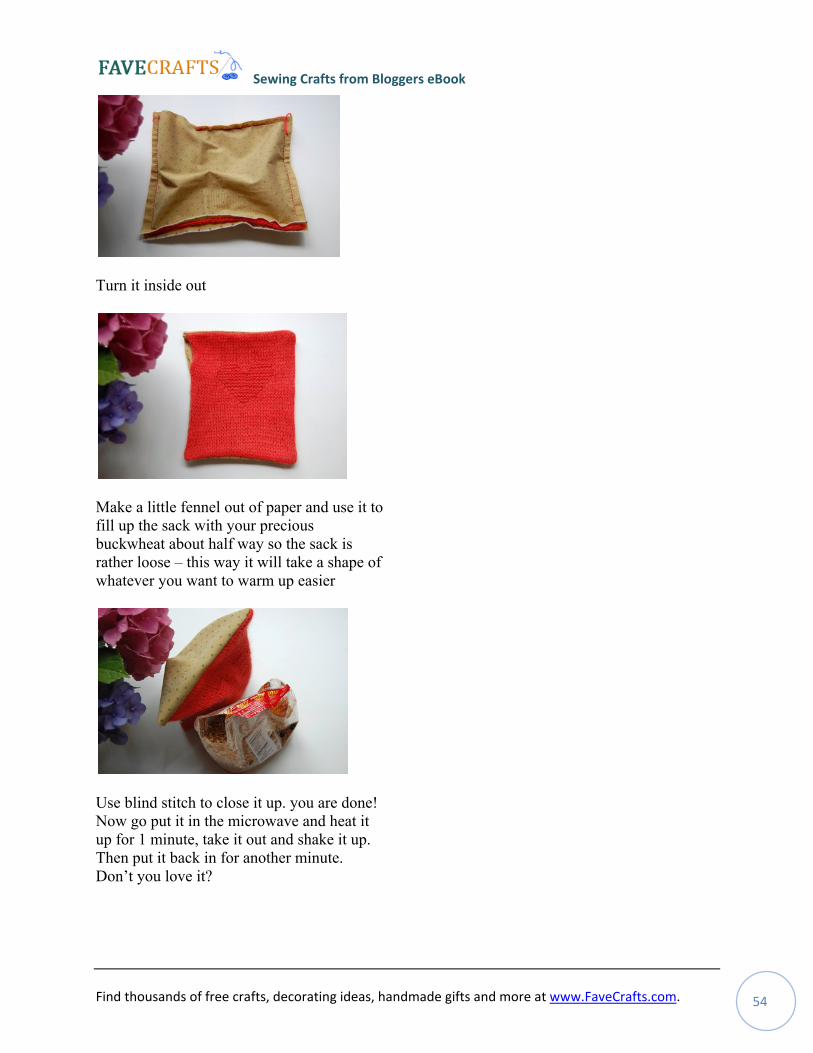
Turn it inside out
Make a little fennel out of paper and use it to fill up the sack with your precious buckwheat about half way so the sack is rather loose – this way it will take a shape of whatever you want to warm up easier
Use blind stitch to close it up. you are done! Now go put it in the microwave and heat it up for 1 minute, take it out and shake it up. Then put it back in for another minute. Don’t you love it?
Sewing Crafts from Bloggers eBook
Find thousands of free crafts, decorating ideas, handmade gifts and more at www.FaveCrafts.com. 55
Sewn Bags
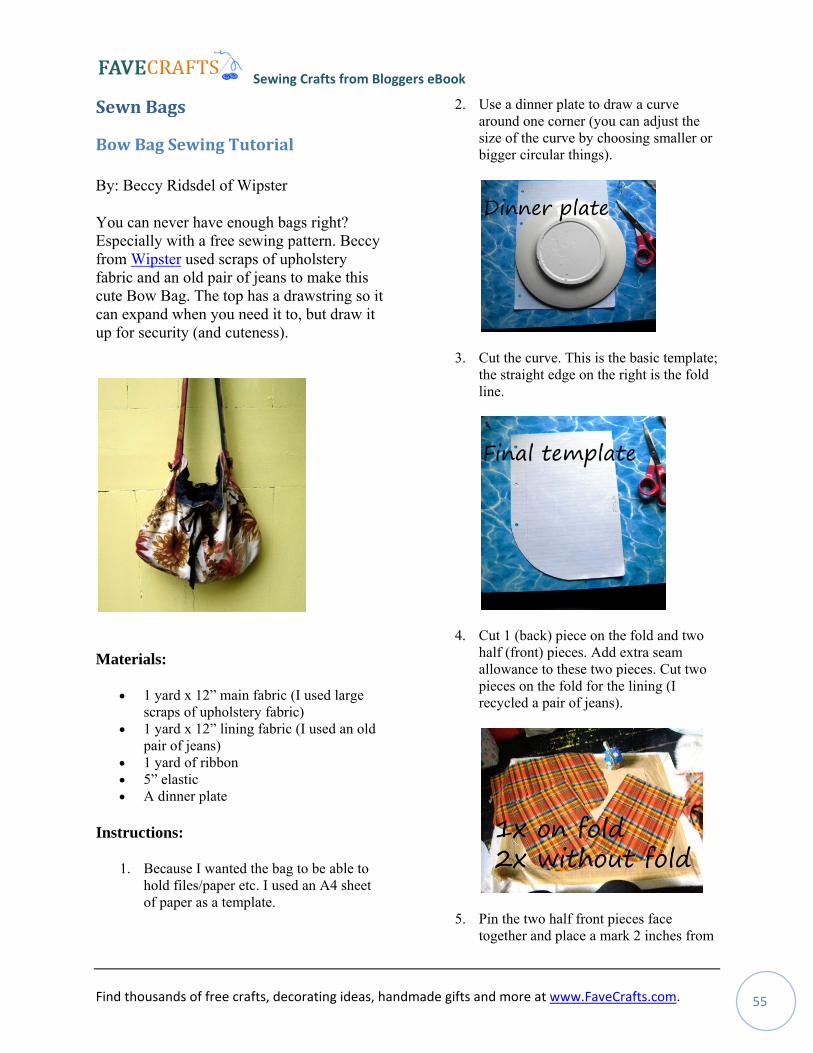
Bow Bag Sewing Tutorial
By: Beccy Ridsdel of Wipster
You can never have enough bags right? Especially with a free sewing pattern. Beccy from Wipster used scraps of upholstery fabric and an old pair of jeans to make this cute Bow Bag. The top has a drawstring so it can expand when you need it to, but draw it up for security (and cuteness).
Materials:
• 1 yard x 12” main fabric (I used large scraps of upholstery fabric)
• 1 yard x 12” lining fabric (I used an old pair of jeans)
• 1 yard of ribbon • 5” elastic • A dinner plate
Instructions:
1. Because I wanted the bag to be able to hold files/paper etc. I used an A4 sheet of paper as a template.
2. Use a dinner plate to draw a curve around one corner (you can adjust the size of the curve by choosing smaller or bigger circular things).
3. Cut the curve. This is the basic template; the straight edge on the right is the fold line.
4. Cut 1 (back) piece on the fold and two half (front) pieces. Add extra seam allowance to these two pieces. Cut two pieces on the fold for the lining (I recycled a pair of jeans).
5. Pin the two half front pieces face together and place a mark 2 inches from
Sewing Crafts from Bloggers eBook
Find thousands of free crafts, decorating ideas, handmade gifts and more at www.FaveCrafts.com. 56
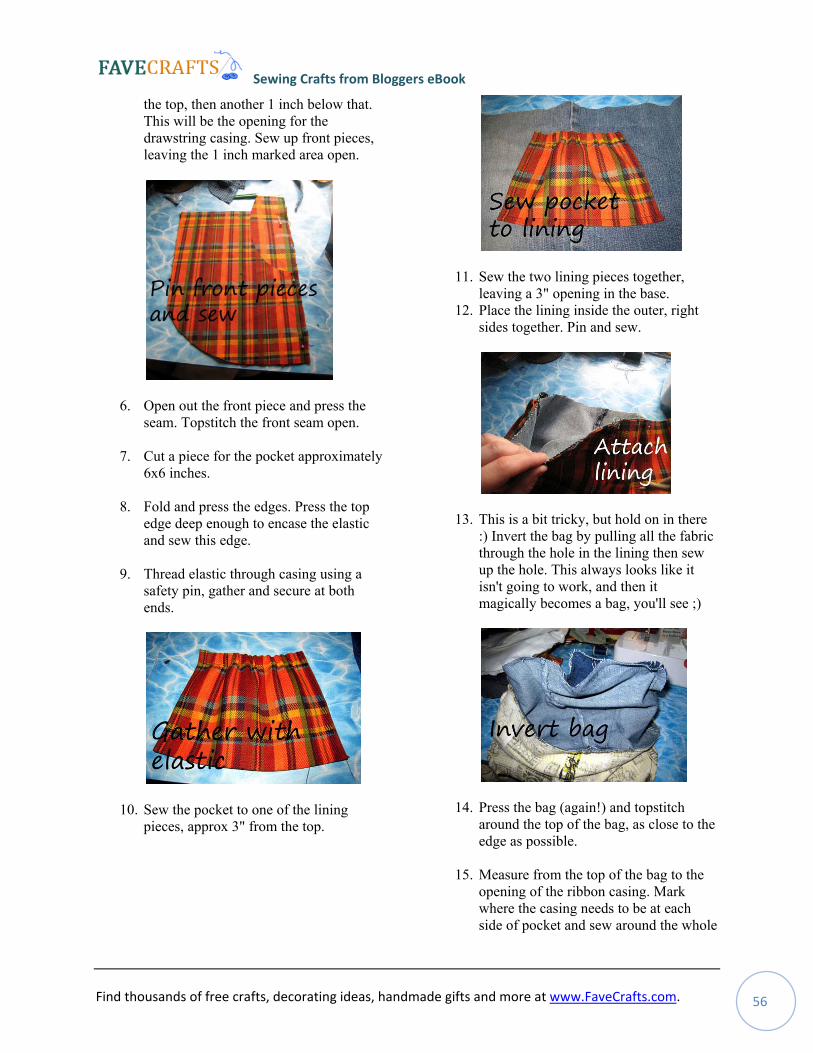
the top, then another 1 inch below that. This will be the opening for the drawstring casing. Sew up front pieces, leaving the 1 inch marked area open.
6. Open out the front piece and press the seam. Topstitch the front seam open.
7. Cut a piece for the pocket approximately 6x6 inches.
8. Fold and press the edges. Press the top edge deep enough to encase the elastic and sew this edge.
9. Thread elastic through casing using a safety pin, gather and secure at both ends.
10. Sew the pocket to one of the lining pieces, approx 3" from the top.
11. Sew the two lining pieces together, leaving a 3" opening in the base.
12. Place the lining inside the outer, right sides together. Pin and sew.
13. This is a bit tricky, but hold on in there :) Invert the bag by pulling all the fabric through the hole in the lining then sew up the hole. This always looks like it isn't going to work, and then it magically becomes a bag, you'll see ;)
14. Press the bag (again!) and topstitch around the top of the bag, as close to the edge as possible.
15. Measure from the top of the bag to the opening of the ribbon casing. Mark where the casing needs to be at each side of pocket and sew around the whole
Sewing Crafts from Bloggers eBook
Find thousands of free crafts, decorating ideas, handmade gifts and more at www.FaveCrafts.com. 57
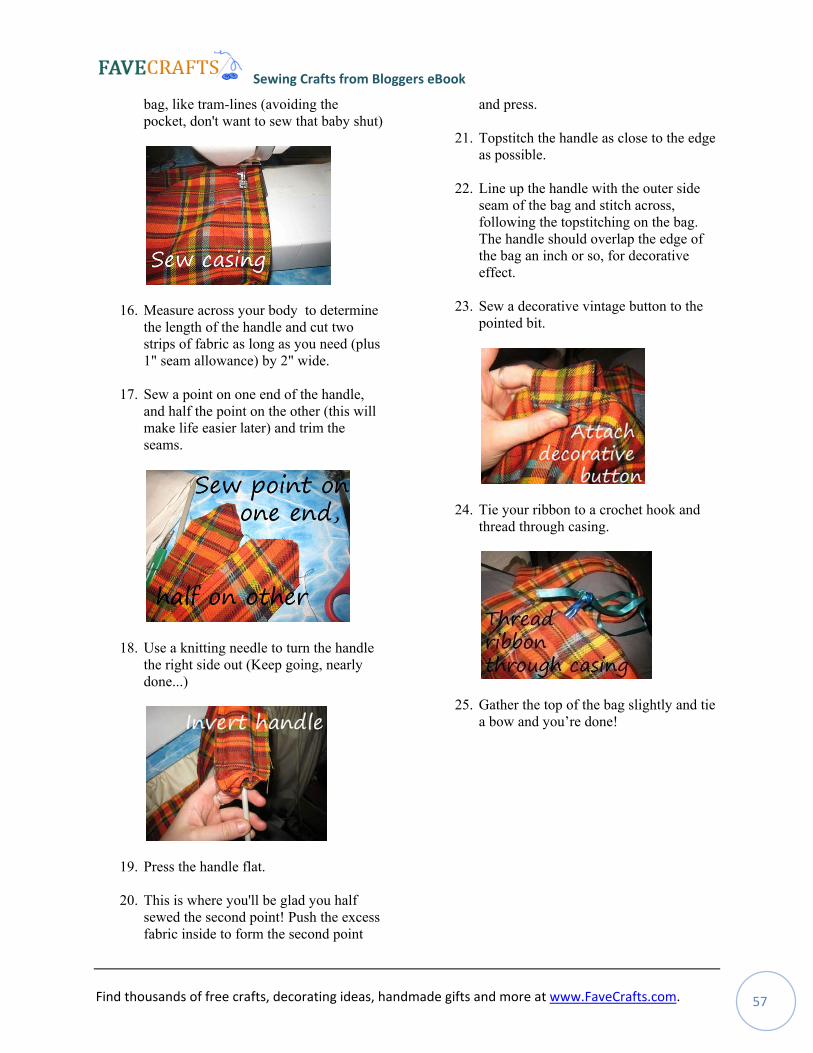
bag, like tram-lines (avoiding the pocket, don't want to sew that baby shut)
16. Measure across your body to determine the length of the handle and cut two strips of fabric as long as you need (plus 1" seam allowance) by 2" wide.
17. Sew a point on one end of the handle, and half the point on the other (this will make life easier later) and trim the seams.
18. Use a knitting needle to turn the handle the right side out (Keep going, nearly done...)
19. Press the handle flat.
20. This is where you'll be glad you half sewed the second point! Push the excess fabric inside to form the second point
and press.
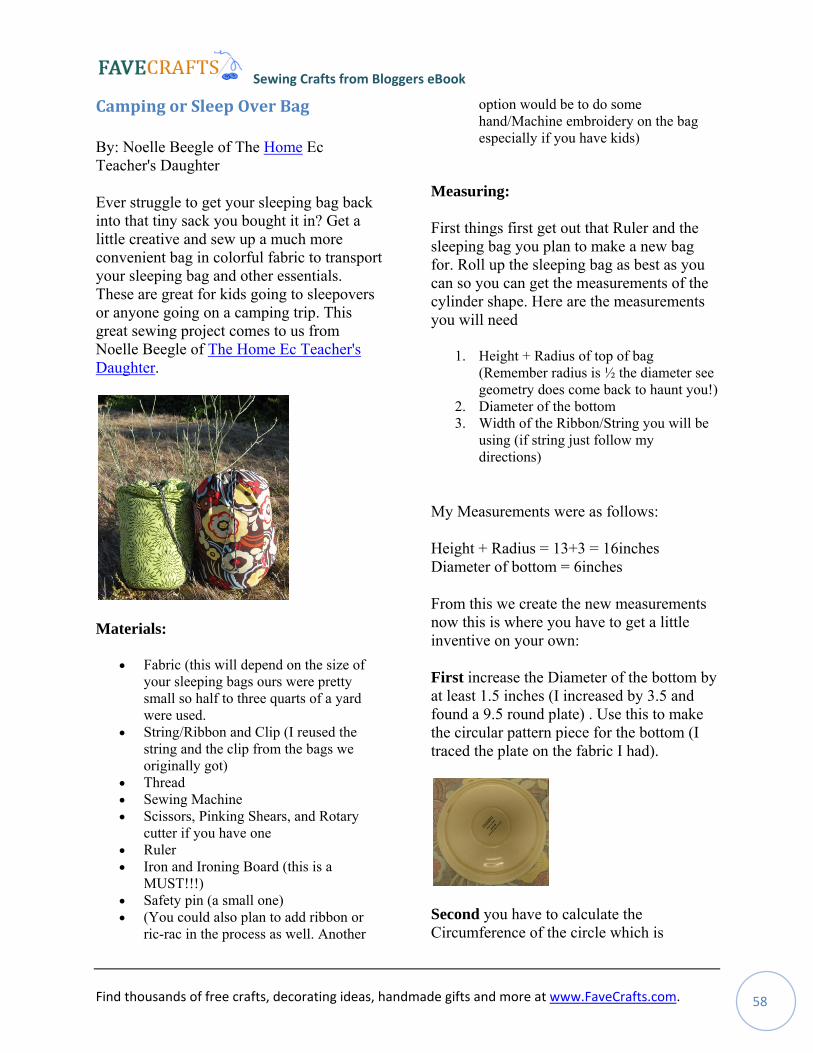
21. Topstitch the handle as close to the edge as possible.
22. Line up the handle with the outer side seam of the bag and stitch across, following the topstitching on the bag. The handle should overlap the edge of the bag an inch or so, for decorative effect.
23. Sew a decorative vintage button to the pointed bit.
24. Tie your ribbon to a crochet hook and thread through casing.
25. Gather the top of the bag slightly and tie a bow and you’re done!
Sewing Crafts from Bloggers eBook
Find thousands of free crafts, decorating ideas, handmade gifts and more at www.FaveCrafts.com. 58
Camping or Sleep Over Bag
By: Noelle Beegle of The Home Ec Teacher's Daughter
Ever struggle to get your sleeping bag back into that tiny sack you bought it in? Get a little creative and sew up a much more convenient bag in colorful fabric to transport your sleeping bag and other essentials. These are great for kids going to sleepovers or anyone going on a camping trip. This great sewing project comes to us from Noelle Beegle of The Home Ec Teacher's Daughter.
Materials:
• Fabric (this will depend on the size of your sleeping bags ours were pretty small so half to three quarts of a yard were used.
• String/Ribbon and Clip (I reused the string and the clip from the bags we originally got)
• Thread • Sewing Machine • Scissors, Pinking Shears, and Rotary
cutter if you have one • Ruler • Iron and Ironing Board (this is a
MUST!!!) • Safety pin (a small one) • (You could also plan to add ribbon or
ric-rac in the process as well. Another
option would be to do some hand/Machine embroidery on the bag especially if you have kids)
Measuring:
First things first get out that Ruler and the sleeping bag you plan to make a new bag for. Roll up the sleeping bag as best as you can so you can get the measurements of the cylinder shape. Here are the measurements you will need
1. Height + Radius of top of bag (Remember radius is ½ the diameter see geometry does come back to haunt you!)
2. Diameter of the bottom 3. Width of the Ribbon/String you will be
using (if string just follow my directions)
My Measurements were as follows:
Height + Radius = 13+3 = 16inches Diameter of bottom = 6inches
From this we create the new measurements now this is where you have to get a little inventive on your own:
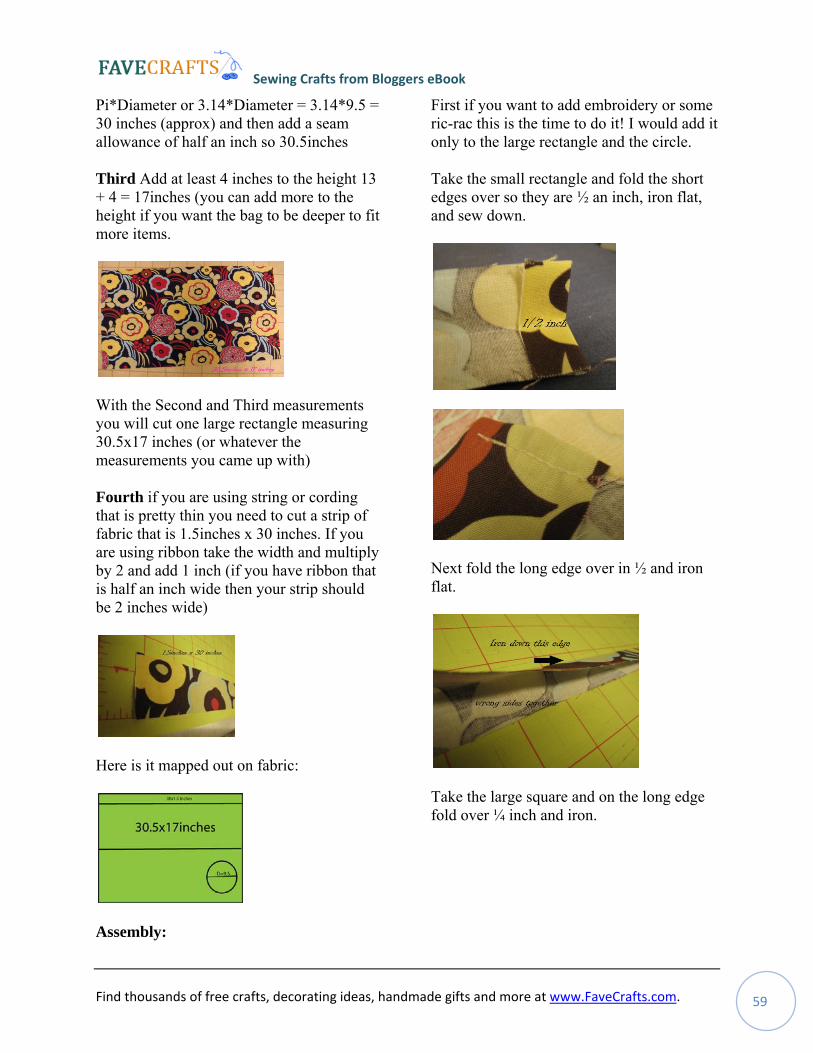
First increase the Diameter of the bottom by at least 1.5 inches (I increased by 3.5 and found a 9.5 round plate) . Use this to make the circular pattern piece for the bottom (I traced the plate on the fabric I had).
Second you have to calculate the Circumference of the circle which is
Sewing Crafts from Bloggers eBook
Find thousands of free crafts, decorating ideas, handmade gifts and more at www.FaveCrafts.com. 59
Pi*Diameter or 3.14*Diameter = 3.14*9.5 = 30 inches (approx) and then add a seam allowance of half an inch so 30.5inches
Third Add at least 4 inches to the height 13 + 4 = 17inches (you can add more to the height if you want the bag to be deeper to fit more items.
With the Second and Third measurements you will cut one large rectangle measuring 30.5x17 inches (or whatever the measurements you came up with)
Fourth if you are using string or cording that is pretty thin you need to cut a strip of fabric that is 1.5inches x 30 inches. If you are using ribbon take the width and multiply by 2 and add 1 inch (if you have ribbon that is half an inch wide then your strip should be 2 inches wide)
Here is it mapped out on fabric:
Assembly:
First if you want to add embroidery or some ric-rac this is the time to do it! I would add it only to the large rectangle and the circle.
Take the small rectangle and fold the short edges over so they are ½ an inch, iron flat, and sew down.
Next fold the long edge over in ½ and iron flat.
Take the large square and on the long edge fold over ¼ inch and iron.
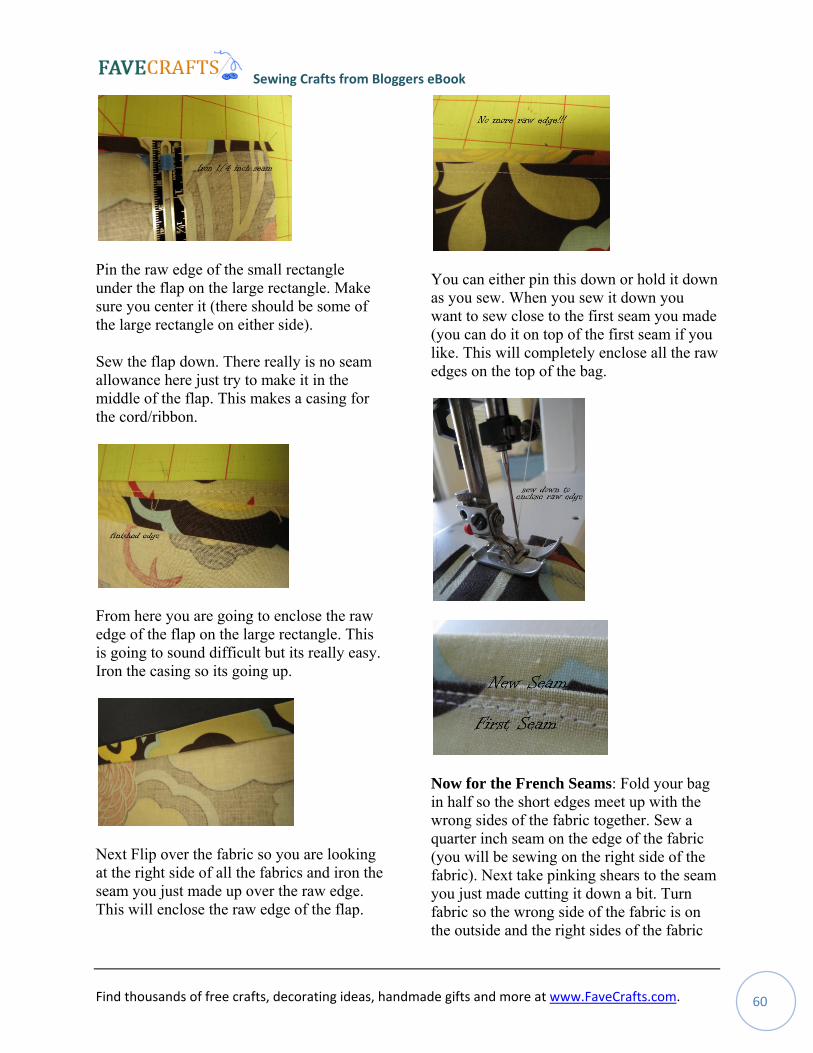
Sewing Crafts from Bloggers eBook
Find thousands of free crafts, decorating ideas, handmade gifts and more at www.FaveCrafts.com. 60
Pin the raw edge of the small rectangle under the flap on the large rectangle. Make sure you center it (there should be some of the large rectangle on either side).
Sew the flap down. There really is no seam allowance here just try to make it in the middle of the flap. This makes a casing for the cord/ribbon.
From here you are going to enclose the raw edge of the flap on the large rectangle. This is going to sound difficult but its really easy. Iron the casing so its going up.
Next Flip over the fabric so you are looking at the right side of all the fabrics and iron the seam you just made up over the raw edge. This will enclose the raw edge of the flap.
You can either pin this down or hold it down as you sew. When you sew it down you want to sew close to the first seam you made (you can do it on top of the first seam if you like. This will completely enclose all the raw edges on the top of the bag.
Now for the French Seams: Fold your bag in half so the short edges meet up with the wrong sides of the fabric together. Sew a quarter inch seam on the edge of the fabric (you will be sewing on the right side of the fabric). Next take pinking shears to the seam you just made cutting it down a bit. Turn fabric so the wrong side of the fabric is on the outside and the right sides of the fabric
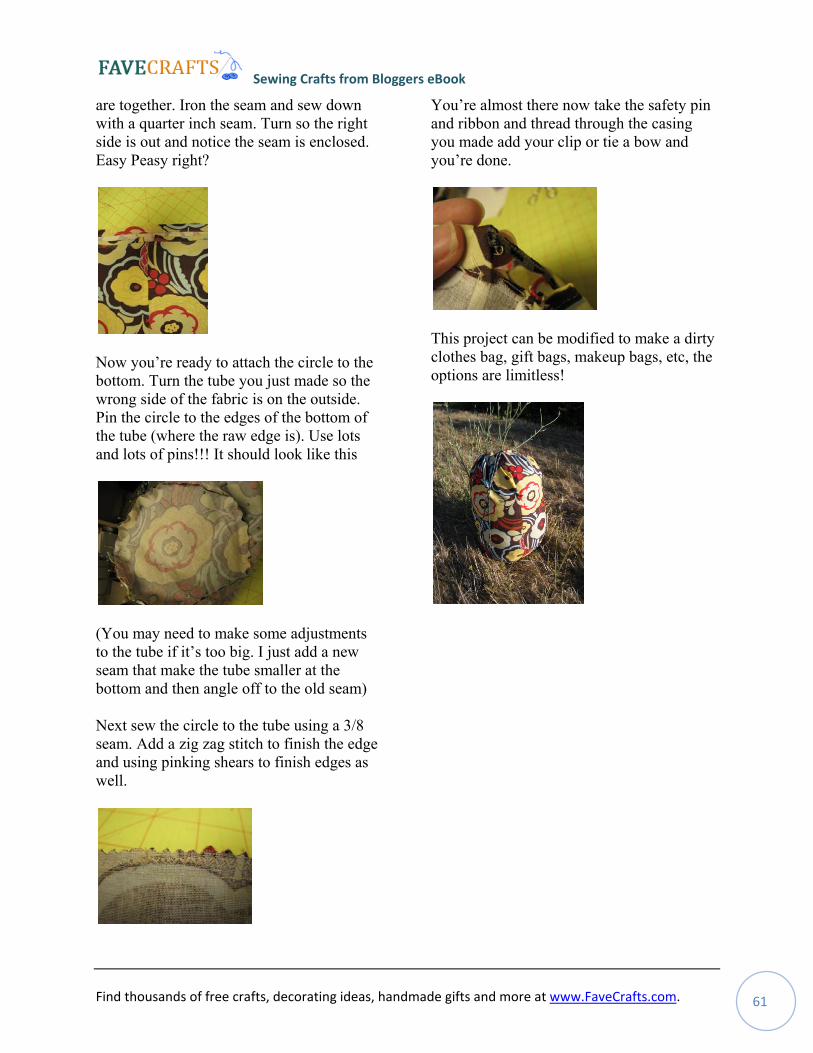
Sewing Crafts from Bloggers eBook
Find thousands of free crafts, decorating ideas, handmade gifts and more at www.FaveCrafts.com. 61
are together. Iron the seam and sew down with a quarter inch seam. Turn so the right side is out and notice the seam is enclosed. Easy Peasy right?
Now you’re ready to attach the circle to the bottom. Turn the tube you just made so the wrong side of the fabric is on the outside. Pin the circle to the edges of the bottom of the tube (where the raw edge is). Use lots and lots of pins!!! It should look like this
(You may need to make some adjustments to the tube if it’s too big. I just add a new seam that make the tube smaller at the bottom and then angle off to the old seam)
Next sew the circle to the tube using a 3/8 seam. Add a zig zag stitch to finish the edge and using pinking shears to finish edges as well.
You’re almost there now take the safety pin and ribbon and thread through the casing you made add your clip or tie a bow and you’re done.
This project can be modified to make a dirty clothes bag, gift bags, makeup bags, etc, the options are limitless!
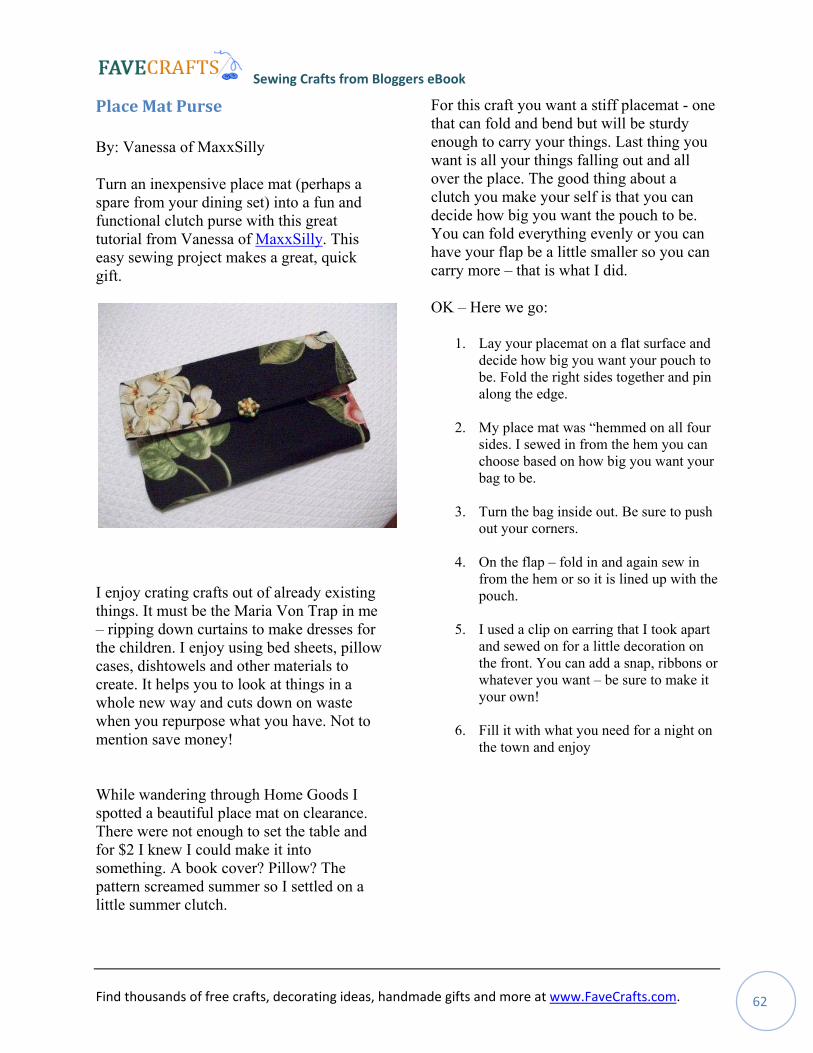
Sewing Crafts from Bloggers eBook
Find thousands of free crafts, decorating ideas, handmade gifts and more at www.FaveCrafts.com. 62
Place Mat Purse
By: Vanessa of MaxxSilly
Turn an inexpensive place mat (perhaps a spare from your dining set) into a fun and functional clutch purse with this great tutorial from Vanessa of MaxxSilly. This easy sewing project makes a great, quick gift.
I enjoy crating crafts out of already existing things. It must be the Maria Von Trap in me – ripping down curtains to make dresses for the children. I enjoy using bed sheets, pillow cases, dishtowels and other materials to create. It helps you to look at things in a whole new way and cuts down on waste when you repurpose what you have. Not to mention save money!
While wandering through Home Goods I spotted a beautiful place mat on clearance. There were not enough to set the table and for $2 I knew I could make it into something. A book cover? Pillow? The pattern screamed summer so I settled on a little summer clutch.
For this craft you want a stiff placemat - one that can fold and bend but will be sturdy enough to carry your things. Last thing you want is all your things falling out and all over the place. The good thing about a clutch you make your self is that you can decide how big you want the pouch to be. You can fold everything evenly or you can have your flap be a little smaller so you can carry more – that is what I did.
OK – Here we go:
1. Lay your placemat on a flat surface and decide how big you want your pouch to be. Fold the right sides together and pin along the edge.
2. My place mat was “hemmed on all four sides. I sewed in from the hem you can choose based on how big you want your bag to be.
3. Turn the bag inside out. Be sure to push out your corners.
4. On the flap – fold in and again sew in from the hem or so it is lined up with the pouch.
5. I used a clip on earring that I took apart and sewed on for a little decoration on the front. You can add a snap, ribbons or whatever you want – be sure to make it your own!
6. Fill it with what you need for a night on the town and enjoy
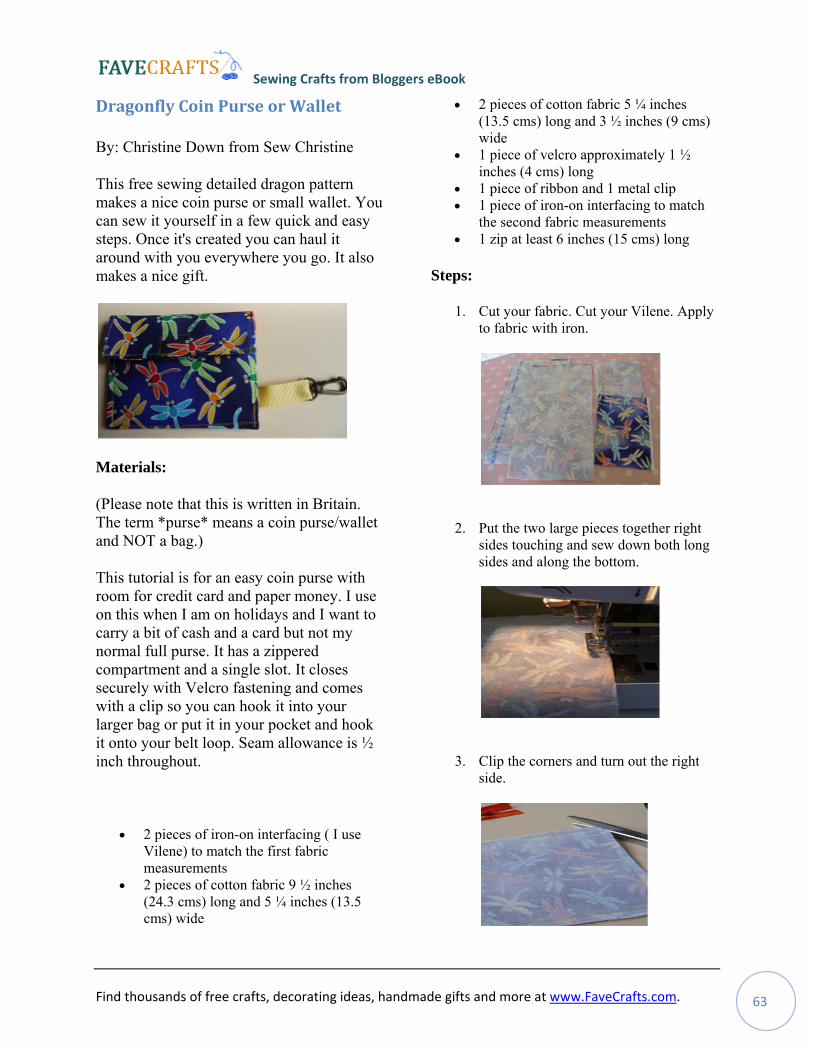
Sewing Crafts from Bloggers eBook
Find thousands of free crafts, decorating ideas, handmade gifts and more at www.FaveCrafts.com. 63
Dragonfly Coin Purse or Wallet
By: Christine Down from Sew Christine
This free sewing detailed dragon pattern makes a nice coin purse or small wallet. You can sew it yourself in a few quick and easy steps. Once it's created you can haul it around with you everywhere you go. It also makes a nice gift.
Materials:
(Please note that this is written in Britain. The term *purse* means a coin purse/wallet and NOT a bag.)
This tutorial is for an easy coin purse with room for credit card and paper money. I use on this when I am on holidays and I want to carry a bit of cash and a card but not my normal full purse. It has a zippered compartment and a single slot. It closes securely with Velcro fastening and comes with a clip so you can hook it into your larger bag or put it in your pocket and hook it onto your belt loop. Seam allowance is ½ inch throughout.
• 2 pieces of iron-on interfacing ( I use Vilene) to match the first fabric measurements
• 2 pieces of cotton fabric 9 ½ inches (24.3 cms) long and 5 ¼ inches (13.5 cms) wide
• 2 pieces of cotton fabric 5 ¼ inches (13.5 cms) long and 3 ½ inches (9 cms) wide
• 1 piece of velcro approximately 1 ½ inches (4 cms) long
• 1 piece of ribbon and 1 metal clip • 1 piece of iron-on interfacing to match
the second fabric measurements • 1 zip at least 6 inches (15 cms) long
Steps:
1. Cut your fabric. Cut your Vilene. Apply to fabric with iron.
2. Put the two large pieces together right sides touching and sew down both long sides and along the bottom.
3. Clip the corners and turn out the right side.
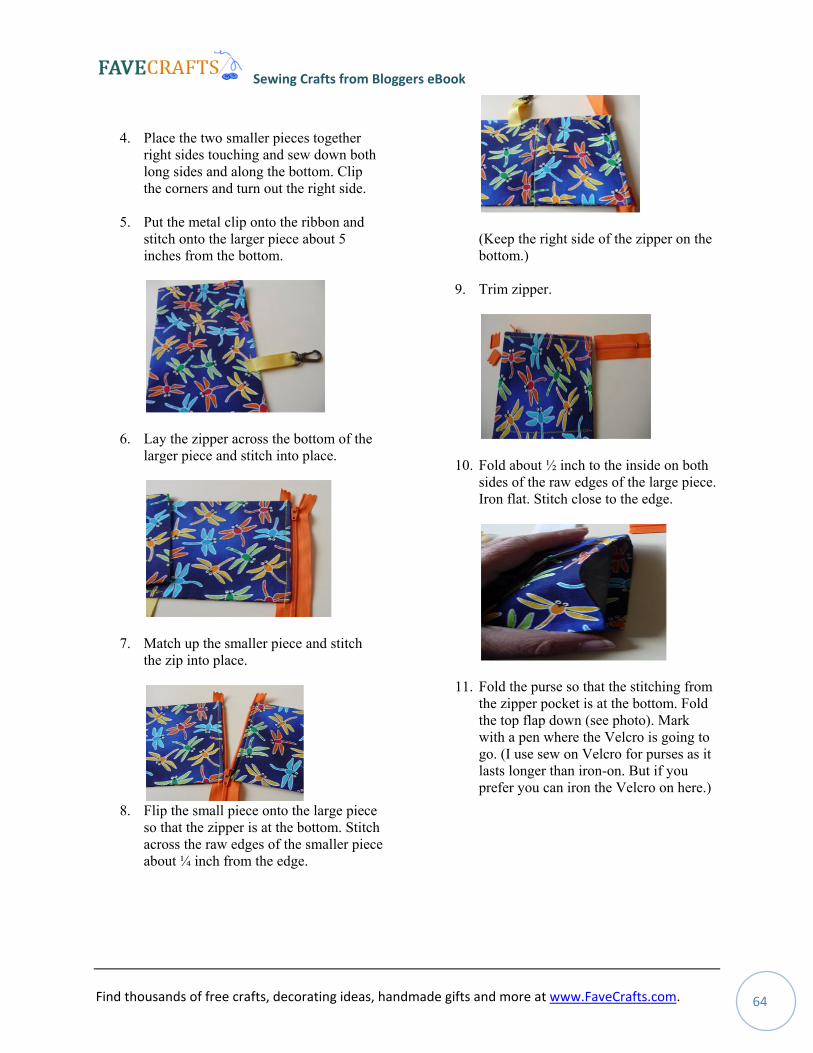
Sewing Crafts from Bloggers eBook
Find thousands of free crafts, decorating ideas, handmade gifts and more at www.FaveCrafts.com. 64
4. Place the two smaller pieces together right sides touching and sew down both long sides and along the bottom. Clip the corners and turn out the right side.
5. Put the metal clip onto the ribbon and stitch onto the larger piece about 5 inches from the bottom.
6. Lay the zipper across the bottom of the larger piece and stitch into place.
7. Match up the smaller piece and stitch the zip into place.
8. Flip the small piece onto the large piece
so that the zipper is at the bottom. Stitch across the raw edges of the smaller piece about ¼ inch from the edge.
(Keep the right side of the zipper on the bottom.)
9. Trim zipper.
10. Fold about ½ inch to the inside on both sides of the raw edges of the large piece. Iron flat. Stitch close to the edge.
11. Fold the purse so that the stitching from the zipper pocket is at the bottom. Fold the top flap down (see photo). Mark with a pen where the Velcro is going to go. (I use sew on Velcro for purses as it lasts longer than iron-on. But if you prefer you can iron the Velcro on here.)
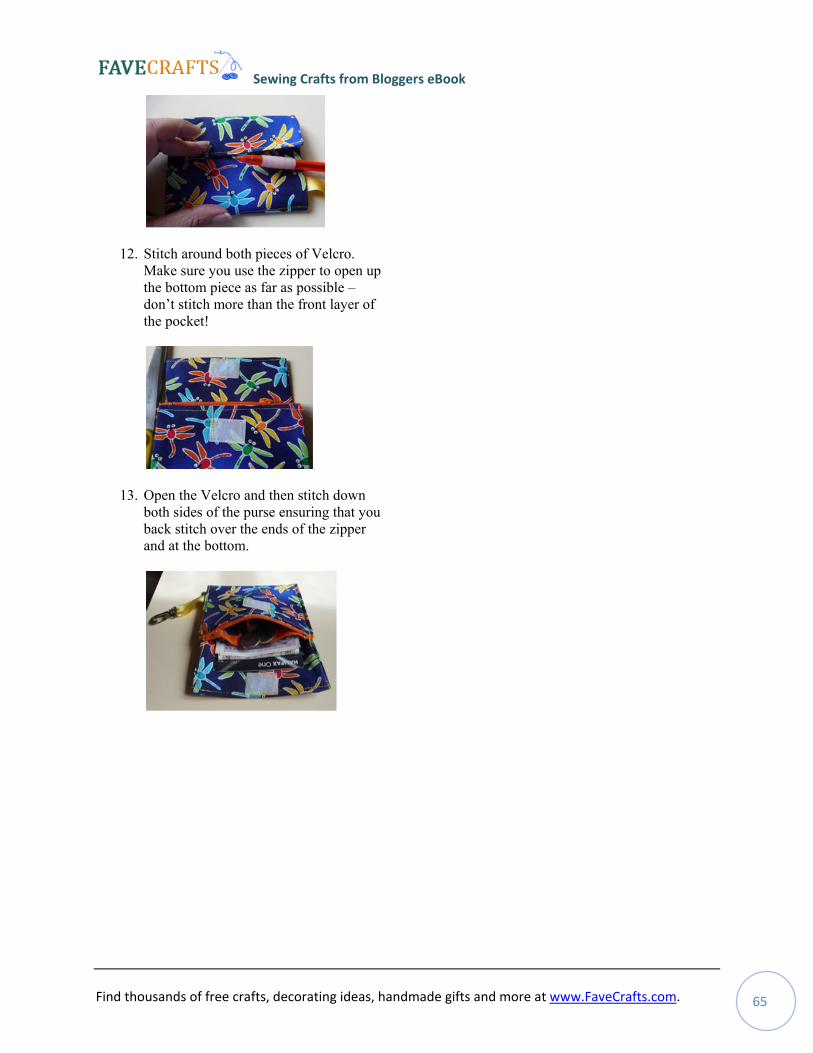
Sewing Crafts from Bloggers eBook
Find thousands of free crafts, decorating ideas, handmade gifts and more at www.FaveCrafts.com. 65
12. Stitch around both pieces of Velcro. Make sure you use the zipper to open up the bottom piece as far as possible – don’t stitch more than the front layer of the pocket!
13. Open the Velcro and then stitch down both sides of the purse ensuring that you back stitch over the ends of the zipper and at the bottom.
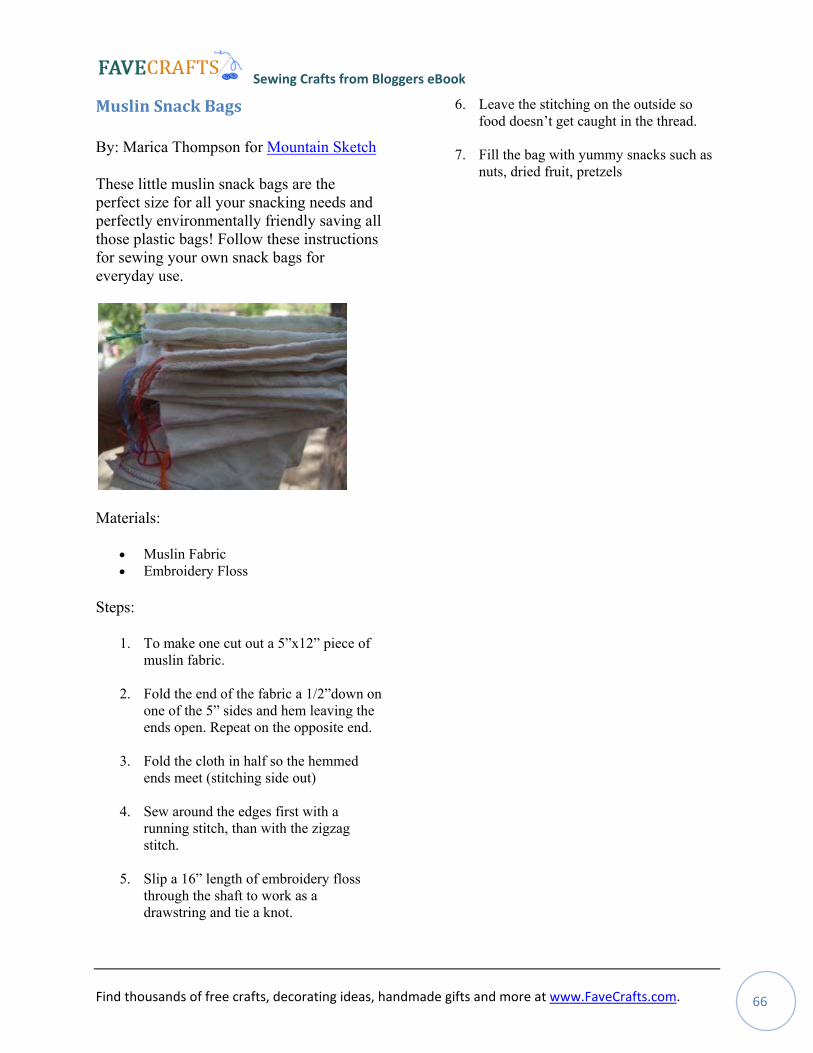
Sewing Crafts from Bloggers eBook
Find thousands of free crafts, decorating ideas, handmade gifts and more at www.FaveCrafts.com. 66
Muslin Snack Bags
By: Marica Thompson for Mountain Sketch
These little muslin snack bags are the perfect size for all your snacking needs and perfectly environmentally friendly saving all those plastic bags! Follow these instructions for sewing your own snack bags for everyday use.
Materials:
• Muslin Fabric • Embroidery Floss
Steps:
1. To make one cut out a 5”x12” piece of muslin fabric.
2. Fold the end of the fabric a 1/2”down on one of the 5” sides and hem leaving the ends open. Repeat on the opposite end.
3. Fold the cloth in half so the hemmed ends meet (stitching side out)
4. Sew around the edges first with a running stitch, than with the zigzag stitch.
5. Slip a 16” length of embroidery floss through the shaft to work as a drawstring and tie a knot.
6. Leave the stitching on the outside so food doesn’t get caught in the thread.
7. Fill the bag with yummy snacks such as nuts, dried fruit, pretzels
Sewing Crafts from Bloggers eBook
Find thousands of free crafts, decorating ideas, handmade gifts and more at www.FaveCrafts.com. 67
Sewing Crafts from Bloggers
eBook from www.FaveCrafts.com
Included in this eBook:
• Clothing Patterns
• Sewing For the Holidays
• Home Décor Craft
• Sewn Bags
Sign up for our free crafting newsletter and receive more low‐cost collections, free craft projects, quick tips, home décor ideas and more right in your inbox every week.