some steps of making your own t-shirt transfer art
TRANSCRIPT
Some Steps of Making Your Own T-Shirt Transfer Art
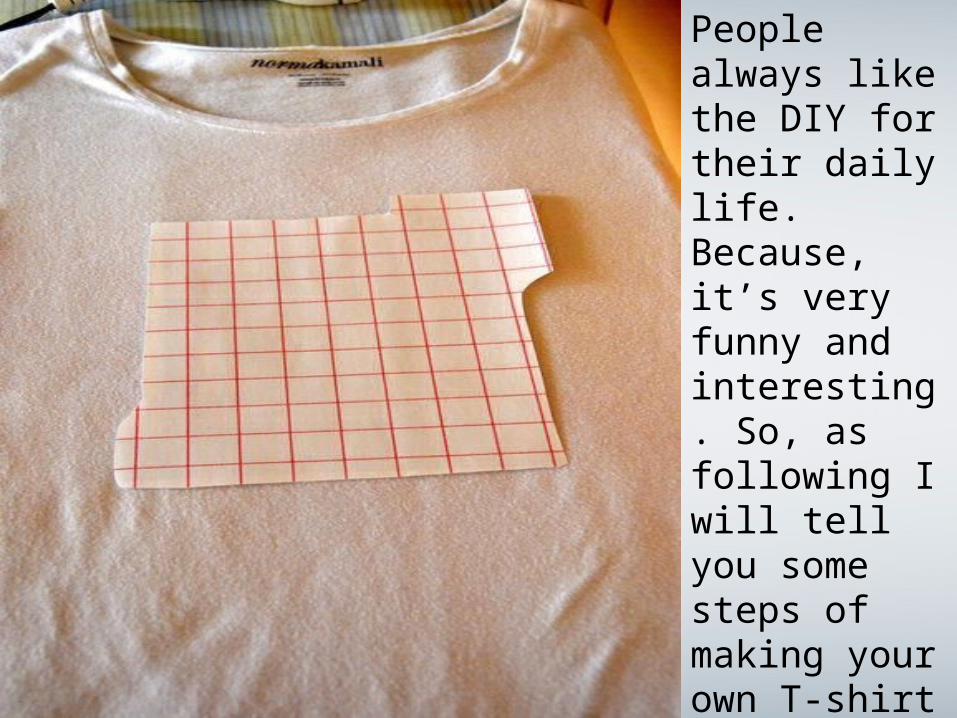
People always like the DIY for their daily life. Because, it’s very funny and interesting. So, as following I will tell you some steps of making your own T-shirt transfer art. Hope this DIY project will help you!
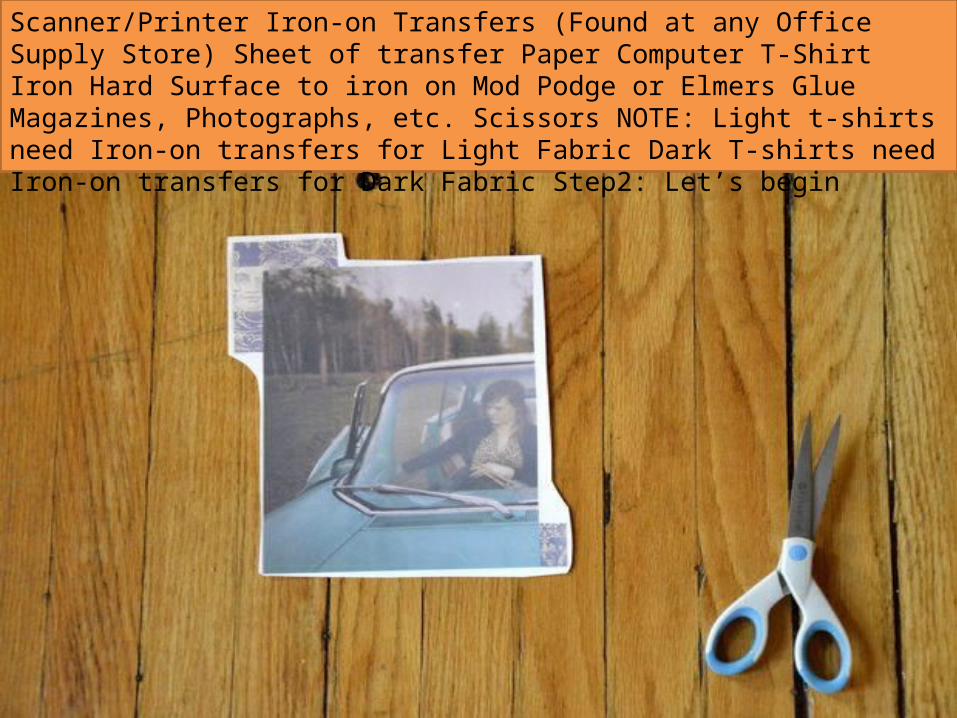
Scanner/Printer Iron-on Transfers (Found at any Office Supply Store) Sheet of transfer Paper Computer T-Shirt Iron Hard Surface to iron on Mod Podge or Elmers Glue Magazines, Photographs, etc. Scissors NOTE: Light t-shirts need Iron-on transfers for Light Fabric Dark T-shirts need Iron-on transfers for Dark Fabric Step2: Let’s begin
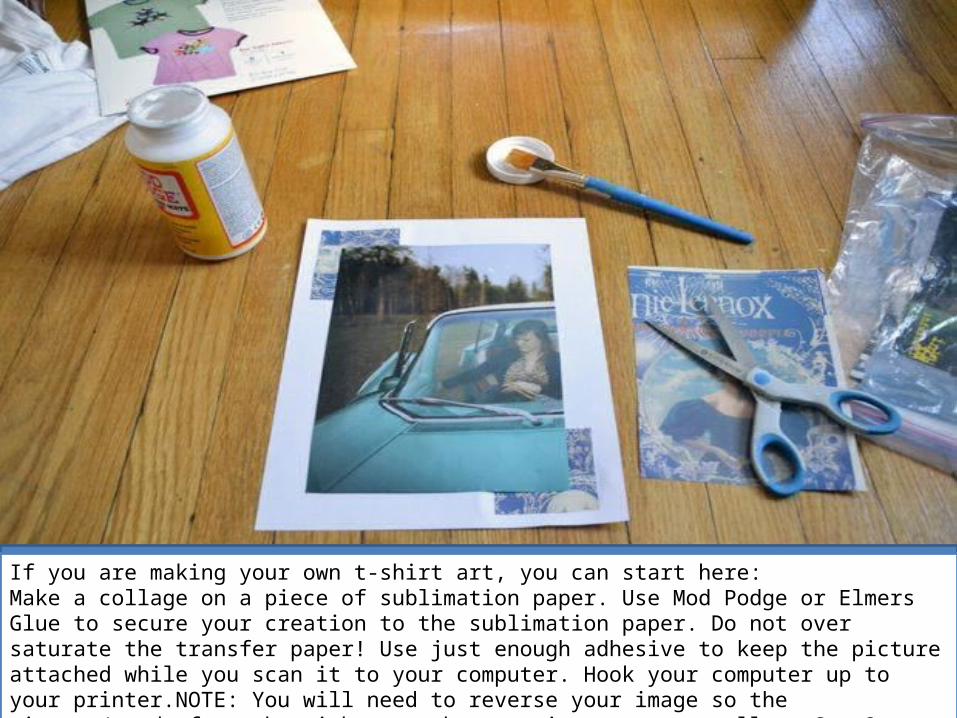
If you are making your own t-shirt art, you can start here:Make a collage on a piece of sublimation paper. Use Mod Podge or Elmers Glue to secure your creation to the sublimation paper. Do not over saturate the transfer paper! Use just enough adhesive to keep the picture attached while you scan it to your computer. Hook your computer up to your printer.NOTE: You will need to reverse your image so the picture/words face the right way when you iron on your collage.Step3: Print out your transfer
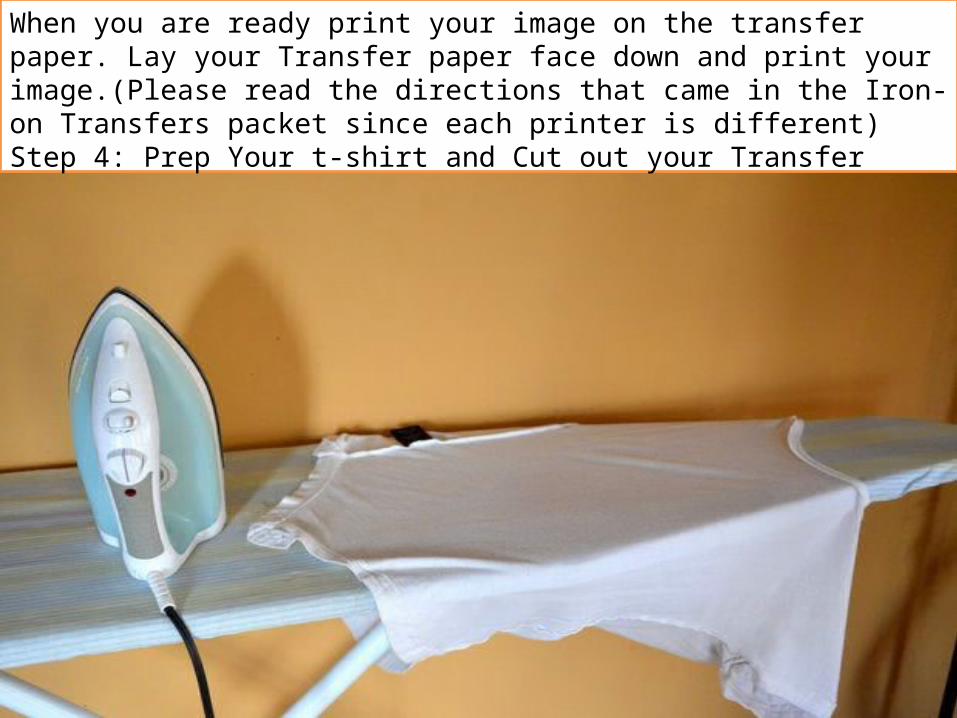
When you are ready print your image on the transfer paper. Lay your Transfer paper face down and print your image.(Please read the directions that came in the Iron-on Transfers packet since each printer is different)Step 4: Prep Your t-shirt and Cut out your Transfer

Iron your shirt so there are no wrinkles on it. Cut your design out. Leave little or no space around the design. If you leave a white border around your design it will show up on your shirt. If you do not want a white border cut close to your design when cutting it out.Step 5: Iron on your Transfer t-shirt
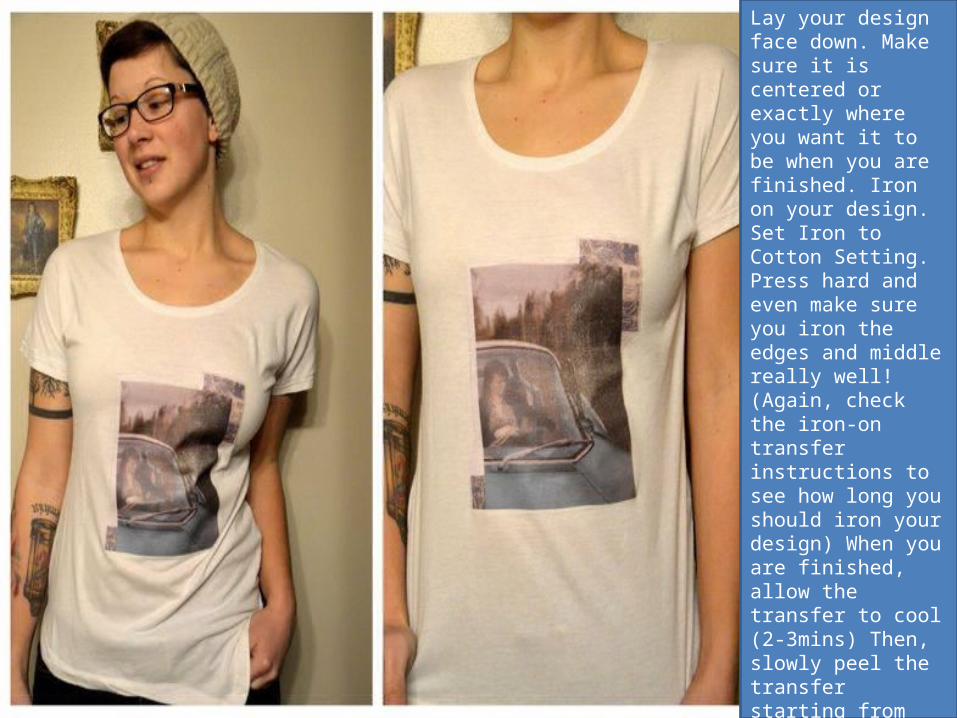
Lay your design face down. Make sure it is centered or exactly where you want it to be when you are finished. Iron on your design. Set Iron to Cotton Setting.Press hard and even make sure you iron the edges and middle really well! (Again, check the iron-on transfer instructions to see how long you should iron your design) When you are finished, allow the transfer to cool (2-3mins) Then, slowly peel the transfer starting from the bottom. Allow design to cool.Step6: Your own t-shirt transfer art finished. Hope you guys can make your own t-shirt transfer perfect.

More info pls visit: More info pls visit: www.hitransfer.comCompany name:Nanjing Hi Company name:Nanjing Hi Transfer Digital Technology Transfer Digital Technology Co.,LimitedCo.,LimitedTel: 86-25-85862106Tel: 86-25-85862106Fax: 86-25-85862106Fax: 86-25-85862106Mail: [email protected]: [email protected]: Web: www.hitransfer.com