steam iron - beko · steam iron / user manual 5 / 129 en • unplug the product before filling the...
TRANSCRIPT

SPA7131P
01M-8831301100-5115-02
Steam IronUser Manual
EN DE FR TR ES
PL HR RO TH

Please read this user manual first!Dear Customers,Thank you for selecting a Beko product. We hope that you get the best results from your product which has been manufactured with high quality and state-of-the-art technology. Therefore, please read this entire user manual and all other accompanying documents carefully before using the product and keep it as a reference for future use. If you handover the product to someone else, give the user manual as well. Follow all warnings and information in the user manual.
Meanings of the symbolsFollowing symbols are used in the various section of this manual:
CImportant information and useful
hints about usage.
AWARNING: Warnings for dan-gerous situations concerning the safety of life and property.
WARNING: Warning for hot surfaces.
It does not contain PCB.Made in P.R.C.
Complies with the WEEE Directive.
This product has been produced in environmentally-friendly, state-of-the-art facilities.

3 / 129 ENSteam Iron / User Manual
CONTENTS
1 Important instructions for safety and environment 4-7
1.1 General safety . . . . . . . . . . . . . . . . . . . . . . 41.2 Compliance with the WEEE Directive and disposal of waste products . . . . . . . 71.3 Package Information . . . . . . . . . . . . . . . 7
2 Your iron 8
2.1 Overview . . . . . . . . . . . . . . . . . . . . . . . . . . .82.2 Technical data . . . . . . . . . . . . . . . . . . . . . .8
3 Operation 9-11
3.1 Intended use . . . . . . . . . . . . . . . . . . . . . . . 93.2 Initial use . . . . . . . . . . . . . . . . . . . . . . . . . . . 93.3 Refilling the water reservoir. . . . . . . . 93.4 Steam ironing . . . . . . . . . . . . . . . . . . . . .103.5 Shock steam. . . . . . . . . . . . . . . . . . . . . . .103.6 Vertical steam . . . . . . . . . . . . . . . . . . . . .103.7 Spraying water . . . . . . . . . . . . . . . . . . . . 113.8 Dry ironing . . . . . . . . . . . . . . . . . . . . . . . . 113.9 Automatic Shutdown (Auto-Off). . 11
4 Cleaning and maintenance 12-13
4.1 Cleaning . . . . . . . . . . . . . . . . . . . . . . . . . . .124.2 Lime removal (Self-Clean) . . . . . . . . .124.3 Storage. . . . . . . . . . . . . . . . . . . . . . . . . . . .134.4 Handling and transportation. . . . . .13
5 Troubleshooting 14

4 / 129 EN Steam Iron / User Manual
This section contains safety instructions that will help protect from risk of personal injury or property damage. Failure to follow these instructions invalidates the granted warranty.
1.1 General safety•This appliance complies with the international
safety standards.•This appliance may be used by children who are at
the age of 8 or over and the people whose physical, perceptive or mental skills are impaired or who are inexperienced or not knowledgeable about the appliance as long as they are supervised or informed and made understood the safe use of the appliance and the encountered dangers. Children should not play with the appliance. Cleaning and user maintenance procedures should not be performed by children unless they are controlled by their elders.
•Do not leave the product unattended while it is plugged in.
1 Important instructions for safety and environment
5 / 129 ENSteam Iron / User Manual
•Unplug the product before filling the water reservoir with water.
•Operate and store the appliance on a stable surface.•When the appliance is placed on its base plate,
ensure that the surface beneath the plate is level.•Do not use the appliance if the power cable or the
appliance itself is damaged. Contact an authorised service.
•If the appliance is dropped or leaks water or has other failures, contact the authorised service. Do not use the appliance until it is repaired.
•When the appliance is not in use or left to cool down keep the appliance and power cable out of reach of children under 8 years old.
•The appliance is not suitable for using outdoors.•Only use the original parts or parts recommended by
the manufacturer.•Do not attempt to dismantle the appliance.•Your mains power supply should comply with the
information supplied on the rating plate of the appliance.
1 Important instructions for safety and environment

6 / 129 EN Steam Iron / User Manual
•The mains supply of the appliance must be secured with a minimum 16 A fuse.
•Use the appliance with a grounded outlet only.•Do not use the appliance with an extension cord.•Do not pull the power cable when unplugging the
appliance.•Unplug the appliance before cleaning it. •Do not wrap the cable around the appliance. •Do not touch the appliance or its plug with wet or
damp hands when the appliance is plugged in.•The soleplate and its surrounding area can be
extremely hot. Contacting hot surfaces may cause burns. Therefore while or just after using the appliance, pay attention not to touch the hot surfaces.
•Never use the appliance in or near to combustible or inflammable places and materials.
•If you keep the packaging materials, store them out of the reach of children.
1 Important instructions for safety and environment

7 / 129 ENSteam Iron / User Manual
1.2 Compliance with the WEEE Directive and disposal of waste products
This appliance does not include harmful and prohibited materials specified in the “Regulation for Supervision of the Waste Electric and Electronic Appliances” issued by the Ministry of Environment and Urban Planning. Complies with the WEEE Directive. This
appliance has been manufactured with high quality parts and materials which can be reused and are suitable for recycling. Therefore, do not dispose the appliance with normal domestic waste at the end of its service life. Take it to a collection point for the recycling of electrical and electronic equipment. Ask the local authority in your area for these collection points. Help protect the environment and natural resources by recycling used appliances.
1.3 Package Information
The packaging used for the appliance is made of recyclable materials. Please ensure that the packaging materials are disposed of as per the applicable local rules in order to include the materials in recycling process for environment protection.
1 Important instructions for safety and environment
8 / 129 EN Steam Iron / User Manual
2.1 Overview
The values which are declared in the markings affixed on your appliance or the other printed documents supplied with it represent the values which were obtained in the laboratories pursuant to the pertinent standards. These values may vary according to the usage of the appliance and ambient conditions.
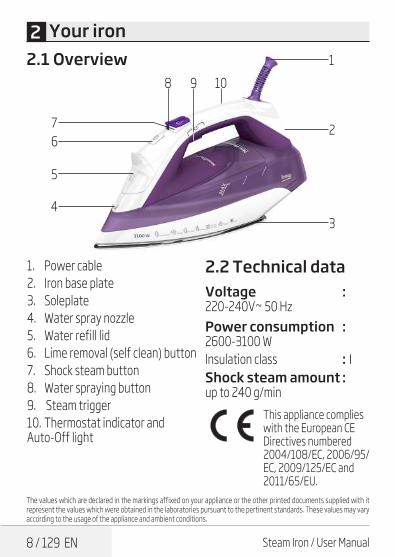
1. Power cable2. Iron base plate3. Soleplate4. Water spray nozzle5. Water refill lid6. Lime removal (self clean) button7. Shock steam button8. Water spraying button9. Steam trigger10. Thermostat indicator and Auto-Off light
2.2 Technical data
Voltage : 220-240V~ 50 Hz
Power consumption : 2600-3100 WInsulation class : IShock steam amount : up to 240 g/min
This appliance complies with the European CE Directives numbered 2004/108/EC, 2006/95/EC, 2009/125/EC and 2011/65/EU.
1
2
34
5
67
8 9 10
2 Your iron

9 / 129 ENSteam Iron / User Manual
3.1 Intended use
This appliance is intended only for household use and ironing; it is not suitable for professional use.
3.2 Initial use
Prior to initial use, fill twice (see 3.3) and vaporize to remove the manufacturing residues (see 3.4). Meanwhile, use shock steam button (7) frequently.
C
You can smell a mild odour or see white sediments coming out of the soleplate holes. After per-forming vaporizing process twice, such odours and sedi-ments will disappear. Also water droplets may form within the water reservoir; this is normal.
3.3 Refilling the water reservoir1. Unplug the appliance. 2. Fill the water cup provided with
the appliance.3. Open the water refill lid (5) and
fill the appliance with water up to MAX level.
4. Close the water refill lid (5).
C
Your appliance is designed for use with tap water. If your tap water is excessively hard, we recommend you to use a mixture of tap water with potable water.
A
UYARI: For ironing, follow the ironing instructions specified on the label of the fabric. This appliance is suitable only for fabrics which can be ironed.
3 Operation

10 / 129 EN Steam Iron / User Manual
C
In order to prevent the bright stains that may form on the synthetic fabrics such as silk, iron on the reverse side of the fabric. Do not use the water spraying feature in order to prevent the stain formation.
3.4 Steam ironing1. Fill the water reservoir (see. 3.3).2. After the thermostat indicator
light (10) goes out, press the steam trigger (9).
C
The product has an electronic Anti-Drip sensor. If the temperature is not high enough you may not get enough amount of steam when you press the steam trigger (10).
3.5 Shock steam1. Fill the water reservoir (see. 3.3).2. After the thermostat indicator
light (10) turns off, you can iron the garments with the powerful steam by pressing the shock steam button (7).
A
WARNING: If this process is maintained for a prolonged time water may come through the soleplate (3) together with steam.
A
WARNING: In order to use the shock steam feature the thermostat indicator light (10) should be turned off.
3.6 Vertical steamYou can also use the shock steam and continuous steam functions in the upright position (see 3.6). You can apply steam to your curtains and your garments on the hanger with the steam you will get by pressing the shock steam button (7) or the steam trigger (9). Keep the appliance 15-30 cm away from the garment and curtains.
3 Operation

11 / 129 ENSteam Iron / User Manual
A
WARNING: During the ironing if the thermostat indicator light (10) turns on, before proceeding with the shock steam process wait for the light to turn off.
AWARNING: Never direct this steam to people or pets.
3.7 Spraying water1. Fill the water reservoir (see. 3.3).2. Press the water spraying button
(8) to spray water.
CYou can easily remove creases using the water spraying feature.
3.8 Dry ironing
In order to be able to perform dry ironing, do not use the steam trigger (9) or shock steam (7) button.
CHaving water in the appliance would be advantageous; you may use the water spraying button (8) when necessary.
3.9 Automatic Shutdown (Auto-Off)
• If the appliance is hold stationary for 30 seconds while in horizon-tal position, it will be automati-cally turned off.
• If the appliance is hold stationary for 7-10 minutes while in upright position, it will be automatically turned off.
• If the appliance is hold stationary for 30 seconds while in a leaned (right or left) position, it will be automatically turned off.
CIn case of automatic turn off the auto-off light (10) flashes.
• If the appliance is moved in hori-zontal position it will be turned on.
CIt may take 60 seconds for the soleplate (3) to reach the previously set temperature.
3 Operation

12 / 129 EN Steam Iron / User Manual
4.1 Cleaning
A
WARNING: When you are finished with ironing, unplug the appliance. You can drain the water in the reservoir by opening the refill lid (5) and tilting the iron to the front.
1. Unplug the appliance before cleaning.
2. Wait for the appliance to cool down completely.
3. Use a slightly damp cloth to cle-an the outer surface of the appli-ance. Then dry it thoroughly.
4. Wipe the sediments and resi-dues on the soleplate (3) with a slightly damp cloth and soft, nonabrasive liquid cleaner as ne-cessary.
A
WARNING: Do not use gasoline, solvent and abrasive cleaning agents or hard brush to clean the appliance.
4.2 Lime removal (Self-Clean)
Lime removal function cleans the lime particles accumulated in the steam generator reservoir of the appliance.
Use this function once in every 2 to 3 weeks. If the tap water is very hard (if lime particles fall down from the soleplate (3) of the appliance), use the lime removal function more frequently.1. Unplug the appliance.2. Refill the appliance with water
(see. 3.3).3. When the thermostat indicator
light (10) turns off, unplug the appliance.
4. Keep the appliance in a hori-zontal position over the sink and shake the appliance while pressing and holding the lime removal button (6). Continue until the water in the reservoir is depleted.
CIt may take some time for the water to drip from the holes of the soleplate.
4 Cleaning and maintenance

13 / 129 ENSteam Iron / User Manual
5. After the reservoir becomes fully empty, release the lime re-moval button (6).
6. If there is still sediment, repeat this process.
7. Following the lime removal pro-cess, let the appliance cool in upright position. After the app-liance cools down, wipe off the soleplate (3) with a cloth.
4.3 Storage
If you do not intend to use the appliance for a long time, store it carefully.
• Before lifting the appliance unp-lug it and then let it cool comp-letely.
• Empty the water reservoir. • Keep the appliance and its acces-
sories in their original packages. • Store it in a cool, dry place. • Always keep the appliance out of
the reach of children.
4.4 Handling and transportation
• During handling and transpor-tation, carry the appliance in its original packaging. The packa-ging of the appliance protects it against physical damages.
• Do not place heavy loads on the appliance or the packaging. The appliance may be damaged.
• Dropping the appliance will ren-der it non-operational or cause permanent damage.
4 Cleaning and maintenancem

14 / 129 EN Steam Iron / User Manual
5 Troubleshooting
Although the appliance is plugged in, soleplate (3) does not heat up.
The appliance may be connected improperly. >>> Check the plug and power cable (1) of the appliance.
The appliance does not generate steam.
The water reservoir may not have enough water. >>> Fill the water reservoir with water up to Max level (see. 3.3).
Shock Steam – Vertical Steam does not function.
These functions may have been used too frequently in a very short period of time. >>> Keep ironing at a horizontal position and wait for a while before using the shock steam function again. >>> Soleplate (3) may not be hot enough. Seat the appliance in a vertical position and wait for the soleplate to heat up.
Water drops fall down onto the fabric during ironing.
You may not have securely closed the water refill lid (5). >>> Close the water refill lid securely.
During ironing, sediments and residues fall down from the soleplate (3).
If the water you use for your appliance is too hard, such sediments may form. >>> Use the self-clean function for once or a few times (see. 4.2). For the subsequent ironings fill the water reservoir of the appliance with a mixture of tap water and potable water.
The appliance drops water after it cools down or stored.
You may have left the appliance on a horizontal position while there is water in its reservoir. >>> Empty the water reservoir.
Stains at the soleplate (3).
Wet garments might have been ironed and the soleplate (3) has had lime stains. >>> After the appliance cools enough, wipe the soleplate with a microfiber knitted or cotton cloth soaked in vinegar.

Bitte lesen Sie zuerst diese Anleitung!Sehr geehrte Kundin, sehr geehrter Kunde,Vielen Dank, dass Sie sich für ein Beko-Produkt entschieden haben. Wir hoffen, dass Sie mit diesem Produkt, das mit den höchsten Qualitätsanforderungen und der modernsten Technologie hergestellt wurde, beste Ergebnisse erzielen. Bitte lesen Sie die gesamte Bedienungsanleitung und alle anderen Begleitdokumente aufmerksam, bevor Sie das Produkt verwenden; bewahren Sie sie zum künftigen Nachschlagen sicher auf. Wenn Sie das Produkt an einen Dritten weitergeben, händigen Sie bitte auch diese Anleitung aus. Befolgen Sie alle Warnhinweise und Informationen in dieser Anleitung.
SymboleFolgende Symbole werden in den verschiedenen Abschnitten dieser Anleitung verwendet:
CWichtige Informationen und nützliche Tipps in Bezug auf die Verwendung.
AWARNUNG: Warnhinweise zu gefährlichen Situationen im Hinblick auf die Sicherheit von Leib, Leben und Eigentum.
WARNUNG: Warnung vor heißen Flächen.
Es enthält kein PCB.Das Gerät erfüllt die Vorgaben der WEEE-Richtlinie.
Dieses Produkt wurde in umweltfreundlichen, hochmodernen Einrichtungen hergestellt
Ursprungsland: Volksrepublik China

16 / 129 DE Bügeleisen / Bedienungsanleitung
INHALT
1 Wichtige Anweisungen zu Sicherheit und Umwelt 17-21
1.1 Allgemeine Sicherheit . . . . . . . . . . . . . . . . . . . . . . 171.2 Konformität mit der WEEE-Richtlinie und Entsorgung von Altprodukten . . . . . . . . . . . . . . . . . 211.3 Informationen zur Verpackung . . . . . . . . . . . . . 21
2 Ihr Bügeleisen 222.1 Übersicht . . . . . . . . . . . . . . . . . . . . . . . . . . . . . . . . . . . 222.2 Technische Daten . . . . . . . . . . . . . . . . . . . . . . . . . . 22
3 Bedienung 23-26
3.1 Bestimmungsgemäße Verwendung . . . . . . . 233.2 Erste Inbetriebnahme . . . . . . . . . . . . . . . . . . . . . . 233.3 Wasserbehälter auffüllen . . . . . . . . . . . . . . . . . . 233.4 Dampfbügeln. . . . . . . . . . . . . . . . . . . . . . . . . . . . . . . 243.5 Dampfstoß . . . . . . . . . . . . . . . . . . . . . . . . . . . . . . . . . 253.6 Vertikaler Dampf . . . . . . . . . . . . . . . . . . . . . . . . . . . 253.7 Sprühwasser . . . . . . . . . . . . . . . . . . . . . . . . . . . . . . . 263.8 Trockenbügeln . . . . . . . . . . . . . . . . . . . . . . . . . . . . . 263.9 Automatische Abschaltung . . . . . . . . . . . . . . . . 26
4 Reinigung und Wartung 27-284.1 Reinigung . . . . . . . . . . . . . . . . . . . . . . . . . . . . . . . . . . 274.2 Entkalkung (Selbstreinigung) . . . . . . . . . . . . . . 274.3 Aufbewahrung . . . . . . . . . . . . . . . . . . . . . . . . . . . . . 284.4 Handhabung und Transport . . . . . . . . . . . . . . . 28
5 Fehlerbehebung 29

17 / 129 DEBügeleisen / Bedienungsanleitung
Dieser Abschnitt enthält Sicherheitsanweisungen, die beim Schutz vor Personen- und Sachschäden helfen. Bei Nichtbeachtung dieser Anweisungen erlischt die gewährte Garantie.
1.1 Allgemeine Sicherheit • Dieses Gerät stimmt mit internationalen Sicherheitsstandards überein.
• Dieses Gerät kann von Kindern im Alter von mindestens 8 Jahren und Personen mit eingeschränkten physischen und psychischen Fähigkeiten oder einem Mangel an Erfahrung und Wissen im Umgang mit dem Gerät verwendet werden, sofern sie beaufsichtigt werden oder im sicheren Umgang mit dem Gerät unterwiesen wurden und die damit verbundenen Gefahren verstehen. Kinder dürfen nicht mit dem Gerät spielen. Reinigungs- und Wartungsarbeiten dürfen nicht von Kindern ausgeführt werden, sofern diese nicht durch einen Erwachsenen beaufsichtigt werden.
1 Wichtige Anweisungen zu Sicherheit und Umwelt

18 / 129 DE Bügeleisen / Bedienungsanleitung
• Lassen Sie das Gerät niemals unbeaufsichtigt, während es angeschlossen ist.
• Ziehen Sie den Netzstecker, bevor Sie den Wasserbehälter auffüllen.
• Verwenden und lagern Sie das Gerät auf einem flachen und stabilen Untergrund.
• Achten Sie darauf, dass der Untergrund unter der Platte eben ist, wenn Sie das Gerät auf die Basisplatte stellen.
• Verwenden Sie das Gerät nicht, wenn das Netzkabel oder das Gerät selbst beschädigt ist. Wenden Sie sich an einen autorisierten Serviceanbieter.
• Falls das Gerät heruntergefallen ist, leckt oder andere Fehler aufweist, wenden Sie sich bitte an einen autorisierten Serviceanbieter. Verwenden Sie das Gerät erst wieder, nachdem es repariert wurde.
• Halten Sie Gerät und Netzkabel bei Nichtbenutzung oder während des Abkühlens von Kindern unter 8 Jahren fern.
1 Wichtige Anweisungen zu Sicherheit und Umwelt

19 / 129 DEBügeleisen / Bedienungsanleitung
• Das Gerät ist nicht zur Benutzung im Freien geeignet.
• Nur Originalteile und vom Hersteller empfohlene Teile verwenden.
• Nicht versuchen, das Gerät zu demontieren. • Ihre Stromversorgung muss mit den Angaben am Typenschild des Gerätes übereinstimmen.
• Die Stromversorgung des Gerätes muss mit einer Sicherung von mindestens 16 A abgesichert werden.
• Verwenden Sie das Gerät nur mit einer geerdeten Steckdose.
• Gerät nicht mit einem Verlängerungskabel verwenden.
• Beim Trennen des Gerätes nicht am Netzkabel selbst ziehen.
• Vor der Reinigung den Netzstecker ziehen. • Netzkabel nicht um das Gerät wickeln. • Gerät oder Netzstecker bei Verbindung mit der Stromversorgung nicht mit feuchten oder gar nassen Händen berühren.
1 Wichtige Anweisungen zu Sicherheit und Umwelt

20 / 129 DE Bügeleisen / Bedienungsanleitung
• Die Sohle und der umliegende Bereich können extrem heiß werden. Bei Berührung heißer Flächen drohen Verbrennungen. Achten Sie daher während und unmittelbar nach der Benutzung darauf, keine heißen Flächen zu berühren.
• Gerät niemals an oder in der Nähe von Stellen benutzen, an denen sich leicht brennbare oder gar explosive Materialien befinden.
• Falls Sie die Verpackungsmaterialien aufheben möchten, bewahren Sie sie außerhalb der Reichweite von Kindern auf.
1 Wichtige Anweisungen zu Sicherheit und Umwelt

21 / 129 DEBügeleisen / Bedienungsanleitung
1 Wichtige Anweisungen zu Sicherheit und Umwelt
1.2 Konformität mit der WEEE-Richtlinie und Entsorgung von Altprodukten
Dieses Gerät enthält keine der in der vom Ministerium für Umwelt und Städteplanung ausgestellten „Regulierung zur Überwachung von elektrischen und elektronischen Altgeräten“ angegebenen gefährlichen und verbotenen Materialien. Das Gerät erfüllt die Vorgaben der WEEE-Richtlinie. Dieses Gerät wurde aus hochwertigen Teilen und Materialien
hergestellt, die wiederverwendet werden können und zum Recycling geeignet sind. Deshalb darf das Gerät am Ende seiner Einsatzzeit nicht mit dem normalen Hausmüll entsorgt werden. Geben Sie das Gerät bei einer Sammelstelle ab, die für das Recycling von elektrischen und elektronischen Geräten zuständig ist. Erkundigen Sie sich bei der örtlichen Behörde in Ihrer Region nach diesen Sammelstellen. Durch das Recycling von Altgeräten tragen Sie zum Schutz der Umwelt und natürlichen Rohstoffe bei.
1.3 Informationen zur Verpackung
Die Produktverpackung besteht aus recyclingfähigen Materialien. Bitte achten Sie darauf, dass die Verpackungsmaterialien entsprechend den geltenden örtlichen Gesetzen entsorgt werden, damit die Materialien zum Schutz
der Umwelt dem Recycling zugeführt werden.

22 / 129 DE Bügeleisen / Bedienungsanleitung
2.1 Übersicht
Die am Gerät oder in der Dokumentation angegebenen Werte wurden nach maßgeblichen Standards unter Laborbedingungen ermittelt. Diese Werte können je nach Einsatz- und Umgebungsbedingungen variieren.
2 Ihr Bügeleisen
1. Netzkabel2. Bügeleisenbasisplatte3. Sohle4. Wassersprühdüse5. Wasserauffülldeckel6. Entkalkungstaste (Selbstreinigung)7. Dampfstoßtaste8. Wassersprühtaste9. Dampfauslöser10. Thermostatanzeige und Auto-Aus-Leuchte
2.2 Technische Daten
Spannung : 220 – 240 V ~ Wechsels pannung, 50 Hz
Stromverbrauch : 2600 – 3100 WIsolationsklasse : IDampfstoßmenge : bis 240 g/min
Dieses Gerät erfüllt die Vorgaben der europäischen CE-Richtlinien 2004/108/EC, 2006/95/EC, 2009/125/EC und 2011/65/EU.
1
2
34
5
67
8 9 10

23 / 129 DEBügeleisen / Bedienungsanleitung
3.1 Bestimmungsgemäße Verwendung
Dieses Gerät ist nur für den Einsatz in Privathaushalten und für das Bügeln vorgesehen; es eignet sich nicht für den professionellen Einsatz.
3.2 Erste Inbetriebnahme
Vor der ersten Benutzung sollten Sie das Gerät zum Beseitigen von Fabrikationsrückständen zweimal befüllen (siehe 3.3) und dampfen (siehe 3.5). Drücken Sie währenddessen regelmäßig die Dampfstoßtaste (7).
C
Sie können einen leichten Geruch bemerken oder se-hen, wie weiße Ablagerungen aus den Löchern an der Sohle (3) heraus-kommen. Nach zwei-maliger Benutzung der Dampffunktion verschwinden sol-che Gerüche und A b l a g e r u n g e n . Zudem können sich Wassertropfen im Wasserbehälter bil-den; dies ist normal.
3.3 Wasserbehälter auffüllen1. Trennen Sie das Gerät vom Netz. 2. Füllen Sie den mit dem Gerät
mitgelieferten Becher.3. Öffnen Sie den
Wasserauffülldeckel (5) und füllen Sie das Gerät bis zur MAX-Markierung.
4. Schließen Sie den Wasserauffülldeckel (5).
3 Bedienung

24 / 129 DE Bügeleisen / Bedienungsanleitung
C
Das Gerät dient der Benutzung mit Leitungswasser. Falls das Leitungswasser übermäßig hart ist, sollte ein Gemisch aus Leitungswasser und aufbereitetem Wasser verwendet werden.
A
W A R N U N G : Beachten Sie beim Bügeln die Bügelanweisungen am Pflegeetikett des Wäschestücks. Dieses Gerät eig-net sich nur für Wäschestücke, die gebügelt werden können.
C
Entsprechende Textilien zur Vermeidung heller Flecken, die sich bei Synthetikfasern oder Seide bilden können, immer auf links bügeln. Wassersprühfunktion zur Vermeidung von Fleckenbildung nicht verwenden.
3.4 Dampfbügeln
1. Füllen Sie den Wasserbehälter (siehe 3.3).
2. Drücken Sie nach Erlöschen der Thermostatindikatorleuchte (10) den Dampfauslöser (9).
C
Das Produkt hat einen elektronischen Tropfschutzsensor. Falls die Temperatur nicht hoch genug ist, erhalten Sie m ö g l i c h e r w e i s e nicht genügend Dampf, wenn Sie den Dampfauslöser (10) drücken.
3 Bedienung
25 / 129 DEBügeleisen / Bedienungsanleitung
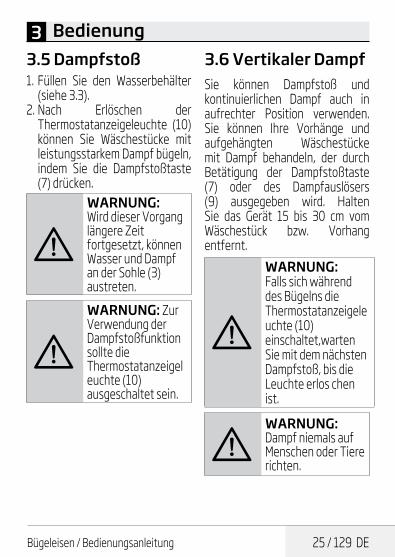
3.5 Dampfstoß1. Füllen Sie den Wasserbehälter
(siehe 3.3). 2. Nach Erlöschen der
Thermostatanzeigeleuchte (10) können Sie Wäschestücke mit leistungsstarkem Dampf bügeln, indem Sie die Dampfstoßtaste (7) drücken.
A
WARNUNG: Wird dieser Vorgang längere Zeit fortgesetzt, können Wasser und Dampf an der Sohle (3) austreten.
A
WARNUNG: Zur Verwendung der Dampfstoßfunktion sollte die Thermostatanzeigel euchte (10) ausgeschaltet sein.
3.6 Vertikaler Dampf
Sie können Dampfstoß und kontinuierlichen Dampf auch in aufrechter Position verwenden. Sie können Ihre Vorhänge und aufgehängten Wäschestücke mit Dampf behandeln, der durch Betätigung der Dampfstoßtaste (7) oder des Dampfauslösers (9) ausgegeben wird. Halten Sie das Gerät 15 bis 30 cm vom Wäschestück bzw. Vorhang entfernt.
A
WARNUNG: Falls sich während des Bügelns die Thermostatanzeigele uchte (10) einschaltet,warten Sie mit dem nächsten Dampfstoß, bis die Leuchte erlos chen ist.
AWARNUNG: Dampf niemals auf Menschen oder Tiere richten.
3 Bedienung

26 / 129 DE Bügeleisen / Bedienungsanleitung
3.7 Sprühwasser1. Füllen Sie den Wasserbehälter
(siehe 3.3). 2. Drücken Sie zum Ausgeben
eines Sprühstrahls die Wassersprühtaste (8).
CMit der Wassersprühfunktion können Sie mühelos Falten beseitigen.
3.8 Trockenbügeln
Verwenden Sie zum Trockenbügeln nicht den Dampfauslöser (9) oder die Dampfstoßtaste (7).
C
Es ist vorteilhaft, wenn sich Wasser im Gerät befindet; dadurch können Sie die Wassersprühtaste (8) bei Bedarf verwenden.
3.9 Automatische Abschaltung
• Falls das Gerät 30 Sekunden ruhig gehalten wird, während es sich in horizontaler Position befindet, schaltet es sich automatisch ab.
• Falls das Gerät 7 bis 10 Minuten ruhig gehalten wird, während es sich in aufrechter Position befindet, schaltet es sich automatisch ab.
• Falls das Gerät 30 Sekunden ruhig gehalten wird, während es zur Seite gelehnt ist (links oder rechts), schaltet es sich automatisch ab.
CFalls die Leuchte der automatischen Abschaltung (10) blinkt.
• Falls das Gerät in horizontaler Position bewegt wird, schaltet es sich ein.
CEs kann 60 Sekunden dauern, bis die Sohle (3) die voreingestellte Temperatur erreicht.
3 Bedienung

27 / 129 DEBügeleisen / Bedienungsanleitung
4.1 Reinigung
A
WARNUNG: Trennen Sie das Gerät nach dem Bügeln von der Stromversorgung. Sie können das Wasser im Behälter ablassen, indem Sie den Auffülldeckel (5) öffnen und das Bügeleisen nach vorne kippen.
1. Ziehen Sie vor der Reinigung den Netzstecker.
2. Warten Sie ab, bis das Gerät vollständig abgekühlt ist.
3. Reinigen Sie die Außenseite des Gerätes mit einem leicht angefeuchteten Tuch. Trocknen Sie es anschließend gründlich.
4. Befreien Sie die Bügeleisensohle (3) bei Bedarf mit einem leicht angefeuchteten Tuch und einem nicht scheuernden Flüssigreiniger von Ablagerungen und Resten.
A
WARNUNG: Reinigen Sie das Gerät niemals mit Benzin, Lösungsmitteln und scheuernden Reinigungsmitteln oder harten Bürsten.
4.2 Entkalkung (Selbstreinigung)
Die Entkalkungsfunktion beseitigt Kalkpartikel, die sich im Behälter des Dampfgenerators angesammelt haben.
Verwenden Sie diese Funktion einmal alle 2 bis 3 Wochen. Falls das Leitungswasser sehr hart ist (Kalkpartikel fallen von der Bügelsohle (3) des Gerätes), sollte die Entkalkungsfunktion häufiger eingesetzt werden.1. Trennen Sie das Gerät vom Netz.2. Füllen Sie das Gerät mit Wasser
(siehe 3.3). 3. Ziehen Sie den
Netzstecker, wenn die Thermostatanzeigeleuchte (10) erlischt.
4 Reinigung und Wartung

28 / 129 DE Bügeleisen / Bedienungsanleitung
4. Halten Sie das Gerät in horizontaler Position über ein Spülbecken und schütteln Sie es, während Sie die Entkalkungstaste (6) gedrückt halten. Fahren Sie fort, bis der Wasserbehälter leer ist.
CEs kann eine Weile dauern, bis Wasser aus den Löchern an der Sohle austritt.
5. Lassen Sie die Entkalkungstaste (6) los, sobald der Behälter vollständig geleert ist.
6. Wiederholen Sie den Vorgang, falls immer noch Ablagerungen vorhanden sind.
7. Lassen Sie das Gerät nach dem Entkalken in aufrechter Position abkühlen. Wischen Sie die Sohle (3) mit einem Tuch ab, sobald das Gerät abgekühlt ist.
4.3 Aufbewahrung
Verstauen Sie das Gerät sorgfältig, falls Sie es längere Zeit nicht benutzen sollten.
• Ziehen Sie den Netzstecker und lassen Sie das Gerät vollständig abkühlen, bevor Sie es anheben.
• Leeren Sie den Wasserbehälter. • Bewahren Sie Dampfbügeleisen
u n d Z u b e h ö r i n d e r Originalverpackung auf.
• Kühl und trocken lagern. • Gerät immer von Kindern
fernhalten.
4.4 Handhabung und Transport
• Transportieren Sie das Gerät in seiner Originalverpackung. Die Verpackung schützt das Gerät vor Sachschäden.
• Legen Sie keine schweren Gegenstände auf dem Gerät oder der Verpackung ab. Andernfalls könnte das Gerät beschädigt werden.
• Falls das Gerät herunterfällt, ist es möglicherweise nicht mehr funktionsfähig oder weist dauerhafte Schäden auf.
4 Reinigung und Wartung

29 / 129 DEBügeleisen / Bedienungsanleitung
5 Fehlerbehebung
Obwohl das Gerät an die Stromversorgung angeschlossen ist, erhitzt sich die Sohle (3) nicht.
Möglicherweise ist das Gerät nicht richtig angeschlossen. >>> Prüfen Sie Stecker und Netzkabel (1) des Gerätes..
Das Gerät erzeugt keinen Dampf.
Möglicherweise befindet sich nicht genügend Wasser im Behälter. >>> Füllen Sie den Wasserbehälter bis zur Max-Markierung (siehe 3.3).
Dampfstoß – vertikaler Dampf funktioniert nicht.
Möglicherweise wurden diese Funktionen in kurzer Zeit zu häufig verwendet. >>> Bügeln Sie in einer horizontalen Position weiter und warten Sie eine Weile, bevor Sie die Dampfstoßfunktion erneut verwenden. >>> Möglicherweise ist die Sohle (3) nicht heiß genug. Stellen Sie das Gerät in einer vertikalen Position auf und warten Sie, bis sich die Sohle erhitzt hat.
Während des Bügelns fallen Wassertropfen auf das Wäschestück.
Möglicherweise haben Sie den Wasserauffülldeckel (5) nicht richtig geschlossen. >>> Schließen Sie den Wasserauffülldeckel richtig.
Während des Bügelns fallen Ablagerungen von der Sohle (3).
Falls das Wasser, das Sie für Ihr Gerät verwenden, zu hart ist, können sich Kalkablagerungen bilden. >>> Verwenden Sie die Selbstreinigungsfunktion einmal oder mehrmals (siehe 4.2). Füllen Sie den Wasserbehälter künftig mit einer Mischung aus Leitungs- und aufbereitetem Wasser.
Das Gerät verliert nach dem Abkühlen und Wegstellen Wasser.
Möglicherweise haben Sie das Gerät horizontal aufgestellt, während sich noch Wasser im Behälter befand. >>> Leeren Sie den Wasserbehälter.
Flecken an der Sohle (3).
Möglicherweise wurden feuchte Wäschestücke gebügelt und bei den Flecken an der Sohle (3) handelt es sich um Kalkablagerungen. >>> Wischen Sie die Sohle mit einem mit Essig angefeuchteten Mikrofaser- oder Baumwolltuch ab, nachdem sich das Gerät abgekühlt hat.

Avant toute chose, veuillez lire ce manuel d'utilisation !Chers clients,Merci d'avoir choisi les produits Beko. Nous espérons que ce produit, fabriqué dans des installations modernes et soumis à un processus de contrôle qualité rigoureux, vous offre les meilleures performances possibles. C’est pourquoi nous vous recommandons, avant d’utiliser ce produit, de lire attentivement ce manuel et tous les autres documents fournis et de les conserver soigneusement pour toute consultation future. Si vous confiez le produit à quelqu’un d’autre, n’oubliez pas de lui remettre également le manuel d’utilisation. Veillez à bien respecter les consignes et les instructions figurant dans le manuel d’utilisation.
Signification des symbolesLes symboles suivants sont repris tout au long de ce manuel:
CInformations importantes et conseils
utiles sur l’utilisation de l’appareil.
AAVERTISSEMENT : Avertissement sur les situations dangereuses concernant la sécurité des biens et des personnes.
AVERTISSEMENT : Avertissement en cas de contact avec une surface brûlante.
Ne contient pas de PCB.FABRIQUÉ EN P.R.C.
Conforme à la Directive DEEE.
Ce produit a été fabriqué dans des usines écologiques et modernes.

31 / 129 FRFer à vapeur / Manuel d'utilisation
TABLE DES MATIÈRES
1 Instructions importantes pour la sécurité et l'environnement 32-36
1.1 Consignes générales de sécurité . . . . . . . . . . . 321.2 Conformité avec la directive DEEE et mise au rebut des produits usagés . . . . . . . . . . . . . . . . . . 361.3 Informations sur l'emballage . . . . . . . . . . . . . . . 36
2 Votre fer 372.1 Vue d'ensemble. . . . . . . . . . . . . . . . . . . . . . . . . . . . . 372.2 Données techniques . . . . . . . . . . . . . . . . . . . . . . . 37
3 Fonctionnement 38-413.1 Utilisation prévue. . . . . . . . . . . . . . . . . . . . . . . . . . . 383.2 Première utilisation . . . . . . . . . . . . . . . . . . . . . . . . 383.3 Remplissage du réservoir d'eau . . . . . . . . . . . . 383.4 Repassage à la vapeur . . . . . . . . . . . . . . . . . . . . . 393.5 Jet de vapeur . . . . . . . . . . . . . . . . . . . . . . . . . . . . . . . 393.6 Vapeur verticale. . . . . . . . . . . . . . . . . . . . . . . . . . . . 403.7 Pulvérisation de l'eau. . . . . . . . . . . . . . . . . . . . . . . 403.8 Repassage à sec . . . . . . . . . . . . . . . . . . . . . . . . . . . 403.9 Arrêt automatique (Auto-Off). . . . . . . . . . . . . . 41
4 Nettoyage et entretien 42-434.1 Nettoyage . . . . . . . . . . . . . . . . . . . . . . . . . . . . . . . . . . 424.2 Détartrage (Auto-nettoyage) . . . . . . . . . . . . . . 424.3 Rangement. . . . . . . . . . . . . . . . . . . . . . . . . . . . . . . . . 434.4 Manipulation et transport. . . . . . . . . . . . . . . . . . 43
5 Dépannage 44

32 / 129 FR Fer à vapeur / Manuel d'utilisation
Cette section contient les consignes de sécurité qui aident à se prémunir contre les risques de dommages corporels ou de dégâts matériels. Le non-respect de ces consignes annule la garantie.1.1 Consignes générales de sécurité
• Cet appareil est conçu selon les normes internationales de sécurité.
• Cet appareil n’est pas conçu pour être utilisé par des enfants de moins de 8 ans et par des personnes dont les capacités physiques, sensorielles ou mentales sont réduites ou qui manquent d’expérience et de connaissances, à moins d’être supervisées par une personne responsable de leur sécurité ou que celle-ci leur ait donné des consignes pour l’utilisation de l’appareil. Les enfants ne doivent pas jouer avec l’appareil. Les procédures de nettoyage et d’entretien par l’utilisateur ne doivent pas être exécutées par les enfants à moins qu’ils soient surveillés par les adultes.
1 Instructions importantes pour la sécurité et l'environnement

33 / 129 FRFer à vapeur / Manuel d'utilisation
• Ne laissez pas l'appareil sans surveillance lorsqu'il est branché.
• Débranchez l'appareil avant d'en remplir le réservoir d'eau.
• Utilisez et entreposez l'appareil sur une surface stable.
• Lorsque l'appareil est placé sur sa semelle, assurez-vous que la surface en dessous est équilibrée.
• N'utilisez pas l'appareil si le câble d'alimentation ou l'appareil lui-même est endommagé. Contactez un service agréé.
• Si l'appareil tombe, coule ou présente d'autres défauts, contactez un service agréé. N'utilisez pas l'appareil avant qu'il ne soit réparé.
• Lorsque vous n'utilisez pas l'appareil ou si vous l'avez laissé refroidir, gardez-le ainsi que le câble d'alimentation hors de la portée des enfants de moins de 8 ans.
• L'appareil n'est pas adapté pour une utilisation extérieure.
1 Instructions importantes pour la sécurité et l'environnement

34 / 129 FR Fer à vapeur / Manuel d'utilisation
• Utilisez uniquement des pièces d’origine ou pièces recommandées par le fabricant.
• N’essayez pas de démonter l’appareil. • Assurez-vous que votre source d’alimentation électrique soit conforme aux informations spécifiées sur la plaque signalétique de votre appareil.
• Un minimum de 16 A est nécessaire pour assurer la sécurité de l'alimentation secteur de l'appareil.
• Utilisez l’appareil uniquement avec une prise de terre.
• Ne branchez pas l'appareil sur une rallonge. • Ne tirez pas sur le câble d’alimentation de l’appareil pour le débrancher de l’alimentation.
• Veillez à toujours débrancher l'appareil avant de le nettoyer.
• Évitez d'enrouler le câble d'alimentation autour de l'appareil.
• Évitez de toucher l'appareil ou sa fiche avec des mains humides ou mouillées lorsqu'il est branché.
1 Instructions importantes pour la sécurité et l'environnement

35 / 129 FRFer à vapeur / Manuel d'utilisation
• La semelle et ses parties environnantes peuvent être extrêmement chaudes. Tout contact avec les surfaces chaudes peut entraîner des brûlures. Par conséquent, pendant ou juste après l'utilisation de l'appareil, évitez de toucher les surfaces chaudes.
• N'utilisez jamais l’appareil à proximité des lieux et matériaux combustibles ou inflammables.
• Si vous conservez le matériel d’emballage, tenez-le hors de la portée des enfants.
1 Instructions importantes pour la sécurité et l'environnement

36 / 129 FR Fer à vapeur / Manuel d'utilisation
1.2 Conformité avec la directive DEEE et mise au rebut des produits usagés
Cet appareil ne contient pas de substances dangereuses et prohibées, telles que décrites dans la « Directive réglementant les déchets d’équipements électriques et électroniques » émanant du Ministère de l’Environnement et de l’Aménagement urbain. Conforme à la Directive DEEE. Cet appareil a été fabriqué avec des
pièces et du matériel de qualité supérieure, susceptibles d’être réutilisés aux fins de recyclage. Par conséquent, à la fin de sa durée de vie, il ne doit pas être mis au rebut aux côtés de déchets domestiques ordinaires. Au contraire, il doit être éliminé dans un point de collecte réservé au recyclage d'appareils électriques et électroniques. Consultez les autorités locales de votre région pour connaître les points de recyclage. Participez à la protection de l'environnement et des ressources naturelles grâce au recyclage des appareils usagés.
1.3 Informations sur l'emballage
L'emballage de l'appareil est fait à partir des matériaux recyclables. Veillez à ce que les matériels d'emballage soient mis au rebut selon la règlementation locale en vigueur afin de les inclure dans le processus de recyclage aux fins de la protection
de l'environnement.
1 Instructions importantes pour la sécurité et l'environnement

37 / 129 FRFer à vapeur / Manuel d'utilisation
2.1 Vue d'ensemble
Les valeurs indiquées sur les inscriptions apposées sur votre appareil ou les autres documents fournis avec le produit sont des valeurs obtenues en conditions de laboratoire, conformément aux normes en vigueur. Ces valeurs peuvent varier selon l’utilisation de l’appareil et les conditions environnantes.
2 Votre fer
1. Câble d'alimentation2. Plaque de base du fer3. Semelle4. Buse de pulvérisation d'eau5. Couvercle du réservoir d'eau6. Bouton de détartrage (auto-
nettoyage)7. Bouton jet de vapeur8. Bouton de pulvérisation d’eau9. Gâchette à vapeur10. Indicateur du thermostat et
voyant d'arrêt automatique
2.2 Données techniques
Tension : 220 - 240 V ~ 50 Hz
Consommation d'énergie
: 2 600 - 3 100 W
Classe d'isolement
: I
Débit vapeur : jusqu'à 240 g/min
Cet appareil est conforme aux Directives européennes 2004/108/EC, 2006/95/EC, 2009/125/EC et 2011/65/UE.
1
2
34
5
67
8 9 10

38 / 129 FR Fer à vapeur / Manuel d'utilisation
3.1 Utilisation prévue
Cet appareil a été conçu uniquement pour une utilisation domestique et pour le repassage ; il ne convient pas à un usage professionnel.
3.2 Première utilisation
Avant la première utilisation, remplissez deux fois (voir 3.3), puis vaporisez pour retirer les résidus de fabrication (voir 3.5). Pendant ce temps, utilisez constamment le bouton (7) du jet vapeur.
C
Vous pouvez perce-voir une légère odeur ou observer des sédi-ments sur les trous de la semelle (3). Après deux proces-sus de vaporisation, l'odeur et les sédi-ments disparaissent. En outre, des goutte-lettes d'eau peuvent également se former à l'intérieur du réser-voir d'eau ; c'est tout à fait normal.
3.3 Remplissage du réservoir d'eau1. Débranchez l'appareil. 2. Remplissez la coupelle d'eau
fournie avec l'appareil.3. Ouvrez le couvercle du réservoir
d'eau (5), puis remplissez l'appareil d'eau jusqu'au niveau MAX.
4. Refermez le couvercle du réservoir d'eau (5).
C
Votre appareil est utilisable avec de l'eau du robinet. Si l'eau de votre robinet contient du calcaire, nous vous recommandons d'y associer de l'eau potable.
A
AVERTISSEMENT : Prenez en compte les instructions de repas-sage mentionnées sur l‘étiquette du tissu avant de le re-passer. Cette appareil ne convient que pour les tissus qui peuvent être repassés.
3 Fonctionnement

39 / 129 FRFer à vapeur / Manuel d'utilisation
C
Pour éviter les effets de brillance éventuels sur les matières synthétiques telles que la soie, repassez le vêtement à l'envers. N'utilisez pas la fonction de pulvérisation pour prévenir la formation des taches.
3.4 Repassage à la vapeur1. Remplissez le réservoir d'eau
(voir 3.3).2. Après l‘extinction du voyant du
thermostat (10), appuyez sur la gâchette à vapeur (9).
C
L‘appareil est doté d‘un capteur anti-égouttement élec-tronique. Si la tempé-rature n‘est pas assez élevée, il se peut que vous n‘obteniez pas une quantité suffi-sante de vapeur en appuyant sur la gâ-chette à vapeur (10).
3.5 Jet de vapeur1. Remplissez le réservoir d'eau
(voir 3.3).2. Après l'extinction du voyant du
thermostat (10), repassez les vêtements avec une vapeur puissante en appuyant sur le bouton du jet vapeur (7).
A
AVERTISSEMENT : Si ce processus est maintenu pendant longtemps, de l'eau pourrait sortir à travers la semelle (3), ainsi que de la vapeur.
A
AVERTISSEMENT : Pour utiliser la fonction Jet de vapeur, le voyant du thermostat (10) doit être éteint.
3 Fonctionnement

40 / 129 FR Fer à vapeur / Manuel d'utilisation
3.6 Vapeur verticaleVous pouvez également utiliser le jet vapeur et la fonction de vapeur en continu en position verticale. Vous pouvez appliquer de la vapeur sur vos rideaux et vos vêtements suspendus en appuyant sur le bouton de jet de vapeur (7) ou sur la gâchette à vapeur (9). Tenez l‘appareil à 15-30 cm des vêtements et des rideaux.
A
AVERTISSEMENT : Pendant le nettoyage, si le voyant du thermostat (10) s'allume, attendez qu'il s'éteigne avant de procéder au jet de vapeur.
A
AVERTISSEMENT : N'orientez jamais la vapeur vers les personnes ou les animaux domestiques.
3.7 Pulvérisation de l'eau1. Remplissez le réservoir d'eau
(voir 3.3).2. Appuyez sur le bouton de
pulvérisation d'eau (8) effectuer cette opération.
CVous pouvez facilement redresser le vêtement en utilisant la fonction de pulvérisation.
3.8 Repassage à secPour le repassage à sec, n‘utilisez pas la gâchette à vapeur (9) ou sur le bouton (7) de jet de vapeur.
C
Il est avantageux d'avoir de l'eau dans votre appareil, ainsi vous pourrez utiliser le bouton de pulvérisation (8) si nécessaire.
3 Fonctionnement

41 / 129 FRFer à vapeur / Manuel d'utilisation
3.9 Arrêt automatique (Auto-Off)
• Si vous laissez l 'appareil pendant 30 secondes en position horizontale, il s'éteint automatiquement.
• Si vous laissez l 'appareil pendant 7 à 10 minutes en position verticale, il s'éteint automatiquement.
• Si vous laissez l'appareil pendant 30 secondes en position inclinée (vers la gauche ou vers la droite), il s'éteint automatiquement.
CEn cas d'arrêt automatique, le voyant correspondant (10) clignote.
• Si vous déplacez l'appareil en position horizontale, il s'allume.
C
La semelle (3) peut prendre 60 secondes pour atteindre la température précédemment réglée.
3 Fonctionnement

42 / 129 FR Fer à vapeur / Manuel d'utilisation
4.1 Nettoyage
A
AVERTISSEMENT : Lorsque vous avez terminé de repasser, débranchez l'appareil. Vous pouvez vider l'eau dans le réservoir en ouvrant le couvercle (5) et incliner le fer vers l'avant.
1. Veillez à toujours débrancher l'appareil avant de le nettoyer.
2. Patientez jusqu'au refroidissement complet de l'appareil.
3. Utilisez un tissu légèrement humidifié pour nettoyer la surface externe de votre appareil. Ensuite, séchez-le correctement.
4. Essuyez les sédiments et résidus de la semelle (3) à l'aide d'un tissu doux et légèrement humidifié, et d'un nettoyant liquide non abrasif.
A
AVERTISSEMENT : N'utilisez jamais d'essence, de solvant, d'agent nettoyant abrasif ou de brosse dure pour nettoyer votre fer.
4.2 Détartrage (Auto-nettoyage)
La fonction de détartrage nettoie les particules de tartre accumulées dans le réservoir du générateur de vapeur de l'appareil.
Utilisez la fonction une fois toutes les 2 ou 3 semaines. Si l'eau de votre robinet est très chargée en calcaire (si des particules de calcaire tombent de la semelle (3) de votre appareil), utilisez plus fréquemment la fonction de détartrage.1. Débranchez l'appareil.2. Remplissez l'appareil d'eau (voir
3.3).3. Lorsque le voyant du thermostat
(10) s'éteint, débranchez l'appareil.
4 Nettoyage et entretien

43 / 129 FRFer à vapeur / Manuel d'utilisation
4. Tenez l'appareil à l'horizontale au-dessus de l'évier, secouez-le tout en appuyant et en maintenant le bouton de détartrage (6). Continuez jusqu'à ce que le réservoir soit vidé d'eau.
CL'eau peut prendre un certain temps pour s'égoutter des orifices de la semelle.
5. Une fois le réservoir vide, relâchez le bouton de détartrage (6).
6. En cas de présence continue de dépôts, répétez l'opération.
7. Après le processus de détartrage, laissez l'appareil refroidir en position verticale. Ensuite, essuyez la semelle (3) à l'aide d'un chiffon.
4.3 RangementSi vous ne comptez pas utiliser votre appareil pendant un certain temps, veuillez le ranger soigneusement.
• Avant de lever l 'appareil, débranchez-le, puis laissez-le refroidir complètement.
• Videz le réservoir d'eau. • Rangez l 'appareil et ses
accessoires dans leurs emballages d'origine.
• Conservez-le dans un endroit frais et sec.
• Maintenez toujours l'appareil hors de portée des enfants.
4.4 Manipulation et transport
• Pendant la manipulation et le transport, portez toujours l'appareil dans son emballage d'origine. L'emballage de l 'appareil le protège des dommages physiques.
• Ne placez pas de charge lourde sur l'appareil ou sur l'emballage. Cela pourrait l'endommager.
• Toute chute de l'appareil peut le rendre non opérationnel ou l'endommager de façon permanente.
4 Nettoyage et entretien

44 / 129 FR Fer à vapeur / Manuel d'utilisation
5 Dépannage
La semelle (3) ne chauffe plus, alors que le fer est branché.
L'appareil n'est pas correctement branché. >>> Vérifiez la fiche et le câble d'alimentation (1) de l'appareil.
L'appareil ne produit pas de vapeur.
L'eau du réservoir est insuffisante. >>> Remplissez le réservoir d'eau jusqu'au niveau Max.(voir 3.3).
Jet de vapeur - la vapeur verticale ne fonctionne pas.
Ces fonctions ont été fréquemment utilisées une très courte période. >>> Maintenez votre fer à l'horizontale tout en repassant et attendez un moment avant d'utiliser à nouveau la fonction jet de vapeur. >>> La semelle du fer (3) n'est pas suffisamment chaude. Posez votre fer en position verticale et attendez que la semelle chauffe.
De l'eau s'écoule sur le vêtement pendant le repassage.
Vous n'avez peut-être pas correctement refermé le couvercle du réservoir d'eau (5). >>> Fermez correctement le couvercle du réservoir d'eau.
Pendant le repassage, les sédiments et les résidus s'échappent de la semelle (3).
Si l'eau que vous utilisez pour votre appareil contient trop de calcaire, des sédiments peuvent se former. >>> Utilisez la fonction auto-nettoyage une fois ou à plusieurs reprises (voir 4.2). Pour les prochains repassages, utilisez un mélange d'eau de robinet et d'eau potable.
Une fois qu'il a refroidi ou lorsqu'il est rangé, l'appareil continue de verser de l'eau.
Vous avez laissé le fer à l'horizontale avec de l'eau dans le réservoir. >>> Videz le réservoir d'eau.
La semelle comporte des taches (3).
Vous avez repassé des vêtements mouillés et la semelle (3) a généré des taches de calcaire. >>> Une fois l'appareil refroidi, essuyez la semelle avec un tissu en microfibres tissé ou en coton imbibé de vinaigre.

Lütfen önce bu kılavuzu okuyun!Değerli Müşterimiz,Beko ürününü tercih ettiğiniz için teşekkür ederiz. Yüksek kalite ve teknoloji ile üretilmiş olan ürününüzün size en iyi verimi sunmasını istiyoruz. Bunun için, bu kılavuzun tamamını ve verilen diğer belgeleri ürünü kullanmadan önce dikkatle okuyun ve bir başvuru kaynağı olarak saklayın. Ürünü başka birisine verirseniz, kullanma kılavuzunu da birlikte verin. Kullanma kılavuzunda belirtilen tüm bilgi ve uyarıları dikkate alarak talimatlara uyun.
Sembollerin anlamlarıBu kullanma kılavuzunun çeşitli kısımlarında aşağıdaki semboller kullanılmıştır:
CCihazın kullanımıyla ilgili önemli bilgiler ve faydalı tavsiyeler.
AUYARI: Can ve mal güvenliğiyle ilgili tehlikeli durumlar konusunda uyarılar.
UYARI: Sıcak yüzeylerle ilgili uyarı.
Bu ürün, çevreye saygılı modern tesislerde doğaya zarar vermeden üretilmiştir.
PCB içermez.Menşei: P.R.C.
AEEE Yönetmeliğine Uygundur.

46 / 129 TR Buharlı Ütü / Kullanma Kılavuzu
İÇİNDEKİLER
1 Önemli güvenlik ve çevre talimatları 47-50
1.1 Genel güvenlik . . . . . . . . . . . . . . . . . . . . 471.2 AEEE yönetmeliğine uyum ve atık ürünün elden çıkarılması . . . . . . . . 501.3 Ürünün ambalajı . . . . . . . . . . . . . . . . . 50
2 Buharlı ütünüz 51
2.1 Genel bakış . . . . . . . . . . . . . . . . . . . . . . . .512.2 Teknik veriler . . . . . . . . . . . . . . . . . . . . . .51
3 Kullanım 52-54
3.1 Kullanım amacı . . . . . . . . . . . . . . . . . . . .523.2 İlk kullanım . . . . . . . . . . . . . . . . . . . . . . . .523.3 Su haznesinin doldurulması . . . . . . .523.4 Buharlı ütüleme . . . . . . . . . . . . . . . . . . .533.5 Şok buhar . . . . . . . . . . . . . . . . . . . . . . . . .533.6 Dik buhar . . . . . . . . . . . . . . . . . . . . . . . . . 543.7 Su püskürtme . . . . . . . . . . . . . . . . . . . . 543.8 Kuru ütüleme . . . . . . . . . . . . . . . . . . . . 543.9 Otomatik kapanma (Auto-Off) . . . 54
4 Temizlik ve bakım 55-56
4.1 Temizlik. . . . . . . . . . . . . . . . . . . . . . . . . . . .554.2 Kireç temizleme özelliği (Self-Clean) . . . . . . . . . . . . . . . . . . . . . . . . . . .554.3 Saklama . . . . . . . . . . . . . . . . . . . . . . . . . . 564.4 Taşıma ve nakliye . . . . . . . . . . . . . . . . 56
5 Sorun giderme 57
47 / 129 TRBuharlı Ütü / Kullanma Kılavuzu
Bu bölümde, yaralanma ya da maddi hasar tehlikele-rini önlemeye yardımcı olacak güvenlik talimatları yer almaktadır. Bu talimatlara uyulmaması halinde her türlü garanti geçersiz hale gelir.
1.1 Genel güvenlik•Bu cihaz, uluslararası güvenlik standartlarına
uygundur.•Cihaz, 8 yaş ve üzeri çocuklar ve fiziksel, algısal ve
zihinsel yetenekleri azalmış veya tecrübe ve bilgi eksikliği olan kişiler tarafından gözetim altında veya cihazın güvenli bir şekilde kullanımına ve karşılaşılan ilgili tehlikelerin anlaşılmasına dair talimat verilirse kullanılabilir. Çocuklar cihazla oynamamalıdır. Temizlik ve kullanıcı bakım işlemleri, başlarında bir büyük olmadığı sürece çocuklar tarafından yapılmamalıdır.
•Cihazı elektrik fişine bağlıyken gözetimsiz bırakmayın.
•Cihazın su haznesine su doldurmadan önce fişini prizden çekin.
•Cihazı sabit bir yüzeyde kullanın ve muhafaza edin.
1 Önemli güvenlik ve çevre talimatları

48 / 129 TR Buharlı Ütü / Kullanma Kılavuzu
1 Önemli güvenlik ve çevre talimatları
•Cihaz altlığı üzerine yerleştirildiğinde, altlığın üzerine konulduğu yüzeyin dengeli olmasını sağlayın.
•Elektrik kablosu veya cihaz hasarlıysa cihazı kullanmayın. Yetkili servise başvurun.
•Cihaz düşürülürse, su sızıntısı yaparsa veya diğer arızalar meydana gelirse, yetkili servise başvurun. Cihazı onarılana kadar kullanmayın.
•Cihaz kullanımda iken veya soğumaya bırakıldığında, 8 yaş altı çocukları cihazdan ve elektrik kablosundan uzak tutun.
•Cihaz dış mekanlarda kullanıma uygun değildir.•Sadece orijinal parçaları veya üretici tarafından
tavsiye edilen parçaları kullanın.•Cihazı parçalarına ayırmayın.•Şebeke güç kaynağınız cihazın tip etiketinde
belirtilen bilgilere uygun olmalıdır.•Cihazı kullanacağınız şebeke en az 16 A’lik bir
sigorta ile emniyete alınmış olmalıdır.•Cihazı topraklı prizde kullanın.•Cihazı uzatma kablosuyla kullanmayın.•Cihazın fişini çıkartırken kablosundan çekmeyin.

49 / 129 TRBuharlı Ütü / Kullanma Kılavuzu
•Cihazı temizlemeden önce fişini prizden çekin.•Cihazın kablosunu etrafına sarmayın. •Cihaz elektriğe bağlıyken elleriniz nemli veya ıslaksa
cihazın fişine dokunmayın.•Cihazın tabanı ve tabana yakın kısımları aşırı
ısınabilir. Sıcak yüzeylere temas yanıklara yol açabilir. Cihazı kullanırken veya kullandıktan hemen sonra sıcak yüzeylere temas etmeyin.
•Cihazı patlayıcı veya yanıcı ortamların ve maddelerin bulunduğu yerde veya yakınında kullanmayın.
•Ambalaj malzemelerini saklıyorsanız çocukların ulaşamayacağı bir yerde muhafaza edin.
1 Önemli güvenlik ve çevre talimatları

50 / 129 TR Buharlı Ütü / Kullanma Kılavuzu
1.2 AEEE yönetmeliğine uyum ve atık ürünün elden çıkarılması
Bu ürün, T.C. Çevre ve Şehircilik Bakanlığı tarafından yayımlanan “Atık Elektrikli ve Elektronik Eşyaların Kontrolü Yönetmeliği”nde belirtilen zararlı ve yasaklı maddeleri içermez. AEEE Yönetmeliğine uygundur. Bu ürün, geri dönüşümlü ve tekrar kullanılabilir nitelikteki yüksek kaliteli parça ve malzemelerden üretilmiştir. Bu
nedenle, ürünü, hizmet ömrünün sonunda evsel veya diğer atıklarla birlikte atmayın. Elektrikli ve elektronik cihazların geri dönüşümü için bir toplama noktasına götürün. Bu toplama noktalarını bölgenizdeki yerel yönetime sorun. Kullanılmış ürünleri geri kazanıma vererek çevrenin ve doğal kaynakların korunmasına yardımcı olun.
1.3 Ürünün ambalajı
Ürününüzde kullanılan ambalajlar geri dönüşümü mümkün ambalajlardır. Ürününüzün ambalajlarının çevresel açıdan geri dönüşüm sürecine katılmasını sağlamanız için yerel resmi makamların kurallarına uygun olarak ambalajların ayrı atılmasını
sağlayınız.
1 Önemli güvenlik ve çevre talimatları

51 / 129 TRBuharlı Ütü / Kullanma Kılavuzu
2.1 Genel bakış
Ürününüz üzerinde bulunan işaretlemelerde veya ürünle birlikte verilen diğer basılı dökümanlarda beyan edilen değerler, ilgili standartlara göre laboratuvar ortamında elde edilen değerlerdir. Bu değerler, ürünün kullanım ve ortam şartlarına göre değişebilir.
2 Buharlı ütünüz
1. Elektrik kablosu2. Ütü altlığı3. Taban4. Su püskürtme deliği5. Su doldurma kapağı6. Kireç temizleme (self clean)
düğmesi7. Şok buhar düğmesi8. Su püskürtme düğmesi9. Buhar tetiği10. Termostat gösterge ve otomatik
kapanma (Auto-Off) ışığı
2.2 Teknik veriler
Gerilim :220-240V~ 50 Hz
Güç tüketimi : 2600-3100 Wİzolasyon sınıfı : IŞok buhar miktarı :240 gr/dk’ya kadar
Bu ürün, 2004/108/EC, 2006/95/EC, 2009/125/EC ve 2011/65/EU sayılı Avrupa CE Direktiflerine uygundur.
1
2
34
5
67
8 9 10

52 / 129 TR Buharlı Ütü / Kullanma Kılavuzu
3.1 Kullanım amacı
Cihaz sadece evde kullanılmak ve ütü yapmak üzere tasarlanmıştır, profesyonel kullanım için uygun değildir.
3.2 İlk kullanım
İlk kullanımda, üretim atıklarını gi-dermek için su haznesine iki kez su doldurarak (bkz. 3.3) buharlaştırın (bkz. 3.5). Bu sırada şok buhar düğ-mesini de (7) sıkça kullanın.
C
Cihazınızdan hafif bir koku ve taban (3) deliklerinden beyaz tortular gelebilir. İki kez buharlaştırma işleminden sonra koku ve tortular yok olacaktır. Ayrıca su haznesinde su dam-lacıkları bulunabilir, bu durum normaldir.
3.3 Su haznesinin doldurulması1. Cihazın fişini prizden çekin. 2. Cihazınızla birlikte verilen su
kabına su doldurun.3. Su doldurma kapağını (5) açın
ve cihazın su haznesine MAX çizgisine kadar su doldurun.
4. Su doldurma kapağını (5) kapatın.
C
Cihazınız musluk suyu kullanımına uy-gun olarak tasarlan-mıştır. Eğer bulundu-ğunuz yerdeki mus-luk suyu aşırı kireçli ise musluk suyunu içme suyu ile karıştı-rarak kullanın.
A
UYARI: Ütüleme için kumaşın etiketin-de belirtilen ütüleme talimatlarını dikkate alın. Cihaz sadece ütülenebilir kumaşlar için uygundur.
3 Kullanım

53 / 129 TRBuharlı Ütü / Kullanma Kılavuzu
C
İpek ve sentetik ku-maşlarda oluşan parlak lekeleri engel-lemek için, kumaşın ters yüzünü ütüle-yin. Leke oluşumunu engellemek için su püskürtme özelliğini kullanmayın.
3.4 Buharlı ütüleme1. Su haznesini doldurun (bkz. 3.3).2. Termostat gösterge ışığı (10)
söndükten sonra buhar tetiğine (9) basın.
C
Cihazınızda elektro-nik Anti-Drip Sensörü (Damlatmama Sensörü) bulunmak-tadır. Buharlı ütüle-me için termostat gösterge ışığının (10) sönmesini bekleyin.
3 Kullanım
3.5 Şok buhar1. Su haznesini doldurun (bkz. 3.3).2. Termostat gösterge ışığı (10)
söndükten sonra şok buhar düğ-mesine (7) basılarak elde edilen güçlü buhar ile ütü yapabilirsiniz.
AUYARI: Şok buhara ara verilmeden de-vam edilir ise taban-dan (3) buhar ile su da gelebilir.
AUYARI: Şok buharı kullanmak için termostat gösterge ışığı (10) sönmüş olmalıdır.

54 / 129 TR Buharlı Ütü / Kullanma Kılavuzu
3.6 Dik buhar
Şok buhar ve sürekli buhar özelliğini dik konumda iken de kullanabilirsi-niz. Şok buhar düğmesine (7) veya buhar tetiğine (9) basarak elde edeceğiniz buhar ile perdeleriniz ve askıdaki giysilerinize buhar püskür-tebilirsiniz. Cihazı giysi ve perdeler-den 15-30 cm uzaklıkta tutun.
A
UYARI: Ütüleme sırasında termostat gösterge ışığı (10) yandığında, şok bu-har işlemine devam etmek için ışığın sön-mesini bekleyin.
AUYARI: Buharı hiç-bir zaman insanlara veya hayvanlara yö-neltmeyin.
3.7 Su püskürtme1. Su haznesini doldurun (bkz. 3.3).2. Su püskürtme düğmesine (8) ba-
sarak suyu püskürtün.
CSu püskürtme özelliği ile kırışıklıkları daha kolay giderebilirsiniz.
3.8 Kuru ütüleme
Kuru ütüleme yapabilmek için buhar tetiğini (9) ve şok buhar (7) düğmesini kullanmayın.
CCihazda su olmasında fayda vardır, gere-kirse su püskürtme düğmesini (8) kulla-nabilirsiniz.
3.9 Otomatik kapanma (Auto-Off)
• Cihaz yatay konumdayken yakla-şık 30 saniye süre hareket ettiril-mezse otomatik olarak kapanır.
• Cihaz dik konumda 7-10 dakika arası yerinden hareket ettiril-mezse otomatik olarak kapanır.
• Cihaz yan konumda (sağa veya sola yaslı) 30 saniye hareket etti-rilmezse otomatik olarak kapanır.
COtomatik kapanma durumunda auto-off ışığı (10) yanıp söner.
• Cihaz yatay konumda hareket et-tirilir ise çalışmaya başlar.
CTaban (3) sıcaklığının eski düzeyine ulaş-ması yaklaşık 60 sa-niye sürebilir.
3 Kullanım

55 / 129 TRBuharlı Ütü / Kullanma Kılavuzu
4.1 Temizlik
A
UYARI: Ütüleme işlemi bittiğinde fişi prizden çekin. Cihazdaki suyu, su doldurma kapağını (5) açıp, ütüyü öne doğru eğerek boşal-tabilirsiniz.
1. Temizlik işleminden önce cihazın fişini prizden çekin.
2. Cihazın tamamen soğumasını bekleyin.
3. Cihazın dış kısmını temizlemek için hafif nemli bir bez kullanın. Daha sonra tamamen kuruması-nı bekleyin.
4. Tabandaki (3) tortu ve kalıntıları hafif nemli bir bezle ve gerekirse yumuşak, aşındırıcı olmayan bir sıvı temizleyiciyle silin.
AUYARI: Cihazı te-mizlemek için benzin, solvent, aşındırıcı temizleyici veya sert fırça kullanmayın.
4.2 Kireç temizleme özelliği (Self-Clean)
Cihazın buhar üretme haznesinde biriken kireç parçalarını temizler.
Kireç temizleme özelliğini 2-3 haf-tada bir kullanın. Eğer bulundu-ğunuz bölgedeki su çok kireçli ise (ütüleme sırasında tabandan (3) ki-reç parçaları dökülüyorsa) kireç te-mizleme özelliğini daha sık kullanın.1. Cihazın fişini prizden çekin.2. Cihaza su doldurun (bkz. 3.3).3. Fişi prize takın. Termostat gös-
terge ışığı (10) söndüğünde ci-hazın fişini prizden çekin.
4. Cihazı yatay şekilde lavabo üze-rine getirin ve kireç temizleme düğmesine (6) basılı tutarak sal-layın. Su haznesindeki su bitene kadar işleme devam edin.
CTaban deliklerinden su gelmesi belirli bir süre alabilir.
5. Su haznesindeki su tamamen boşaldığında kireç temizleme düğmesini (6) bırakın.
4 Temizlik ve bakım

56 / 129 TR Buharlı Ütü / Kullanma Kılavuzu
6. Dökülen suda hala tortu var ise işlemi tekrarlayın.
7. Kireç temizleme işleminden son-ra cihazı dik konumda soğumaya bırakın. Cihaz tamamen soğu-duktan sonra tabanı (3) bir bez ile silin.
4.3 Saklama • Cihazı uzun süre kullanmayı dü-
şünmüyorsanız, dikkatli bir şe-kilde saklayın.
• Cihazı kaldırmadan önce fişini çekin ve tamamen soğumasını bekleyin.
• Su haznesini boşaltın. • Cihazı ve aksesuarlarını orijinal
paketlerinde saklayın. • Serin ve kuru bir yerde saklayın. • Cihazı, daima çocukların ulaşa-
mayacağı bir yerde muhafaza edin.
4.4 Taşıma ve nakliye
• Taşıma ve nakliye sırasında ci-hazı orijinal ambalajı ile birlikte taşıyın. Cihazın ambalajı, cihazı fiziksel hasarlara karşı koruya-caktır.
• Cihazın veya ambalajının üzerine ağır cisimler koymayın. Cihaz zarar görebilir.
• Cihazın düşürülmesi durumunda cihaz çalışmayabilir veya kalıcı hasar oluşabilir.
4 Temizlik ve bakım

57 / 129 TRBuharlı Ütü / Kullanma Kılavuzu
5 Sorun giderme
Cihaz prize takılı olduğu halde taban (3) ısınmıyor.
Bağlantı sorunu olabilir. >>> Cihazın fişini ve elektrik kablosunu (1) kontrol edin.
Cihaz buhar üretmiyor.
Su haznesinde yeterli miktarda su olmayabilir. >>> Su haznesine MAX çizgisine kadar su doldurun (bkz. 3.3).
Şok Buhar - Dik Buhar fonksiyonu çalışmıyor.
Bu fonksiyonlar çok kısa sürede çok fazla kullanılmış olabilir. >>> Yatay
ütülemeye devam edin ve şok buhar fonksiyonunu tekrar kullanmadan önce
bekleyin. >>> Taban (3) yeterince sıcak olmayabilir. Cihazı dik pozisyonda oturtup, tabanın ısınmasını bekleyin.
Kumaş üzerine su damlacıkları dökülüyor.
Su doldurma kapağını (5) tam kapatmamış olabilirsiniz. >>> Su doldurma kapağını tam kapatın.
Ütüleme sırasında tabandan (3) tortular ve kalıntılar dökülüyor.
Cihazınızda kullandığınız su çok kireçli ise bu tür tortular oluşabilir. >>> Bir yada birkaç sefer kireç temizleme fonksiyonunu kullanın (bkz. 4.2). Sonraki ütülemelerde cihazın su haznesini musluk suyu ve içme suyunu karıştırarak doldurun.
Cihaz soğuduktan ya da kaldırıldıktan sonra su damlatıyor.
Cihaz haznesinde su var iken yatay konumda bırakılmış olabilir. >>> Su haznesini boşaltın.
Tabanda (3) lekeler var.
Kireç kaynaklı tabanda (3) lekeler oluşmuştur. >>> Yeterince soğuduktan sonra hafif nemli temiz bir bez ile tabanı silin.

Por favor, ¡lea este manual de usuario primero!Estimados clientes,Gracias por escoger un producto Beko. Esperamos que obtenga los mejores resultados de nuestro producto, que ha sido fabricado con gran calidad y con tecnología de vanguardia. Por tanto, le aconsejamos que lea este manual de usuario con atención y todos los demás documentos adjuntos antes de utilizar el aparato y que lo guarde para futuras consultas. Si va a entregar este aparato a otra persona, proporciónele también el manual del usuario. Siga todas las advertencias e instrucciones incluidas en este manual de usuario.
Significado de los símbolosLos símbolos siguientes se usan en las diversas secciones del presente manual:
CInformación importante y consejos
útiles sobre su uso.
AADVERTENCIA: Advertencias de situaciones peligrosas sobre la seguridad de las personas y la propiedad.
ADVERTENCIA: Advertencia acerca de las superficies calientes.
No contiene policlorobifenilos (PCV).
Cumple con la Directiva RAEE.
Este aparato ha sido fabricado en unas instalaciones respetuosas con el medio ambien-te y en instalaciones de vanguardia.
País de origen: R.P.C.

59 / 129 ESPlancha al vapor / Manual de usuario
CONTENIDO
1 Instrucciones importantes para la seguridad y el medio ambiente 60-63
1.1 Seguridad general . . . . . . . . . . . . . . . . . . . . . . . . . . 601.2 Cumple con de la Directiva RAEE y eliminación de residuos. . . . . . . . . . . . . . . . . . . . . . . . 631.3 Información de embalaje . . . . . . . . . . . . . . . . . . . 63
2 Su plancha 642.1 Información general . . . . . . . . . . . . . . . . . . . . . . . . 642.2 Datos técnicos. . . . . . . . . . . . . . . . . . . . . . . . . . . . . . 64
3 Funcionamiento 65-683.1 Uso previsto . . . . . . . . . . . . . . . . . . . . . . . . . . . . . . . . 653.2 Primer uso. . . . . . . . . . . . . . . . . . . . . . . . . . . . . . . . . . 653.3 Recargar el depósito de agua . . . . . . . . . . . . . . 653.4 Planchado al vapor . . . . . . . . . . . . . . . . . . . . . . . . . 663.5 Descarga de vapor. . . . . . . . . . . . . . . . . . . . . . . . . . 663.6 Vapor vertical . . . . . . . . . . . . . . . . . . . . . . . . . . . . . . 673.7 Pulverización de agua . . . . . . . . . . . . . . . . . . . . . . 673.8 Planchado en seco . . . . . . . . . . . . . . . . . . . . . . . . . 673.9 Apagado automático (Auto-Off) . . . . . . . . . . . 68
4 Limpieza y mantenimiento 694.1 Limpieza. . . . . . . . . . . . . . . . . . . . . . . . . . . . . . . . . . . . 694.2 Eliminación de cal (Autolimpieza) . . . . . . . . . . 694.3 Almacenamiento . . . . . . . . . . . . . . . . . . . . . . . . . . . 704.4 Manejo y transporte . . . . . . . . . . . . . . . . . . . . . . . 70
5 Resolución de problemas 71
60 / 129 ES Plancha al vapor / Manual de usuario
Esta sección contiene instrucciones de seguridad que ayudarán a la protección contra los riesgos de lesiones personales o daño a la propiedad. El incumplimiento de estas instrucciones causará la pérdida de la garantía.
1.1 Seguridad general • Este aparato cumple con los estándares internacionales sobre seguridad.
• Los niños a partir de 8 años y los adultos cuyas facultades físicas, sensoriales o mentales estén mermadas o que carezcan de la experiencia o conocimientos necesarios sobre el aparato pueden usar el aparato, siempre y cuando lo hagan bajo supervisión o reciban la información pertinente sobre su uso seguro y los peligros asociados. No deje que los niños jueguen con el aparato. Las tareas de limpieza y mantenimiento no deben dejarse en manos de niños a menos que sean supervisados por un adulto.
• Nunca deje el aparato desatendido mientras esté enchufado.
1 Instrucciones importantes para la seguridad y el medio ambiente

61 / 129 ESPlancha al vapor / Manual de usuario
• Desenchufe el aparato antes de cargar el depósito de agua con agua.
• Utilice el aparato sobre una superficie de trabajo estable.
• Cuando el electrodoméstico esté colocado en su placa de base, asegúrese de que la superficie debajo de la placa esté anivelada.
• Nunca utilice el aparato si éste o el cable de alimentación están dañados. Contacte con un servicio de atención al cliente autorizado.
• Si el aparato se cae, deja escapar agua o tiene otros fallos, contacto con el servicio de atención al cliente autorizado. No utilice el aparato hasta que esté reparado.
• Cuando el electrodoméstico no está en uso o enfriado mantenga la aplicación y el cable de alimentación fuera del alcance de los niños menores de 8 años.
• El aparato no es apto para su uso en exteriores. • Sólo use las piezas originales o las piezas recomendadas por el fabricante.
1 Instrucciones importantes para la seguridad y el medio ambiente

62 / 129 ES Plancha al vapor / Manual de usuario
• No trate de desmontar el aparato. • Su fuente de alimentación debe ser conforme a la información que se indica en la placa de datos del aparato.
• La fuente de alimentación del aparato debe protegerse con un fusible de 16 A como mínimo.
• Use el aparato únicamente con un enchufe con toma a tierra.
• No utilice este aparato con un cable alargador. • No tire del cable de alimentación cuando desenchufe el aparato.
• Desenchufe el aparato antes de limpiarlo. • No enrolle el cable de corriente alrededor del aparato.
• No toque el aparato o su enchufe con las manos húmedas o mojadas cuando esté conectado a la red eléctrica.
• La placa del fondo y su área circundante pueden estar extremadamente calientes. Tocar la superficie caliente puede provocar quemaduras. Por lo tanto, tenga cuidado de no tocar las partes calientes durante o justo después de usarlo.
1 Instrucciones importantes para la seguridad y el medio ambiente

63 / 129 ESPlancha al vapor / Manual de usuario
• No utilice el aparato en lugares con materiales u objetos combustibles o inflamables, o cerca de ellos.
• Si guarda el material de embalaje, manténgalo fuera del alcance de los niños.
1.2 Cumple con de la Directiva RAEE y eliminación de residuos.
Este producto no incluye los materiales nocivos y prohibidos especificados en la normativa para la supervisión de los residuos de aparatos eléctricos y electrónicos de desecho (RAEE), promulgada por el Ministerio de Medio Ambiente y Planificación Urbanística. Cumple con la Directiva RAEE. En la fabricación de
este producto se han empleado piezas y materiales de alta calidad, que pueden reutilizarse y reciclarse. Por lo tanto, no arroje este producto a la basura junto con sus residuos domésticos normales al final de su vida útil. Llévelo a un punto de recogida para el reciclado de sus componentes eléctricos y electrónicos. Diríjase a la autoridad local de su zona para obtener la dirección de dichos puntos de recogida. Ayude a proteger el medio ambiente reciclando los productos usados.
1.3 Información de embalaje
El embalaje usado para este electrodoméstico está hecho de materiales reciclables. Por favor, asegúrese de que los materiales de embalaje se eliminan de acuerdo con la normativa local para incluir dichos materiales en el proceso de reciclaje para la
protección medioambiental.
1 Instrucciones importantes para la seguridad y el medio ambiente

64 / 129 ES Plancha al vapor / Manual de usuario
2.1 Información general
Los valores declarados en las etiquetas adosadas al aparato o indicados en los demás documentos impresos suministrados junto con él representan los valores obtenidos en los laboratorios de acuerdo con los estándares pertinentes. Estos valores pueden variar según el uso que se haga del aparato y de las condiciones ambientales.
2 Su plancha
1. Cable de alimentación2. Placa de base de la plancha3. Suela4. Pulverizador de agua5. Tapa para la recarga de agua6. Botón de eliminación
(autolimpieza) de cal7. Botón de descarga de vapor8. Botón de pulverización de agua9. Gatillo de vapor10. Indicador de termostato y luz
de apagado automática
2.2 Datos técnicos
Voltaje : 220-240V~ 50HzConsumo de potencia
: 2.600-3.100 W
Clase de aislamiento
: I
Cantidad de descarga de vapor
: hasta 240 g/min
Este aparato cumple con las directivas europeas numeradas 2004/108/CE, 2006/95/CE, 2009/125/CE y 2011/65/UE.
1
2
34
5
67
8 9 10

65 / 129 ESPlancha al vapor / Manual de usuario
3.1 Uso previsto
Este electrodoméstico está pensado para un planchado y un uso doméstico no es apto para uso profesional.
3.2 Primer uso
Antes del primer uso, llénelo dos veces (ver 3.3) y vaporice para quitar los residuos de fabricación (ver 3.5). Mientras, use el botón de descarga de vapor (7) a menudo.
C
Puede oler un olor leve o ver sedimentos blancos saliendo de los agujeros (3) de las suelas. Después de realizar el proceso de vaporización dos veces, estos olores y sedimentos desaparecerán. De la misma forma, pueden formarse gotitas en el depósito de agua; esto es normal.
3.3 Recargar el depósito de agua1. Desenchufe el aparato. 2. Llene el vaso de agua incluido en
el aparato.3. Llene la tapa de recarga de agua
(5) y llene el aparato con agua hasta el nivel MAX.
4. Cierre la tapa de recarga de agua (5).
C
El electrodoméstico está diseñado para usarse con agua del grifo. Si el agua del grifo es demasiado dura, le recomendamos usar una mezcla de agua del grifo con agua potable.
A
ADVERTENCIA: Para planchar, siga las instrucciones de planchado indicadas en la etiqueta de la prenda. Este e l e c t ro d o m é s t i co es únicamente apto para prendas que puedan plancharse.
3 Funcionamiento

66 / 129 ES Plancha al vapor / Manual de usuario
C
Para evitar las marcas de brillo en los tejidos sintéticos como la seda, planche la prenda del revés. No utilice la función de vaporizar para evitar la formación de manchas.
3.4 Planchado al vapor1. Llene el depósito de agua (ver.
3.3).2. Pulse el gatillo de vapor (9)
después de que la luz indicadora del termostato (10) se apague.
C
El aparato tiene un sensor antigoteo electrónico. Si la temperatura no es lo suficientemente alta, puede que no obtenga suficiente cantidad de vapor cuando pulse el gatillo de vapor (10)
3.5 Descarga de vapor1. Llene el depósito de agua (ver.
3.3).2. Después de que la luz indicadora
del termostato (10) se apague, podrá planchar las prendas con el vapor potente pulsando el botón de descarga de vapor (7).
A
ADVERTENCIA: Si este proceso se mantiene durante un tiempo prolongado, el agua puede salir a través de la suela (3) junto con el vapor.
A
ADVERTENCIA: Para usar la función de descarga de vapor, apague la luz indicadora del termostato (10).
3 Funcionamiento

67 / 129 ESPlancha al vapor / Manual de usuario
3.6 Vapor vertical
También puede usar las funciones de descarga de vapor en posición vertical y de vapor continuo. Puede aplicar vapor a las cortinas y sus prendas en el colgador con el vapor que obtendrá pulsando el botón de descarga de vapor (7) o el gatillo de vapor (9). Mantenga el aparato 15-30 cm separado de las prendas y las cortinas.
A
ADVERTENCIA: Si la luz indicadora del termostato (10) se enciende durante el planchado, espere a que la luz se apague antes de proceder con el proceso de descarga de vapor.
AADVERTENCIA: No dirija el vapor a personas o a mascotas.
3.7 Pulverización de agua1. Llene el depósito de agua
(ver. 3.3).2. Pulse el botón de pulverización
de agua (8) para pulverizar agua.
CPuede eliminar fácilmente arrugas con la función de pulverización de agua.
3.8 Planchado en secoNo use el gatillo de vapor (9) o o el botón de descarga de vapor (7) para poder planchar en seco.
C
Tener agua en el aparato puede ser ventajoso; puede usar el botón de pulverización de agua (8) cuando sea necesario.
3 Funcionamiento

68 / 129 ES Plancha al vapor / Manual de usuario
3.9 Apagado automático (Auto-Off)
• El aparato se apagará automáticamente si lo mantiene fijo durante 30 segundos en posición horizontal.
• El aparato se apagará automáticamente si lo mantiene fijo durante 7-10 minutos en posición vertical.
• El aparato se apagará automáticamente si lo mantiene fijo durante 30 segundos en posición inclinada, tanto hacia la derecha como hacia la izquierda.
CEn caso de que sea automático, apague los destellos (10) de la luz de apagado automática.
• El aparato se encenderá si se mueve a una posición horizontal.
CPuede que la suela (3) tarde 60 segun-dos en alcanzar la temperatura confi-gurada previamente.
3 Funcionamiento

69 / 129 ESPlancha al vapor / Manual de usuario
4.1 Limpieza
A
ADVERTENCIA: Desenchufe la plancha cuando termine de planchar. Puede drenar el agua en el depósito abriendo la tapa de rellenado (5) e inclinando la plancha hacia el frente.
1. Desenchufe el aparato antes de limpiarlo.
2. Espere que el aparato se enfríe completamente.
3. Utilice un trapo húmedo para limpiar la superficie exterior del aparato. A continuación, déjela secar completamente.
4. Limpie los sedimentos y residuos de la suela (3) con un paño ligeramente húmedo y un limpiador líquido suave, no abrasivo, según sea necesario.
A
ADVERTENCIA: Nunca use gasolina, productos de limpieza disolventes y abrasivos o cepillos duros para limpiar el aparato.
4.2 Eliminación de cal (Autolimpieza)
La función de eliminación de cal limpia la acumulación de partículas de cal en el depósito de vapor del aparato.
Utilice esta función una vez cada 2 o 3 semanas. Si el agua es muy dura (si se caen partículas de cal de la suela (3) de la plancha), le recomendamos que utilice la función de autolimpieza más a menudo.1. Desenchufe el aparato.2. Rellene el aparato con agua (ver.
3.3).3. Cuando la luz del indicador del
termostato (10) se apague, desenchufe el aparato.
4. Mantenga el aparato en una posición horizontal encima del fregadero y agítelo mientras pulsa y mantiene pulsado el botón de eliminación de cal (6). Siga hasta que no haya agua en el depósito.
CQue el agua gotee desde los agujeros de la suela puede llevar un tiempo.
4 Limpieza y mantenimiento

70 / 129 ES Plancha al vapor / Manual de usuario
5. Suelte el botón de eliminación de cal (6) cuando el depósito esté completamente vacío.
6. Si todavía hay sedimentos, repita el proceso.
7. Después del proceso de eliminación de cal, deje enfriar el aparato en posición vertical. Cuando el aparato se haya enfriado, limpie la suela (3) con un paño.
4.3 Almacenamiento
Si no va a utilizar el aparato durante un periodo prolongado de tiempo, guárdelo cuidadosamente.
• Antes de levantar el aparato, desenchúfelo y luego deje que se enfríe completamente.
• Vacíe el depósito de agua. • Guarde el aparato y sus
accesorios en su embalaje original.
• Guárdelo en un lugar fresco y seco.
• Mantenga siempre el aparato fuera del alcance de los niños.
4.4 Manejo y transporte
• Durante el manejo y el transporte, lleve el aparato en su embalaje original. El embalaje del aparato lo protege de daños físicos.
• No coloque cargas pesadas en el aparato o en el embalaje. El aparato podría dañarse.
• Dejar caer el aparato causará que éste no funcione o causará un daño permanente.
4 Limpieza y mantenimiento

71 / 129 ESPlancha al vapor / Manual de usuario
5 Resolución de problemas
Aunque el aparato esté enchufado, la suela (3) no se calienta.
Puede que el aparato no esté conectado correctamente. >>> Compruebe el enchufe y el cable de alimentación (1) del aparato.
El aparato no genera vapor.
Puede que el depósito de agua no tenga agua suficiente. >>> Llene el depósito de agua con agua hasta el nivel máximo (ver. 3.3).
Descarga de vapor - el Vapor Vertical no funciona.
Estas funciones pueden haberse usado demasiado a menudo en un período de tiempo corto. >>> Siga planchando en una posición horizontal y espere un rato antes de usar la función de descarga de vapor de nuevo >>> La suela (3) puede no estar lo suficientemente caliente. Coloque el aparato en una posición vertical y espere hasta que la suela se caliente.
Caen gotas al tejido durante el planchado.
Puede que no haya cerrado correctamente la tapa del rellenado de agua (5). >>> Cierre la tapa de rellanado correctamente.
Durante el planchado, los sedimentos y residuos caen desde la suela (3).
Dichos sedimentos pueden formarse si el agua que usa para el aparato es demasiado dura. >>> Utilice la función de autolimpieza una vez o unas cuantas veces (ver. 4.2). Para los planchados sucesivos, llene el depósito de agua del aparato con una mezcla de agua del grifo y agua potable.
El aparato deja caer agua cuando se enfría o se guarda.
Puede que haya dejado el aparato en una posición horizontal mientras haya agua en el depósito. >>> Vacíe el depósito de agua.
Hay manchas en la suela (3).
Puede que las prendas húmedas se hayan planchado y que la suela (3) tuviera manchas de cal. >>> Después de que el aparato se enfríe lo suficiente, limpie la suela con una microfibra tejida o un paño de algodón empapado de vinagre.

Proszę najpierw przeczytać instrukcję obsługi.Szanowni Klienci!Dziękujemy za wybranie produktu firmy Beko. Mamy nadzieję, że wyrób ten, wyprodukowany przy użyciu najnowszych technologii wysokiej jakości, okaże się w najwyższym stopniu zadowalający. Przed użyciem urządzenia należy uważnie przeczytać całą instrukcję obsługi oraz towarzyszące jej dokumenty i zachować ją do wglądu na przyszłość. Przekazując wyrób innemu użytkownikowi, proszę oddać mu również niniejszą instrukcję. Proszę przestrzegać wszystkich ostrzeżeń i informacji w tej instrukcji obsługi.
Znaczenie symboliW niniejszej instrukcji stosuje się następujące symbole:
CWażne informacje i przydatne
wskazówki dotyczące użytkowania.
AOSTRZEŻENIE: Ostrzeżenia dotyczące sytuacji zagrażających bezpieczeństwu, życiu i mieniu.
OSTRZEŻENIE: Ostrzeżenie przed gorącymi powierzchniami.
Nie zawiera bifenyli polichlorowanych (PCB).
Wyrób zgodny z Dyrektywą WEEE.
Urządzenie zostało wyprodukowane w bezpiecznych dla środowiska, nowoczesnych zakładach.
Kraj pochodzenia: C.R.L.

73 / 129 PLŻelazko parowe / Instrukcja obsługi
SPIS TREŚCI
1 Ważne instrukcje zachowania bezpieczeństwa i ochrony środowiska naturalnego 75-79
1.1 Ogólne zasady zachowania bezpieczeństwa. . . . . . . . . . . . . . . . . . . . . . . . . . . . . . . . 751.2 Zgodność z dyrektywą WEEE i pozbywanie się zużytych wyrobów . . . . . . . . . . . 791.3 Informacje o opakowaniu . . . . . . . . . . . . . . . . . . 79
2 Żelazko 802.1 Opis ogólny . . . . . . . . . . . . . . . . . . . . . . . . . . . . . . . . . 802.2 Dane techniczne . . . . . . . . . . . . . . . . . . . . . . . . . . . 80
3 Obsługa 81-843.1 Przeznaczenie . . . . . . . . . . . . . . . . . . . . . . . . . . . . . . 813.2 Pierwsze użycie . . . . . . . . . . . . . . . . . . . . . . . . . . . . 813.3 Uzupełnianie wody w zbiorniku . . . . . . . . . . . . 813.4 Prasowanie parowe . . . . . . . . . . . . . . . . . . . . . . . . 823.5 Uderzenie parą . . . . . . . . . . . . . . . . . . . . . . . . . . . . . 823.6 Pionowe uderzenie parą . . . . . . . . . . . . . . . . . . . 833.7 Spryskiwanie wodą. . . . . . . . . . . . . . . . . . . . . . . . . 833.8 Prasowanie na sucho . . . . . . . . . . . . . . . . . . . . . . 833.9 Automatyczne wyłączanie . . . . . . . . . . . . . . . . . 84
4 Czyszczenie i konserwacja 85-864.1 Czyszczenie . . . . . . . . . . . . . . . . . . . . . . . . . . . . . . . . 854.2 Odkamienianie (samoczyszczenie). . . . . . . . . 854.3 Przechowywanie. . . . . . . . . . . . . . . . . . . . . . . . . . . 864.4 Przenoszenie i transport . . . . . . . . . . . . . . . . . . . 86
5 Rozwiązywanie problemów 87

74 / 129 PL Żelazko parowe / Instrukcja obsługi
Rozdział ten zawiera instrukcje zachowania bezpieczeństwa, które ułatwią zabezpieczenie się przed obrażeniami ciała lub uszkodzeniem mienia. Nieprzestrzeganie tych instrukcji powoduje unieważnienie udzielonej gwarancji.
1.1 Ogólne zasady zachowania bez-pieczeństwa
• Urządzenie jest zgodne z międzynarodowymi normami bezpieczeństwa.
• Produkt może być używany przez dzieci powyżej 8 lat oraz osoby z niepełnosprawnością fizyczną, percepcyjną lub umysłową, a także osoby bez doświadczenia lub wiedzy w zakresie obsługi urządzenia, o ile znajdują się one pod nadzorem lub zostały szczegółowo poinstruowane o bezpiecznym korzystaniu z żelazka parowego i potencjalnych zagrożeniach. Dzieci nie powinny bawić się tym urządzeniem. Dzieci nie powinny czyścić go ani konserwować, o ile nie są pod nadzorem osoby dorosłej.
1 Ważne instrukcje zachowania bezpieczeństwa i ochrony środowiska naturalnego

75 / 129 PLŻelazko parowe / Instrukcja obsługi
• Nie wolno pozostawiać urządzenia bez dozoru, jeśli jest podłączone do zasilania.
• Przed napełnieniem zbiornika wodą należy odłączyć urządzenie od zasilania.
• Urządzenie powinno być używane i przechowywane na stabilnej powierzchni.
• Gdy urządzenie jest ustawione na podstawie, powierzchnia pod nią musi być równa.
• Urządzenia nie wolno używać, jeśli przewód zasilający lub ono samo są uszkodzone. Należy skontaktować się z autoryzowanym punktem serwisowym.
• Jeśli urządzenie zostało upuszczone, wycieka z niego woda lub występują inne awarie, należy skontaktować się z autoryzowanym punktem serwisowym. Nie wolno używać urządzenia, dopóki nie zostanie naprawione.
• Jeśli urządzenie nie jest używane lub zostało pozostawione do ostygnięcia, należy przechowywać je wraz z przewodem zasilającym poza zasięgiem dzieci poniżej 8 lat.
1 Ważne instrukcje zachowania bezpieczeństwa i ochrony środowiska naturalnego

76 / 129 PL Żelazko parowe / Instrukcja obsługi
• Wyrób nie nadaje się do stosowania na zewnątrz budynków.
• Należy stosować wyłącznie oryginalne lub zalecane przez producenta części zamienne.
• Nie należy próbować rozkładać tego urządzenia na części.
• Zasilanie z domowej sieci elektrycznej powinno być zgodne z informacjami podanymi na tabliczce znamionowej tego urządzenia.
• Sieć elektryczna musi być zabezpieczona bezpiecznikiem co najmniej 16 A.
• Urządzenia można używać tylko wtedy, gdy jest podłączone do gniazda ściennego z uziemieniem.
• Z tym urządzeniem nie należy używać przedłużaczy.
• Nie należy wyjmować wtyczki z gniazdka, ciągnąc za przewód zasilający.
• Przed przystąpieniem do czyszczenia urządzenia należy wyjąć jego wtyczkę z gniazdka.
1 Ważne instrukcje zachowania bezpieczeństwa i ochrony środowiska naturalnego

77 / 129 PLŻelazko parowe / Instrukcja obsługi
• Nie wolno owijać przewodu wokół urządzenia. • Nie wolno dotykać tego urządzenia ani jego wtyczki mokrymi ani wilgotnymi dłońmi, jeśli jest ono podłączone do gniazdka.
• Stopa żelazka i obszar wokół niej mogą być bardzo gorące. Kontakt z gorącymi powierzchniami może powodować poparzenia. W związku z tym podczas używania urządzenia lub zaraz potem należy uważać, aby nie dotknąć gorącej powierzchni.
• Nigdy nie wolno używać tego urządzenia w pobliżu przedmiotów ani materiałów łatwopalnych i palnych.
• Opakowanie urządzenia należy przechowywać poza zasięgiem dzieci.
1 Ważne instrukcje zachowania bezpieczeństwa i ochrony środowiska naturalnego

78 / 129 PL Żelazko parowe / Instrukcja obsługi
1.2 Zgodność z dyrektywą WEEE i pozbywanie się zużytych wyrobów
Urządzenie nie zawiera materiałów szkodliwych ani zabronionych określonych w „Rozporządzeniu w sprawie nadzorowania odpadów urządzeń elektrycznych i elektronicznych” wydanym przez Ministerstwo Środowiska i Urbanistyki. Wyrób zgodny z Dyrektywą WEEE. Urządzenie wykonano z części i materiałów
wysokiej jakości, które mogą być odzyskane i użyte jako surowce wtórne. W związku z tym po zakończeniu użytkowania nie należy pozbywać się go razem z innymi odpadami domowymi. Należy przekazać wyrób do punktu zbiórki urządzeń elektrycznych i elektronicznych na surowce wtórne. Informacje o lokalizacji takich punktów zbiórki można uzyskać od władz miejscowych. Odzyskiwanie surowców ze zużytych wyrobów pozwala chronić środowisko naturalne.
1.3 Informacje o opakowaniu
Opakowanie urządzenia jest wykonane z materiałów nadających się do recyklingu. Opakowanie należy usunąć w sposób zgodny z lokalnymi przepisami w zakresie ochrony środowiska, tak aby wszystkie materiały zostały poddane recyklingowi.
1 Ważne instrukcje zachowania bezpieczeństwa i ochrony środowiska naturalnego

79 / 129 PLŻelazko parowe / Instrukcja obsługi
2.1 Opis ogólny
Wartości podane w oznaczeniach umieszczonych na tym urządzeniu lub w innych dostarczanych wraz z nim materiałach drukowanych uzyskano w warunkach laboratoryjnych zgodnie z obowiązującymi normami. Wartości te mogą się różnić w zależności od użytkowania urządzenia i warunków w jego otoczeniu.
2 Żelazko
1. Przewód zasilający2. Podstawa żelazka3. Przycisk regulacji temperatury4. Stopa żelazka5. Dysza spryskiwacza6. Pokrywka zbiornika wody7. Przycisk odkamieniania
(samoczyszczenia)8. Przycisk spryskiwania wodą9. Przycisk uderzenia parą10. Spust pary11. Wskaźnik termostatu i dioda
automatycznego wyłączania
2.2 Dane techniczne
Napięcie : 220–240 V, ~50 Hz
Zużycie energii : 2600–3100 WKlasa izolacji : ISiła uderzenia parą
: do 240 g/min
Urządzenie to jest zgodne z następującymi dyrektywami UE: 2004/108/WE, 2006/95/WE, 2009/125/WE i 2011/65/UE.
1
2
34
5
67
8 9 10

80 / 129 PL Żelazko parowe / Instrukcja obsługi
3.1 Przeznaczenie
Urządzenie to przeznaczone jest do użytku i prasowania w gospodarstwie domowym. Nie nadaje się do zastosowań profesjonalnych.
3.2 Pierwsze użycie
Przed pierwszym użyciem urządzenia należy dwukrotnie napełnić zbiornik wodą (patrz punkt 3.3) i odparować ją, aby usunąć pozostałości po procesie produkcji (patrz punkt 3.5). W tym czasie należy często używać przycisku uderzenia parą (7).
C
Z otworów stopy że-lazka (3) wydobywa się mało intensywny odór lub widocz-ny jest biały osad. Zapach i osad zniknie po dwukrotnym od-parowaniu żelazka. Ponadto w zbiorniku na wodę mogą zbie-rać się krople wody — jest to normalne zjawisko.
3.3 Uzupełnianie wody w zbiorniku1. Wyjmij z gniazdka wtyczkę
przewodu zasilającego urządzenia.
2. Napełnij wodą pojemnik dostarczony wraz z urządzeniem.
3. Otwórz pokrywkę zbiornika wody (5) i napełnij go wodą do poziomu MAX.
4. Zamknij pokrywkę zbiornika wody (5).
C
Urządzenie umoż-liwia stosowanie wody z kranu. Jeśli woda z kranu jest zbyt twarda, zaleca się używanie roz-tworu wody z kranu i wody oczyszczonej.
A
OSTRZEŻENIE: Przed rozpoczęciem prasowania należy zapoznać się z in-strukcjami na metce dołączonej do tkani-ny. Urządzenie można stosować wyłącznie do tkanin nadających się do prasowania.
3 Obsługa

81 / 129 PLŻelazko parowe / Instrukcja obsługi
C
Aby uniknąć jasnych plam, które mogą powstać na tkaninach z włókien syntetycznych lub z jedwabiu, należy prasować odzież na lewej stronie. Nie należy używać funkcji spryskiwania wodą, aby nie dopuścić do powstawania plam.
3.4 Prasowanie parowe1. Napełnij zbiornik na wodę (patrz
punkt 3.3).2. Gdy kontrolka termostatu (10)
zgaśnie, naciśnij spust pary (9).
C
Urządzenie jest wy-posażone w elektro-niczny czujnik kapa-nia. Jeśli temperatura jest zbyt niska, ilość pary uzyskanej po naciśnięciu spustu pary (10) może oka-zać się niewystarcza-jąca.
3.5 Uderzenie parą1. Napełnij zbiornik na wodę (patrz
punkt 3.3).2. Po zgaśnięciu wskaźnika
termostatu (10) można prasować odzież parą, naciskając przycisk uderzenia parą (7).
A
OSTRZEŻENIE: Jeśli ta czynność jest wykonywana przez dłuższy czas, woda może wydobywać się ze stopy żelazka (3) wraz z parą.
A
OSTRZEŻENIE: Aby można było użyć funkcji uderzenia parą, wskaźnik termostatu (10) powinien być wyłączony.
3 Obsługa
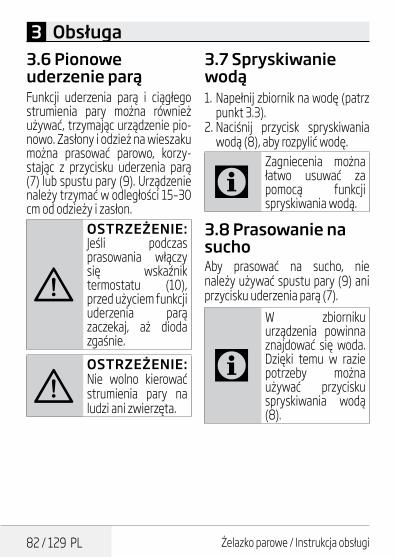
82 / 129 PL Żelazko parowe / Instrukcja obsługi
3.6 Pionowe uderzenie parąFunkcji uderzenia parą i ciągłego strumienia pary można również używać, trzymając urządzenie pio-nowo. Zasłony i odzież na wieszaku można prasować parowo, korzy-stając z przycisku uderzenia parą (7) lub spustu pary (9). Urządzenie należy trzymać w odległości 15–30 cm od odzieży i zasłon.
A
OSTRZEŻENIE: Jeśli podczas prasowania włączy się wskaźnik termostatu (10), przed użyciem funkcji uderzenia parą zaczekaj, aż dioda zgaśnie.
AOSTRZEŻENIE: Nie wolno kierować strumienia pary na ludzi ani zwierzęta.
3.7 Spryskiwanie wodą1. Napełnij zbiornik na wodę (patrz
punkt 3.3).2. Naciśnij przycisk spryskiwania
wodą (8), aby rozpylić wodę.
CZagniecenia można łatwo usuwać za pomocą funkcji spryskiwania wodą.
3.8 Prasowanie na suchoAby prasować na sucho, nie należy używać spustu pary (9) ani przycisku uderzenia parą (7).
C
W zbiorniku urządzenia powinna znajdować się woda. Dzięki temu w razie potrzeby można używać przycisku spryskiwania wodą (8).
3 Obsługa

83 / 129 PLŻelazko parowe / Instrukcja obsługi
3.9 Automatyczne wyłączanie
• Jeśl i urządzenie będzie stało przez 30 sekund w położeniu poziomym, zostanie automatycznie wyłączone.
• Jeśl i urządzenie będzie stało przez 7–10 minut w położeniu pionowym, zostanie automatycznie wyłączone.
• Jeśli urządzenie będzie stało przez 30 sekund w położeniu poziomym z pochyleniem (w lewo lub w prawo), zostanie automatycznie wyłączone.
C
W przypadku auto-matycznego wyłą-czenia urządzenia dioda automatycz-nego wyłączenia (10) miga.
• Urządzenie włącza się po ustawieniu go w położeniu poziomym.
COsiągnięcie nasta-wionej temperatury stopy żelazka (3) może potrwać 60 se-kund.
3 Obsługa

84 / 129 PL Żelazko parowe / Instrukcja obsługi
4.1 Czyszczenie
A
OSTRZEŻENIE: Po zakończeniu prasowania wyjmij z gniazdka wtyczkę przewodu zasilania żelazka. Zbiornik na wodę można opróżnić przez pokrywę napełniania (5), przechylając żelazko do przodu.
1. Przed przystąpieniem do czyszczenia urządzenia wyjmij jego wtyczkę z gniazdka.
2. Zaczekaj, aż urządzenie całkiem ostygnie.
3. Wyczyść zewnętrzne części żelazka lekko wilgotną szmatką. Następnie należy dokładnie osusz urządzenie.
4. Wytrzyj osad i pozostałości ze stopy żelazka (3) lekko wilgotną ściereczką oraz w razie potrzeby nieściernym środkiem czyszczącym w płynie.
A
OSTRZEŻENIE: Do czyszczenia urządzenia nie wolno używać benzyny, r o z p u s z c z a l n i k a , ściernych środków czyszczących ani twardych szczotek.
4.2 Odkamienianie (samoczyszczenie)
Funkcja odkamieniania minimalizu-je gromadzenie się cząstek kamie-nia w zbiorniku pary żelazka.
Funkcji samoczyszczenia używa się raz na 2–3 tygodnie. Jeśli woda z kranu jest bardzo twarda, a cząstki osadu kamiennego wypadają ze stopy żelazka (3), zaleca się częstsze stosowanie funkcji odkamieniania.1. Wyjmij z gniazdka wtyczkę
przewodu zasilającego urządzenia.
2. Uzupełnij wodę w urządzeniu (patrz punkt 3.3).
3. Gdy wskaźnik termostatu (10) zgaśnie, odłącz urządzenie od zasilania.
4 Czyszczenie i konserwacja

85 / 129 PLŻelazko parowe / Instrukcja obsługi
4. Umieść urządzenie poziomo nad zlewem i potrząśnij nim, jedno-cześnie naciskając i przytrzymu-jąc przycisk odkamieniania (6). Wykonuj tę czynność do momen-tu, aż zbiornik na wodę zostanie opróżniony.
CWypłynięcie wody z otworów stopy żelazka może zająć nieco czasu.
5. Po całkowitym opróżnieniu zbiornika zwolnij przycisk odkamieniania (6).
6. Jeśli w urządzeniu pozostał osad, powtórz całą procedurę.
7. Po zakończeniu odkamieniania pozostaw urządzenie w położeniu pionowym, aby ostygło. Gdy urządzenie ostygnie, przetrzyj szmatką stopę żelazka (3).
4.3 Przechowywanie
Jeśli urządzenie nie będzie używane przez dłuższy czas, należy je przechowywać w bezpiecznym miejscu.
• Przed podniesieniem urządzenia należy odłączyć je od zasilania i zaczekać, aż całkowicie ostygnie.
• Opróżnij zbiornik na wodę. • Żelazko i jego akcesoria należy
przechowywać w oryginalnych opakowaniach.
• U r z ą d z e n i e n a l e ż y przechowywać w chłodnym i suchym miejscu.
• Urządzenie należy chronić przed dostępem dzieci.
4.4 Przenoszenie i transport
• Urządzenie należy przenosić i transportować w oryginalnym opakowaniu. Zabezpiecza ono urządzenie przed fizycznymi uszkodzeniami.
• Nie wolno umieszczać ciężkich ładunków na urządzeniu lub opakowaniu. Może to spowodować uszkodzenie żelazka parowego.
• Upuszczenie żelazka może spowodować jego awarię lub trwałe uszkodzenie.
4 Czyszczenie i konserwacja

86 / 129 PL Żelazko parowe / Instrukcja obsługi
5 Rozwiązywanie problemów
Urządzenie jest podłączone do gniazdka, ale stopa żelazka (3) nie nagrzewa się.
Urządzenie może być nieprawidłowo podłączone. >>> Sprawdź wtyczkę i przewód zasilający (1) urządzenia.
Urządzenie nie wytwarza pary.
Ilość wody w zbiorniku może być niewystarczająca. >>> Napełnij zbiornik wodą do poziomu Max (patrz punkt 3.3).
Funkcja pionowego uderzenia parą nie działa.
Możliwe, że funkcje te były używane zbyt często w krótkim okresie. >>> Kontynuuj prasowanie w położeniu poziomym i odczekaj chwilę przed ponownym użyciem funkcji uderzenia parą. >>> Ustaw urządzenie w położeniu pionowym i zaczekaj, aż nagrzeje się stopa żelazka.
Podczas prasowania krople wody spadają na tkaninę.
Być może pokrywa zbiornika wody (5) nie została całkowicie zamknięta. >>> Prawidłowo zamknij pokrywę zbiornika wody.
Podczas prasowania ze stopy żelazka (3) wypadają osady i inne pozostałości.
Jeśli używana woda jest zbyt twarda, w urządzeniu może powstawać osad. >>> Użyj jednokrotnie lub wielokrotnie funkcji samoczyszczenia (patrz punkt 4.2). Przed następnym prasowaniem napełnij zbiornik na wodę roztworem wody z kranu i oczyszczonej.
W trakcie stygnięcia lub przechowywania z urządzenia wydobywają się krople wody.
Być może urządzenie z wodą w zbiorniku znajduje się w położeniu poziomym. >>> Opróżnij zbiornik na wodę.
Plamy na stopie żelazka (3).
Być może prasowano mokrą odzież i na stopie żelazka (3) powstały plamy z kamienia. >>> Po ostygnięciu urządzenia przetrzyj jego stopę ściereczką z mikrofibry lub bawełny nasączoną octem.

Najprije pročitajte ovaj korisnički priručnik!Poštovani kupci,hvala što ste odabrali proizvod tvrtke Beko. Nadamo se da ćete dobiti najbolje rezultate od vašeg proizvoda koji je proizveden s pomoću kvalitetne i moderne tehnologije. Zbog toga prije uporabe proizvoda pažljivo pročitajte korisnički priručnik i druge popratne dokumente i čuvajte ih kao referencu za buduću uporabu. Ako predajete proizvod nekome drugome, proslijedite toj osobi i korisnički priručnik. Slijedite sva upozorenja i informacije u korisničkom priručniku.
Značenje simbolaSljedeći se simboli upotrebljavaju u raznim dijelovima ovog priručnika:
CVažne informacije i korisni savjeti o
uporabi.
AUPOZORENJE: Upozorenja o opasnim situacijama vezanim za sigurnost života i imovine.
UPOZORENJE: Upozorenje o vrućim površinama.
Ne sadrži PCB.Zemlja porijekla: P.R.C.
U skladu s WEEE direktivom.
Ovaj je proizvod proizveden u najmodernijim postrojenjima na ekološki neškodljiv način.

88 / 129 HR Parno glačalo / Korisnički priručnik
SADRŽAJ
1 Važne upute o sigurnosti i zaštiti okoliša 89-92
1.1 Općenita sigurnost . . . . . . . . . . . . . . . . . . . . . . . . . 891.2 Sukladnost s WEEE direktivom i odlaganje proizvoda . . . . . . . . . . . . . . . . . . . . . . . . . . . . . . . . . . . . . . 921.3 Informacije o pakiranju . . . . . . . . . . . . . . . . . . . . . 92
2 Glačalo 932.1 Pregled . . . . . . . . . . . . . . . . . . . . . . . . . . . . . . . . . . . . . 932.2 Tehnički podaci . . . . . . . . . . . . . . . . . . . . . . . . . . . . . 93
3 Rad 943.1 Namjena . . . . . . . . . . . . . . . . . . . . . . . . . . . . . . . . . . . . 943.2 Prva uporaba . . . . . . . . . . . . . . . . . . . . . . . . . . . . . . . 943.3 Nadolijevanje vode u spremnik za vodu . . . . 943.4 Glačanje na paru . . . . . . . . . . . . . . . . . . . . . . . . . . . 953.5 Naglo ispuštanje pare . . . . . . . . . . . . . . . . . . . . . . 953.6 Okomito glačanje na paru . . . . . . . . . . . . . . . . . . 963.7 Raspršivanje vode . . . . . . . . . . . . . . . . . . . . . . . . . . 963.8 Suho glačanje . . . . . . . . . . . . . . . . . . . . . . . . . . . . . . 963.9 Automatsko isključivanje (Auto isključivanje) . . . . . . . . . . . . . . . . . . . . . . . . . . . . . 97
4 Čišćenje i održavanje 984.1 Čišćenje . . . . . . . . . . . . . . . . . . . . . . . . . . . . . . . . . . . . 984.2 Uklanjanje kamenca (Samočišćenje) . . . . . . . 984.3 Pohrana . . . . . . . . . . . . . . . . . . . . . . . . . . . . . . . . . . . . 994.4 Rukovanje i transport . . . . . . . . . . . . . . . . . . . . . . 99
5 Rješavanje problema 100
89 / 129 HRParno glačalo / Korisnički priručnik
Ovaj dio sadrži upute o sigurnosti koje će vam pomoći u zaštiti od tjelesnih ozljeda ili materijalne štete. Nepoštivanje ovih uputa poništava odobreno jamstvo.
1.1 Općenita sigurnost • Ovaj uređaj u skladu je s međunarodnim sigurnosnim standardima.
• Uređaj mogu upotrebljavati djeca od 8 godina ili starija i osobe s ograničenim fizičkim, osjetilnim ili mentalnim sposobnostima ili pak s nedostatkom iskustva i znanja o uređaju, ako su pod nadzorom ili su obaviješteni o ili im je objašnjena sigurna uporaba uređaja i moguće opasnosti vezane za uređaj. Djeca se ne smiju igrati s uređajem. Čišćenje i održavanje ne smiju provoditi djeca, osim ako su pod nadzorom starijih osoba.
• Nikada ne ostavljajte uređaj bez nadzora dok je uključen na napajanje.
1 Važne upute o sigurnosti i zaštiti okoliša

90 / 129 HR Parno glačalo / Korisnički priručnik
• Odspojite proizvod iz napajanja prije nadolijevanja vode u spremnik za vodu.
• Uređaj upotrebljavajte i pohranjujte na stabilnim površinama.
• Kad uređaj stavljate na osnovnu ploču, provjerite je li površina ispod ploče ravna.
• Ne upotrebljavajte uređaj ako su kabel napajanja ili uređaj vidljivo oštećeni. Obratite se ovlaštenom servisu.
• Ako uređaj padne ili propušta vodu ili pak primijetite druge kvarove, obratite se ovlaštenom servisu. Ne upotrebljavajte uređaj ako nije obavljen popravak.
• Kad uređaj nije u uporabi ili dok se hladi držite uređaj i naponski kabel izvan dosega djece mlađe od 8 godina.
• Uređaj nije prikladan za uporabu u vanjskom prostoru.
• Uvijek upotrebljavajte samo originalne dijelove ili one koje je preporučio proizvođač.
1 Važne upute o sigurnosti i zaštiti okoliša

91 / 129 HRParno glačalo / Korisnički priručnik
• Ne pokušavajte rastavljati uređaj. • Vaša električna mreža treba biti u skladu s podacima na tipskoj pločici uređaja.
• Napajanje uređaja mora se zaštititi osiguračem od minimalno 16 A.
• Upotrebljavajte uređaj samo s uzemljenom utičnicom.
• Ne upotrebljavajte produžni kabel za rad uređaja. • Ne povlačite naponski kabel prilikom isključivanja uređaja iz struje.
• Prije čišćenja uređaja, isključite ga iz struje. • Ne omatajte kabel oko uređaja. • Ne dodirujte uređaj mokrim ili vlažnim rukama dok je uključen u struju.
• Grijača ploča i površine oko nje mogu biti vrlo vruće. Dodirivanje vruće površine može uzrokovati opekline. Stoga pazite da tijekom ili neposredno nakon uporabe uređaja ne dodirujete vruće površine.
1 Važne upute o sigurnosti i zaštiti okoliša
92 / 129 HR Parno glačalo / Korisnički priručnik
• Nikada nemojte koristiti uređaj na zapaljivim ili eksplozivnim mjestima ili blizu zapaljivih ili eksplozivnih mjesta, materijala i namještaja.
• Ako ste zadržali materijale pakiranja, držite ih dalje od dosega djece.
1.2 Sukladnost s WEEE direktivom i odlaganje proizvoda
Ovaj uređaj ne sadrži opasne i zabranjene materijale naznačene u „Pravilniku o gospodarenju otpadnim električnim i elektroničkim uređajima” koji je izdalo Ministarstvo okoliša i urbanog planiranja. U skladu s WEEE direktivom. Ovaj uređaj proizveden je s kvalitetnim dijelovima i materijalima koji se mogu ponovno upotrebljavati i
pogodni su za reciklažu. Stoga uređaj na kraju radnog vijeka ne odlažite s uobičajenim kućanskim otpadom. Odnesite ga na odlagalište za reciklažu električne i elektroničke opreme. Obratite se lokalnim vlastima u vezi tih odlagališta. Pomognite u zaštiti okoliša i prirodnih resursa reciklažom iskorištenih uređaja.
1.3 Informacije o pakiranju
Ambalaža uređaja izrađena je od materijala koji se mogu reciklirati. Pobrinite se da se ambalaža odloži u skladu s primjenjivim lokalnim propisima kako bi se materijali uključili u postupak recikliranja radi zaštite okoliša.
1 Važne upute o sigurnosti i zaštiti okoliša

93 / 129 HRParno glačalo / Korisnički priručnik
2.1 Pregled
Vrijednosti iskazane na oznakama pričvršćenim na uređaju ili drugim ispisanim dokumentima isporučenim s uređajem predstavljaju vrijednosti dobivene u laboratorijima u skladu s postojećim standardima. Te se vrijednosti mogu razlikovati s obzirom na uporabu proizvoda i uvjete okoline.
2 Glačalo
1. Naponski kabel2. Osnovna ploča glačala3. Grijaća ploča4. Mlaznica za raspršivanje vode5. Poklopac za dopunu vode6. Gumb za uklanjanje kamenca
(samočišćenje)7. Gumb za naglo ispuštanje pare8. Gumb za raspršivanje vode9. Okidač za paru10. Oznaka termostata i svjetlo
automatskog isključivanja
2.2 Tehnički podaci
Napon : 220 - 240 V ~ 50 Hz
Potrošnja energije
: 2600 - 3100 W
Klasa izolacije : IKoličina naglo ispuštene pare
: do 240 g/min
Ovaj je uređaj usklađen s propisima europskih direktiva 2004/108/EZ, 2006/95/EZ, 2009/125/EZ i 2011/65/EU.
1
2
34
5
67
8 9 10

94 / 129 HR Parno glačalo / Korisnički priručnik
3.1 Namjena
Ovaj je uređaj namijenjen samo za uporabu u kućanstvu za potrebe glačanja i nije podesan za profesionalnu uporabu.
3.2 Prva uporaba
Prije prve uporabe uređaj dva puta napunite (pogledajte 3.3) i pustite da ispari kako bi se uklonili ostaci od proizvodnje (pogledajte 3.5). Pritom više puta upotrijebite gumb za naglo ispuštanje pare (7).
C
Možete osjetiti blagi miris ili primijetiti bijele naslage koje izlaze iz otvora na grijaćoj ploči (3). Takvi će mirisi i naslage nestati nakon dva postupka isparavanja. U spremniku za vodu mogu se oblikovati kapljice vode; to je normalno.
3.3 Nadolijevanje vode u spremnik za vodu1. Isključite uređaj iz struje. 2. Napunite čašicu za vodu
isporučenu s uređajem.3. Otvorite poklopac za dopunu
vode (5) i nadolijte vodu u uređaj do maksimalne razine.
4. Zatvorite poklopac za dopunu vode (5).
C
Vaš je uređaj osmišljen za uporabu s vodom iz slavine. Ako je voda iz slavine pretvrda, p r e p o r u č u j e m o uporabu mješavine vode iz slavine i pročišćene vode.
A
UPOZORENJE: Prenez en compte les instructions de repa-ssage mentionnées sur l‘étiquette du tis-su avant de le repas-ser. Cette appareil ne convient que pour les tissus qui peuvent être repassés.
3 Rad

95 / 129 HRParno glačalo / Korisnički priručnik
C
Kako bi se spriječila pojava svijetlih mrlja na sintetičkim tkaninama kao što je svila, glačajte tkaninu s naličja. Radi sprečavanja pojave mrlja, nemojte u p o t r e b l j a v a t i značajku raspršivanja vode.
3.4 Glačanje na paru1. Napunite spremnik za vodu
(pogledajte 3.3).2. Après l‘extinction du voyant du
thermostat (10), appuyez sur la gâchette à vapeur (9).
C
L‘appareil est doté d‘un capteur anti-é-gouttement électro-nique. Si la tempéra-ture n‘est pas assez élevée, il se peut que vous n‘obteniez pas une quantité suffi-sante de vapeur en appuyant sur la gâc-hette à vapeur (10).
3.5 Naglo ispuštanje pare1. Napunite spremnik za vodu
(pogledajte 3.3).2. Nakon što se svjetlo oznake
termostata (10) ugasi, odjevne predmete možete glačati s pomoću snažne pare pritiskom na gumb za naglo ispuštanje pare (7).
A
UPOZORENJE: Ako se ovaj postupak održava dulje vrijeme, voda može procuriti iz grijaće ploče (3) zajedno s parom.
A
UPOZORENJE: Kako biste uporabili značajku naglog ispuštanja pare svjetlo oznake termostata (10) mora biti isključeno.
3 Rad

96 / 129 HR Parno glačalo / Korisnički priručnik
3.6 Okomito glačanje na paru
Vous pouvez également utiliser le jet vapeur et la fonction de vapeur en continu en position verticale. Vous pouvez appliquer de la vapeur sur vos rideaux et vos vêtements suspendus en appuyant sur le bouton de jet de vapeur (7) ou sur la gâchette à vapeur (9). Tenez l‘appareil à 15-30 cm des vêtements et des rideaux.
A
UPOZORENJE: Ako se tijekom glačanja uključi svjetlo oznake termostata (10), pričekajte da se svjetlo isključi prije nastavka postupka naglog ispuštanja pare.
AUPOZORENJE: Nikad ne usmjeravajte paru prema osobama ili kućnim ljubimcima.
3.7 Raspršivanje vode1. Napunite spremnik za vodu
(pogledajte 3.3).2. Pritisnite gumb za raspršivanje
vode (8) kako biste raspršili vodu.
CNabore možete jednostavno ukloniti uporabom značajke raspršivanja vode.
3.8 Suho glačanjePour le repassage à sec, n‘utilisez pas la gâchette à vapeur (9) ou sur le bouton (7) de jet de vapeur.
CPoželjno je imati vode u uređaju; možete uporabiti gumb za raspršivanje vode (8) po potrebi.
3 Rad

97 / 129 HRParno glačalo / Korisnički priručnik
3.9 Automatsko isključivanje (Auto isključivanje)
• Uređaj će se automatski isključiti ako se nalazi mirno u vodoravnom položaju u trajanju od 30 sekundi.
• Uređaj će se automatski isključiti ako se nalazi mirno u uspravnom položaju u trajanju od 7 do 10 minuta.
• Uređaj će se automatski isključiti ako se nalazi mirno u nagnutom položaju (nalijevo ili nadesno) u trajanju od 30 sekundi.
CU slučaju automat-skog isključivanja zatreperit će svjetlo oznake automatskog isključivanja (10).
• Uređaj će se uključiti ako se pomakne u vodoravnom položaju.
C
Možda će biti po-trebno 60 sekundi da grijaća ploča (3) dostigne prethodno postavljenu tempe-raturu.
3 Rad

98 / 129 HR Parno glačalo / Korisnički priručnik
4.1 Čišćenje
A
UPOZORENJE: Kada završite s glačanjem, isključite uređaj s napajanja. Vodu iz spremnika možete ispustiti otvaranjem poklopca za dopunu vode (5) i naginjanjem glačala na prednjoj strani.
1. Prije čišćenja isključite uređaj iz struje.
2. Pričekajte da se uređaj ohladi do kraja.
3. Za čišćenje vanjske površine uređaja uporabite lagano vlažnu krpu. Zatim ga temeljito osušite.
4. Obrišite naslage i ostatke s grijaće ploče (3) s pomoću lagano vlažne krpe i, po potrebi, blagim, neabrazivnim tekućim sredstvom za pranje.
A
UPOZORENJE: Za čišćenje ovog uređaja nemojte u p o t r e b l j a v a t i benzin, otapala i abrazivna sredstva za čišćenje ili tvrde četke.
4.2 Uklanjanje kamenca (Samočišćenje)
Funkcija uklanjanja kamenca čisti čestice kamenca iz spremnika generatora pare u uređaju.
Funkciju samočišćenja upotrebljavajte jednom u 2 do 3 tjedna. Ako je voda iz slavine pretvrda (ako čestice kamenca ispadaju iz grijaće ploče (3) vašeg uređaja), češće upotrebljavajte funkciju uklanjanja kamenca.1. Isključite uređaj iz struje.2. Dopunite uređaj vodom
(pogledajte 3.3).3. Kad se isključi svjetlo oznake
termostata (10) isključite naponski kabel iz utičnice.
4. Uređaj postavite u vodoravni položaj iznad sudopera i tresite ga dok držite pritisnut gumb za uklanjanje kamenca (6). Ponavljajte postupak dok ne iscuri sva voda iz spremnika.
CMožda će biti potrebno neko vrijeme da voda iscuri kroz otvore na grijaćoj ploči.
4 Čišćenje i održavanje

99 / 129 HRParno glačalo / Korisnički priručnik
5. Nakon što je spremnik potpuno prazan otpustite gumb za uklanjanje kamenca (6).
6. Ako i dalje ima naslaga, ponovite postupak.
7. Nakon završetka postupka uklanjanja kamenca ostavite uređaj da se ohladi u uspravnom položaju. Kad je uređaj dovoljno hladan, krpom obrišite grijaću ploču (3).
4.3 Pohrana
Ako ne planirate upotrebljavati uređaj dulje vrijeme, pažljivo ga pohranite.
• Prije podizanja uređaja isključite ga iz napajanja i pričekajte da se potpuno ohladi.
• Ispraznite spremnik za vodu. • Uređaj i njegove dodatke odložite
u njihovoj originalnoj ambalaži. • Držite ga na hladnom, suhom
mjestu. • Uvijek držite uređaj podalje od
dosega djece.
4.4 Rukovanje i transport
• Tijekom rukovanja i transporta uređaj nosite u originalnom pakiranju. Pakiranje štiti uređaj od fizičkog oštećenja.
• Nemojte stavljati teški teret na uređaj ili pakiranje. Može doći do oštećenja uređaja.
• Ispuštanje uređaja na tlo može uzrokovati trajno oštećenje i onemogućiti njegov rad.
4 Čišćenje i održavanje

100 / 129 HR Parno glačalo / Korisnički priručnik
5 Rješavanje problema
Grijaća ploča (3) se ne zagrijava iako je uređaj uključen u napajanje.
Uređaj je možda neispravno spojen. >>> Provjerite utikač i naponski kabel (1) uređaja.
Uređaj ne stvara paru.
Možda nema dovoljno vode u spremniku za vodu. >>> Napunite spremnik za vodu do maksimalne razine (pogledajte. 3.3).
Naglo ispuštanje pare - Okomito glačanje na paru nisu u funkciji.
Te su funkcije upotrebljavane previše puta u vrlo kratkom vremenskom razdoblju. >>> Nastavite glačati u vodoravnom položaju i pričekajte neko vrijeme prije ponovne uporabe funkcije naglog ispuštanja pare. >>> Postavite uređaj u okomiti položaj i pričekajte da se grijaća ploča zagrije.
Kapljice vode padaju na tkaninu tijekom glačanja.
Možda niste dovoljno čvrsto zatvorili poklopac za dopunu vode (5). >>> Čvrsto zatvorite poklopac za dopunu vode.
Naslage i ostaci padaju iz grijaće ploče (3) tijekom glačanja.
Naslage mogu nastati ako je voda koju upotrebljavate s vašim uređajem pretvrda. >>> Uporabite funkciju samočišćenja jednom ili više puta (pogledajte. 4.2). Prije sljedećeg glačanja napunite spremnik za vodu mješavinom vode iz slavine i pročišćene vode.
Uređaj ispušta vodu nakon što se ohladio ili je spremljen.
Možda ste ostavili uređaj u vodoravnom položaju dok ima vode u spremniku. >>> Ispraznite spremnik za vodu.
Mrlje na grijaćoj ploči (3).
Možda ste glačali mokre odjevne predmete i grijaća ploča ima mrlje od kamenca (3). >>> Nakon što se uređaj dovoljno ohladi obrišite grijaću ploču krpom od pletenih mikrovlakana ili pamuka, umočenom u ocat.

Vă rugăm să citiţi mai întâi acest manual de utilizare!Stimați clienți,Vă mulțumim pentru selectarea unui produs Beko. Sperăm să obţineţi cele mai bune rezultate de la produsul dumneavoastră, care a fost fabricat la o calitate înaltă şi cu tehnologii performante. În acest scop, vă rugăm să citiţi cu grijă şi în întregime acest manual de utilizare şi toate celelalte documente însoţitoare înainte de a utiliza produsul şi să le păstraţi pentru consultări ulterioare. Dacă transmiteţi produsul altei persoane, oferiţi-i şi manualul de utilizare. Respectaţi toate avertismentele şi informaţiile din manualul de utilizare.
Semnificaţia simbolurilorUrmătoarele simboluri sunt utilizate în diverse părţi ale acestui manual de utilizare:
CInformaţii importante și sfaturi utile cu privire la utilizare.
AAVERTISMENT: Avertismente pentru situații periculoase referitoare la siguranța vieții și proprietății.
AVERTISMENT: Avertisment de suprafețe fierbinți.
Nu conţine PCB.Fabricat în R.P.C.
Conform Directivei WEEE.
Acest produs a fost fabricat în uzine prietenoase cu mediul înconjurător și de ultimă generație.

102 / 129 RO Fier de călcat cu abur / Manual de utilizare
CONŢINUT
1 Instrucțiuni importante referitoare la siguranță și mediu înconjurător 103-107
1.1 Siguranţă generală . . . . . . . . . . . . . . . . . . . . . 1031.2 Conform Directivei WEEE şi de eliminare a produselor reziduale. . . . . . . . . . . 1071.3 Informații despre ambalare . . . . . . . . . . . . 107
2 Fierul dumneavoastră 1082.1 Prezentare generală. . . . . . . . . . . . . . . . . . . . 1082.2 Date tehnice. . . . . . . . . . . . . . . . . . . . . . . . . . . . 108
3 Utilizarea 109-1123.1 Utilizare destinată . . . . . . . . . . . . . . . . . . . . . . 1093.2 Utilizare iniţială. . . . . . . . . . . . . . . . . . . . . . . . . 1093.3 Reumplerea rezervorului de apă . . . . . . . 1093.4 Călcarea cu abur. . . . . . . . . . . . . . . . . . . . . . . . 1103.5 Jet de abur . . . . . . . . . . . . . . . . . . . . . . . . . . . . . . 1113.6 Abur vertical. . . . . . . . . . . . . . . . . . . . . . . . . . . . 1113.7 Pulverizarea apei . . . . . . . . . . . . . . . . . . . . . . . 1123.8 Călcare uscată. . . . . . . . . . . . . . . . . . . . . . . . . . 1123.9 Oprire automată (Oprire auto). . . . . . . . . . 112
4 Curățarea și întreținerea 113-114
4.1 Curăţarea . . . . . . . . . . . . . . . . . . . . . . . . . . . . . . . 1134.2 Eliminarea calcarului (Autocurățare) . . . 1134.3 Depozitarea . . . . . . . . . . . . . . . . . . . . . . . . . . . . 1144.4 Manevrarea și transportul . . . . . . . . . . . . . 114
5 Depanarea 115

103 / 129 ROFier de călcat cu abur / Manual de utilizare
Această secţiune conţine instrucţiuni de siguranță care vă vor ajuta să vă protejați de riscul vătămărilor personale sau pagubelor materiale. Nerespectarea acestor instrucţiuni invalidează garanţia furnizată.
1.1 Siguranţă generală • Acest produs este conform cu standardele internaţionale de siguranţă.
• Acest produs poate fi utilizat de către copii cu vârsta mai mare de 8 ani şi de persoanele cu capacităţi fizice, perceptive sau mentale diminuate sau de persoanele care nu sunt experimentate sau nu cunosc informaţii despre aparat numai dacă aceştia sunt supravegheaţi sau informaţi cu privire la utilizarea în siguranţă a aparatului şi înţeleg riscurile prezente. Copii nu trebuie să se joace cu produsul. Lucrările de curăţare şi întreţinere nu trebuie să fie efectuate de către copii cu excepţia controlării acestora de către persoanele lor adulte.
1 Instrucțiuni importante referitoare la siguranță și mediu înconjurător

104 / 129 RO Fier de călcat cu abur / Manual de utilizare
• Nu lăsați produsul nesupravegheat atunci când acesta este conectat la priză.
• Înaintea umplerii rezervorului cu apă, deconectați produsul de la priză.
• Utilizați și depozitați produsul pe o suprafață stabilă.
• În momentul când produsul este plasat pe placa sa de bază, asigurați-vă că suprafața de sub placă este echilibrată.
• Nu utilizaţi produsul dacă cablul de alimentare sau produsul în sine este avariat. Contactaţi un service autorizat.
• Dacă produsul este aruncat sau pierde apă sau prezintă alte avarii, contactați service-ul autorizat. Nu utilizaţi produsul până când acesta nu este reparat.
• În momentul când acesta nu este utilizat sau este lăsat să se răcească, mențineți produsul împreună cu cablul de alimentare departe de copii cu vârsta mai mică de 8 ani.
1 Instrucțiuni importante referitoare la siguranță și mediu înconjurător

105 / 129 ROFier de călcat cu abur / Manual de utilizare
• Produsul nu este potrivit pentru a fi utilizat în exterior.
• Utilizați doar componentele originale sau componentele recomandate de către producător.
• Nu încercaţi să demontaţi produsul. • Tensiunea de alimentare a prizelor trebuie să corespundă cu informaţiile furnizate pe eticheta produsului.
• Tensiunea de alimentare a produsului trebuie să fie securizată cu o siguranţă de minim 16 A.
• Utilizaţi produsul doar cu o priză cu împământare. • Nu utilizaţi produsul cu un prelungitor. • În momentul când scoateţi din priză, nu trageţi de cablu.
• Înainte de curățarea produsului, decuplați-l. • Nu înfășurați cablul de alimentare în jurul produsului.
1 Instrucțiuni importante referitoare la siguranță și mediu înconjurător

106 / 129 RO Fier de călcat cu abur / Manual de utilizare
• În momentul când produsul este conectat la priză, nu atingeți produsul sau ștecherul acestuia cu mâinile umede.
• Talpa și zona din jurul acesteia pot deveni foarte fierbinți. Contactul cu suprafețele fierbinți poate cauza arsuri. Astfel, după un timp sau după utilizarea produsului, fiți atenți să nu atingeți suprafețele fierbinți.
• Nu utilizaţi niciodată produsul în sau lângă locuri şi materiale combustibile sau inflamabile.
• Dacă menţineţi materialele de ambalare, depozitaţi-le departe de copii.
1 Instrucțiuni importante referitoare la siguranță și mediu înconjurător

107 / 129 ROFier de călcat cu abur / Manual de utilizare
1.2 Conform Directivei WEEE şi de eliminare a produselor reziduale.
Acest produs nu conţine materiale periculoase sau interzise specificate în ”Regulamentul pentru Supervizarea Produselor Electrice şi Electronice Reziduale” eliberat de către Ministerul Mediului şi Planificării Urbane. Conform Directivei WEEE. Acest produs a fost fabricat folosind componente şi materiale de înaltă
calitate, care pot fi refolosite şi sunt potrivite pentru reciclare. Aşadar, la sfârşitul perioadei sale de utilizare, nu aruncaţi produsul împreună cu gunoiul menajer. Duceţi-l la un centru de colectare pentru reciclarea echipamentelor electrice şi electronice. Adresaţi-vă autorităţii locale din zona dumneavoastră pentru aceste puncte de colectare. Ajutați la protejarea mediului înconjurător și resurselor naturale prin reciclarea produselor utilizate.
1.3 Informații despre ambalare
Ambalajul utilizat pentru produs este fabricat din materiale reciclabile. Asigurați-vă că materialele de ambalare sunt eliminate conform reglementărilor locale aplicabile pentru a include materialele în procesul de reciclare pentru protecția
mediului înconjurător.
1 Instrucțiuni importante referitoare la siguranță și mediu înconjurător
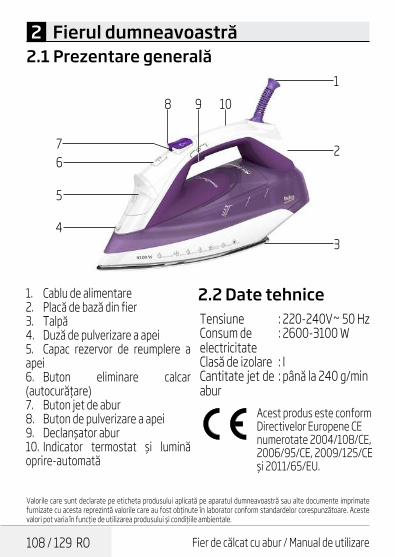
108 / 129 RO Fier de călcat cu abur / Manual de utilizare
2.1 Prezentare generală
Valorile care sunt declarate pe eticheta produsului aplicată pe aparatul dumneavoastră sau alte documente imprimate furnizate cu acesta reprezintă valorile care au fost obţinute în laborator conform standardelor corespunzătoare. Aceste valori pot varia în funcţie de utilizarea produsului şi condiţiile ambientale.
2 Fierul dumneavoastră
1. Cablu de alimentare2. Placă de bază din fier3. Talpă4. Duză de pulverizare a apei5. Capac rezervor de reumplere a apei 6. Buton eliminare calcar (autocurățare)7. Buton jet de abur8. Buton de pulverizare a apei9. Declanșator abur10. Indicator termostat și lumină oprire-automată
2.2 Date tehnice
Tensiune : 220-240V~ 50 HzConsum de electricitate
: 2600-3100 W
Clasă de izolare : ICantitate jet de abur
: până la 240 g/min
Acest produs este conform Directivelor Europene CE numerotate 2004/108/CE, 2006/95/CE, 2009/125/CE și 2011/65/EU.
1
2
34
5
67
8 9 10

109 / 129 ROFier de călcat cu abur / Manual de utilizare
3.1 Utilizare destinată
Acest produs este destinat doar uzului casnic și pentru călcare; nu este potrivit pentru uzul profesional.
3.2 Utilizare iniţială
Înainte de utilizarea inițială, umpleți de două ori (consultați 3.3) și vaporizați pentru eliminarea reziduurilor de producție (consultați 3.5). Între timp, utilizați butonul pentru jet d e abur (7) frecvent.
C
D u m n e a v o a s t r ă puteți sesiza un mi-ros ușor sau vedea sedimente de cu-loare albă ce cad din găurile de pe talpă. După ce ați efectuat de două ori procesul de vaporizare, astfel de mirosuri și sedi-mente vor dispărea. De asemenea, stropii de apă se pot forma în interiorul rezer-vorului de apă; acest lucru este normal.
3.3 Reumplerea rezervorului de apă1. Decuplaţi produsul. 2. Umpleți cană de apă furnizată
împreună cu produsul.3. Deschideți capacul de reumplere
al rezervorului (5) și umpleți produsul cu apă până la nivelul MAX.
4. Închideți capacul de reumplere al rezervorului (5).
3 Utilizarea

110 / 129 RO Fier de călcat cu abur / Manual de utilizare
C
Produsul dumnea-voastră este proiec-tat de a utiliza apă de robinet. Dacă apa de la robinet este foarte dură, noi recoman-dăm să utilizați un amestec de apă de robinet împreună cu apă potabilă.
A
AVERTISMENT: Pentru călcare, luați în considerare instrucțiunile de călcare specificate pe eticheta articolelor de îmbrăcăminte. Acest produs este potrivit doar mate-rialelor care pot fi călcate.
C
Pentru a preveni for-marea petelor des-chise pe materialele sintetice cum ar fi mătasea, călcați pe partea reversibilă a materialului. Pentru prevenirea formării petei, nu utilizați ca-racteristica de pulve-rizare a apei.
3.4 Călcarea cu abur1. Umpleți rezervorul de apă
(consultați 3.3).2. După ce lumina indicatorului
termostatului (10) se oprește, apăsați pe declanșatorul de abur (9).
C
Produsul este pre-văzut cu un senzor electronic de Anti-Picurare. În momentul când dumneavoastră apăsați declanșatorul de abur (10), dacă temperatura nu este suficient de ridicată, dumneavoastră nu puteți obține o can-titate suficientă de abur.
3 Utilizarea

111 / 129 ROFier de călcat cu abur / Manual de utilizare
3.5 Jet de abur1. Umpleți rezervorul de apă
(consultați 3.3).2. După ce lumina indicatorului
termostatului (10) se oprește, dumneavoastră puteți călca articole de îmbrăcăminte cu ajutorul aburului puternic prin apăsarea butonului pentru jet de abur (7).
A
AVERTISMENT: Dacă procesul este menținut pentru mult timp, apa poate apărea prin intermediul tălpii (3) împreună cu aburul.
A
AVERTISMENT: Pentru a utiliza caracteristica de jet de abur, lumina i n d i c a t o r u l u i termostatului (10) trebuie să fie oprită.
3.6 Abur vertical
De asemenea, dumneavoastră puteți folosi funcțiile de jet de abur și abur continuu în poziția verticală. Dumneavoastră puteți aplica abur perdelelor și articolelor de îmbrăcăminte aflate pe umeraș prin apăsarea butonului pentru jetul de abur (7) sau declanșatorului de abur (9). Mențineți produsul la o distanță de 15-30 de cm. de articole de îmbrăcăminte și perdele.
A
AVERTISMENT: În timpul călcării, dacă lumina indicatorului termostatului (10) se aprinde, înainte de continuarea către procesul de jet de abur, așteptați pentru ca lumina să se stingă.
AAVERTISMENT: Niciodată nu direcționați acest abur către oameni sau animale.
3 Utilizarea
112 / 129 RO Fier de călcat cu abur / Manual de utilizare
3.7 Pulverizarea apei1. Umpleți rezervorul de apă
(consultați 3.3).2. Apăsați pe butonul de
pulverizare a apei (8) pentru a pulveriza apă.
CD u m n e a v o a s t r ă puteți elimina cu ușurință cutele uti-lizând caracteristica de pulverizare a apei.
3.8 Călcare uscatăPentru a efectua o călcare uscată, nu utilizați declanșatorul de abur (9) sau butonul de jet de abur (7).
C
Deținerea apei în produs poate fi avan-tajoasă; dumnea-voastră puteți utiliza butonul de pulveri-zare a apei (8) atunci când este necesar.
3.9 Oprire automată (Oprire auto)
• Dacă produsul este menținut staționar timp de 30 de secunde în timp ce acesta se află într-o poziție orizontală, acesta se va opri automat.
• Dacă produsul este menținut staționar timp de 7-10 minute în timp ce acesta se află într-o poziție verticală, acesta se va opri automat.
• Dacă produsul este menținut staționar timp de 30 de secunde în timp ce acesta se află într-o poziție înclinată (stânga sau dreapta), acesta se va opri automat.
CÎn cazul unei opriri automate, lumina de oprire automată (10) clipește.
• Dacă produsul este mutat într-o poziție orizontală, acesta va porni.
CAr putea dura 60 de secunde pentru ca talpa (3) să ajungă la temperatura setată anterior.
3 Utilizarea

113 / 129 ROFier de călcat cu abur / Manual de utilizare
4.1 Curăţarea
A
AVERTISMENT: În momentul când ați finalizat călcarea, deconectați produ-sul. Dumneavoastră puteți goli apa afla-tă în rezervor prin deschiderea capa-cului de reumplere a rezervorului (5) și înclinarea fierului de călcat în față.
1. Înainte de curăţare decuplaţi produsul.
2. Aşteptaţi răcirea completă a produsului.
3. Pentru curățarea exterioară a produsului, utilizați un material textil ușor umezit. Apoi uscați-l în întregime.
4. Ștergeți sedimentele și reziduurile de pe talpă (3) utilizând un material textil moale și puțin umed, și detergent lichid non-abraziv dacă este necesar.
A
AVERTISMENT: Nu utilizați benzină, solvent și agenți de curățare abrazivi sau raclete dure pentru curățarea produsului.
4.2 Eliminarea calcarului (Autocurățare)
Funcția de eliminare a calcarului curăță particulele de calcar acumulate în rezervorul de generare al aburului.
Utilizați această funcție o dată la fiecare 2 sau 3 săptămâni. Dacă apa de la robinet este foarte dură (dacă particulele de calcar cad de pe talpa (3) produsului), utilizați funcția de eliminare a calcarului mai frecvent.1. Decuplaţi produsul.2. Reumpleți produsul cu apă
(consultați 3.3).3. În momentul când lumina
indicatorului termostatului (10) se oprește, deconectați produsul.
4 Curățarea și întreținerea

114 / 129 RO Fier de călcat cu abur / Manual de utilizare
4. Mențineți produsul într-o poziție orizontală deasupra chiuvetei și agitați-l în timp ce apăsați și mențineți butonul de eliminare al calcarului (6). Continuați până când apa din rezervor este epuizată.
CPoate dura ceva timp pentru ca apa să curgă din găurile aflate pe talpă.
5. După ce rezervorul devine gol, eliberați butonul de eliminare al calcarului (6).
6. Dacă încă sunt sedimente, repetați acest proces.
7. După finalizarea procesului de eliminare al calcarului, permiteți-i aparatului să se răcească într-o poziție verticală. După ce produsul se răcește, ștergeți talpa (3) cu un material textil.
4.3 Depozitarea
Dacă nu doriţi să utilizaţi produsul pentru o perioadă lungă de timp, depozitaţi-l cu grijă.
• Înainte de ridicarea produsului, deconectați-l și apoi lăsați-l să se răcească complet.
• Goliți rezervorul de apă. • Mențineți produsul și accesoriile
acestuia în ambalajele originale. • Depozitați-l într-un loc răcoros
și uscat. • Întotdeauna mențineți produsul
departe de copii.
4.4 Manevrarea și transportul
• În timpul manevrării și transportului, transportați produsul în ambalajul său original. Ambalajul produsului îl protejează împotriva avariilor fizice.
• Nu plasați sarcini grele pe aparat sau pe ambalaj. Produsul poate fi avariat.
• Scăperea produsul va contribui la nefuncționarea sau cauza avarii permanente.
4 Curățarea și întreținerea

115 / 129 ROFier de călcat cu abur / Manual de utilizare
5 Depanarea
Deși produsul este conectat, talpa acestuia (3) nu se încălzește.
Produsul poate fi conectat necorespunzător. >>> Verificați ștecherul și cablul de alimentare (1) al produsului.
Produsul nu generează abur.
Rezervorul de apă poate să nu conțină destulă apă. >>> Umpleți rezervorul cu apă până la nivelul Max (consultați 3.3).
Jet de abur - Aburul vertical nu funcționează.
Aceste funcții ar fi putut fi utilizate prea frecvent într-o perioadă foarte scurtă de timp. >>> Mențineți călcarea într-o poziție orizontală și așteptați o durată de timp înainte de a utiliza din nou funcția de jet de abur. >>> Talpa (3) poate să nu fie destul de fierbinte. Așezați produsul într-o poziție verticală și așteptați ca talpa să se încălzească.
În timpul călcării stropii de apă cad pe material.
Dumneavoastră nu ați închis în mod securizat capacul de reumplere al rezervorului (5). >>> Închideți capacul de reumplere al rezervorului în mod securizat.
În timpul călcării, sedimentele și reziduurile cad de pe talpă (3).
Dacă apa pe care dumneavoastră o utilizați în aparat este prea dură, se pot forma astfel de sedimente >>> Utilizați funcția de autocurățare o dată sau de mai multe ori (consultați 4.2). Pentru călcări consecutive, umpleți rezervorul de apă al produsului cu un amestec de apă de robinet și apă potabilă.
Produsul scapă apă după ce se răcește sau după ce este depozitat.
Dumneavoastră ați putea lăsa produsul într-o poziție orizontală în timp ce există apă în rezervorul acestuia. >>> Goliți rezervorul de apă.
Pete pe talpa (3).
Articolele de îmbrăcăminte umede ar putea fi călcate și talpa (3) putea să aibă pete de calcar. >>> După ce produsul se răcește, ștergeți talpa cu un material textil tricotat din microfibră sau din bumbac înmuiat în oțet.


AR 13 / 13 مكواه البخار/ دليل المستخدم
حل المشكالت 5بالرغم من أن قابس المكواه متصل بالطاقة، إال أن لوح القاعدة )3( ال يسخن.
قد يكون توصيل الجهاز بصورة غير صحيحة. <<<تفحص القابس وكابل الطاقة )1( للجهاز.الجهاز ال يخرج البخار.
قد ال يحتوي خزان المياه على الكمية الكافية من الماء. <<< عليك تعبئة خزان المياه بالمياه حتى الحد األقصى )أنظر. 3.3(.
صدمة البخار - وظيفة البخار الرأسي ال تعمل.قد تستخدم هذه الوظائف مرات متعددة في فترة زمنية قصيرة للغاية <<< استمر بالكي في وضع أفقي وانتظر فترة قبل استخدام وظيفة صدمة البخار مرة أخرى.<<<فربما ال تصل درجة حرارة القاعدة )3( إلى الحرارة الكافية. أ.
تسقط قطرات مياه على المالبس أثناء الكي.قد ال تكون أغلقت غطاء تعبئة المياه بإحكا. <<< تأكد من إغالق غطاء تعبئة المياه بإحكام.
أثناء عملية الكي، قد تتساقط البقايا والرواسب من لوح القاعدة )5(.إن كان الماء المستخدم في الجهاز شديد العسورة، فقد تتراكم تلك الشوائب.<<< استخدم وظيفة التنظيف الذاتي لمرة واحدة أو لبضعة مرات )أنظر. 4.2(. لعمليات الكي الالحقة قم بتعبئة خزان المياه بالجهاز بخليط من
ماء الصنبور وماء الشرب.
تتقاطر المياه من الكواه بعد أن تبرد أو عند تخزينها.قد تكون تركت المكواه في وضع أفقي بينما هناك مياه في الخزان. <<< أفرغ خزان المياه.
وجود أوساخ على لوح القاعدة )3(.قد تكون استخدمت الجهاز في كي مالبس مبللة لذا تلطخ لوح القاعدة )3( بالبقع الكلسية. <<< بعد أن يبرد الجهاز
إلى مستوى مناسب، امسح قاعدة المكواه بقطعة قطن أو مايكروفيبر منقوعة في الخل.

مكواه البخار/ دليل المستخدم AR 12 / 13
اترك زر . 5 تماًما، فارَغا الخزان أن يصبح بعد إزالة الكلس )6(.
إذا الزال هناك ترسبات، كرر العملية.. 6اترك . 7 الكلس، إزالة عملية من االنتهاء بعد
يبرد أن بعد رأسي. وضع في ليبرد الجهاز من بقطعة )3( القاعدة لوح امسح الجهاز،
القماش.
4.3 التخزينمن طويلة لفترة الجهاز الستخدام تخطط لم إذا
الوقت، يرجى تخزينه بعناية.ليبرد • واتركه القابس انزع الجهاز رفع قبل
تماًما.أفرغ خزان المياه. •احتفظ بالجهاز وكماليته في عبواته األصلية. •عليك تخزينه في مكان بارد وجاف. •حافظ على الجهاز دائماً بعيداً عن متناول أيدي •
األطفال.
4.4 التعامل والنقلأثناء التعامل والنقل فقم بحمل الجهاز في عبوتها •
التعرض من تحميه الجهاز عبوة األصلية. ألضرار فيزيائية.
العبوة. • أو الجهاز على ثقيلة أحمال تضع ال يمكن أن يكون الجهاز متضرًرا.
على • قادر غير يجعله سوف الجهاز إسقاط التشغيل أو يتسبب في إلحاق أضرار دائمة.
الصيانة والتنظيف 4

AR 11 / 13 مكواه البخار/ دليل المستخدم
4.1 التنظيف
Aمن تنتهي عندما تحذير: الجهاز. قابس انزع الكي، يمكنك تفريغ المياه من الخزان التعبئة )5( وإمالة بفتح غطاء
المكواه إلى األمام.
انزع قابس الجهاز قبل التنظيف.. 1انتظر اترك الجهاز ليبرد تماًما.. 2السطح . 3 لتنظيف رطبة قماش قطعة استخدم
الخارجي للجهاز. ثم جففها جيًدا.امسح الرواسب والبقايا على اللوح القاعدي )3( . 4
بقطعة قماش رطبة وناعمة، ومنظف سائل ال يؤدي إلى التآكل على النحو الضروري.
Aأبداً تستخدم ال تحذير: التنظيف مواد أو الجازولين، إلى تؤدي التي أو المذيبة الخشنة الفرشاة أو التآكل
لتنظيف هذا الجهاز.
4.2 إزالة الكلس )التنظيف الذاتي(
جسيمات تنظيف على الكلس إزالة خاصية تعمل الكلس المتراكمة في خزان البخار بالجهاز.
استخدم هذه الخاصية مرة كل 2 إلى 3 أسابيع. إذا العسورة )إذا تساقطت كانت مياه الصنبور شديدة نوصيك )3(الجهاز(، قاعدة من الكلس جسيمات أكثر نحو على الذاتي التنظيف وظيفة باستخدام
تكراراً.انزع قابس الجهاز.. 1أعد تعبئة المكواة بالمياه )أنظر. 3.3(.. 2الثرموستات . 3 مصباح ضوء ينطفئ عندما
)10(، قم بفصل الكهرباء عن الجهاز.حافظ على الوضع األفقي للجهاز أعلى بالوعة . 4
الضغط في االستمرار مع هزها ثم الصرف على زر إزالة الكلس )6(. استمر في ذلك حتى
تفريغ خزان المياه بالكامل.
Cعبر الماء خروج يستغرق قد بعًضا القاعدي اللوح فتحات
من الوقت.
الصيانة والتنظيف 4

مكواه البخار/ دليل المستخدم AR 10 / 13
3.8 الكي الجافلتتمكن من تنفيذ الكي الجاف، ال تستخدم زر زناد .)7( البخار صدمة أو )9( البخار
Cالمكواه في ماء وجود يعتبر يمكن حيث جيدة؛ ميزة عند )8( البخاخ زر استخدام
الضرورة.
3.9 اإليقاف التلقائي )توقف-تلقائي(
إن تم إمساك الجهاز في وضع أفقي ثابت لمدة •30 ثانية، فستنطفئ تلقائًيا.
إن تم إمساك الجهاز في وضع رأسي ثابت لمدة •7 - 10 دقائق، فستنطفئ تلقائًيا.
إن تم إمساك الجهاز في وضع مائل )يميًنا أو •يساًرا(ثابت لمدة 30 ثانية، فستنطفئ تلقائًيا.
Cوضع على الضبط حالة في يومض التلقائي اإليقاف التلقائي اإليقاف مصباح
.)10(فستعمل • أفقي الجهاز في وضع تحريك تم إن
تلقائًيا.
Cلكي ثانية 60 األمر يتطلب إلى )3( القاعدة لوحة تصل المضبوطة الحرارة درجة
سابقاً.
التشغيل 3

AR 9 / 13 مكواه البخار/ دليل المستخدم
3.4 الكي بالبخارقم بتعبئة خزان المياه )أنظر. 3.3(.. 12 . )10( الثرموستات مؤشر انطفاء مصباح بعد
اضغط على زناد البخار )9(.
C
مستشعر المنتج هذا يضم إن التقطر. مضاد إلكتروني لم تكن درجة الحرارة مرتفعة من تتمكن لن الكافي بالقدر البخار كمية على الحصول على تضغط عندما الالزمة
زناد البخار )10(.
3.5 صدمة البخارقم بتعبئة خزان المياه )أنظر. 3.3(.. 12 . ،)10( الثرموستات مؤشر ضوء انطفاء بعد
يمكنك كي المالبس بواسطة البخار القوي عبر الضغط على زر صدمة البخار )7(.
Aالعملية استمرت إن تحذير: لتفرة طويلة قد تخرج المياه من فتحات اللوح القاعدي )3( مع
البخار.
Aمن لتتمكن تحذير: البخار صدمة ميزة استخدام مؤشر ضوء إطفاء ينبغي
الثرموستات )10(.
3.6 البخار الرأسيالبخار صدمة وظائف استخدام أيًضا يمكنك كما )انظر. العمودي الوضع في المستمر والبخار يمكنك كي الستائر ومالبسك على الشماعة بالبخار صدمة زر على بالضغط عليه ستحصل الذي امسك .)9( البخار إطالق ظر أو )7( البخار المالبس قطعة بعد 30-15 سم من المكواه على الستائر أو
Aمصباح أضاء إن تحذير: مؤشر الثرموستات )10( أثناء االنتظار فعليك الكي، عملية قبل أخرى مرة ينطفئ حتى
االستمرار في عملية الكي.
Aالبخار هذا توجه تحذير:ال باتجاه األشخاص أو الحيوانات
األليفة.3.7 رش المياه
قم بتعبئة خزان المياه )أنظر. 3.3(.. 1رذاذ . 2 لرش )8( المياه رش زر على اضغط
المياه.
Cالتجاعيد كافة إزالة يمكنك بكل سهولة عبر خاصية بخاخ
المياه.
التشغيل 3

مكواه البخار/ دليل المستخدم AR 8 / 13
3.1 االستخدام المرغوبصمم هذا الجهاز لالستخدام المنزلي أو وللكي فقط؛
وال يصلح لالستخدامات المهنية.
3.2 االستخدام المبدئيوتفريغ بتعبئة قم المكواه، استخدام في البدء قبل أي إلزالة مرتين )3.3 )أنظر البخار جهاز هذه في .)3.5 )أنظر التصنيع لعملية مخلفات االثناء، استخدم زر البخار المتقطع )7( باستمرار.
C
خفيفة رائحة تشتم أن يمكنك أو رؤية رواسب بيضاء تخرج إال القاعدي. اللوح فتحات من الرواسب أو الروائح تلك أن بالبخار تنظيفها بعد ستختفي تكون يحتمل أنه كما لمرتين. قطرات من المياه داخل خزان
المياه، وهذا أمر طبيعي.
3.3 إعادة تعبئة خزان المياهانزع قابس الجهاز. . 1امأل كوب المياه المرفق بالجهاز.. 2بتعبئة . 3 قم ثم )5( المياه تعبئة غطاء افتح ثم
الخزان بالمياه حتى مستوى الحد األقصى.أغلق غطاء تعبئة المياه )5(.. 4
Cلالستخدام مصمم جهازك كان إن الصنبور. مياه مع العسورة، شديد الصنبور ماء من خليط باستخدام فننصحك
ماء الصنبور وماء الشرب.
A
بإتباع التزم بالكي للقيام على الموجودة الكي تعليمات المرفقة التعليمات بطاقة مناسب الجهاز هذا باألقمشة. فقط لالستخدام مع األقمشة التي
يمكن أن يتم كيها.
C
على المعة بقع نشوء لمنع األقمشة ذات مالبسك عليك الحرير، مثل الصناعية المعكوس الجانب على الكي القماش. ال تستخدم وظيفة من
البخاخ لمنع تكون البقايا.
التشغيل 3

AR 7 / 13 مكواه البخار/ دليل المستخدم
2.1 نظرة عامة
القيم المشار إليها في العالمات المثبتة على المنتج أو المستندات االخرى المطبوعة المتوفرة معه تمثل القيم التي تم الحصول عليها في المختبرات وفقاً للمعايير ذات الصلة. قد تختلف هذه القيم وفقاً الستخدام الجهاز والظروف المحيطة.
مكواتك 2
كابل الطاقة. 1لوح قاعدة المكواة. 2لوح قاعدي. 3فوهة رش المياه. 4غطاء تعبئة المياه. 5زر إزالة الكلس )التنظيف الذاتي(. 6زر صدمة البخار. 7زر رش المياه. 8زناد البخار. 9
مؤشر الثرموستات ومصباح اإليقاف التلقائي. 10
2.2 البيانات الفنية : 240-220 فولت ~ الجهد
50 هيرتز: 3100-2600 واتاستهالك الطاقة
: Iفئة العزل:جم/مقدار صدمة البخار 240 حتى تصل :
دقيقةيتوافق هذا الجهاز مع التوجيهات األوروبية
CE برقم /2004/108 ،2006/95/EC و ،EC
و EC/2009/125، و 2011/65/EU.
1
2
34
5
67
8 9 10

مكواه البخار/ دليل المستخدم AR 6 / 13
قد يكون السطح السفلي للجهاز أو المنطقة المحيطة به ساخنة جداً. •قد يتسبب االتصال باألسطح في حدوث حروق. ولذلك، فأثناء أو بعد
استخدام الجهاز، عليك االنتباه لعدم لمس األجزاء الساخنة. ال تستخدم الجهاز في أو بالقرب من األماكن والمواد القابلة لالحتراق، •
أو سريعة االحتراق.حافظ على مواد التغليف بعيداً عن متناول أيدي األطفال. •
1.2 متوافق مع تشريعات WEEE وتشريعات التخلص من المنتجات الفاسدة.
هذا الجهاز ال يشمل مواد مؤذية أو محظورة من تلك المشار إليها في "تشريعات اإلشراف على العمراني. والتخطيط البيئة وزارة من المصدرة اإللكترونية" واألجهزة الكهربائية النفايات متوافق مع توجيهات WEEE. تم تصنيع هذا الجهاز من أجزاء ومواد عالية الجودة يمكن النفايات في الجهاز من تتخلص ال ولذلك، التدوير. إلعادة مناسبة وهي استخدامها إعادة المنزلية العادية بعد انتهاء فترة خدمته. بل عليك أخذه إلى نقطة التجميع إلعادة تدوير األجهزة الكهربائية واإللكترونية. اسأل السلطات المحلية في منطقتك عن نقاط التجميع. ساعد على حماية البيئة
والموارد الطبيعية بإعادة تدوير األجهزة المستخدمة.
1.3 معلومات التعبئة مواد أن التحقق من يرجى للتدوير. قابلة مواد للجهاز مصنوعة من المستخدمة العبوات التغليف يتم التخلص منها وفًقا للقواعد المحلية السارية وذلك ضماًنا لدخول المواد في دورة
إعادة التدوير لحماية البيئة.
1 تعليمات هامة للسالمة والبيئة

AR 5 / 13 مكواه البخار/ دليل المستخدم
إذا سقط الجهاز أو حدث به تسرب للماء أو حدث به عطل آخر، •ذلك يكن لم ما الجهاز تستخدم ال المعتمد. الخدمة بقطاع اتصل
مطلوباً.عند عدم استخدام الجهاز أو تركه ليبرد، حافظ على الجهاز وكابل •
الطاقة بعيداً عن متناول األطفال تحت 8 أعوام.هذا الجهاز غير مناسب لالستخدام خارج المنزل. •ال تستخدم سوى األجزاء األصلية التي توصي بها جهة التصنيع. •ال تحاول أبداً فك الجهاز. •ينبغي أن تتوافق امدادات الطاقة الخاصة بك مع المعلومات المقدمة •
على لوحة تصنيف الجهاز. البد وأن يكون التيار الموصل بالجهاز محمي بمنصهر 16 أمبير •
كحد أدنى.ال تستخدم الجهاز سوى مع منفذ به طرف أرضي. •ال تستخدم الجهاز على كابل تمديد خارجي. •التسحب كابل الكهرباء عند فصل الجهاز. •انزع قابس الجهاز قبل التنظيف. •ال تقم بلف الكابل حول الجهاز. •أثناء ما • ويداك مبتلتان أو رطبتان أبداً القابس ال تلمس الجهاز أو
يكون الجهاز متصالً بالطاقة.
1 تعليمات هامة للسالمة والبيئة

مكواه البخار/ دليل المستخدم AR 4 / 13
يحتوي هذا القسم على تعليمات السالمة التي ستساعدك على تجنب خطر إصابة األفراد أو اإلضرار بالممتلكات.
عدم اتباع هذه التعليمات يؤدي إلى إبطال الضمان الممنوح.
1.1 السالمة العامةيخضع هذا الجهاز مع المعايير الدولية للسالمة. •يجوز استخدام هذا الجهاز من طرف األطفال في عمر 8 أو أكثر •
غير أو الذهنية، أو السمعية، أو البدنية، اإلعاقة ذوي واألفراد أنهم طالما الجهاز بهذا معرفة لديهم ليس الذين أو المتمرسين يخضعوا للرقابة أو يتم إبالغهم وإفهامهم باالستخدام اآلمن للجهاز والمخاطر التي قد يواجهونها. ال يجوز لألطفال اللعب بالجهاز. ال لم ما األطفال خالل من والتنظيف الصيانة بعمليات القيام يجوز
يكونوا خاضعين لرقابة البالغين.ال تترك الجهاز بدون رقابة طالما أنه متصل بالطاقة. •المياه • مستودع تعبئة قبل بالمنتج الخاص الطاقة قابس فك عليك
بالمياه.استخدم الجهاز واجعله دائماً على سطح مستقر. •القاعدة • السطح تحت أن تأكد من قاعدته، الجهاز على عند وضع
مستو.ال تستخدم الجهاز إذا كان كابل الطاقة أو الجهاز به عطب. اتصل •
بمركز الخدمة المعتمد.
1 تعليمات هامة للسالمة والبيئة

AR 3 / 13 مكواه البخار/ دليل المستخدم
المحتويات
4-6 1 تعليمات هامة للسالمة والبيئة 4 . . . . . . . . . . . . . . . . . . . . . . 1.1 السالمة العامة
1.2 متوافق مع تشريعات WEEE وتشريعات التخلص 6 من المنتجات الفاسدة. . . . . . . . . . . . . . . . .6 1.3 معلومات التعبئة . . . . . . . . . . . . . . . . . . . .
7 مكواتك 27 2.1 نظرة عامة. . . . . . . . . . . . . . . . . . . . . . . .7 2.2 البيانات الفنية . . . . . . . . . . . . . . . . . . . . . .
8-10 التشغيل 38 3.1 االستخدام المرغوب. . . . . . . . . . . . . . . . . . .8 . . . . . . . . . . . . . . . . . . . . 3.2 االستخدام المبدئي8 . . . . . . . . . . . . . . . . . 3.3 إعادة تعبئة خزان المياه9 . . . . . . . . . . . . . . . . . . . . . . . 3.4 الكي بالبخار9 3.5 صدمة البخار . . . . . . . . . . . . . . . . . . . . . .9 3.6 البخار الرأسي. . . . . . . . . . . . . . . . . . . . . .9 3.7 رش المياه . . . . . . . . . . . . . . . . . . . . . . . .10 3.8 الكي الجاف . . . . . . . . . . . . . . . . . . . . . .10 3.9 اإليقاف التلقائي )توقف-تلقائي(. . . . . . . . . . . .
11-12 الصيانة والتنظيف 411 4.1 التنظيف . . . . . . . . . . . . . . . . . . . . . . . .11 4.2 إزالة الكلس )التنظيف الذاتي( . . . . . . . . . . . .12 4.3 التخزين . . . . . . . . . . . . . . . . . . . . . . . .12 . . . . . . . . . . . . . . . . . . . . . 4.4 التعامل والنقل
13 حل المشكالت 5

يرجى قراءة هذا الدليل أوال!عزيزي العميل،
شكراً لك على تفضيل منتجات Beko. نأمل أن تحصل على افضل النتائج من جهازك والذي قد تم تصنيعه بأعلى جودة وبأحدث التقنيات. وعلى ذلك، يرجى قراءة كامل
دليل المستخدم هذا وجميع المستندات المصاحبة له بعناية قبل استخدام المنتج واالحتفاظ به كمرجع لالستخدام المستقبلي. إذا قمت بتسليم الجهاز لشخص آخر، أعطه دليل
المستخددم ايضاً. اتبع التحذيرات والمعلومات في دليل المستخدم.تذكر أن دليل المستخدم هذا ينطبق أيضاً على العديد من الموديالت األخرى. سيتم
تناول االختالفات بين الموديالت في هذا الدليل. توضيح للرموز
خالل دليل المستخدم هذا سيتم استخدام الرموز التالية:
Cمعلموات هامة أو تنويهات مفيدة عن
االستخدام.
Aتحذيرات عن مواقف خطيرة فيما يتعلق
بالحياة أو الممتلكات.
تحذير أسطح ساخنة.
.تم إنتاج هذا المنتج في مرافق حديثة، وصديقة للبيئة
.P.R.C المحرز في

SPA7131P
01M-8831301100-5115-02
هاوكممدختسملا ليلد
AR