stem on screen 9-11 movies and magic · stem on screen 9-11 movies and magic ... club leader guide...
TRANSCRIPT

STEM ON SCREEN 9-11
Movies and magicSTEM Learning activity resources
Key information AGE RANGE: 9-11.
SUBJECT LINKS: science, mathematics, design and technology, computing.
DURATION: activities range from 20 to 90 minutes – at least 6 hours in total.
FLEXIBILITY: complete the whole programme over a half term or choose individual activities to suit the needs of your Club.
RESOURCES: each activity includes a list of the resources required and a comprehensive set of Club leader and pupil notes in the form of guides.
IMPACT MEASUREMENT: each set of resources is designed to help evaluate and assess the progress of Club-based learning on Club members. A useful set of assessment tools are available at www.stem.org.uk/stem-clubs
ACHIEVEMENT: pupils that successfully complete an entire set of activities can be rewarded with the downloadable STEM Clubs certificate of achievement. Students may be able to use these resources to work towards a CREST Discovery Award.
APPROPRIATE VENUES: club leaders can run most activities in general spaces e.g. classrooms, halls, and outdoor areas. If not, suggested locations are marked clearly in the Club leader guide and in the table below.
SAFETY: each activity includes details about significant health and safety considerations, such as appropriate eye protection, gloves, etc. Club Leaders should ensure that all equipment is handled with care, particularly sharp instruments. Advice and guidelines are available from CLEAPPS and SSERC, or see the STEM Clubs handbook (page 20). We recommend that practical activities are risk assessed before commencing and Club Leaders must follow their employer or organisations policies. Other activities: Visit www.stem.org.uk/resources/stem-clubs/ for a wealth of ideas for STEM-related Clubs.
OTHER ACTIVITIES: visit www.stem.org.uk/resources/stem-clubs/ for a wealth of ideas for STEM-related clubs.
FURTHER SUPPORT: the STEM Clubs Best Practice handbook includes comprehensive support for leaders of all STEM-related clubs. It can be found at
www.stem.org.uk/stem-clubs/support
IntroductionThis programme has been created by STEM Learning, the largest provider of STEM education and careers support in the UK. It has been developed in partnership with STEM Club leaders.
Movies and magicSometimes what looks like magic is actually science! In this programme, pupils will look at magic and movie tricks for inspiration and find out how it’s done. They explore how things are done to make movies look realistic, and investigate whether some of the themes or technology from the movies could be possible in real life.

STEM ON SCREEN MOVIES AND MAGIC
Activities
MAY THE FORCE…: pupils explore how static electricity can be used to make objects move.
30 minutes
PSYCHIC DEBUNKING: pupils explore how a magnet can make a compass needle move in order to recreate a famous television ‘psychic’s’ trick.
50 minutes
WHERE’S MY HOVERBOARD?: pupils explore using the repulsion force of magnets to make something levitate.
60 minutes
THE CAMERA NEVER LIES: pupils use forced perspective to make a person or object look smaller.
30 minutes
LIGHTS, CAMERA, ACTION: pupils use animation software to create a stop-motion animation.
90+ minutes
NOW YOU SEE ME: pupils investigate how light bends in different materials and how this can make some objects invisible.
30 minutes
INVISIBILITY CLOAK: pupils try out green screen effects to make themselves a real invisibility cloak.
60 minutes
MAGIC SCIENCE SHOW: pupils learn a range of ‘magic tricks’ and explore the science behind them.
60+ minutes
1
3
2
4
5
7
6
8

HEALTH AND SAFETY: A suitable risk assessment using guidance from CLEAPSS and SERCC should be written and adhered to for this activity.
When working with static electricity, it is possible that a small electrical charge may get transferred from an object to a person, or even between people. When this happens, the people involved will feel a small electric shock. While this can be startling, it is not harmful in any way. Be sure to explain this possibility to the children and reassure them that there is nothing to worry about.
When working with empty aluminium cans, be sure to explain to the children that they have sharp edges around the rim that can be dangerous.
Objective In this activity, pupils explore how static electricity can be used to make objects move and use what they observe to move a drink can and a stream of water.
TOPIC LINKS
Science: compare everyday materials on the basis of their properties
TIME 30 minutes
RESOURCES AND PREPARATION
inflated balloons
empty aluminium drink cans
range of other objects to test: foil containers, paper aeroplanes, etc
cloths (natural and manmade fabrics) and other materials to charge balloon
optional: other items to experiment with – i.e. foil containers, paper aeroplanes, pieces of tissue paper, paperclips, salt & pepper
DELIVERY
1 Ask the pupils if they have seen tractor beams being used in movies. Maybe in ‘Star Trek’, or in ‘Star Wars’ when the ‘Death Star’ captures the ‘Millennium Falcon’? You may want to show a short video clip of a relevant scene to help set the context.
2 Give the children an opportunity to discuss what techniques, technology or phenomena could be used to make a tractor beam.
3 After the children have exhausted all of their ideas, get out an inflated balloon and see whether any of the pupils know how it might be used to attract other objects.
4 Give them balloons and explain that that they can use them to make things move without touching them, just like a tractor beam. You can demonstrate this by rubbing a balloon on your clothes and holding it near your hair, causing it to stand on end.
5 Ask pupils to explore how they can get the most effective tractor beam to attract an aluminium can to their balloon. They can try rubbing it on different surfaces/materials to find out which works best (by causing the greatest amount of negative electrical charge on the balloon’s surface). Allow them time to play and explore before moving to the next step.
6 Make sure the students use a consistent system to track the strength of each method. Place the can in the same place each time and then carefully measure how close the balloon needs to be to make the can move. Make sure that each student uses the same balloon every time so that their results are accurate and fair. Explain the need to do this to maintain a fair test.
continued over...
CLUB LEADER GUIDE 9-11
Movies and magicMay the force...

STEM ON SCREEN MOVIES AND MAGIC MAY THE FORCE...
7 Ask pupils to fill in the chart in the pupil guide to track their results.
8 Once students have decided which surface/material is best for creating an electrical charge, they can add additional variables, such as rubbing the balloon at different speeds, or blowing their balloons up to different sizes. Does this change how much static electricity builds up on the surface of the balloon?
9 Ask pupils to again fill in the chart in the pupil guide to track their tests.
10 Pupils can then compare their results. Why not have a competition to see whose method is most effective?
What’s going on?
When you rub the balloon on your clothes, a negative electrical charge builds up on the surface of the balloon. The electrical charge cannot flow through the balloon as the balloon does not conduct electricity. This is why it is called a static electrical charge – as the charge is unable to move from the surface of the object (until it comes into contact with another object that conducts electricity). This negative electrical charge naturally wants to spread to other objects that do not have a negative electrical charge. The negative electrical charge will attract to objects with a neutral charge in order to spread to those objects. This is what causes the balloon to attract other objects.
DIFFERENTIATION IDEAS
Support: ask pupils to focus on comparing the best method to ‘charge up’ their balloons. They can use the table in the pupil guide to track their results.
Challenge: provide pupils with a range of items they should try to move with their tractor beam. They can then try to find the item that is attracted to the balloon from the furthest distance. They can create their own table to build on the example in the pupil guide, charting which objects they tried to move and from what distance.
EXTENSION IDEAS
1 Can the pupils make small pieces of paper dance? Place them in a shallow tub with cling film over the top. Rub the cling film with a cloth duster. The paper should jump up to the cling film, and then drop back down again.
2 Can they use the power of static electricity to separate pepper from a mix of salt and pepper? They can do this with a plastic spoon rather than a balloon.
3 Who can make a paperclip stick to their balloon longest? Have each student choose what they think is the best method for creating a static electrical charge and then try to make a paperclip stick to the balloon for as long as possible.
TIPMake sure the drink can is on a smooth
surface.
HEALTH AND SAFETY: Be careful when introducing the paperclips, making the pupils aware of their sharp, pointed ends and their ability to puncture the balloons (disqualifying them from the paperclip competition).

1 The phrase ‘tractor beam’ was invented by the author EE Smith in his novel ‘Spacehounds of IPC’ in 1931.
2 Scientists have made drops of water and small pieces of food levitate in thin air using only sound waves.
3 NASA is researching how to user laser light to capture particles from planets and the atmosphere, and send them to a spacecraft in orbit.
FUN FACTS
Your challengeTractor beams are commonly found in sci-fi films such as ‘Star Trek’, ‘Star Wars’ and ‘Transformers’. But could they work in real life? Can you make an object move without touching it or using a magnet?
YOUR TASK Your task today is to make the best tractor beam possible! Using only a balloon, some materials and the power of static electricity, can you make something move across a table? What is the largest object you can move with your tractor beam?
THINGS TO THINK ABOUT
1 How can you charge up your tractor beam?
2 Which materials make the strongest tractor beams? Try rubbing your balloon against lots of different materials to work out which creates the strongest tractor beam.
3 What kind of objects do you think will move the furthest with your tractor beam? (Think about their size, weight, materials.)
4 Why do you think these things affect your tractor beam?
STUDENT GUIDE 9-11
You can try using different sized balloons, different materials, or different objects to attract. Plan out a test to see what makes a good tractor beam.Take some time to try out different ideas!
TIPS
Movies and magicMay the force...
continued over...
REPORT
Look at your chart and tell the rest of the group what you’ve found out. Compare your results – who has the strongest tractor beam?

STUDENT GUIDE 9-11
Movies and magicMay the force...
Notes
Material used to make balloon tractor beam
Distance between can and balloon Describe the way the can moved
Name:
RESULTS

HEALTH AND SAFETY: A suitable risk assessment using guidance from CLEAPSS and SERCC should be written and adhered to for this activity.
Before starting the activity, remind pupils that sewing needles have sharp, pointed ends and need to be handled with care. Count the needles out and back in to ensure they are accounted for.
Small magnets pose a risk if swallowed. Warn pupils not to put them in or near their mouths. Children will need to be supervised using them.
Objective In this activity, pupils will attempt to recreate a famous television ‘psychic’ trick of making a compass needle move without touching it. Pupils will explore how a magnet can make a compass needle move.
TOPIC LINKS
Science: compare everyday materials and their response to magnets
TIME 50 minutes
RESOURCES AND PREPARATION
small magnets
compasses
corks
sewing needles
bowls
water
DELIVERY
1 Explain that you were watching an old television show and there was a famous ‘psychic’ who performed a trick - he made a compass needle move with the ‘power of his mind’.
2 Ask the pupils to try this out using their own compasses. To make a compass, fill a bowl with water and place a thin section of cork in the centre. Then, magnetise a sewing needle by stroking it against a magnet roughly 40 times. Be sure to only stroke the sewing needle against the magnet in one direction, not back and forth.
3 Next, place the sewing needle onto the cork, making sure it is in the centre of the bowl. Let go and watch as it begins to spin and eventually settles pointing north-south. Use another compass to check which end is pointing north and which is pointing south.
4 Now that you've made your compasses, can anyone move them with their minds?
5 Explain a little about the science behind compasses and see whether any students can suggest ways to make the compasses move only using the materials listed at the top of this guide.
continued over...
CLUB LEADER GUIDE 9-11
Movies and magicPsychic debunking

STEM ON SCREEN MOVIES AND MAGIC PSYCHIC DEBUNKING
6 If no one speaks up, explain that you have a suspicion that there might be an easy way to make the compasses move. Give each pupil a magnet and ask them to experiment. Then ask them to explain why the compasses move, linking to the description you gave earlier about how compasses interact with the magnetic field of the earth.
7 How far away can they hold the magnet and still make the needle move?
8 Can they ‘palm’ the magnet to hide it in their hand to make it look like the magic trick?
What’s going on?
The Earth is surrounded by the same type of force that makes magnets attract to certain metal objects. This force is called magnetism. The Earth acts like a giant magnet and creates a magnetic field. The Earth’s magnetic field starts at the South Pole and ends at the North Pole – this is why compasses point in a north-south direction. However, when another magnetic field gets close to a compass, like the magnetic field of a magnet, it can change the way the compass points. Even though the magnetic force from the magnet is much weaker than the magnetic force from the Earth, it can still affect the compass if it is placed close enough.
DIFFERENTIATION IDEAS
Support: allow pupils to follow the step by step instructions in the pupil guide.
Challenge: give pupils the materials and allow them to experiment before showing them detailed instructions to build their compass.
EXTENSION IDEAS
Pupils can use lots of homemade compasses and magnets to see what patterns they can make. For example, challenge pupils to:
1 Place the compasses in a circle and put a magnet in the middle.
2 Then move the magnet around the outside of the circle and watch as the compasses move together.
3 Try using two magnets and placing them on opposite sides of the circle.
4 Try placing a magnet above a compass.
Ask pupils to consider what these experiments tell us about the way magnets interact with compasses and the range of different magnets?
TIPS Experiment with different
sizes and shapes of magnets. The strongest may not be the best for the trick if they are not easy to conceal!
How far away from the compass can pupils hold the magnet and still make the trick work? Place the compass on a sheet of paper and plot the range of the magnet.
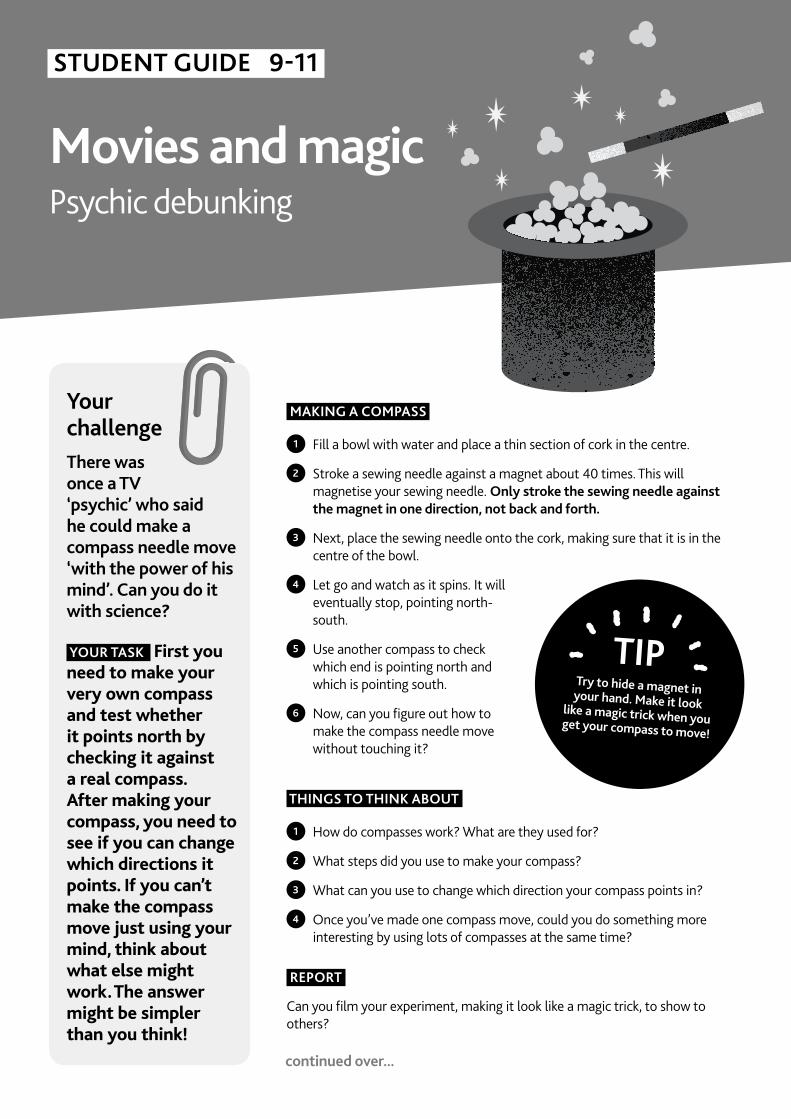
Your challengeThere was once a TV ‘psychic’ who said he could make a compass needle move ‘with the power of his mind’. Can you do it with science?
YOUR TASK First you need to make your very own compass and test whether it points north by checking it against a real compass. After making your compass, you need to see if you can change which directions it points. If you can’t make the compass move just using your mind, think about what else might work. The answer might be simpler than you think!
MAKING A COMPASS
1 Fill a bowl with water and place a thin section of cork in the centre.
2 Stroke a sewing needle against a magnet about 40 times. This will magnetise your sewing needle. Only stroke the sewing needle against the magnet in one direction, not back and forth.
3 Next, place the sewing needle onto the cork, making sure that it is in the centre of the bowl.
4 Let go and watch as it spins. It will eventually stop, pointing north-south.
5 Use another compass to check which end is pointing north and which is pointing south.
6 Now, can you figure out how to make the compass needle move without touching it?
THINGS TO THINK ABOUT
1 How do compasses work? What are they used for?
2 What steps did you use to make your compass?
3 What can you use to change which direction your compass points in?
4 Once you’ve made one compass move, could you do something more interesting by using lots of compasses at the same time?
REPORT
Can you film your experiment, making it look like a magic trick, to show to others?
STUDENT GUIDE 9-11
Try to hide a magnet in your hand. Make it look like a magic trick when you get your compass to move!
TIP
Movies and magicPsychic debunking
continued over...
STUDENT GUIDE 9-11
Notes
Name:
Movies and magicPsychic debunking
1 Some animals can detect the Earth’s magnetic field. Pigeons have magnetic cells in their beak that act like a compass and help them to navigate.
2 The compass was invented over 2,000 years ago.
3 As long ago as 300–200 BCE Chinese explorers were navigating using compasses made of lodestones, which are naturally-occurring magnetic rocks.
FUN FACTS
HEALTH AND SAFETY: A suitable risk assessment using guidance from CLEAPSS and SERCC should be written and adhered to for this activity.
Small magnets pose a risk if swallowed. Warn pupils not to put them in or near their mouths. Pupils will need to be supervised using them.
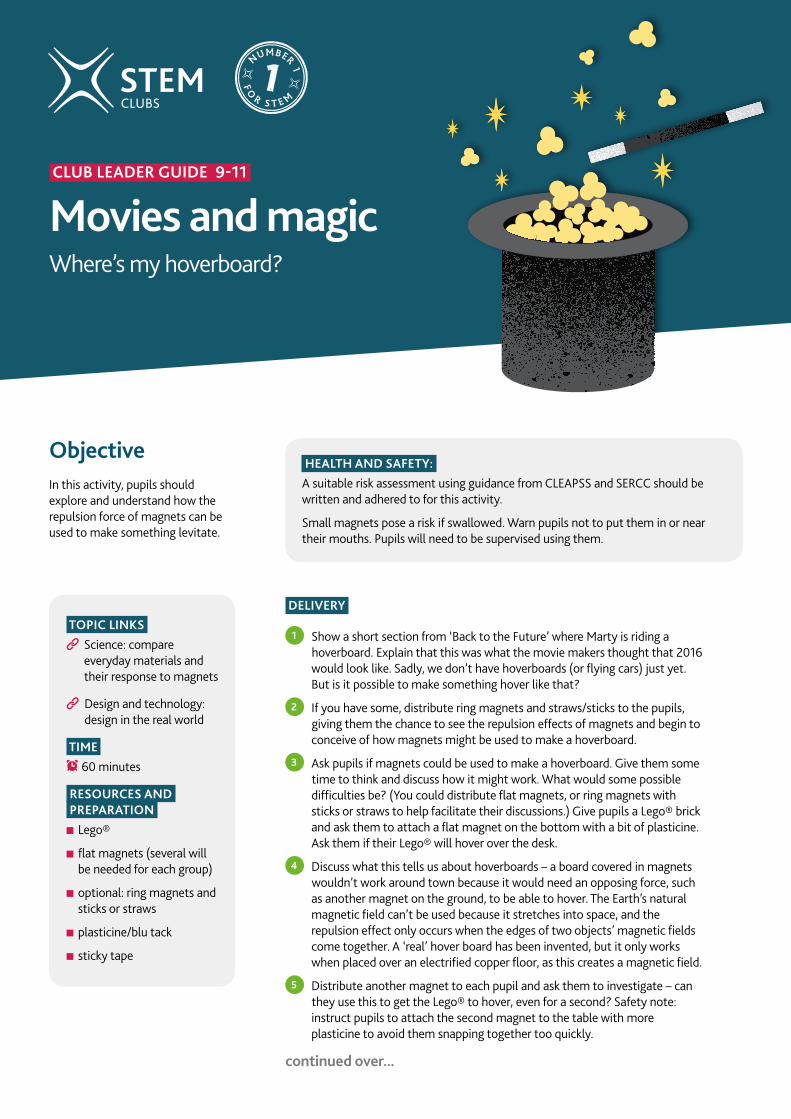
Objective In this activity, pupils should explore and understand how the repulsion force of magnets can be used to make something levitate.
TOPIC LINKS
Science: compare everyday materials and their response to magnets
Design and technology: design in the real world
TIME 60 minutes
RESOURCES AND PREPARATION
Lego®
flat magnets (several will be needed for each group)
optional: ring magnets and sticks or straws
plasticine/blu tack
sticky tape
DELIVERY
1 Show a short section from ‘Back to the Future’ where Marty is riding a hoverboard. Explain that this was what the movie makers thought that 2016 would look like. Sadly, we don’t have hoverboards (or flying cars) just yet. But is it possible to make something hover like that?
2 If you have some, distribute ring magnets and straws/sticks to the pupils, giving them the chance to see the repulsion effects of magnets and begin to conceive of how magnets might be used to make a hoverboard.
3 Ask pupils if magnets could be used to make a hoverboard. Give them some time to think and discuss how it might work. What would some possible difficulties be? (You could distribute flat magnets, or ring magnets with sticks or straws to help facilitate their discussions.) Give pupils a Lego® brick and ask them to attach a flat magnet on the bottom with a bit of plasticine. Ask them if their Lego® will hover over the desk.
4 Discuss what this tells us about hoverboards – a board covered in magnets wouldn’t work around town because it would need an opposing force, such as another magnet on the ground, to be able to hover. The Earth’s natural magnetic field can’t be used because it stretches into space, and the repulsion effect only occurs when the edges of two objects’ magnetic fields come together. A ‘real’ hover board has been invented, but it only works when placed over an electrified copper floor, as this creates a magnetic field.
5 Distribute another magnet to each pupil and ask them to investigate – can they use this to get the Lego® to hover, even for a second? Safety note: instruct pupils to attach the second magnet to the table with more plasticine to avoid them snapping together too quickly.
continued over...
CLUB LEADER GUIDE 9-11
Movies and magicWhere’s my hoverboard?

STEM ON SCREEN MOVIES AND MAGIC WHERE'S MY HOVERBOARD?
6 Most pupils will be familiar with the fact that placing the same poles of a magnet facing each other will cause them to repel. Now ask them to think about how they could apply that idea to make a train that moves without actually touching the track.
7 Assist pupils in using the pupil guide to build a simple Magnetic Levitation (maglev) train out of Lego®.
8 Encourage pupils to test and modify their designs to improve on the basic instructions.
What’s going on?
Similar poles of two magnets repel each other and opposite poles attract each other. In Magnetic Levitation, two similar poles are placed facing each other so that they repel or push each other apart. This force is stronger than the pull of gravity, so the top magnet will stay floating above the other magnet. These are the principles in play behind the levitation of maglev trains.
DIFFERENTIATION IDEAS
Support: give pupils ring magnets to explore before beginning the discussion. Provide pupils with step by step instructions on how to build the model maglev train.
Challenge: give pupils the materials but do not provide the instructions. Allow them to experiment with their own designs. Encourage them to explore modifications that will improve its stability or speed.
EXTENSION IDEAS
1 Research the Japanese bullet train. Find out why hovering on magnets allows it to travel so fast.
2 Once pupils have made their maglev models, they could create designs for the exterior of their train.
USEFUL LINKS Video showing a real hoverboard (but it needs a copper sheet to work)!
Instructions for making a simple maglev train
Video demo for a simple mag-lev train
TIPS Club leaders are strongly advised to
practise on their own before doing this activity with pupils.
Make sure that the school has enough flat magnets for this activity before you begin. It may be that more magnets need to be bought in order to enable all the pupils to enjoy this activity. Some types of sticky magnetic tape can be used as a cost-effective alternative, but you are strongly advised to test it prior to beginning the session.
Use flat magnets to build the maglev train. Make sure all the track has the same pole facing up (e.g. N) and the train has all the same pole facing down (also N).

Your challengeAccording to the ‘Back to the Future’ films, we should already have hoverboards by now. But where are they? Experts believe that the easiest way for us to make hoverboards would be using magnets. It’s up to you to explore how magnets work, how they interact with each other and whether we can use the science behind magnets to make vehicles that hover off the ground!
YOUR TASK You are going to experiment, plan and then build your own hovering vehicle using Lego® and magnets.
WHAT YOU NEED TO DO
1 Use sticky tack to attach a bar magnet to the bottom of a piece of Lego®. Can it hover over the table? Why not?
2 Now experiment with using a second magnet. Can you get it to hover now – even for a second? Do the magnets want to stay still?
3 Now, think about how you might build a train, instead of a board, that uses magnets to float above the ground. These trains are actually real and they are called Magnetic Levitation (Maglev) Trains.
THINGS TO THINK ABOUT
1 Do the magnets try to flip over? Why do they do this?
2 How can the magnets stop gravity from pulling the Lego® to the ground?
3 How will you get your train to stay on the track?
4 Will the train flip over? How will you make sure your train doesn’t flip over?
HOW TO BUILD A MAGLEV TRAIN
1 Create a track for your train with Lego®.
2 Attach a line of flat magnets to the track. Make sure the same pole is facing up for all of them!
3 Now use another Lego® piece as your train. Attach a flat magnet to the bottom, remember, magnets always try to have their opposite poles facing each other so that the magnets attract. But you need the magnets to repel. Test the train on the track, what happens?
4 Think about how you can improve your train so that it moves easily along the track and doesn’t flip or stick. Can you design and then build a solution?
STUDENT GUIDE 9-11
Movies and magicWhere’s my hoverboard?
continued over...

STUDENT GUIDE 9-11
Movies and magicWhere’s my hoverboard?
1 The speed record for Japan’s Bullet Train is currently 603 km/h. That’s 374 mph! It uses magnets to hover 10cm above the track
2 A real hoverboard has finally been made. However, the floor needs to be covered in copper for it to work
FUN FACTS
5 Test your design and make changes if needed.
what happens if you make it lighter?
what happens if you make it heavier?
what happens if you add extra magnets?
try out different design ideas for your train
what makes your train move faster or farther?
6 Can you think of any ways you could change the train or the track to make your Maglev Train travel more smoothly or faster?
REPORT
Think about your Maglev train and how you designed and tested it:
what did you do to stop the train from flipping or sticking?
what changes did you make so that it ran more smoothly or faster?
did you make changes to the track and how did this affect your train?
can you think of any other changes you would like to make?
what did you learn about magnets?Lego®
Magnets
N
S
Glue or sticky tack

HEALTH AND SAFETY: A suitable risk assessment using guidance from CLEAPSS and SERCC should be written and adhered to for this activity
Be sure to have the necessary permission to film the pupils and closely follow the school’s health and safety policy on such matters. If there is any doubt, use only the Lego® figures.
Objective In this activity, pupils explore a simple movie effect that can make one actor appear far bigger, or far smaller, than another. Pupils should explore these techniques and understand the idea of forced perspective.
TOPIC LINKS
DT: build TV/movie sets and use precise measurements to create the effect of forced perspective.
Computing: use Digital Devices to create Content
TIME 30 minutes
RESOURCES AND PREPARATION
tablets or digital cameras
Lego® mini-figures or similar action figures
tripod or stand for camera
extra – materials to build sets with, either for Lego® figures or for the pupils to interact with
rulers
DELIVERY
1 Have the pupils ever seen ‘The Lord of the Rings’, or the ‘Harry Potter’ movies? How do they think the filmmakers made some of the actors appear small like a hobbit or tall like Hagrid?
2 Sometimes, the filmmakers used very tall or very short actors as stand-ins, but this wouldn’t have worked if they had wanted to see the real actors’ faces. So, instead, they used something called ‘forced perspective’.
3 Explain to the children the idea of forced perspective and how it links to distance and one’s visual field. Go outside and ask the students to cover up a large, distant object (not the sun, as it may damage their eyes) with their thumb. Explain that while the distant object (for example, the school building) is much larger than their thumb, their thumb can take up the same amount of their visual field as it is much closer to their eye. In the same way, filmmakers can make small things appear bigger or smaller by placing them closer to or farther away from the camera’s lens.
4 Ask the pupils to try it out by holding two Lego® figures up in front of their faces and closing one eye. They should move a figure nearer and one further away and describe how they look. Filmmakers can make actors look very big by making them stand closer to the camera, or smaller by making them stand farther away from the camera.
5 Pupils should try to film it with a digital camera (or tablet) and two figures.
continued over...
CLUB LEADER GUIDE 9-11
Movies and magicThe camera never lies

STEM ON SCREEN MOVIES AND MAGIC WHERE'S MY HOVERBOARD?
6 If they can do it with small figures, could they try it out with real people? Show examples to the pupils of holiday pictures at the Leaning Tower of Pisa, the Eiffel Tower or the Bolivian Salt Flats where forced perspective is used to make it seem like people are interacting with their surroundings in unusual ways. Get pupils in groups and have them take turns being the actors and filming the scene.
What’s going on?
Forced perspective is a technique that uses an optical illusion to distort the way that something looks on screen. When looking forward normally, you see an image. The distance from the bottom of this image to the top of this image (and from the left side to the right side) is known as your visual field. Small things that are close to your eye and large things that are far away from your eye can take up the same amount of space in your visual field. Think about using your thumb to cover up the sun in your visual field. When looking normally in 3D, the human brain can determine how far from your eye an object is, so the forced perspective effect doesn’t work. However, when we view images on a 2D screen, the forced perspective effect works. Using this effect, filmmakers can make actors appear huge by having them stand closer to the camera (and take up a larger amount of the camera’s visual field), or tiny by making them stand farther from the camera (thus taking up a smaller amount of the camera’s visual field), and the audience doesn’t realise.
DIFFERENTIATION IDEAS
Support: rather than creating a film, have the students take a photo where the optical effect of forced perspective is present. Use the holiday pictures suggested above to explain what they need to do.
Challenge (Maths Link): ask the pupils to use precise measurements to make students in their class all look the same height in a picture. Explain that, because of the concept of forced perspective, if a person is twice as big as another, they’d have to stand twice as far from a camera to appear the same size in a picture. By measuring everyone’s height and placing them at relative distances from the camera, everyone in the class should be able to take up the same amount of the camera’s visual field, making them appear the same size in a photo/video.
EXTENSION IDEAS
1 Pupils could create some outsized props to use in their scene to emphasise the size differences, such as a tiny cup or a giant pencil. Can they get the scale correct?
USEFUL LINKS How to make a Hobbit
How the Lord of the Rings used Forced Perspective
Read more about forced perspective in films
TIPS Use a stand or tripod to fix the camera/
tablet in position and stop it moving while the shot is set up.
You could illustrate this by showing a scene from ‘Lord of the Rings, such as Gandalf arriving in Hobbiton near the start of ‘Fellowship of the Ring’, riding on the cart with Frodo.
Alternatively, look at some of the thousands of photos taken every day of people using forced perspective, such as eating cars, holding up the Leaning Tower of Pisa, or doing something creative on the Bolivian Salt Flats. It’s the same effect!

1 The Lord of the Rings movies used a mix of large actors, small actors and forced perspective to create the illusion of size. When you see Frodo sitting in the cart, he’s not actually sitting right next to Gandalf!
2 Movies might save money by using a cheap model, such as a car or tank, and placing it nearer to the camera so that it looked life size. However, these days it’s easy to recreate the effect using computer effects!
FUN FACTS
Your challengeFilmmakers use an effect called ‘forced perspective’ to make actors on screen appear bigger or smaller than they really are, such as the hobbits in ‘Lord of the Rings’ or Hagrid in ‘Harry Potter’. Do you have what it takes to be a filmmaker? Can you use forced perspective to make something look bigger or smaller than in real life?
YOUR TASK Try to create the effect of forced perspective using a digital camera or tablet and toy figures.
THINGS TO THINK ABOUT
1 How are you going to get a Lego® figure to look much bigger than in real life?
2 How are you going to get a Lego® figure to look much smaller than in real life?
3 Can you make a scene for the Lego® figures that will help to make the forced perspective effect look even more real?
4 Can you also do this with real people instead of toys?
5 Using forced perspective and careful measurements, could you make everyone in your class look the same height in a picture?
6 What kind of objects can you add to the frame to make it more interesting?
REPORT
Print out your photo and add a caption if you like, to show to the group.
STUDENT GUIDE 9-11
Movies and magicThe Camera Never Lies
TIPS Take photographs of the toys in different positions. Move one nearer to the camera and one farther away.
Look online for photos that people have taken using forced perspective, there are some great ideas. They have used forced perspective to make it look like they are much bigger/smaller than in real life. This makes it look like they are interacting with things that are far behind them or in front of them.
HEALTH AND SAFETY: A suitable risk assessment using guidance from CLEAPSS and SERCC should be written and adhered to for this activity.
Be sure to have the necessary permission to film the pupils and closely follow the primary school’s health and safety policy on such matters. If there is any doubt, use only clay models and Lego® figures.
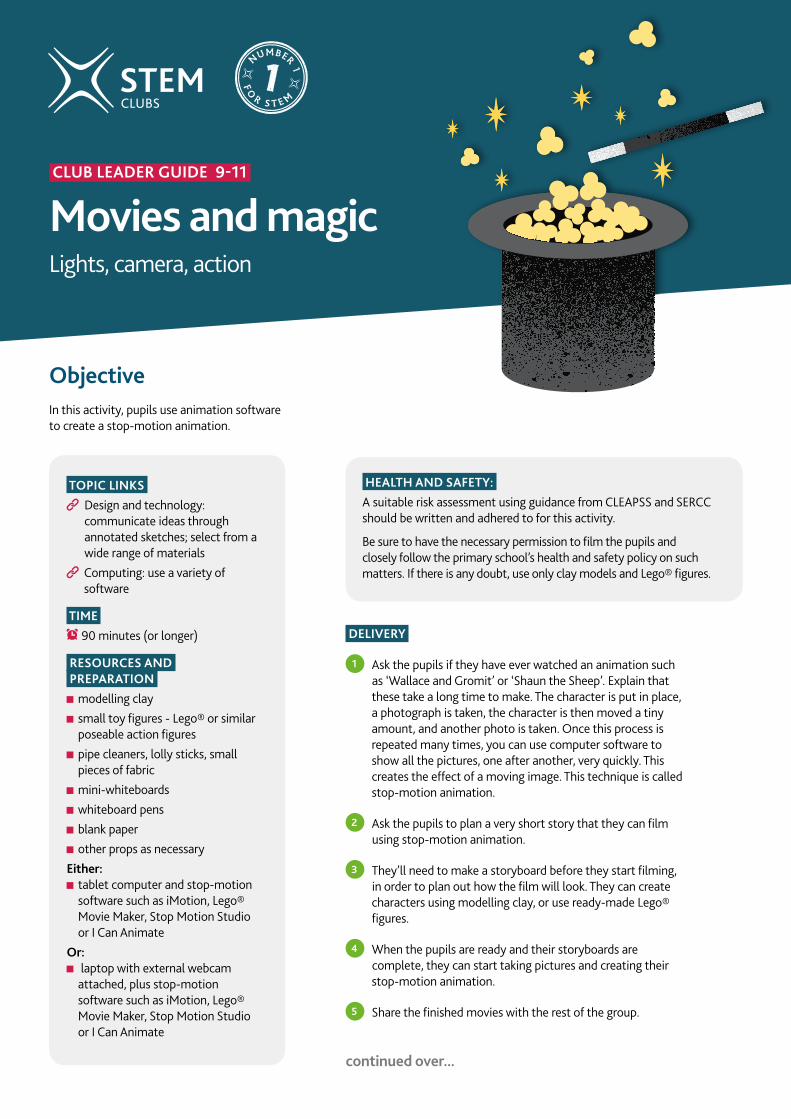
Objective In this activity, pupils use animation software to create a stop-motion animation.
TOPIC LINKS
Design and technology: communicate ideas through annotated sketches; select from a wide range of materials
Computing: use a variety of software
TIME 90 minutes (or longer)
RESOURCES AND PREPARATION
modelling clay small toy figures - Lego® or similar poseable action figures
pipe cleaners, lolly sticks, small pieces of fabric
mini-whiteboards whiteboard pens blank paper other props as necessary
Either: tablet computer and stop-motion software such as iMotion, Lego® Movie Maker, Stop Motion Studio or I Can Animate
Or: laptop with external webcam attached, plus stop-motion software such as iMotion, Lego® Movie Maker, Stop Motion Studio or I Can Animate
DELIVERY
1 Ask the pupils if they have ever watched an animation such as ‘Wallace and Gromit’ or ‘Shaun the Sheep’. Explain that these take a long time to make. The character is put in place, a photograph is taken, the character is then moved a tiny amount, and another photo is taken. Once this process is repeated many times, you can use computer software to show all the pictures, one after another, very quickly. This creates the effect of a moving image. This technique is called stop-motion animation.
2 Ask the pupils to plan a very short story that they can film using stop-motion animation.
3 They’ll need to make a storyboard before they start filming, in order to plan out how the film will look. They can create characters using modelling clay, or use ready-made Lego® figures.
4 When the pupils are ready and their storyboards are complete, they can start taking pictures and creating their stop-motion animation.
5 Share the finished movies with the rest of the group.
continued over...
CLUB LEADER GUIDE 9-11
Movies and magicLights, camera, action

STEM ON SCREEN MOVIES AND MAGIC LIGHTS, CAMERA, ACTION
DIFFERENTIATION IDEAS
Support: keep it simple with just one moving character.
Challenge: use several characters, plus other props. Make a more complex story. Select appropriate sound effects and background music to fit the tone of the film.
EXTENSION IDEAS
1 Why not make a video promoting your school’s STEM club? Or a film encouraging people to recycle or eat healthily? Several groups could work on different parts, with the finished film being spliced together in something like iMovie. Or, give the students the means to continue working on their stop-motion film project during their breaks and lunchtimes.
USEFUL LINKS Video: Making a Wallace and Gromit short film
Ray Harryhausen biography
TIPS Professional films might use 24 frames
per second, but if the software lets you, change the frame rate to a more manageable number, like 12. This means that the pupils will need to take fewer photos to make a short film. However, the quality of the film will be lower and the movement of the figures will look less smooth.
Make sure onion-skinning mode is turned on. This overlays the last shot taken as you set up the next shot, so it is easier to see how far you have moved the characters. Remember, you only want things to move a tiny amount between shots.
Mini-whiteboards make great set backdrops. Put these behind the action to screen out unwanted people appearing in your film! They are also good for adding dialogue in speech bubbles, if you want it.
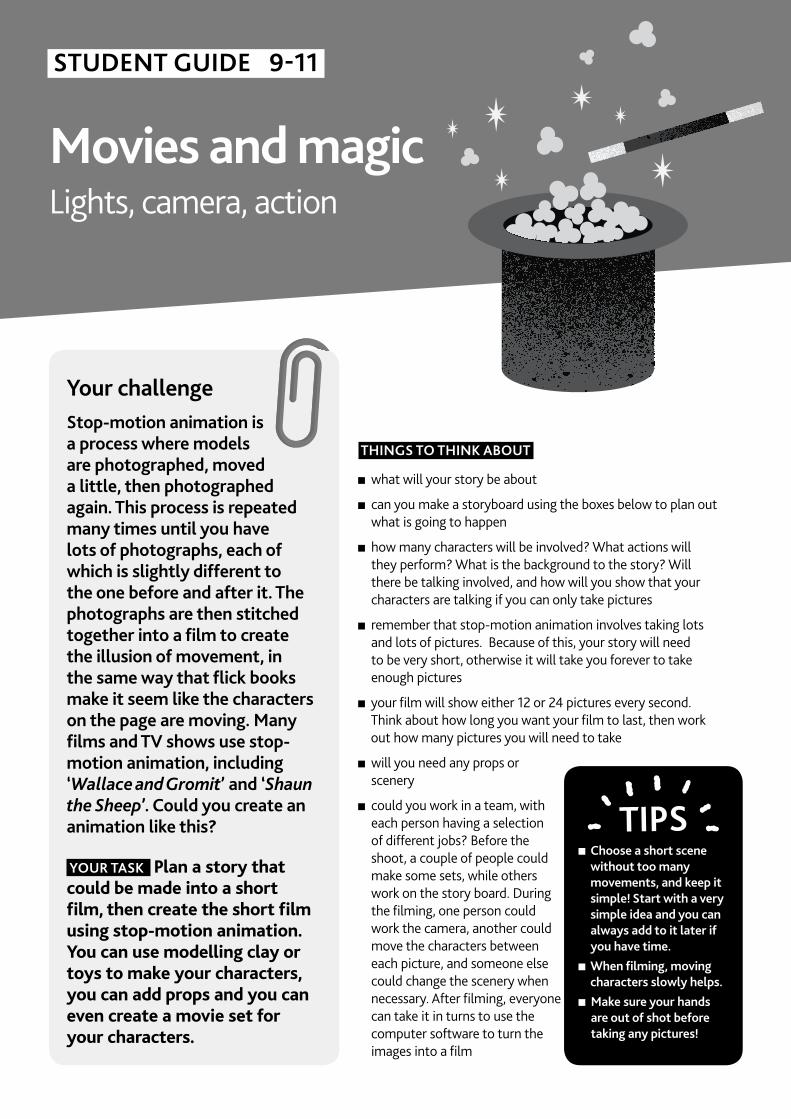
Your challengeStop-motion animation is a process where models are photographed, moved a little, then photographed again. This process is repeated many times until you have lots of photographs, each of which is slightly different to the one before and after it. The photographs are then stitched together into a film to create the illusion of movement, in the same way that flick books make it seem like the characters on the page are moving. Many films and TV shows use stop-motion animation, including ‘Wallace and Gromit’ and ‘Shaun the Sheep’. Could you create an animation like this?
YOUR TASK Plan a story that could be made into a short film, then create the short film using stop-motion animation. You can use modelling clay or toys to make your characters, you can add props and you can even create a movie set for your characters.
THINGS TO THINK ABOUT
what will your story be about
can you make a storyboard using the boxes below to plan out what is going to happen
how many characters will be involved? What actions will they perform? What is the background to the story? Will there be talking involved, and how will you show that your characters are talking if you can only take pictures
remember that stop-motion animation involves taking lots and lots of pictures. Because of this, your story will need to be very short, otherwise it will take you forever to take enough pictures
your film will show either 12 or 24 pictures every second. Think about how long you want your film to last, then work out how many pictures you will need to take
will you need any props or scenery
could you work in a team, with each person having a selection of different jobs? Before the shoot, a couple of people could make some sets, while others work on the story board. During the filming, one person could work the camera, another could move the characters between each picture, and someone else could change the scenery when necessary. After filming, everyone can take it in turns to use the computer software to turn the images into a film
STUDENT GUIDE 9-11
Movies and magicLights, camera, action
TIPS Choose a short scene without too many movements, and keep it simple! Start with a very simple idea and you can always add to it later if you have time.
When filming, moving characters slowly helps.
Make sure your hands are out of shot before taking any pictures!

STUDENT GUIDE 9-11
Movies and magicLights, camera, action
1 In a typical animation, one second of film will use 24 separate frames. Because of this, animators typically film only a few seconds of footage every day. A movie like Wallace and Gromit can take almost a year and half to film!
2 One of the pioneers of stop-motion in the movies was Ray Harryhausen. He created a technique called Dynamation, which mixed stop-motion monsters with live-action actors. He’s famous for films such as Clash of the Titans and Jason and the Argonauts which had real actors fighting stop-motion skeletons!
FUN FACTS
REPORT
Share your film with the other groups. Think about the techniques that other pupils used. What do you think of their set? How did they show that characters were speaking? Was there anything they did that made you say ‘WOW’? After seeing other pupils’ work, what would you do differently if you were to make another stop-motion animation?
Notes
Movement 1 Movement 2 Movement 3 Movement 4
Name:

HEALTH AND SAFETY: A suitable risk assessment using guidance from CLEAPSS and SERCC should be written and adhered to for this activity.
Warn the children of the dangers associated with glass, especially if it gets broken. Tell them to be wary when handling glass that has been in contact with oil as it may be especially slippery. Keep lots of newspaper or paper towels on hand in case an accident occurs.
Objective In this activity, pupils investigate how light bends in different materials and how this can make some objects invisible. Pupils explore refraction of light in oil and Pyrex.
TOPIC LINKS
Science: recognise that light appears to travel in straight lines
TIME 30 minutes
RESOURCES AND PREPARATION Each group will need:
3 large Pyrex bowls
small Pyrex bowls
three liquids to test – one of which must be vegetable oil
newspaper and paper towels for clean-up
regular drinking glasses or other objects to place in the large Pyrex bowl (if attempting the challenge)
DELIVERY
1 Tell the pupils you are going to bend a pencil before their very eyes – just using water! Fill a drinking glass half full with water. Put a pencil in the water. Ask the pupils what they see? (The pencil should look bent.)
2 Can they explain what has happened? Explain that light travels differently in the water compared to the air. The light is bent, or refracted. Different materials bend the light by different amounts, and this can be used to make something appear invisible.
3 Look at the small Pyrex bowl on their table. How can we see it if it is transparent? Establish we can see it because the light travels at a different speed through the glass than through the air, which causes the light to be reflected or refracted.
4 Challenge the pupils to make the small Pyrex bowl vanish by submerging it in a liquid. Can they predict which liquid will make the Pyrex bowl disappear?
5 Tell pupils that they will need to fill the large Pyrex bowl with the liquid they are testing and then put the smaller Pyrex bowl in the larger Pyrex bowl, making sure it is submerged by the liquid.
6 Give pupils time to test out the different liquids and see which one makes the bowl vanish. They will find that only the vegetable oil makes the Pyrex bowl vanish.
continued over...
CLUB LEADER GUIDE 9-11
Movies and magicNow you see me
STEM ON SCREEN MOVIES AND MAGIC LIGHTS, CAMERA, ACTION
DIFFERENTIATION IDEAS
Support: assist pupils through the process, and only compare water and vegetable oil.
Challenge: give pupils a range of objects and other liquids including lemonade, bubble bath, etc. They can then explore for themselves until they find the combination that makes the object disappear.
EXTENSION IDEAS
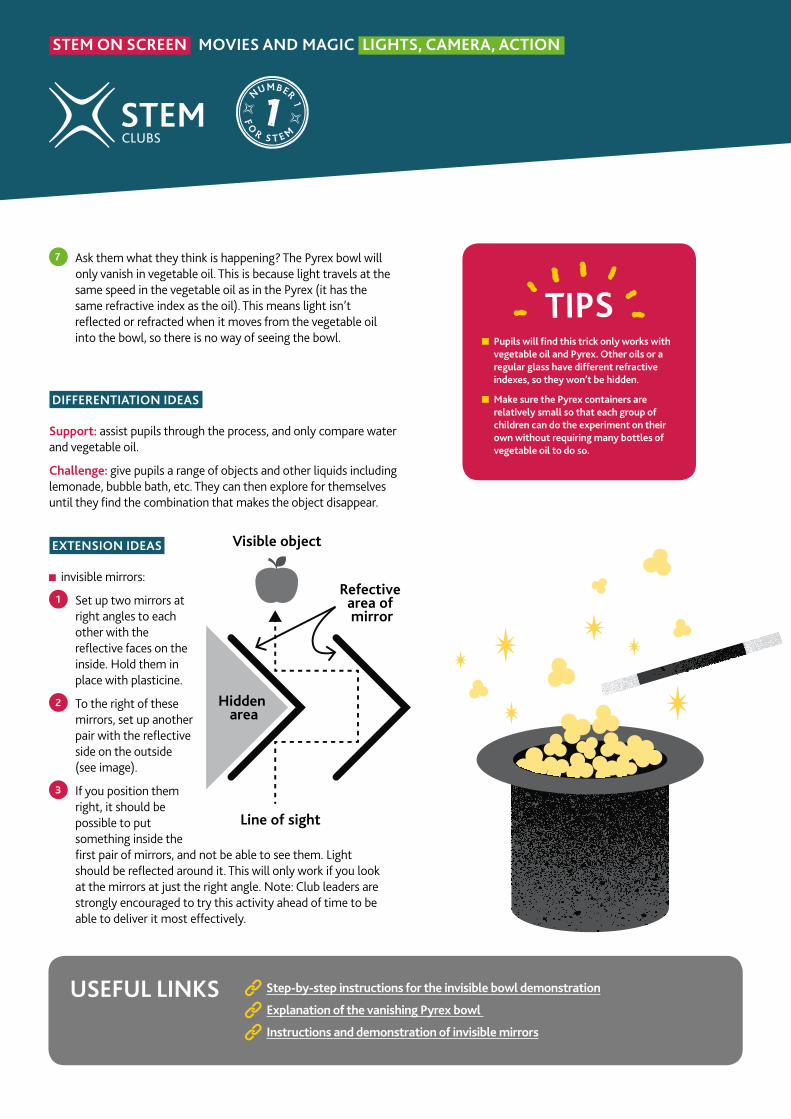
invisible mirrors:
1 Set up two mirrors at right angles to each other with the reflective faces on the inside. Hold them in place with plasticine.
2 To the right of these mirrors, set up another pair with the reflective side on the outside (see image).
3 If you position them right, it should be possible to put something inside the first pair of mirrors, and not be able to see them. Light should be reflected around it. This will only work if you look at the mirrors at just the right angle. Note: Club leaders are strongly encouraged to try this activity ahead of time to be able to deliver it most effectively.
USEFUL LINKS Step-by-step instructions for the invisible bowl demonstration
Explanation of the vanishing Pyrex bowl
Instructions and demonstration of invisible mirrors
TIPS Pupils will find this trick only works with
vegetable oil and Pyrex. Other oils or a regular glass have different refractive indexes, so they won’t be hidden.
Make sure the Pyrex containers are relatively small so that each group of children can do the experiment on their own without requiring many bottles of vegetable oil to do so.
7 Ask them what they think is happening? The Pyrex bowl will only vanish in vegetable oil. This is because light travels at the same speed in the vegetable oil as in the Pyrex (it has the same refractive index as the oil). This means light isn’t reflected or refracted when it moves from the vegetable oil into the bowl, so there is no way of seeing the bowl.
Line of sight
Visible object
Refective area of mirror
Hidden area

Your challengeFilm directors use special effects to make objects seem invisible. But can you do it with science? Test out different materials to find out!
YOUR TASK Can you make your Pyrex bowl disappear using the materials you are given?
THINGS TO THINK ABOUT
1 Before starting the experiment, look at one of the Pyrex bowls. It is transparent but you can still see it. Why do you think this is? Use the diagram on the right to help explain your thinking.
2 Now test out some different liquids in your large bowl. Can you find one that makes the small bowl disappear?
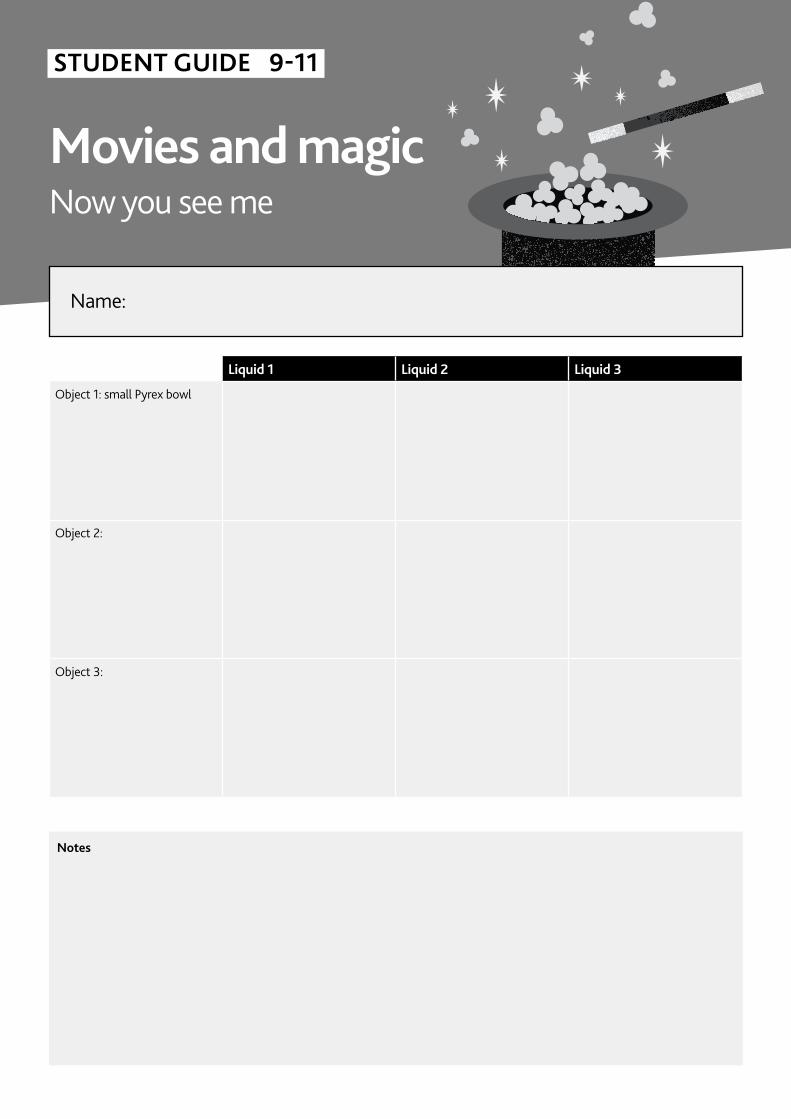
3 Use the table below to help you record what you find out.
4 What do you think is happening when the bowl disappears?
5 Try out different objects and liquids. Think about things like their material, colour, shape and size. Make notes in the table below about which work and which don’t.
6 Why do you think some objects disappear but not others?
STUDENT GUIDE 9-11
Movies and magicNow you see me
1 The speed of light in a vacuum is always the same, but different materials can slow light down. In 2013 scientists managed to slow light down enough they could trap it inside a super cooled crystal for a whole minute.
2 A TV magic trick showed a magician appearing to walk on the surface of the water in a swimming pool. It’s thought that there were really pillars of Plexiglas in the pool which are invisible when submerged, and he walked on top of those.
FUN FACTS
REPORT
Tell the rest of the group what you found out. Can you explain or act out what happened to the light to make the Pyrex bowl disappear?
Light travelling through glass
STUDENT GUIDE 9-11
Movies and magicNow you see me
Notes
Liquid 1 Liquid 2 Liquid 3
Object 1: small Pyrex bowl
Object 2:
Object 3:
Name:

HEALTH AND SAFETY: A suitable risk assessment using guidance from CLEAPSS and SERCC should be written and adhered to for this activity.
Be sure to have the necessary permission to film the pupils and closely follow the school’s health and safety policy on such matters. If there is any doubt, only film the sets the pupils create and avoid filming pupils.
Objective In this activity, pupils try out green screen effects and design a green screen film set. They evaluate and improve their design to make the most realistic special effects.
TOPIC LINKS
Computing: use a variety of software
Design and technology: Evaluate designs
TIME 60 minutes or longer (you may consider doing this over 2 sessions)
RESOURCES AND PREPARATION
green paint
a large cardboard box per group
lollypop sticks
puppets (or paper/ card to make them)
green gloves
tablets/iPads
green screening app such as ‘Do Ink’
DELIVERY
1 Ask the pupils if they’d ever wanted to be invisible. Have they seen the ‘Harry Potter’ films where he uses an invisibility cloak to sneak around? What would they do if they had Harry’s cloak?
2 Ask the pupils how they think this special effect is achieved in the movies. Explain it’s done with something called Chroma Key. This is a simple effect where the actors are placed in front of a single colour background (usually green) and a green cloth is used to hide the actor – or just some of their body parts.
3 The software used for creating the movie then replaces any green colour with an image or video, making the actor become invisible, or making parts of them vanish.
4 Explain that they are going to design their own ‘green screen film set’ to make the puppet characters look as though they are moving by themselves. Ask pupils to discuss their initial ideas – how could they use the resources provided? What kind of story will they tell? What puppet characters will they need to create?
5 Pupils will need to paint the inside of the cardboard box and the lolly sticks green and attach them to puppets to make it look like they are moving by themselves. The pupils could also wear green gloves and sleeves to move the puppets without being seen. To save time, you could also have pre-painted boxes or use green paper to line it instead.
6 Allow pupils time to explore the app and see how it works before they start filming their green screen puppet show.
CLUB LEADER GUIDE 9-11
Movies and magicInvisibility cloak
USEFUL LINKS How to Green Screen with the Do Ink app
TIPYou can also get pupils to make
themselves invisible. Make a cheap green screen with green shower curtains
or cover a wall in plain green sugar paper. You can then use green pieces of material and the green screening
app to make pupils disappear.
DIFFERENTIATION IDEAS
Support: Pupils may need help selecting suitable images and setting up the green screen app.
Challenge: pupils create a longer sequence where parts of the puppets vanish. Could they make a headless ghost?
EXTENSION IDEAS
1 Work this special effect into a short film where the puppet needs to vanish as part of the plot.
2 Pupils can test different colours to see which work best. Can they explain why some work better than others?
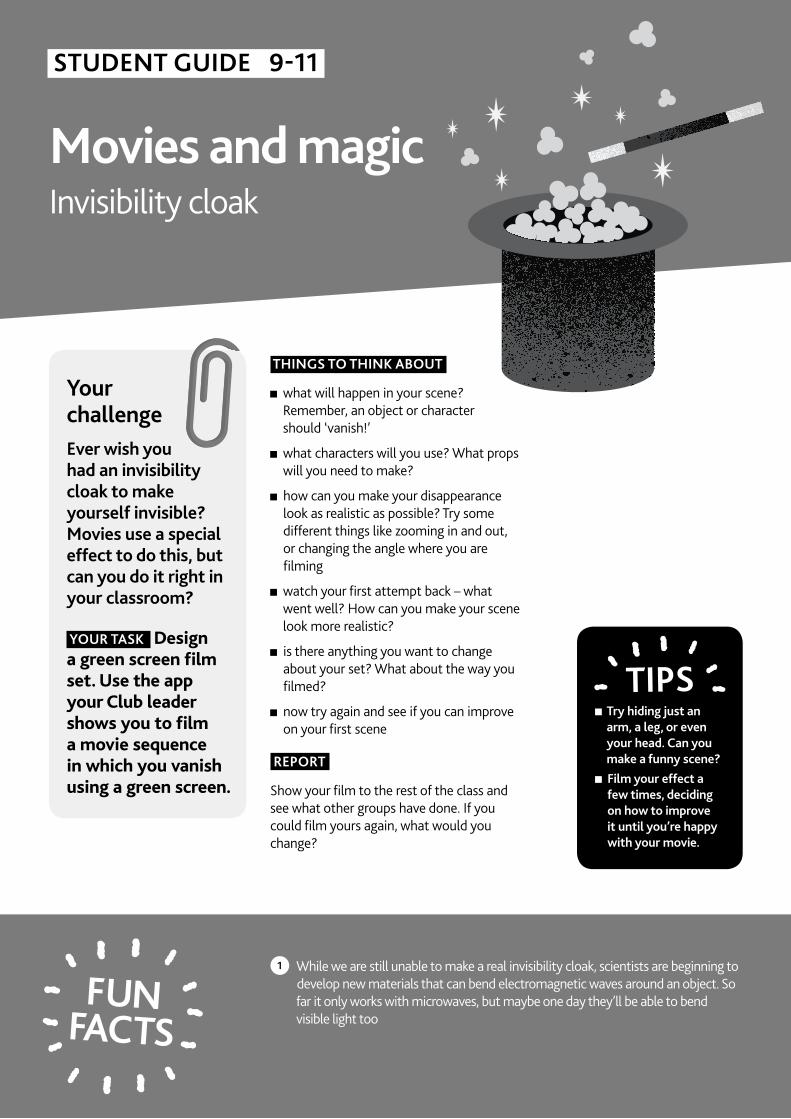
Your challengeEver wish you had an invisibility cloak to make yourself invisible? Movies use a special effect to do this, but can you do it right in your classroom?
YOUR TASK Design a green screen film set. Use the app your Club leader shows you to film a movie sequence in which you vanish using a green screen.
THINGS TO THINK ABOUT
what will happen in your scene? Remember, an object or character should ‘vanish!’
what characters will you use? What props will you need to make?
how can you make your disappearance look as realistic as possible? Try some different things like zooming in and out, or changing the angle where you are filming
watch your first attempt back – what went well? How can you make your scene look more realistic?
is there anything you want to change about your set? What about the way you filmed?
now try again and see if you can improve on your first scene
REPORT
Show your film to the rest of the class and see what other groups have done. If you could film yours again, what would you change?
STUDENT GUIDE 9-11
Movies and magicInvisibility cloak
TIPS Try hiding just an arm, a leg, or even your head. Can you make a funny scene?
Film your effect a few times, deciding on how to improve it until you’re happy with your movie.
1 While we are still unable to make a real invisibility cloak, scientists are beginning to develop new materials that can bend electromagnetic waves around an object. So far it only works with microwaves, but maybe one day they’ll be able to bend visible light too
FUN FACTS

STUDENT GUIDE 9-11
Movies and magicInvisibility cloak
Notes
Name:

HEALTH AND SAFETY: A suitable risk assessment using guidance from CLEAPSS and SERCC should be written and adhered to for this activity. Appropriate eye protection should be worn for certain parts of the following activities.
Ensure pupils handle hair dryer with care. They should use the cool setting if possible to avoid excess heat.
When handling metal coat hanger, pupils should be aware of potential sharp points. Club leaders should take care to file down sharp points before pupils handle them.
Objective In this activity, pupils try out a range of different magic tricks that all involve science to make them work. Pupils will explore a range of different science magic tricks, then put on a magic show.
TOPIC LINKS
Science: identify the effects of air resistance, water resistance and friction; the force of gravity acting between the Earth and the falling object; working scientifically to design and make products and explore their effects; explain that some changes result in the formation of new materials
TIME 60 minutes (or longer)
RESOURCES AND PREPARATION pint glass or plastic beaker sheets of card of different thicknesses
square sections of various other materials
ping pong balls various other balls hairdryer metal coat hangers (with sharp edges filed away and already bent into shape)
various coins sachet of ketchup (or other condiment)
salt a two-litre plastic drinks bottle nappies newspaper plastic bags instruction sheets safety goggles
DELIVERY
1 Sometimes it seems like there’s not a lot of difference between magic and science. You watch a magic trick or a demonstration and wonder how it’s done. Ask the pupils to try out a range of different science activities that could form part of a magic show.
2 Refer to the Instruction sheets. Pick some, or all of them, to practise and then perform them.
CLUB LEADER GUIDE 9-11
Movies and magicMagic science show
USEFUL LINKS More ideas for 'magic trick' experiments
DIFFERENTIATION IDEAS
Support: allow pupils to follow the step by step instructions in performing the tricks.
Challenge: set the task and give pupils the materials, but do not give the detailed instructions. Allow them to work out the ‘tricks’ on their own and explain how they’ve done them.
EXTENSION IDEAS (ALSO USEFUL FOR GROUPS THAT FINISH EARLY)
1 Pupils can research more science magic tricks to add to the show. There are lots of others they can try. Be sure you review any tricks they suggest for safety concerns before allowing them to attempt them.
2 Plan and perform a Science Magic Show. Invite an audience, or film the experiments and share online.
TIPS Encourage pupils to try to figure out the
solutions before looking at ‘The trick: revealed!’ They can then try to add their own flourish as they perform the tricks.
It might be worthwhile giving small groups of student’s different magic tricks to practise, leaving a few tricks extra in case a group finishes early. You can then give them another trick to practise while the other groups continue working.
Notes
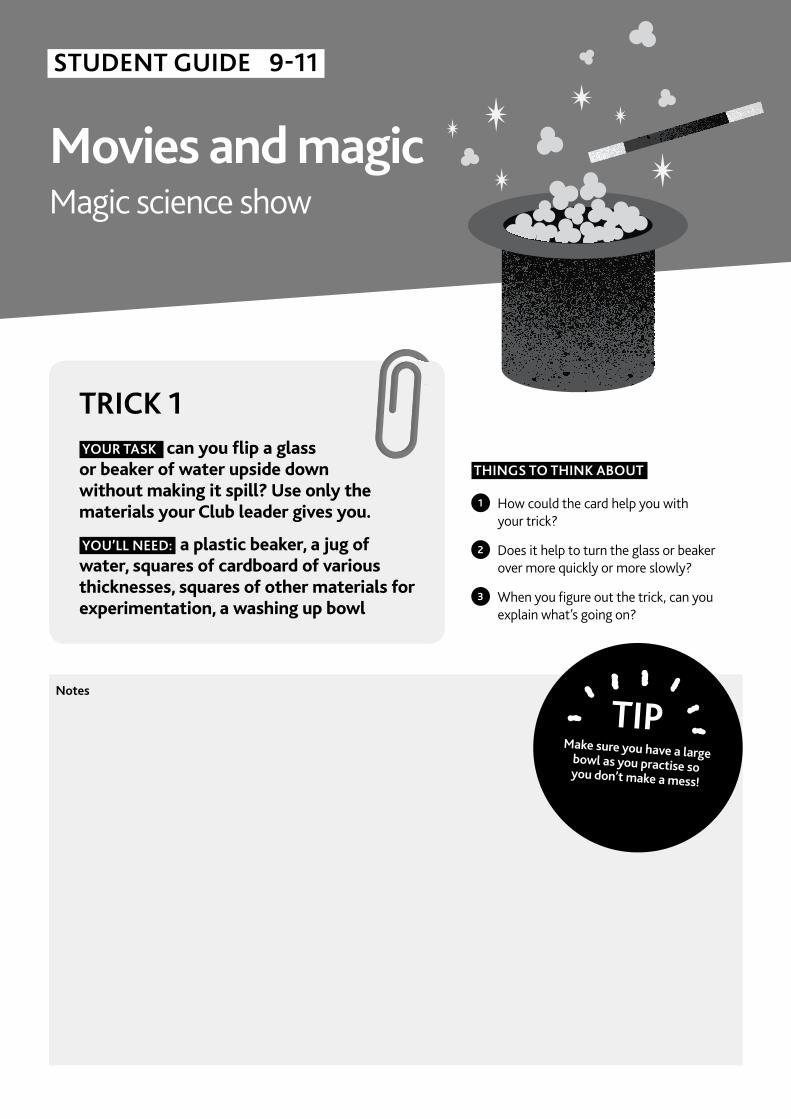
TRICK 1 YOUR TASK can you flip a glass or beaker of water upside down without making it spill? Use only the materials your Club leader gives you.
YOU’LL NEED: a plastic beaker, a jug of water, squares of cardboard of various thicknesses, squares of other materials for experimentation, a washing up bowl
THINGS TO THINK ABOUT
1 How could the card help you with your trick?
2 Does it help to turn the glass or beaker over more quickly or more slowly?
3 When you figure out the trick, can you explain what’s going on?
STUDENT GUIDE 9-11
Make sure you have a large bowl as you practise so you don’t make a mess!
TIP
Movies and magicMagic science show

STUDENT GUIDE 9-11
Movies and magicMagic science show
THE TRICK: REVEALED!
Make sure the square of card is 2.5cm larger than the glass or beaker on all sides.
1 Fill the glass or plastic beaker with water so that it is completely full to the brim.
2 Place the card over the mouth of the glass. Make sure the glass is in the centre.
3 Hold the glass over the washing up bowl (just in case).
4 Place one hand on top of the card and quickly turn the glass upside down, holding the card in place.
5 Slowly remove your hand from the card.
HOW DOES THIS WORK?
First, the pressure of the air is higher outside the glass than inside. This pushes the card upwards and holds it in place (if you get it just right). The surface tension of the water also helps to hold the card in place.
Beaker
Water
Card

Notes
TRICK 2 YOUR TASK make a Ping pong ball levitate. Use only the materials your Club leader gives you.
YOU’LL NEED: ping pong balls, other balls or small objects for experimentation, a hair dryer.
THINGS TO THINK ABOUT
1 How can you get the ball to hover in the air the best?
2 Try different high/low settings, or holding the hair dryer at different angles. Which is best for keeping the ball up?
3 What happens if you use a heavier ball? Or something with a different shape instead of a ball? Why do you think this is?
STUDENT GUIDE 9-11
Use the ‘cool’ setting if your hair
dryer has one.
TIP
Movies and magicMagic science show
STUDENT GUIDE 9-11
Movies and magicMagic science show
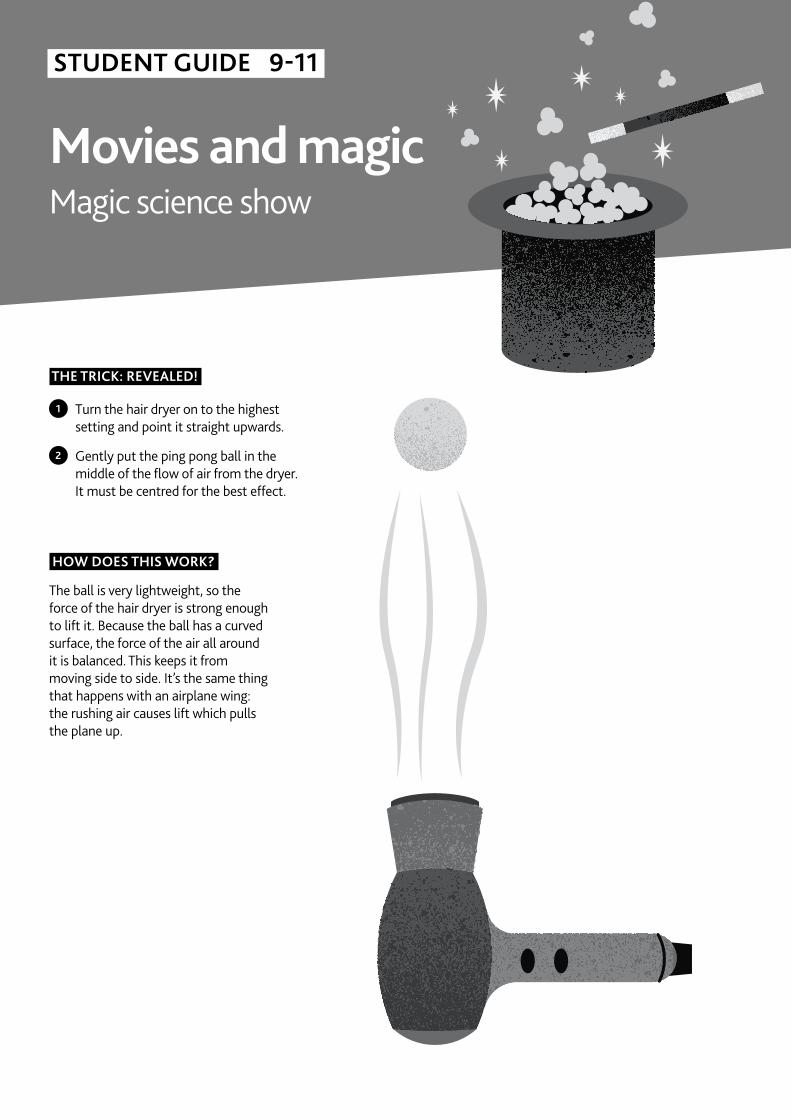
THE TRICK: REVEALED!
1 Turn the hair dryer on to the highest setting and point it straight upwards.
2 Gently put the ping pong ball in the middle of the flow of air from the dryer. It must be centred for the best effect.
HOW DOES THIS WORK?
The ball is very lightweight, so the force of the hair dryer is strong enough to lift it. Because the ball has a curved surface, the force of the air all around it is balanced. This keeps it from moving side to side. It’s the same thing that happens with an airplane wing: the rushing air causes lift which pulls the plane up.
Notes
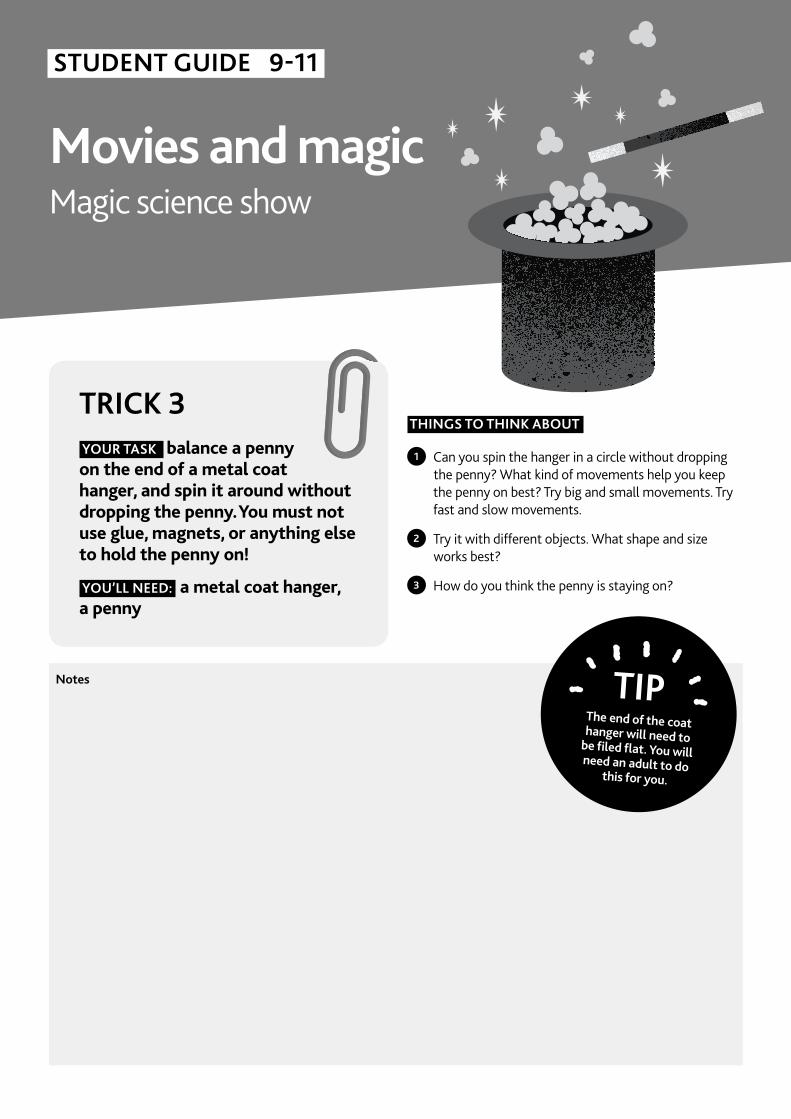
TRICK 3 YOUR TASK balance a penny on the end of a metal coat hanger, and spin it around without dropping the penny. You must not use glue, magnets, or anything else to hold the penny on!
YOU’LL NEED: a metal coat hanger, a penny
THINGS TO THINK ABOUT
1 Can you spin the hanger in a circle without dropping the penny? What kind of movements help you keep the penny on best? Try big and small movements. Try fast and slow movements.
2 Try it with different objects. What shape and size works best?
3 How do you think the penny is staying on?
STUDENT GUIDE 9-11
The end of the coat hanger will need to be filed flat. You will need an adult to do this for you.
TIP
Movies and magicMagic science show

STUDENT GUIDE 9-11
Movies and magicMagic science show
THE TRICK: REVEALED!
1 Stretch the hanger from the middle so that it makes a square.
2 Place the bend of the hanger on your index finger and let it hang so that the hook is hanging down freely.
3 Balance a penny on the flattened end of the hook.
4 Slowly swing the hanger back and forth. The penny should stay in place.
5 Try and do a full loop-the-loop.
6 Remove the coin at the end to prove to your audience that the coin was not glued on.
HOW DOES THIS WORK?
As the coat hanger is spun around, an accelerating force pushes the penny down onto the hook, and keeps it moving in a circular motion. This is called centrifugal force. The same idea works with a bottle of water – if you swing it with a smooth motion, it won’t spill! (But don’t try it indoors, just in case!)
Can you think of other times when this force affects objects or your body? Think about going on fairground rides and when you’re driving in the car. Can you see any similarities?
Penny
Finger

Notes
TRICK 4 YOUR TASK fill a plastic bottle with water and add a sealed ketchup sachet to the bottle. Without directly touching the ketchup sachet, can you get it to rise and fall in the water?
YOU’LL NEED: a two-litre plastic bottle, a sachet of ketchup, water and salt (optional)
THINGS TO THINK ABOUT
1 You can’t touch the ketchup sachet directly, (or with a tool like a spoon or chopstick!) so what can you do to affect it?
2 Could you do something to the bottle to affect what’s inside?
3 Think about pressure – is there a way you could change the pressure inside the bottle?
4 Why do you think you need a plastic bottle for this trick, and not glass or metal?
5 Once you’ve figured it out, can you explain what’s happening?
STUDENT GUIDE 9-11
Adding salt can help the sachet float.
TIP
Movies and magicMagic science show

STUDENT GUIDE 9-11
Movies and magicMagic science show
THE TRICK: REVEALED!
1 Fill the bottle right to the top with water. Put the ketchup sachet (still sealed up) inside the bottle.
2 If the ketchup sinks, add a few spoons of salt to the water.
3 Seal the bottle up tightly.
4 Squeeze the bottle. The ketchup should sink when you squeeze the bottle and float upwards when you release it. Try and see if you can get it to stop in the middle of the bottle.
5 Wow your audience with your ability to command the ketchup to rise and fall!
HOW DOES THIS WORK?
There’s a small air bubble inside the ketchup sachet. When you squeeze the bottle hard, you put pressure on the ketchup which causes the bubble to get smaller. This makes the sachet denser than the water around it, so it sinks. When you stop squeezing, the bubble expands, making the sachet less dense again and so it floats back up.
Water
Salt
Ketchup sachet

Notes
TRICK 5 YOUR TASK make water vanish in a cup using the materials your Club leader gives you.
YOU’LL NEED: several sheets of newspaper, plastic bags, scissors, disposable nappies, paper cups, salt, and a jug of water.
THINGS TO THINK ABOUT
1 Which of the items your Club leader gave you might be the best at absorbing water?
2 Can you take anything apart to find a very good absorbing material?
3 Once you find the best absorbing material, how can you perform a trick where water vanishes right before your audience’s eyes?
4 Is there anything you can do to bring the water back after it has disappeared?
STUDENT GUIDE 9-11
It’s not a ‘trick’ if you just pour the water into the nappy. You must be able to make the water vanish in the cup!
TIP
Movies and magicMagic science show

STUDENT GUIDE 9-11
Movies and magicMagic science show
THE TRICK: REVEALED!
Before you perform the trick:
1 Spread the sheets of newspaper out.
2 Cut the nappy in half while holding it inside a plastic bag. Carefully empty the nappy into the bag, being careful not to breathe in the dust.
3 Shake it out over the newspaper. You want the white powder from the nappy. Remove any fluffy cotton.
4 Pour the powder into one of the paper cups.
HOW DOES THIS WORK?
Nappies contain an absorbing gel called Sodium Polyacrylate. It’s able to absorb 200-300 times its own mass in water. When you add salt, this interferes with its ability to hold on to the water, so it releases it all.
This gel is even used in nappies for astronauts in case they need the toilet whilst on a spacewalk!
Instead of cutting up nappies, you can also do this trick with Magic Snow, which is the same chemical.
TIP
To perform the trick
1 Tell the audience you are going to make the water vanish.
2 Pour a small amount into the paper cup with the powder in it. The powder should absorb all the water.
3 Say the magic words. (You can choose what they are!)
4 Tip the cup – no water should pour out.
EXTRA: To bring the water back, pour some salt into the cup and stir. This will stop the powder working, and release the water.
EXTRA EXTRA: if you want to make this more of an act, first use a cup without the powder and without saying the magic words. Look surprised when it goes wrong… Pour from that cup into your cup with the powder, and this time say the magic words!
Nappy
Scissors Cup
Water

For more information on the programmes and publications available from STEM Learning, visit our website www.stem.org.uk
STEM Clubs Programme, led by STEM Learning
Achieving world-leading STEM education for all young people across the UK.