step 1: click on item type management.. step 2: click on add new item type
TRANSCRIPT

Step 1: Click on Item Type Management.

Step 2: Click on Add New Item Type.
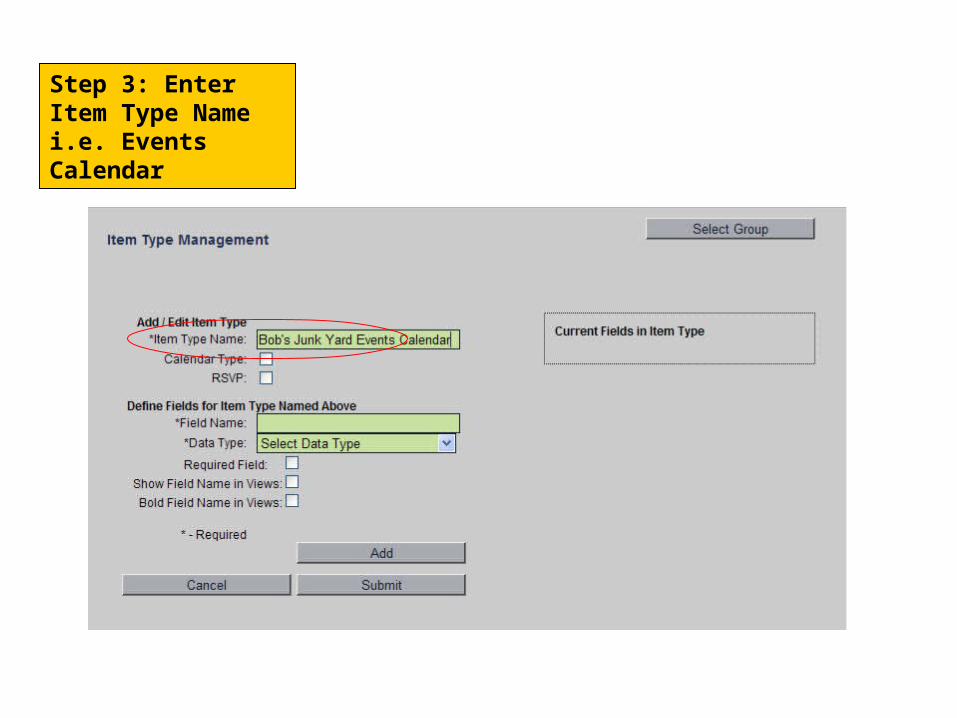
Step 3: Enter Item Type Name i.e. Events Calendar

Step 4: Select Calendar Type with check box.
Step 6: Click Submit
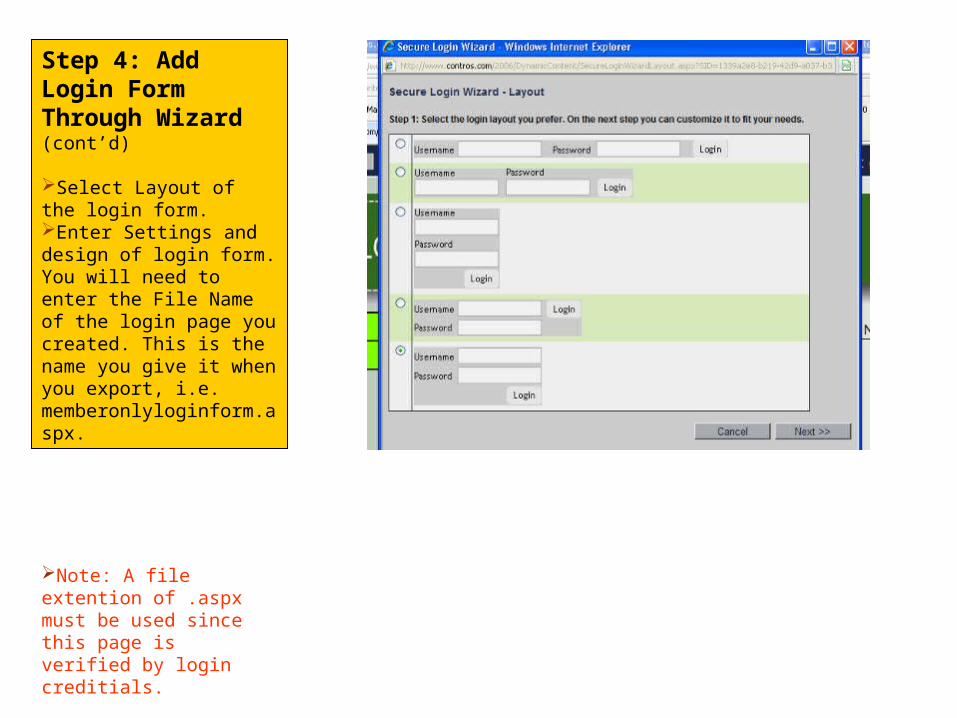
Step 4: Add Login Form Through Wizard (cont’d)
Select Layout of the login form.Enter Settings and design of login form. You will need to enter the File Name of the login page you created. This is the name you give it when you export, i.e. memberonlyloginform.aspx.
Note: A file extention of .aspx must be used since this page is verified by login creditials.

Step 4: Add Login Form Through Wizard (cont’d)
Enter Settings and design of login form. You will need to enter the File Name of the login page you created. This is the name you give it when you export, i.e. memberonlyloginform.aspx.
Note: A file extention of .aspx must be used since this page is verified by login creditials.

Step 7: You now need to go to Group Management area.
Step 8: Find your new Item Type and Select it.

Step 9: Then add an item to your item type (i.e. such as an specific event). Once you have added an item, click on Groups again to get to Group Management area.

Step 9: Cont’dYou can edit event by clicking on event in page
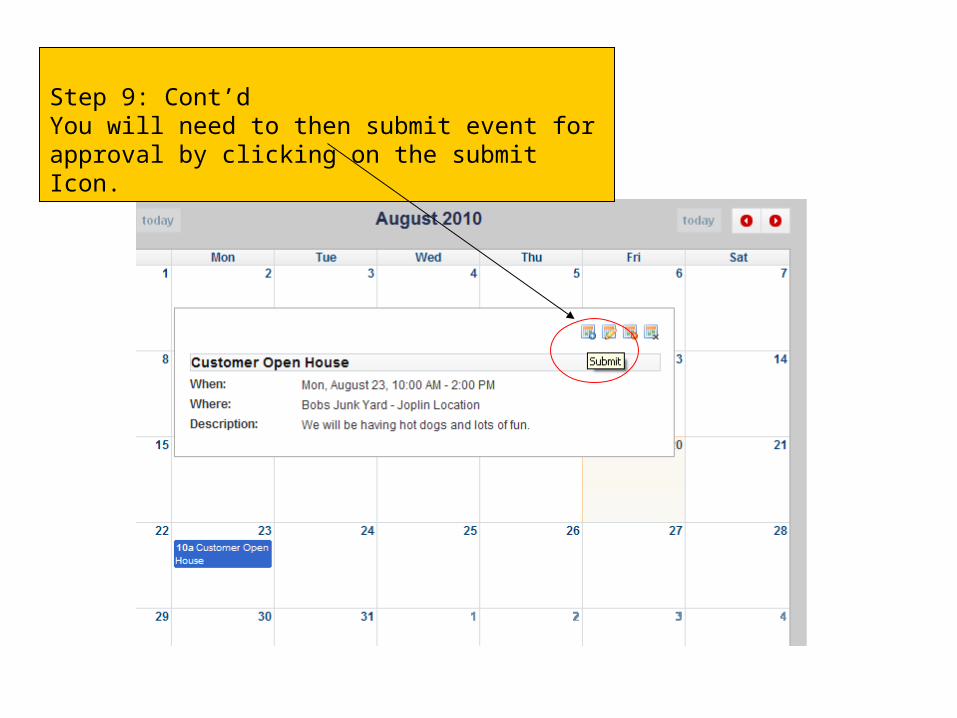
Step 9: Cont’dYou will need to then submit event for approval by clicking on the submit Icon.

Step 10: Then go to Page Management to create your page that will show your new Calendar View. Once in the edit area of your new page, select from tool bar, Add Calendar View.

Step 11: Configure Settings. Here you can add name of your view, department, width and also default view such as month, week or day. Click Next.

Step 12: Now select Skin that you would like to have for your Calendar View. Then click Finish.

Step 13: Now back at View Management Screen, click Select to add Calendar View to your new page.