stephanie l. simon-dack, ph.d. assistant professor ball...
TRANSCRIPT

BIOPSYCHOLOGY ACTIVITIES 1
Interactive Teaching Activities for Introductory Biopsychology
Stephanie L. Simon-Dack
Ball State University
Supported by a 2011 Instructional Resource Award to Stephanie L. Simon-Dack
Author Contact Information:
Stephanie L. Simon-Dack, Ph.D.
Assistant Professor
Department of Psychological Science
Ball State University
Muncie, IN 47306
765-285-1693
E-mail: [email protected]
Copyright 2012 by Stephanie L. Simon-Dack. All rights reserved. You may reproduce
multiple copies of this material for your own personal use, including use in your classes
and/or sharing with individual colleagues as long as the author’s name and institution and
the Office of Teaching Resources in Psychology heading or other identifying information
appear on the copied document. No other permission is implied or granted to print, copy,
reproduce, or distribute additional copies of this material. Anyone who wishes to
produce copies for purposes other than those specified above must obtain the permission
of the author(s).

BIOPSYCHOLOGY ACTIVITIES 2
Overview
The field of biopsychology is becoming increasingly relevant to the field of
psychology as a whole (Stanovich, 2010). The American Psychological Association
(APA) now specifies that understanding “the biological bases of behavior” is one of the
core learning outcomes covered by undergraduate programs in the APA guidelines for the
undergraduate psychology major (APA, 2007). However, teaching a biopsychology
(neuroscience, physiological) course to undergraduates can often be challenging,
particularly at institutions where resources are limited. Traditionally, biopsychology
courses tend to be structured as lecture courses with several integrated lab components,
such as the dissection of sheep brains by students (Lloyd, 2008). Although it may be
assumed that students taking biopsychology will have an opportunity to be involved in
activities such as examining stained cells on slides through powerful microscopes or
collecting physiological data, not all departments have the resources to invest in these
types of labs.
Lack of lab resources does not need to pose as severe a limit as might be expected
as long as students have the opportunity to be involved in interactive ways of learning
what many of them perceive as dry material. Simple, clear, and interactive activities can
replace or supplement the traditional labs that are often associated with a biopsychology
course. Furthermore, a large body of literature suggests that games, interactive activities,
and simulations in the classroom promote student retention and learning (e.g., Kumar &
Lightner, 2007).
As a neuroscience instructor in a department with limited resources, I have
created a handbook of 11 simple, clear, and, most importantly, interactive activities that
engage students and illuminate core neurophysiological concepts. Each activity requires
little or no outlay of resources. Most activities can be implemented in the classroom and
will take only 10-15 min of class time. Instructors can easily prepare all while adding an
engaging and necessary interactive element to learning biopsychology. Some of these
activities are unique to this book and others are unique interpretations of well-known
demonstrations (e.g., the demonstration on touch receptor densities was adapted from
two-point threshold demonstrations such as can be found here:

BIOPSYCHOLOGY ACTIVITIES 3
http://frontiersofsci.org/?q=node/296). Because each activity stands alone, users of this
resource can select whichever best fit their classes. Each description include instructions
for how to prepare and implement the activity.
References
American Psychological Association. (2007). APA guidelines for the
undergraduate psychology major. Washington, DC: Author. Retrieved from
www.apa.org/ed/resources.html.
Kumar, R., & Lightner R. (2007). Games as an interactive classroom technique:
Perceptions of corporate trainers, college instructors and students. International
Journal of Teaching and Learning in Higher Education, 19(1), 53-63.
Lloyd, S. A. (2008). Enhancing the physiological psychology course through the
development of neuroanatomy laboratory experiences and integrative exercises.
Retrieved from
http://teachpsych.org/resources/Documents/otrp/resources/lloyd13.pdf
Stanovich, K. E. (2010). How to think straight about psychology (9th ed.). Boston, MA:
Allyn & Bacon.
BIOPSYCHOLOGY ACTIVITIES 4
Table of Contents
Overview Page 2
References 3
Classroom Activities
1. Conducting Self- Phrenology 5
2. Building a Model Neuron 7
3. Acting Out the Human Action Potential 9
4. Acting Out Saltatory Conduction 12
5. Visualizing Exocytosis 13
6. Sampling Tastes On the Tongue 14
7. Emulating Labeled Lines & Population Coding 16
8. Experiencing Olfactory Habituation 17
9. Acting Out Photoreceptor, Bipolar, and Ganglion Cells 18
10. Experiencing Touch Receptor Densities 20
11. Acting Out Synchronized Cell Oscillations 21
Acknowledgement 22
BIOPSYCHOLOGY ACTIVITIES 5
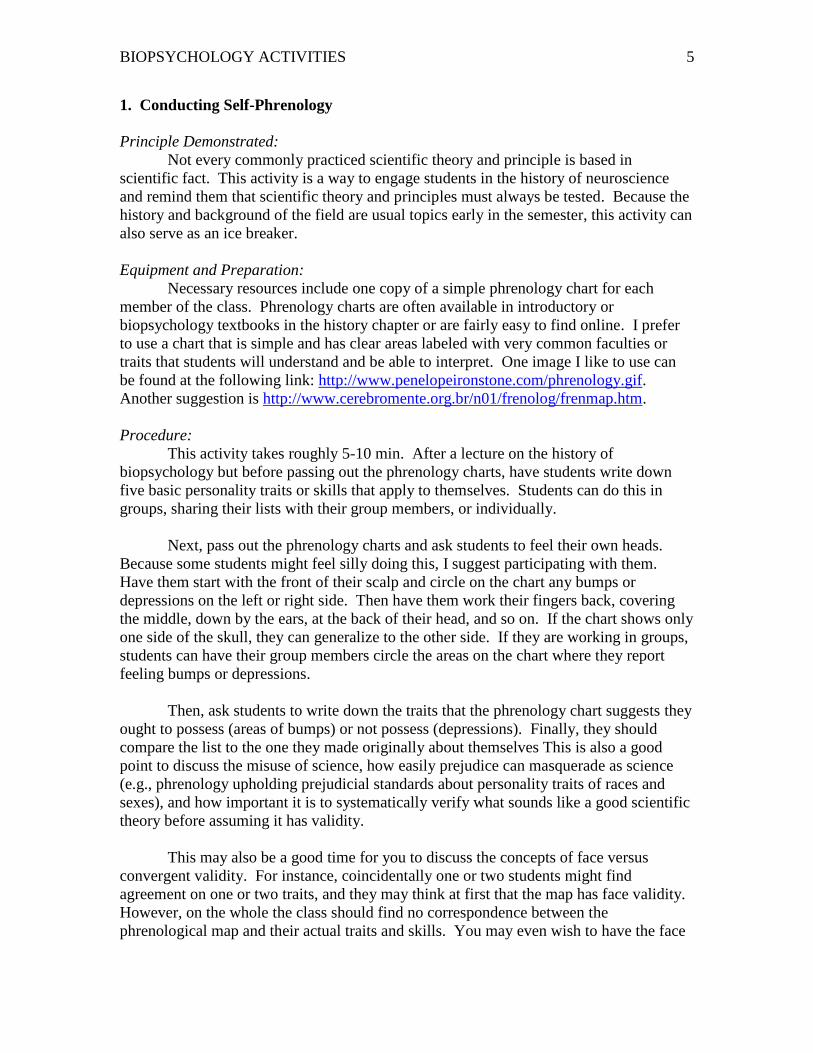
1. Conducting Self-Phrenology
Principle Demonstrated:
Not every commonly practiced scientific theory and principle is based in
scientific fact. This activity is a way to engage students in the history of neuroscience
and remind them that scientific theory and principles must always be tested. Because the
history and background of the field are usual topics early in the semester, this activity can
also serve as an ice breaker.
Equipment and Preparation:
Necessary resources include one copy of a simple phrenology chart for each
member of the class. Phrenology charts are often available in introductory or
biopsychology textbooks in the history chapter or are fairly easy to find online. I prefer
to use a chart that is simple and has clear areas labeled with very common faculties or
traits that students will understand and be able to interpret. One image I like to use can
be found at the following link: http://www.penelopeironstone.com/phrenology.gif.
Another suggestion is http://www.cerebromente.org.br/n01/frenolog/frenmap.htm.
Procedure:
This activity takes roughly 5-10 min. After a lecture on the history of
biopsychology but before passing out the phrenology charts, have students write down
five basic personality traits or skills that apply to themselves. Students can do this in
groups, sharing their lists with their group members, or individually.
Next, pass out the phrenology charts and ask students to feel their own heads.
Because some students might feel silly doing this, I suggest participating with them.
Have them start with the front of their scalp and circle on the chart any bumps or
depressions on the left or right side. Then have them work their fingers back, covering
the middle, down by the ears, at the back of their head, and so on. If the chart shows only
one side of the skull, they can generalize to the other side. If they are working in groups,
students can have their group members circle the areas on the chart where they report
feeling bumps or depressions.
Then, ask students to write down the traits that the phrenology chart suggests they
ought to possess (areas of bumps) or not possess (depressions). Finally, they should
compare the list to the one they made originally about themselves This is also a good
point to discuss the misuse of science, how easily prejudice can masquerade as science
(e.g., phrenology upholding prejudicial standards about personality traits of races and
sexes), and how important it is to systematically verify what sounds like a good scientific
theory before assuming it has validity.
This may also be a good time for you to discuss the concepts of face versus
convergent validity. For instance, coincidentally one or two students might find
agreement on one or two traits, and they may think at first that the map has face validity.
However, on the whole the class should find no correspondence between the
phrenological map and their actual traits and skills. You may even wish to have the face

BIOPSYCHOLOGY ACTIVITIES 6
versus convergent validity discussion both before and after conducting the activity. You
can discuss other personality assessment tools introduced in personality or social or
abnormal introductory classes that might be utilized to measure convergent validity (or
lack thereof) between the phrenological map and other validated assessments.
Note: Students do not like to touch one another, so I found that typical versions of this
kind of activity that require students to exam each other’s scalps, even through a swim-
cap, are unsuccessful. This activity still demonstrates the problems with early
cognitive/neuropsychological theory without asking the students to put themselves in an
uncomfortable position.

BIOPSYCHOLOGY ACTIVITIES 7
2. Building a Neuron Model
Principle Demonstrated:
This activity will assist students in learning the parts of a neuron, including its
structural elements and organelles, in detail.
Equipment and Preparation:
Students can perform this activity in class, as homework, or as an extra credit
assignment. If you opt to do the entire activity in class, you will need to supply a variety
of materials, including construction paper, pipe cleaners, Styrofoam™, Play-Doh™ or
clay, paint, markers, crayons, scissors, and glue. You may also include other craft items
such as candy, puff balls, and cotton.
Procedure:
The students will be building a three-dimensional model of a neuron. You may
specify what structures to include or assign a minimum number of labeled structures,
such as:
The Soma
o Cell nucleus
o Rough endoplasmic reticulum
o Ribosomes
o Golgi body
o Mitochondria
Dendrites
At least one Axon
o Axon proper
o Axon terminal
Myelin
Nodes of Ranvier
Encourage students to be creative, accurate, and detailed. If you opt to have the
students do this on their own time, remind them they will have to transport their neurons
to class. The in-class version of this activity will probably take nearly an entire class
period, or approximately 45-60 min to complete.
Whether students build their models at home or in the classroom, take 15 min of
class time for students to display their neurons to one another. You can have the students
vote on the best neuron in specific categories (e.g., most creative, strangest material, most
detailed, weirdest looking).
Alternative/Advanced Task Version: An alternative or more advanced version of this task
would be to assign different types of neurons to students (e.g., 5 students all build a
multipolar cell; another 5 complete a pyramidal cell, etc.). You could include bipolar
neurons, unipolar neurons, stellar neurons, pyramidal neurons, granule neurons, Purkinje
neurons, and so on. When students complete their models or bring them to class, you

BIOPSYCHOLOGY ACTIVITIES 8
might ask for brief presentations on the differences in function in each cell, or you might
contribute this information as students present each cell. You might wish to highlight, or
have the students highlight, information on how neurons differ from other cells in the
body and why and how neurons with different structures might serve different specific
functions.

BIOPSYCHOLOGY ACTIVITIES 9
3. Acting Out the Human Action Potential
Principles Demonstrated:
Students act out how the action potential is initiated and propagates down the
axon and the roles of specific ions, ion gates, and the principle of diffusion.
Equipment and Preparation:
Necessary resources include colored construction paper, tape, and individually
wrapped candies (Starbursts™ work well and are inexpensive). In advance, cut
construction paper into large rectangles and choose a color to represent each “character”
in the action potential. For a class of approximately 35-40 students, I prepare
6-8 rectangles labeled “K+” for potassium (pink)
10 rectangles labeled “Na+” for sodium (red)
10 rectangles labeled “anion” for negative ions (blue)
2 rectangles labeled the “NA+/K+ Pump” (brown)
2 rectangles labeled “Na+ Channels” (brown with a red patch)
2 rectangles labeled “K+ Channels” (brown with a pink patch)
4-6 rectangles labeled “Axon” for nonpermeable axon (green)
1 rectangle for the cell body labeled “Soma” (yellow)
Note:
For a larger class, either double the number of cards for each character, except
“Soma,” or repeat the demonstration with the remaining students. Also, you will need a
space long enough for all the “Soma,” “Axon,” and “Gate” students to stand in a line and
wide enough for three lines (“Ions” on each side of the “Soma-Axon-Gate” line).
Procedure:
This activity takes about 10-15 min of class time, including set up and
organization. Start class by reviewing the action potential. Then tell students they are
going to act it out. Ask for volunteers (Who wants to be a sodium ion? A segment of
axon? The soma?) and encourage every student to participate. Have the students tape
their construction paper label to their shirts. Place the “Axon” students in a line and
insert the “Channel” students in between the “Axon” students, alternating one “K+
Channel” between two “Axon” sections followed by one “NA+ Channel” ion between
the next two “Axon” sections, so it alternates “Axon,” “Channel,” “Axon,” “Channel.”
The “Soma” stands at the head of the line. Now place the “K+ ion” and “anion” students
“inside” the cell (keeping it relatively negative in comparison to the extracellular
membrane) behind the membrane line and the “NA+” students on the outside or
extracellular side of the line.
Step 1. Once the students are placed, tell the “Soma” student to stretch out both
hands and keep count of the Starbursts as you or another student drops them into and
removes them from her or his hands until the count reaches 10. These simulate the
postsynaptic potentials. Drop Starbursts into the outstretched “Soma” hands, quickly
removing some and dropping more, so the “Soma” really has to keep count.
BIOPSYCHOLOGY ACTIVITIES 10
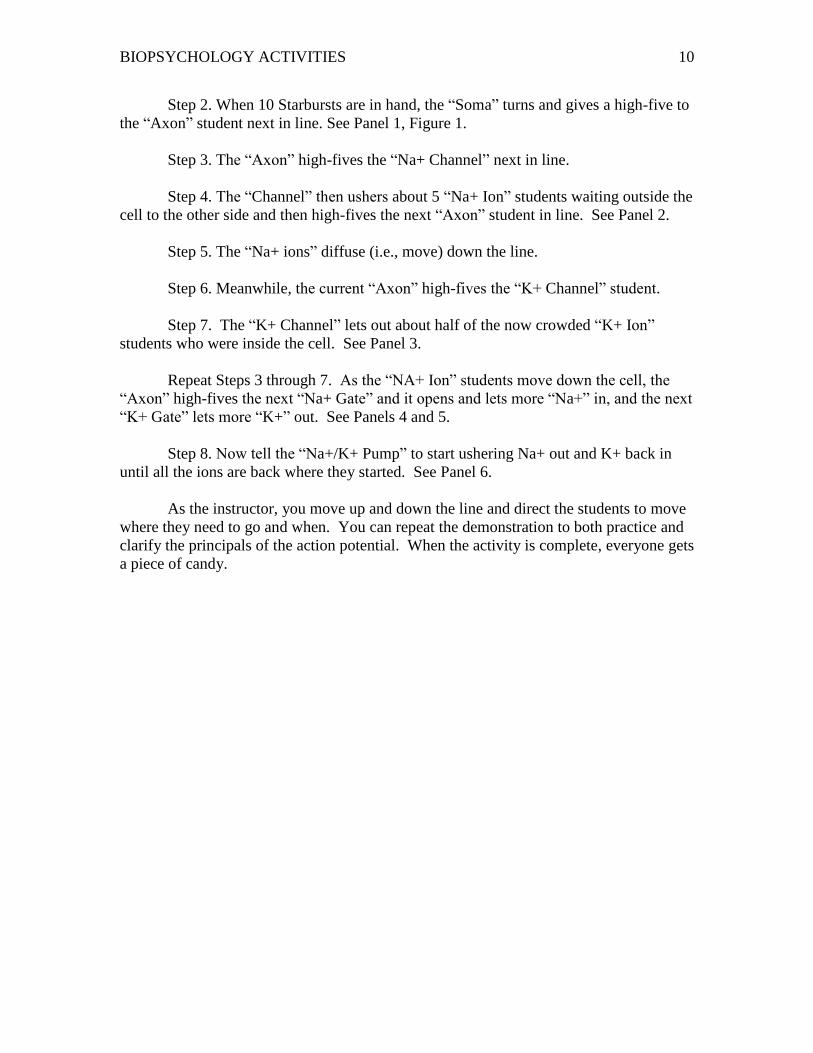
Step 2. When 10 Starbursts are in hand, the “Soma” turns and gives a high-five to
the “Axon” student next in line. See Panel 1, Figure 1.
Step 3. The “Axon” high-fives the “Na+ Channel” next in line.
Step 4. The “Channel” then ushers about 5 “Na+ Ion” students waiting outside the
cell to the other side and then high-fives the next “Axon” student in line. See Panel 2.
Step 5. The “Na+ ions” diffuse (i.e., move) down the line.
Step 6. Meanwhile, the current “Axon” high-fives the “K+ Channel” student.
Step 7. The “K+ Channel” lets out about half of the now crowded “K+ Ion”
students who were inside the cell. See Panel 3.
Repeat Steps 3 through 7. As the “NA+ Ion” students move down the cell, the
“Axon” high-fives the next “Na+ Gate” and it opens and lets more “Na+” in, and the next
“K+ Gate” lets more “K+” out. See Panels 4 and 5.
Step 8. Now tell the “Na+/K+ Pump” to start ushering Na+ out and K+ back in
until all the ions are back where they started. See Panel 6.
As the instructor, you move up and down the line and direct the students to move
where they need to go and when. You can repeat the demonstration to both practice and
clarify the principals of the action potential. When the activity is complete, everyone gets
a piece of candy.

BIOPSYCHOLOGY ACTIVITIES 11
Figure 1. Acting Out the Human Action Potential
1. Instructor gives candies
to Soma
2. Once Soma collects 10
candies, slaps hand of Axon
Instructor SomaAxon NA+ channel K+ channel
Anion
K+
NA+
NA+/K+ pump
candies
3. Axon slaps hand of NA+
channel.
4. NA+ channel
ushers NA+ into the cell.
7. K+ channel ushers K+ out of the cell.
5. & 6. NA+ ions move down the membrane, axon slaps the K+
channel to open.
8. Last axon slaps the NA+/K+ pump which pumps the Na+ out of the cell and pumps the K+ back into the cell
Repeat Steps 3 & 4. Remaining NA + Enter Cell
Repeat steps 5 - 7. Remaining K+ exit.

BIOPSYCHOLOGY ACTIVITIES 12
4. Acting Out Saltatory Conduction
Principles Demonstrated:
This activity will clarify for students the function of the myelin sheath and the
importance of saltatory conduction.
Equipment and Preparation:
This activity requires no equipment or preparation. It will take approximately 5
min of class time.
Procedure:
Ask for 15 student volunteers to come to the front of the class. Have 10 students
stand in one line (representing an unmyelinated neuron) while the other 5 are in a second
line (representing a myelinated neuron). Have the first line of students stand close to one
another and hold hands. Have the second line stretch out so their line lengths are the
same as the first line and have them hold hands. Tell students they are playing the “pulse
game.” When you say “go,” the first student in each line will squeeze the next person’s
hand, who will then squeeze the next person’s hand. When the student at the end of each
line feels the pulse, she or he raises a hand.
What the students will find is the line with more students closer together takes
twice as long to conduct the pulse signal as the line with fewer students standing farther
apart. You can then explain that saltatory conduction works in this fashion – myelin
allows for fewer points of re-initiation for the action potential and thus the signal can
travel much faster down the neuron. Meanwhile, the neuron line without myelin has to
keep reinitiating the signal constantly as it travels down the axon, and this takes much
longer.
As long as the unmyelinated line is twice as long as the myelinated one, the
activity can be modified for different class sizes.
If your class is more advanced, you could have students use a stopwatch or their
cell phones to time the difference between the two lines as they finish the conduction
game. These data could be compared statistically, thus giving students experience
working with primary data. You might also lead the students into a discussion of why the
myelinated axon is faster than the unmyelinated axon to complete conduction,
incorporating ideas such as the purpose of insulation and time requirements for active
propagation due to the opening and closing of ion gates.

BIOPSYCHOLOGY ACTIVITIES 13
5. Visualizing Exocytosis
Principles Demonstrated:
This activity will assist students in visualizing the process of exocytosis in the
axon terminal button. Specifically, it will aid in understanding the form and function of
vesicles and how they bind with the presynaptic membrane at the active zones to release
neurotransmitter.
Equipment and Preparation:
You may either do this as a demonstration at the front of the class or have
students perform the demonstration in small groups. You or each group will need a wide,
shallow container, such as a disposable aluminum pie tin, into which you have poured
some bubble soap; a large bubble wand; and a small bubble wand.
Note: Although this activity is basic, the act of visualizing the process of exocytosis may
assist students remembering how the process works.
Procedure:
This activity will take between 5-10 min of class time. Perform this
demonstration after lecturing about the process of exocytosis and the role of calcium and
the SNARE proteins in vesicle binding to the presynaptic membrane. Explain to students
that vesicles are like pockets or bubbles of protein, which is similar to actual bubbles.
Blow a bubble (make it as big as possible) using your larger wand and catch it on
the base of the wand (you may wish to practice this at home before coming to class!).
You can carefully rest this in the tray if you’re concerned about losing it, or you may
have a student hold it for you. Then blow one or more smaller bubbles with your smaller
wand. Catch one of those as well. Now ask students to picture that the larger bubble is
the presynaptic membrane with the inside of the bubble as the synapse. Explain to them
that neurotransmitter packets will need to escape the vesicle (the smaller bubble) and
diffuse into the synapse. When calcium floods the cell, it causes a reaction that allows
the vesicle to bind with the presynaptic membrane wall. To demonstrate this fusion
process, carefully tilt the smaller bubble onto the bigger bubble so that now it has joined
with the larger bubble. You should be able to remove your wand and have the smaller
bubble now on top of the larger bubble. Explain that in this way a neurotransmitter
inside the vesicle is now free to dump into the synapse. Note that because the proteins
forming the various membranes are similar in material, like the bubble soap, it allows for
the fusion of the membranes and proteins when necessary (as in exocytosis).

BIOPSYCHOLOGY ACTIVITIES 14
6. Sampling Tastes on the Tongue
Principles Demonstrated:
This activity clarifies for students the role of the taste buds, the process of taste
transduction for salt and sour, as well as dispels the urban myth that taste buds are
localized to different regions of the tongue.
Equipment and Preparation:
Resources include small paper plates or napkins, unsalted unflavored tortilla chips
or bland bread, enough lemon or lime wedges (or unsweetened lemon or lime juice) for
all students in the class, small paper cups containing water, several shakers or containers
of salt that can be passed around the class, and a pump-bottle of hand sanitizer.
Procedure:
This demonstration will take approximately 10 min of class time. It should follow
lectures introducing the cell anatomy of the tongue, types of taste, and taste transduction.
Before passing out the lime or lemon wedges or the salt shakers, re-introduce the idea of
taste transduction by clarifying how sodium passes straight through the sodium ion
channels on the taste buds and is the most simple form of transduction we know. Thus,
salt is innately a taste enhancer because the influx of sodium automatically excites taste
cells and makes them more likely to fire in the presence of other tastants. Remind
students that sour works in a similar way to salt. Sour acids dissolve in water and release
hydrogen ions. These protons are able to flow through the same sodium channels that
enable our taste of salt, thus exciting the cell. You may also wish to note that unlike
sodium ions, hydrogen ions also block potassium channels, decreasing the membrane’s
permeability to potassium and making it more likely to fire, which scientists believe leads
to a different perceptual experience of sour from salty. Because of their ability to move
through sodium channels, however, both sour and salty items should act to enhance
flavor.
To those students who wish to participate, pass out the food items so that each
student receives several chips or small pieces of plain bread and a lime or lemon wedge
(alternatively, use paper cups containing a small amount of lime or lemon juice). Instruct
students to taste a plain chip or piece of bread and rate its taste from 1(bland) to 5
(flavorful). Students should then cleanse their palate with a sip of water. Now have
students squeeze or sprinkle a small amount of lime or lemon juice on the chip or bread.
Ask them to rerate the flavor – is the flavor stronger? Finally, pass around the salt
containers and have students sprinkle salt on a chip or bread piece and rate it again. Why
do they think people add lemon juice to water and salt to bland food?
The second part of this activity demonstrates how there are not separate
compartments or areas on the tongue for each type of taste bud. Have students place a
small amount of salt on the very back of their tongue. Are they able to taste it? Now
have them clear their mouths and place some salt at the tip of the tongue. Can they still
taste it? You may have them continue to place salt in various locations on the tongue,
having a sip of water or a bite of the bland chip in between each trial to cleanse the

BIOPSYCHOLOGY ACTIVITIES 15
palate. They should conclude that all taste buds are equally distributed around the
tongue, such that the different parts of the tongue are equally capable of responding to
different tastants. You will want to mention the blind spot at the very center of the
tongue, where no receptors are located – you may suggest that students try to find this
spot, although they may find they have limited success due to the chemical nature of the
tastants and how they spread upon contact with saliva.
In order to clarify that this is not true just of salty tastants, suggest that students
attempt this same activity at home with different types of tastants (e.g., sugar for sweet, a
small piece of meat for umami). Use the hand-sanitizer at the end of the activity to clean
hands.
You may also use this demonstration as an opportunity to discuss individual differences
in perception of taste, the role of the frontal and orbitofrontal cortex in taste perception,
and the potential confounds in the task such as procedural difficulties and construct
validity (e.g., rating tastes).
BIOPSYCHOLOGY ACTIVITIES 16
7. Emulating Labeled Lines and Population Coding
Principles Demonstrated:
This demonstration will help students to understand the function of labeled lines,
how patterns of labeled lines lead to population coding, and how population coding leads
to cohesive sensory perception.
Equipment and Preparation:
This demonstration requires at least one guitar or bass player with a guitar or bass;
this can be a student or guest willing to bring in an instrument, or yourself. Alternately,
you might download a single guitar string sound and chord sounds from the internet. One
site that easily allows you to download guitar sounds is
http://archive.org/details/GuitarChord-A
Procedure:
The activity takes approximately 5 min of class time. Begin by explaining the
concept of labeled lines in taste and olfaction perception. Then, further explain how
stimulating patterns of labeled lines leads to population coding of particular smells or
tastes. Then you or the musician volunteer should play a single string or note. Explain
that this is like a labeled line. A single note has no innate meaning to us but it does have
a specific quality we can hear, just as a single tastant or odorant has a specific quality the
neuron responds to individually. Now play or have the volunteer play a chord. Explain
that this is like population coding. Now we suddenly have a holistic, integrated, beautiful
sound that is unique – just as a pattern of neurons responding to a pattern of tastants or
odorants now gives us a cohesive perception of that unique taste or smell. If you like,
you can verbally extend this to an orchestra analogy for multisensory perception.
You may also wish to utilize this demonstration as an opportunity to give more detail
regarding the gustatory and olfactory systems, the features of bottom-up and top-down
perception, and some of the basic theory of sensation and perception such as parallel and
hierarchical processing.

BIOPSYCHOLOGY ACTIVITIES 17
8. Experiencing Olfactory Adaptation
Principles Demonstrated:
This activity demonstrates the slow-acting nature of the unmyelinated olfactory
nerves and also the process of olfactory sensory adaptation.
Equipment and Preparation:
You will need to be creative with your resources. Before the students arrive, you
need to bring to class something that smells strongly/pungently (pleasant or unpleasant)
such as heavily perfumed soap; pungent soap, herbs or flowers; or even garbage. If your
classroom is very large, you may wish to bring in several such containers and set them
around the perimeter of the classroom. Visually obscure or hide the items, so students
cannot source the scent.
Procedure:
This demonstration will take place over an entire class period, but you should be
able to conduct the class as usual while the demonstration occurs in the background.
When students settle into the classroom, either ignore their comments on the smells or
point out that their olfactory cells will habituate. Lecture on the transduction and process
of olfaction and specifically point out the slow-acting nature of the unmyelinated
olfactory nerves. Pause to ask students if they noticed a different odor in the class today.
Ask them how long it took them to notice. It should be the case that it took them several
moments to notice the scents after they walked into the door despite the strong smell,
although students will report different experiences. Continue to lecture, including
olfactory habituation as part of the topic for the day. By the time the class is over,
students should by and large be less aware of the smell. Point this out to them at the end
of the class (although this will make them re-aware of the scents – you can point this out
too, if you want to give a quick nod to the role of attention). Explain that during the hour,
they became much less sensitive to the scent, which allowed them to continue to operate
in the classroom despite their initial response, and that this is part of the role of olfactory
adaptation.
If you like, you can roll this demonstration into a discussion of the difference between the
slow adapting olfactory system and other more rapidly adapting receptor systems (such as
vision), the role of evolution on adaption and the systems involved in alerting to danger
versus sensory adaptation to constant sensory stimuli and the purpose of both.

BIOPSYCHOLOGY ACTIVITIES 18
9. Acting Out Photoreceptor, Bipolar, and Ganglion Cells
Principles Demonstrated:
This activity will clarify when the photoreceptors are excited versus inhibited, the
difference between the off and on bipolar cells, and when and how bipolar and ganglion
cells respond to stimulation from the photoreceptors.
Equipment and Preparation:
This activity requires square or rectangular pieces of paper (one for each member
of the class) and tape. The pieces of paper should be divided into four equal groups plus
one group twice as large. For example, for a class of 36 have
6 rectangles labeled “Rod”
6 rectangles labeled “Cone”
6 rectangles labeled “On Bipolar Cell”
6 rectangles labeled “Off Bipolar Cell”
12 rectangles labeled “Ganglion Cell”
Procedure:
This activity takes approximately 15-20 min of class time. Start class by
reviewing the principles of transduction in the eye and how photoreceptors synapse onto
bipolar cells that then synapse onto ganglion cells. Students will probably need to be
reminded that photoreceptors are excited in the dark and inhibited in the light, and that on
and off bipolar cells respond differently to light.
Hand out the labeled paper and have students tape the labels to their shirts. Have
the “Rods” and “Cones” come to the front of the class. Now pair half of the “On Bipolar
Cells” with “Rods” and half with “Cones” and do the same with the “Off Bipolar Cells.”
Then have a “Ganglion Cell” join each pair of students. You should now have 12 groups
of three standing at the front of the class.
Begin the demonstration with the “Rods” and “Cones” and remind these students
that they respond to light in the same way. Tell them that photoreceptors like to party at
night and sleep all day. Because the classroom lights are on, it is day, so they should act
sluggish, close their eyes, maybe sit down or lean against the wall to demonstrate
inhibition.
Next, tell the “Off Bipolar Cells” that they are the best friends of the
photoreceptors, so when photoreceptors are inactive, “Off Bipolar Cells” will also be
sleepy and inactive. They want to do whatever their photoreceptor friends do. Have
them mimic the photoreceptors.
Tell the “On Bipolar Cells” that they are like the gossipy/not-nice friend of the
photoreceptors. Whatever the photoreceptors do, the “On Bipolar Cells” will do the
opposite. Thus, ask all of the “On Bipolar Cells” to immediately start acting up, jumping
around, and gossiping to the “Ganglion Cells.” Therefore, when the lights are on, the
“On Bipolar Cells” are active even while their photoreceptor companions are inactive.

BIOPSYCHOLOGY ACTIVITIES 19
The “Ganglion Cells” will be instructed to do whatever the “Bipolar Cell” they
are paired with does. Thus, “Ganglion Cells” paired with “Off Bipolar Cells” should be
sleepy and inactive; “Ganglion Cells” paired with “On Bipolar Cells” should be just as
gossipy, talkative, and animated as the “On Bipolar Cells.”
The students should be able to look around the room and see two types of groups
of three. Half the triplets will consist of three inactive people, whereas the other chains
of three will consist of one inactive (the “photoreceptor”) and two active people.
Whether the “photoreceptor” is a “Rod” or “Cone” will not influence the behavior, only
whether the “Bipolar Cell” is labeled “On” or “Off.”
For phase two of the demonstration, dim or turn off the classroom lights. Now
instruct the “photoreceptors” that because it is dark, they are awake and ready to party!
Have them get all excited and talkative. Meanwhile, this will be the cue for the “Off
Bipolar Cells” to get active as well, and thus so will their “Ganglion Cells.” Now the
“On Bipolar Cells” and their paired “Ganglion Cells” should get lethargic and sleepy.
Thus, the chains have reversed activity from what they did in the light.
You can run through this demonstration several times so that the students can
understand that on bipolar cells are excited when the lights are on, regardless of what
photoreceptors do, and off bipolar cells are excited when the lights are off, regardless of
what the photoreceptors do.

BIOPSYCHOLOGY ACTIVITIES 20
10. Experiencing Touch Receptor Densities
Principles Demonstrated:
The difference in touch response on different areas of the skin depends on the
density of touch receptor cells in that area. This activity clearly demonstrates the
difference in the proportions of skin area represented in the somatosensory cortex and can
directly be related, then, to the homunculus and its disproportional representations.
Equipment and Preparation:
This activity requires only that each student have a pencil, pen, or toothpick. It is
also useful to project an image of the sensory homunculus.
Procedure:
This activity should take 5-10 min of class time. It is a fairly simple touch
perception demonstration that should follow a lecture on mechanoreceptors and their
various sizes of the receptive fields. Have students break into pairs or small groups,
depending on the size of the class. Explain that we have different densities of skin
receptors on different parts of our body depending on the level of use and the amount of
detail we need from that body area. Refer to or show an image of the homunculus. You
can point out that the hands and face are well represented but the arms and legs are barely
represented and that this has to do with nerve density in these areas. More dense layers
of nerves mean finer two-point threshold discrimination.
Ask students to roll up their sleeves. Students will shut their eyes in turn while
their partner or group members lightly and briefly touch them on the arm (outer is better
than inner) with the tip of the pencil, pen, or toothpick. The closed-eyed student must
then try to approximate where the touch occurred once the pencil is removed – they can
use a pencil tip to point to the location they believe was just touched so as not to obscure
the distance between the actual touch location and their approximation. They should be
several centimeters off. Have students try this with each other until everyone has had a
turn attempting to localize the touch. Note: because the receptors in these areas are large,
less specific information is being transmitted to the brain. Now have students perform
this activity again, but the touch should occur on the palm of their hands. They should be
able to exactly identify the location of the touch. Once they have all tried, point out that
there are many small, densely packed receptors on the palm, thus giving it greater
representation in the homunculus and allowing for more precise touch perception. You
can also segue into a discussion regarding the type of mechanoreceptors on different
areas of the skin and their response characteristics to different kinds of stimuli.
If you wish to further expand the demonstration, you might include different types
of touch stimuli to activate different types of mechanoreceptors on the arm or palm. For
instance, you can include the corner of a piece of paper and then vibrate the paper gently
with your fingers to create a different vibration frequency for the touch. You might also
include different types of stimuli, such as a feather, the tip of a piece of chalk, or the edge
of a penny, and ask students to guess what the stimuli are depending on whether they
touch the arm or the palm of the hand. This can lead into discussions of active and
passive touch and top-down versus bottom-up processing in the role of perception.

BIOPSYCHOLOGY ACTIVITIES 21
11. Acting Out Synchronized Cell Oscillation
Principles Demonstrated:
This activity will aid students in understanding how populations of neurons
synchronize their firing patterns with one another at a local and global level in the brain,
and how this synchronized pattern is believed to be a neural correlate of awareness.
Equipment and Preparation:
This activity will require moving the classroom chairs against the walls or finding
spaces where groups of students can march in place.
Procedure
This activity takes about 10-15 min of class time. After explaining that neurons
fire in unity via synchronized cellular activity, divide students into three groups.
Alternatively you can just divide the classroom into thirds and have students march next
to their desks. Ask the students to stand up and make room for themselves to march in
place (while standing in their three separate groups). From the front of the classroom,
explain that you are a single neuron in the auditory system and you are firing in temporal
unity with an external vocal pattern. Begin to march, slowly. Now ask the first group
(Group 1) of students in the room to march with you (to the cadence: 1, 2, 3, 4; 1, 2, 3, 4).
Explain to the class that Group 1 consists of sensory neurons in the auditory cortex and
the neurons they synapse with in the inferior colliculus and other “early” midbrain
sensory regions. Once Group 1 has the hang of marching, have them stop for a moment,
but ask them to remember the rhythm. Now explain to Group 2 that they are receiving
synaptic input from Group 1. While Group 1 begins again to march at their old rhythm
(1, 2, 3, 4), Group 2 should start marching twice as fast but in time with Group 1 (1&,
2&, 3&, 4&; 1&, 2&, 3&, 4&). In other words, Group 2’s base rhythm should match the
slow beat of Group 1, but they should be hitting the half-beats as well. Now pause both
groups while you instruct Group 3 that they are higher-level systems in the temporal and
parietal lobes that help to bind conscious information together. They fire at even faster
rates but are still receiving input, and thus firing in rhythm with the first two groups. Ask
Group 1 to start marching and Group 2 to join in. Now have (and assist by
demonstrating) Group 3 start marching in rhythm but hitting the interim and half beats
(1a&a, 2a&a, 3a&a, 4a&a) – note that they must hit the 1, 2, 3, 4 when Group 1 does, and
the “&” beat when Group 2 does. Once the rhythm is well-established, you can point out
that this is how neurons in the brain communicate and how information that is the focus
of attention gets amplified and selected for further processing at a neuronal level. This is
a fantastic opportunity to guide the class into a discussion about the neural underpinnings
of consciousness and the predominant theory of how neural oscillatory synchrony and the
phase-locking of neuronal patterns allow certain stimuli to be amplified to conscious
processing.

BIOPSYCHOLOGY ACTIVITIES 22
Acknowledgement
I thank Dr. Ruth Ault with her assistance in preparation of this resource and Dr.
Richard H. Ault for his assistance with Figure 1.